Use Care Console in Distributed to support care functions efficiently
Updated
Distributed users who are involved in customer care activities and responsible for managing case information for all the conversations, can make the best use of this feature that comes as a usability enhancement.
Amplify customer satisfaction by empowering Distributed users to double up as customer care for their clients/region.
Allow agents to manage care functions efficiently by providing all relevant information in a single customizable view.
Agents can easily view the customer and case information alongside the conversation thread.
Engage with customers via channels like chat, emails, and video calls depending on the severity of the grievance.
To Set Up Care Colsole in Distributed Control Panel
Click the New Tab icon
. Under the Governance Console, click All Settings within Platform Setup.
Search Distributed Control Panel and select it.
Click New Configuration in the top right corner. Or edit an existing configuration by selecting the Edit option.
The details you mention on this page are Basic Details.Mention the Name in the given field.
Write a Description in the given field. Though it is not mandatory to write a description, it will, however, help you understand the purpose of this particular configuration.
Select user groups in the User Groups field. You can select one or multiple, based on your preferences.
Select the Languages the users can operate in.
Select the Allowed Channels for the distributed users.
Click Save in the bottom right corner. You move to the next tab where you put in the Menu Details.
Under the Menu Details tab, click Add a menu item.
Enter a Name.
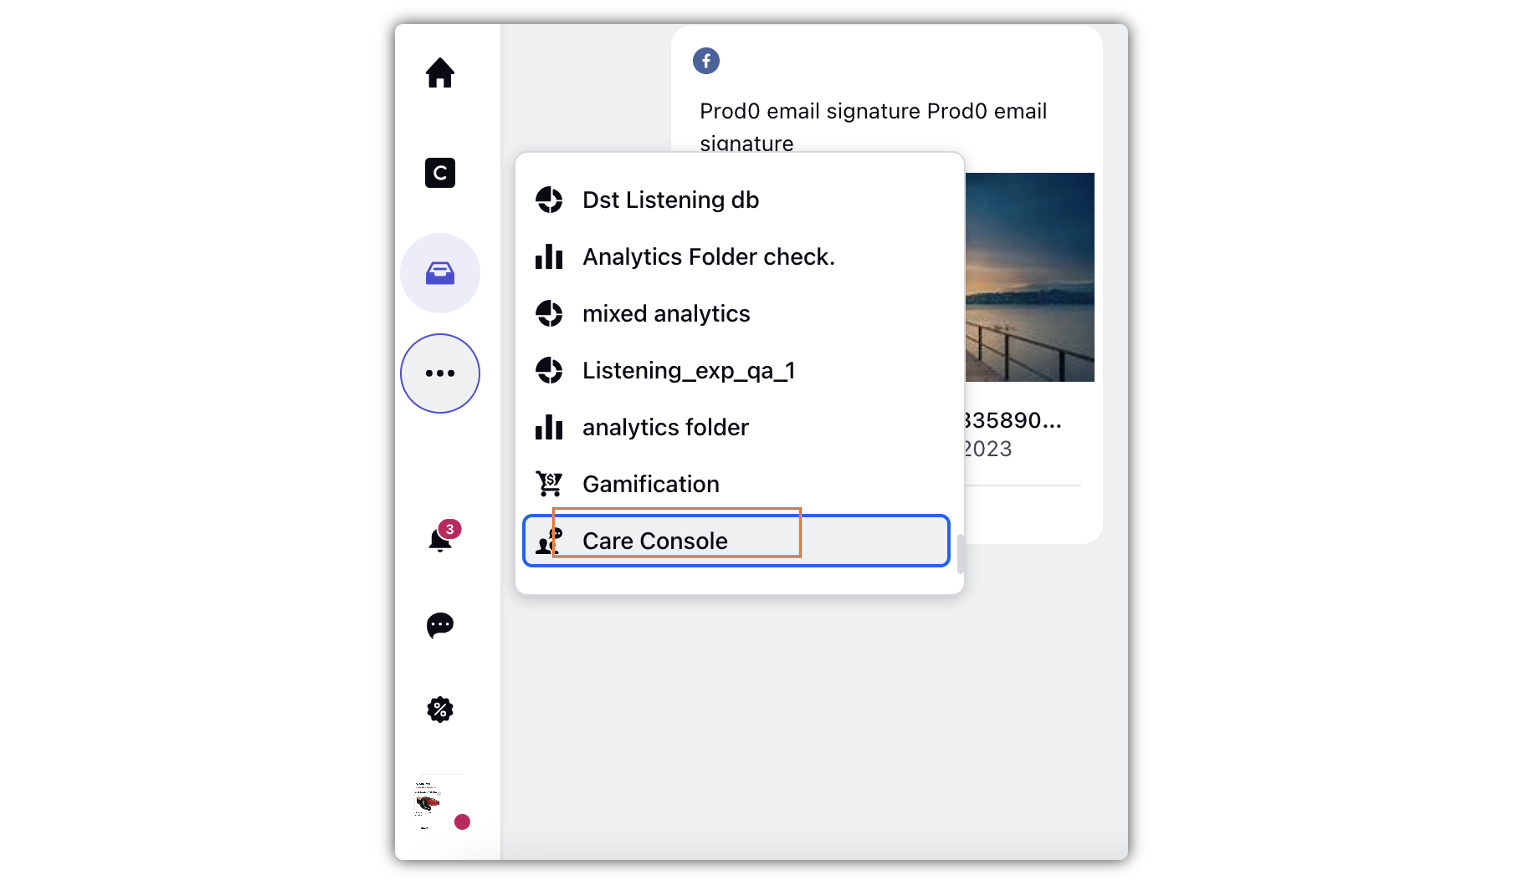
In the Type field, select Care Console from the dropdown.
Enter the other details based on your preference.
Click Save in the bottom right corner.
Enter details for the other tabs - App Properties, Theme, Platform Links, IC Details.
Click Save in the bottom right corner.

Steps to Search Case Queues using User Profile Name
![]() Note: This capability is DP controlled. Get in touch with your Success Manager to get this feature enabled.
Note: This capability is DP controlled. Get in touch with your Success Manager to get this feature enabled.
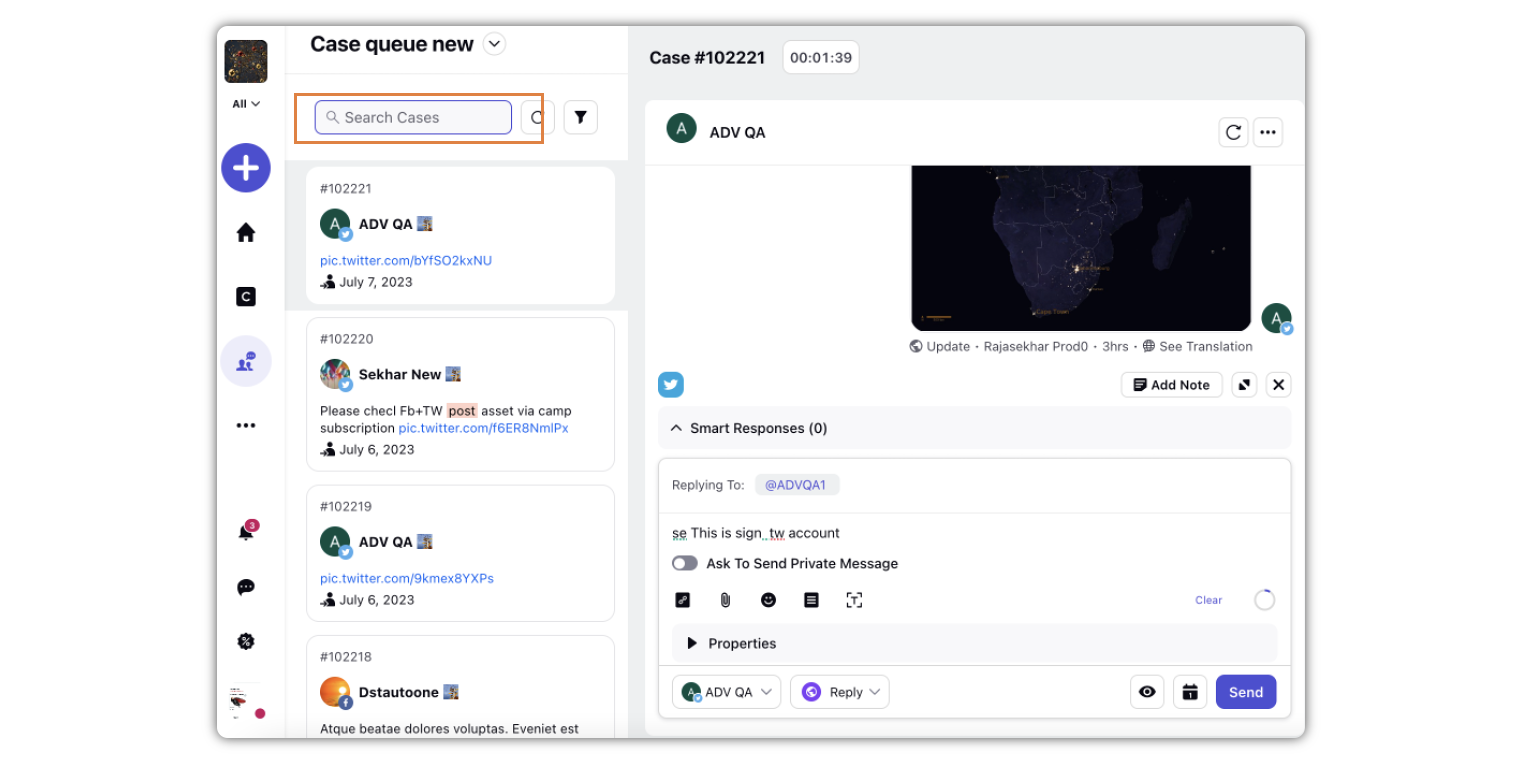
Log in to the Distributed environment.
Go to the Care Console tab.
In the Search Cases box, enter the user profile name to find the case.
Steps to Sort Case Columns in Care Console
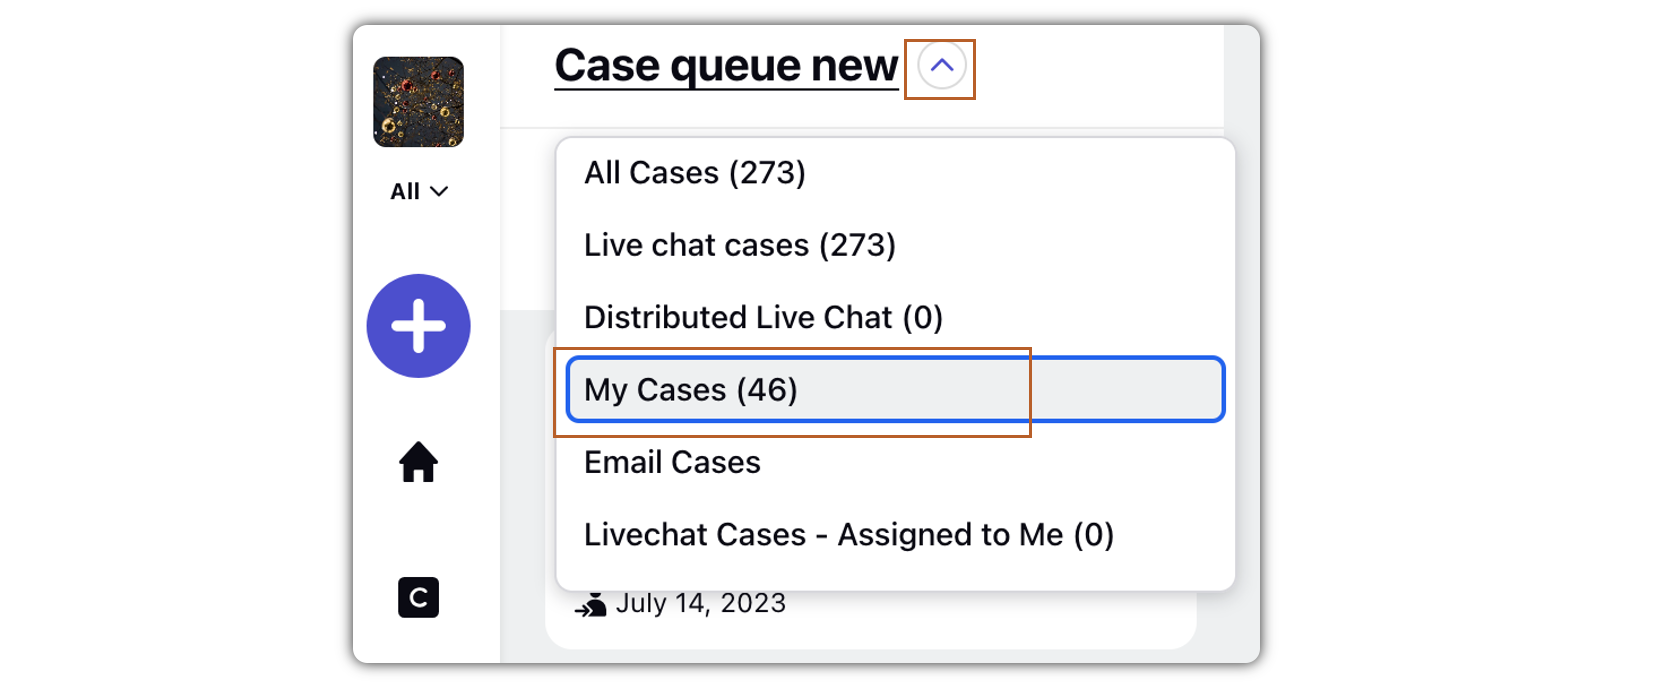
Log in to the Distributed environment.
Go to the Care Console tab.
Click the Case Queue dropdown icon and select the category/topic to sort your case queues. You can also view the number of cases under each topic/submenu label.
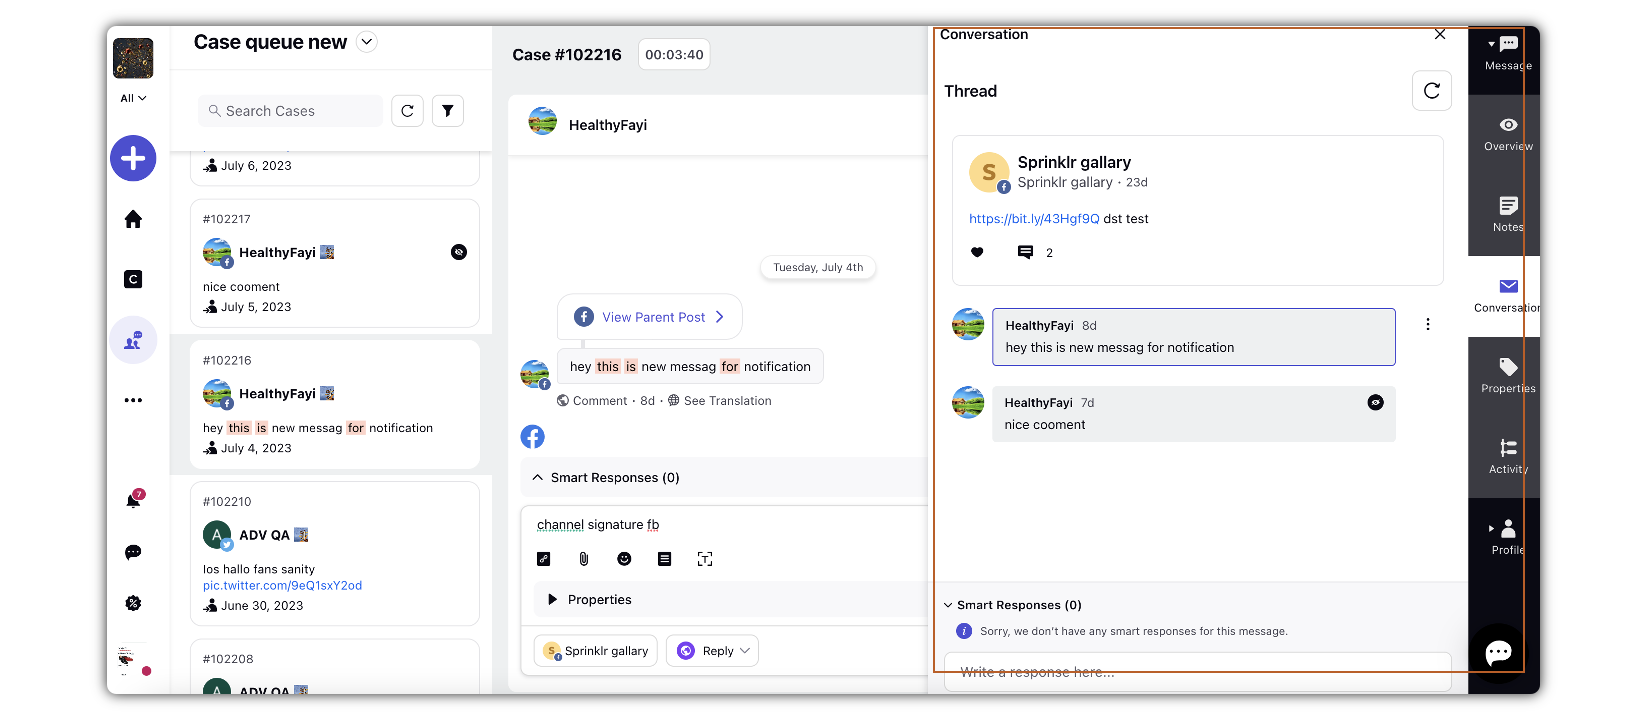
Steps to View Case Details in the Third Pane
![]() Note: This capability is DP controlled. Get in touch with your Success Manager to get this feature enabled.
Note: This capability is DP controlled. Get in touch with your Success Manager to get this feature enabled.
Log in to the Distributed environment.
Go to the Care Console tab.
Under Case Queue, select the case that you want to view.
When the case opens in the middle pane, you will see the first message. You can scroll down to the last message, if required. To see message details, hover over the message. Click the Options icon, and select Details.
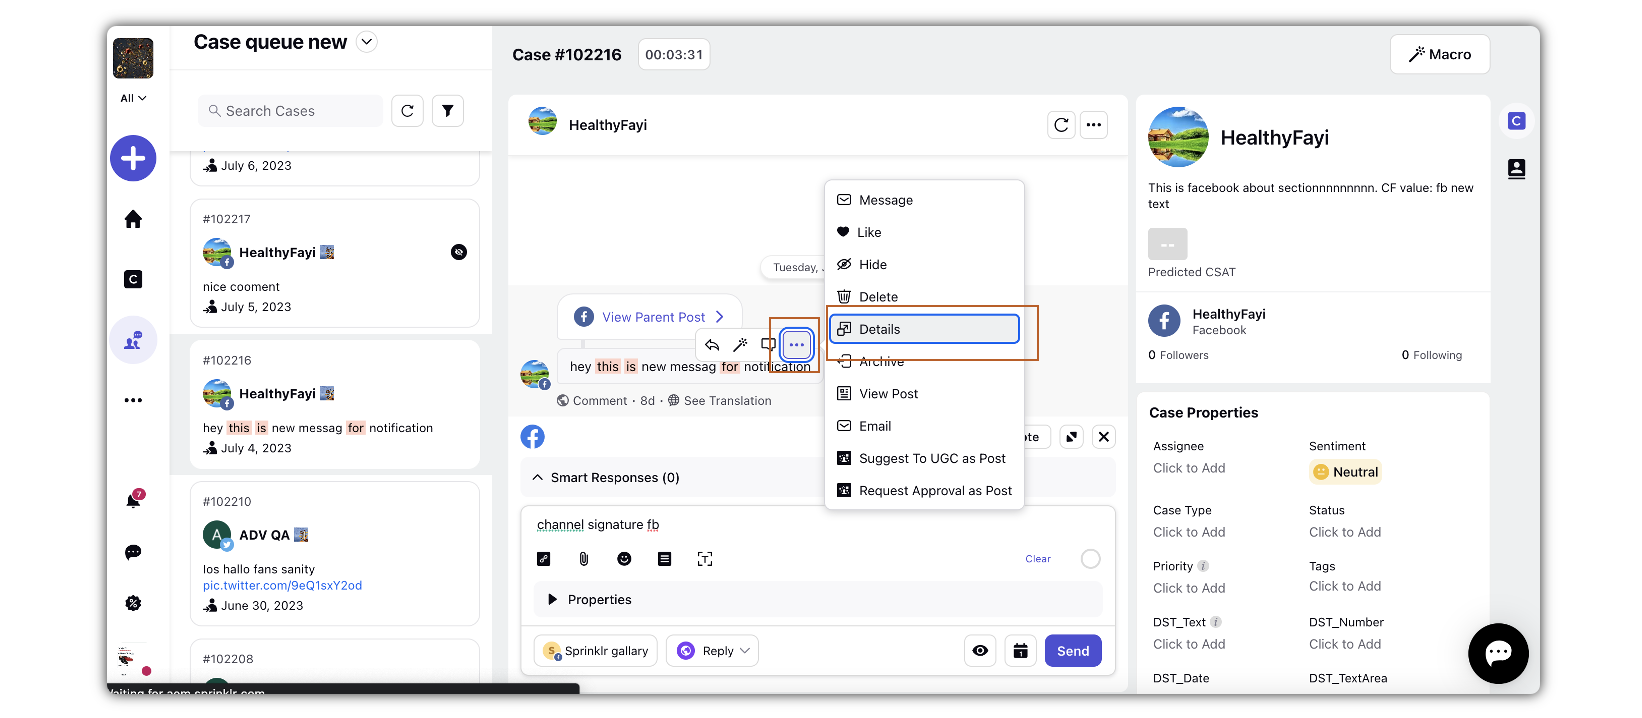
You can view the case details in the third pane.
Steps to View Past Case History on Care Console in Distributed
You can view case history with the contacts in past in Care Console within Distributed, so that w can see all cases and how they are closed. You can also switch between cases to increase agent efficiency.
![]() Note: This capability needs specific set up. Get in touch with your Success Manager to enable this capability.
Note: This capability needs specific set up. Get in touch with your Success Manager to enable this capability.
Log in to the Distributed environment.
Go to the Care Console tab.
In the Search Cases box, enter the user profile name to find the case. Or, go to the preferred case for which you want to get details.
Click View Conversation.
Click the in the bar, and you can select cases from the dropowon.
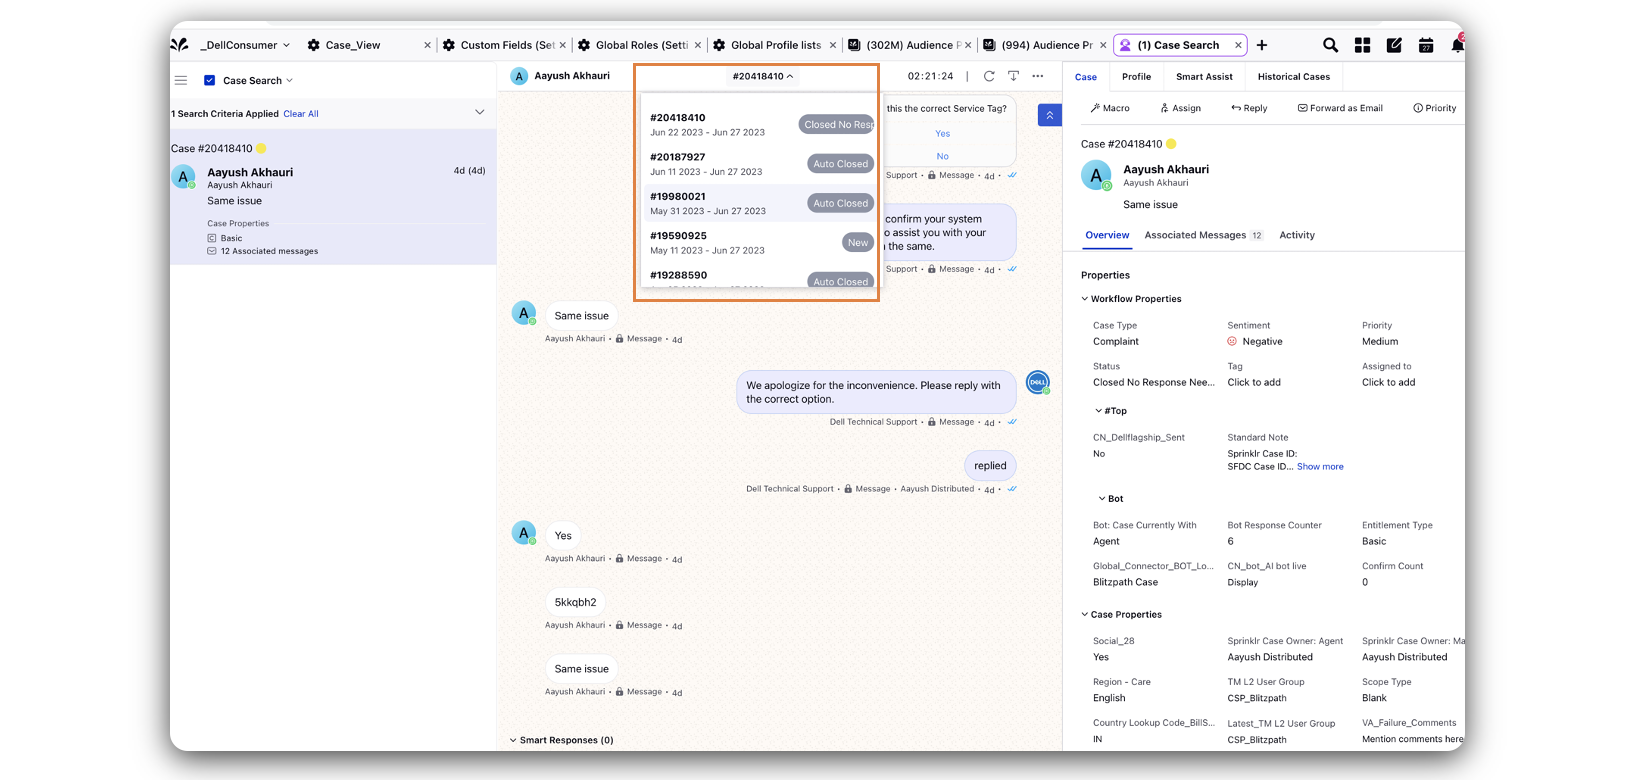 You can now view all the cases handled by the agent. You can also switc between cases related to the same agent.