Naming Convention for Outbound Messages
Updated
Automating the process of naming Outbound Messages by adding the Set Naming Convention action eliminates the manual effort of users in naming the Outbound Message. This saves a lot of time for the users. Having a standard naming convention simplifies the identification and maintenance of a multitude of Outbound Messages. Once the rule is enabled, all the Outbound Messages satisfying the condition will have the selected actions initiated on it.
An example Use case is shown below: A naming convention is implemented on the outbound message if the custom property - “Ignore Naming Convention” does not have the value “Yes”.
How to set up
Click the New Tab icon. Under Governance, click Manage Rules within Platform Setup.
In the top right corner of the Rule Engine window, click Create New Rule. For more information, see Create New Rule.
On the New Rule window, fill in the required details. Make sure you select Draft from the Context dropdown.
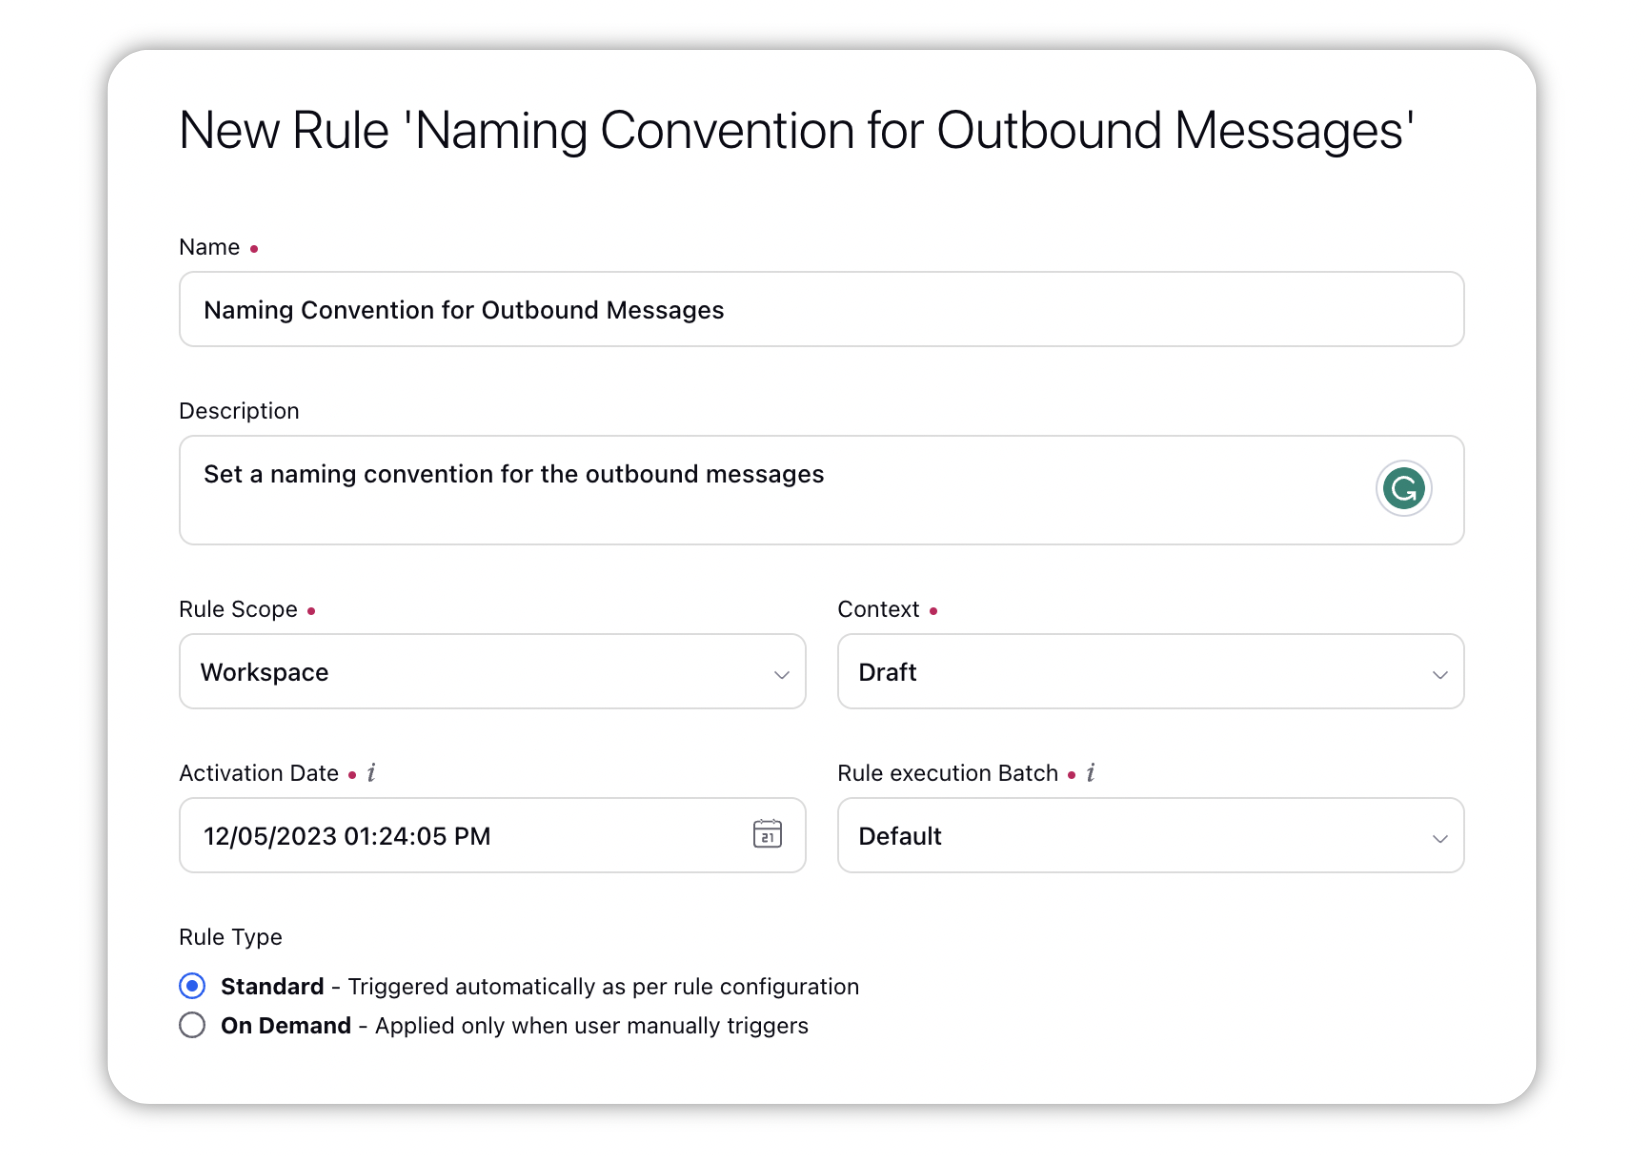
Modify the values for Activation Date, Rule Execution Batch, Rule Type, and Custom Fields. To proceed with the default values, click Next in the bottom right corner.
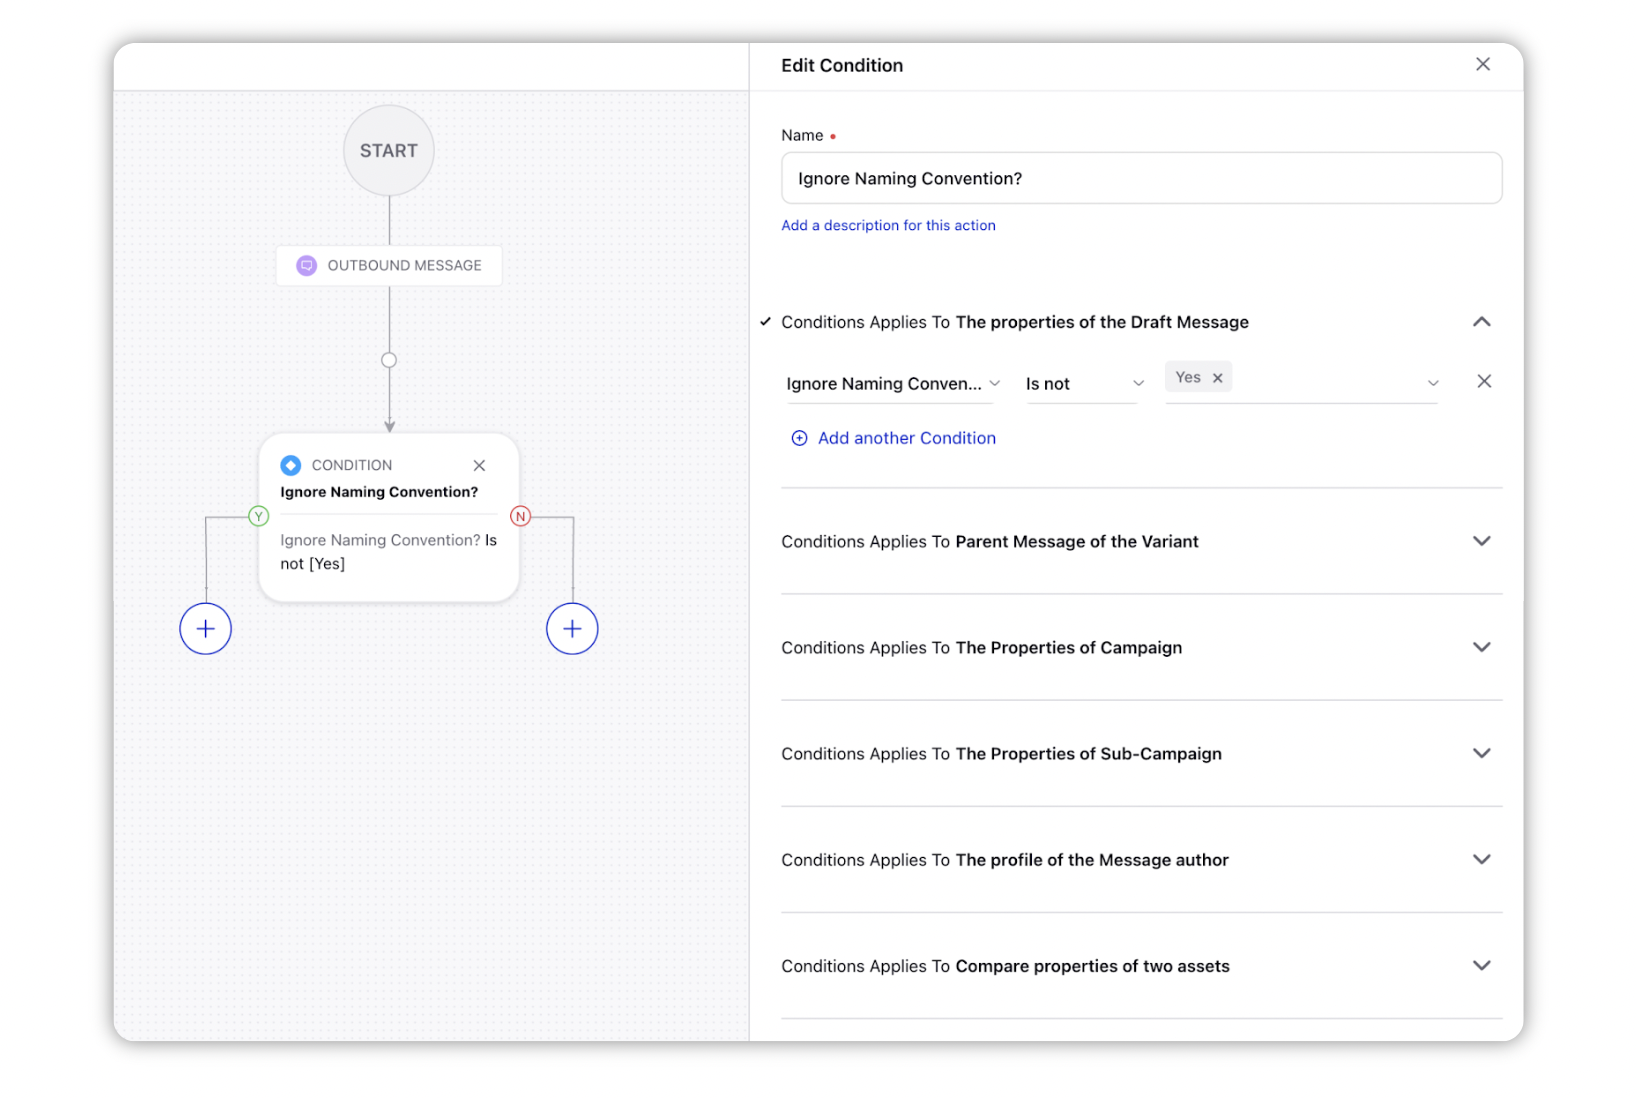
On the Rule Builder window, select Add Condition to set up specific scenarios that must be met for subsequent actions to execute. You can also chain multiple conditions together to refine the scenarios.
Setup the condition, “Ignore Naming Convention” with values “Is Not Yes” under the sub-section “The properties of the Draft Message”
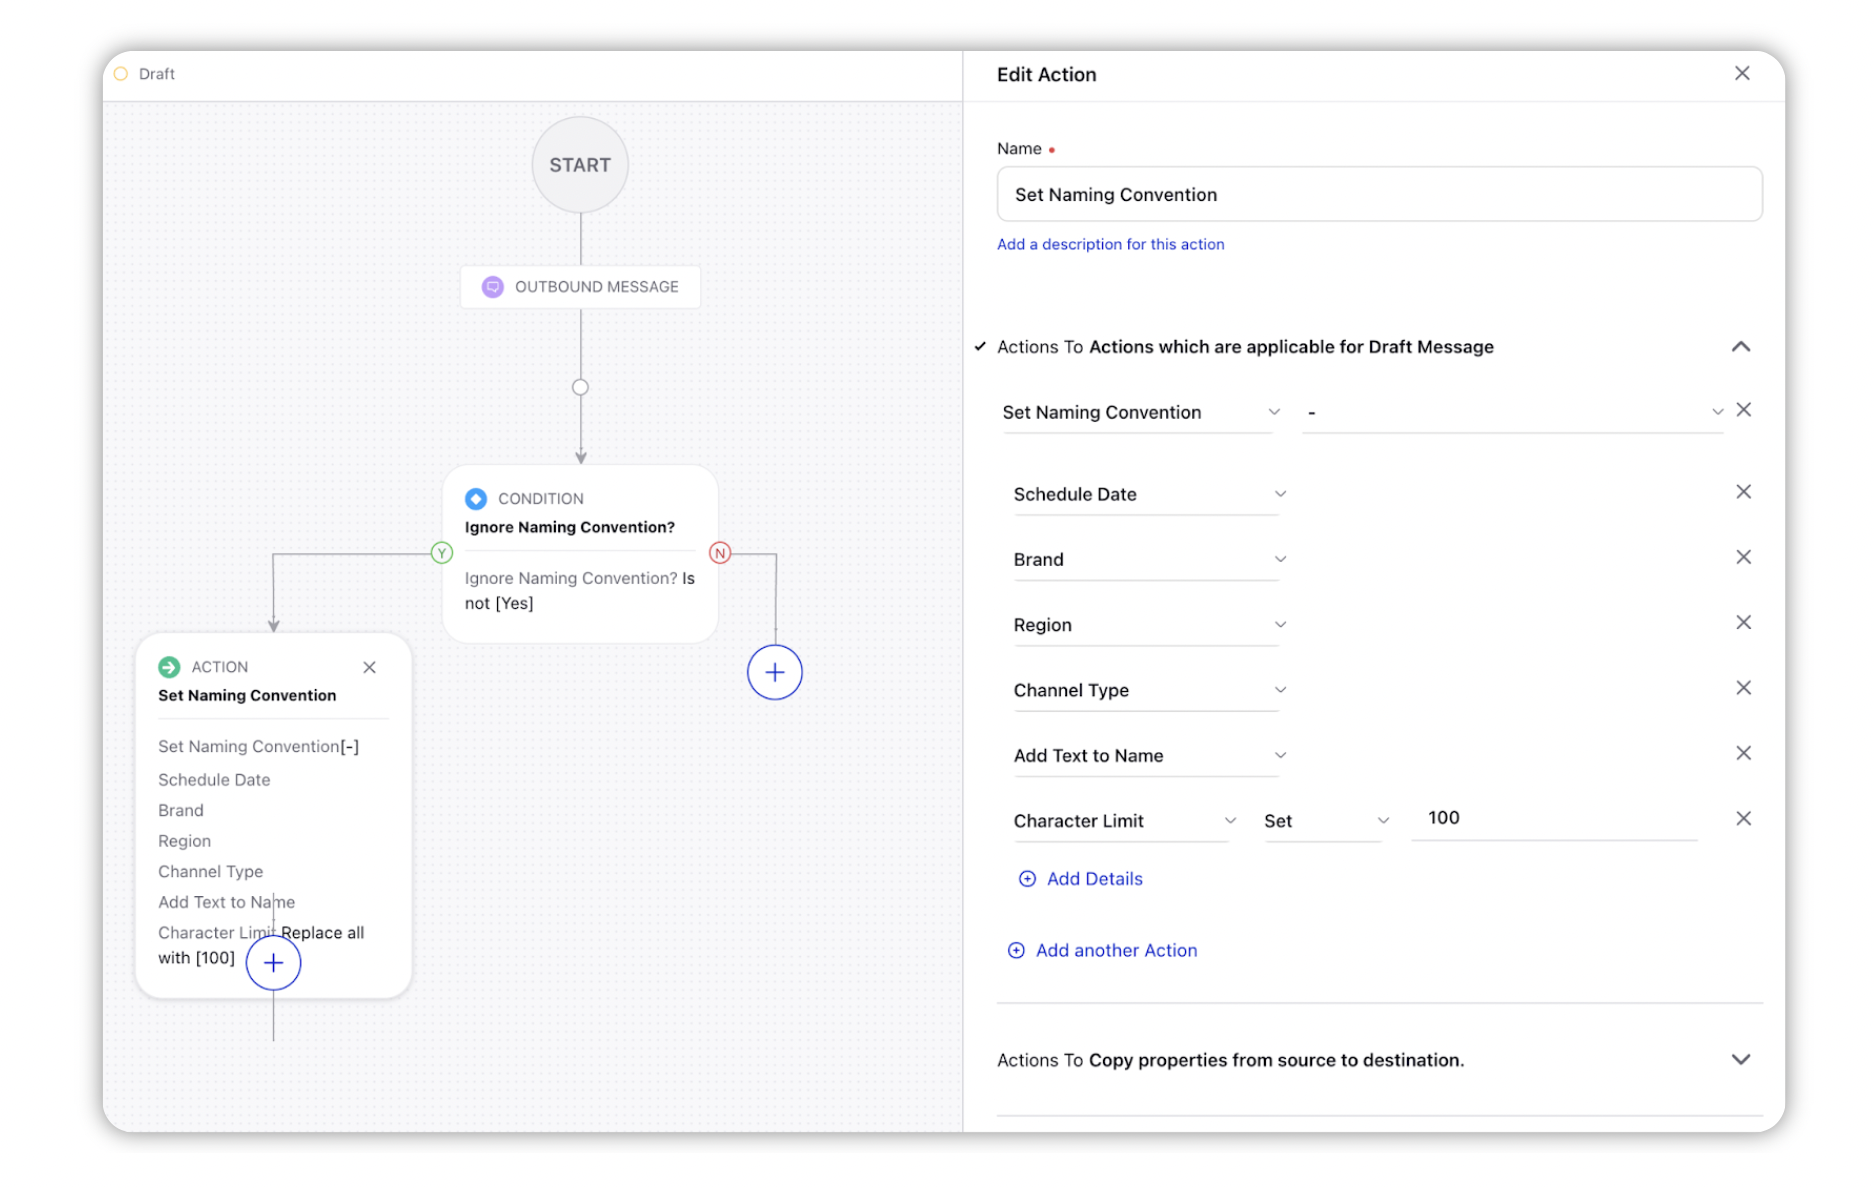
To configure actions in a rule, select Add Action on the Yes or a No branch of the condition depending on when you want the action to be executed.
To define the naming convention, select Set Naming Convention from the action dropdown under the subsection to "Actions which are applicable for Draft Message". Select a suitable separator from the adjacent dropdown.
Click Add Details to select system and custom properties to define the naming convention from the dropdown menu
Click Save in the bottom right corner to finalize the creation of your new rule, or Save as Draft to create a draft version of your rule.