Content Templates
Updated
Content templates are an efficient way to create personalized email content that meets your specific needs. With the help of these templates, you can curate the look and feel of your emails by including various elements such as text, images, and social media links. In addition, you can also add compelling call-to-action buttons that can help increase engagement with your audience. Furthermore, if you have knowledge of HTML, you can even create HTML-based templates by inserting HTML code blocks in your template. These templates can save time and provide consistency in your email campaigns, ensuring that your messages are always on-brand and effective in communicating with your subscribers.
1) Click the New Tab icon. Under the Sprinklr Marketing tab, click Content Templates within Publish.
2) On the top right corner of the Content Template Builder window, click New Content Template.
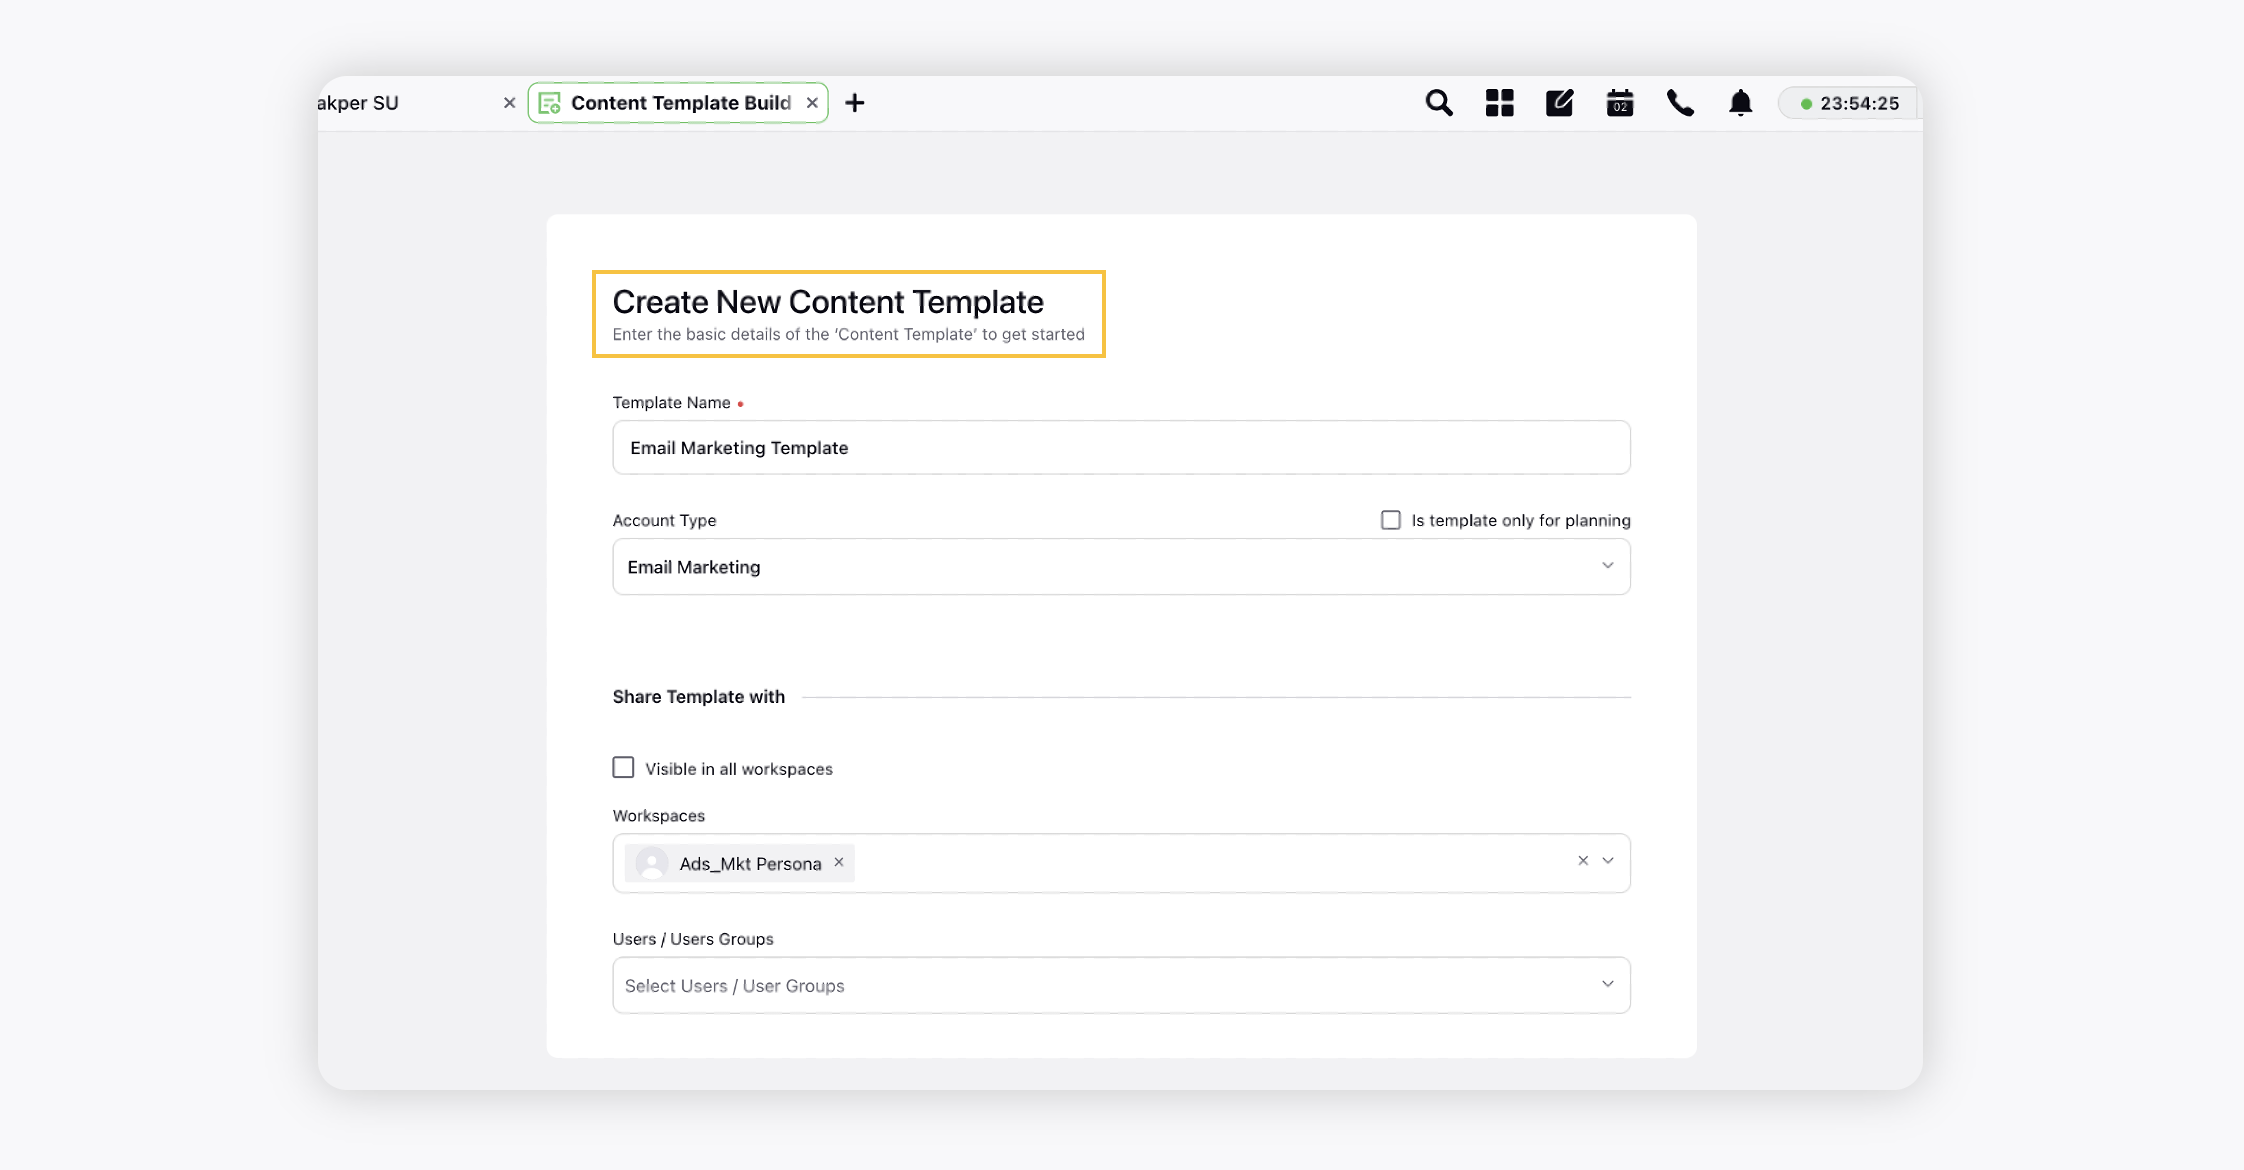
3) Enter the basic details in the Create New Content Template window. Give your template a Name and select Email Marketing as the Account Type. Select the Workspace(s) and User group(s) to share your template with.
4) Click Save in the bottom right corner.
5) Build your template from the Designer tab of the Template Builder. Set the desired basic layout i.e. Banner Image, Text, CTA button, and social media links. Click the Addition Space_Icon_Addition.png icon and select from the following widgets.
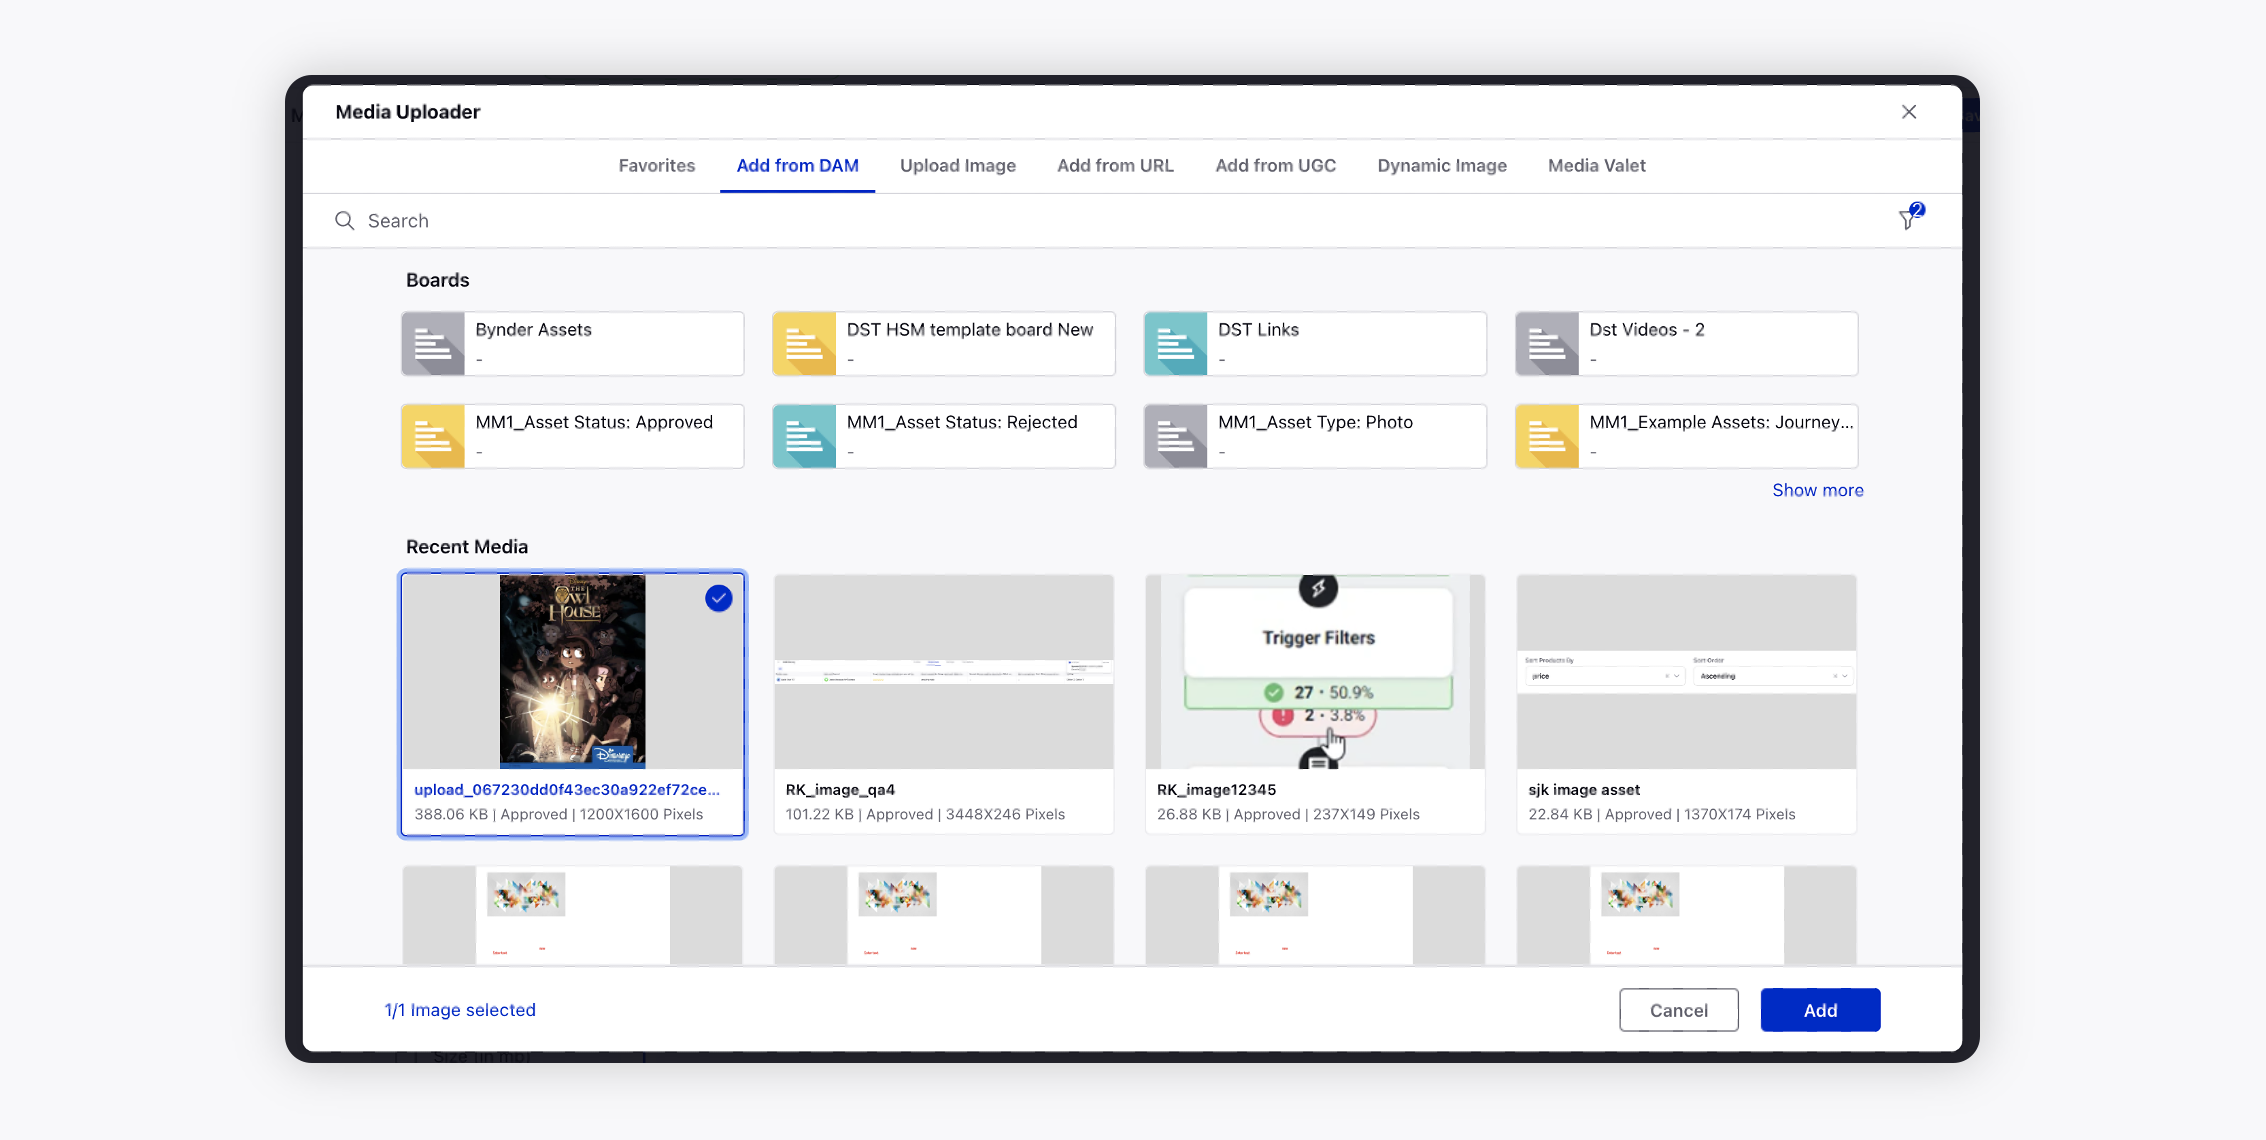
Image: Click to add media (images, GIFs, and videos) to your template. Media can be added from SAM, UGC, via URL or from your system.
Spacer: Click to add space between two widgets.
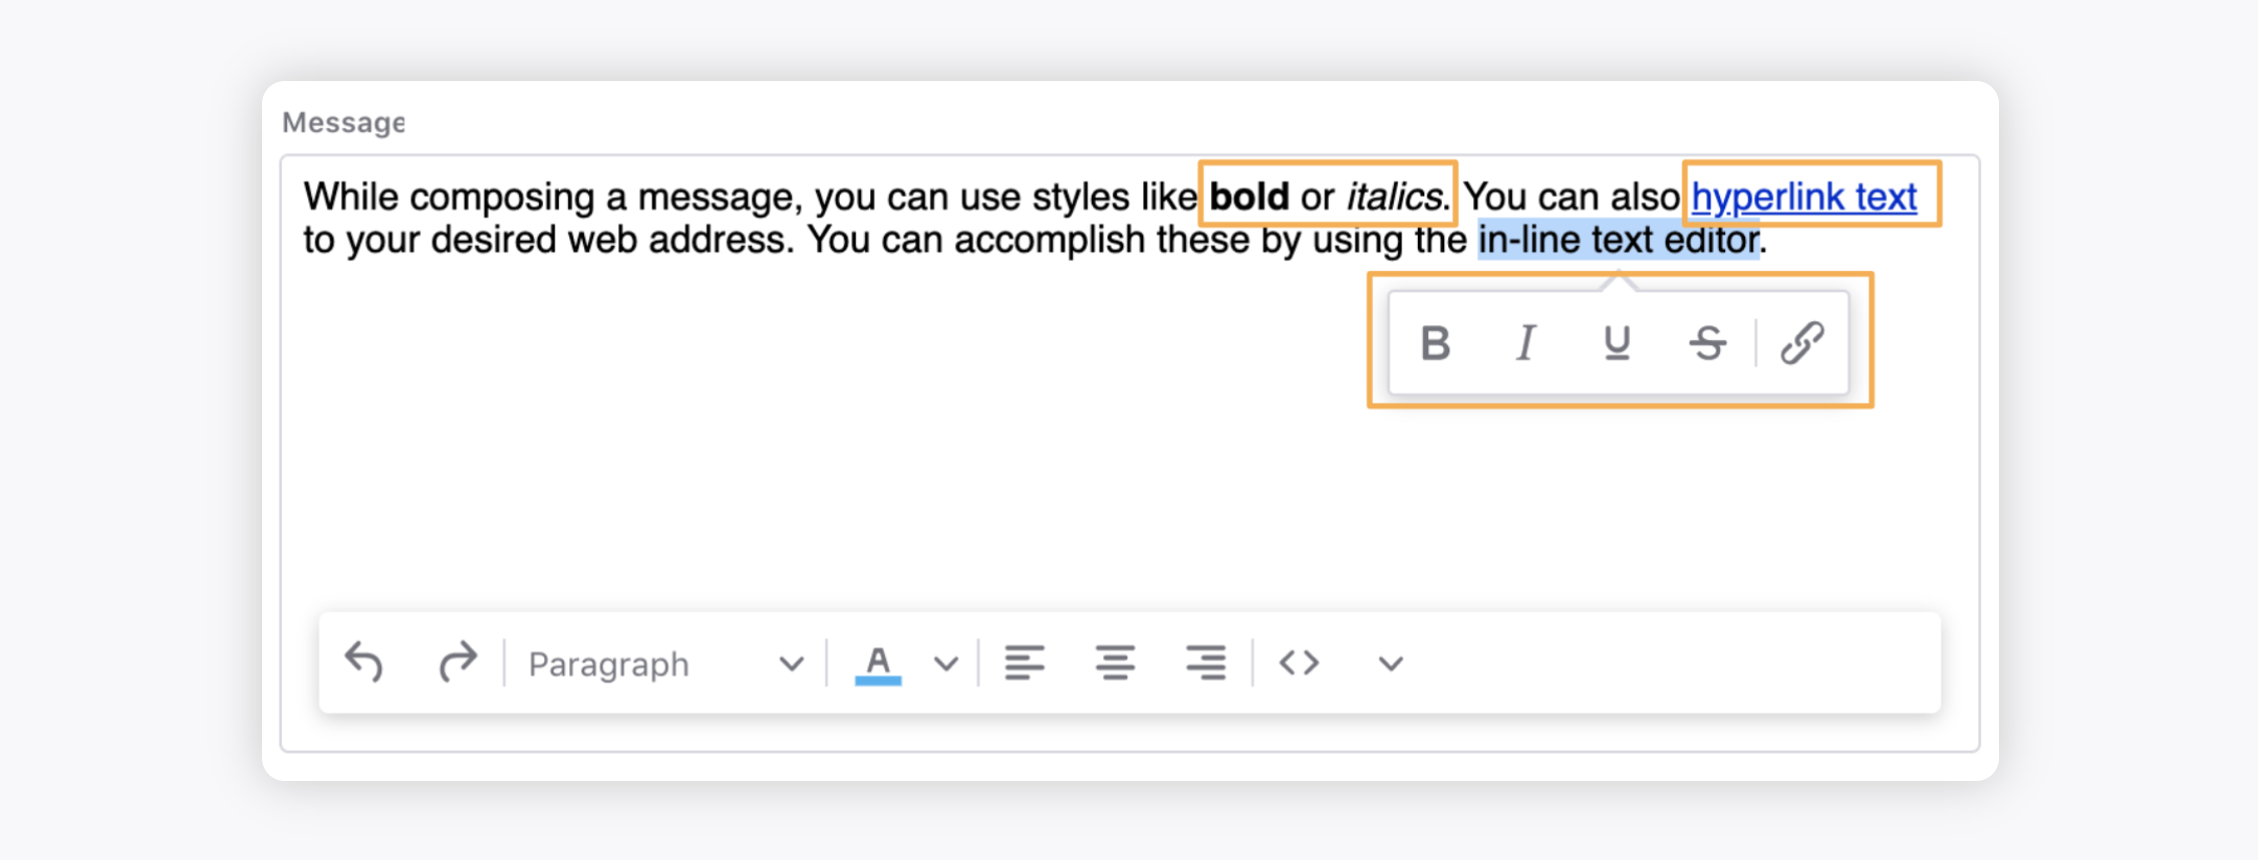
Text: Click to add rich text to your template i.e. bold, italic, underline, headings, hyperlinks, etc. You can also set the alignment and change the text color as desired.
Button: Click to add a button to your template. This is usually a CTA button. You can also add text to your button.
HTML: Click to add HTML code in order to add a component that is not available amongst the given templates, e.g. tables, etc.
Social Footer: Click to add the URLs of your social media accounts.
Image and Text: Click to add the image and text combination to your template. You can change the alignment of the image and the text.
6) As you select a particular widget, a column constituting various adjustment options (height, width, color, border) shall appear. Make changes as per your requirement.
7) After setting the basic layout, upload the desired images and add the text and other details by switching to the Form Input tab.
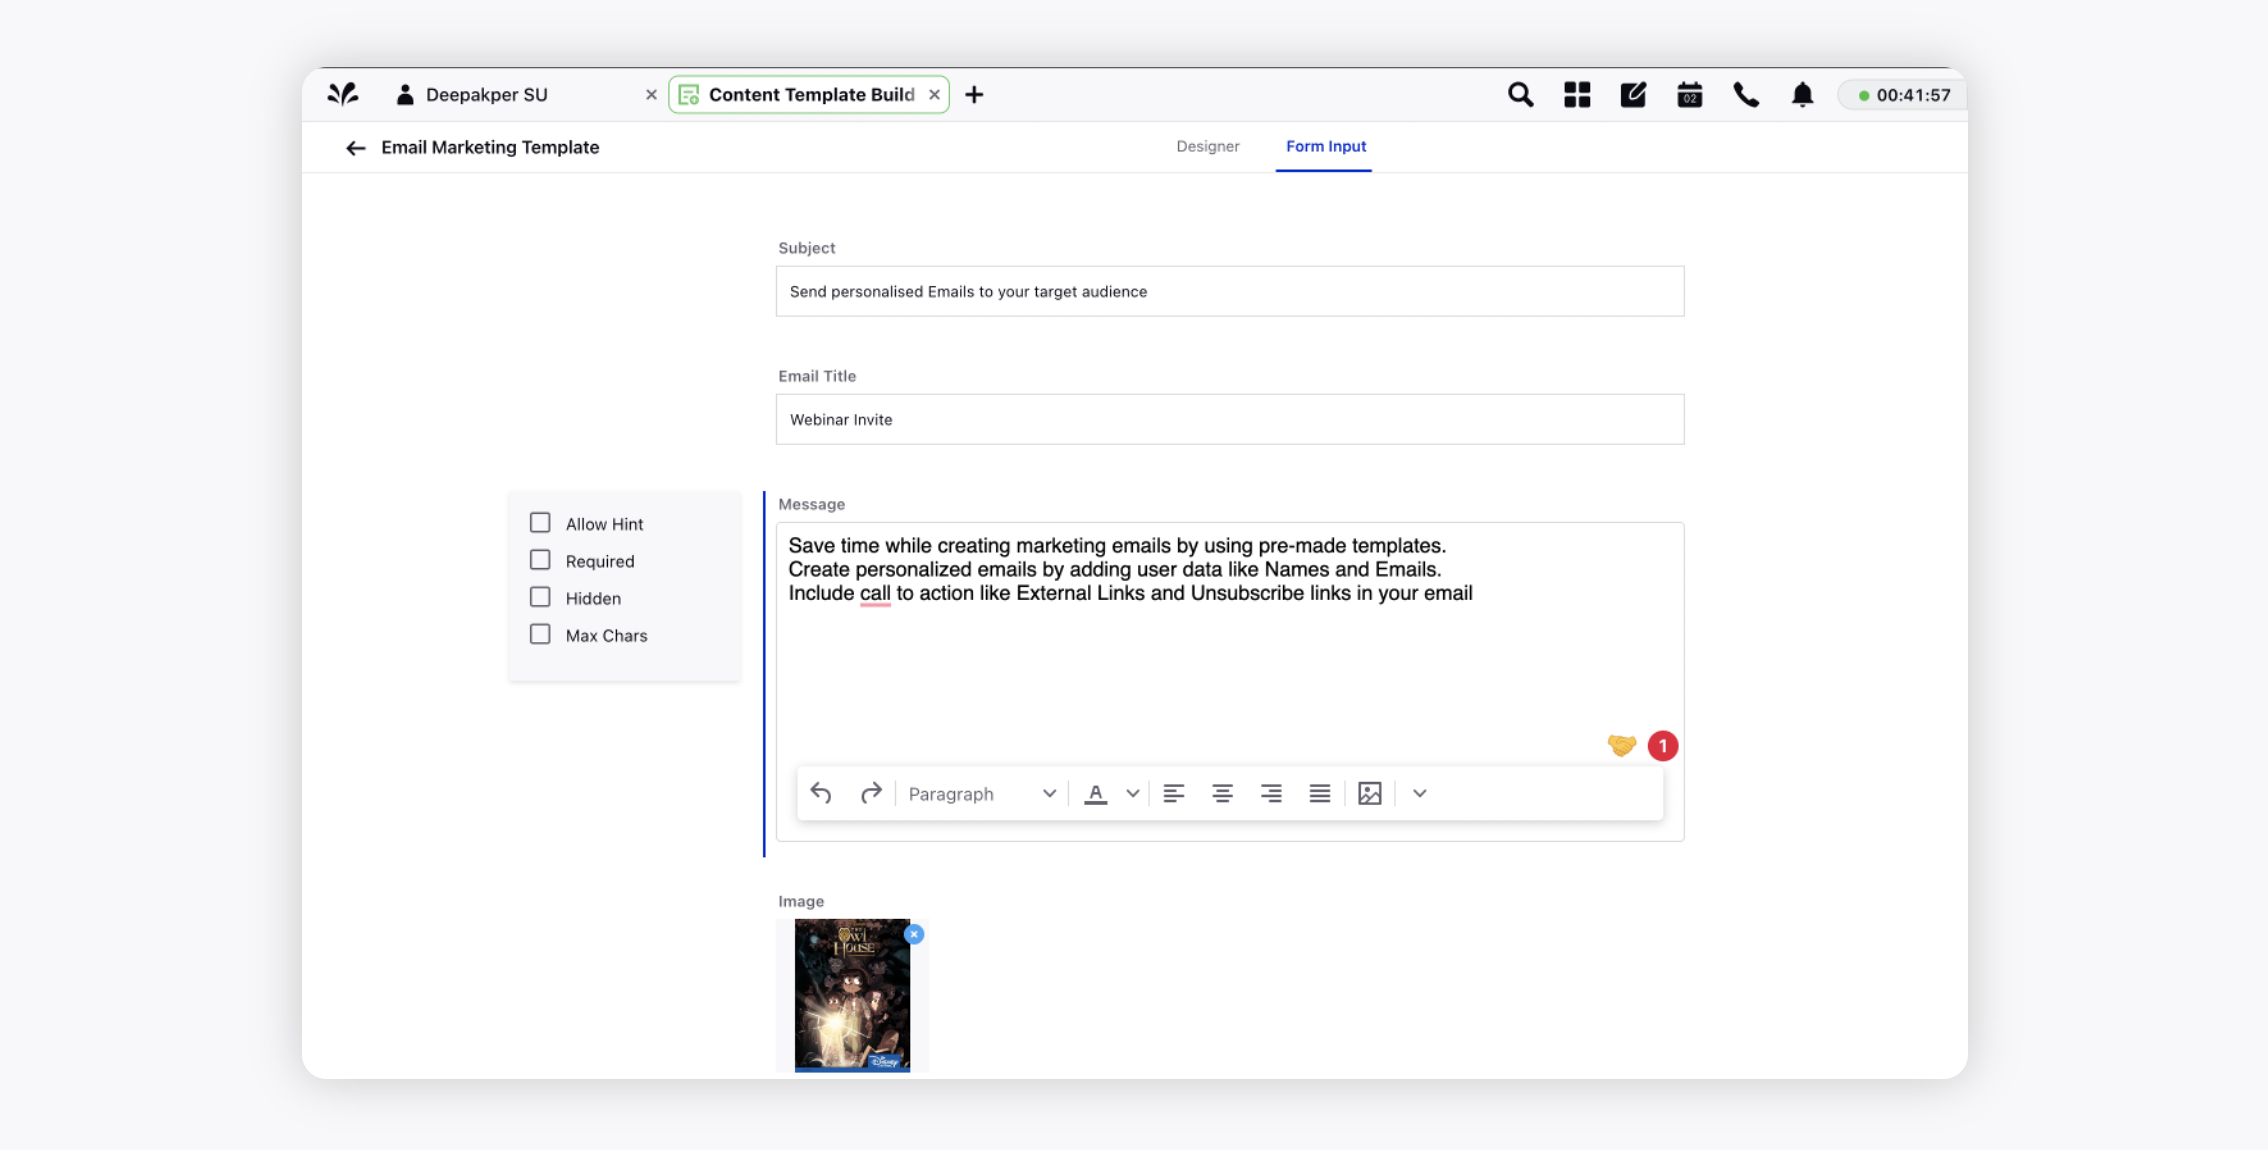
8) You can add Subject and Email Title in the Form Input tab.
9) Text can be added in the message box and can be easily edited.
10) When you choose Image and Text, you can change the alignment of the image and the text with the options given in the right pane.
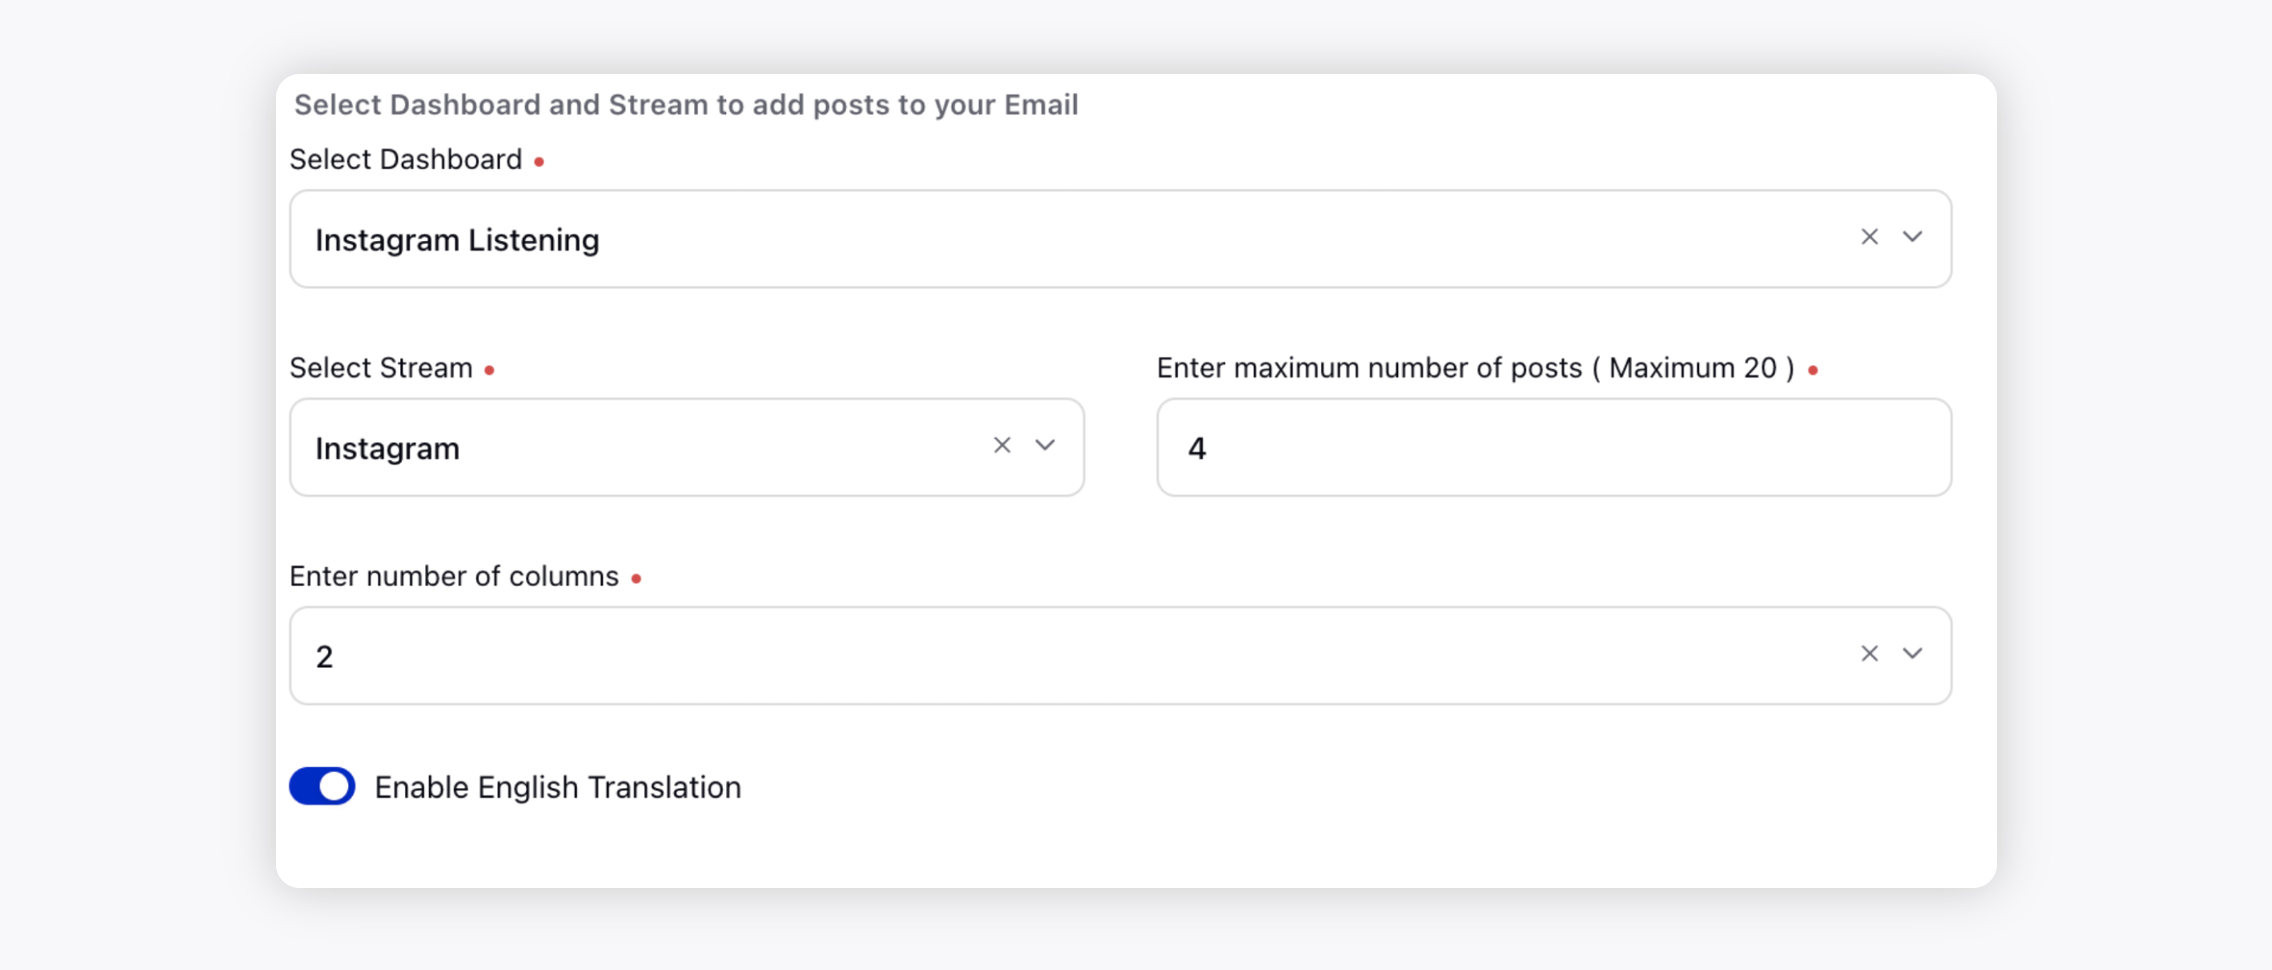
11) When adding live posts in the email, select the necessary stream from the dashboard. You can limit the number of posts visible in the template and also organize them in columns.
12) Click Save in the top right corner to save the email template.
To add email address of intended recipient into email body
Sprinklr allows you to include the email address of the intended recipient in the email body. You may include it at the beginning of the mail, or in the footer, or at any other space of your preference in the mail body.
1) Create an email template or go to the email template in which you want to include the email address.
2) Type curly bracket ( { ) and contact email in place of the email address . Select Contact Email from the dropdown.
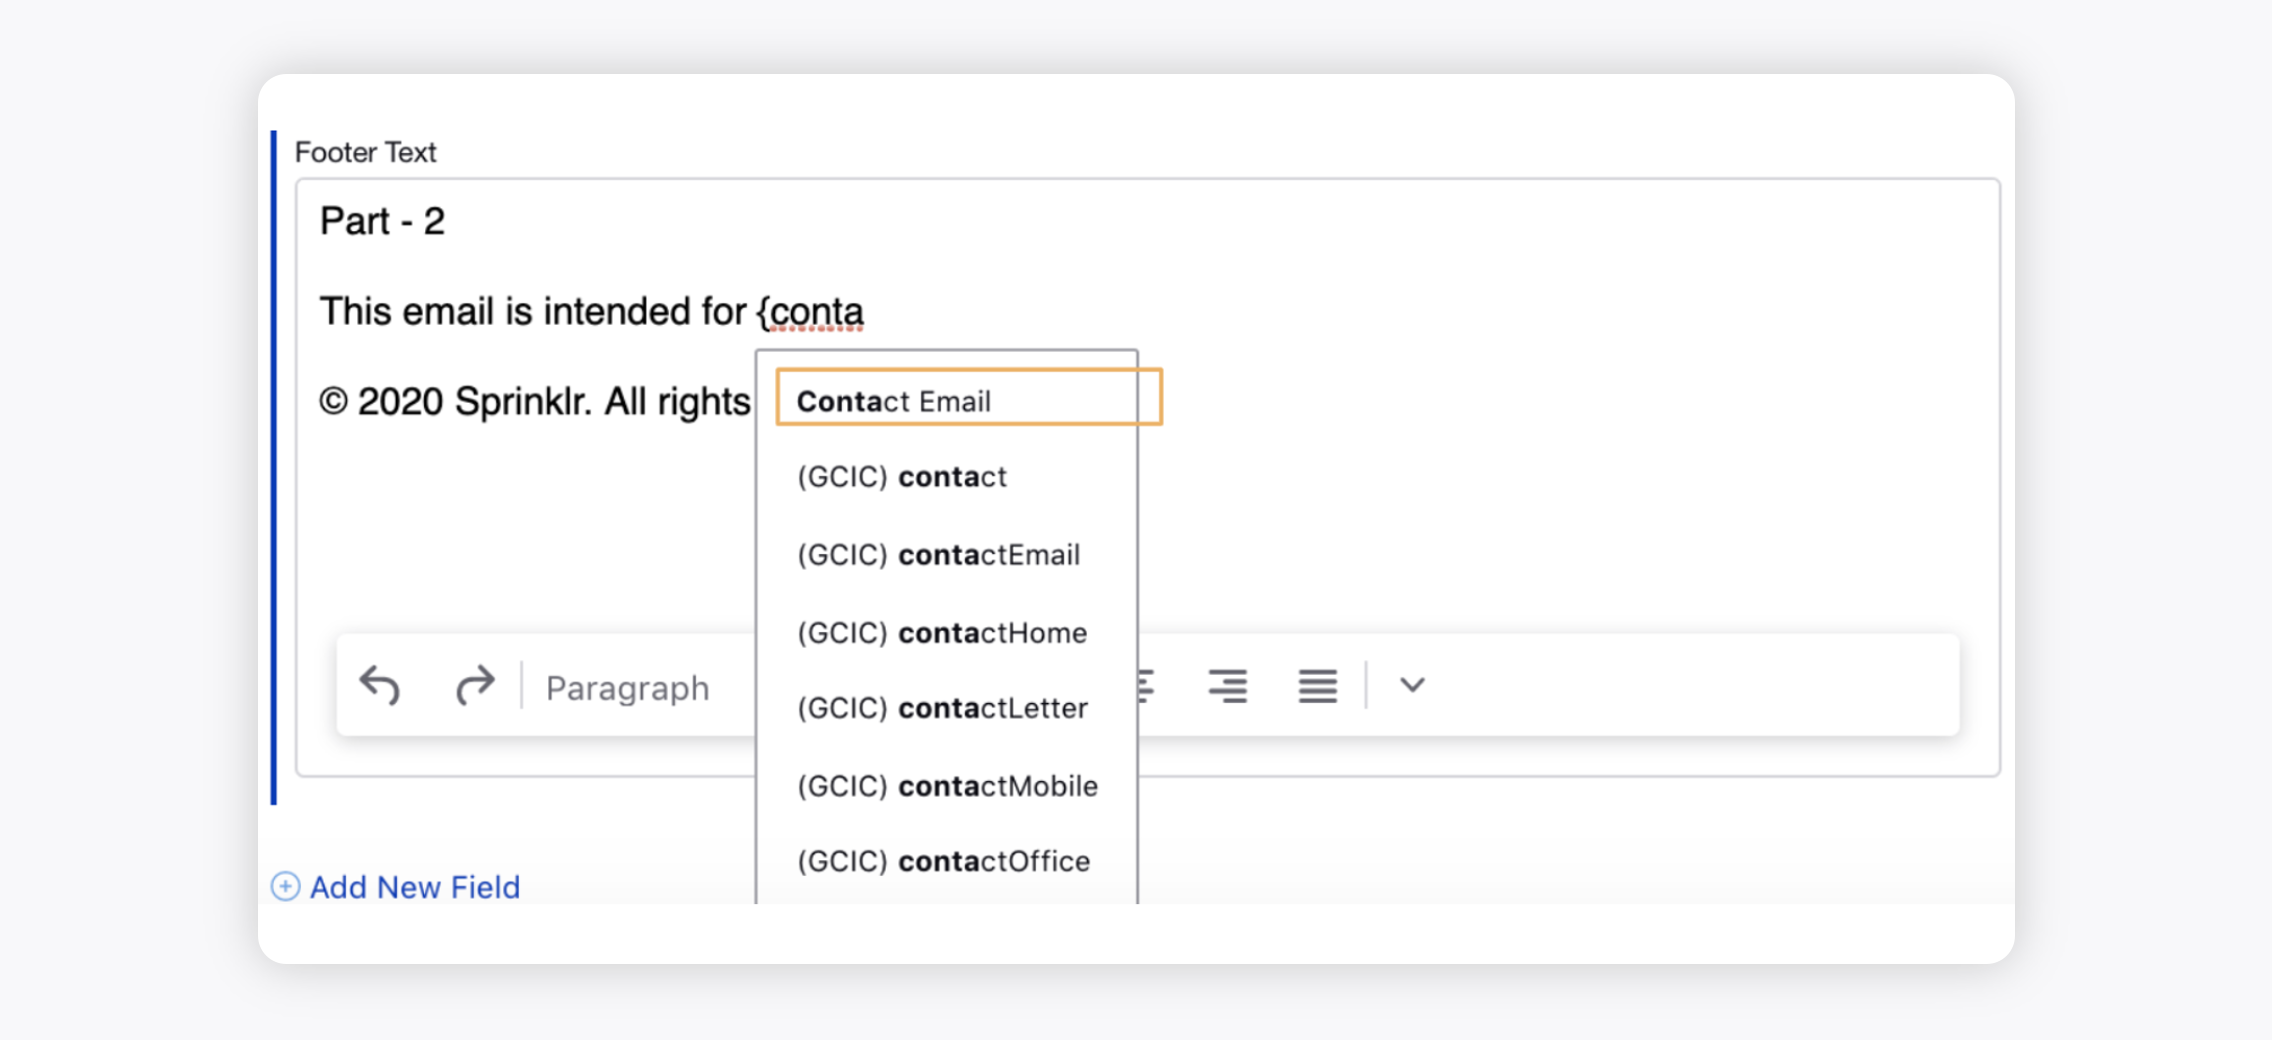
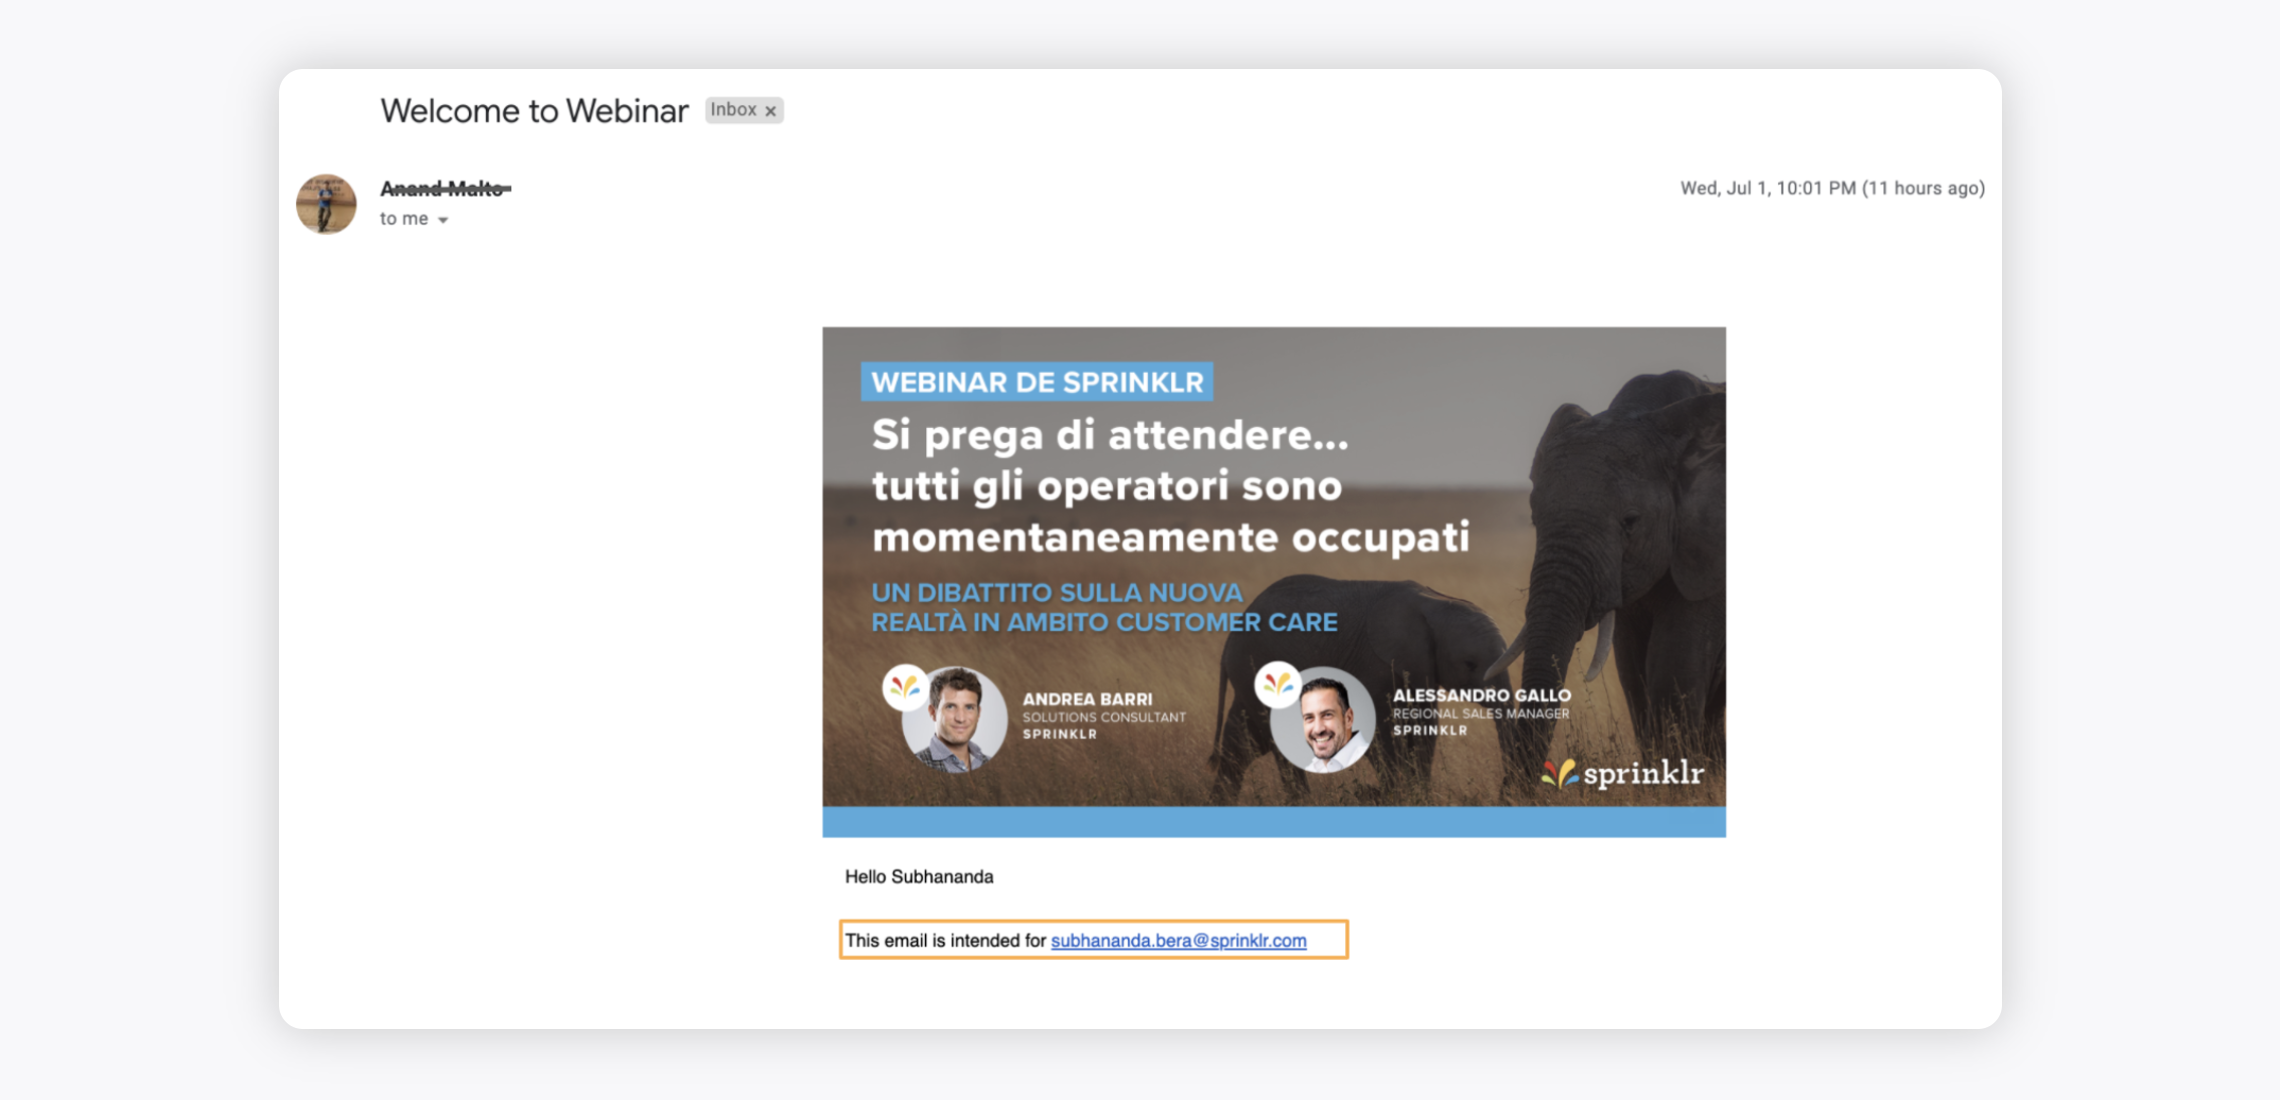
In the email it will look like the following:
To open email in a new web browser
Sprinklr allows you to create and send emails that open in a new web browser. You may include the CTA at the beginning of the mail, or in the footer, or at any other space of your preference in the mail body.
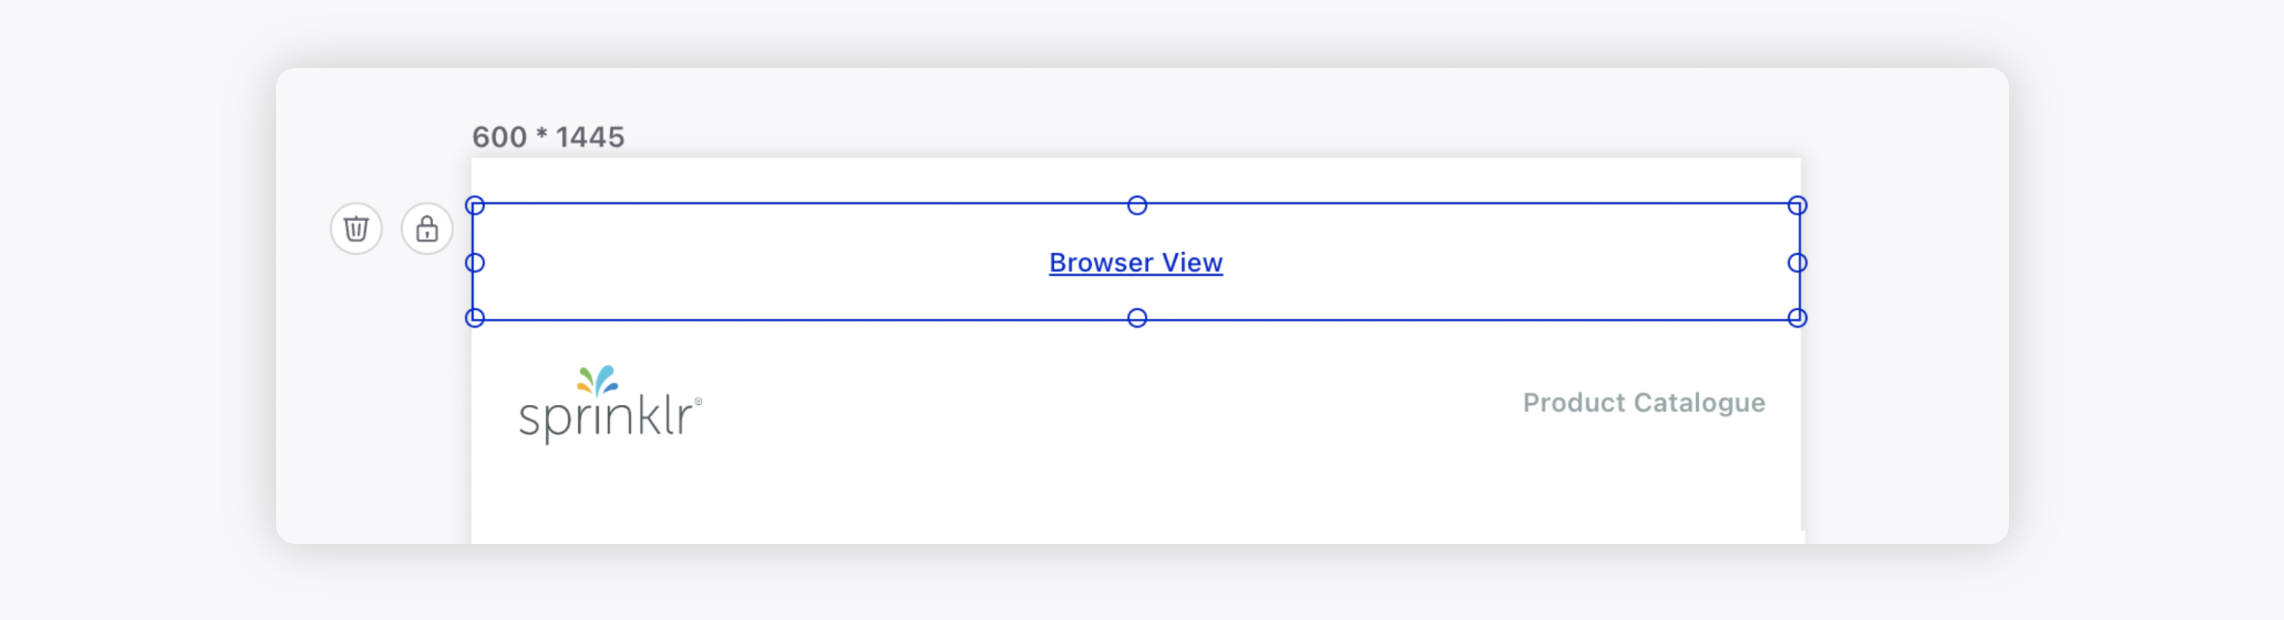
1) Create an email template or go to the email template which you want to open in a new browser.
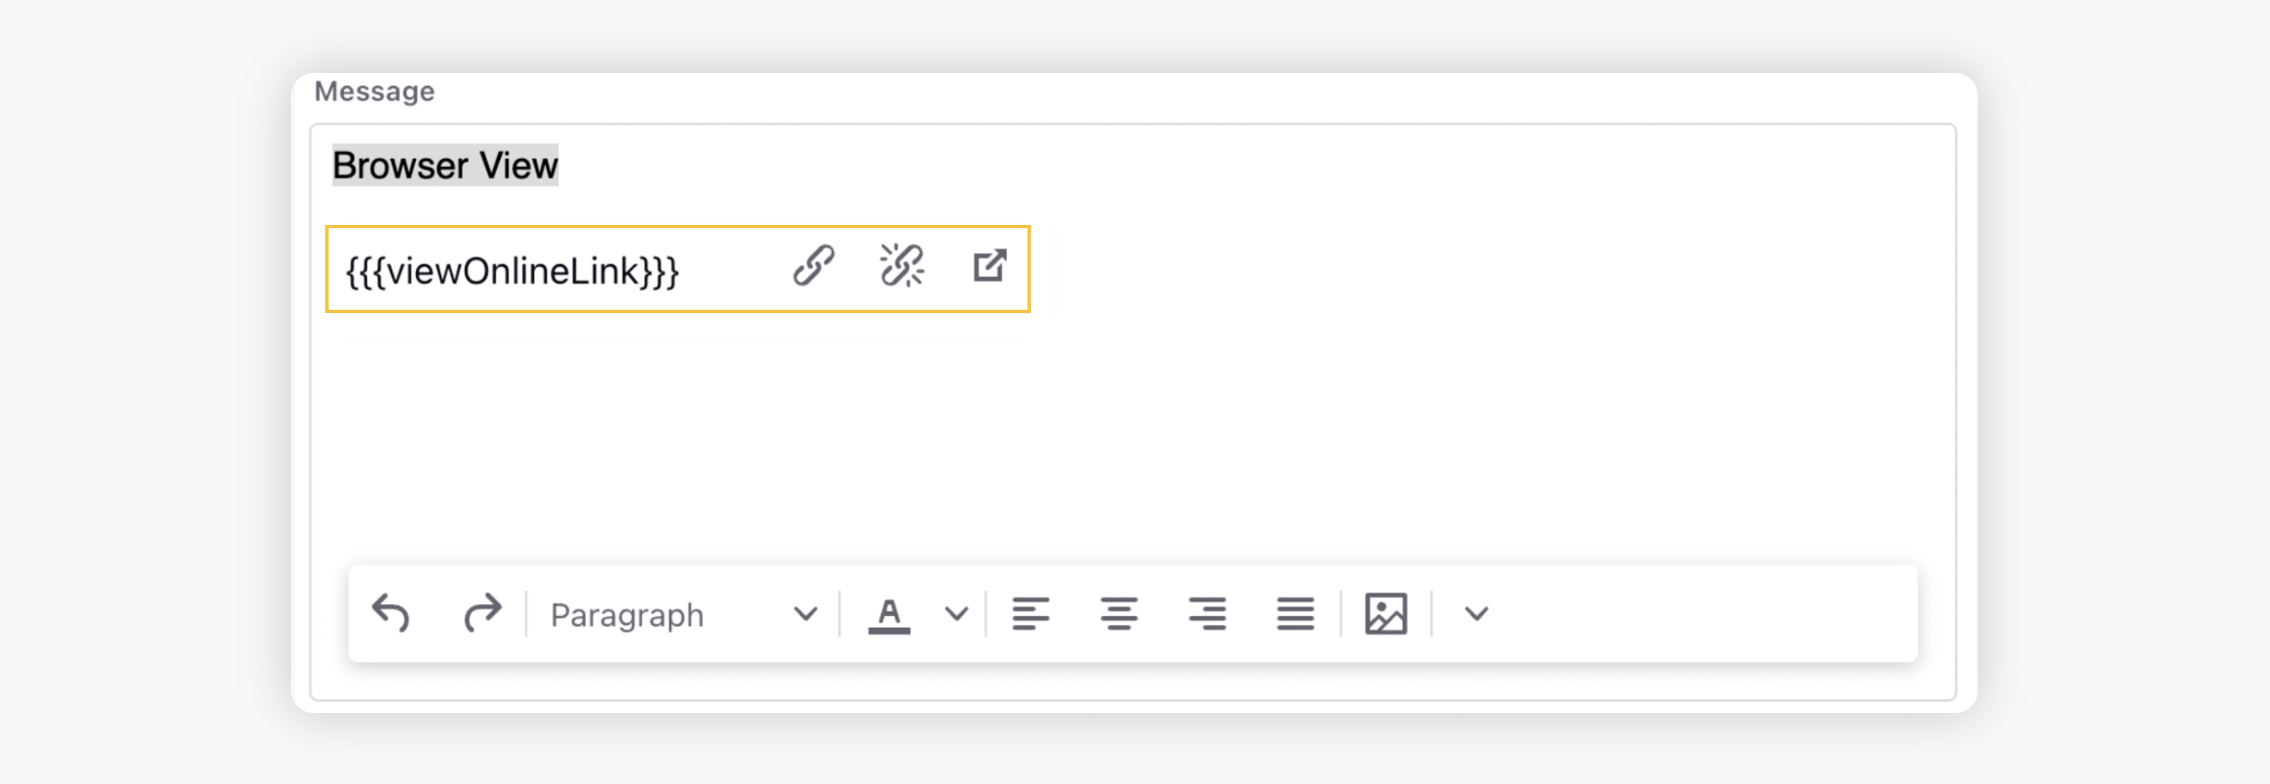
2) Type in the text you want to hyperlink, like "View in Browser", and select it.
3) Click the Add Link icon in the inline text editor.
4) Type in the given field.
5) Click the Add Link icon to create the unsubscribe link.
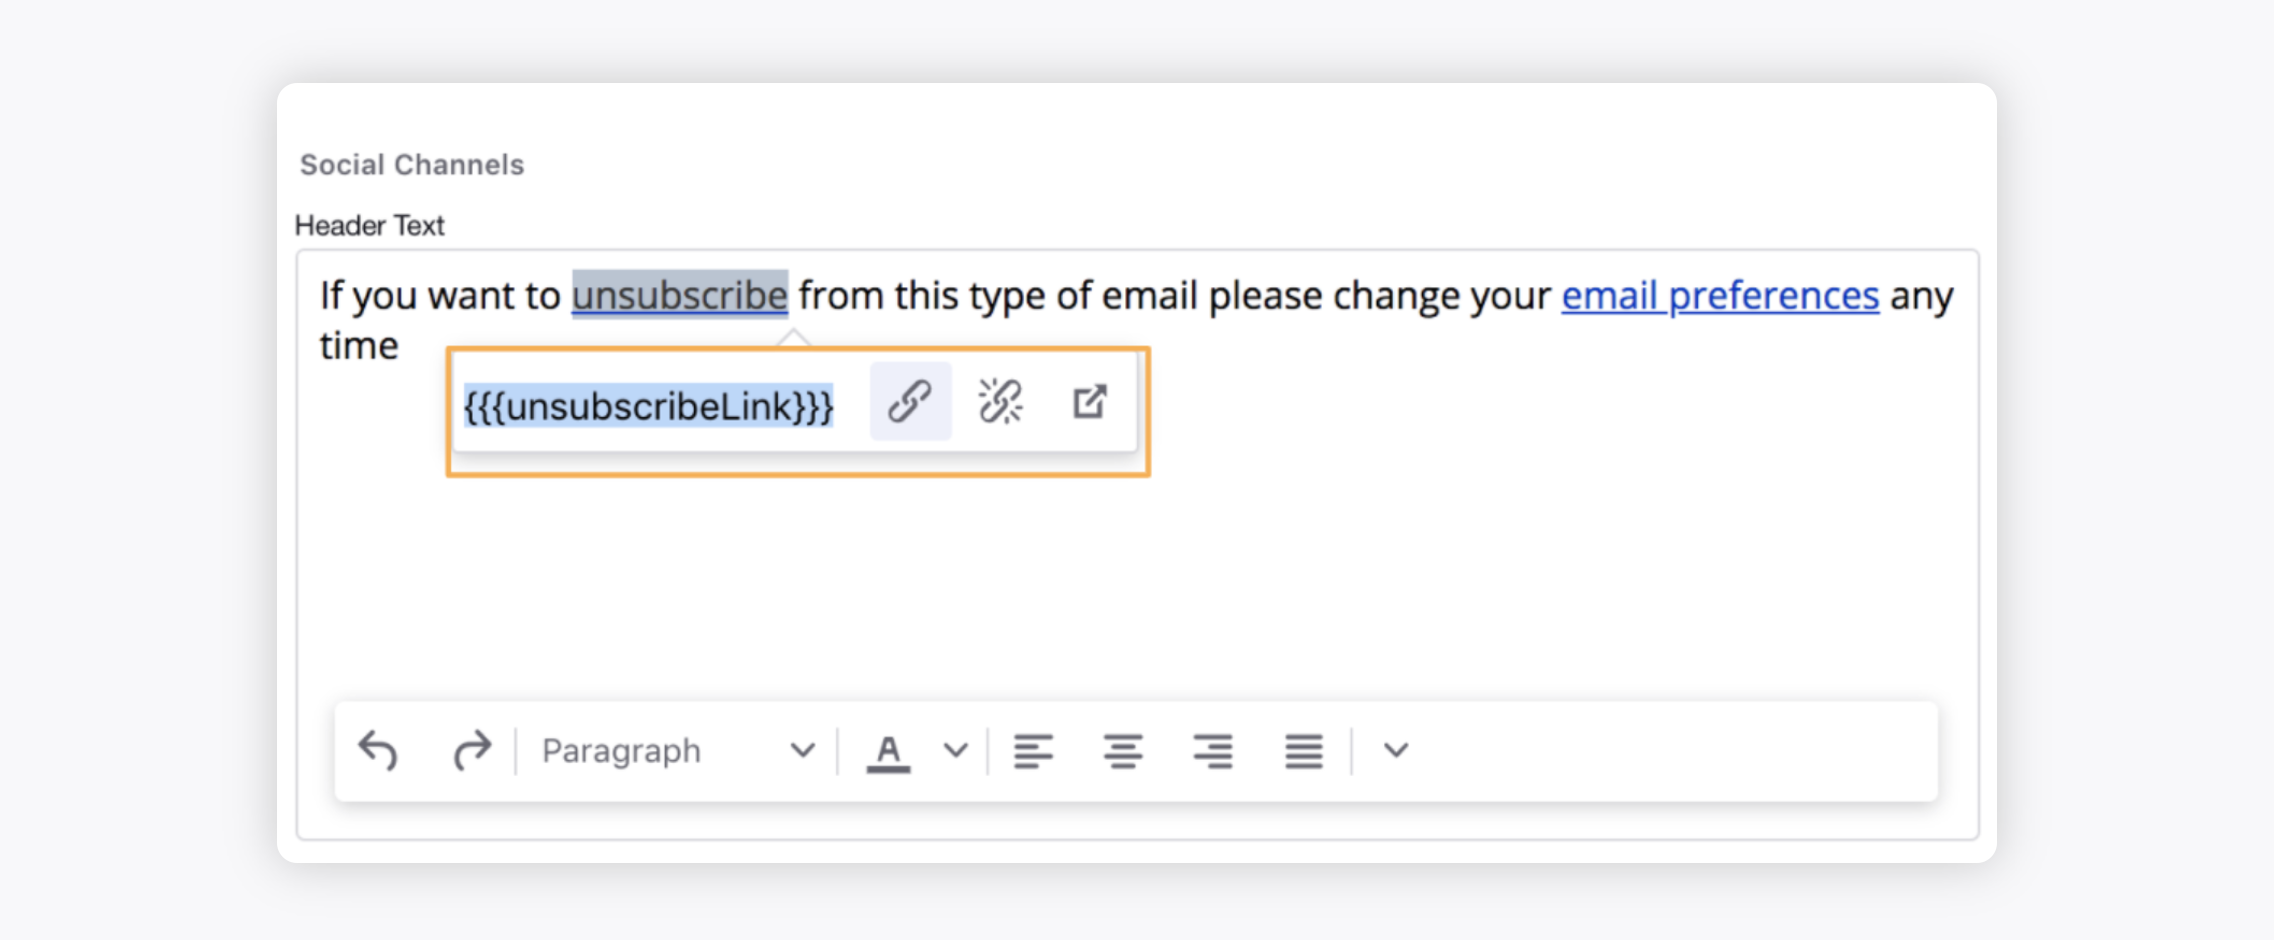
To include unsubscribe link in Email Template
Sprinklr allows you to include a link in your email to allow the recipient to unsubscribe from your mailers. You may include the unsubscribe link at the bottom/footer of the mail, as it is the norm.
1) Create an email template or go to the email template in which you want to include a unsubscribe link.
2) Type in the text you want to add the link to, like "Unsubscribe", and select it.
3) Click the Add Link icon in the inline text editor.
4) Type {{{unsubscribeLink}}} in the given field.
5) Click the Add Link icon to create the unsubscribe link.