Add Brand’s Social Posts in Email Newsletter
Updated
Admins can also send the brand’s social posts through email newsletters to amplify the engagement on those. This will update the advocates about the newly added brand posts on advocacy sites attracting and motivating them to disseminate the content further.
Steps to Set Up Email Newsletters
Connecting the Email Marketing Account:
Step 1: Contact your Success Manager to get an Email Marketing Account.
Step 2: In the dashboard, ensure that the 'Email Marketing' option is ready for connection.
Step 3: Any discrepancies should be immediately reported to the Success Manager.
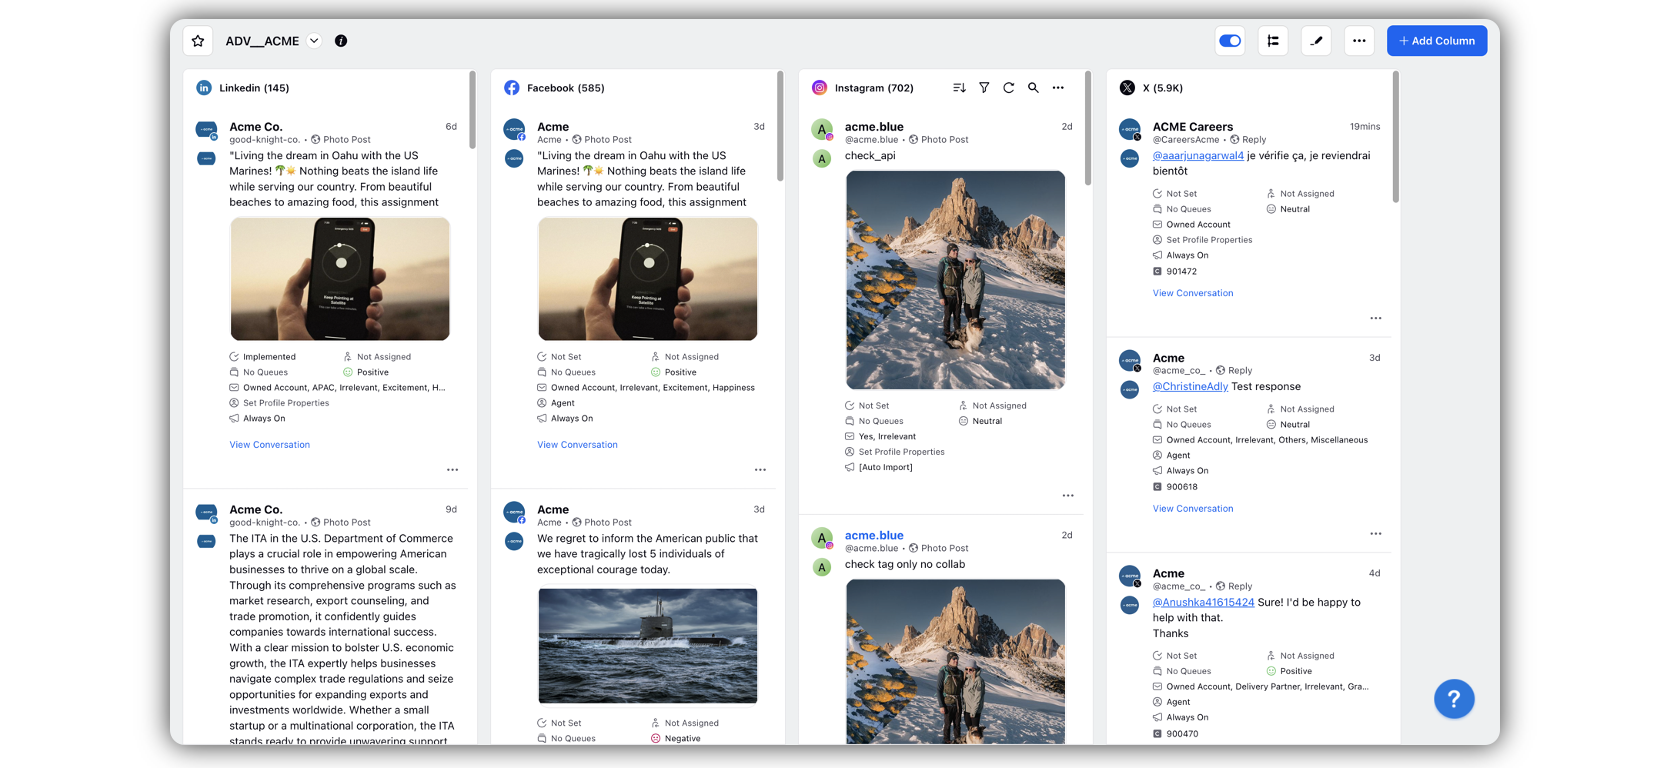
Harnessing Engagement Dashboards: Setting up Engagement Columns: These columns act as a source, feeding the newsletters with relevant content. They can be tailored to filter content and ensure only the most pertinent pieces make it to the newsletter. Create individual engagement columns for different channels i.e. LinkedIn, X, Instagram, Facebook, etc. in an engagement dashboard.

Crafting Content Templates:
Get in touch with your Success Manager or raise a support ticket to create email newsletters containing brand posts.
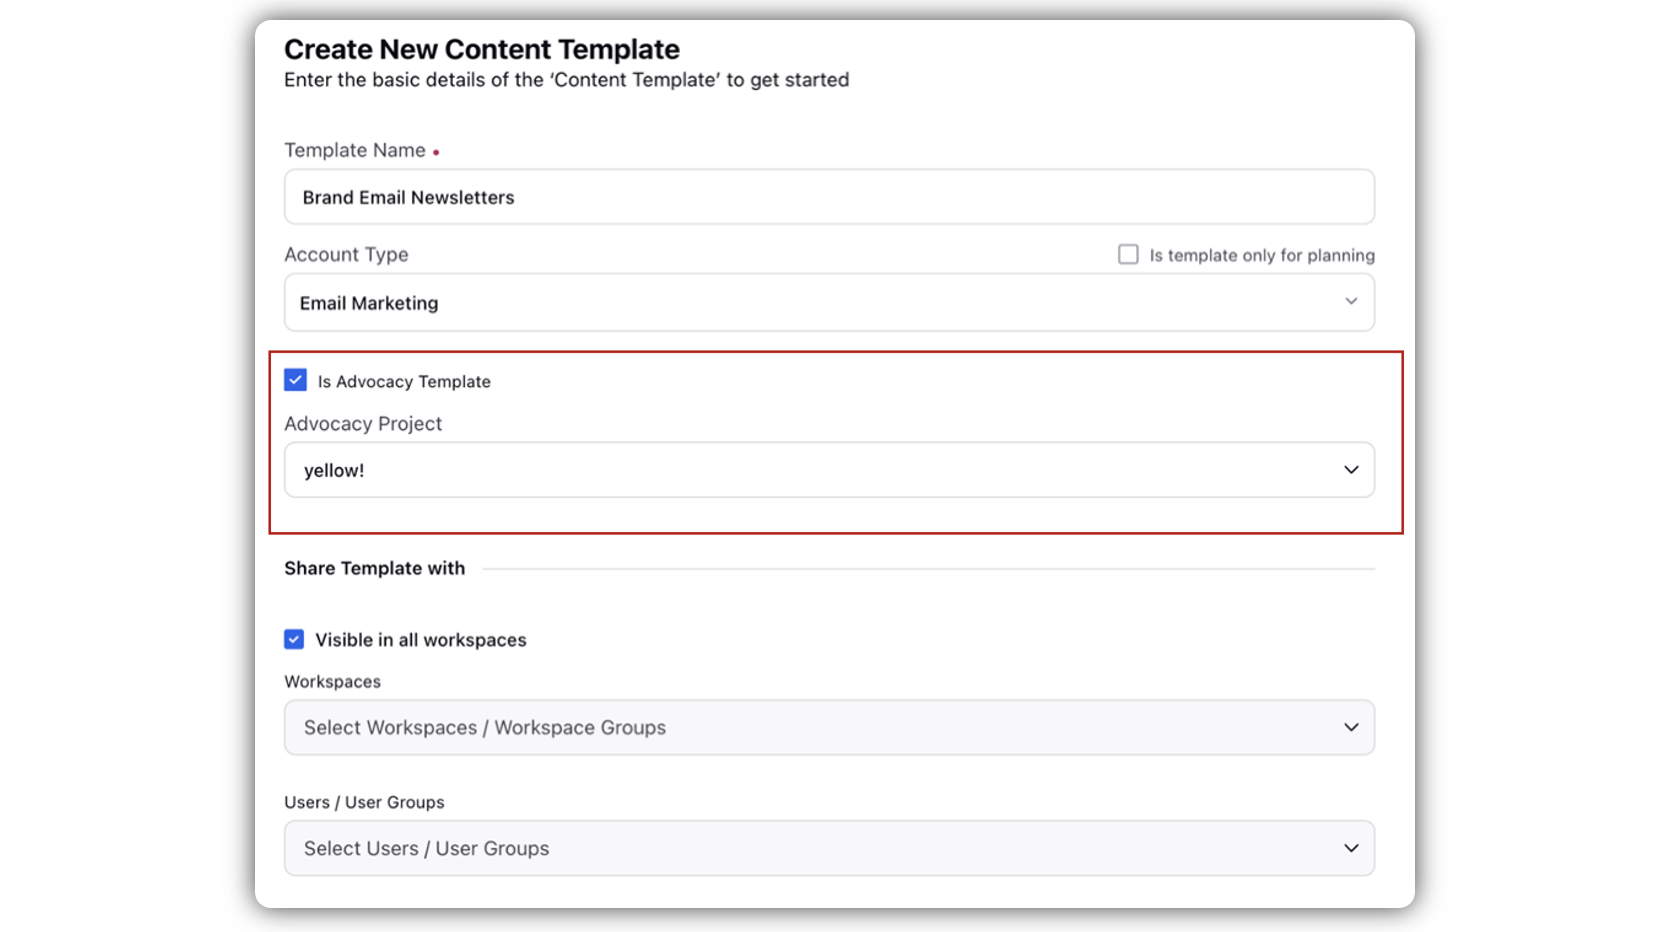
Create Content Template: Select Content Templates within Advocacy Tab under Sprinklr Social. While creating content template, select “is Advocacy Template” for adding brand posts within the template. Add the advocacy project’s name in the below field.

Designing: The process begins in the 'Content Template Builder'. Every component, be it images, texts, buttons, or HTML blocks, should resonate with the brand's voice and the message intended.
Tailoring Inputs: The 'Form Input' tab allows for meticulous detailing, ensuring each newsletter is optimized for its target audience.
Perfecting Audience Targeting: Segmenting is more than just a strategy; it is an art. By understanding the nuances of your audience, you can craft newsletters that speak directly to them.
Manual Addition: A step-by-step approach involves accessing the Audience Profiles window, downloading a pre-structured template, filling it, and uploading it back to create a profile list.
Rule-Based Segmentation: Community rules, based on certain conditions or behaviours, automatically categorize users into various profile lists that you can later use while curating an email newsletter.
Curating an Email Newsletter: Step-by-Step Guide
After understanding the necessary setup for curating an email newsletter, let us delve into the process of creating one. Follow the steps outlined below:
Click the Quick Publish icon in the top right corner of your navigation bar, and select Create Post.
Click the Maximize icon at the top right to see the expanded version of the Create Post window. If needed, click the Minimize icon to revert to a compact view.
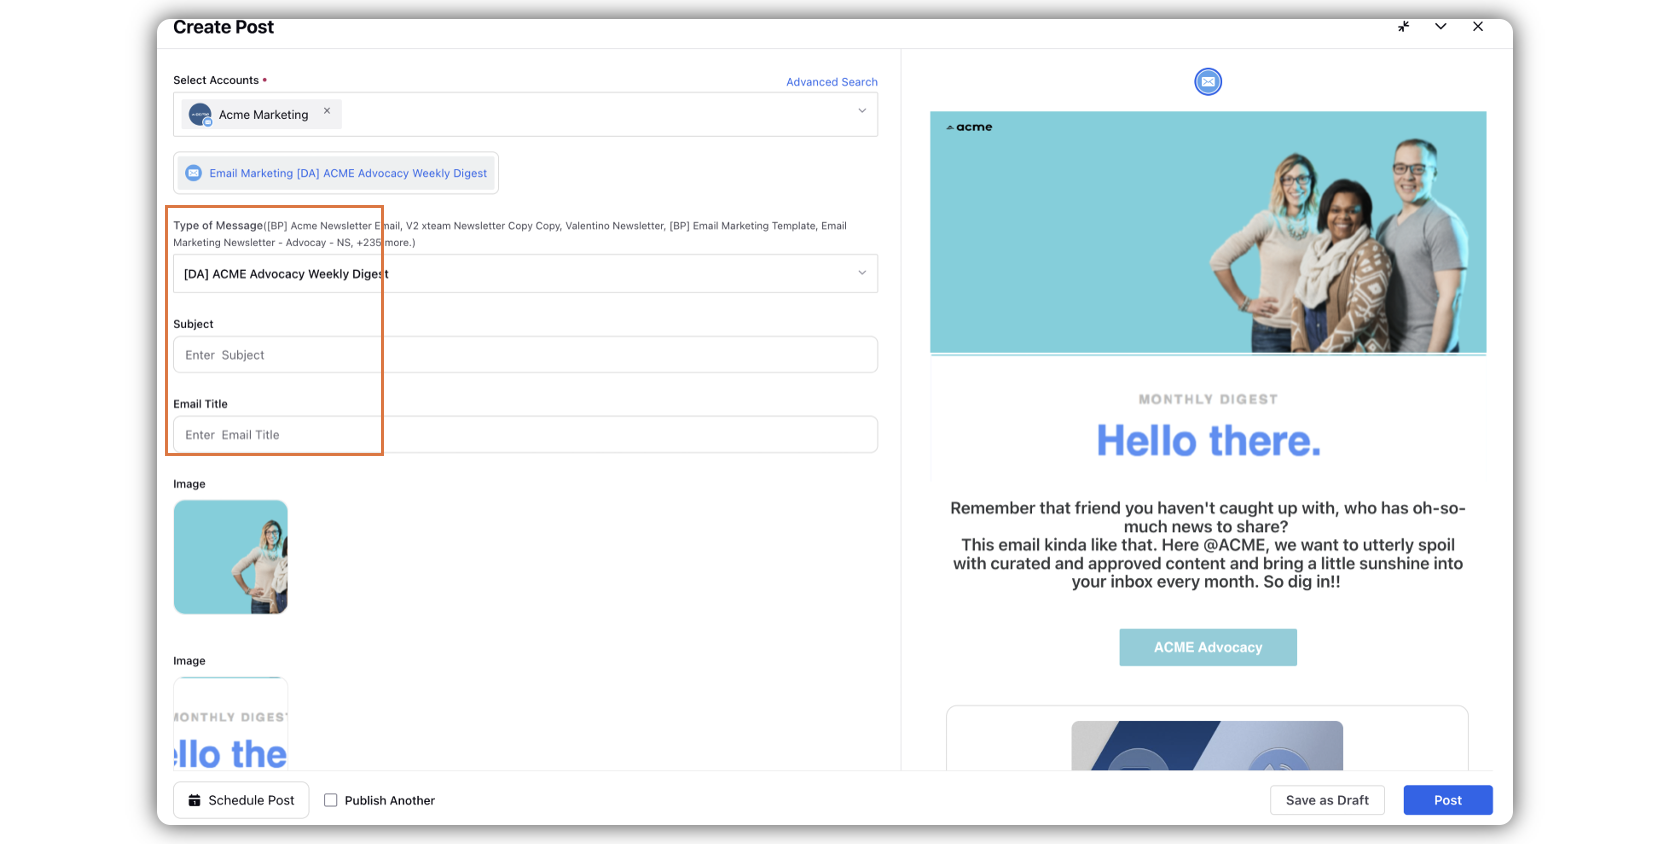
In the Create Post window, in the Select Accounts field, find and select your desired Email Marketing account. For a more refined search, the Advanced Search option offers a variety of filters.
Select Content Template under Type of message. Then, enter your email's Subject and Title.

Select Content Type:
Automated Content: By selecting 'Automated Content from Dashboard', the system automatically chooses content based on your settings. For instance, if you choose 6 posts, the system retrieves the latest 6 entries from your chosen dashboard. Skip to Step 8.
Manual Content Selection: If you opt for 'Manually Select Content', proceed to the next step.
Under Select Dashboard, pick your desired content source. Set your preferred number of posts and columns for the newsletter layout.
You can edit the Under Content, hit Add Content. In the subsequent window, pick your content using various filters. A preview of the chosen posts will be available on the right pane.
Link your content with a campaign from the Campaign dropdown. If desired, set this campaign as your default by clicking Set as Default.
Use the URL Shortener feature to shorten every link that you add to your message.
You can apply specific properties or select Audience Targeting to designate a particular profile list or user group.
Click Post in the bottom right to dispatch your email. Alternatively, if you wish to refine it later, select Save as Draft.
If you do not want to send immediately, you have the flexibility to schedule your newsletter for a custom time range.