Send interactive message templates via auto-response rule
Updated
Learn how to build an auto-response rule to send interactive message templates to the intended users on the Apple Messages for Business channel.
This article describes how Interactive Message Templates, i.e., List Picker, Time Picker, Payment, iMessage, and Authentication, can be sent via auto response rule on Apple Messages for Business channel.
Before you begin
You need to create interactive message templates. To learn how to create these templates, see Create Templates for Interactive Messages on Apple Messages for Business.
To send interactive message templates via auto-response rule
Click the New Tab icon. Under Governance Console, click Rule Engine within Collaborate.
On the Rule Engine window, click Create New Rule in the top right corner.
On the New Rule window, provide a Name and an optional Description for your new rule and set the Rule Scope to Customer.
From the Context drop-down menu, select Inbound.
In Rule Type, select Standard or On-Demand, depending on your requirement.
If required, modify the values for Activation Date and Rule Execution Batch. To proceed with the default values, click Next.
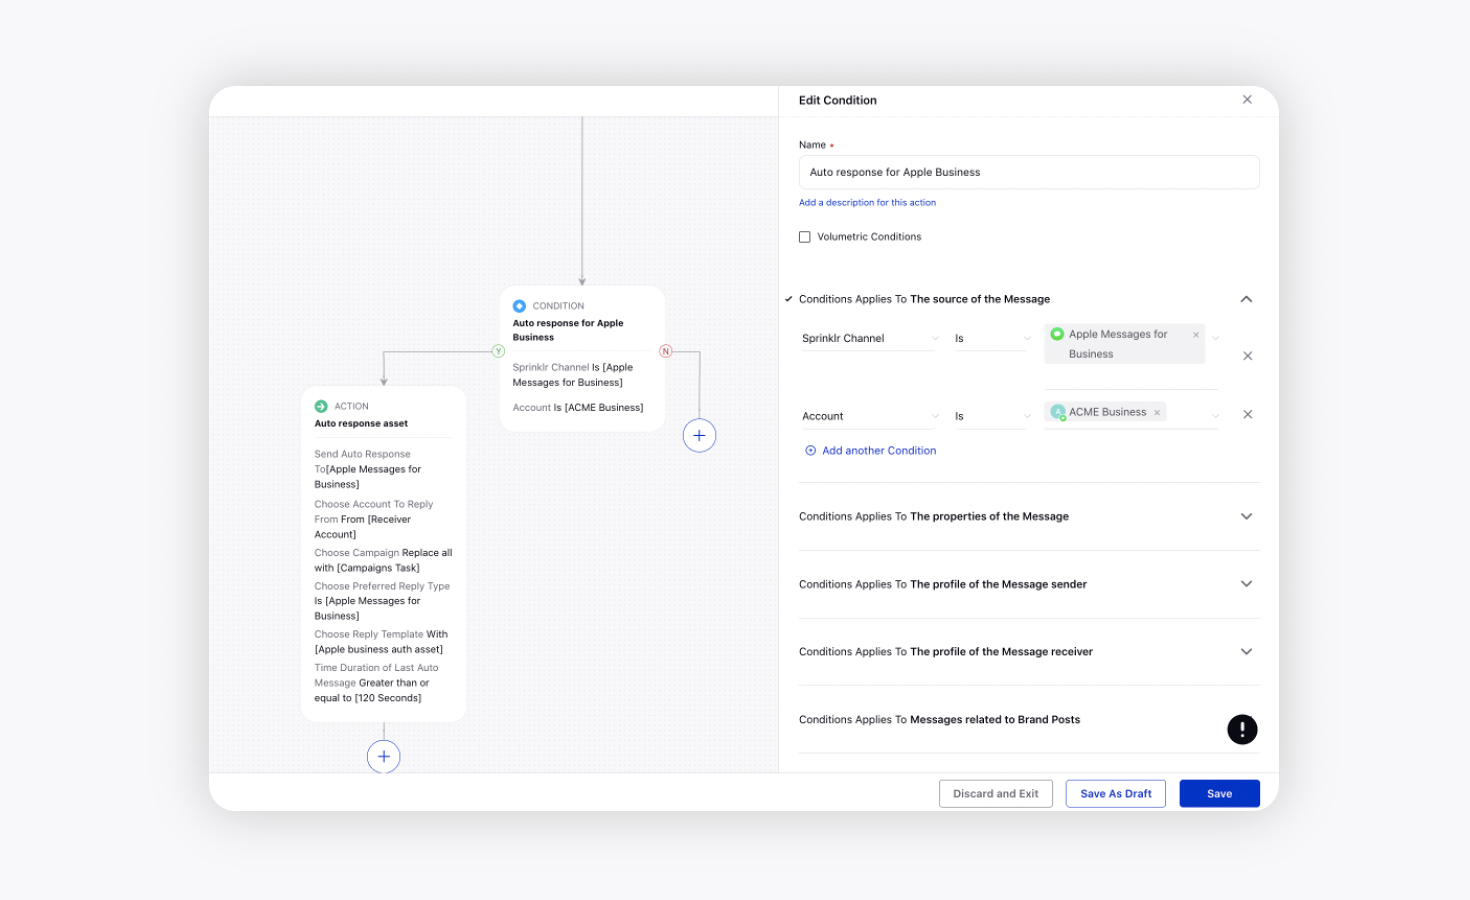
On the Rule Builder window, Add Condition.
On the Edit Condition pane on the right, enter a Name for the condition.
Under Conditions Applies To The source of the Message, select the desired Channel and Account conditions. You can chain multiple conditions together to refine the scenarios that must be met for the subsequent action to execute.
On the Rule Builder window, click the icon on the Yes branch of the condition and select Add Action to add the action.
On the Edit Action pane in the right, enter a Name for the action select Client from the dropdown.
Under Actions To Auto respond to a message, select Send Auto Response To from the Action dropdown and Apple Messages for Business from the corresponding dropdown.
Next, from the dropdown corresponding to Choose Account To Reply From, select the desired account to send the auto response from.
Choose Campaign as per requirement.
From the dropdown corresponding to Choose Preferred Reply Type, select Apple Messages for Business.
Next, Choose Reply Template that you want to appear as an auto-response. You can select Image, PDF, List Pickers, Date Pickers, Payment, iMessage, Authentication Templates, etc. that you have created in Digital Asset Manager.
Select Time Duration of Last Auto Message as Greater than or Equal To the time you want to set. You can set the time in Seconds, Minutes, Hours, Days, Weeks, and Months.
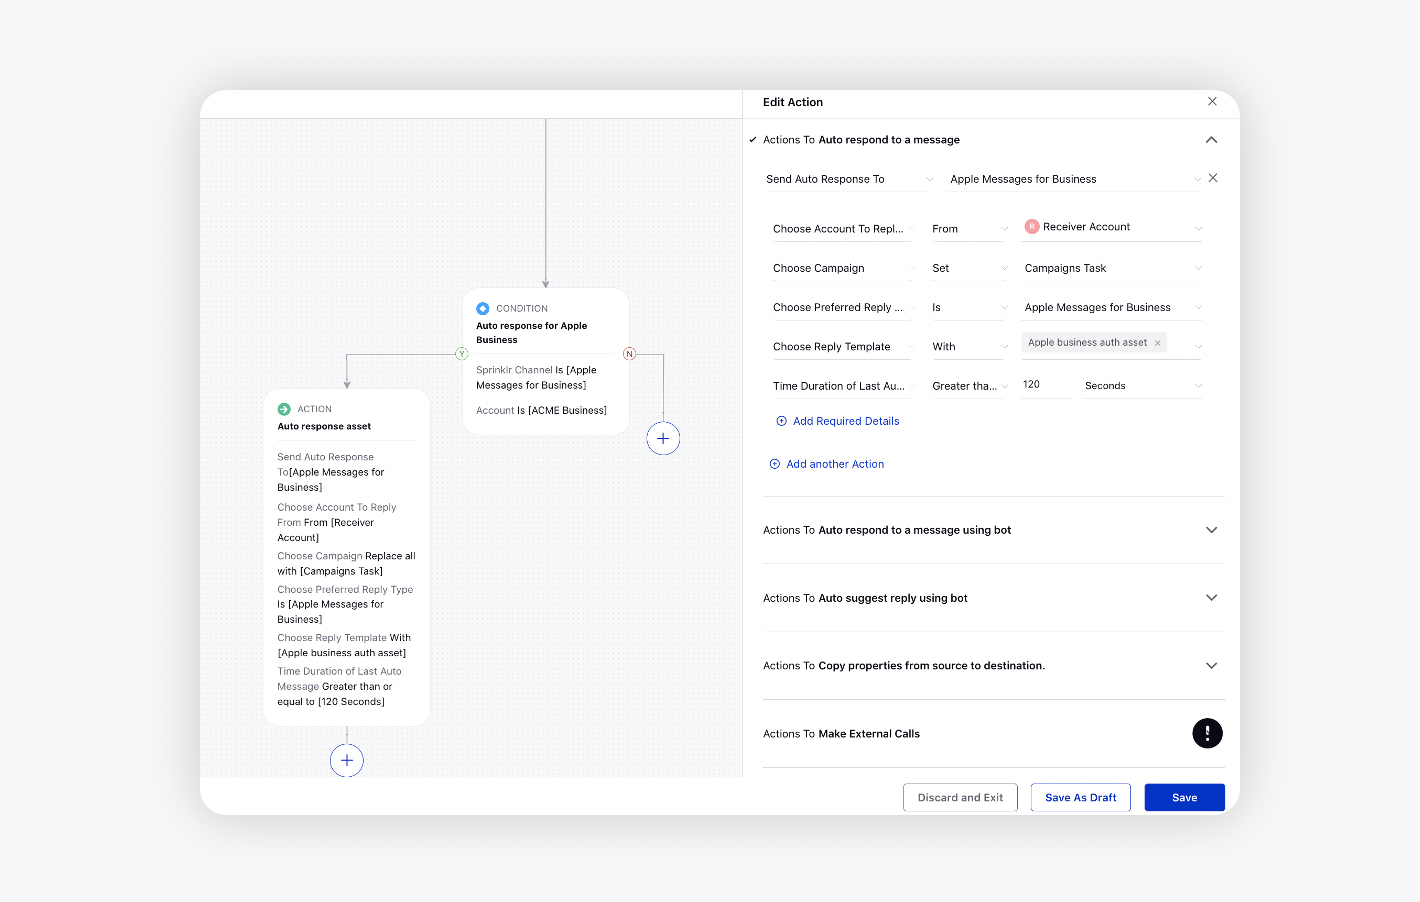
Click Save in the bottom right corner.