Configuring Events
Updated
The Events Management feature offers brands a comprehensive solution within the Sprinklr community platform. With this capability, brands can effortlessly create and promote both online and offline events, allowing users to express their interest and participation. Whether it's virtual webinars, workshops, or physical gatherings, Sprinklr's events management ensures businesses have a powerful tool to orchestrate successful events and connect with their audience effectively. Utilizing this feature could serve as a strategic approach to advertise events within a community that already boasts a substantial user presence.
Permissions
The users must have the Manage Community Event permission under Care Community to use this feature. 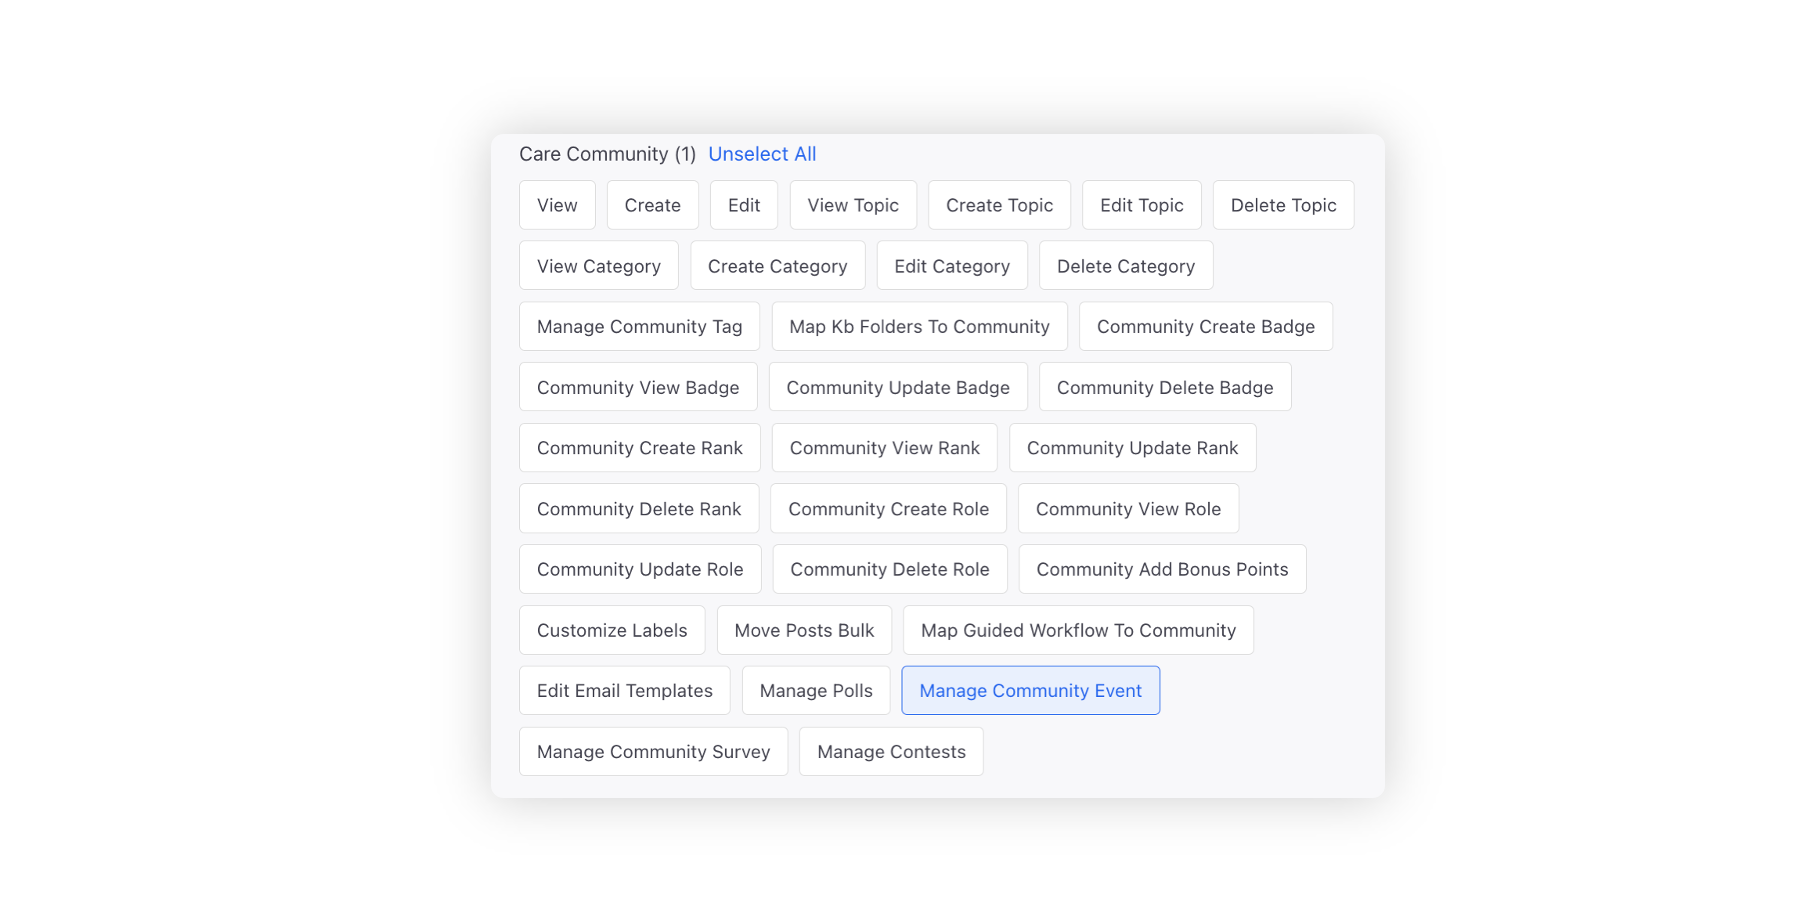
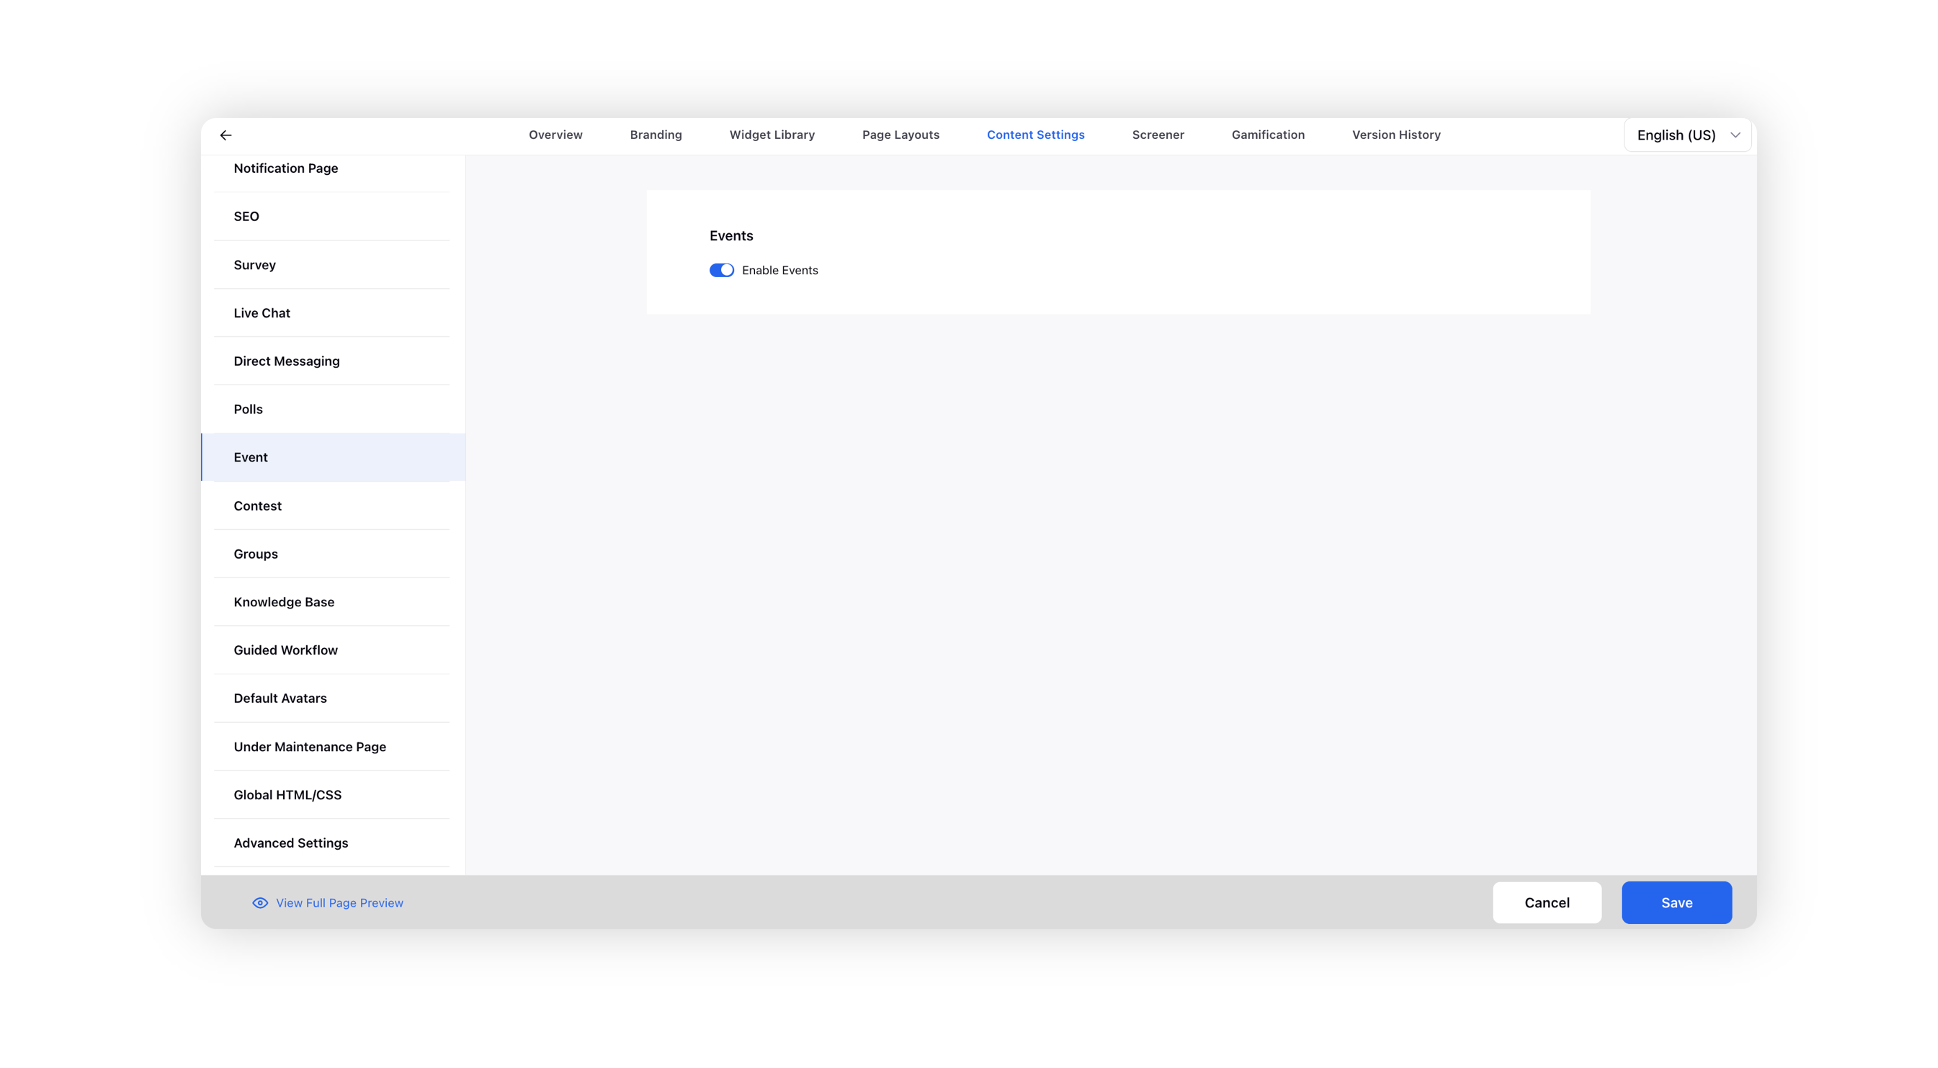
Within the Content Settings tab of the Community Builder, click the Event tab on the left.
Slide the toggle to the right to Enable Events which will allow permissioned community users to create and publish events on the Community Forum.
Configuration Steps
Click the New Tab icon. Under the Sprinklr Service tab, click Community Builder with Resolve.
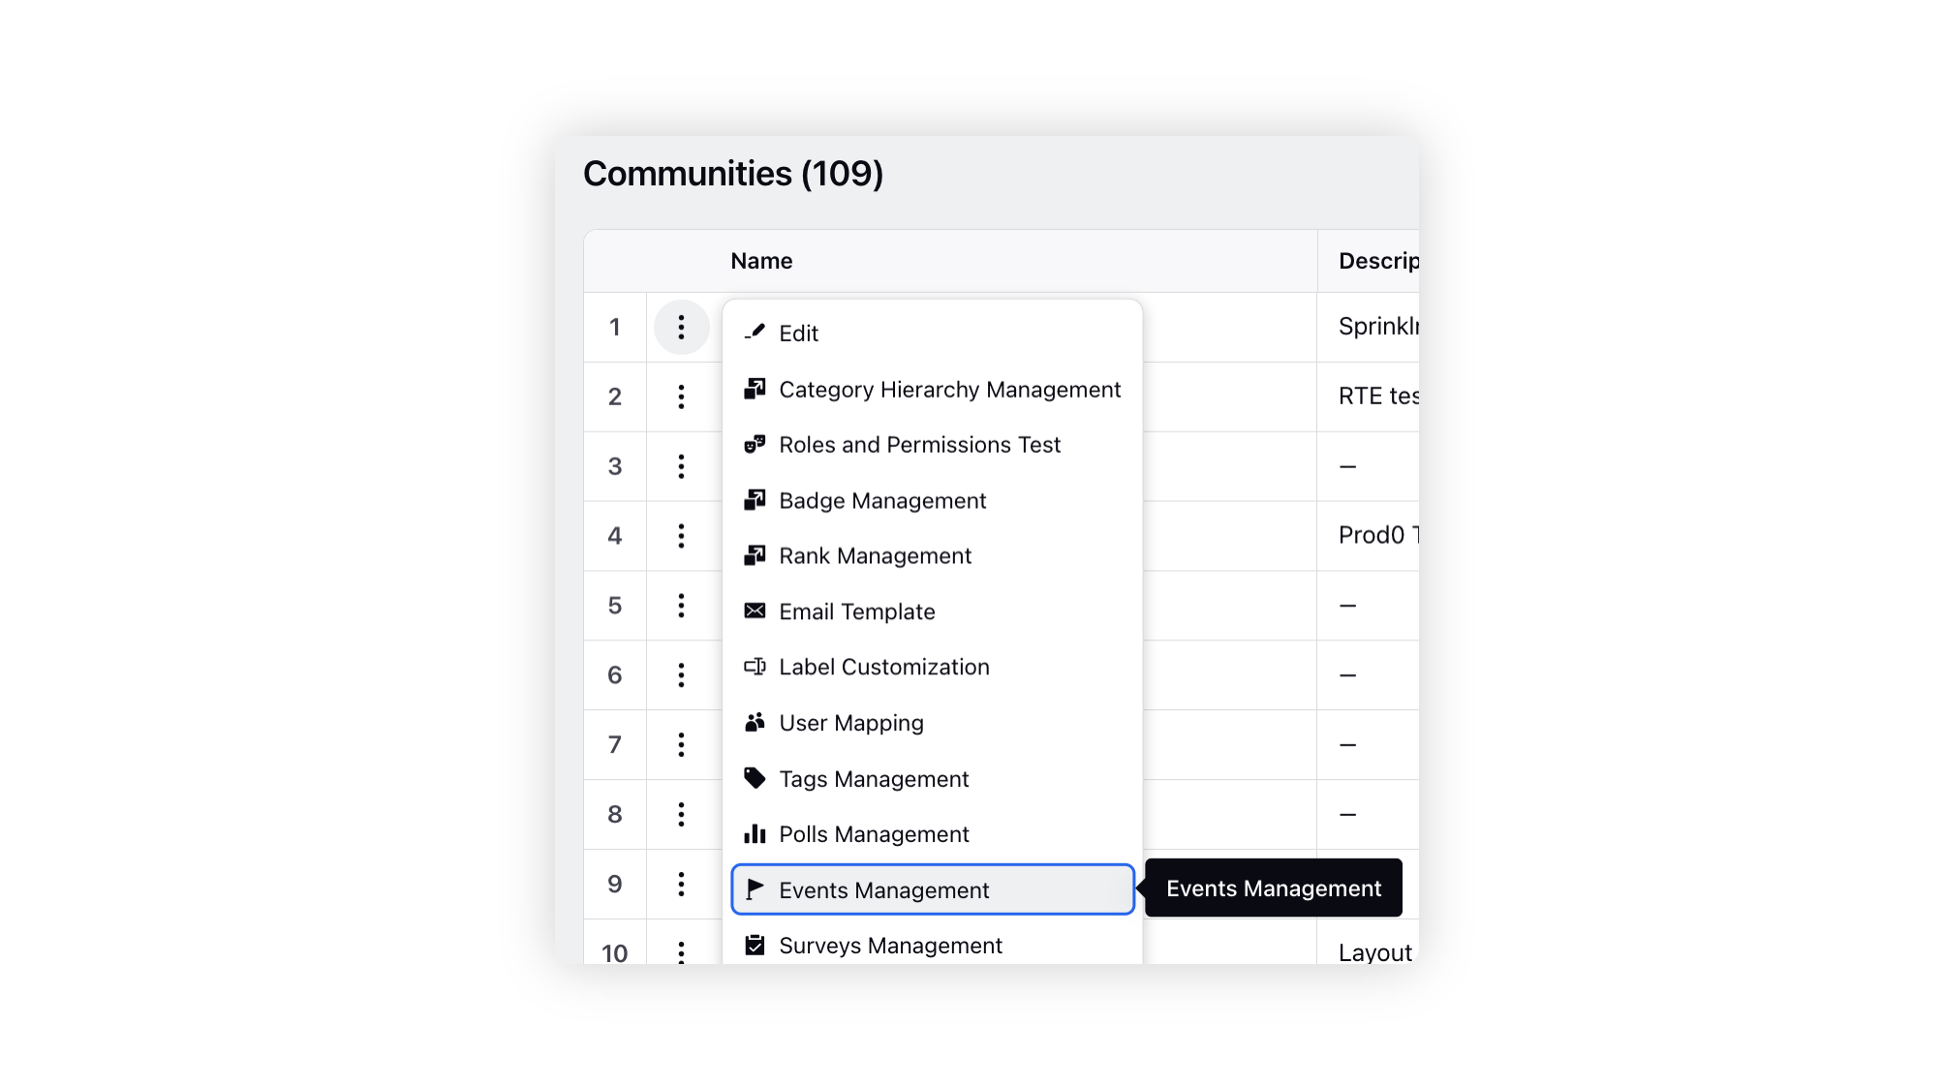
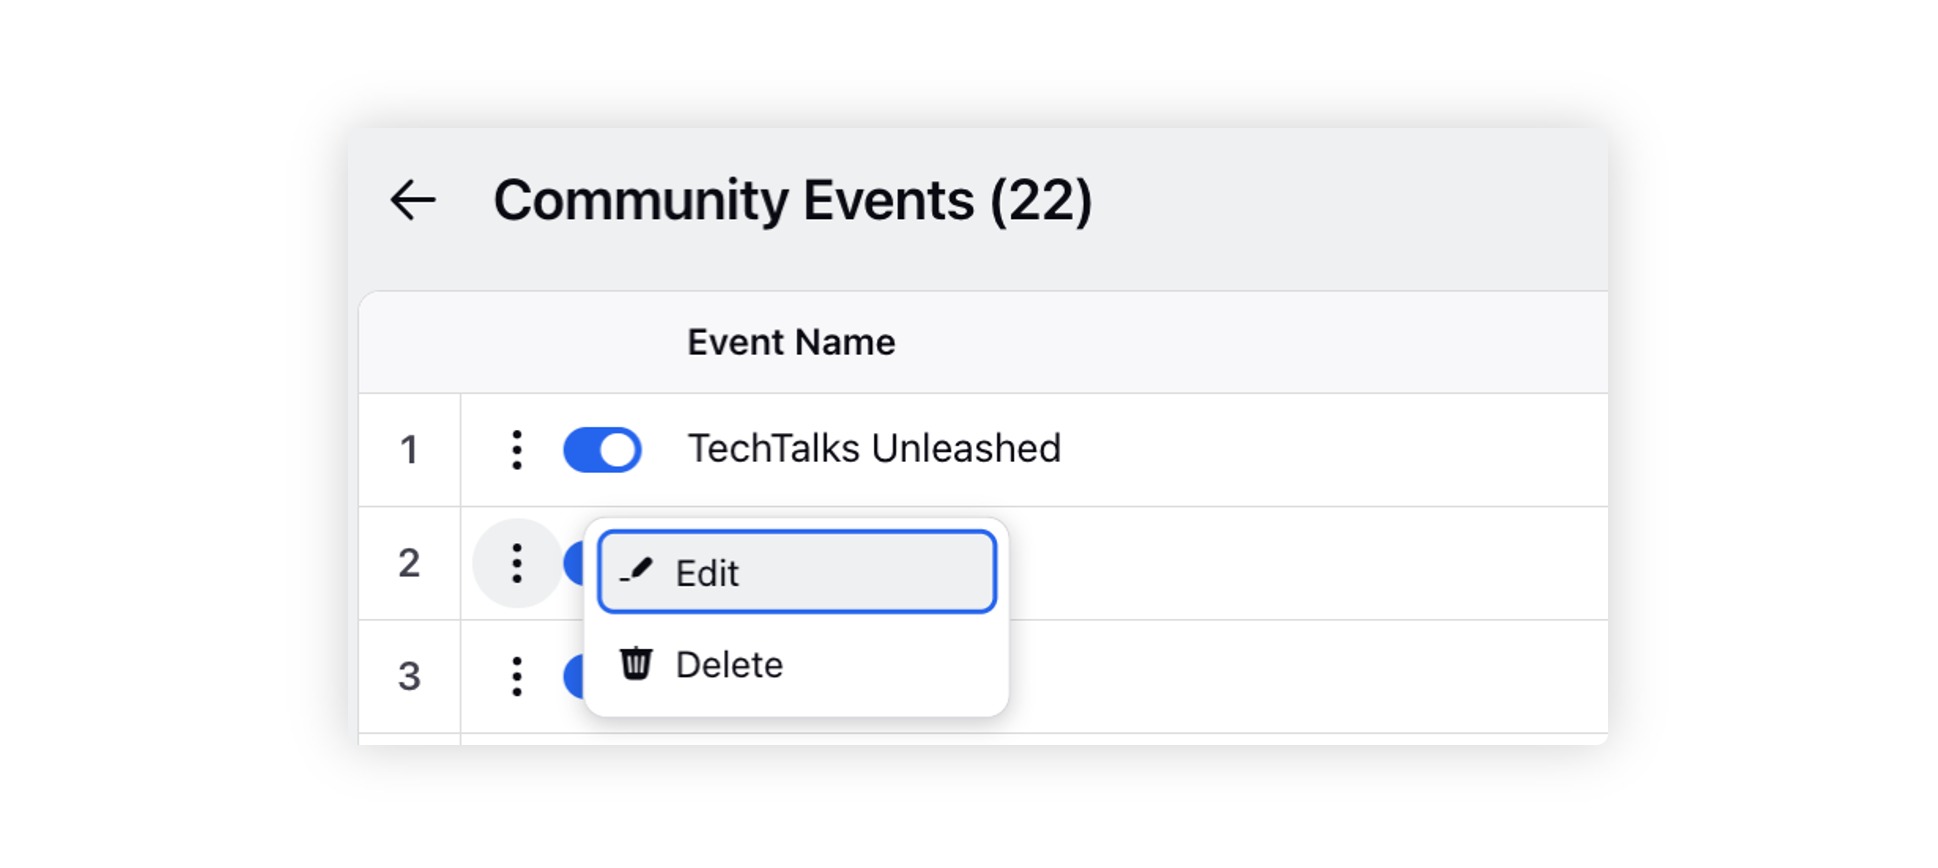
Hover over the Options icon alongside the desired community and select Events Management.
On the Community Events window, click Create Event in the top right corner.
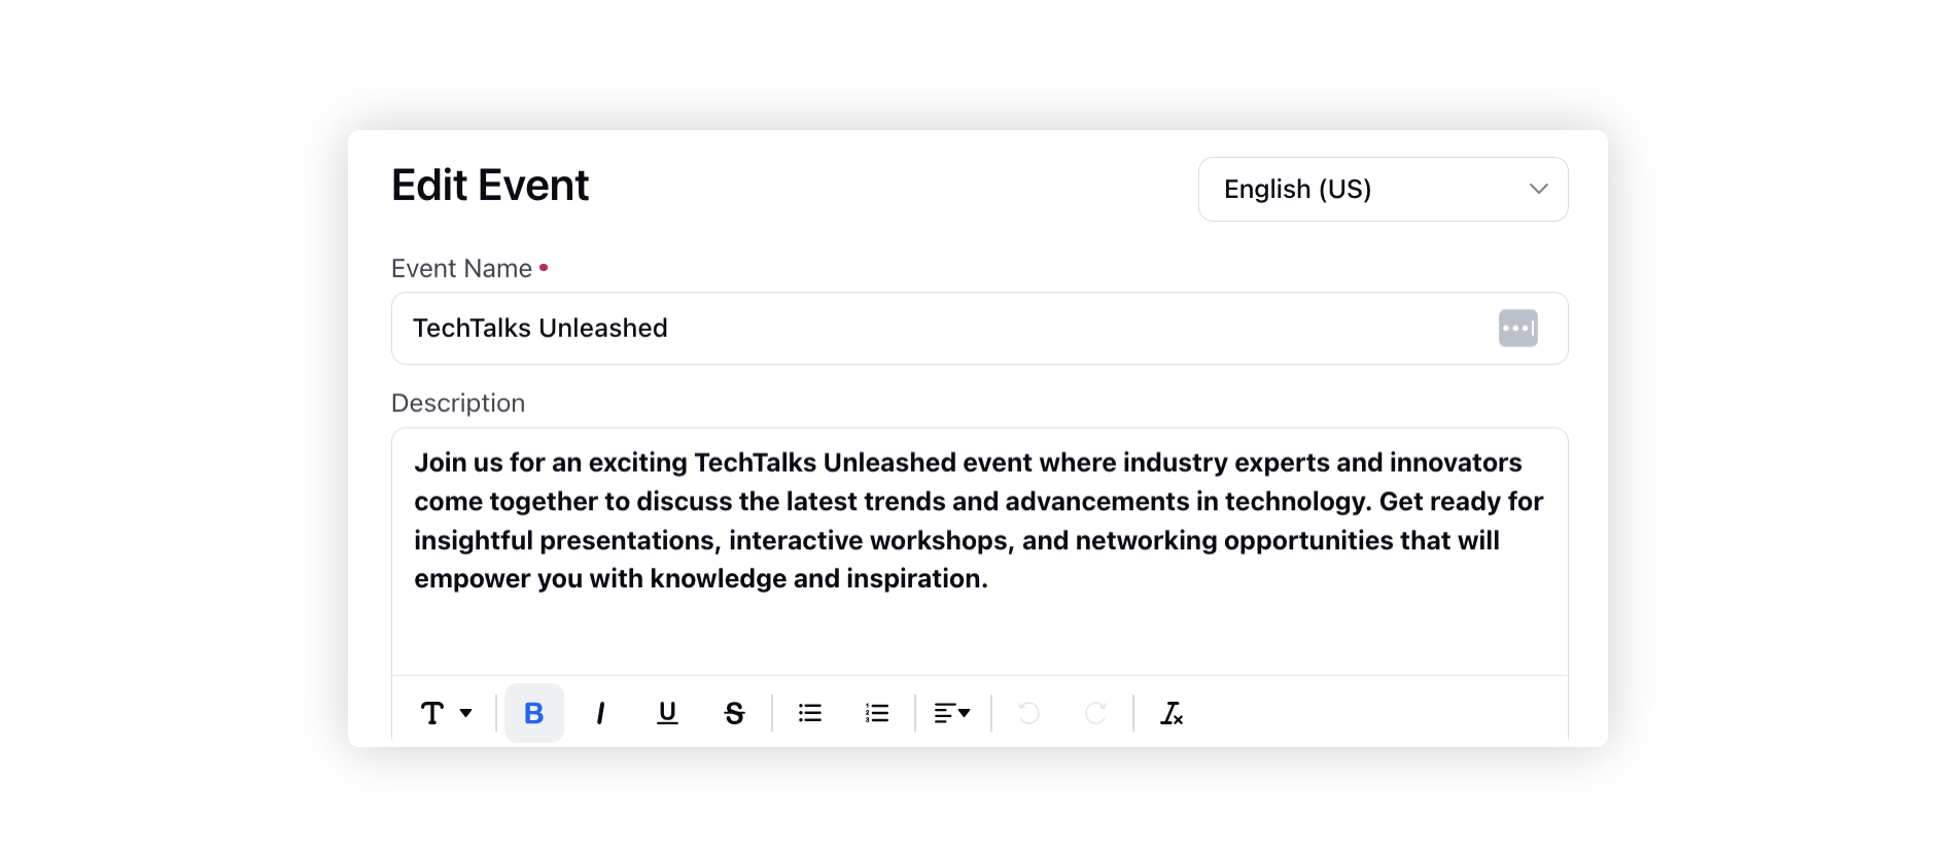
On the Create Event window, add the Event Name and Description. Add a Featured Image and a Thumbnail Image to accompany the event, if desired. A thumbnail image for an event acts as a compact, preview-sized representation, providing a visual snapshot of the event. This thumbnail is prominently displayed on the events list page.

Next, choose the Date Range, Event Language, and Event Type (Online or Offline) for the event.
To add the event to the community, you need to choose the appropriate Category and Topic that best represents the subject matter of the event. This will make it easier for community members to discover the event.
Next, choose the appropriate Tags for your event.
Next, provide the Event Address and include the Google Map Link (for Offline events). You can insert Google Meet links under the event address for online events.

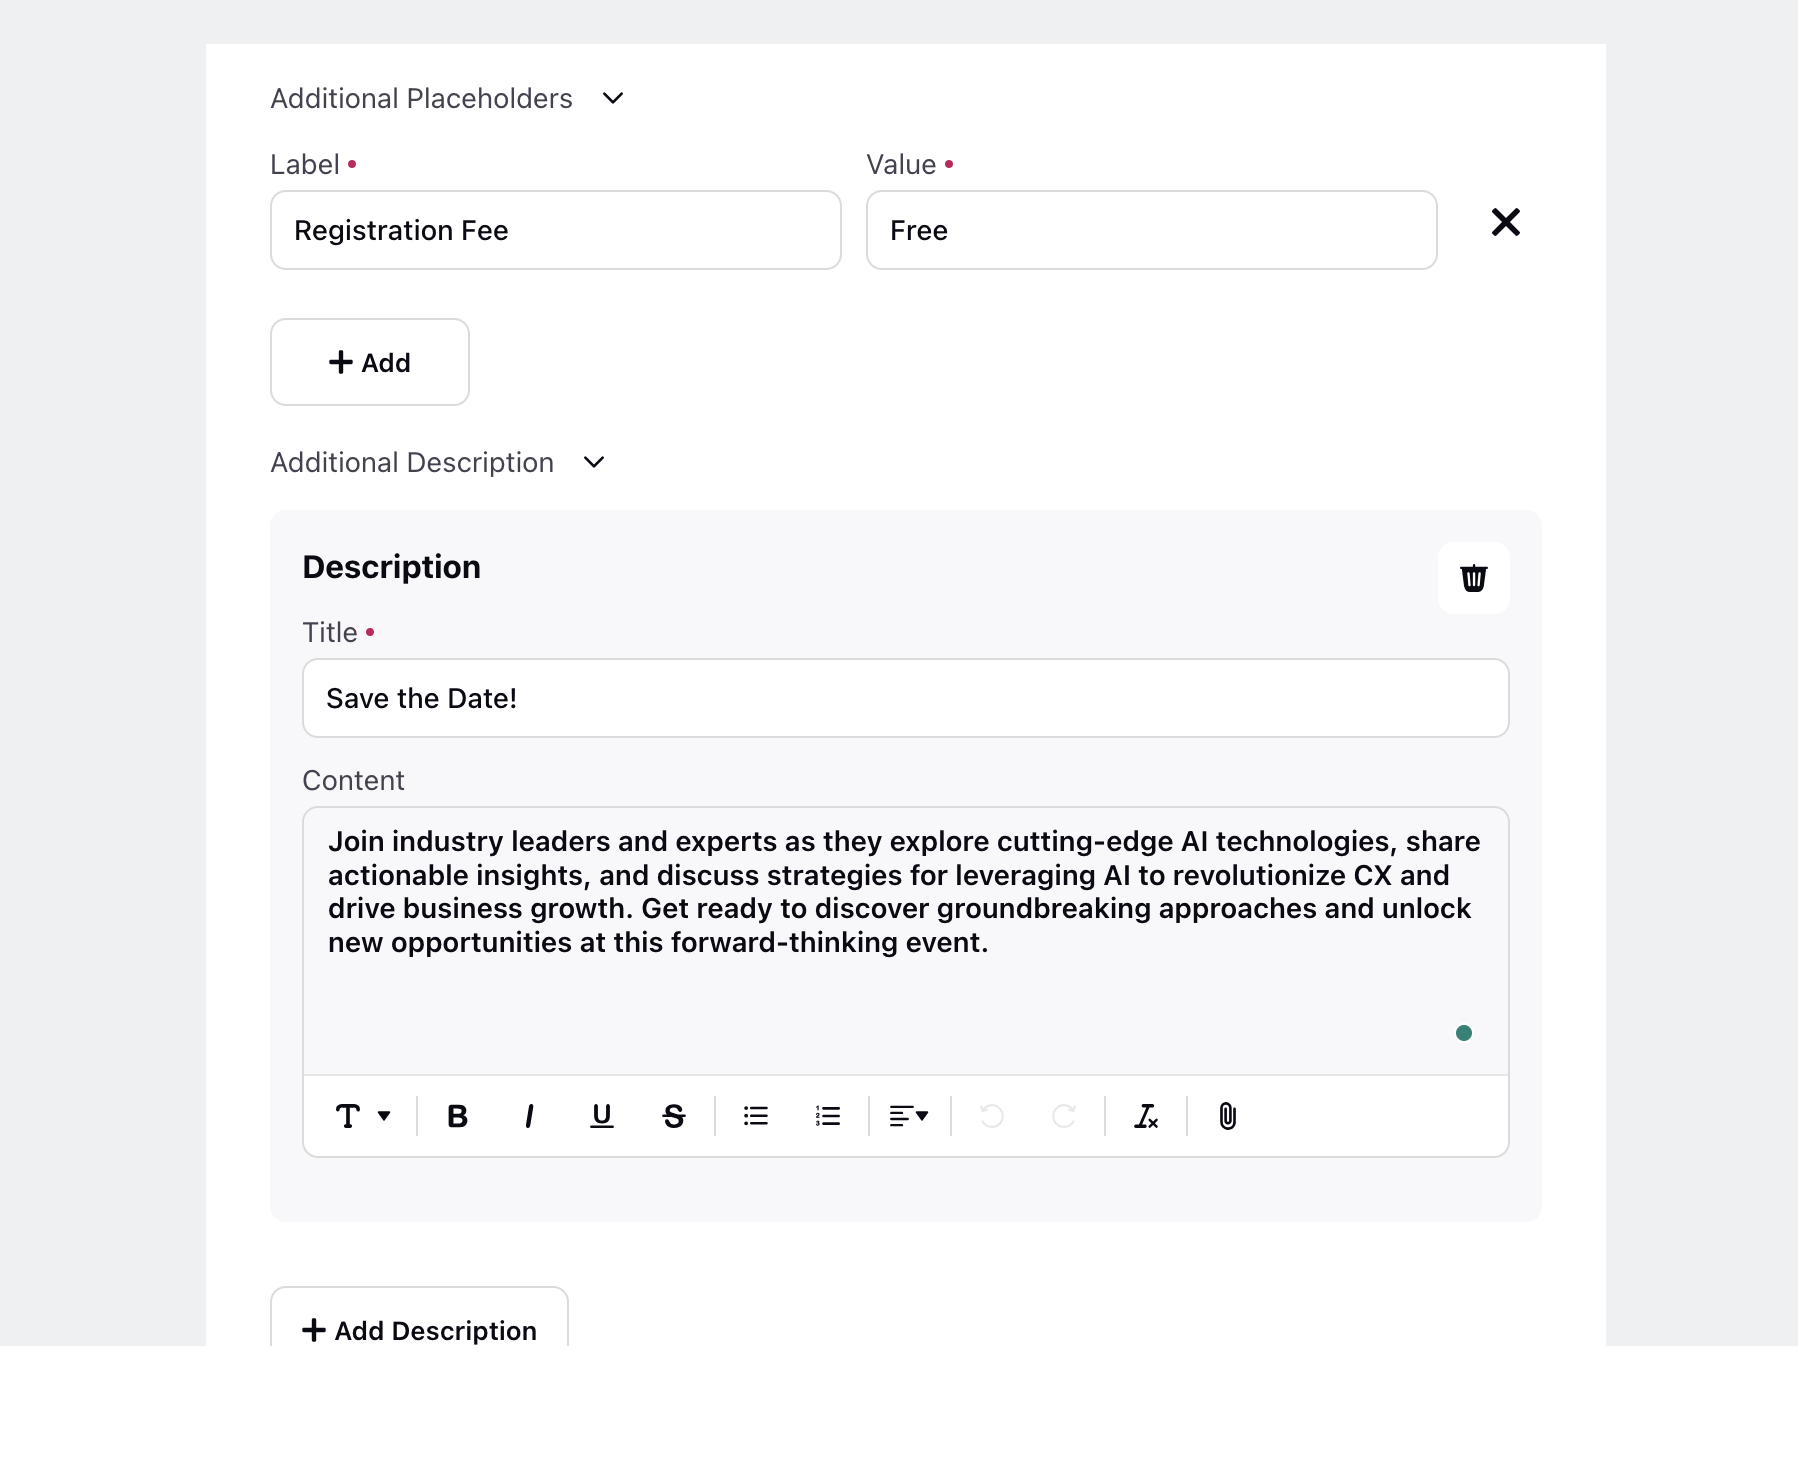
Include additional placeholders and an additional description section for the events. This allows you to add more specific information or details related to the event, enhancing the event's overall content and providing attendees with comprehensive insights.
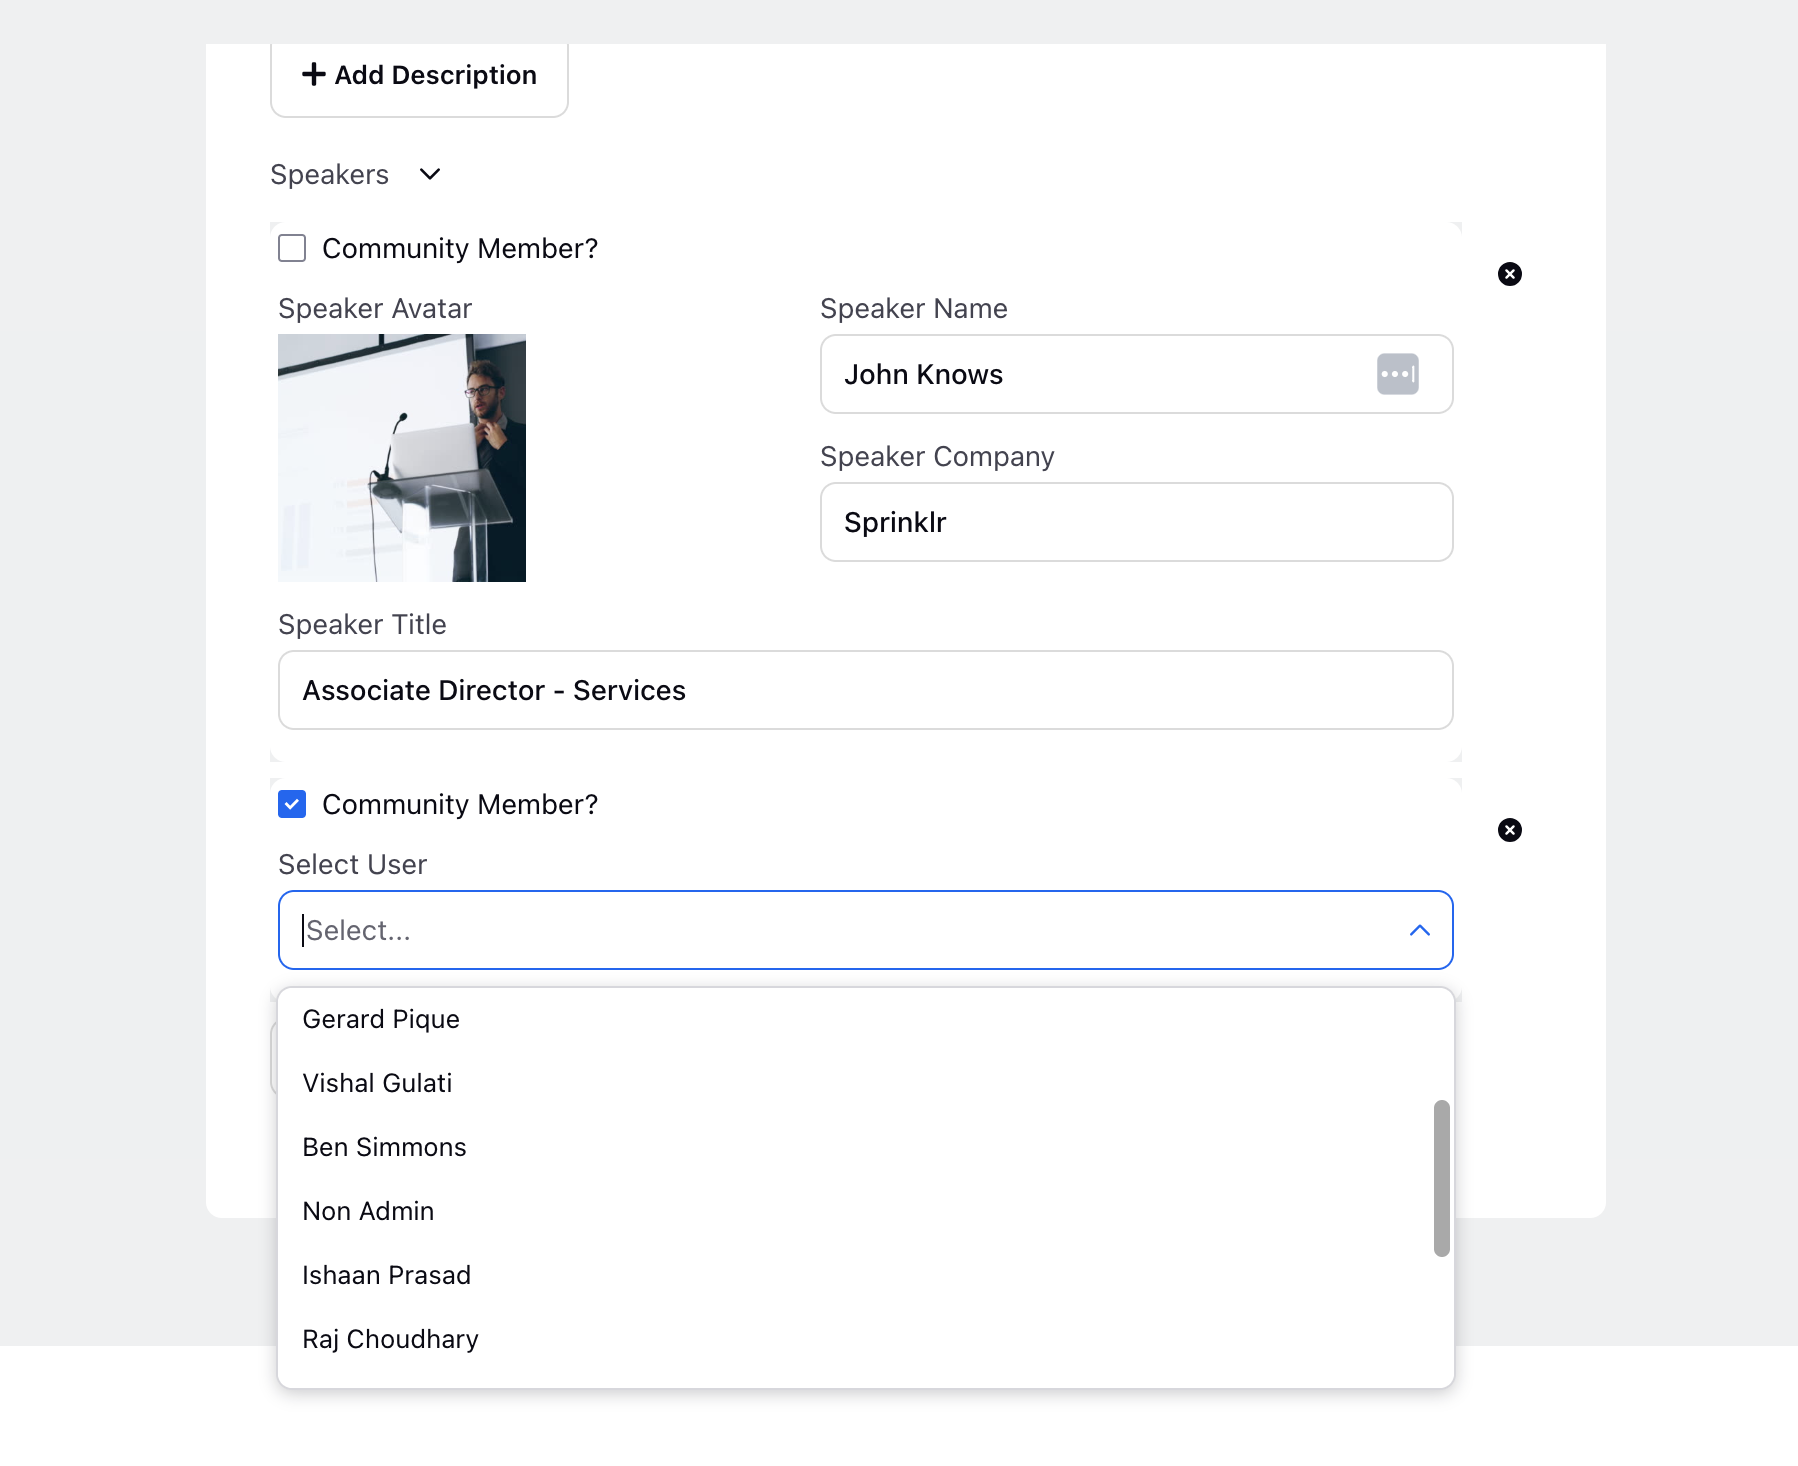
Next, you have the option to select Speakers from either the community's user pool or external sources. This includes providing their avatar, name, title, and affiliated company. By curating speakers relevant to the event's theme or target audience, whether they are internal community members or external industry experts, you can create richer experiences for attendees.
Click Create in the bottom right corner. Once created, you can edit or delete an event.
On editing, you can change the language from the top right to translate the event into.
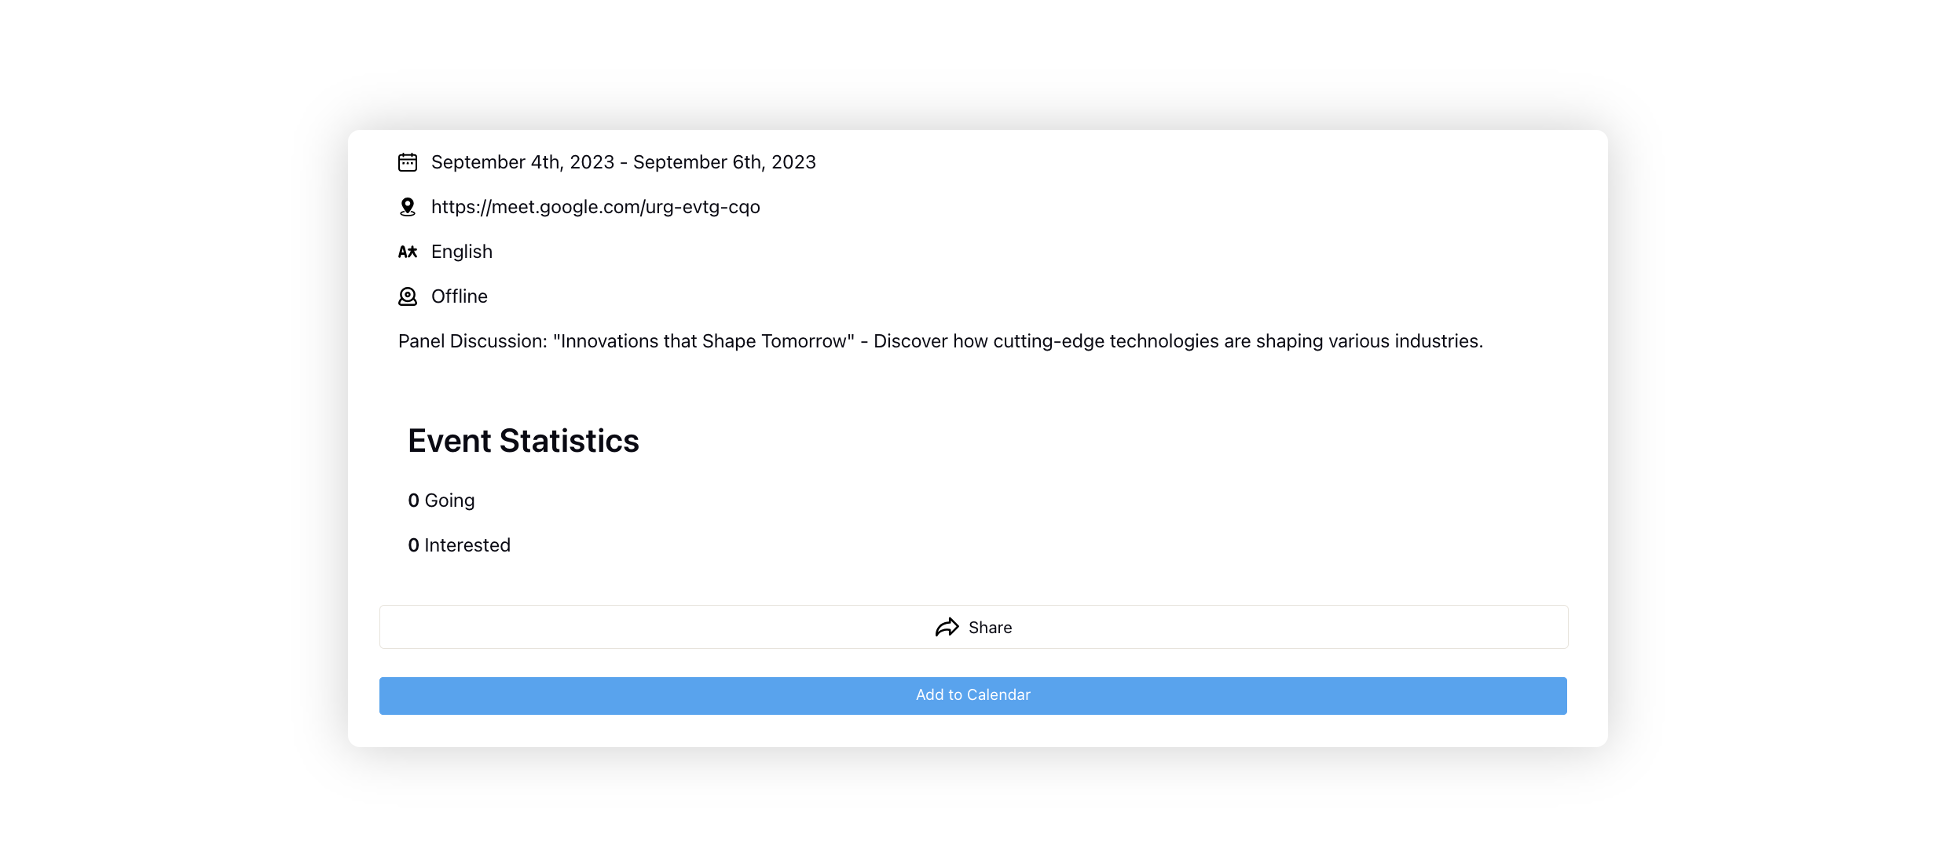
Here's an illustration of an event posted on a community platform, allowing users to express their interest by voting "Interested," "Going," or "Not Going." Additionally, attendees have the option to add the event to their calendar for easy reference.

Users also have the capability to access event statistics indicating the number of people who are "Going" and those who have shown "Interest."
Language Translation for Events
The system supports language translation for Events, allowing users to view them in their preferred language and enabling administrators to manage localized names directly from the builder.
When a user selects a locale, the Event names are automatically displayed in the selected language.
![]()
Administrators can manage translations directly from the builder. They can add localized names for Events for supported locales, update existing translations without affecting other locales, and maintain consistent naming across all user experiences.