Using the Advanced Publisher for Email Marketing
Updated
In this article, you will learn how to use Advanced Publisher for Email Marketing.
How it works
Navigate to the Advanced Publisher.
In the overview section, select Account Type as Email Marketing and then select desired Content Template. You can learn more about creating Content Templates for Email Marketing here.
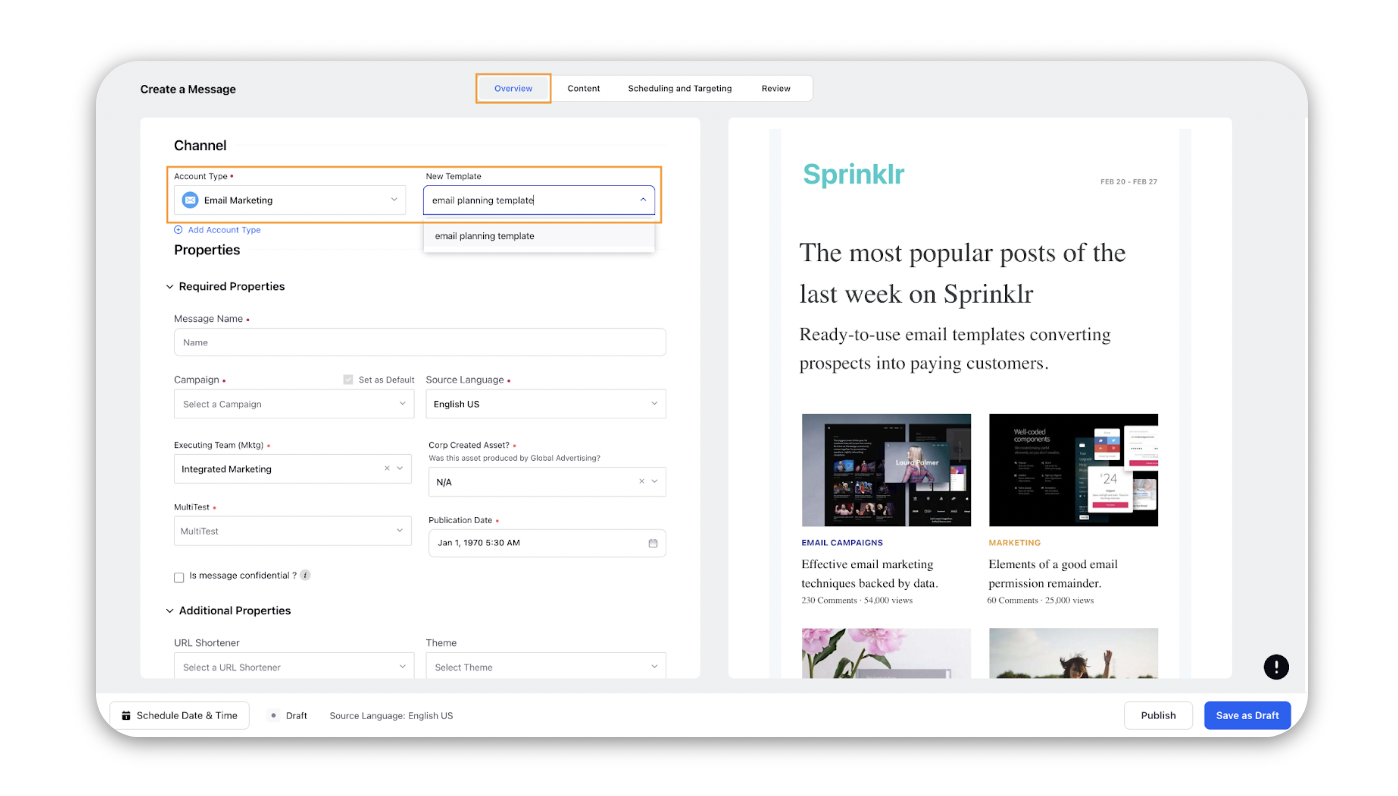
Fill up the required fields within the Overview tab like Message Name, Campaign, etc to Save it as a draft.
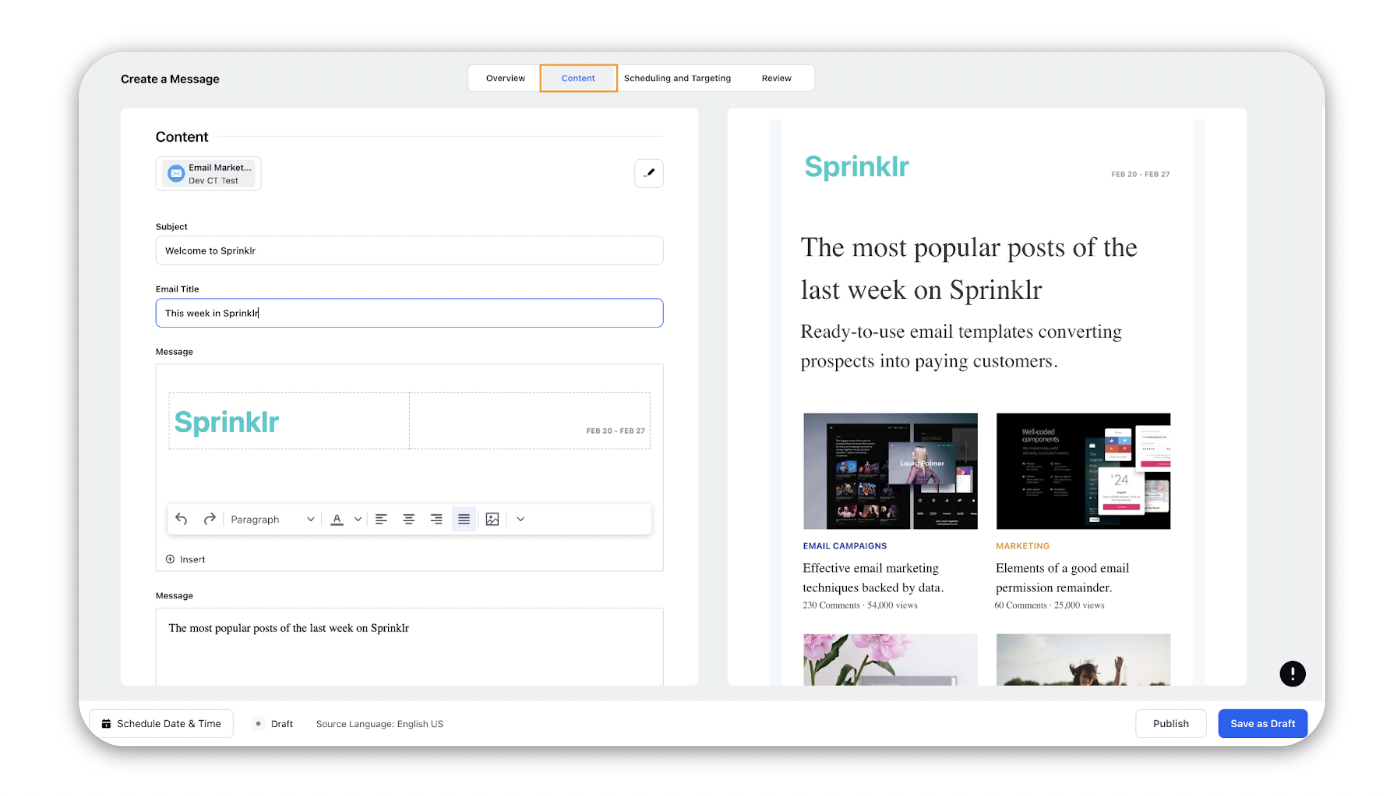
Now you can build upon this Email Marketing draft to add content in the Content tab.
Fill in the required content like Subject, Title etc. for your emails. You can also make changes to the content of the template here.
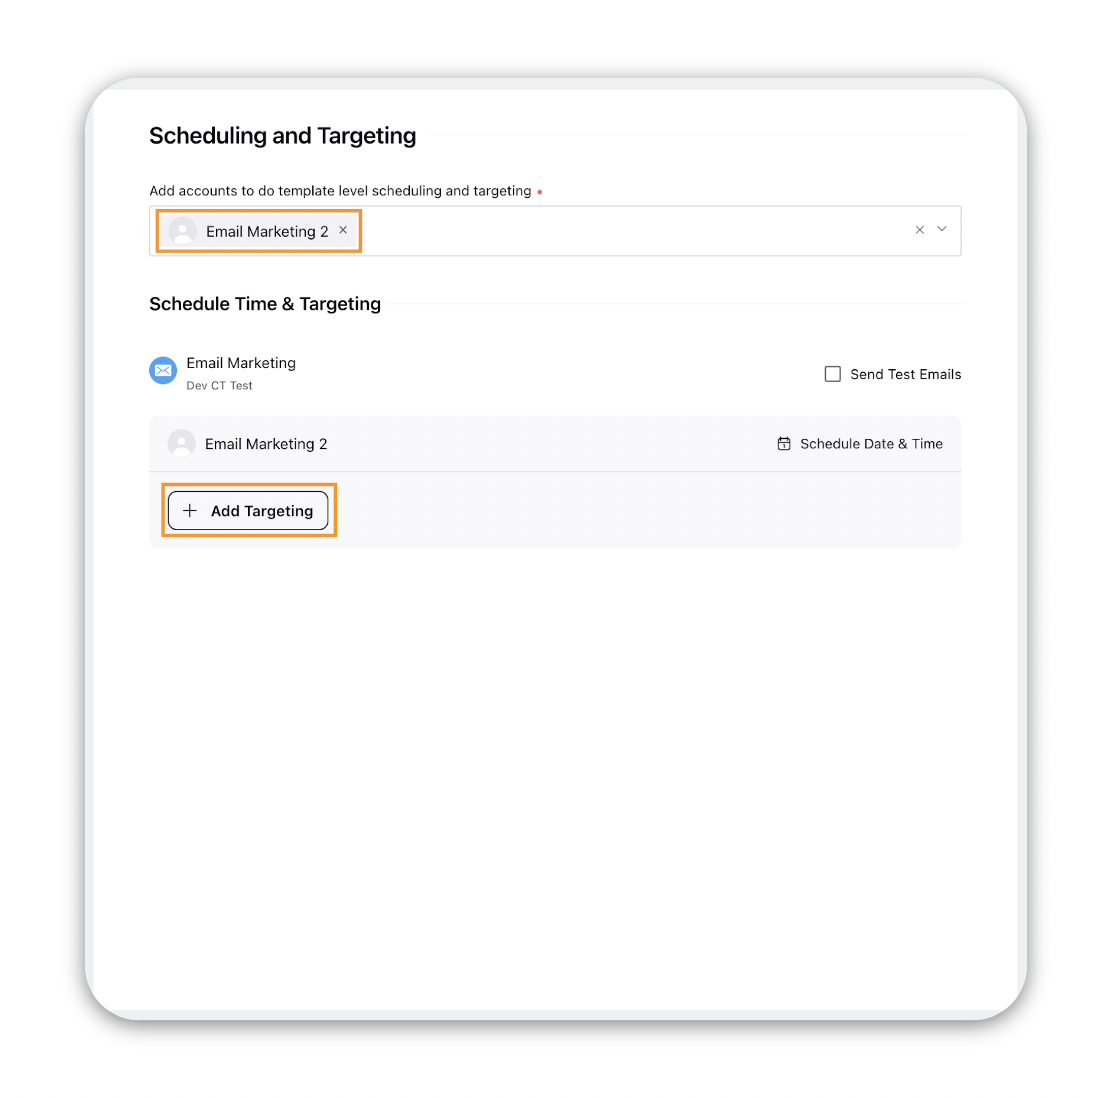
In the Scheduling and Targeting tab, select the account from which you want to publish the emails.
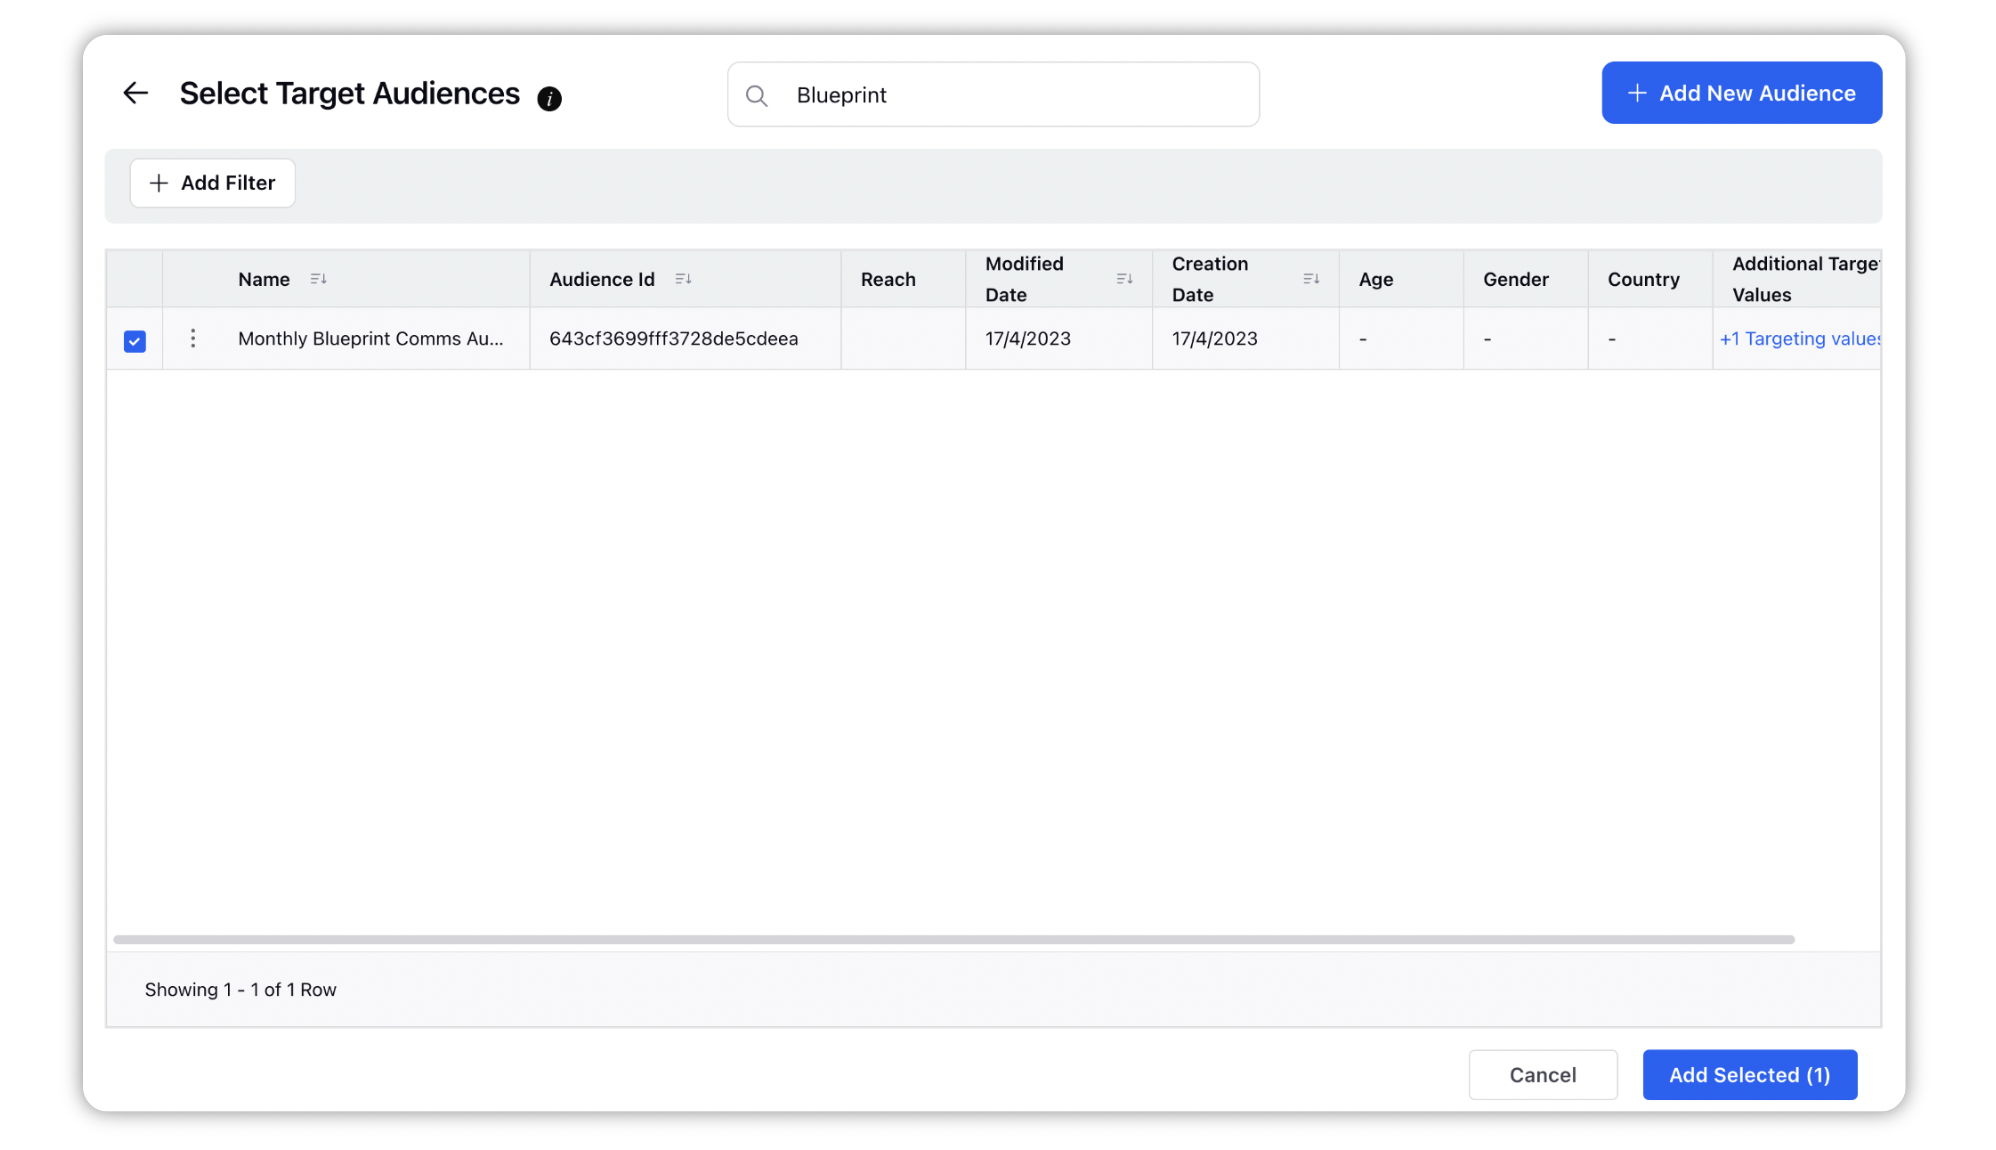
You can also add targeting for an Audience by clicking on the Add Targeting button. Learn more about creating Targeting lists here.
Select the desired Audience from the list you wish to target.
You can also create new Audience by clicking on the Add Audience button and selecting desired Profile Lists and Audience Segments.
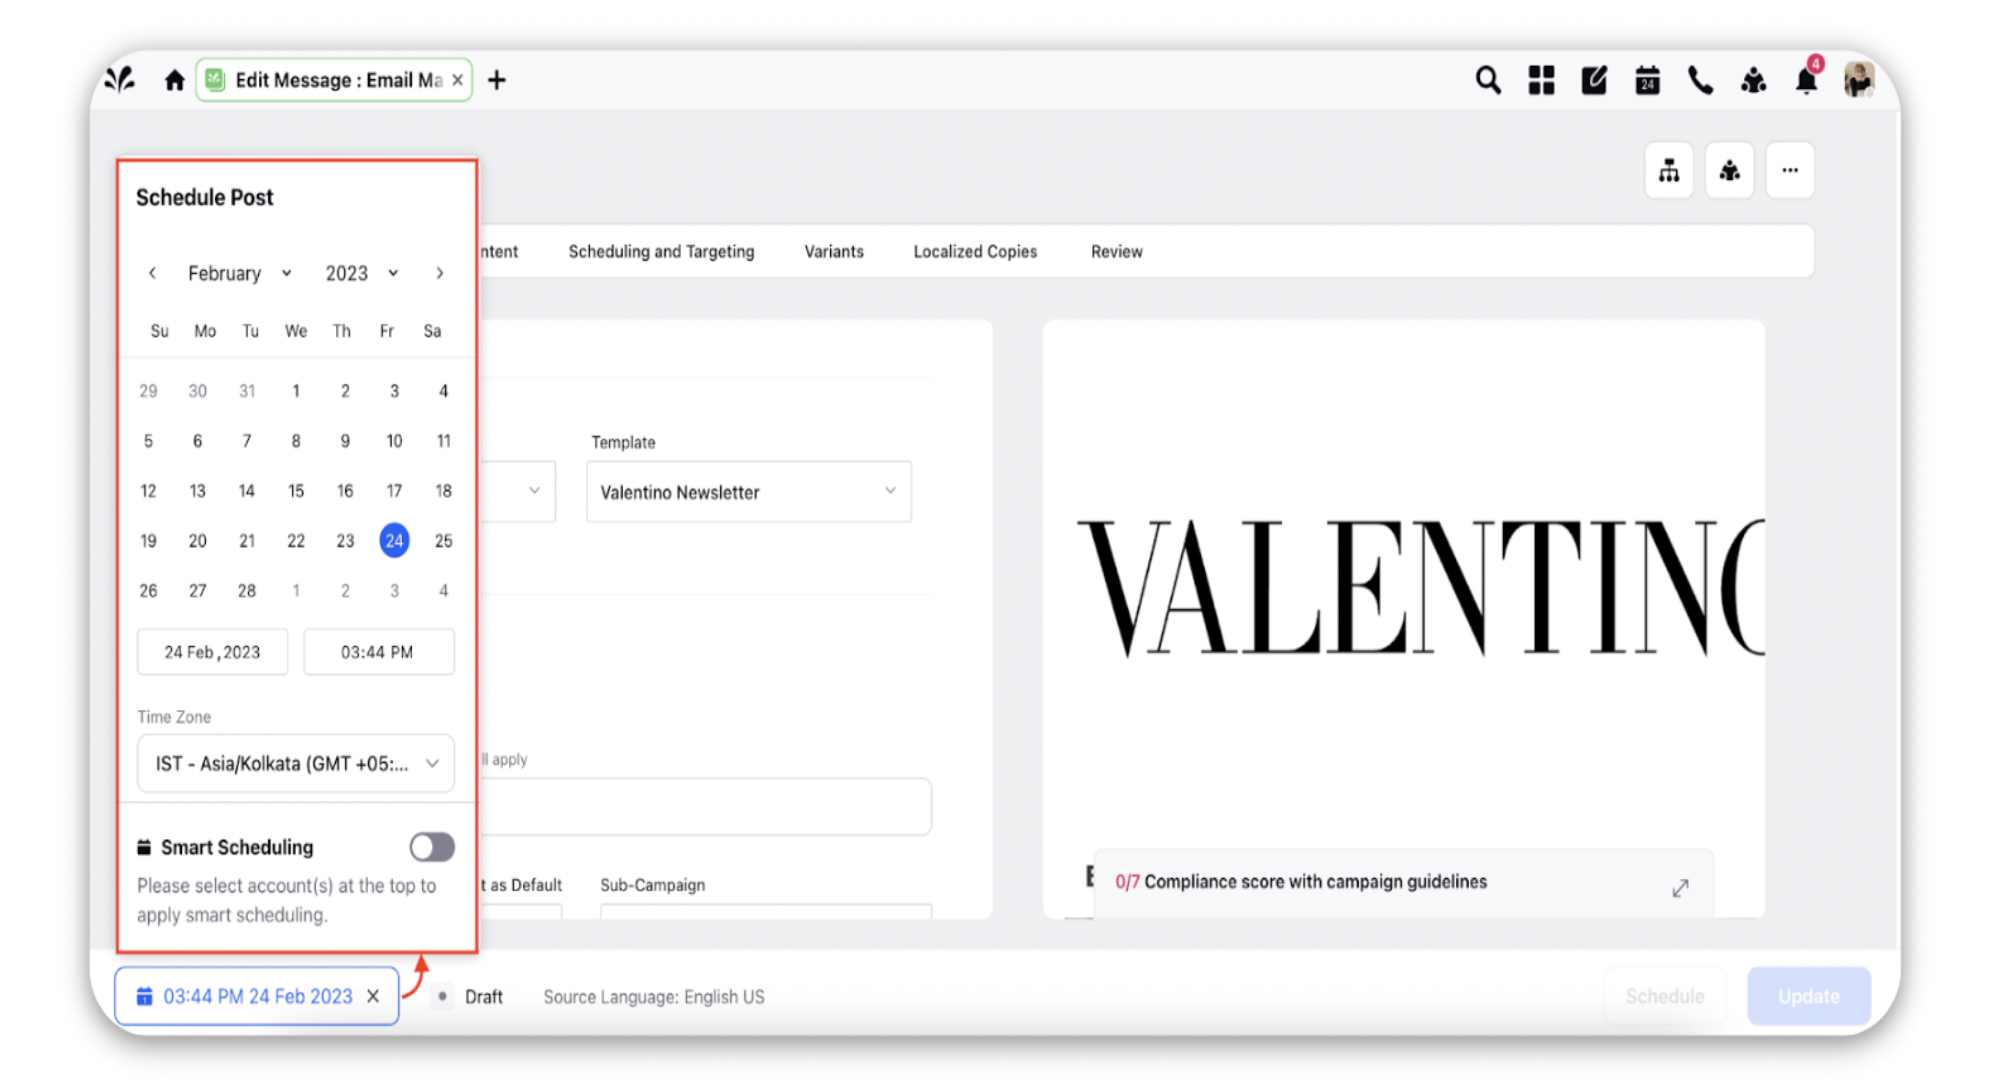
In the Review tab you can review the content of your email marketing message, finally, click on Publish to send the emails to send immediately or Schedule them for a time in future using the Schedule Date and Time button on the bottom left.