Create and Use Meta Lead Forms
Updated
Lead ads allow you to find people who may be interested in your products or services and collect information from them. You can create Facebook Lead Forms in Sprinklr Marketing (Ads) to customize and capture information that is important to your business. You will also be able to grow inbound inquiries, email subscriptions, sign-ups, applications, registrations, pre-orders, and more.
To Create Meta Lead Forms Through Ads Tools & Settings
Open a new tab and navigate to Sprinklr Marketing > Advertising > Tools and Settings.
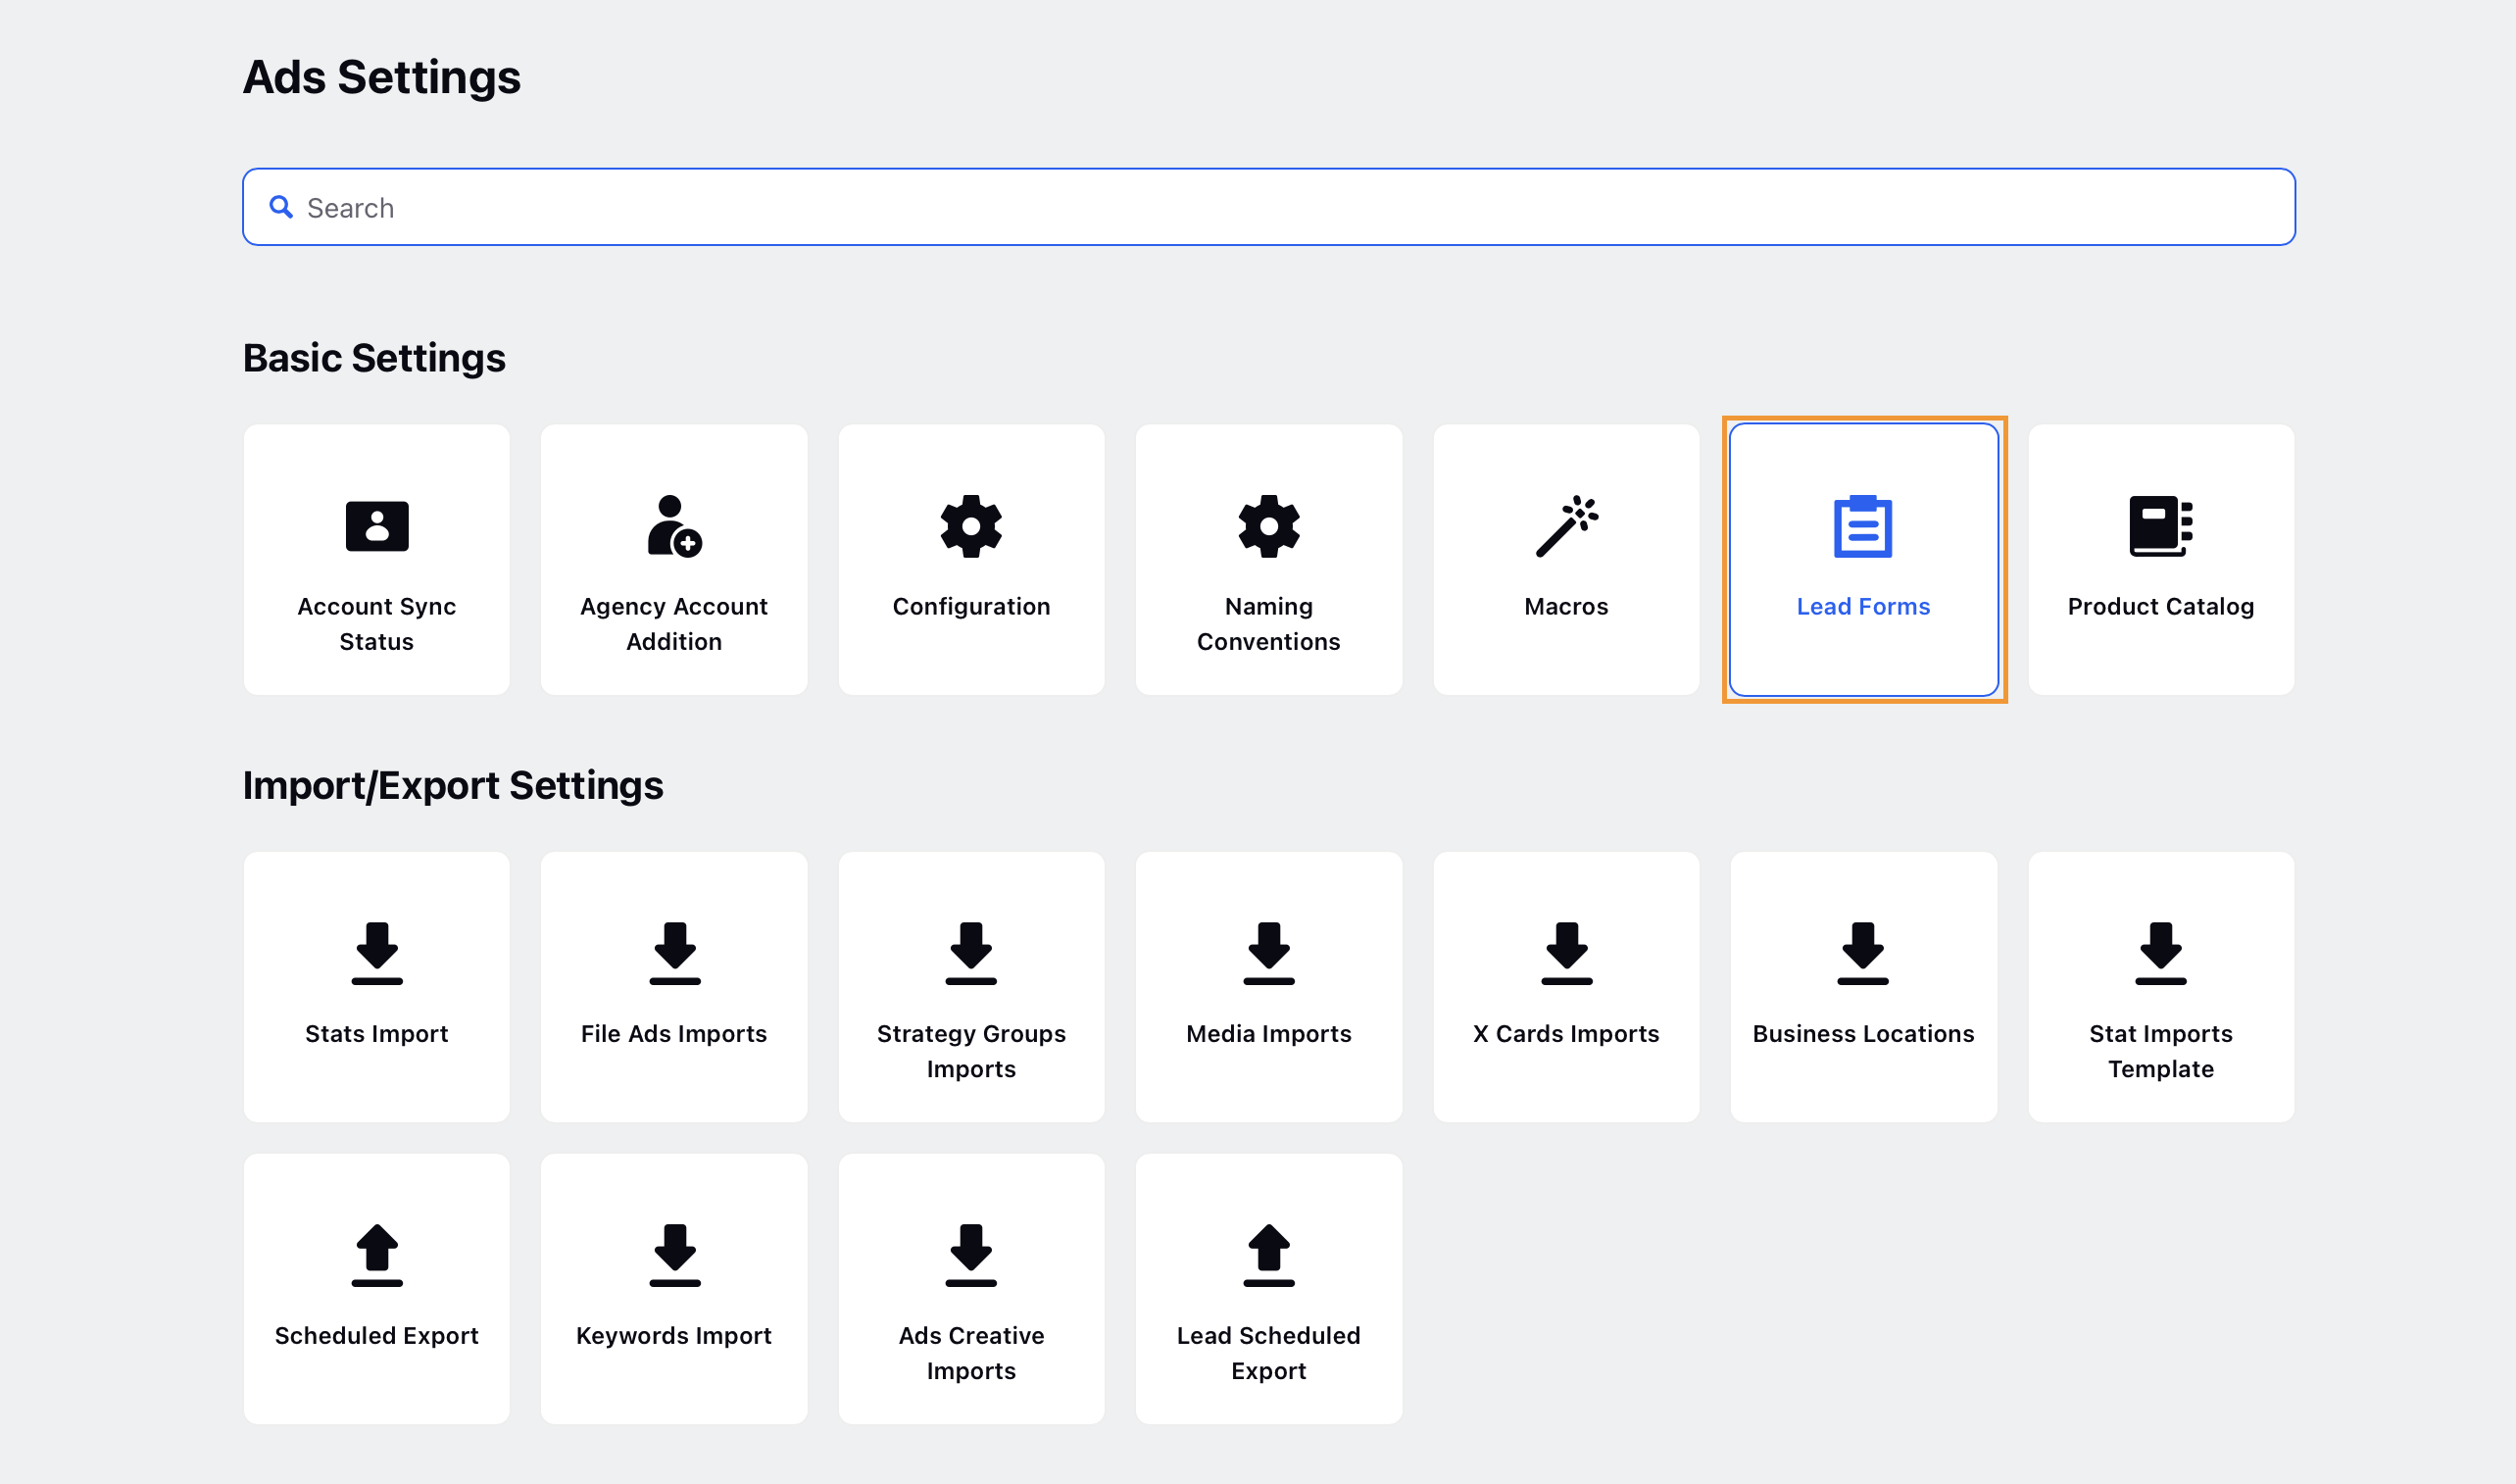
Select Lead Forms within Basic Settings.
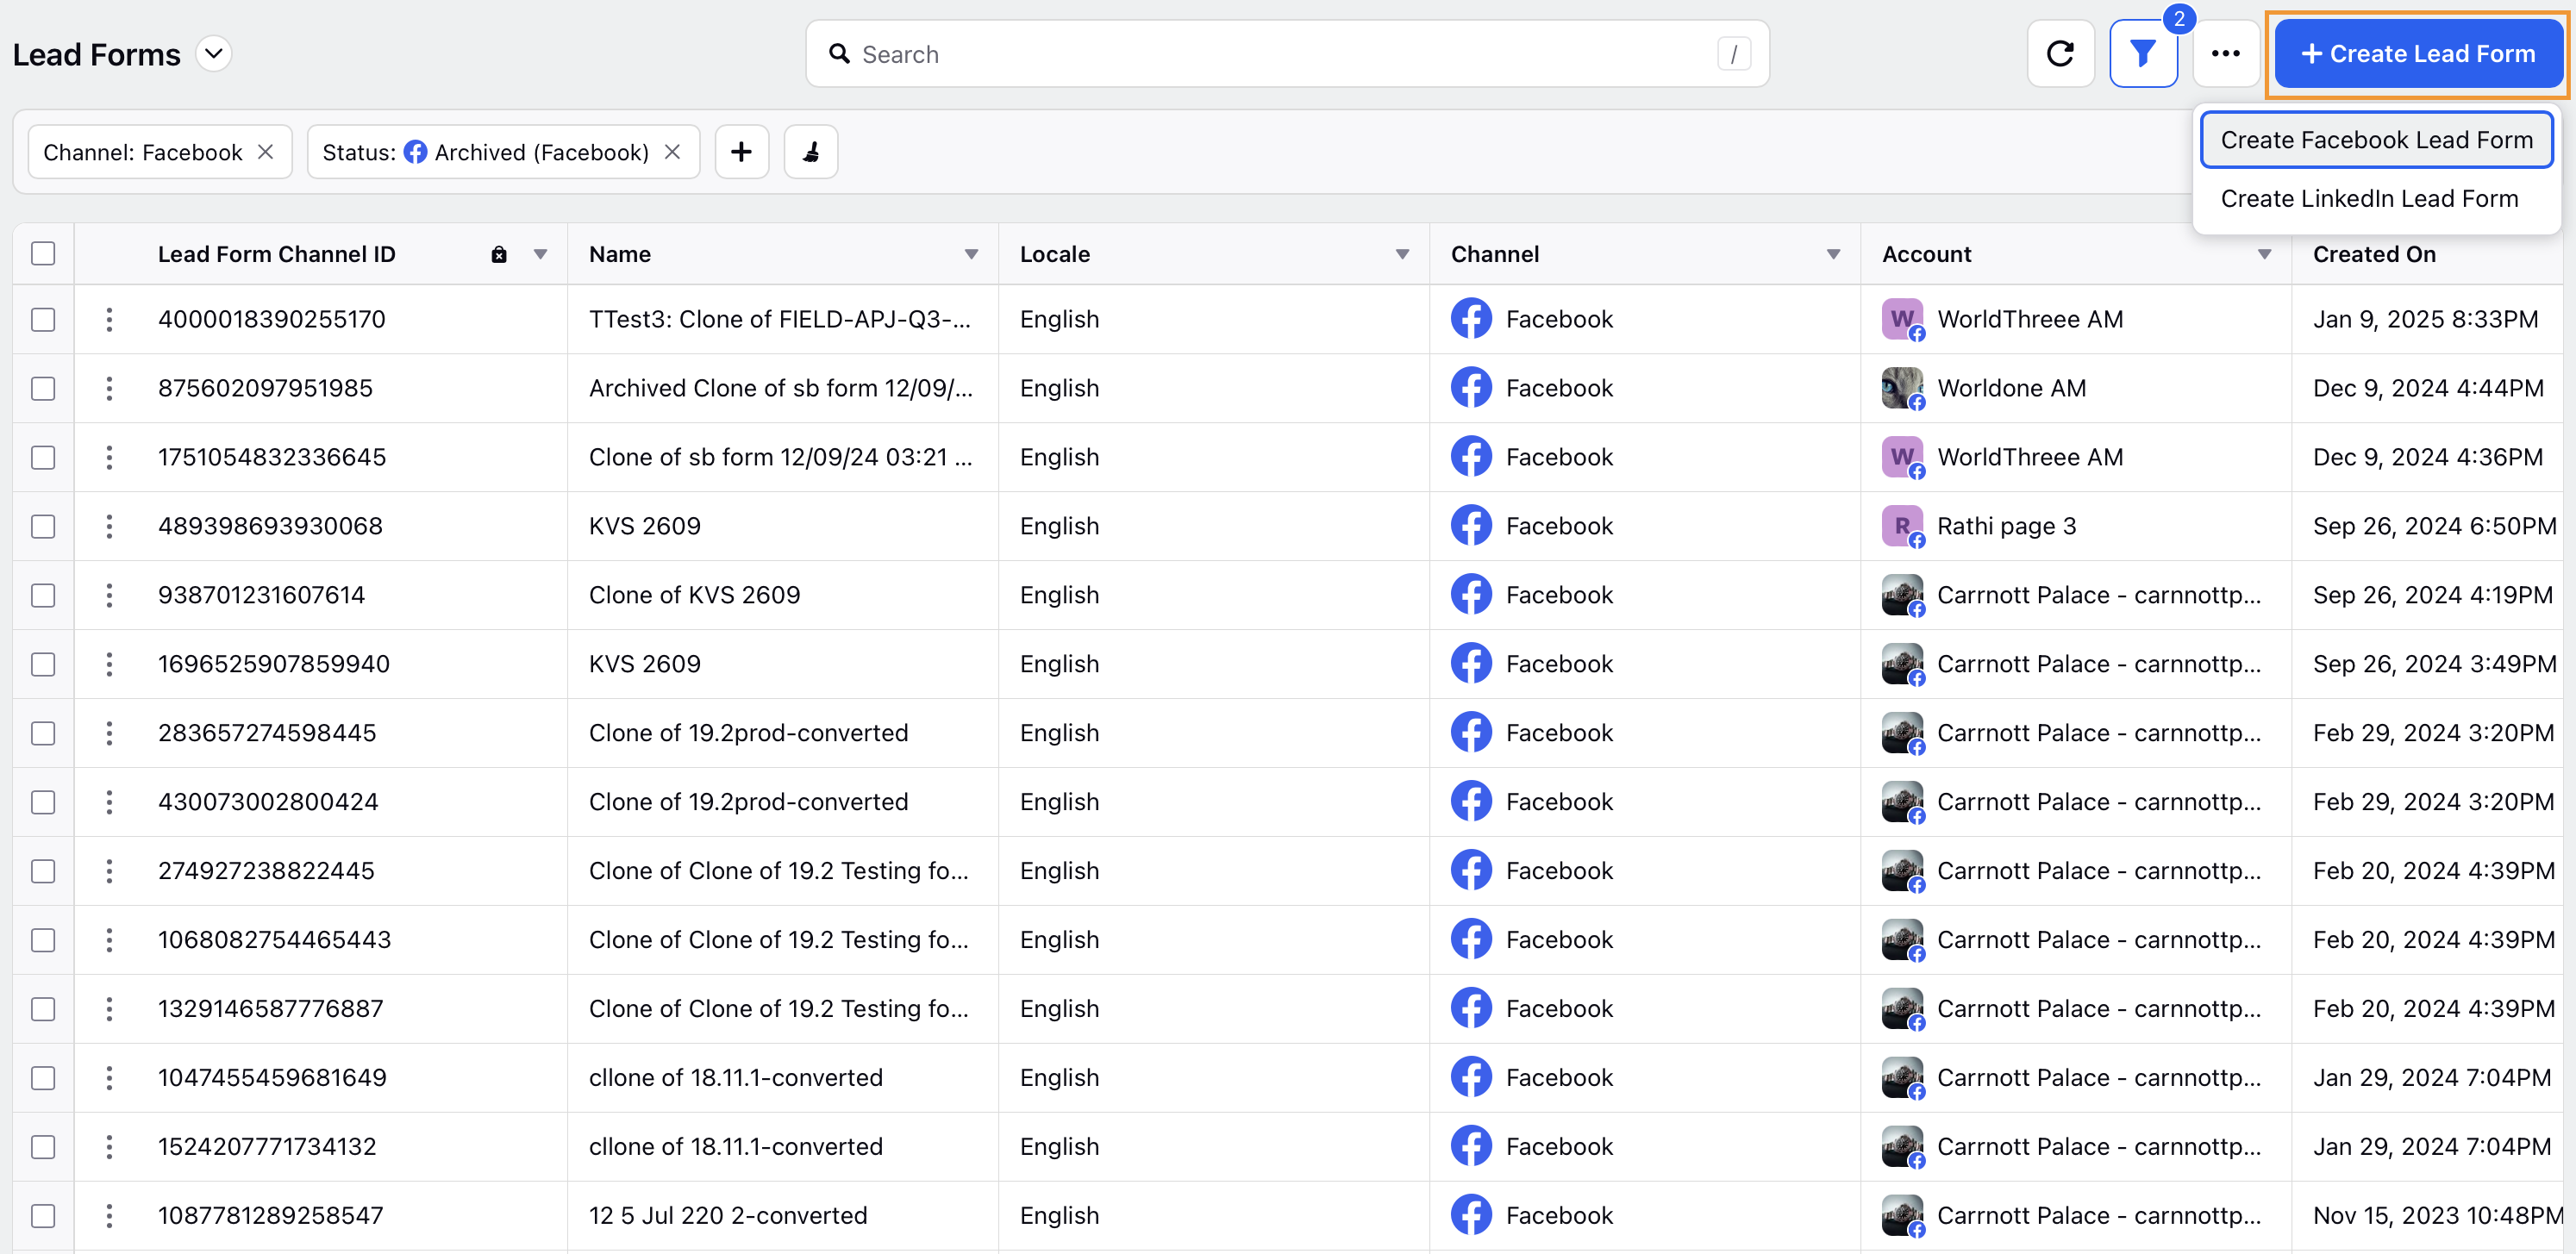
On the Lead Forms screen, click + Create Lead Form in the top right corner.
Select Create Facebook Lead Form.
Note:
Access to this feature is controlled by the DP: PAID_FACEBOOK_LEAD_FORM_CREATION_ENABLED. To enable this feature in your environment, reach out to your Success Manager. Alternatively, you can submit a request at
Fill in the details in the Create Lead Form window. Refer to the table below for the field descriptions.
In the right pane of the Create Lead Form window, you will see a preview of your lead form. Click the next arrow above to view the different parts of your lead form.

Click Create Lead Form in the bottom-right corner to save the lead form.
To Create Meta Leads Form Through Native
Open a new tab and navigate to Sprinklr Marketing > Advertising > Tools & Settings.
Select Lead Forms within Basic Settings.
On the Lead Forms screen, click + Create Lead Form in the top right corner.
Select Create Facebook Lead Form.
On the Create Facebook Lead Form pop-up window, select your Facebook Ad Account and Page.
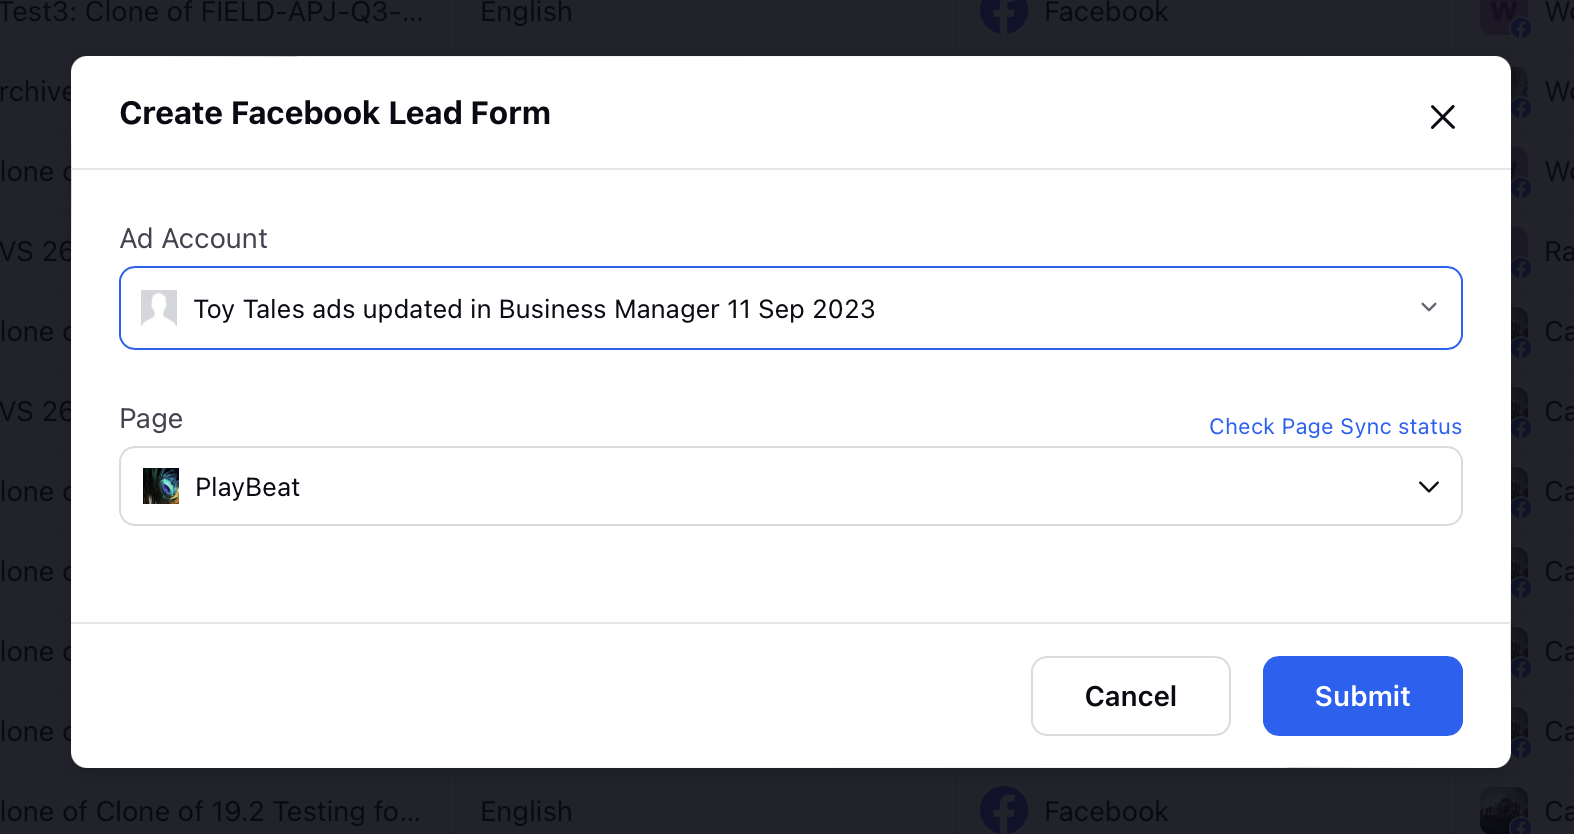
Click Submit and you will be redirected to the Facebook Lead Ads Form Builder window.
On the Lead Ads Form Builder window, select from the following options and click Next:
New Form - Create a new form and enter all new information.
Duplicate an existing form - Duplicate one of your existing forms and make changes as desired. Refer to the table below for the field descriptions.
Click Finish in the top-right corner, once all the information is filled.
Click Save in the bottom-right corner and proceed to publish your campaign.
To Create Meta Lead Forms Through Ads Composer
Open a new tab and navigate to Sprinklr Marketing > Advertising > Ads Composer.
Select your Facebook Ad account.
Select Leads as your campaign objective and within the Paid Initiative Details section.
Choose Instant Form as the website or app you want to promote.
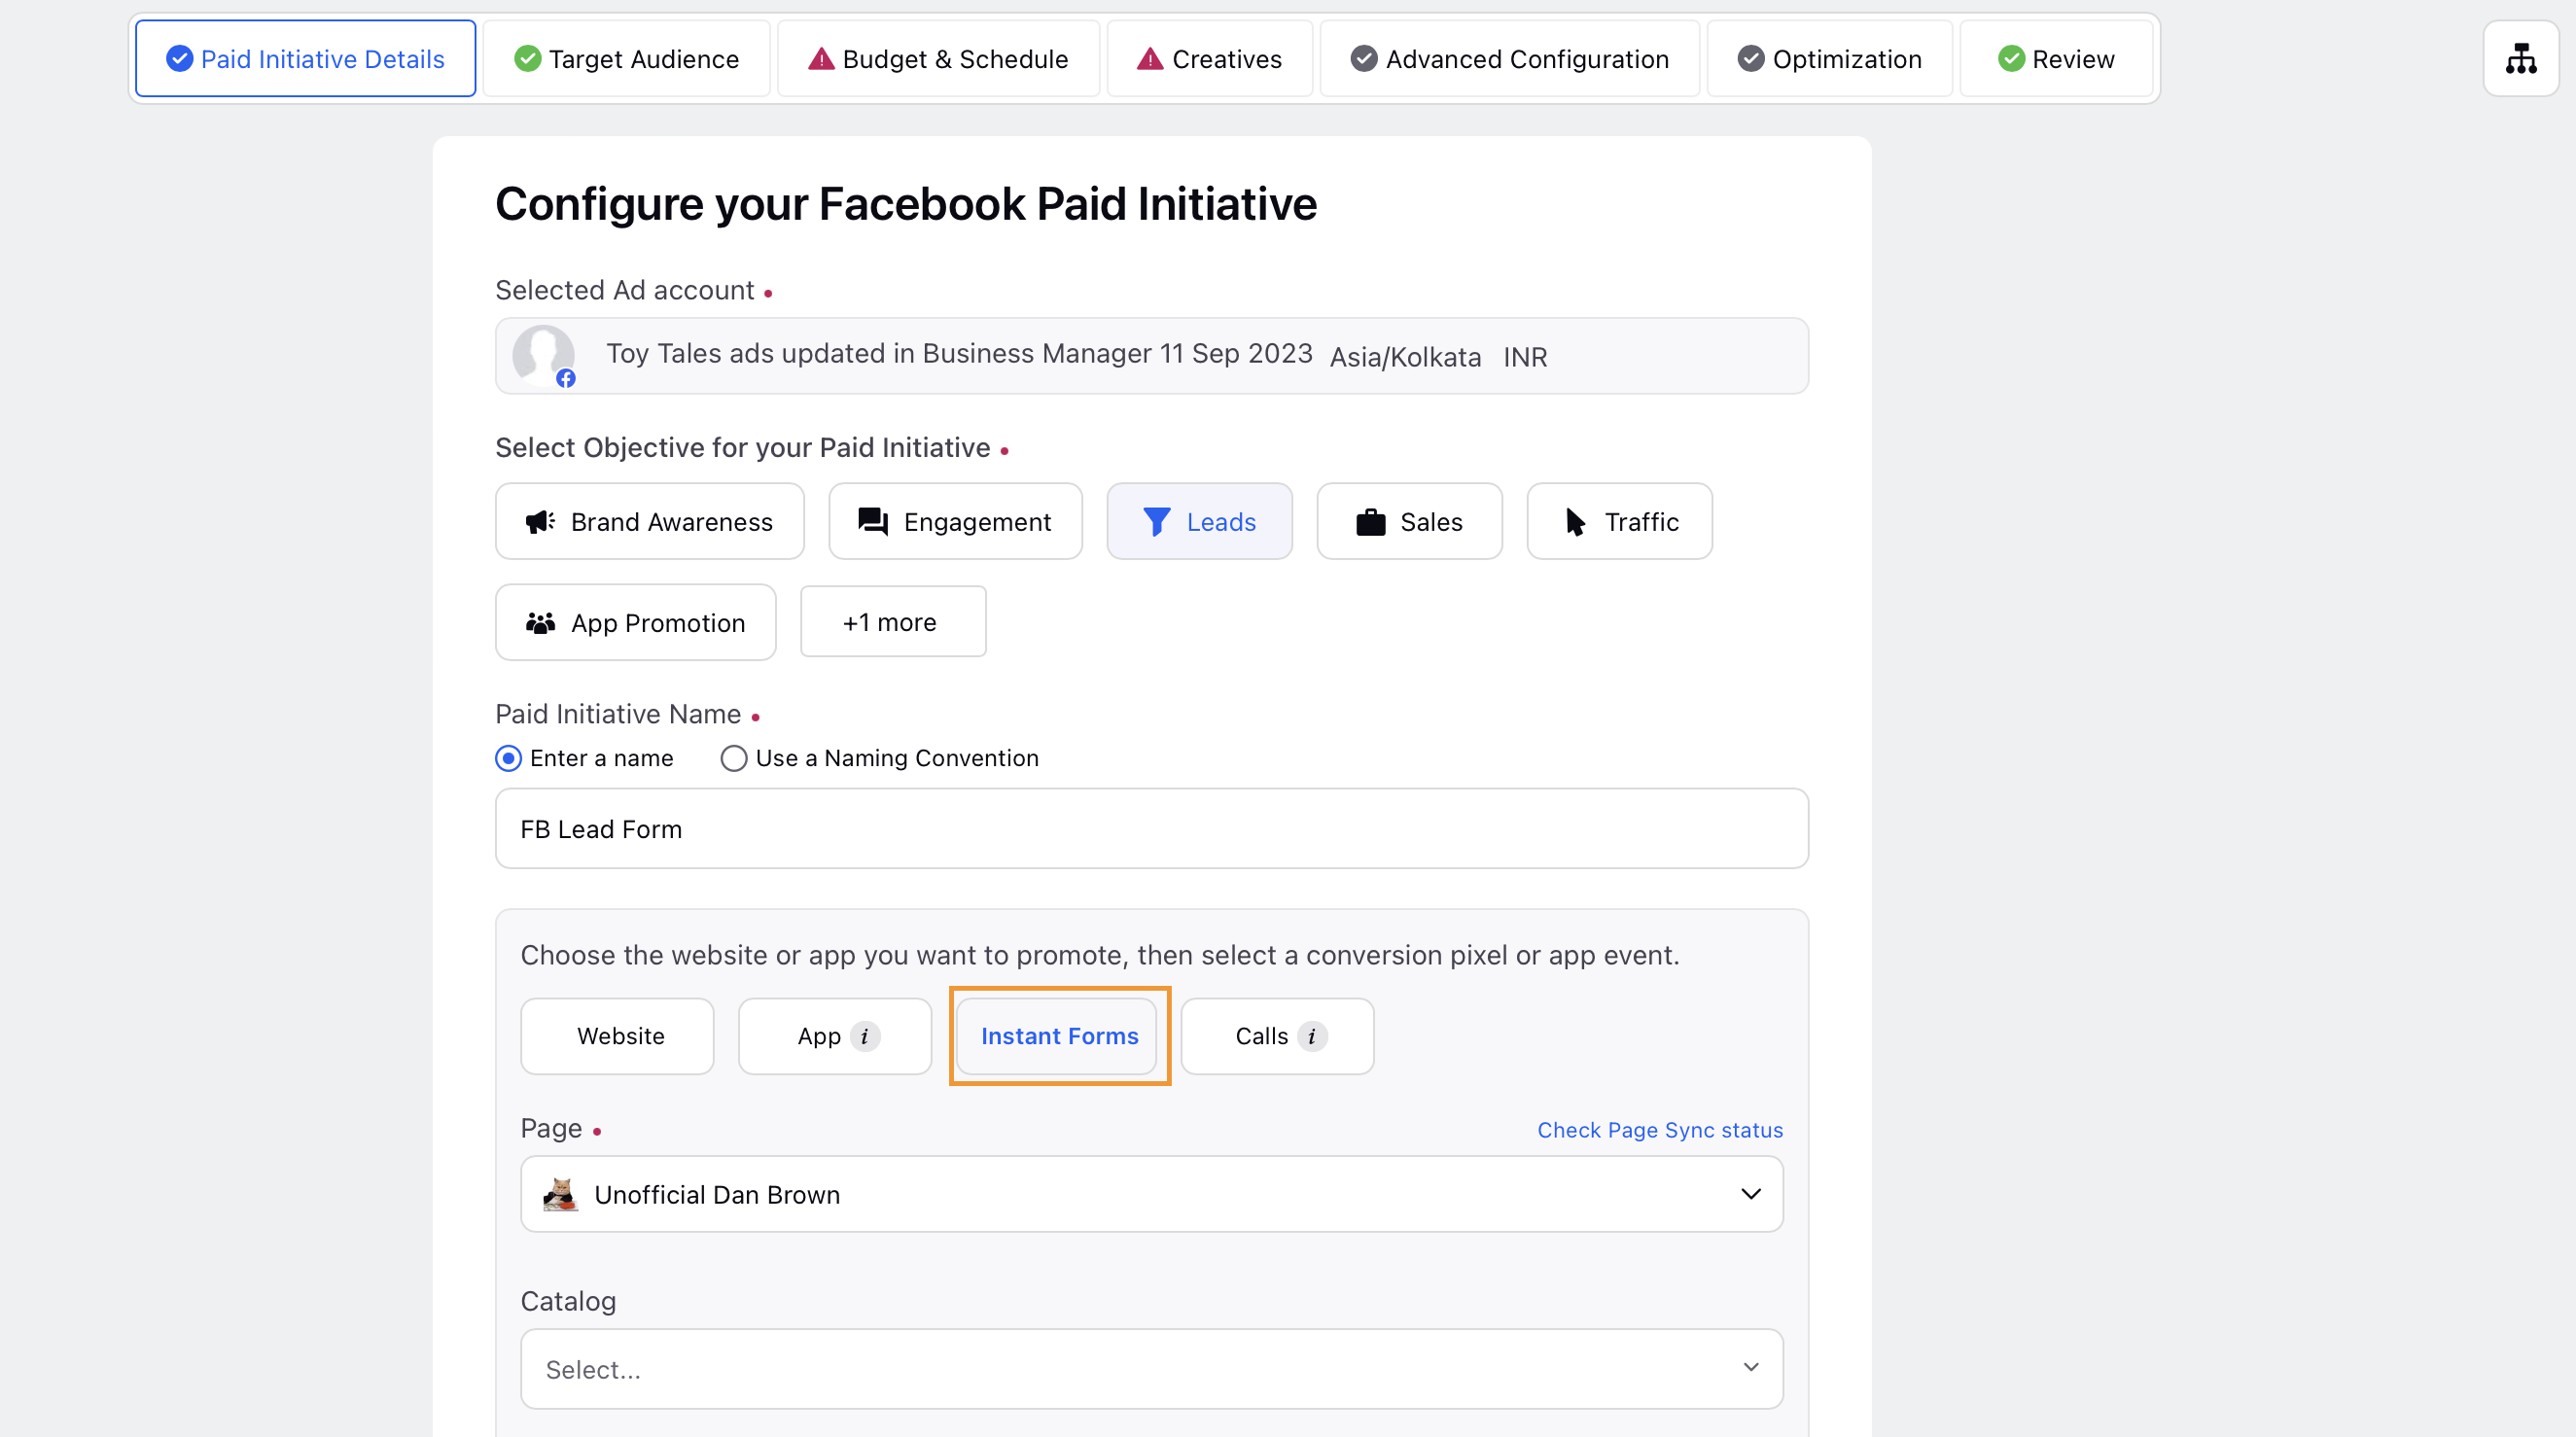
Enter the other details for your lead generation campaign and proceed to the Creatives section. For more details, refer to Compose Facebook and Instagram Ads.
Within the Creatives section, click + Add another creative.
Click + Add New Creative in the top right corner of the Select Creatives window to build your creative.
Click Add New Lead Form in the right-hand corner of the Lead Form field. This will redirect you to the Facebook Lead Ads Form Builder window.
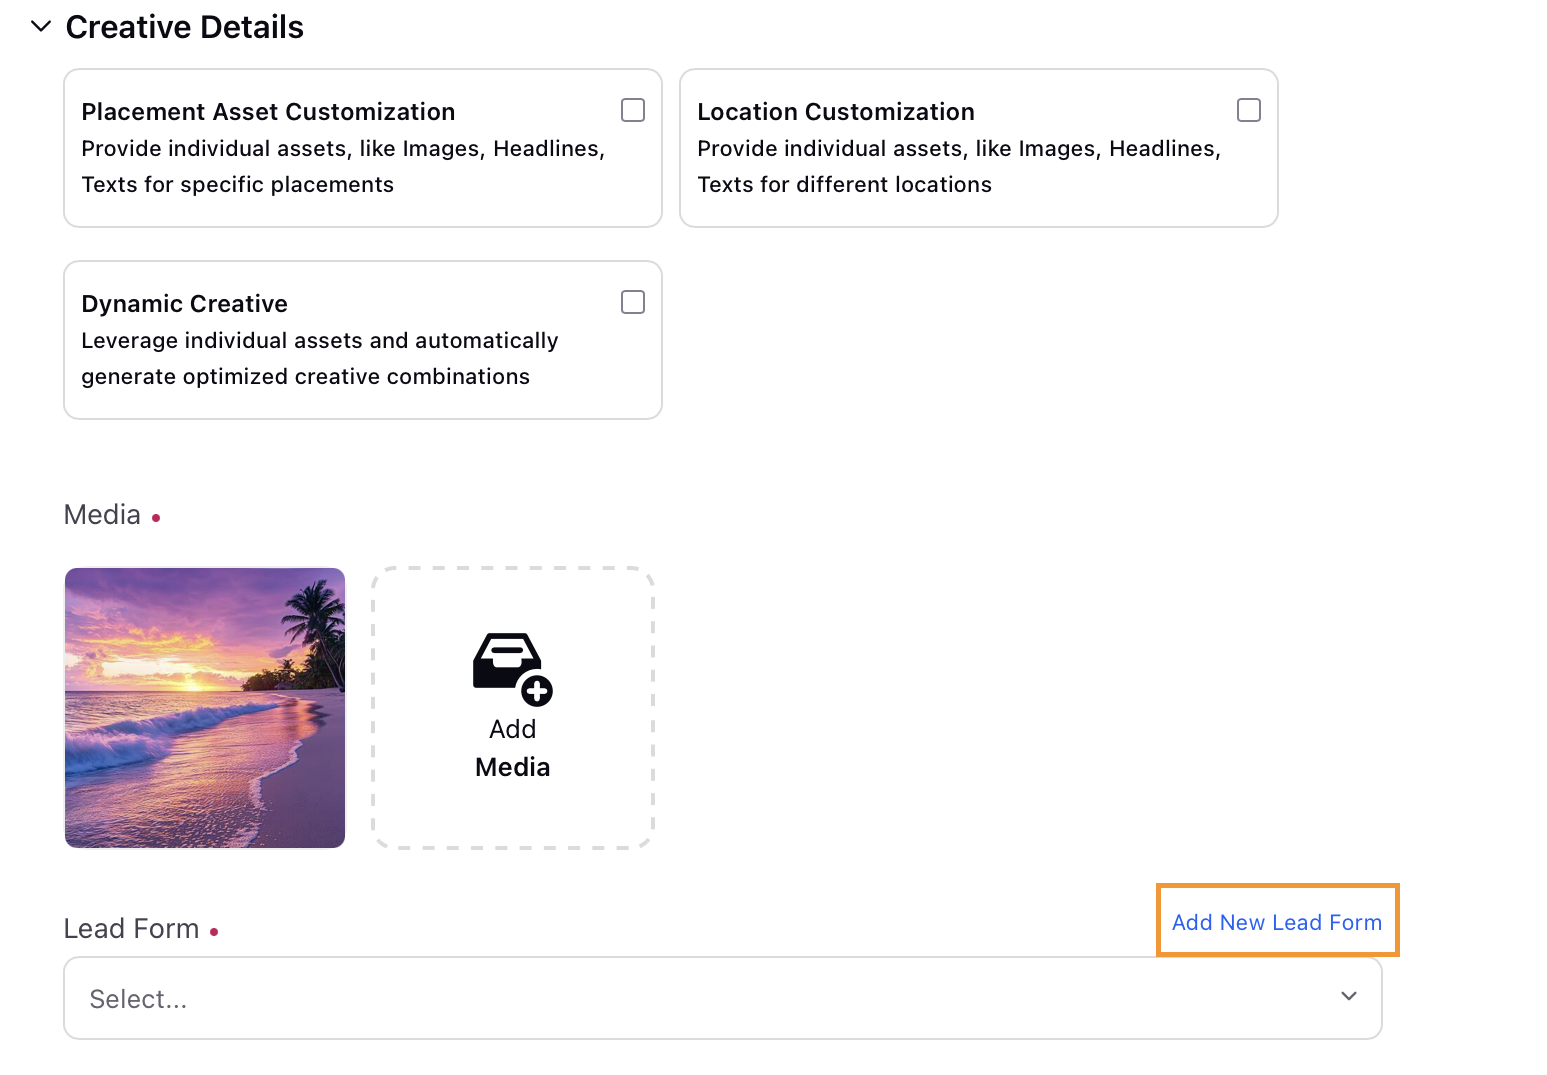
On the Lead Ads Form Builder window, select from the following options and click Next:
New Form - Create a new form and enter all new information.
Duplicate an existing form - Duplicate one of your existing forms and make changes as desired. Refer to the Create Lead Form - Field Descriptions (Native) table above.
Once completed, click Finish in the top-right corner.
Click Save in the bottom-right corner and proceed to publish your campaign.
To Create Meta Lead Forms Through Ads Manager
Open a new tab and navigate to Sprinklr Marketing > Advertising > Ads Manager.
On the Ads Manager window, click the View and Edit icon next to the desired Facebook Lead Generation campaign.
In the Edit window to the right, navigate to the Ad Variant level from the leftmost pane.
In the middle pane, scroll down to the Creatives section and click Edit within Post Details.
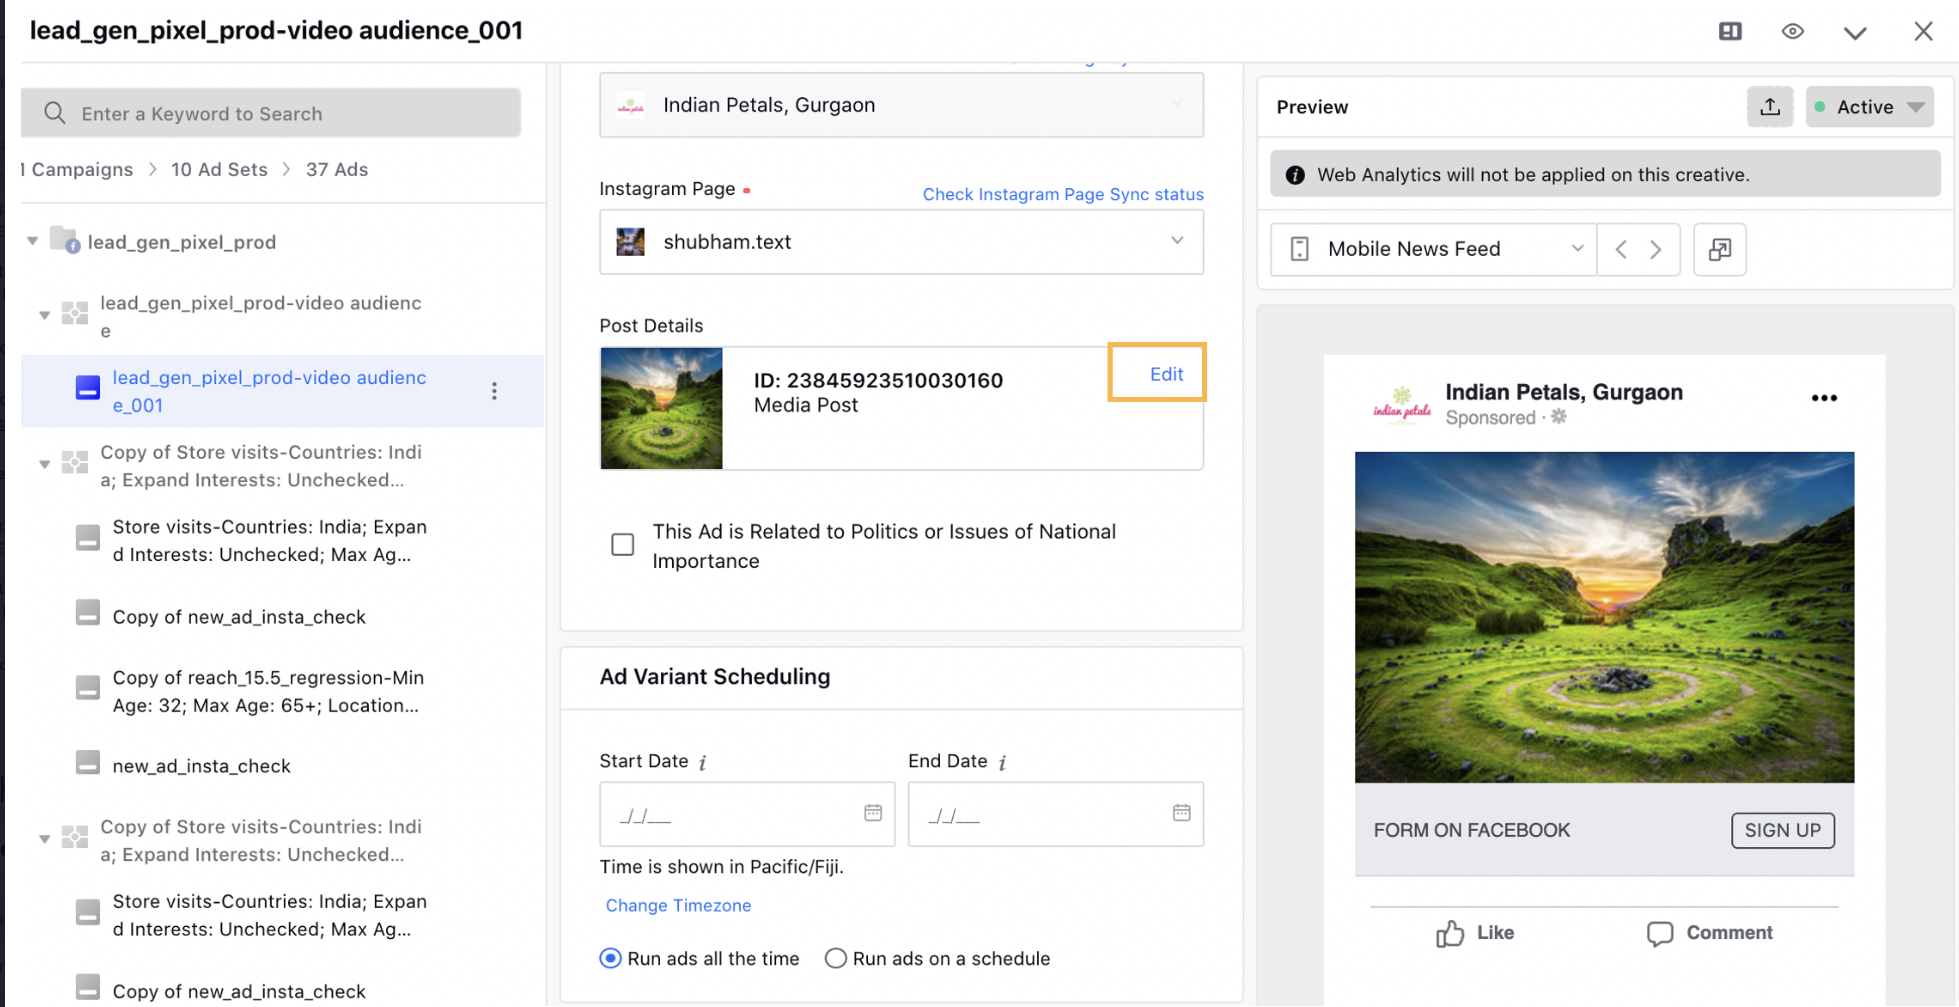
In the Creative Details section, scroll down to the Lead Form field and click Add New Lead Form in the right-hand corner.
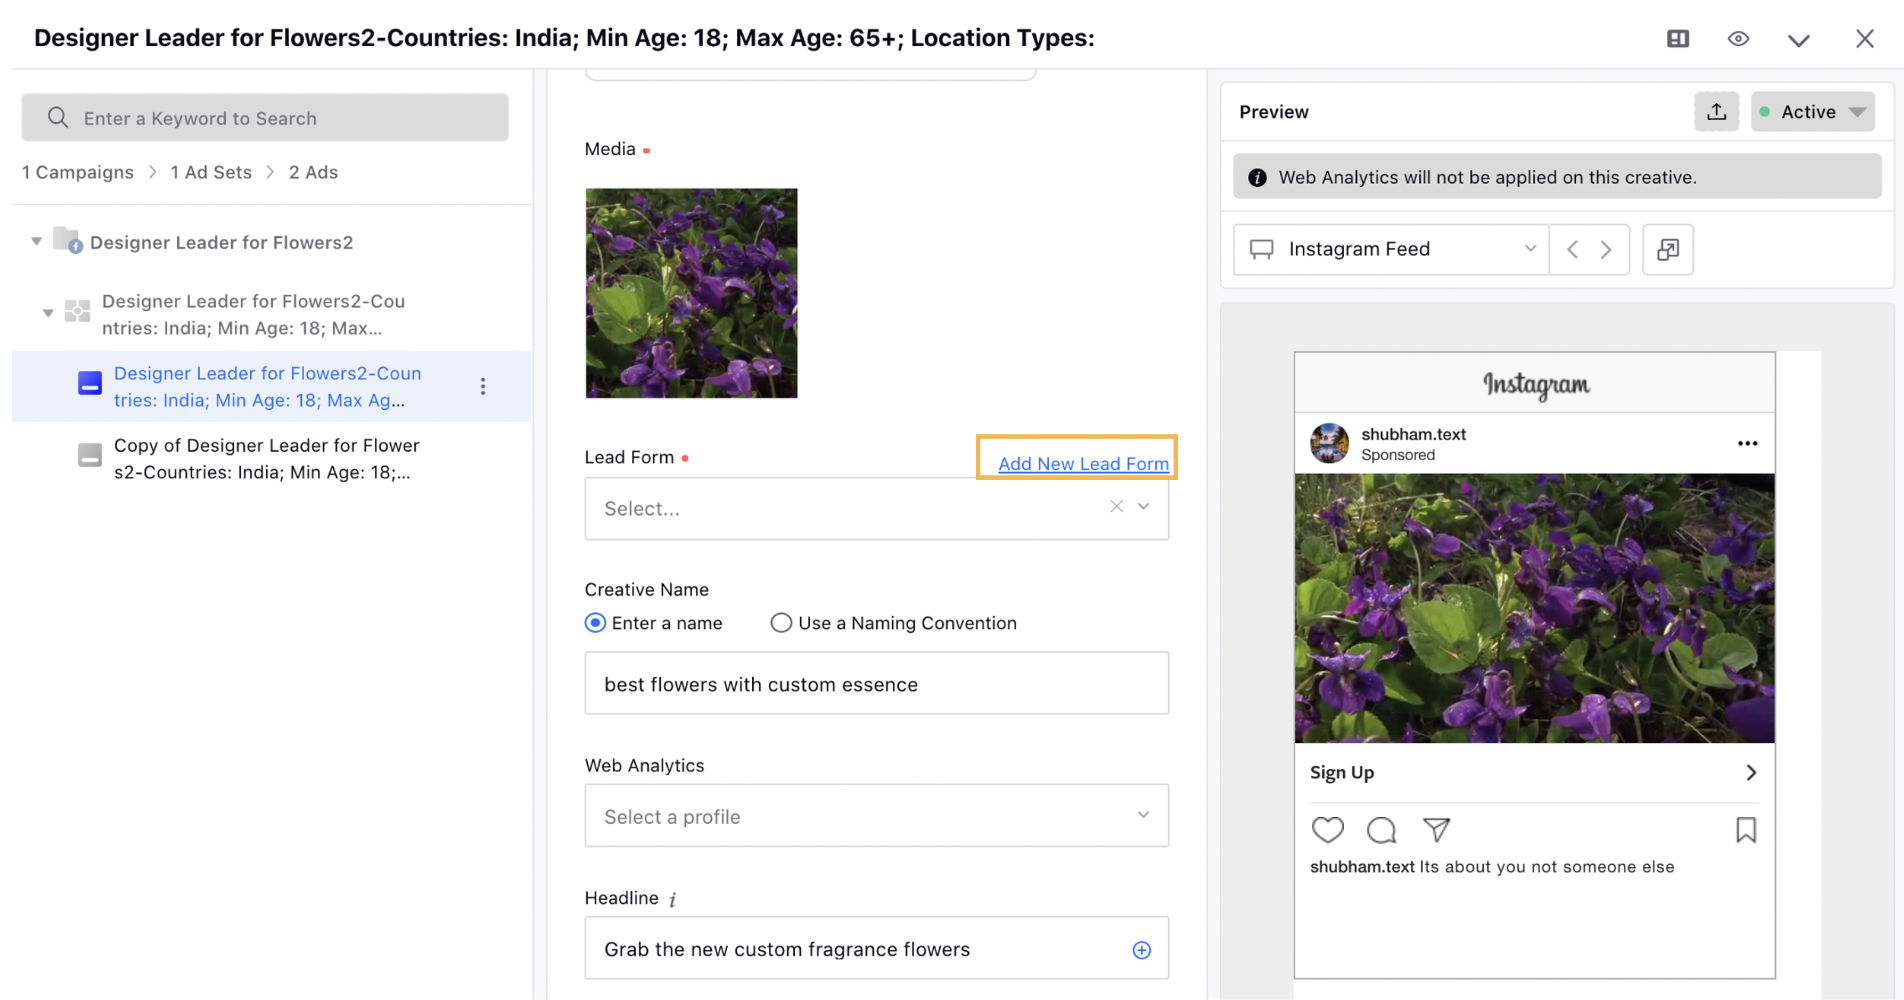
On the Create Lead Form window, fill in the details. For more information, see Create Lead Form — Field Descriptions.
After you have completed, click Create Lead Form in the bottom-right corner.
From the bottom-right corner of the Ads Manager window, click Review Changes to review your changes.
On the Review Changes window, click Apply Changes.
To Manage Existing Facebook Lead Forms
Open a new tab and navigate to Sprinklr Marketing > Advertising > Tools & Settings.
Select Lead Forms within Basic Settings.
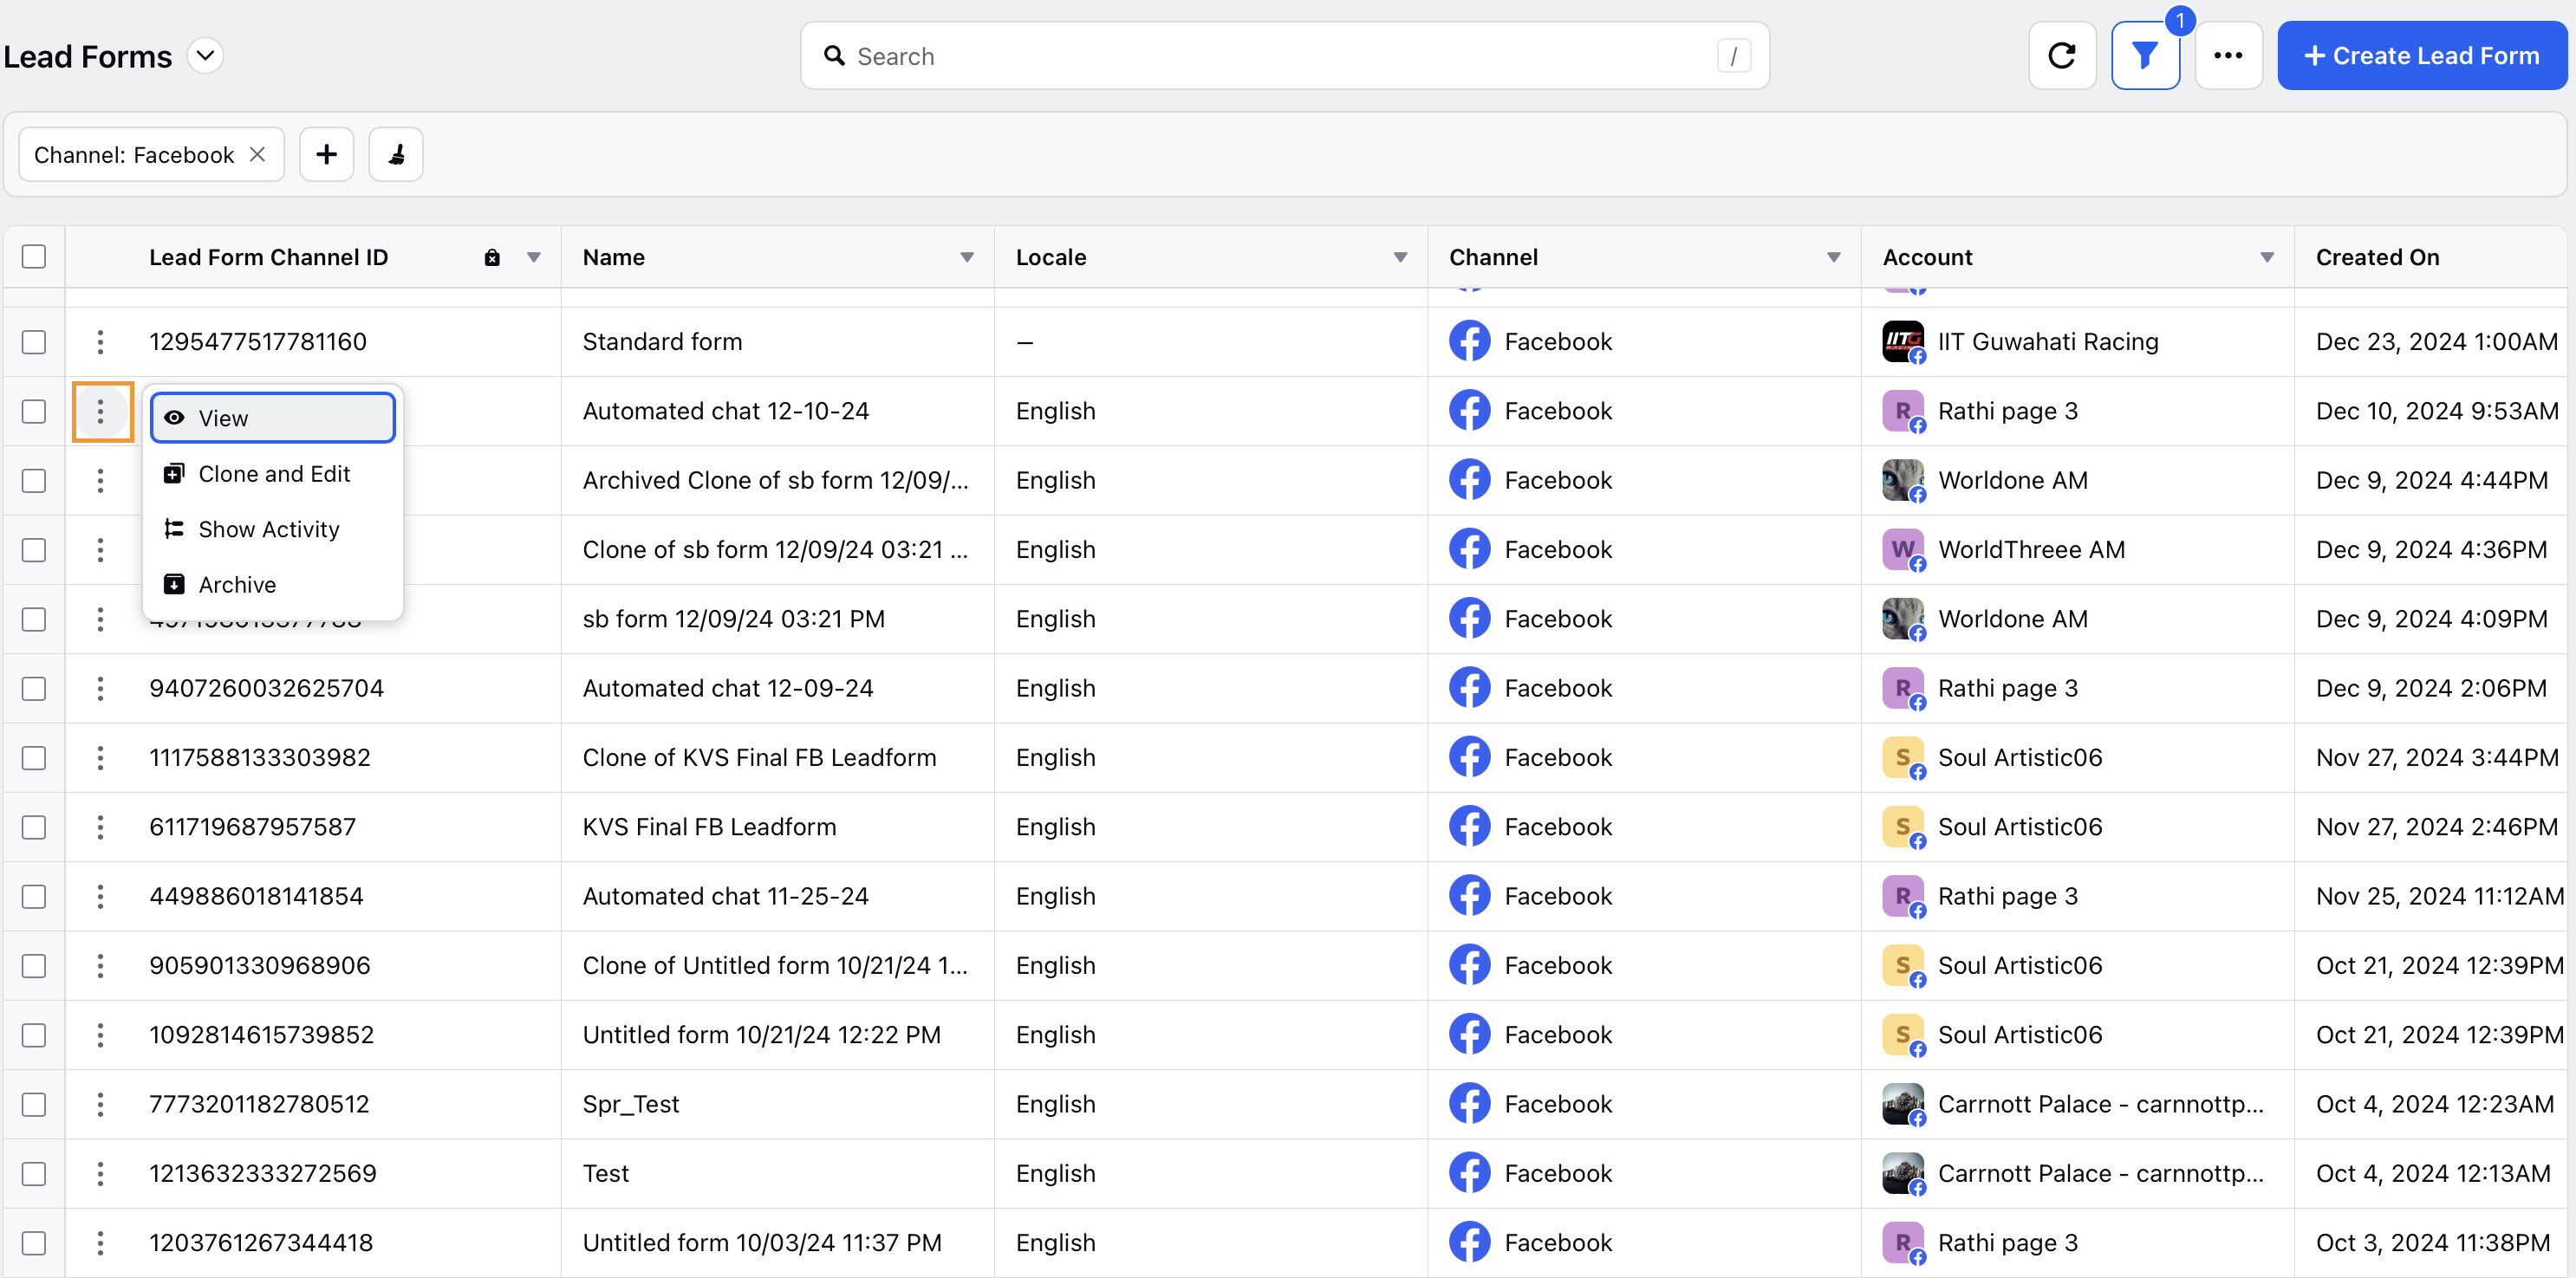
In the Lead Forms window, hover over the vertical ellipsis next to the Lead Form and select from the given options:
View - Preview the Lead Form.
Clone and Edit - Click to clone the existing lead form and edit the details of the lead form to create a new lead form.
Show Activity - Track any updates made to the Lead Form.
Archive - Archive the lead form.
To Unarchive a Lead Form -
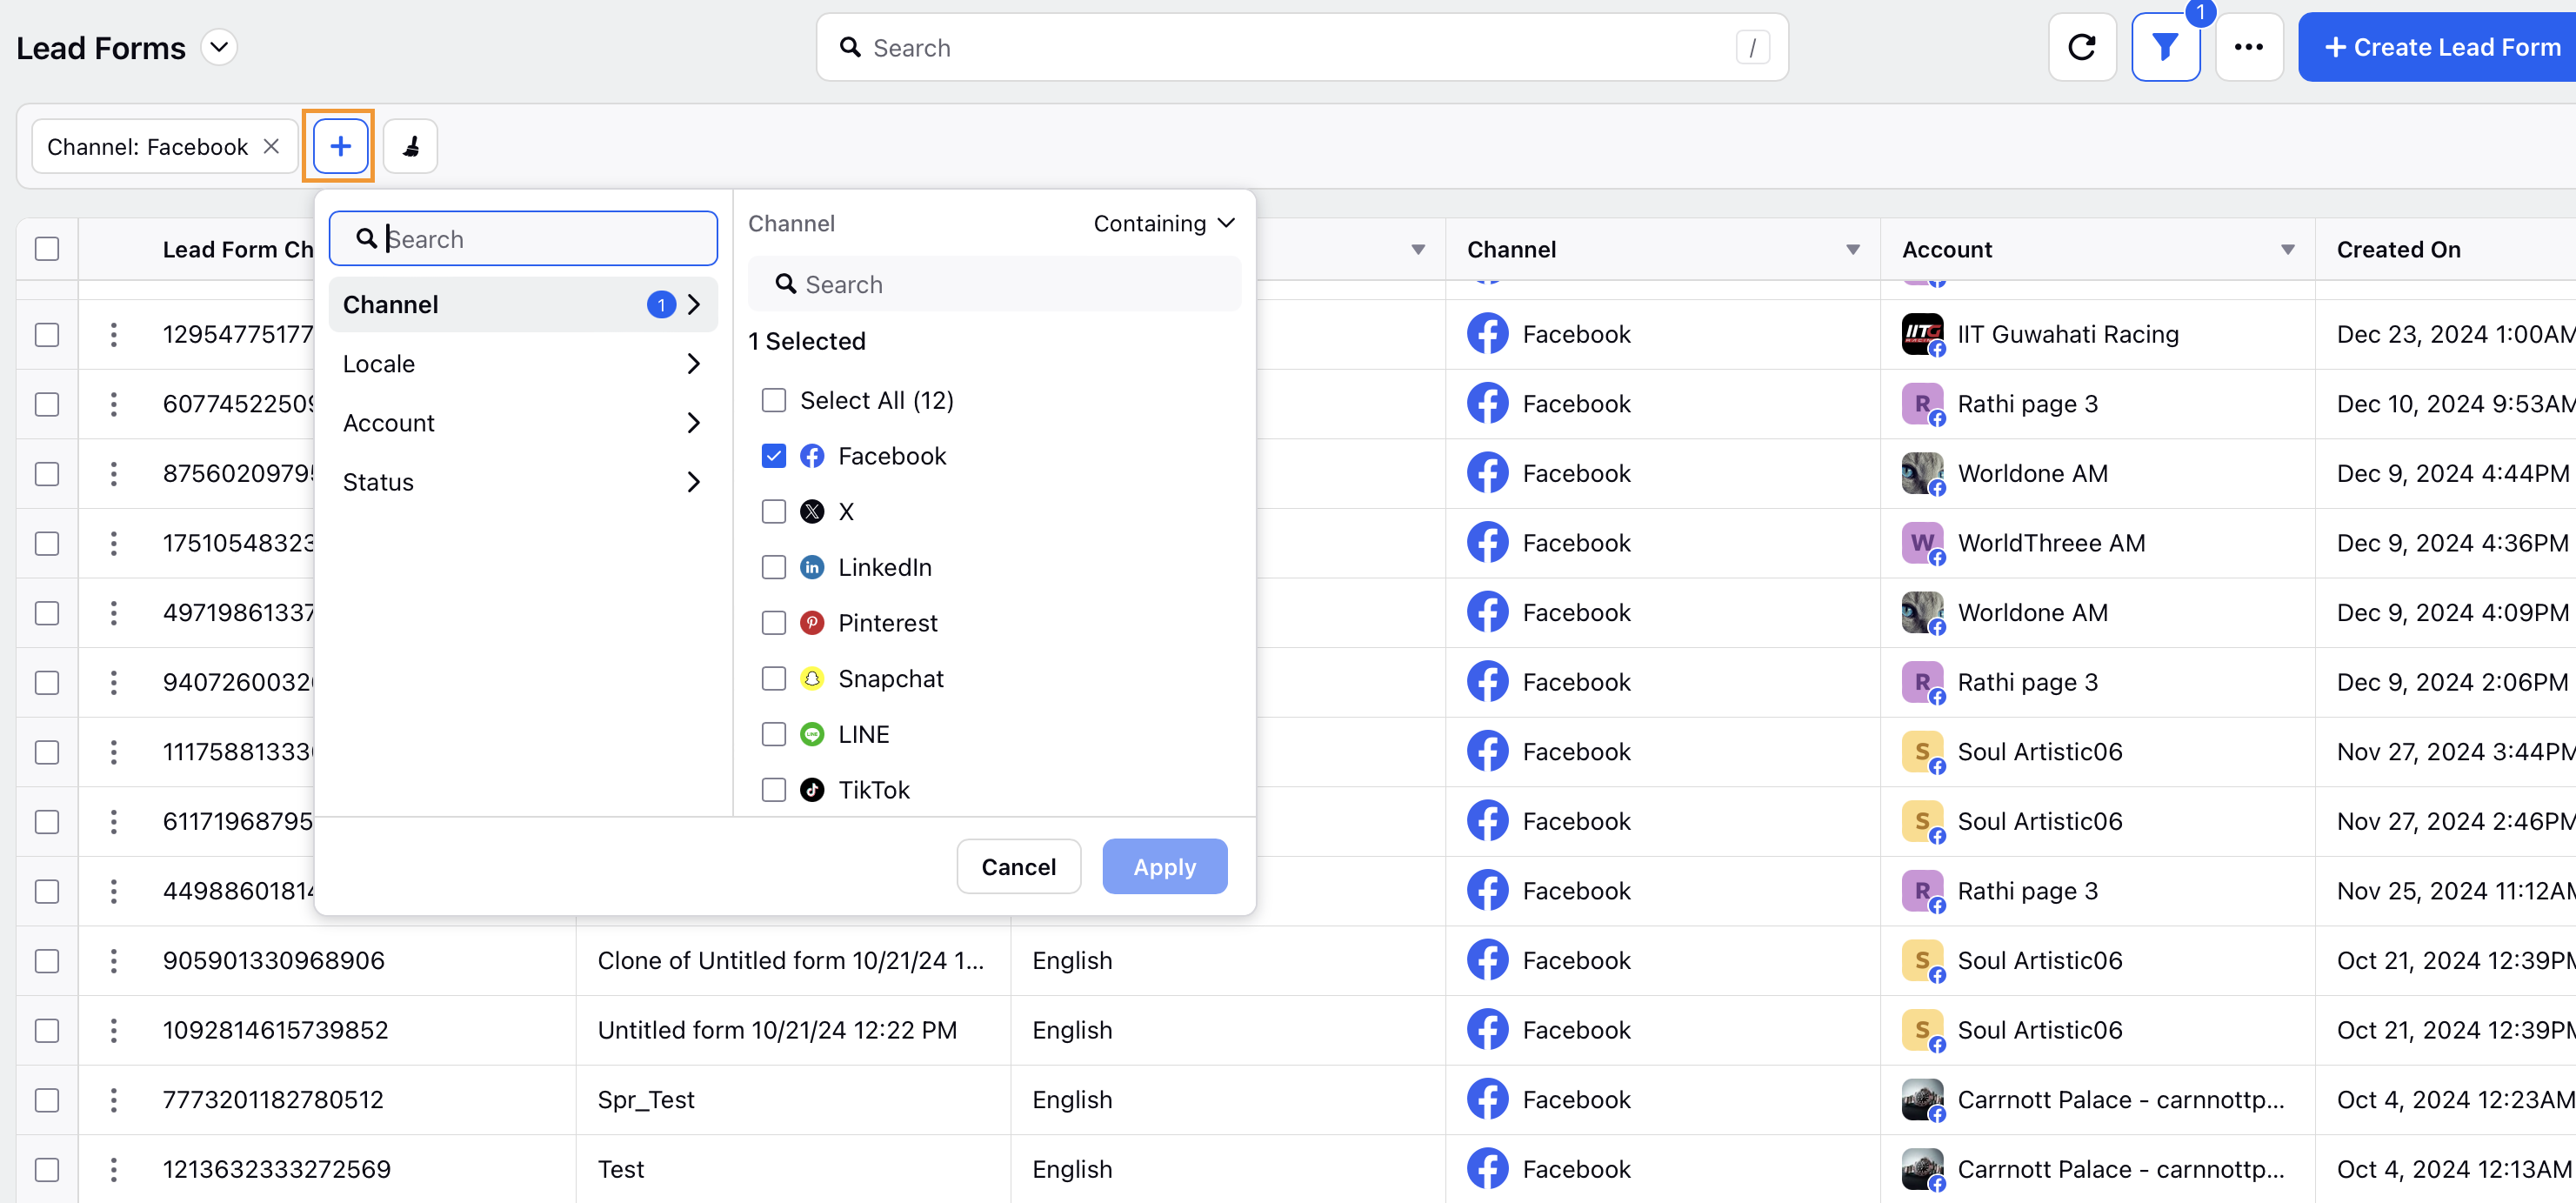
Click the + icon in the Lead Form screen to access the filters.
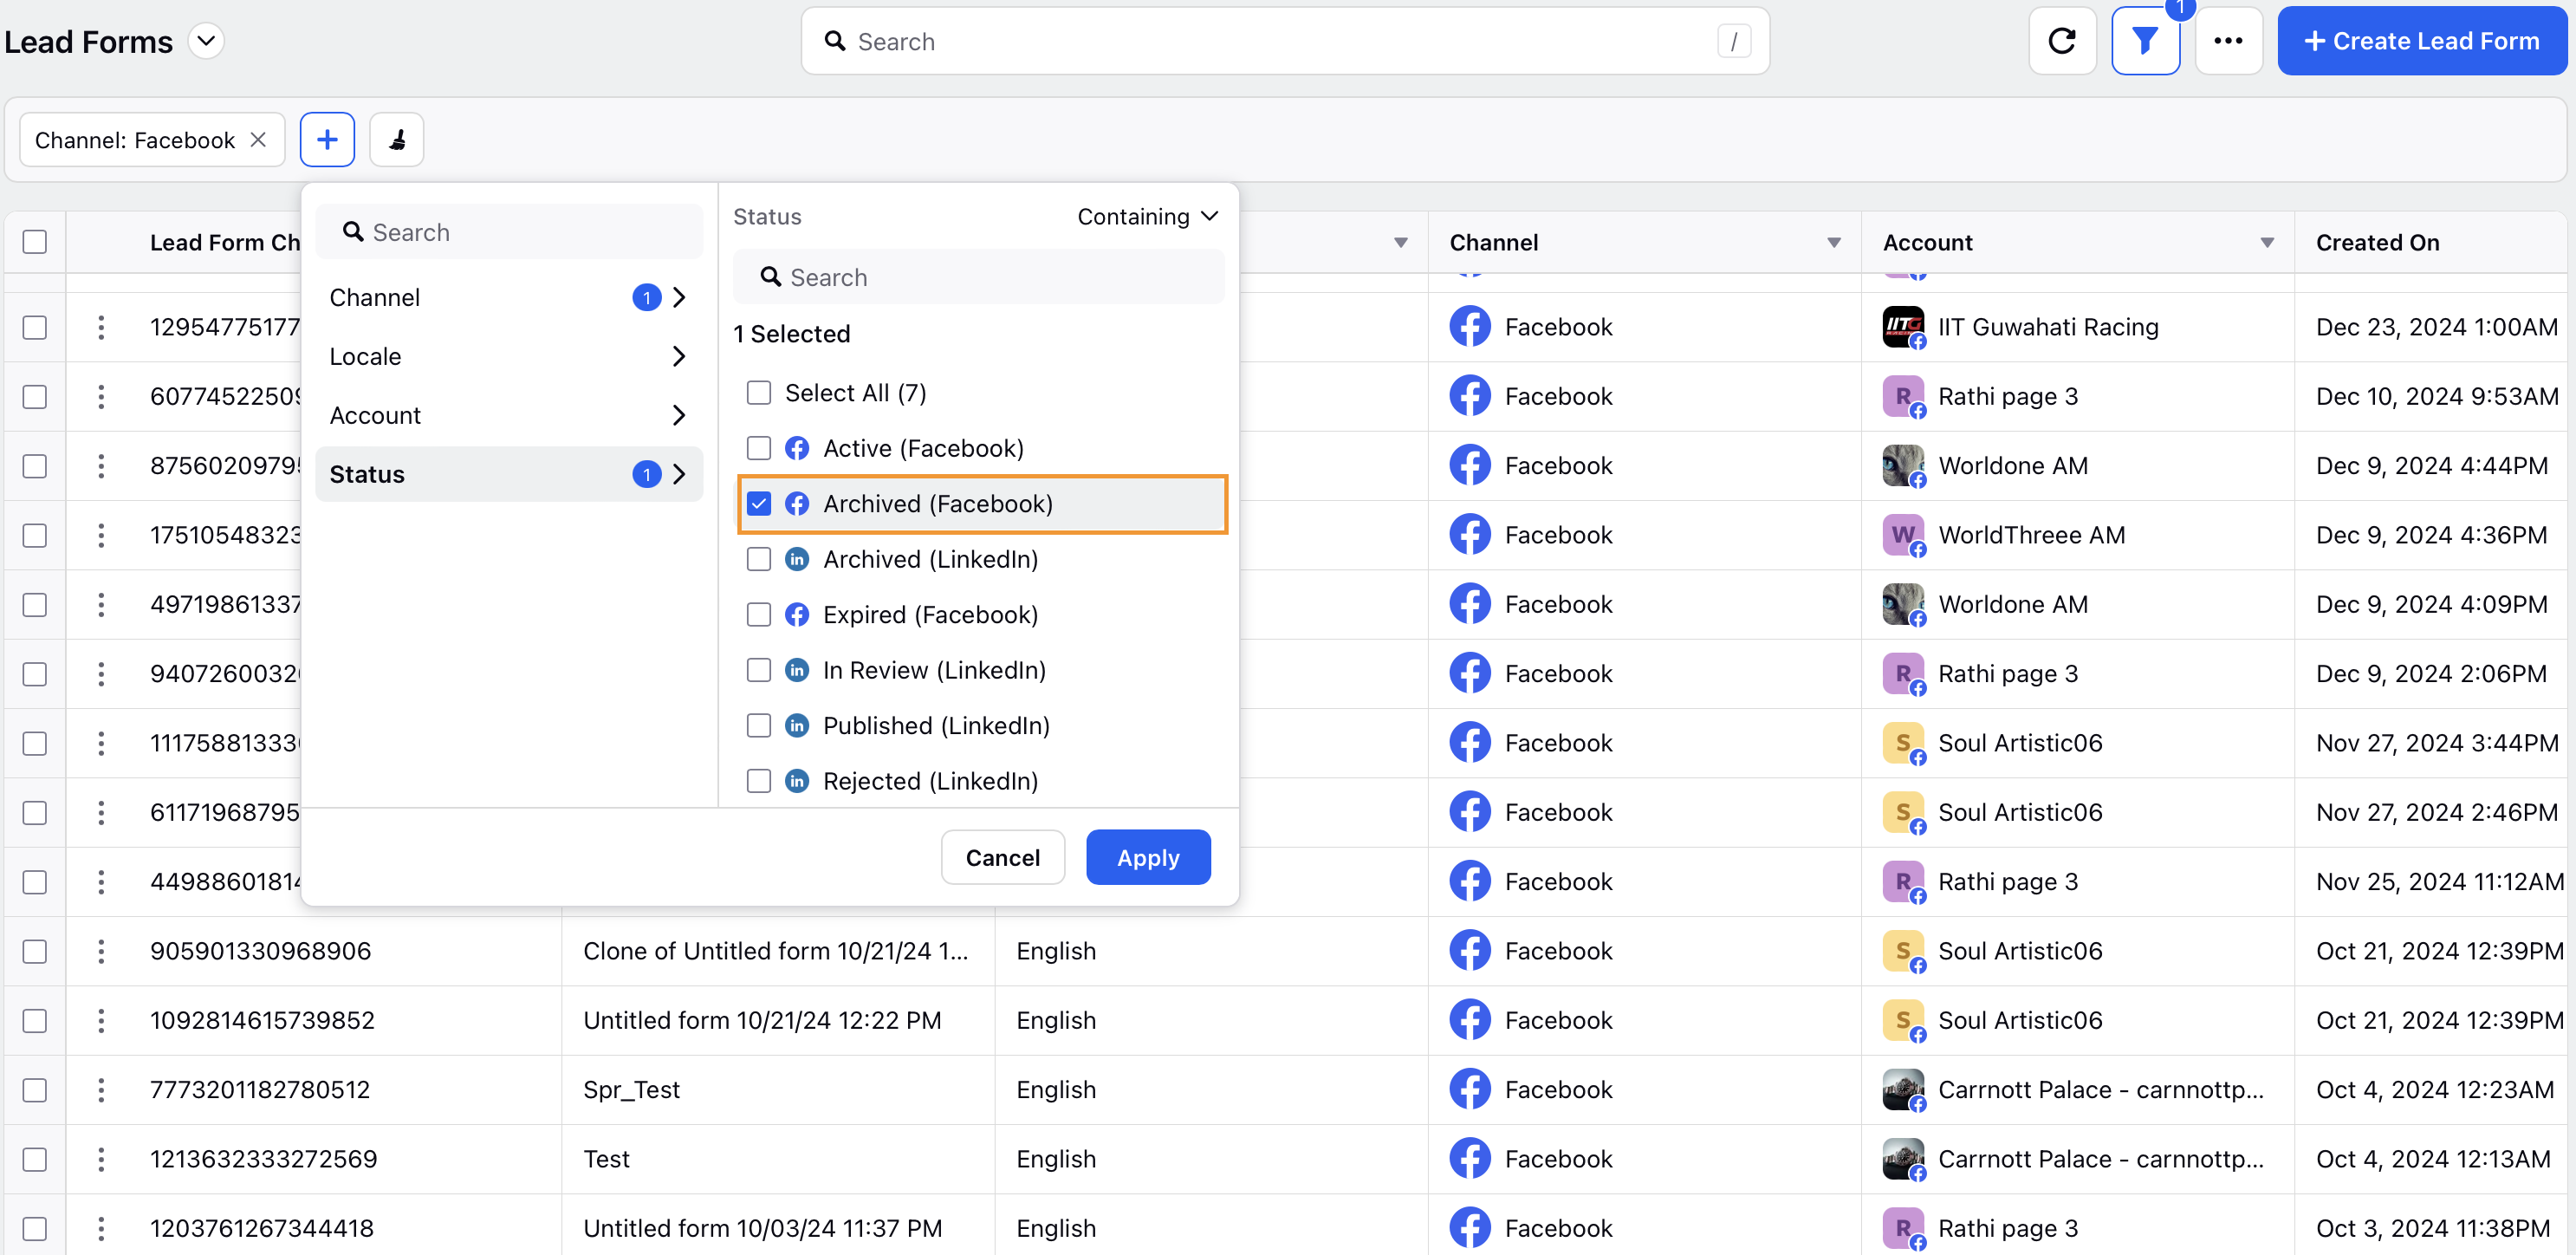
Select the Status filter and choose the Archived (Facebook) filter value to view all archived Meta Lead Forms.
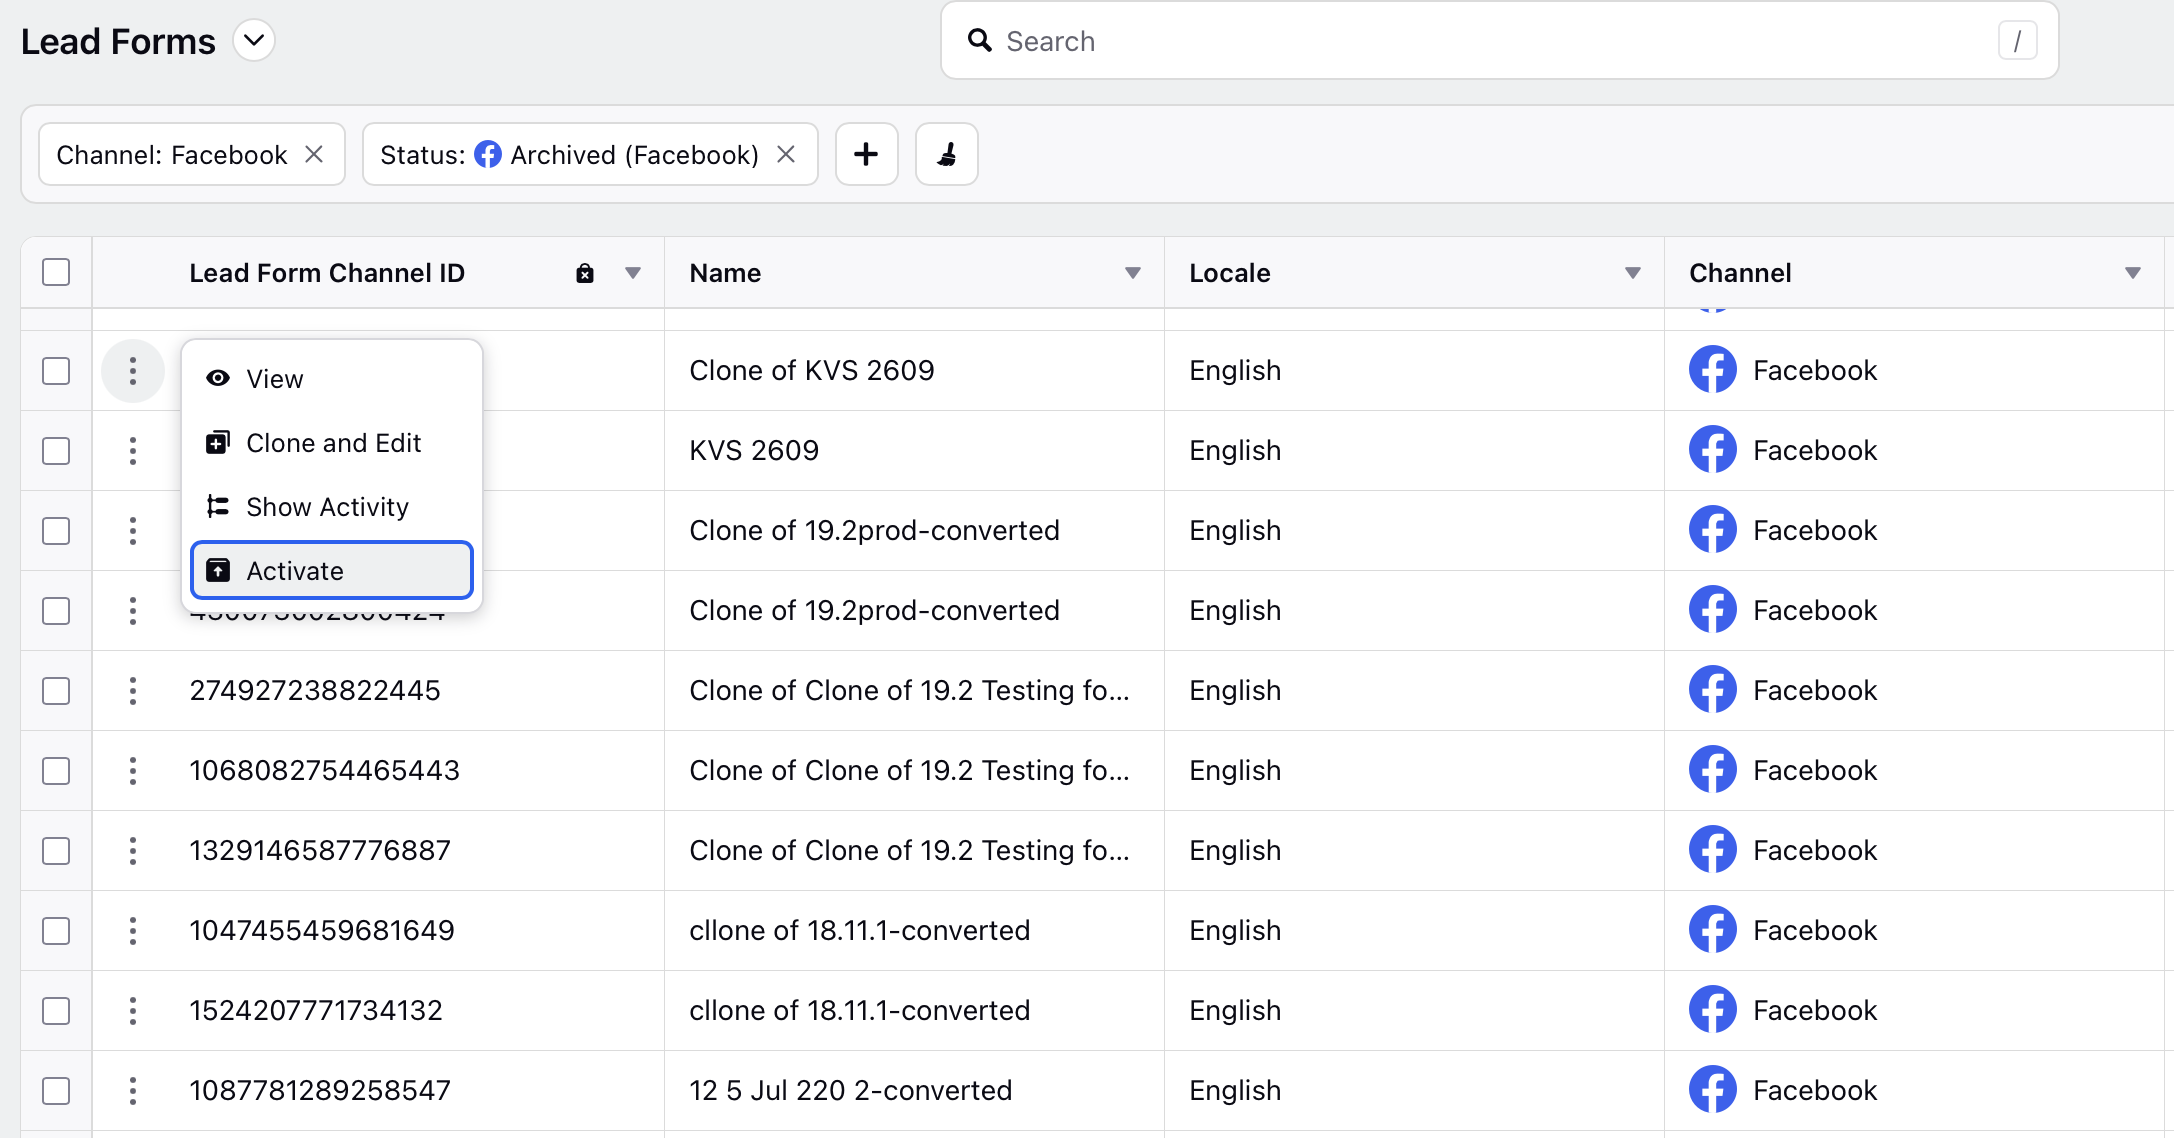
Hover over the vertical ellipsis next to the Lead Form and select Activate to unarchive the Lead Form.
To Use Facebook Lead Forms in Campaigns
Lead Generation Forms can be created and attached to new campaigns when the Lead Generation objective is selected during the campaign creation flow.
Open a new tab and navigate to Sprinklr Marketing > Advertising > Ads Composer.
Select your Facebook Ad account.
In the Campaign Details section, select Lead Generation as your Campaign Objective.
Enter the other details for your Lead Generation campaign and proceed to the Creatives section. For more information, refer to Compose Facebook & Instagram Ads.
In the Creatives section, click Add New Creative and build your creative.
From the Lead Form drop-down menu, select the lead form you want to use in your creative.
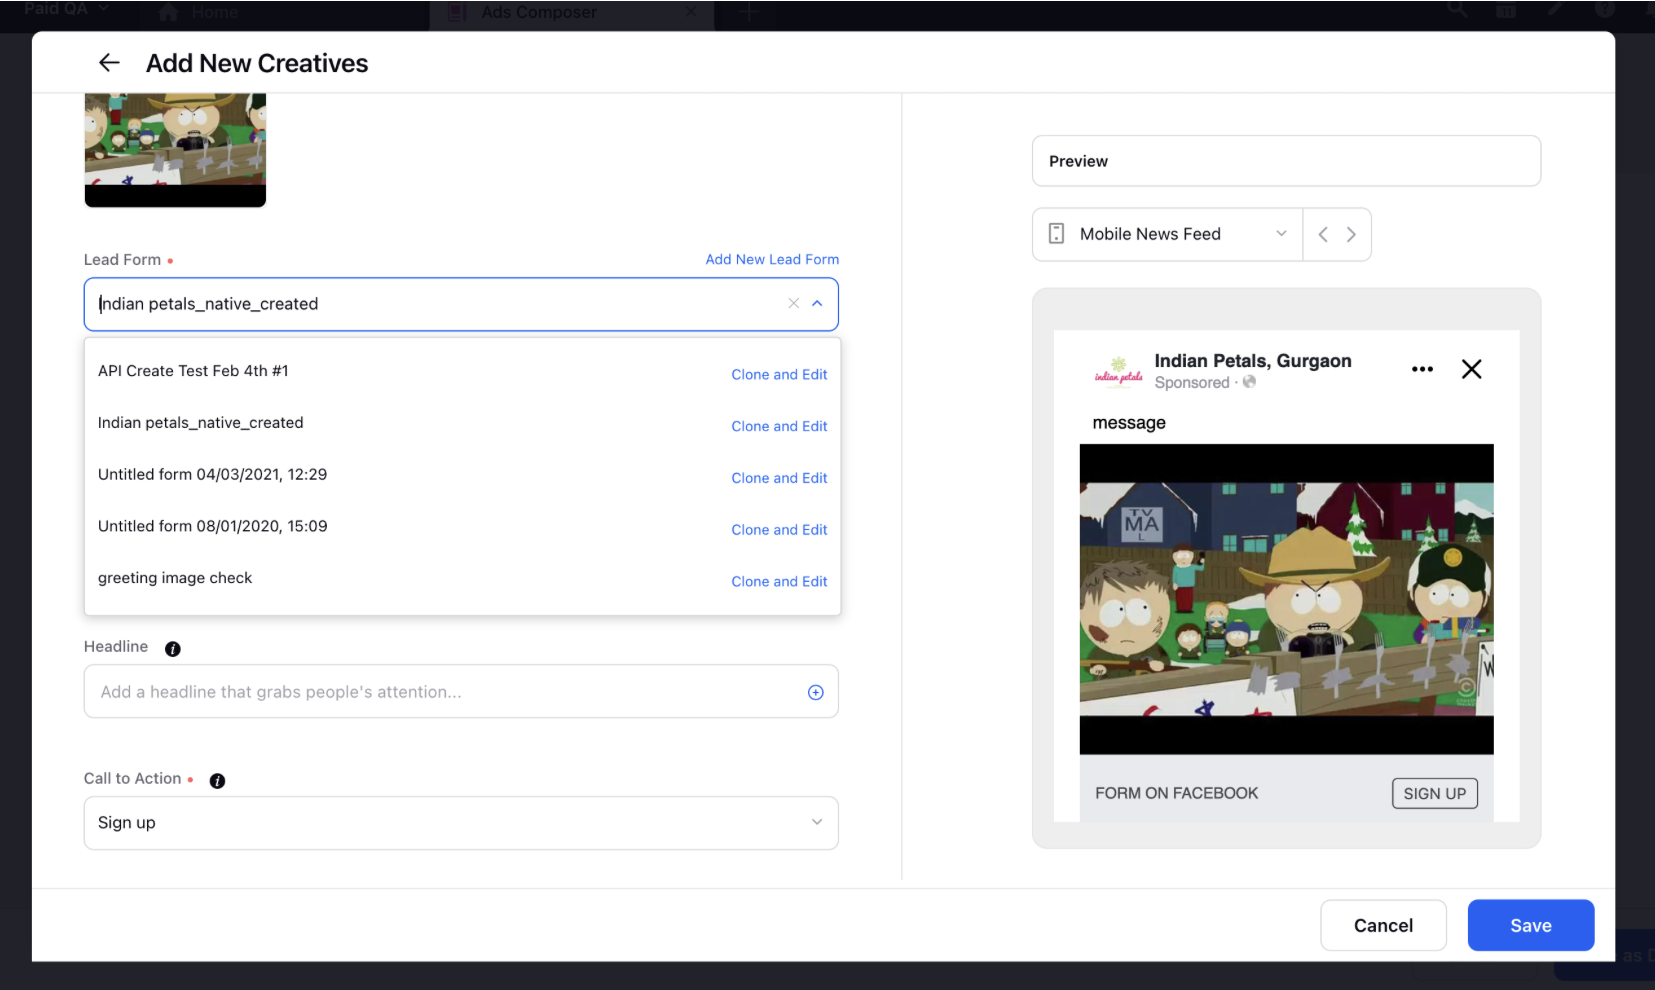
After you have completed, click Save in the bottom-right corner and proceed to publish your campaign.
To Export Leads
You can download leads generated from your Facebook and LinkedIn lead generation campaigns.
Open a new tab and navigate to Sprinklr Marketing > Advertising > Tools & Settings.
Select Lead Forms within Basic Settings.
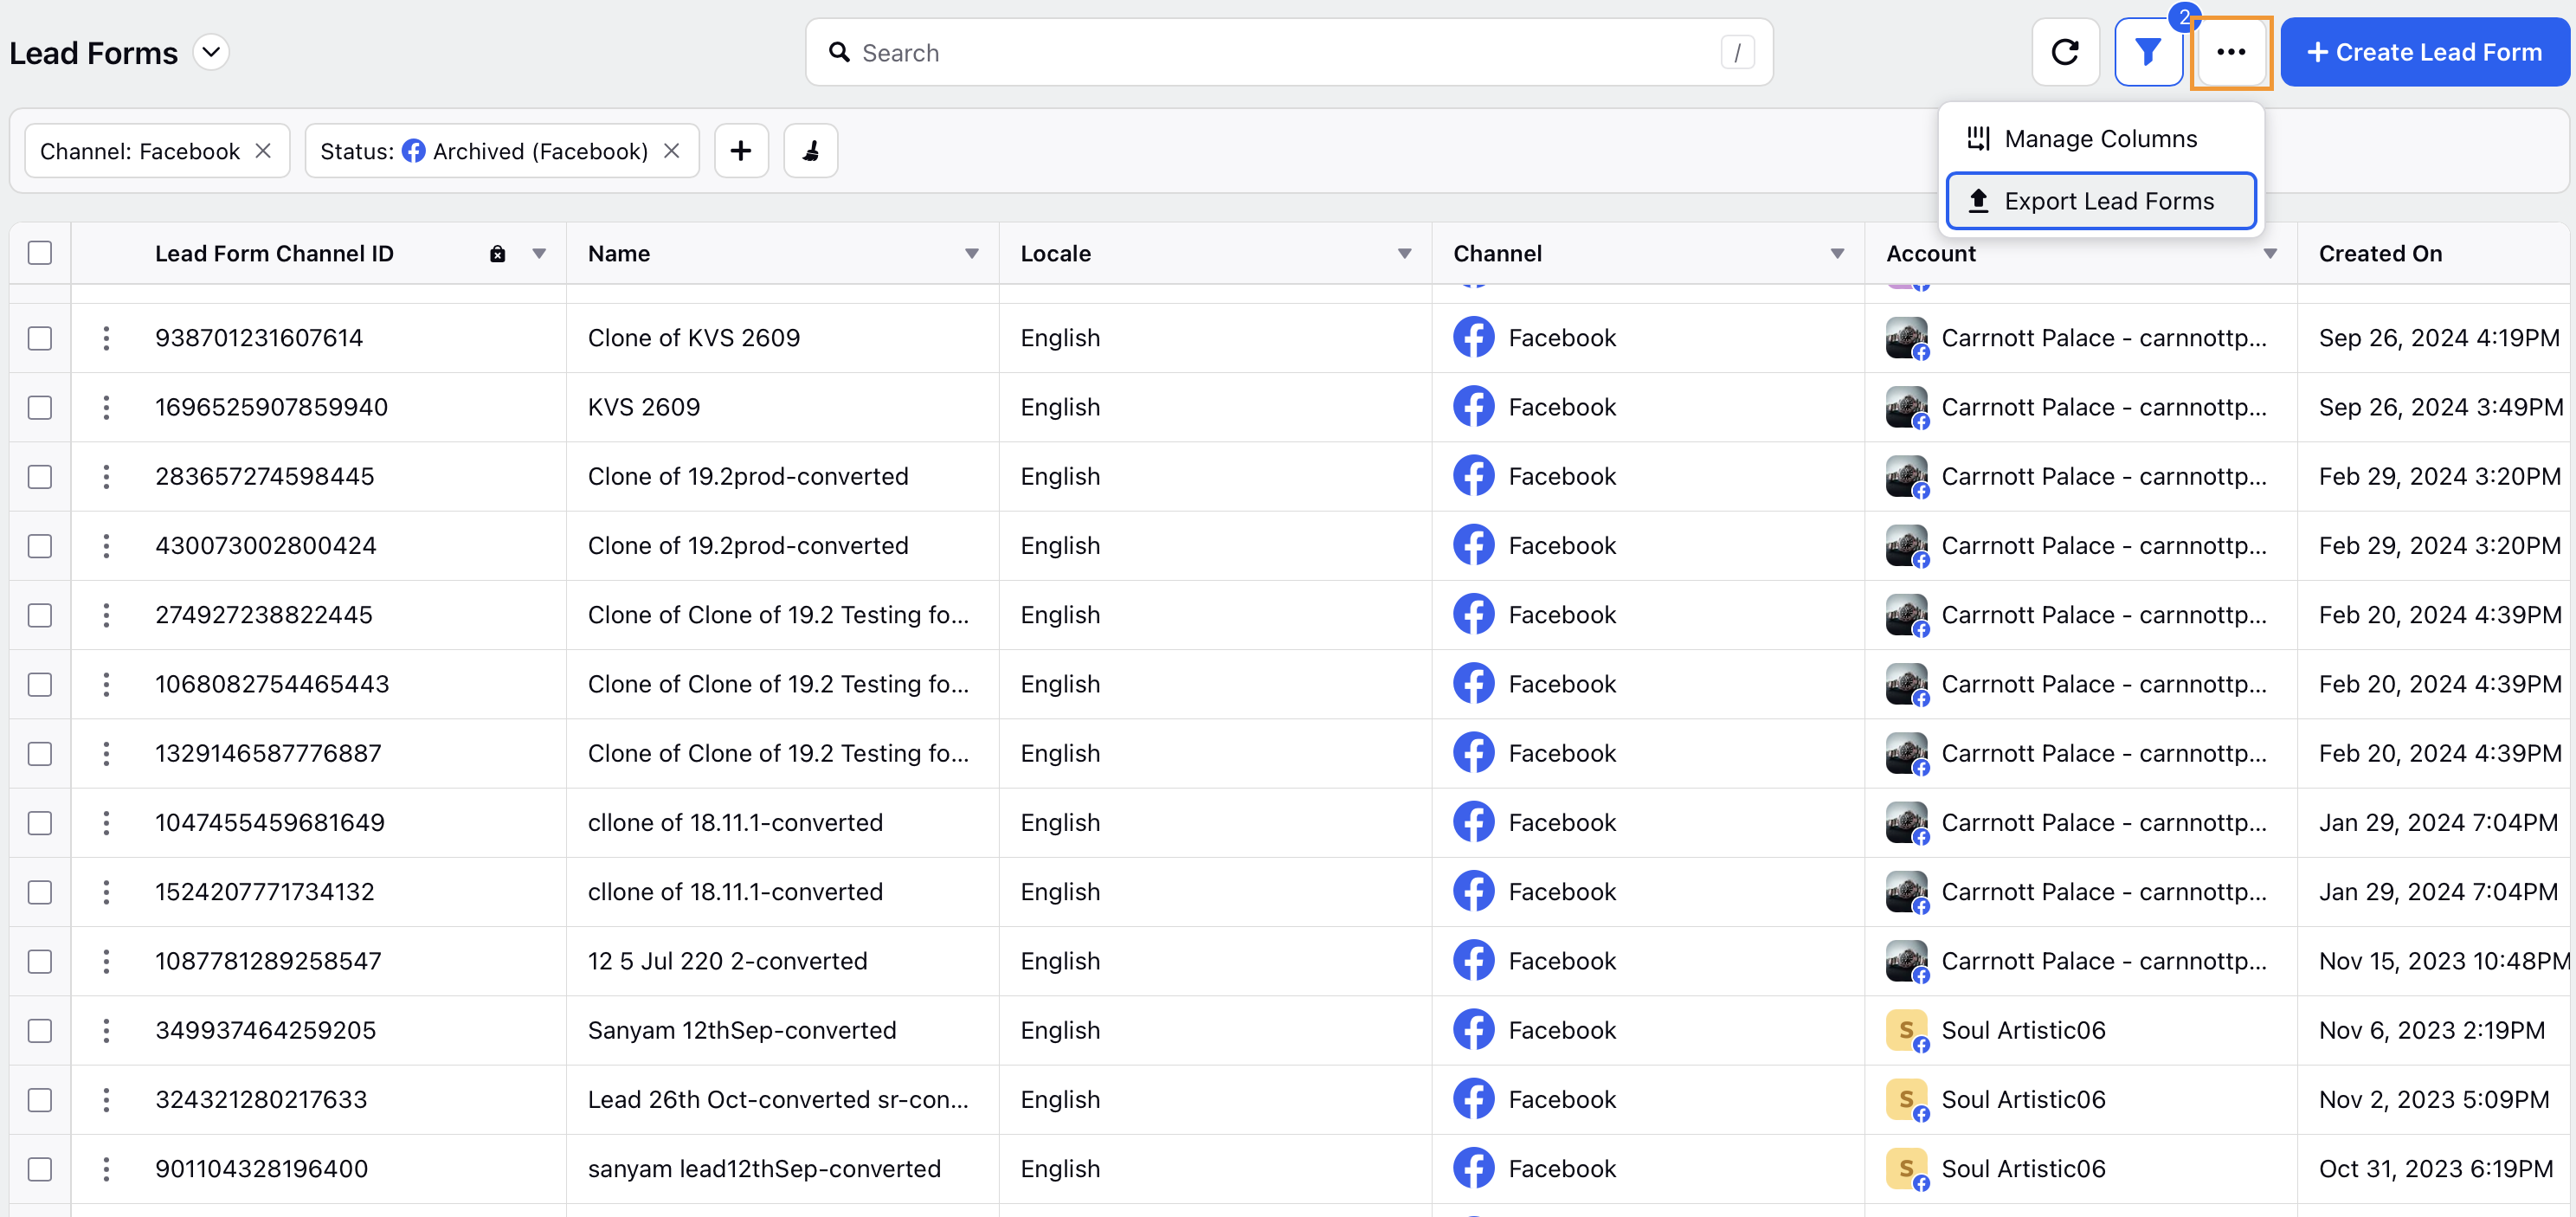
Click the ellipsis (...) in the top right corner and select Export Lead Forms.
On the Export Lead Forms screen, select the desired date range from the Download leads for drop-down menu.
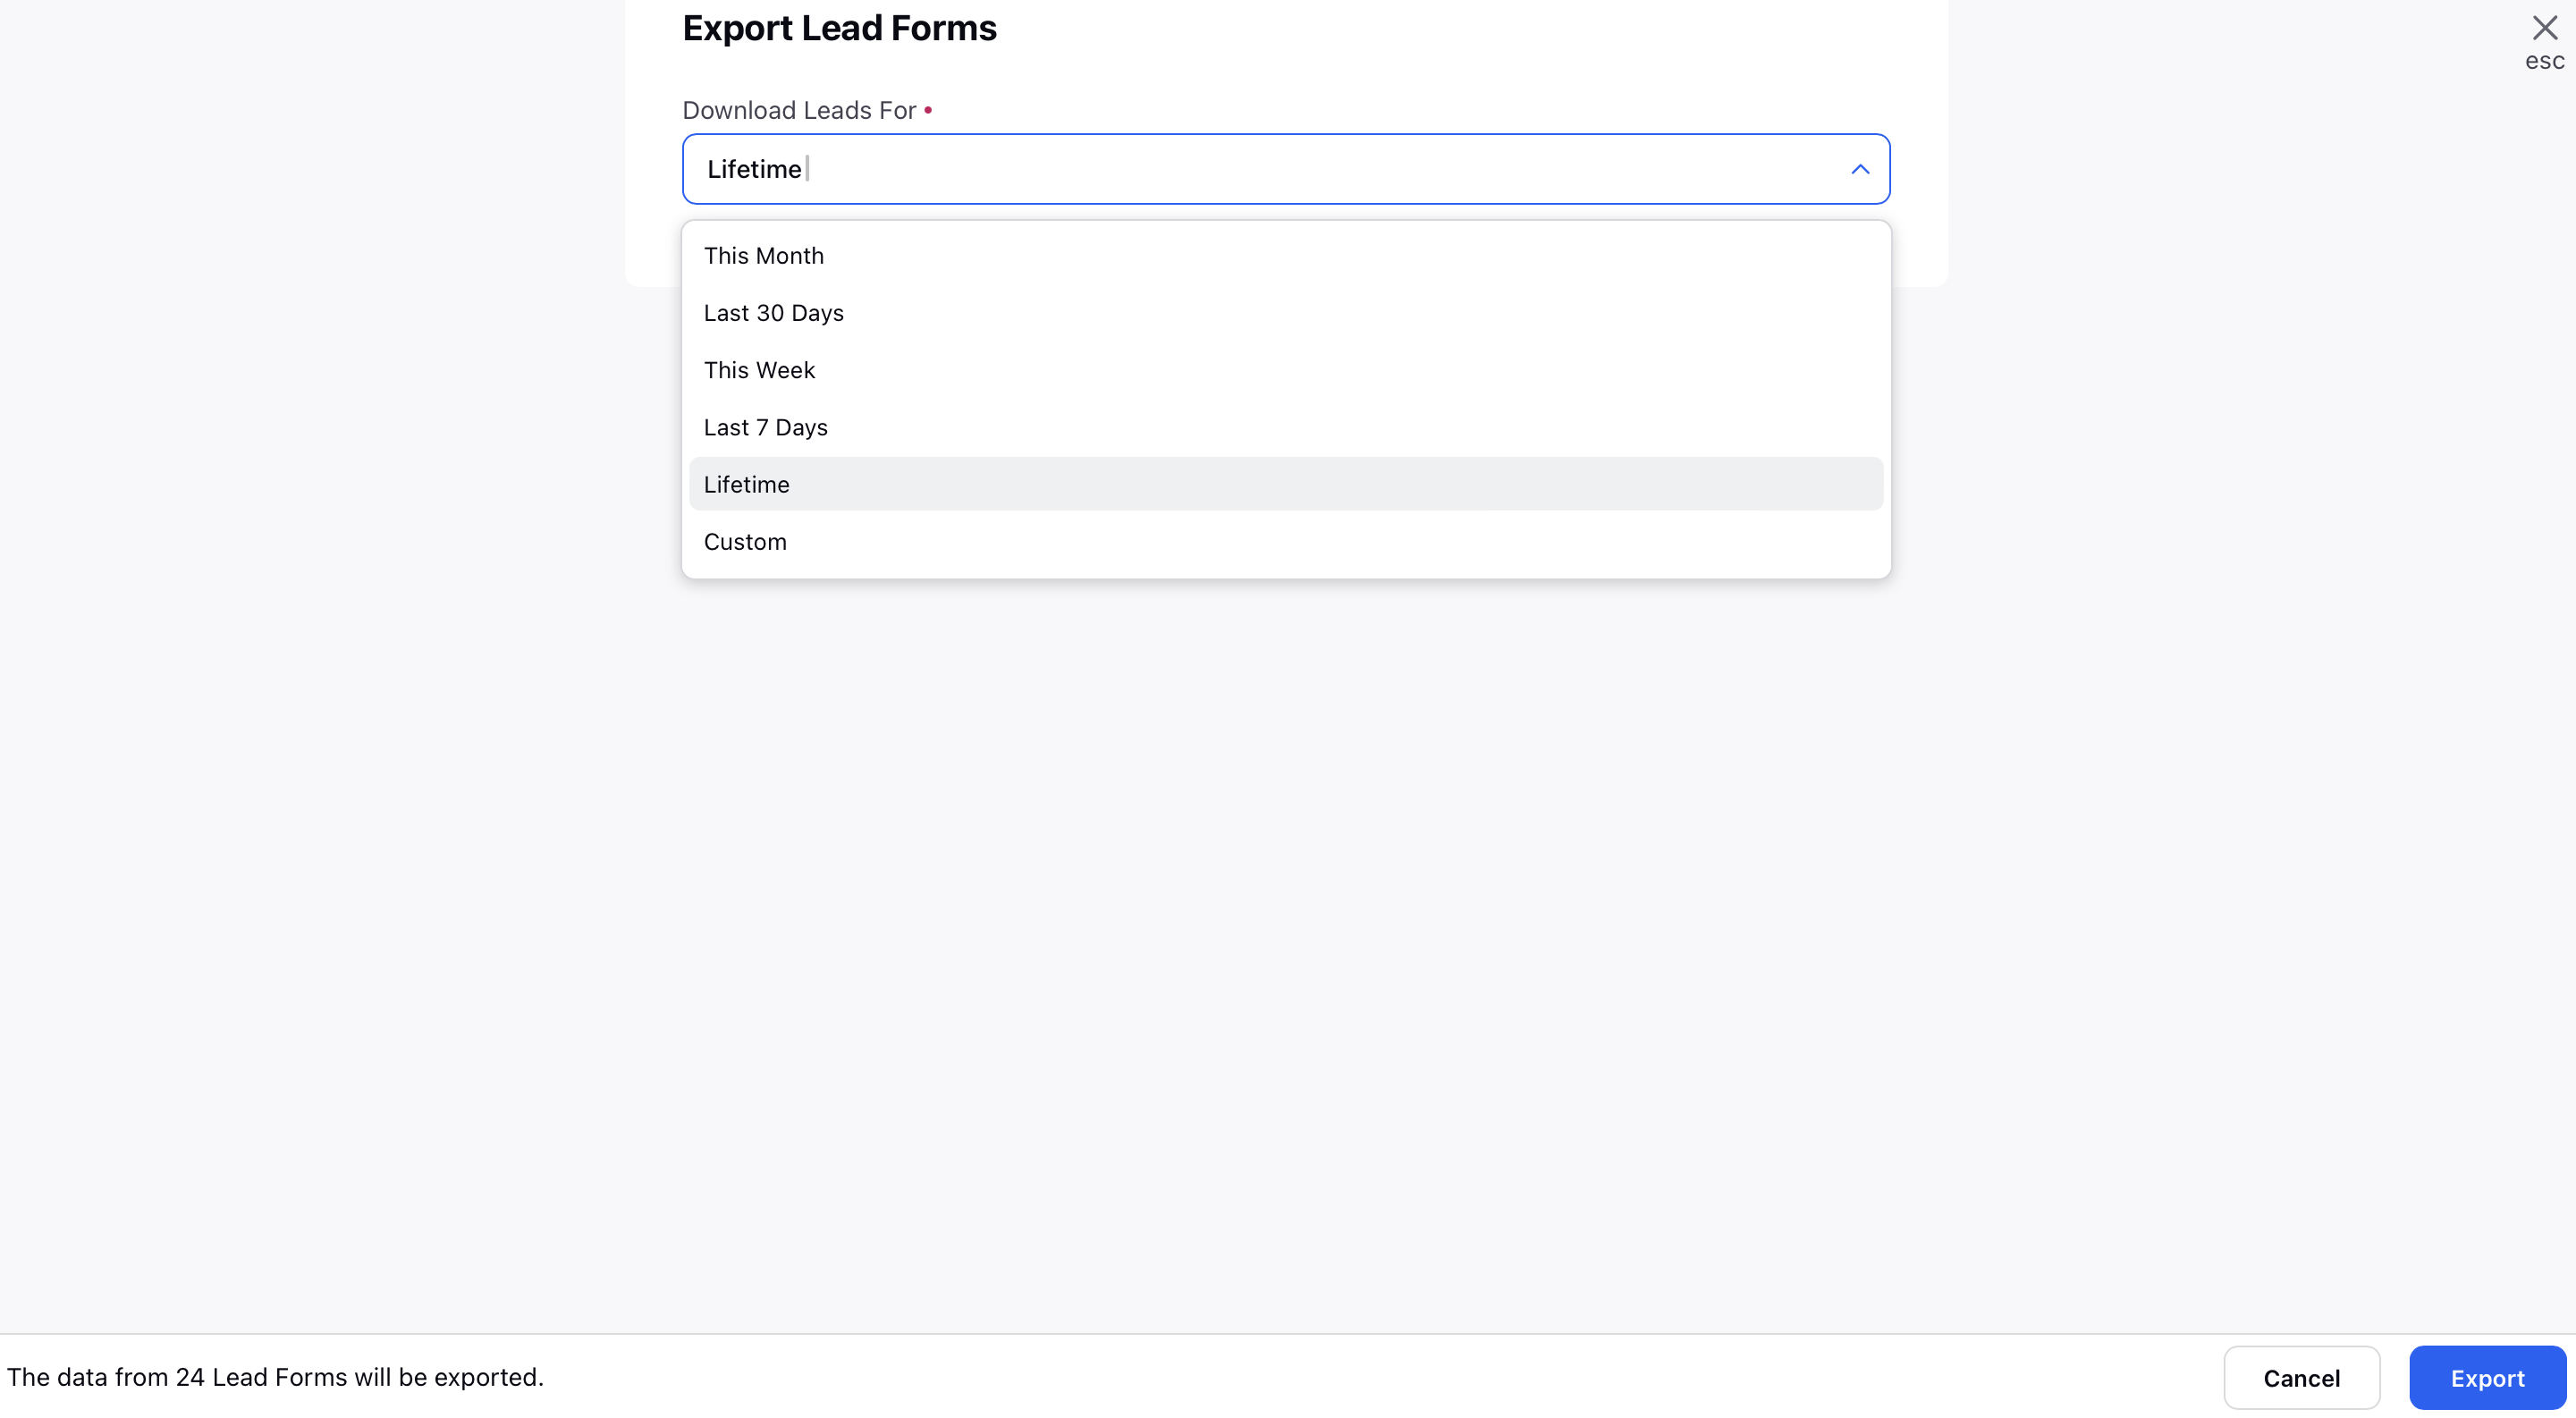
Click Export to export the leads. A notification will populate once the leads are ready to be download in a spreadsheet.