Audit via Third Pane
Updated
To audit agents via the Case or Message third pane, first associate the desired checklist with cases and messages using the Rule Engine.
You can define conditions in the rule or create a macro using the rule to apply it to the relevant cases and messages. Once the checklist is associated, navigate to the third pane to initiate the audit process.
![]() Note: Access to this feature is controlled by DP - WORKFLOW_AUDIT_CHECKLIST_RESPONSES_ENABLED dynamic property. To enable this feature in your environment, reach out to your Success Manager. Alternatively, you can submit a request at tickets@sprinklr.com.
Note: Access to this feature is controlled by DP - WORKFLOW_AUDIT_CHECKLIST_RESPONSES_ENABLED dynamic property. To enable this feature in your environment, reach out to your Success Manager. Alternatively, you can submit a request at tickets@sprinklr.com.
![]() Enablement Note: You can manage the visibility of the Audit tab using the 'Audit Checklist Responses: View' permission. Without this permission, all users get access to the Audit tab and can view all audits. Work with your Success Manager to enable this permission in your environment.
Enablement Note: You can manage the visibility of the Audit tab using the 'Audit Checklist Responses: View' permission. Without this permission, all users get access to the Audit tab and can view all audits. Work with your Success Manager to enable this permission in your environment.
To Associate Audit Checklists to Messages/Cases via Rule Engine
Create an inbound or queue rule for messages and a case update rule for cases.
Specify the desired conditions that trigger the deployment of the rule. These conditions could be based on specific accounts, social channels, or any other relevant criteria to effectively filter and identify messages/cases for associating checklists.
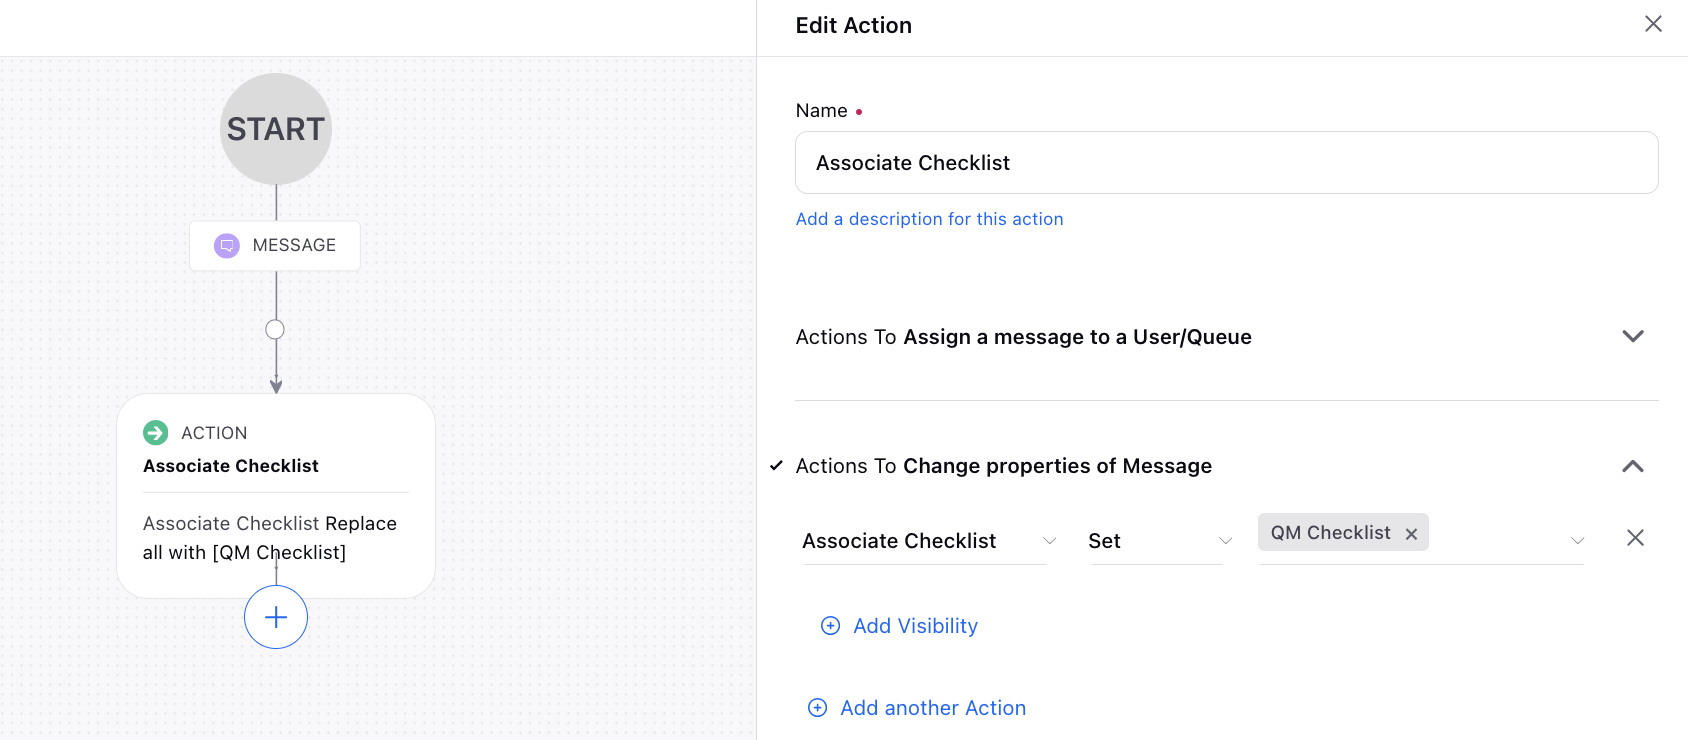
Click + to add an action.
For inbound rules, under Actions to Change properties of Message, select the Associate Checklist from the drop-down menu and pick the desired checklist for the messages.
For case update rules, under Actions to Universal Case, choose the Associate Checklist action and select the desired checklist to associate with the cases.

Click Save in the bottom right corner to save the rule.
To Perform Audit of Conversations using Associated Audit Checklists
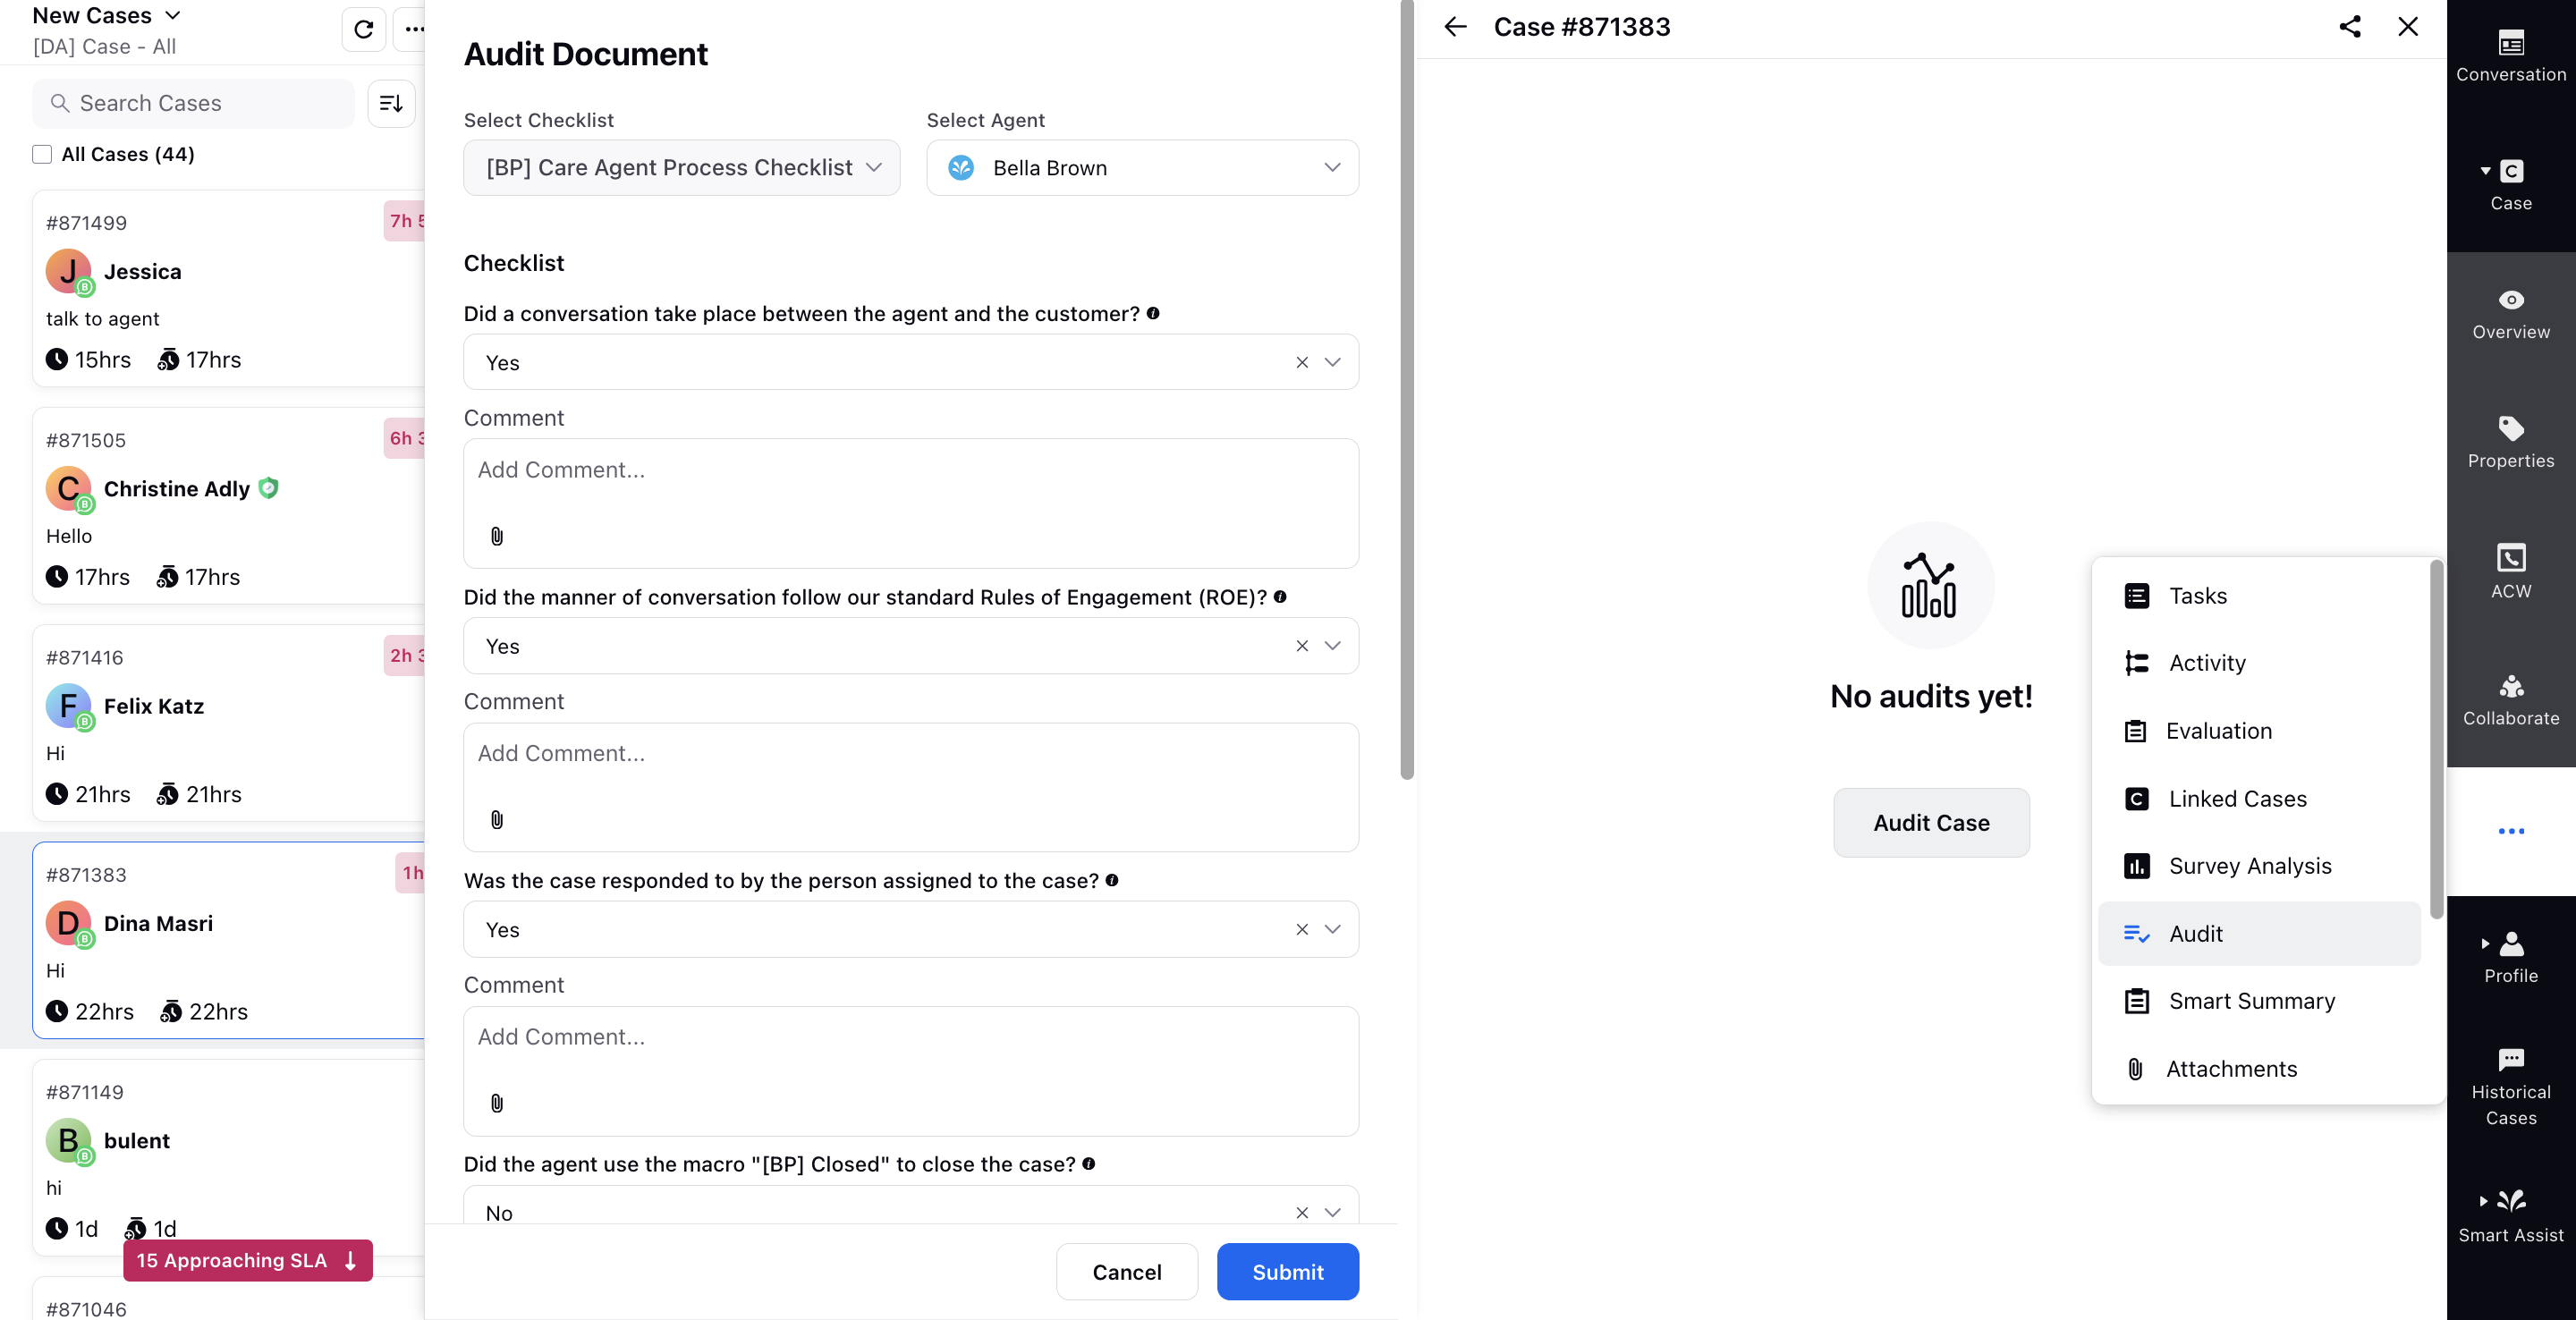
Open the desired Case or Message by navigating to the third pane from Engagement Dashboards, Agent Console, or Care Console.
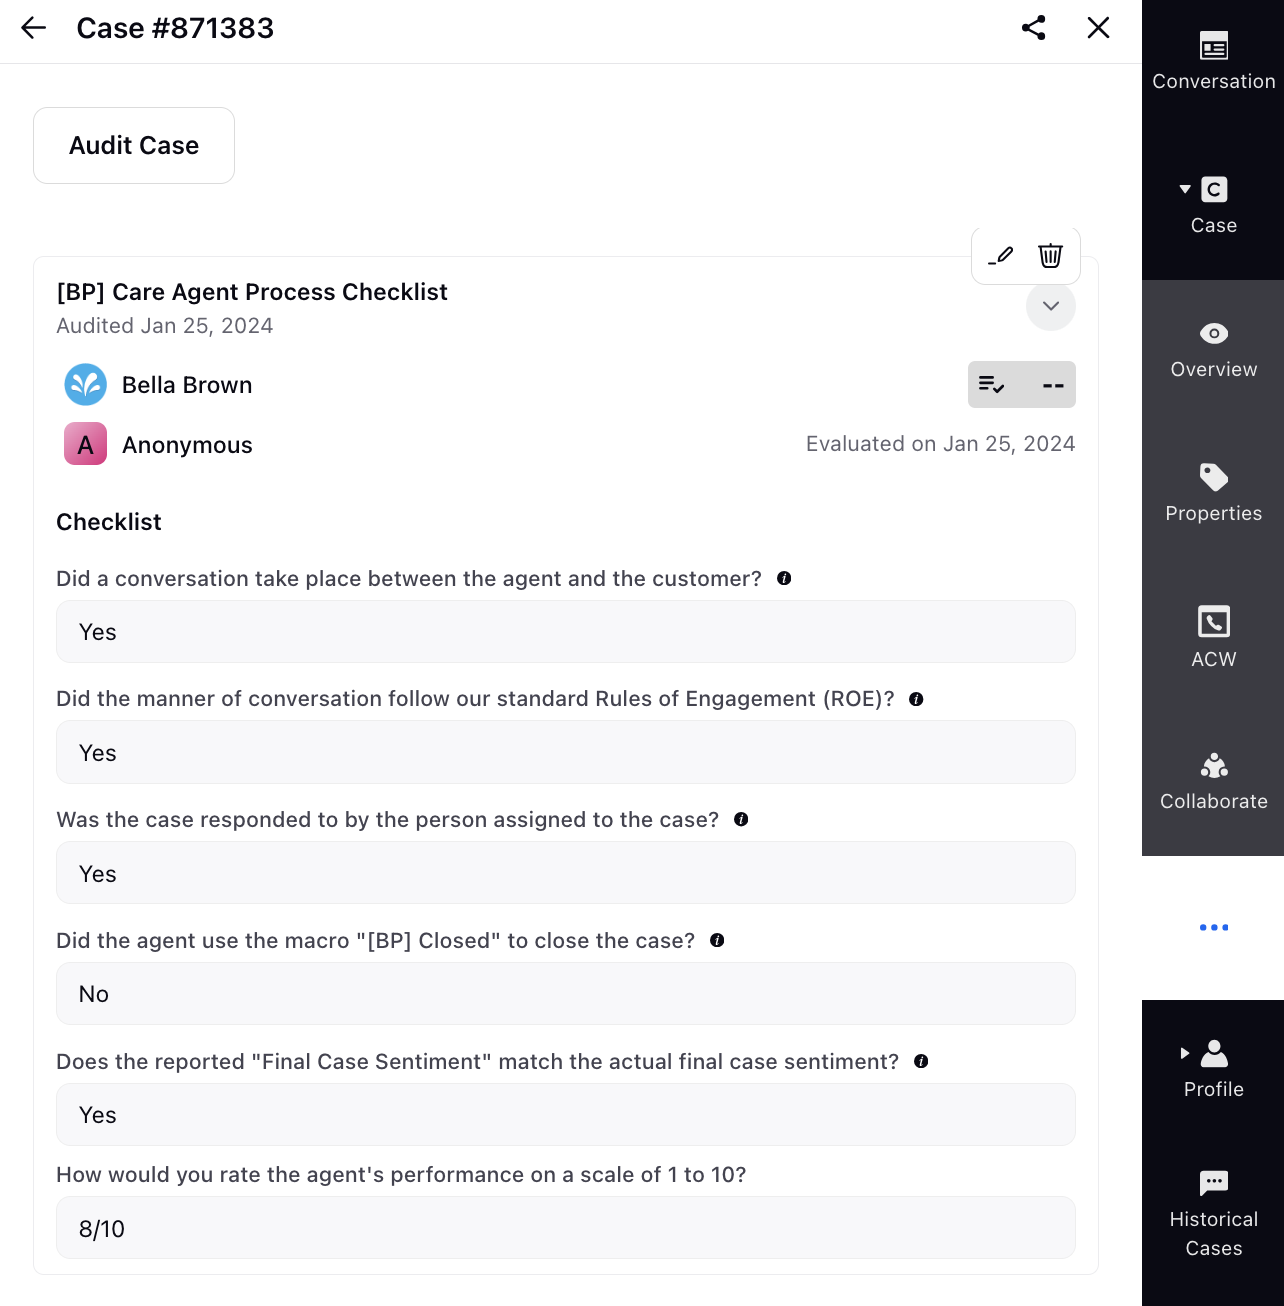
Within Case or Message, select the Audit tab. Click Audit Case, and the Audit Document pane appears on the left.
Choose the specific agent and checklist if there are multiple checklists associated with the case or message.
Enter the necessary auditing details in the pre-configured audit checklist form. Additionally, you can provide comments for each checklist item in the designated Comment field.
Once all details and comments are entered, click Submit to complete the audit process.
After submission, you can review the submitted responses and make edits or delete them as required.