Getting Started with Reward Engine
Updated
This article provides a step-by-step guide to set up the Reward Engine on the Advocacy platform. From enabling gamification to making the Reward Engine visible to you, this guide ensures admins can configure the feature effectively and deliver a seamless experience.
Pre-requisites Required to Set Up the Reward Engine
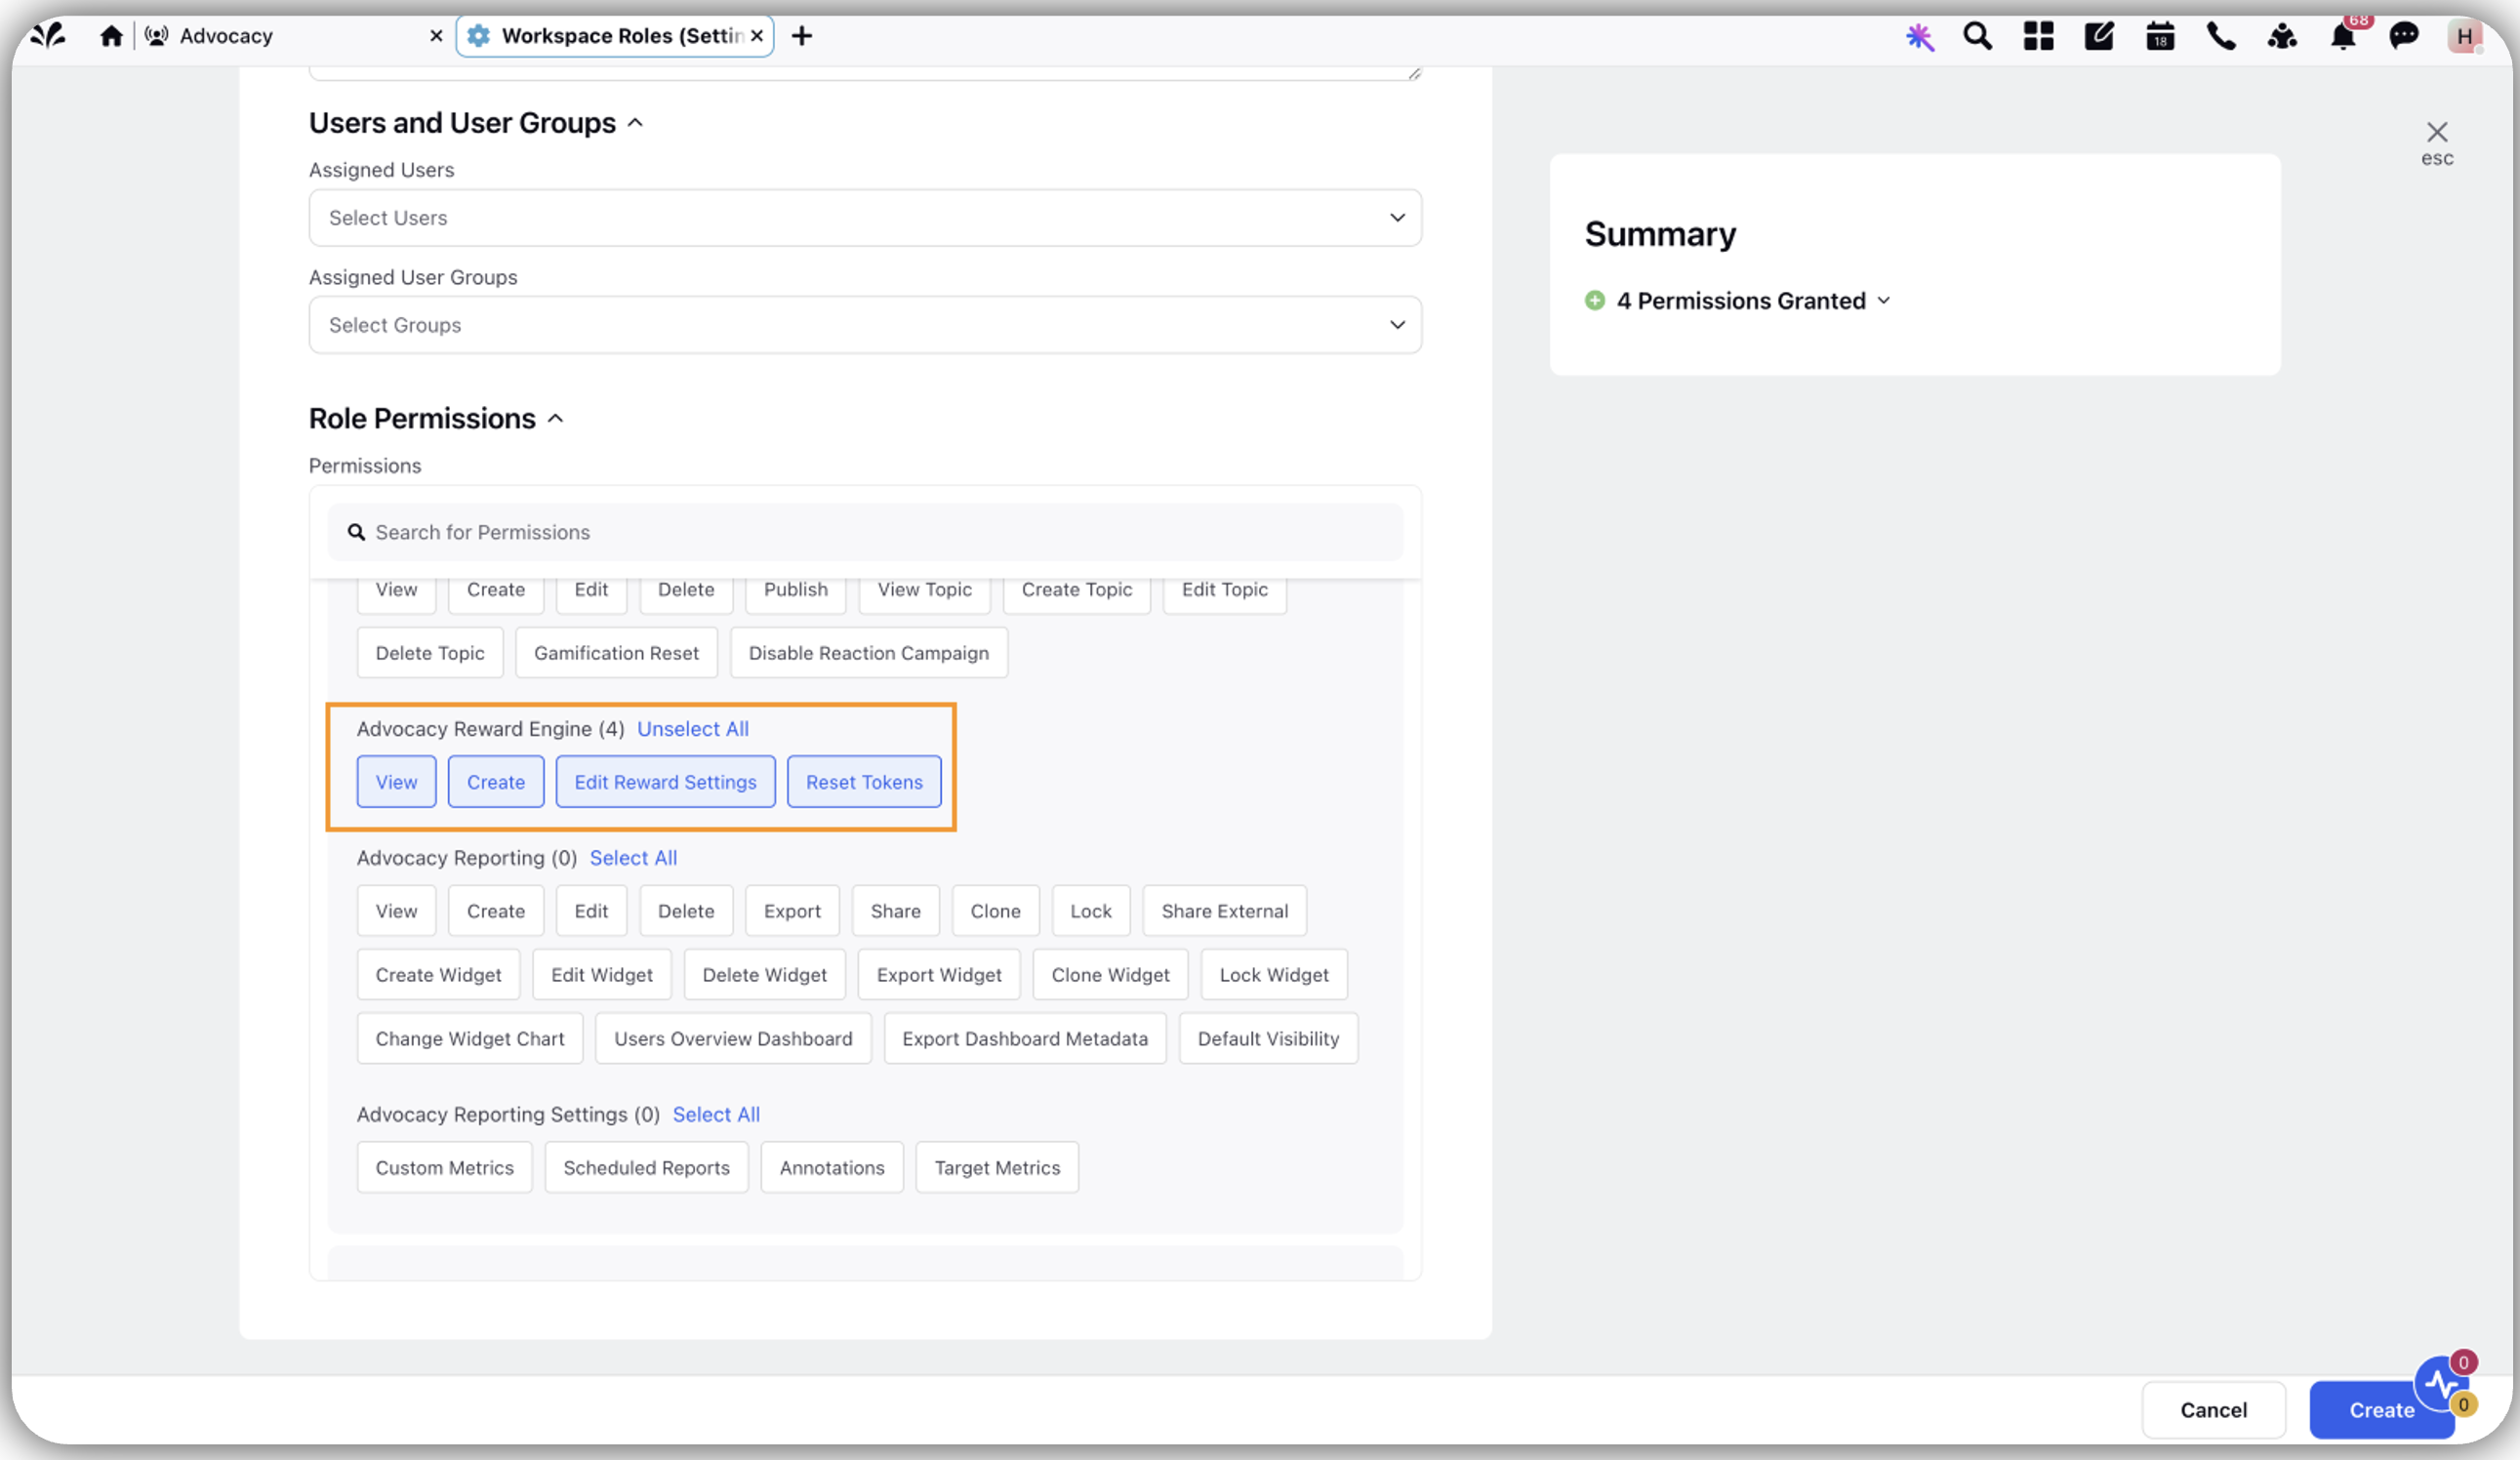
To set up the Reward Engine, admins must have the following permissions:
Permissions required to set up Reward Engine:
Create: Allows admins to create rewards and access the +Create Reward section.
Reset Tokens: Allows admins to perform a token reset, resetting all users’ tokens without affecting the token expiry settings.
View: Provides admins the ability to view the Reward Engine section.
Edit Reward Settings: Grants admins full access to edit all settings within the Reward Engine configuration, including setting up points-to-token conversion and adjusting other configuration fields.
Note: Admins can make edits if they have permission to edit the Edit Reward Settings. However, admins can only view the Reward Engine Section if they have View permissions.

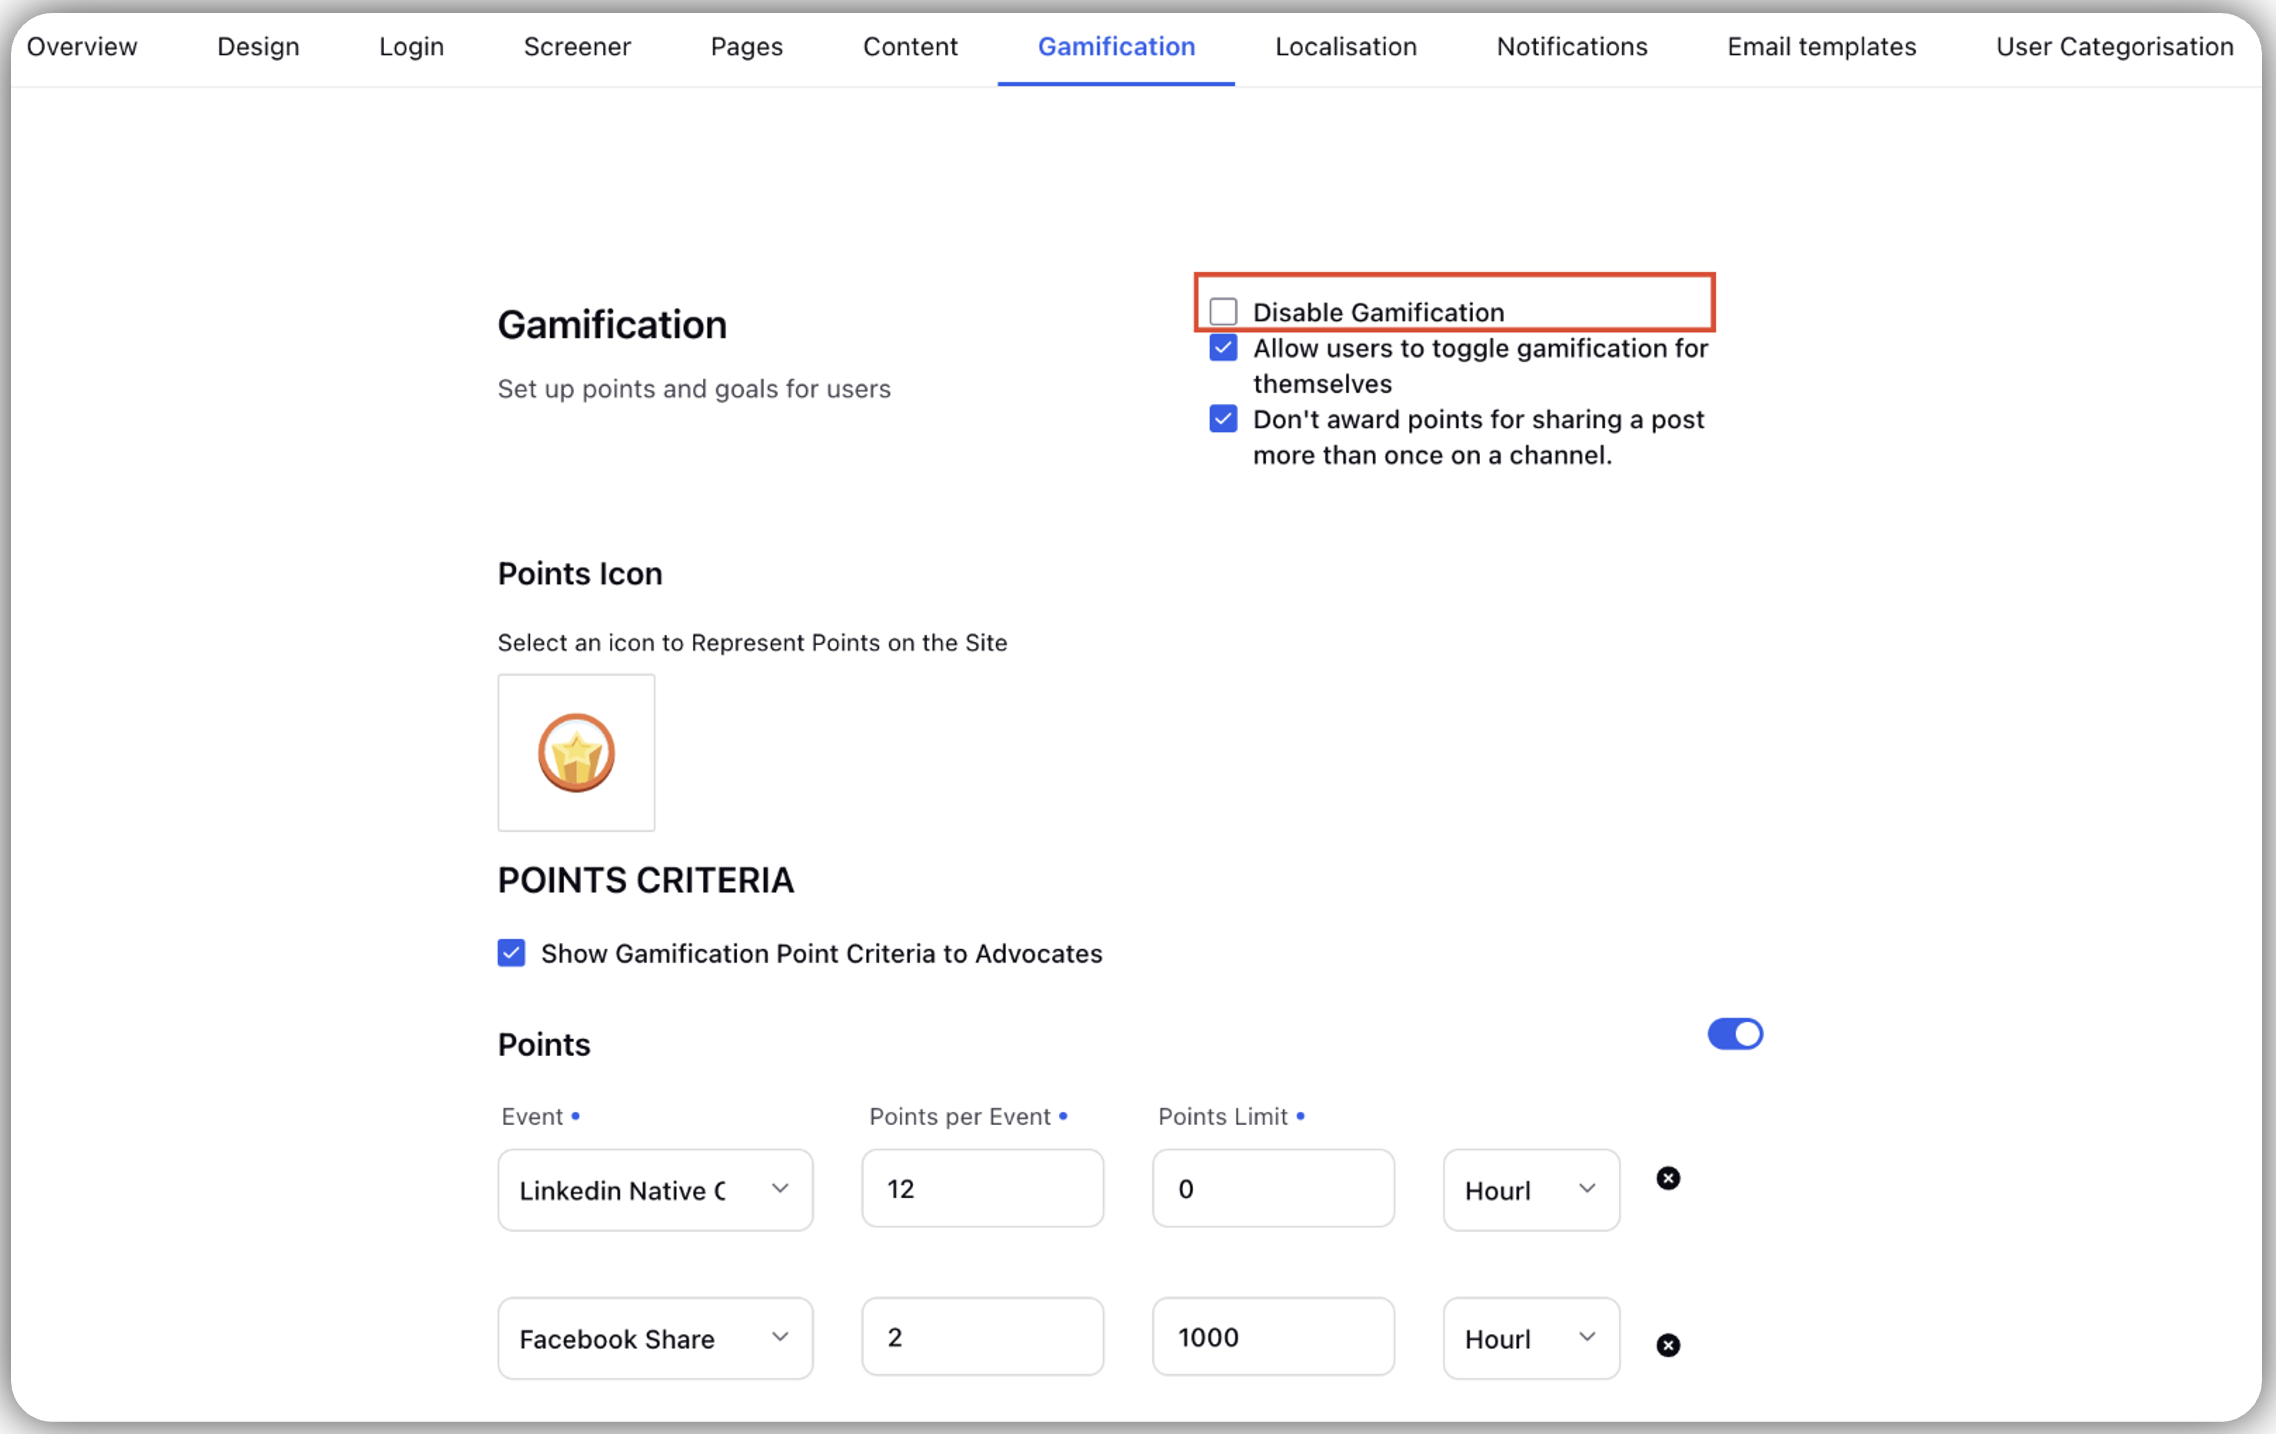
Gamification must be enabled:
To enable the Reward Engine, please ensure Gamification is enabled on the site through the Admin Console.
Note: If you have opted out of gamification or if it has been disabled by an admin, you will not see the Reward Engine section in the menu items on the site.

Enable the Reward Engine
Enabling the Reward Engine ensures that rewards are visible to you and points are converted to tokens based on your configuration.
Steps to Enable the Reward Engine
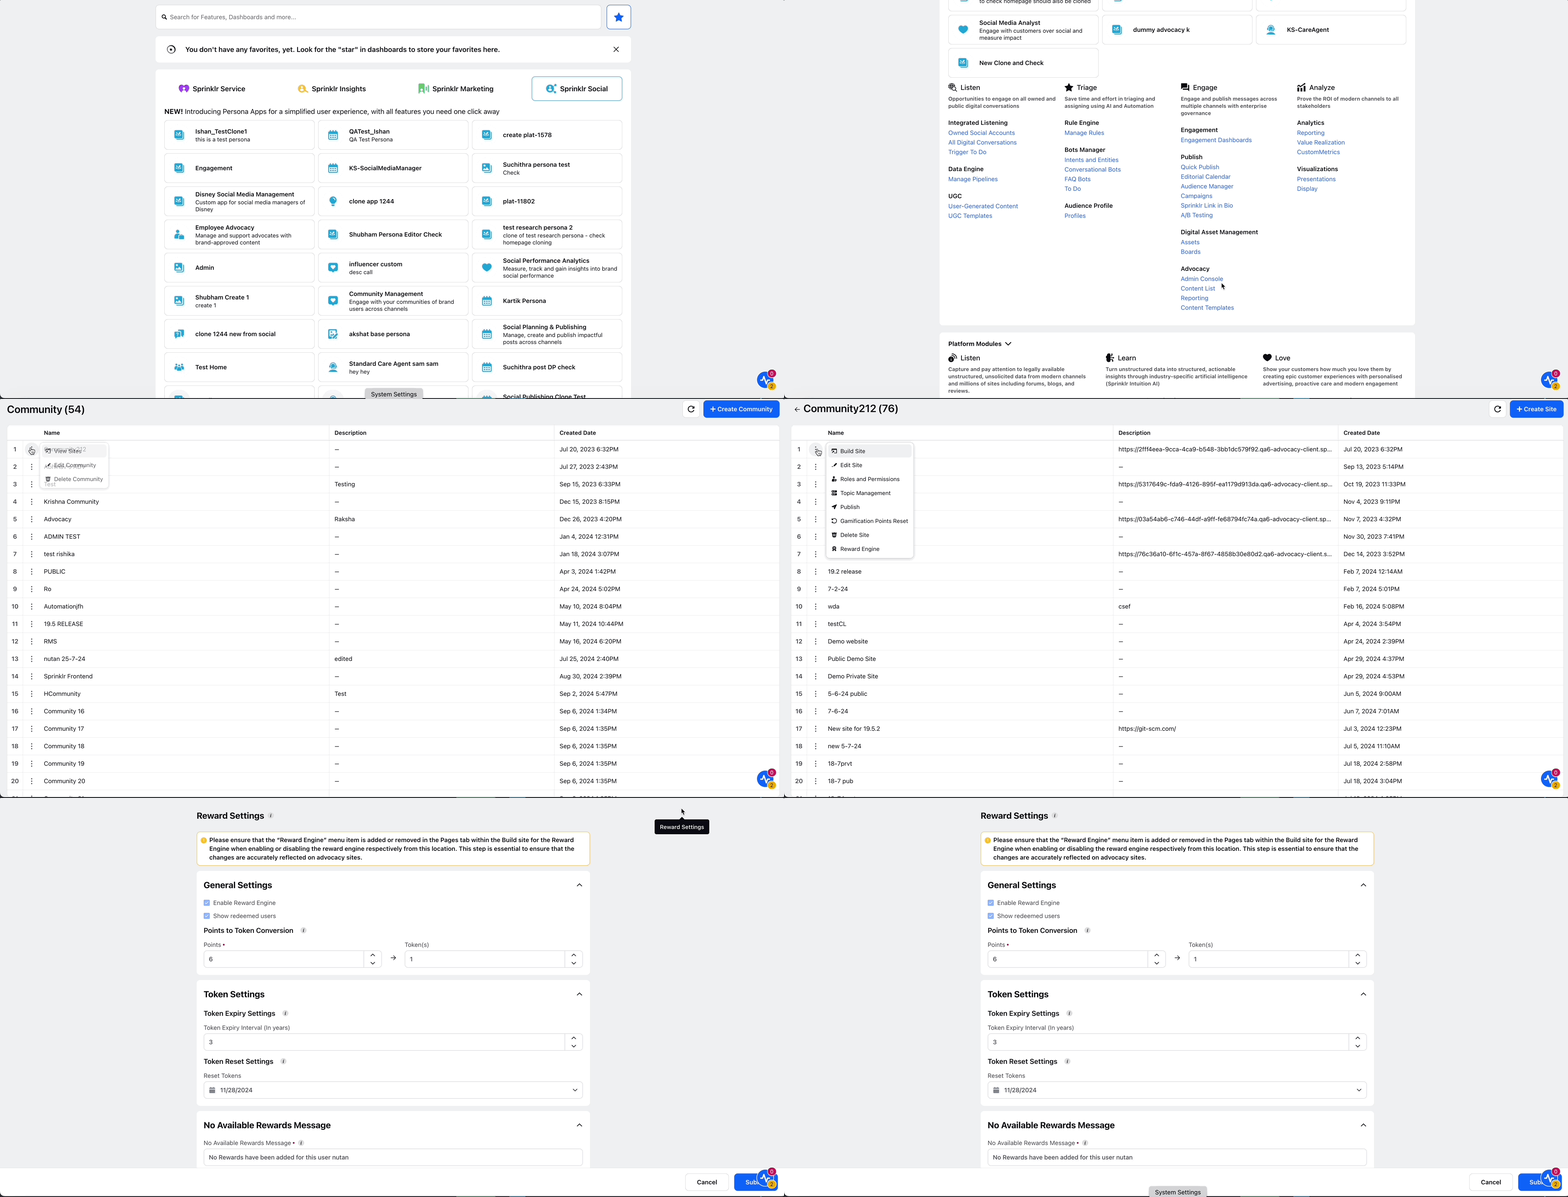
Go to New Page (+) > Sprinklr Social > Admin Console(under Advocacy under Engage).
Click Vertical Ellipses (3 dots) against required Community's Name.
Click View Sites.
Click Vertical Ellipses (3 dots) against required Site Name.
Click Reward Engine.
Locate and Click Reward Settings (Gear icon on the top right corner).
Go to General Settings and check the box against Enable Reward Engine to enable reward engine and vice-versa.
Note: The Reward Engine can only be enabled when all mandatory fields are filled.

Learn how Reward Engine works once enabled
Once you enable the system, it will start converting points to tokens from the day the Reward Engine is activated. Any points you accumulated prior to activation will not be converted to tokens.
Recommendation
To ensure a smooth experience, we recommend refreshing points before enabling the Reward Engine. This ensures consistency in token conversions and avoids user confusion.
Setup Reward Engine in Menu Items
To make the Reward Engine icon visible on the left rail of the site and display rewards, you need to add the Reward Engine to the menu items.
Steps to Add the Reward Engine to Menu Items
Go to New Page (+) > Sprinklr Social > Admin Console(under Advocacy under Engage).
Click Vertical Ellipses (3 dots) against required Community's Name.
Click View Sites.
Click Vertical Ellipses (3 dots) against required Site Name.
Select Build Site.

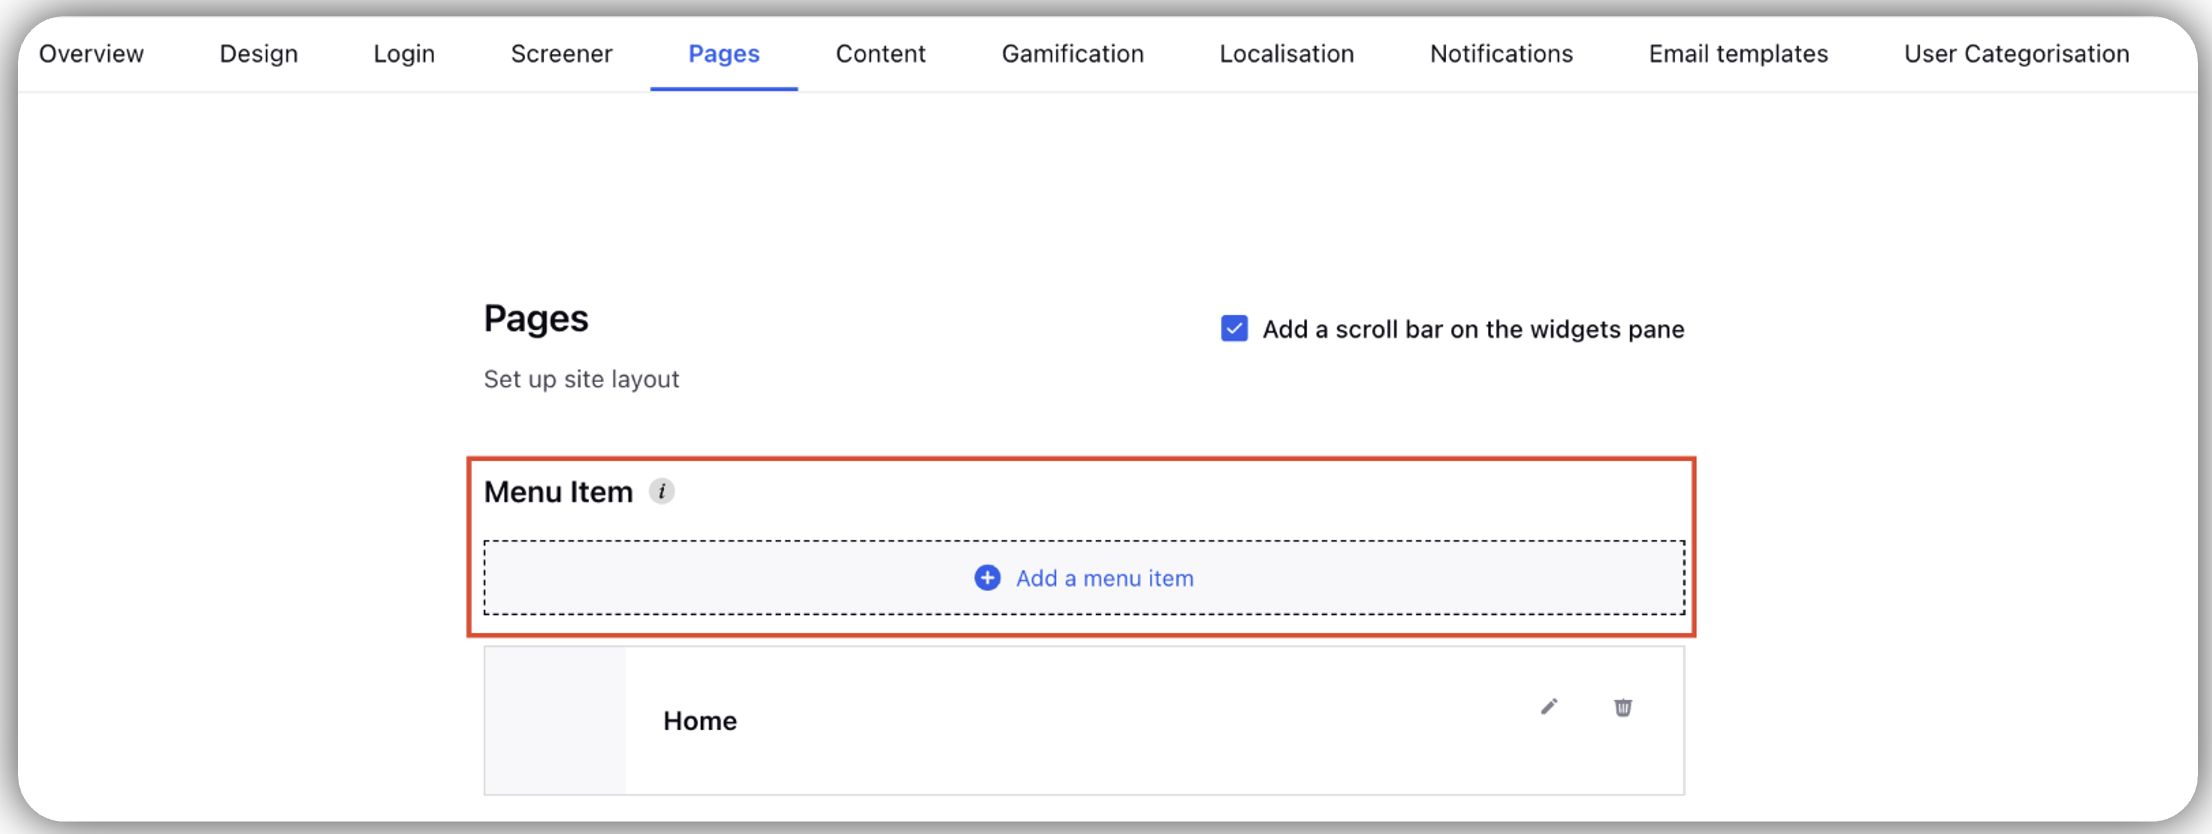
Go to Pages tab.

Click Add a menu item.
Add details to configure menu items:
Name: Enter Reward Engine name. This is the name you will see on the site.
Type: Select Reward Engine from the dropdown menu.
Reward Engine Icon cannot be customised.
Click Save.
Go back to the Vertical Ellipses (3 dots) against required Site Name.
Click Publish.


Learn how it works when configured
Once completed, the Reward Engine will appear in the menu with the name you entered in the Name field.
Note: Ensure the Reward Engine is configured and enabled before adding it to the menu to avoid user confusion.
Setup Admin Roles and Permissions
To manage rewards effectively, assign appropriate permissions to site admins:
Steps to add permissions for admin to manage rewards on advocacy site
Go to New Page (+) > Sprinklr Social > Admin Console(under Advocacy under Engage).
Click Vertical Ellipses (3 dots) against required Community's Name.
Click View Sites.
Click Vertical Ellipses (3 dots) against required Site Name.

Click Roles and Permissions.
All: Access to all requests (pending, approved, rejected, completed) with comprehensive management capabilities.
Reward Approval: Manage pending, approved, or rejected requests, with options to approve or reject.
Reward Delivery Manager: Handle approved and completed requests, focusing on finalizing rewards.
