How to Create Automations?
Updated
Permissions needed to create automations
You should be an owner or admin of the project to create automations.
Steps to create automations
Open the project and click on the blue button in the upper right corner of the screen and select “Add Automation”

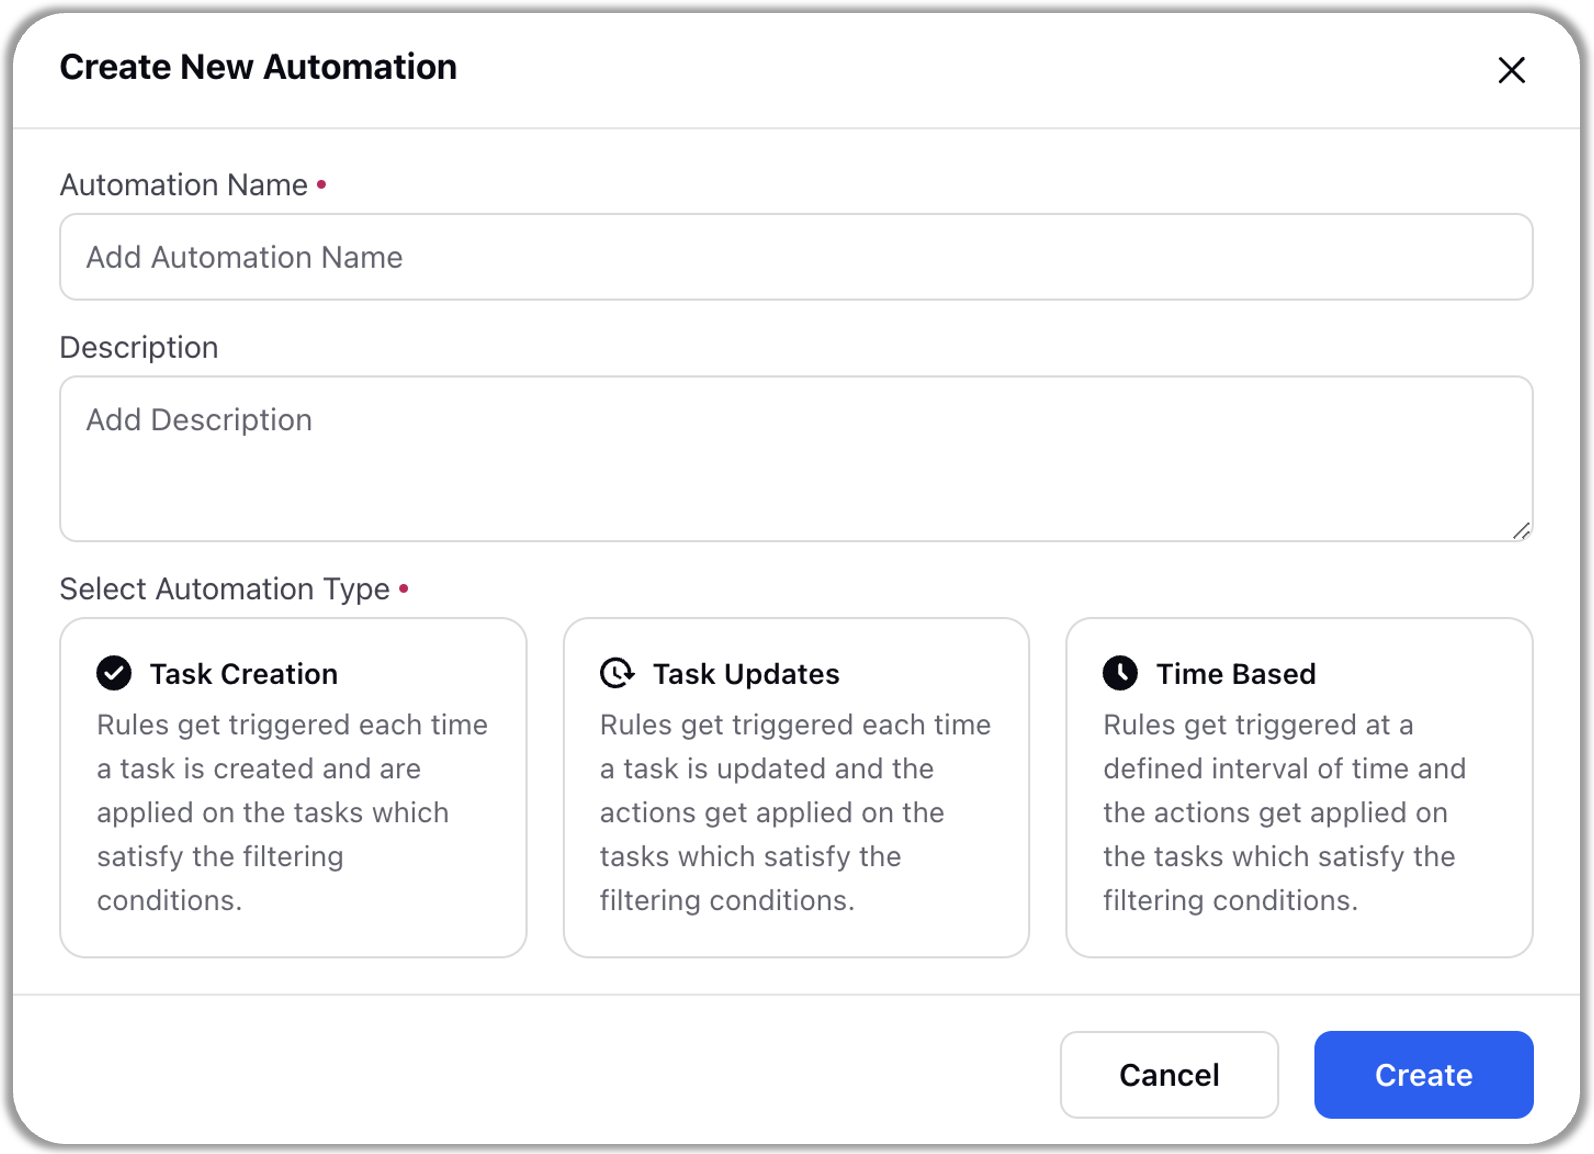
Write the Automation name, description and choose the automation type

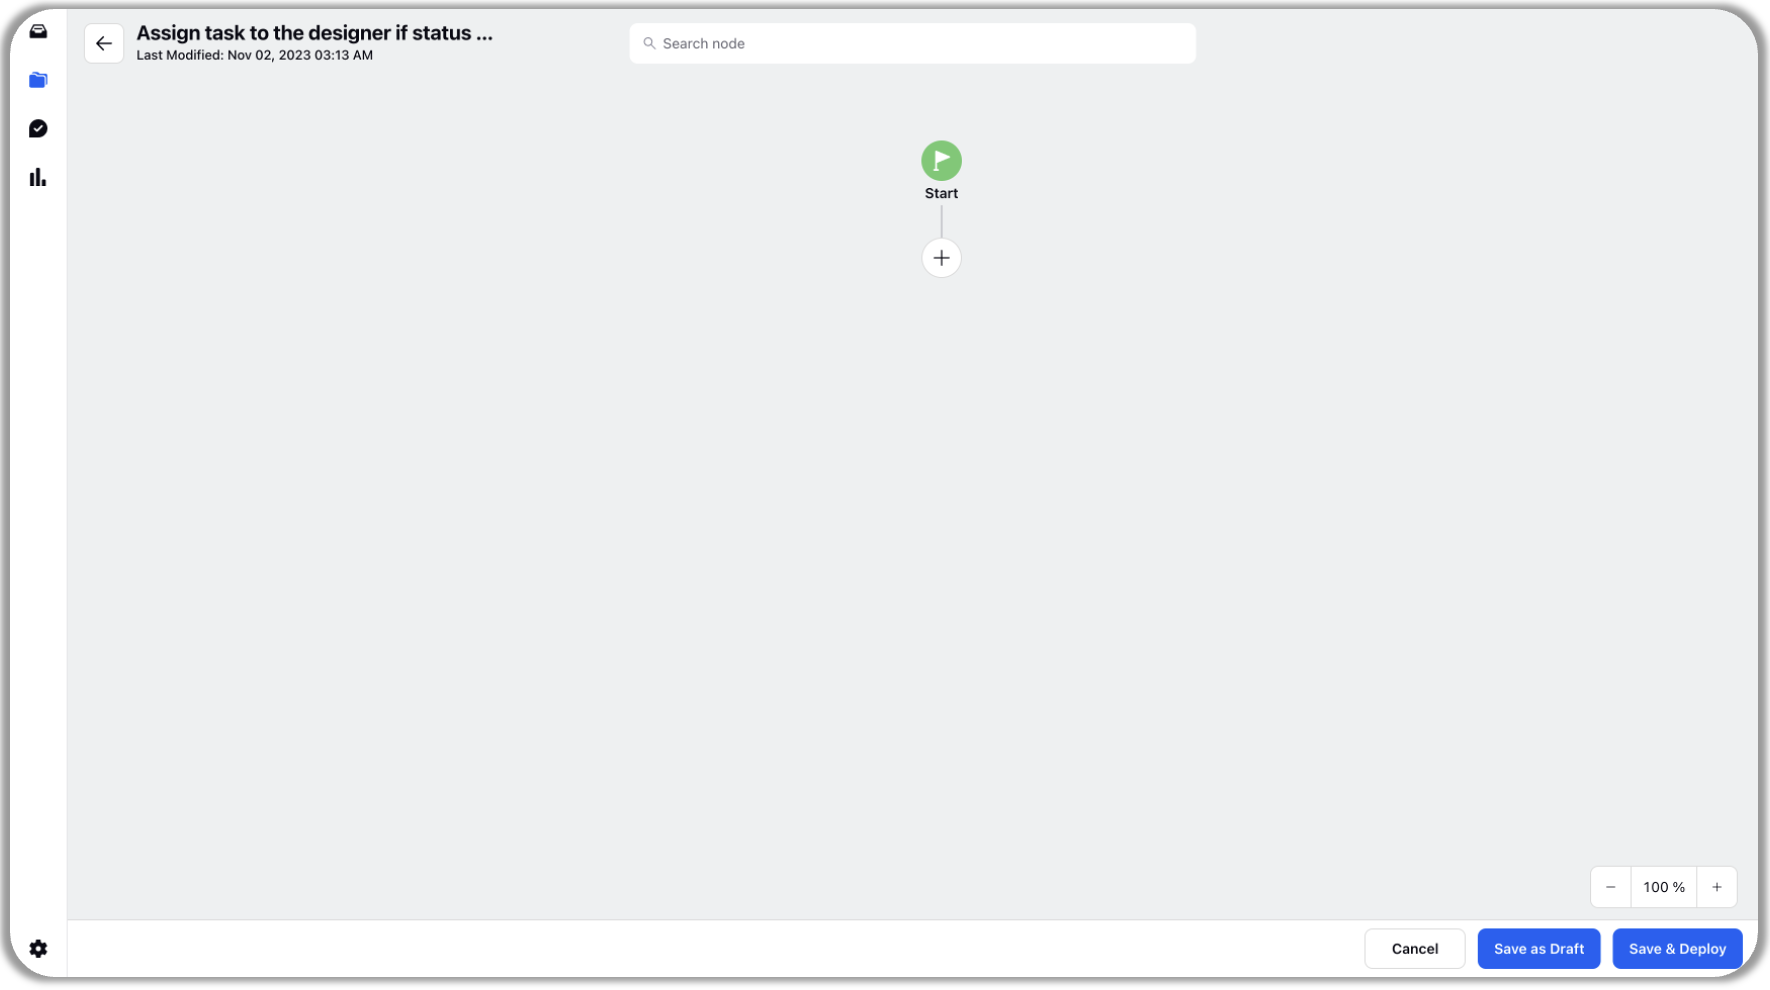
Click on “Create”. Automation builder will open for you to build the automation
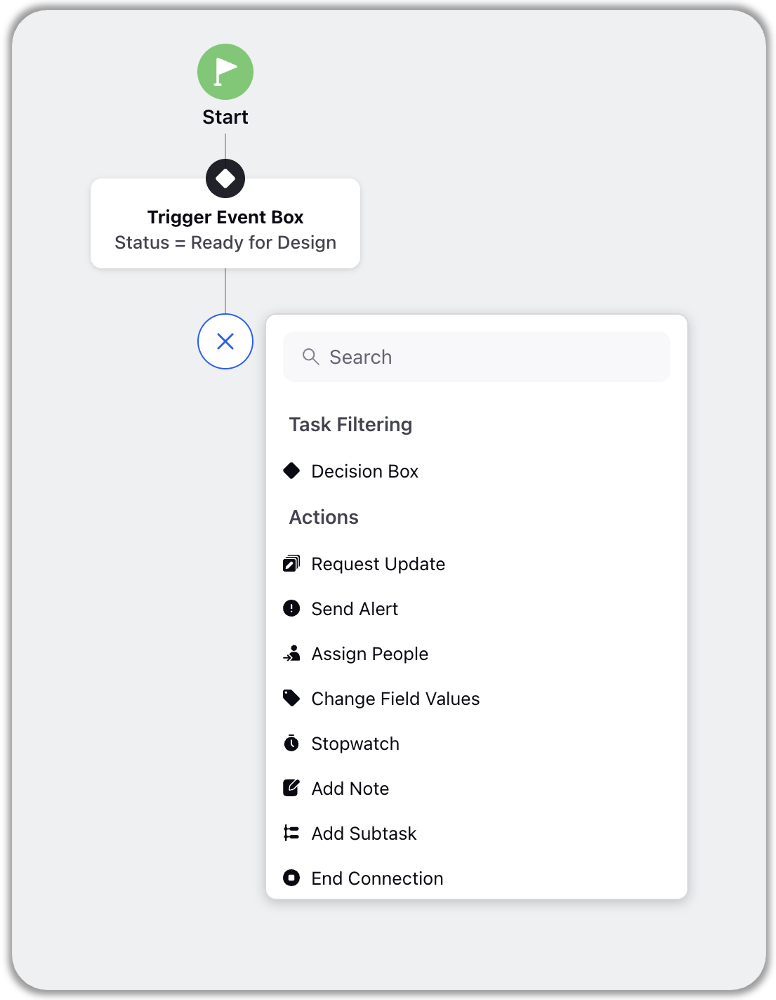
Click on + icon and define the trigger

Add decision box (if needed) and actions as required. Below actions are available to add-
(a) Send Alert: Sends an alert to the mentioned user on email and platform notification
(b) Request Update: Requests an update from the mentioned user on email and platform notification
(c) Assign people: Assign users to user columns
(d) Change Field Values: Add, remove or alter cell values
(e) Stopwatch: Add a delay to your automations
(f) Add Note: Add comments to task
(g) Add Subtask: Automatically create sub-tasks of a particular task
Add an end node at last to specify the end point.
Save and deploy the automation.

How to view Automations
Open the project and go to automations tab

Select task creation, task update or time-based tabs to view the respective automations
