Add, Manage, Remove Delegates in Distributed
Updated
Distributed users can now add delegates who can work within the Distributed platform, abiding by the permissions given by the distributed user. The delegate invited by the user to the platform can access some/all the accounts for which the Distributed user is the Account Owner.
The capability of the Distributed user to delegate tasks to another user makes sure that no task remains pending, in case a user is not available for work. The user can invite another user as a delegate who can perform the tasks and handle accounts for which the inviter is the account owner. Besides, if the amount of work rises up significantly, adding delegates and getting tasks done will keep the work under control, while the work will be done smoothly.
![]() Note: Delegates are able to perform profile update/management from the Distributed platform.
Note: Delegates are able to perform profile update/management from the Distributed platform.
Governance Layers on Delegate Management
Additional governance layers concern the ability to add delegates from the same workspace, all workspaces, a specific user group, or any external source. Permissions granted to users by admins will determine their delegation abilities based on specified criteria.

The Delegation Management enhances user control and security by adding additional governance layers. Success Managers can set up the right roles and permissions while enabling this feature for clients, depending on the use case. This allows for configuration in the Backend for user group level Permissions.
To Invite a Delegate and Assign Accounts at the Same Time
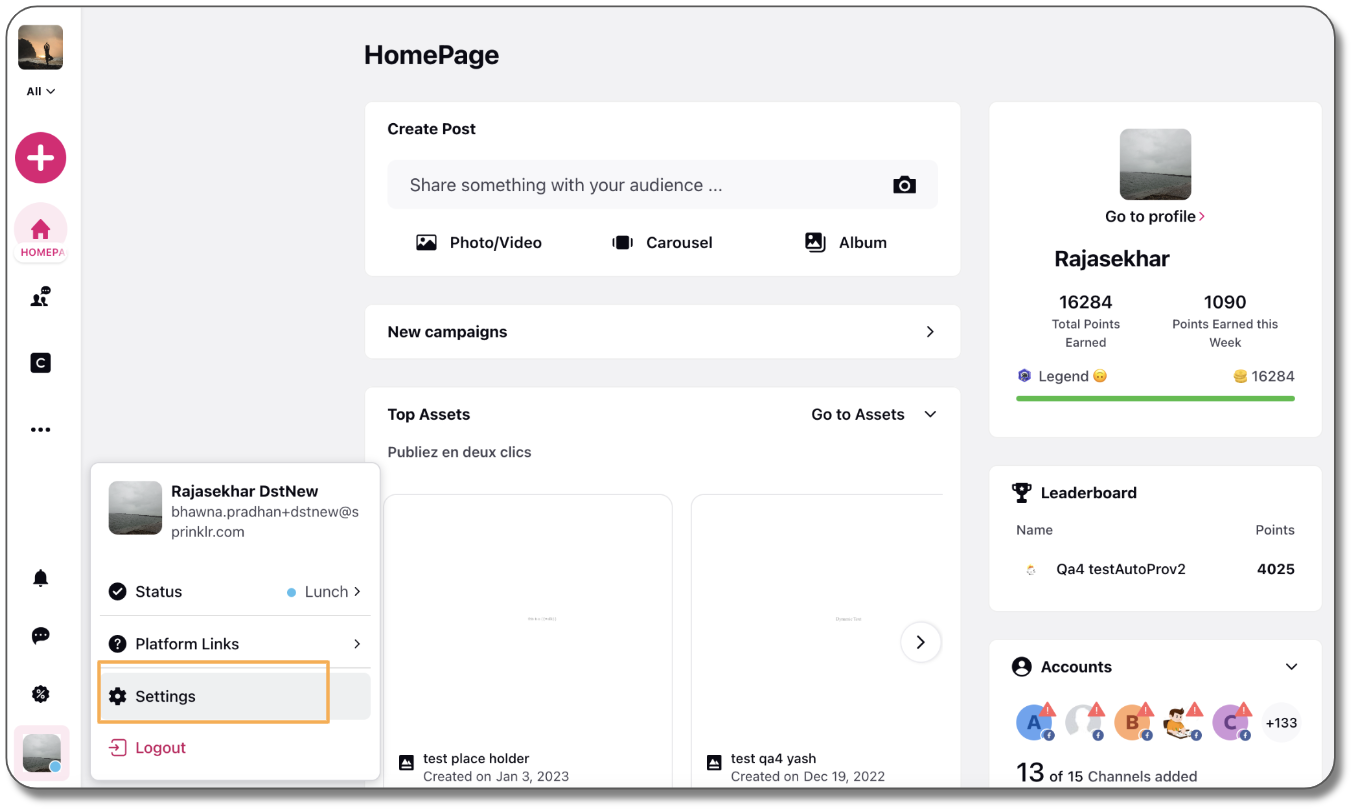
Log in to the Distributed environment.
Click the Profile icon at the bottom left corner. Click Settings.
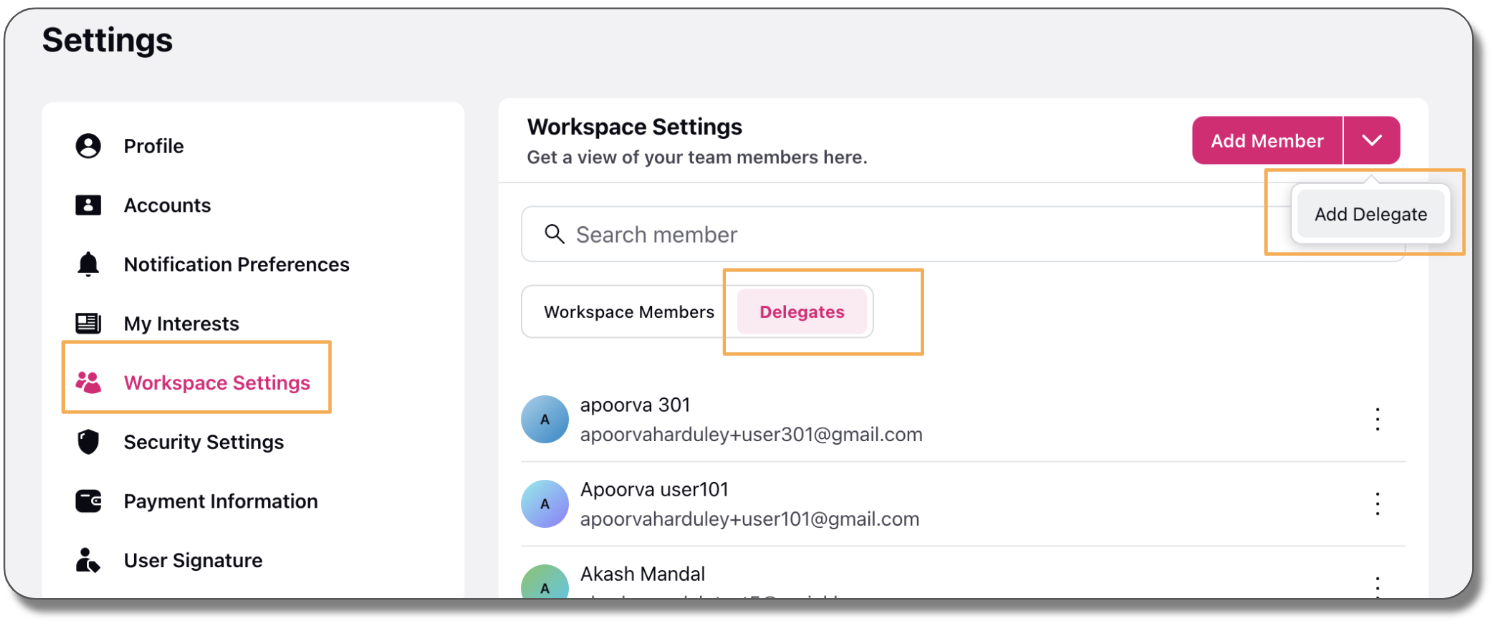
Go to the Workspace Settings tab.
Click Delegates. Then click the dropdown icon adjuscent to Add Member in the top right corner, and click Add Delegate.
Enter the email address of the delegate, and click Enter/Return.
Click Create Delegate at the bottom right corner.
In the Create Delegate window, enter the First Name and the Last Name of the delegate.
Enter the accounts you want to share with the delegate.
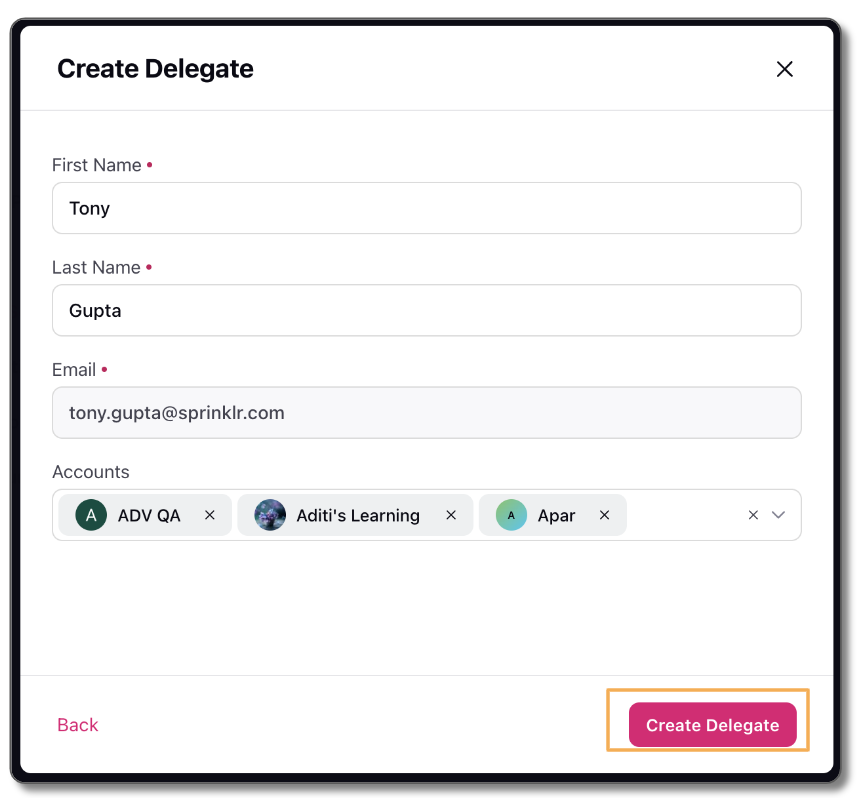
Click Create Delegate in the bottom right corner.
Once the Delegate is added, Delegate start showing up in the list of the Delegates in the Workspace Settings tab.
The delegate also receives a notification mail in the added email address.
To Add/Remove Delegates for an Account
Log in to the Distributed environment.
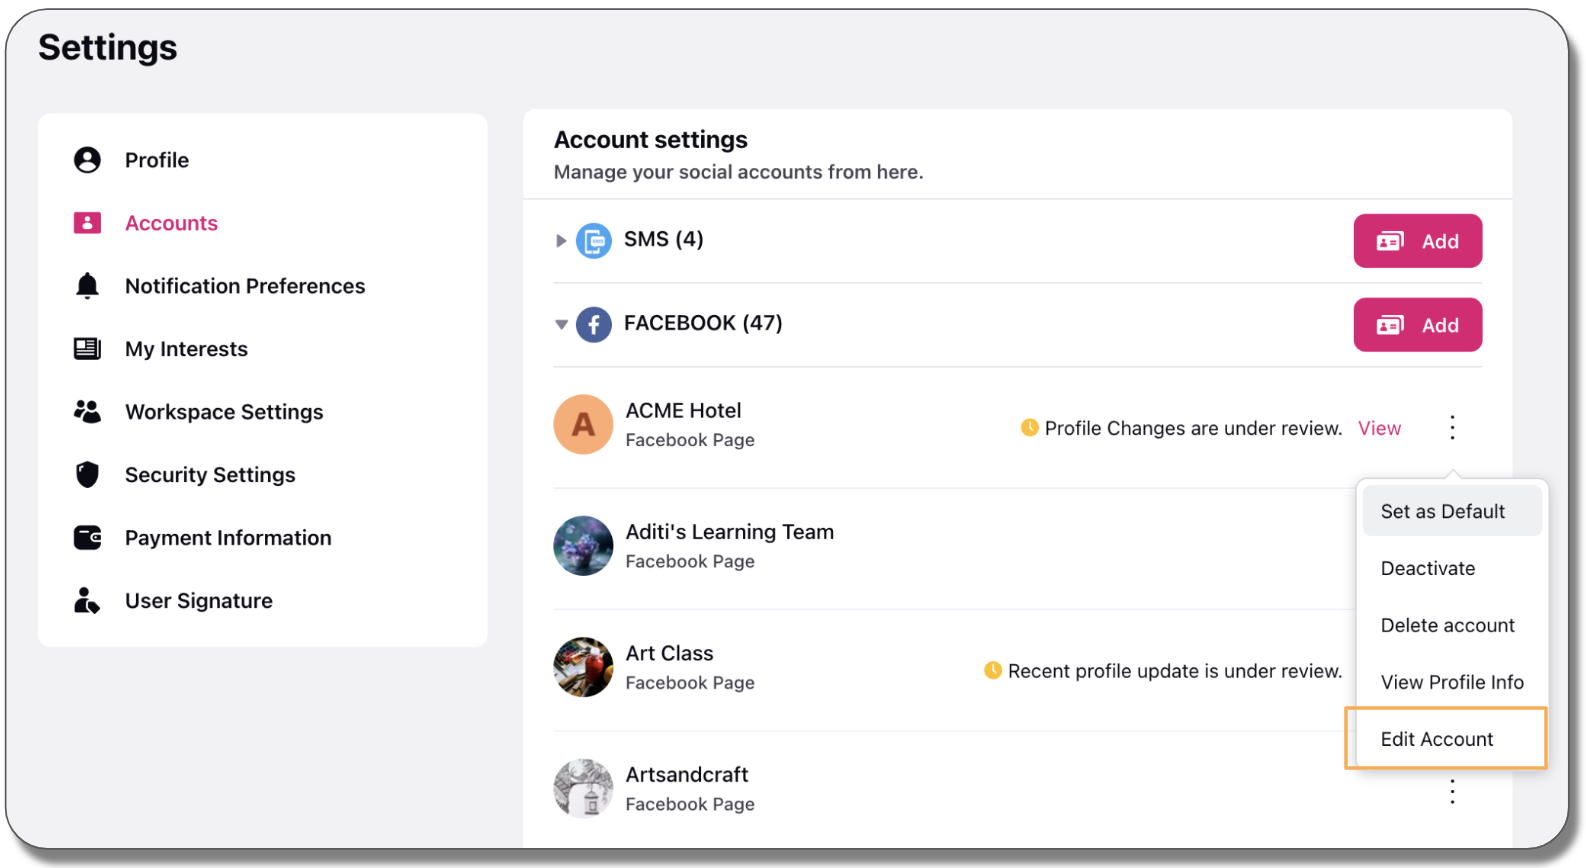
Click the Profile icon at the bottom left corner. Click Settings.
Click Accounts. Hover over the Options icon, and click Edit Account.
Under Select Delegate for this account, select the Delegate. You can also remove a Delegate from here.
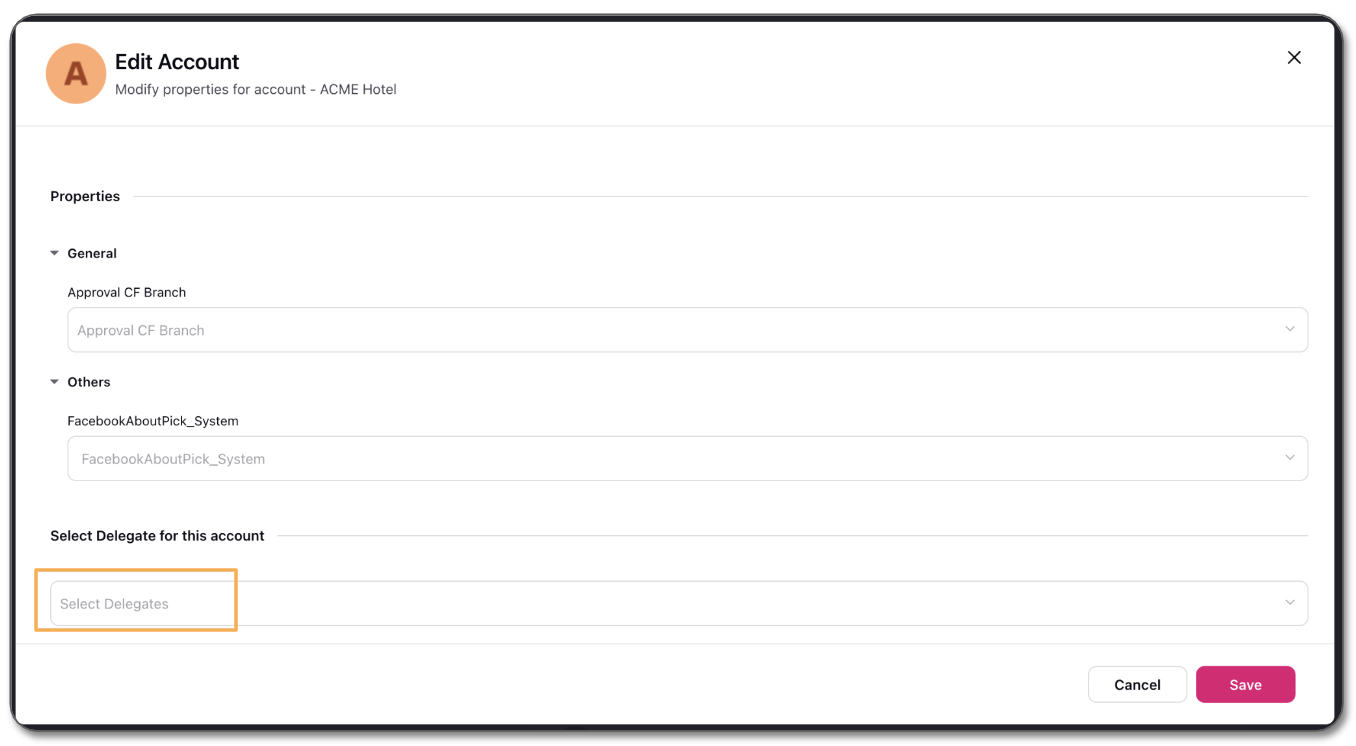
Click Save in the bottom right corner.
Note:
You can add multiple Delegates to an Account.
When you add a Delegate to an Account, the Delegate will get all the permissions that you have.
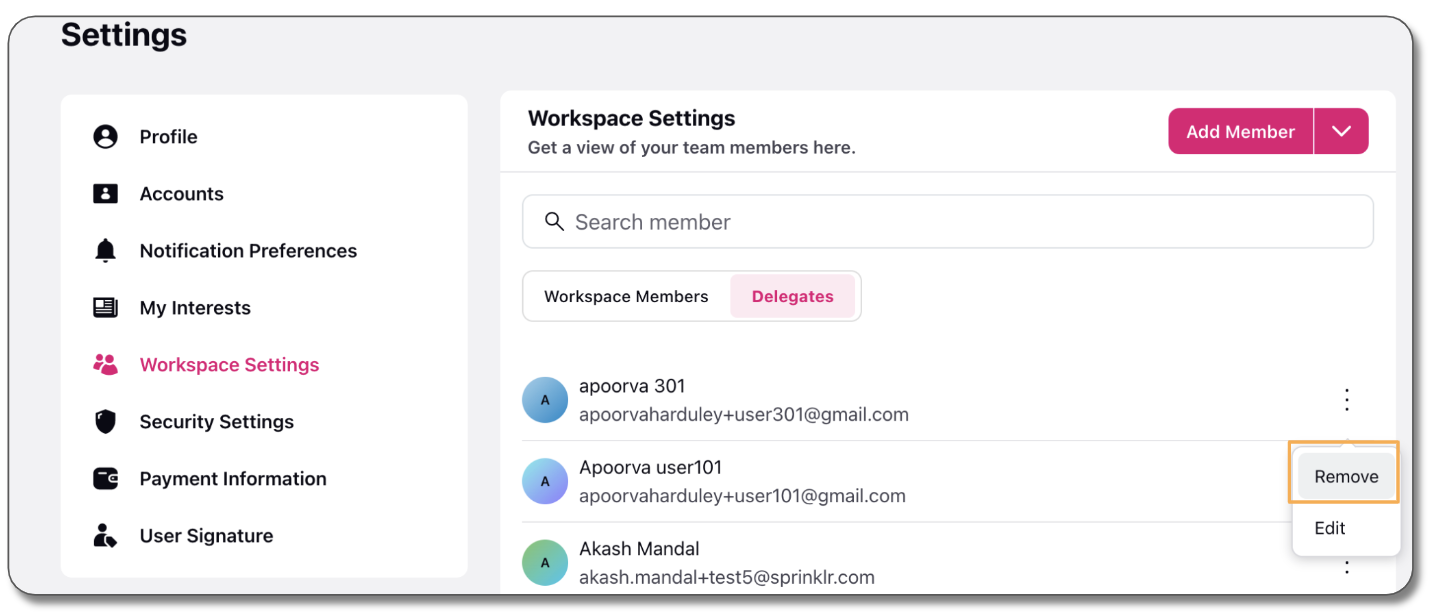
To Remove a Delegate from Workspace Settings
Log in to the Distributed environment.
Click the Profile icon at the bottom left corner. Click Settings.
Go to the Workspace Settings tab.
Click Delegates. You will see the list of existing Delegates.
Click the Options icon adjuscent to the delegate you want to remove, and click Remove.