How to Make an Ad Creative in the Ads Creative Library
Updated
Enhance workflow efficiency, transparency, and accountability by increasing collaboration with a single, easy-to-use repository.
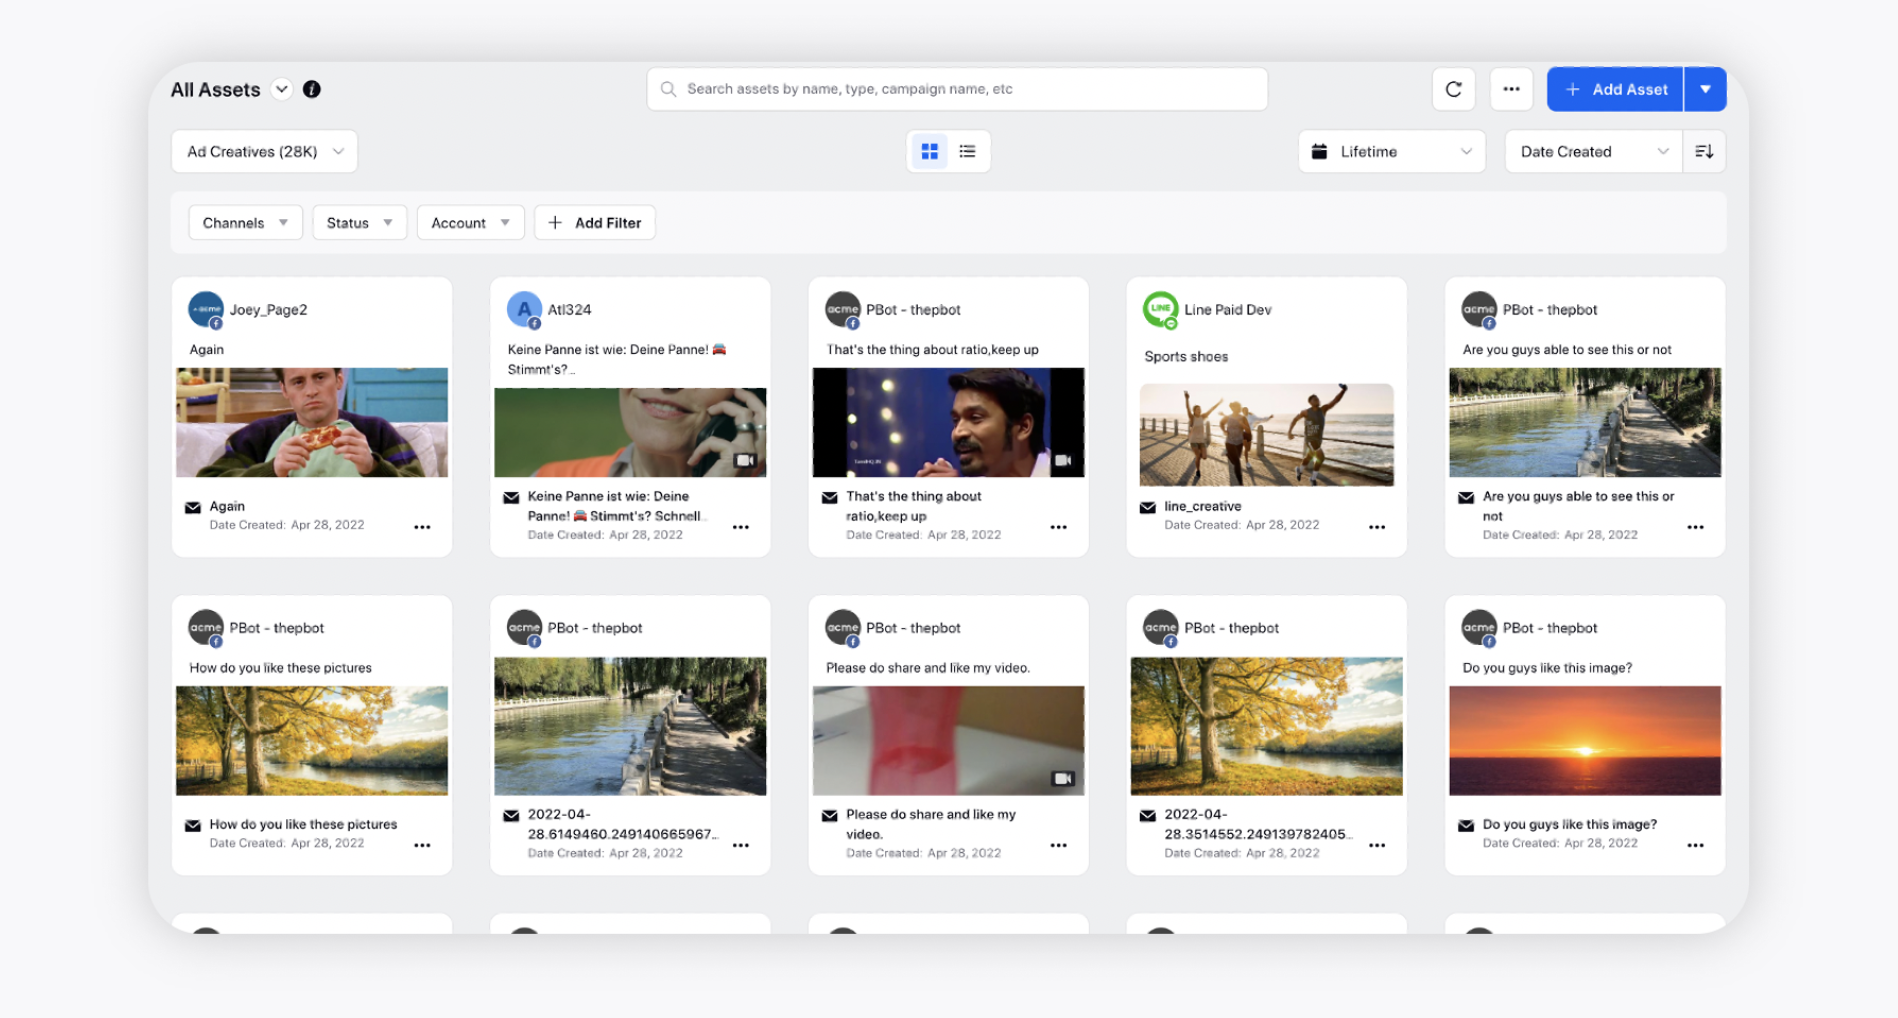
Having all creatives in one place can help you prepare for your campaign launch in advance. The Ad Creatives tab (Creative Library) within the Asset Manager provides a unified and efficient workflow in the vital areas of ad creation. It lets you centralize your advertising assets in a single and easy-to-use repository. The Creative Library doesn't just store assets; it also allows your team to classify, annotate, and govern creatives while accessing asset performance data.
![]() Note: You can control visibility of Ad Creatives based on account-level permissions.
Note: You can control visibility of Ad Creatives based on account-level permissions.
![]() What's New:
What's New:
Sprinklr now integrates Channel-Specific Guidelines directly into the Ad Creation Workflow to reduce the risk of non-compliant ads being submitted. This new feature performs real-time compliance checks in the UI, providing immediate feedback on whether an asset is compliant or not, and what specific issues need to be addressed to meet channel guidelines.
To add an ad creative in the Creative Library
Click the New Tab icon. Under the Sprinklr Marketing (Ads) tab, click Creative Library within Plan.
You will be redirected to the Digital Asset Manager (DAM) with Ad Creatives selected by default.
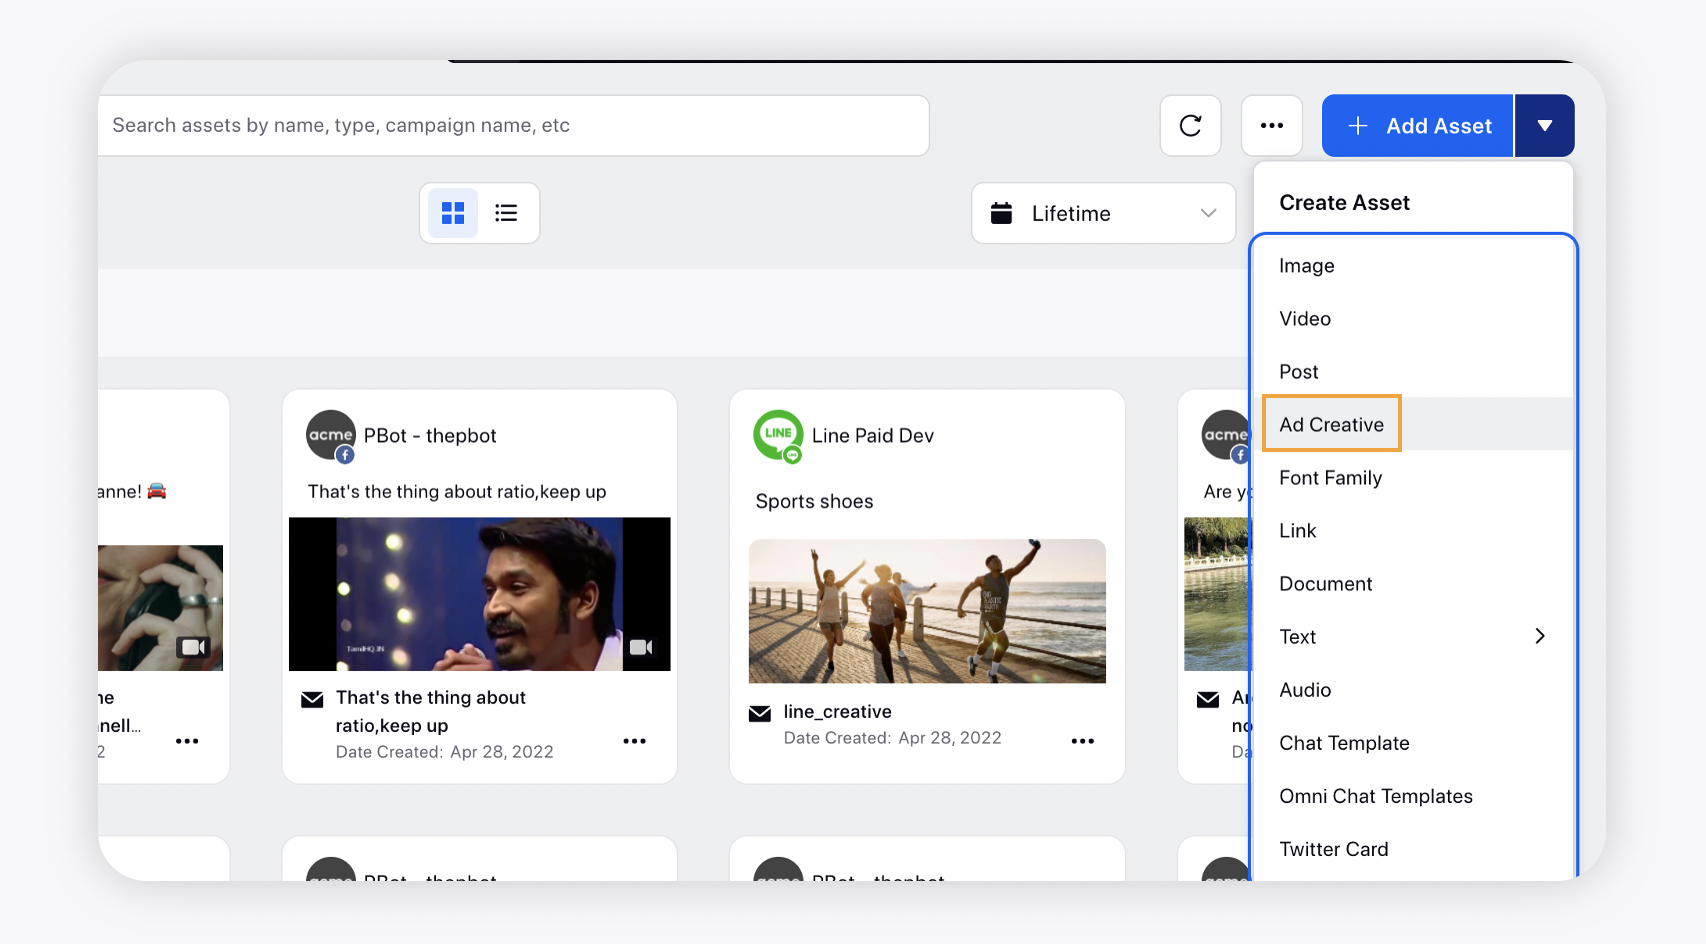
In the top right corner of the DAM window, click the Dropdown icon alongside Add Asset and select Ad Creative.
On the Create New Asset window, enter the Creative Name or Use a Naming Convention, select a Channel, the respective Objective, and Ad Account for your new creative.
Below are the channels with their objectives for which Ad Accounts are mandatory/not mandatory for creating ad creatives:Channel
Objectives
Ad Account
Facebook
Conversions, App Install, Catalog Sales
Mandatory
Traffic, Messages, Post Engagement, Brand Awareness, Page Likes, Video Views, Lead Generation, Store Visits, Reach
Non Mandatory
Twitter
Tweet Engagements, Followers, Website Visits, App Installs, App Engagements, Video Views, Awareness, Reach, Preroll Views
Mandatory
LinkedIn
Lead Generation, Video Views, Brand Awareness, Website Visits, Engagement, Website Conversion, Job Applicant, Reach
Mandatory
Snapchat
Awareness, App Install, Drive Traffic to Website, Drive Traffic to App, Engagement, Video Views, Lead Gen, Website Conversions
Mandatory
Pinterest
Brand Awareness, Traffic, Conversions, Video Views
Non Mandatory
Line
Line Website Visits, Line Website Conversions, Line App Installs, Line App Engagement, Line Gain Friends, Video Views
Mandatory
TikTok
Traffic, Conversions, App Install, Reach, Video Views
Mandatory
Select the desired option from the Post Type drop-down based on the supported objective. Below are the channels with their supported post types and whether they can be saved as a draft and/or published:
Channel
Post Type
Supported Publish/Save Type
Facebook
Media Post, Video Post, Carousel Ad, Status Post, Collection Ad, Slideshow Post
Publish / Save as Draft
If you have any Ad Creative customizations (PAC, DLO, Location Customization, Dynamic Creative) in place, then the ad creatives can only be saved as a Draft. You will be able to use these creatives in Ads Composer/Ads Manager.
Twitter
Image Tweet, Status Tweet, Video Tweet
Publish / Save as DraftNote:
When web analytics gets applied to a new post having Twitter Cards, you can only save this post as a Draft.
When the draft post is selected in Ads Composer / Ads Manager, Sprinklr will extract the Website URL information from the card and append the web analytics parameters. This will publish a new instance of the Post and Card, keeping the original Post and Card unchanged.
LinkedIn
Link Post, Image Post, Video Post, Carousel Ad, Text Ad, Message Ad, Conversation Ad
Publish / Save as Draft
Pinterest
Pin, Video, Carousel
Publish / Save as Draft
Snapchat
Story Ads, Top Snap, Website, App Install, Longform Video Snaps, Deep Link
Publish / Save as Draft
TikTok
Image, Video
Save as Draft
You will be able to use these creatives in Ads Composer/Ads Manager.
Line
Carousel
Publish/Save as Draft
Tip:
For Facebook, Twitter, and Pinterest Media Posts, you can manually select the desired Thumbnail for your video. You can select multiple thumbnails and test different variations from the preview to see which results in the best performance.
Depending on the Post Type you selected, your option of asset upload will vary. You have the option to select your assets from the DAM, upload from your system, or add from a URL.
Channel-Specific Guidelines
After you add your media assets, the system displays visual feedback on each asset (see image below) to indicate whether it meets the channel-specific guidelines.

Click the visual feedback on the asset, to view the specific channel guidelines it complies with or violates, and update the media asset as needed.

Tip:
You can bulk import image and video files in zip format for Facebook and Twitter from the Creative Library. You can also export your creatives from the Creative Library.
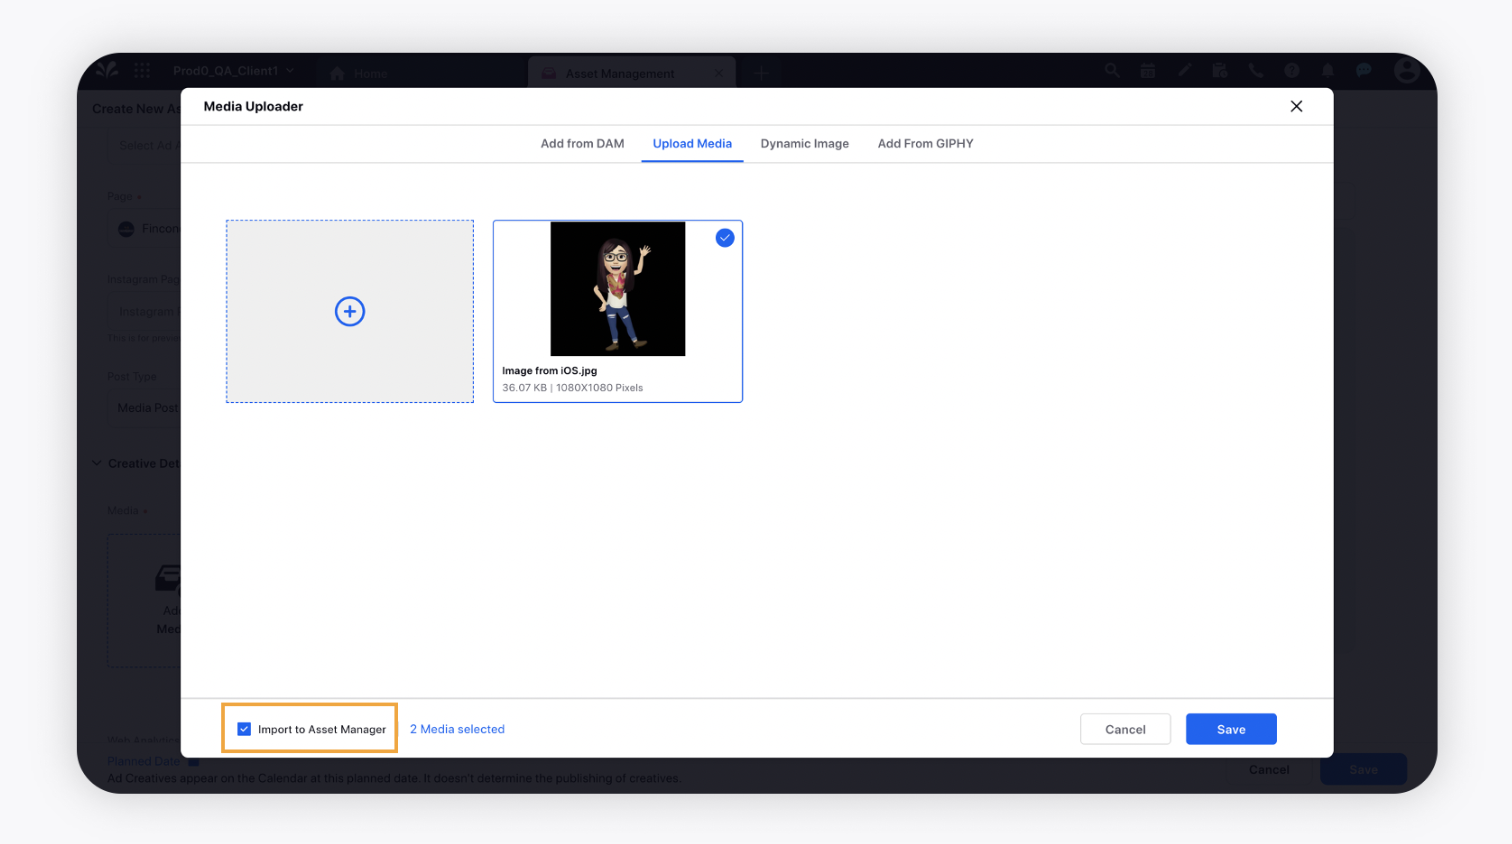
While uploading assets using the Media Uploader, you can check the box alongside Import to Asset Manager to move the uploaded images, videos, and GIFs to the Digital Asset Manager repository and reuse them in your creatives directly from DAM.
Note:
While creating an asset for Facebook, you have the option to create a new canvas using the Facebook Canvas Editor option for supported objectives and post types.
Click Add New Canvas alongside the Canvas drop-down menu. Select Build a custom Instant Experience and click Create New Canvas in the pop-up box.

For Facebook, under the Creative Details section, you can select from the following customizations:
Placement Asset Customization - Customize your ad creatives for different placements by enabling Placement Asset Customization (PAC). This will allow you to provide individual assets, like images and headlines for specific placements.
Language Customization - Add various details of your creatives in multiple languages by enabling Language Customization. This will allow you to use multiple languages within the same ad and target the users based on the language their app is set up to.
Location Customization - This allows you to serve your audience with the most high-performing creative combinations by taking multiple ad components (such as images, videos, titles, descriptions, and CTAs) and automatically generating combinations of these assets across audiences.
Dynamic Creative : Leverage individual assests and automatically generate optimized creative combinations.
Note:
These ad creatives can only be saved as a Draft. In order to view these creatives in Ads Composer, you will need to have the Customization filter in place.

In this case, we have selected Media Post as the Post Type, and so we are given the option to upload more than one media.
Select a Web Analytics profile from the drop-down menu to apply to your Ad Creative for tracking purposes.
Note:
Ad Creatives can only be saved as a Draft since most Paid Web Analytics Profiles have different parameters in them (Paid Initiative ID, Ad Set ID, Ad ID, etc.) that are not available in Sprinklr while creating Ad Creatives through the Creative Library.

Select the Destination where people will be taken when they click on your ad. You can select from Website URL, Canvas, and Messenger.
Next, provide the following details:
Website URL - Enter a website URL you want to promote.
Headline - Add a brief headline to let people know what your ad is about.
Text - Enter the text that clearly tells people about what you are promoting.
Display URL - If your website is long, use a display URL to show a shorter, friendlier URL.
Link Description - Describe why someone should view this link or what they should expect when they click.
Call to Action - Choose the action you want people to take when they see your ad.
Select a URL Shortener as per your needs. Shortened links allow you to share long URLs while maintaining the maximum number of characters for your message.
Tip:
You can use a URL Shortener for the web links in your post copy while building Facebook Collection Ads. Any link that you have added to the ad body will have the URL Shortener and Web Analytics (if selected) applied. The Web Analytics and URL Shortener will work similarly for Ads that have been cloned.
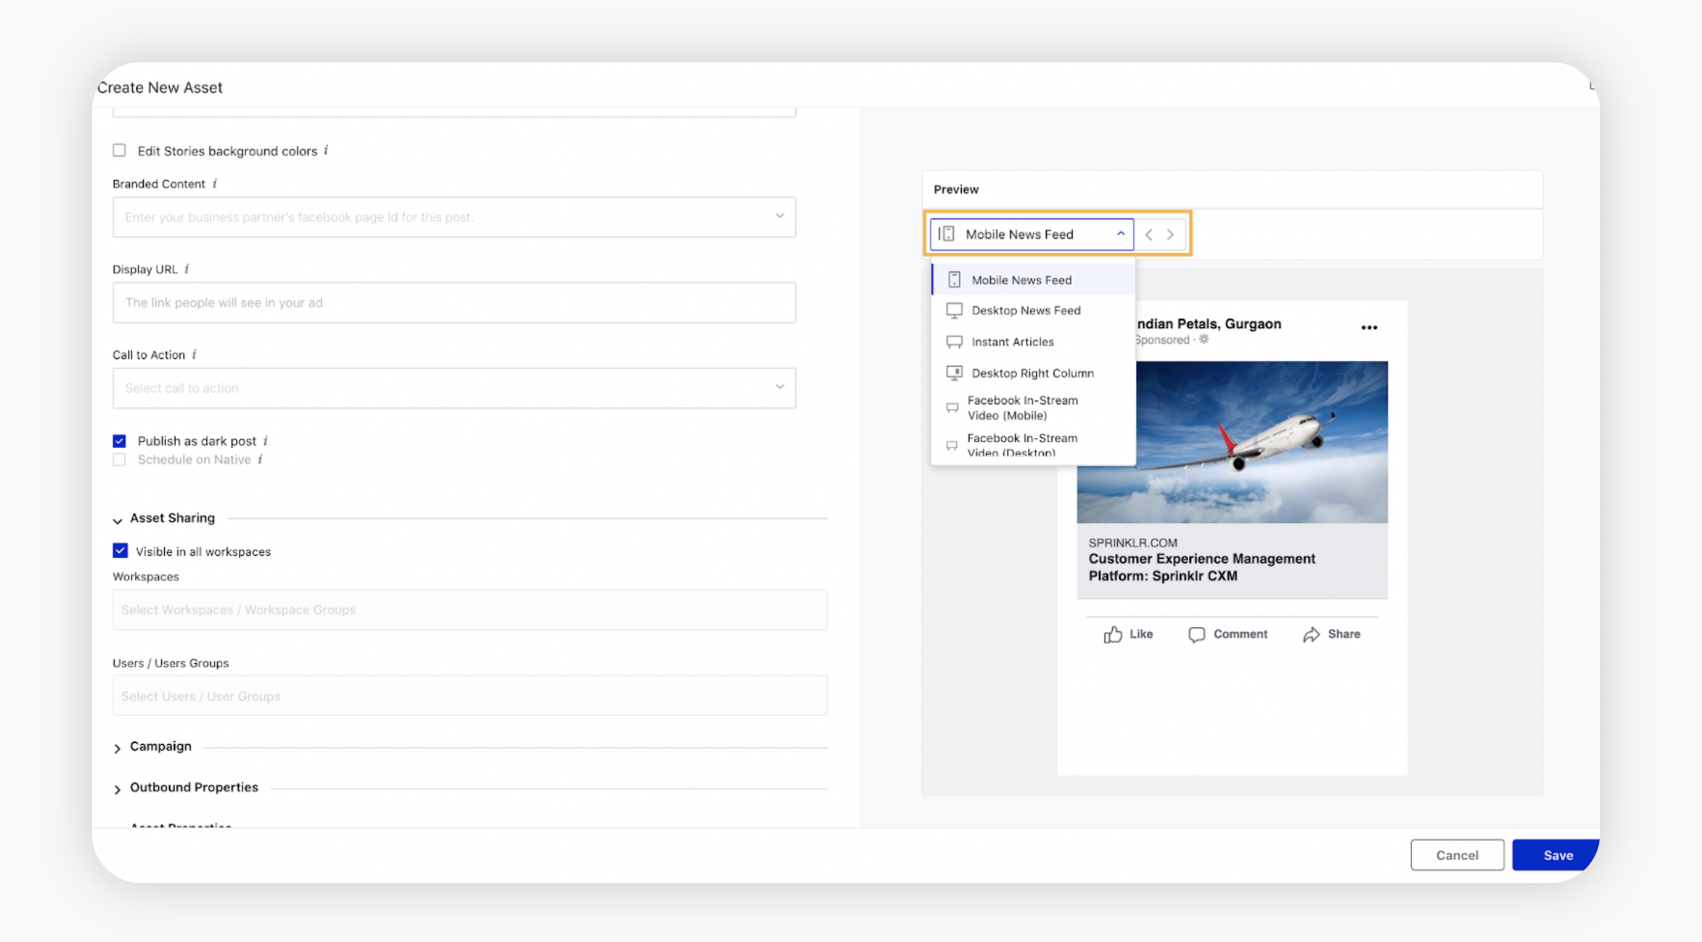
For Facebook and Instagram Story Ads, you can edit the top and bottom background colors by checking the box alongside Edit Stories background colors. This is supported by the following objectives: Brand Awareness, Reach, Traffic, App Installs, Video Views, Lead Generation, and Conversions.
Note:
This capability is only available for the Media post type.
Check the box alongside the following options:
Publish as a dark post - Publish the creative as a dark post. If your creative is scheduled as a dark post, the posts will not get organic distribution.
Schedule on Native - Schedule the post to be published on the native platform. You will not be able to select this if you are publishing it as a dark post.
On the right side, choose between the different Channel Previews from the drop-down to see how your creative will render.
Under the Asset Sharing section, select Workspace(s) and Users/Users Group(s) you want to share the asset. You can also check the box alongside Visible in all workspaces to share the asset with all workspaces.
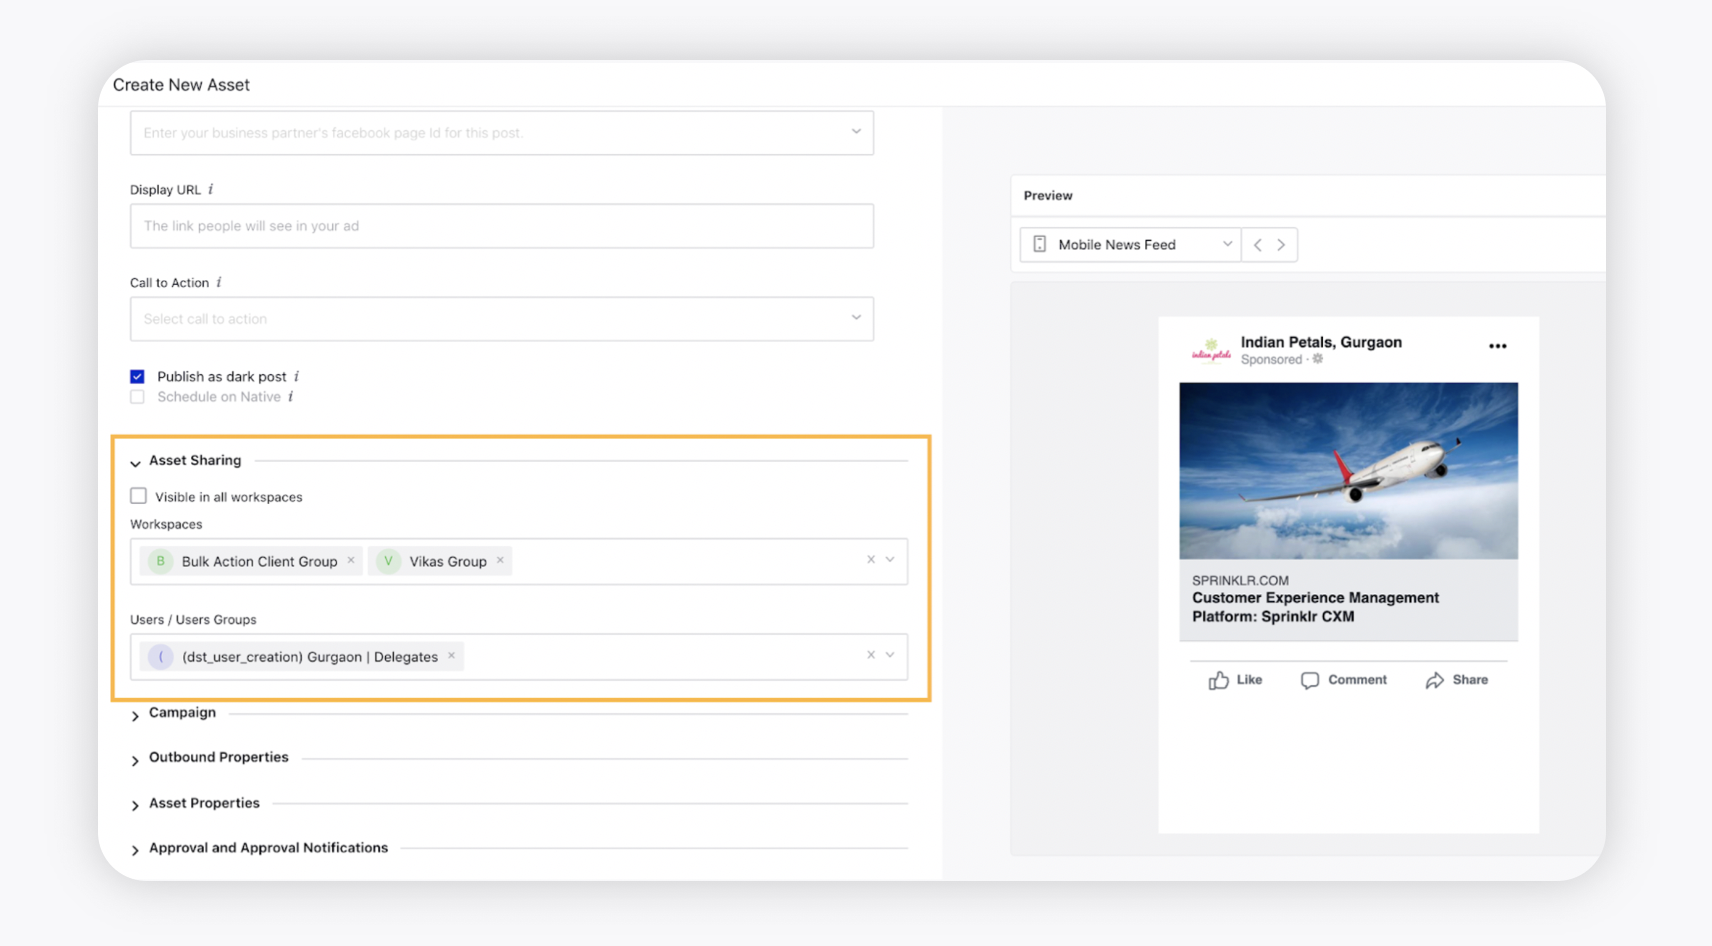
Choose a campaign to associate your asset with from the Campaigns drop-down menu within Campaign.
Note:
You can make Campaign Tags mandatory for specific users. To learn more about getting this capability enabled in your environment, please work with your Success Manager.
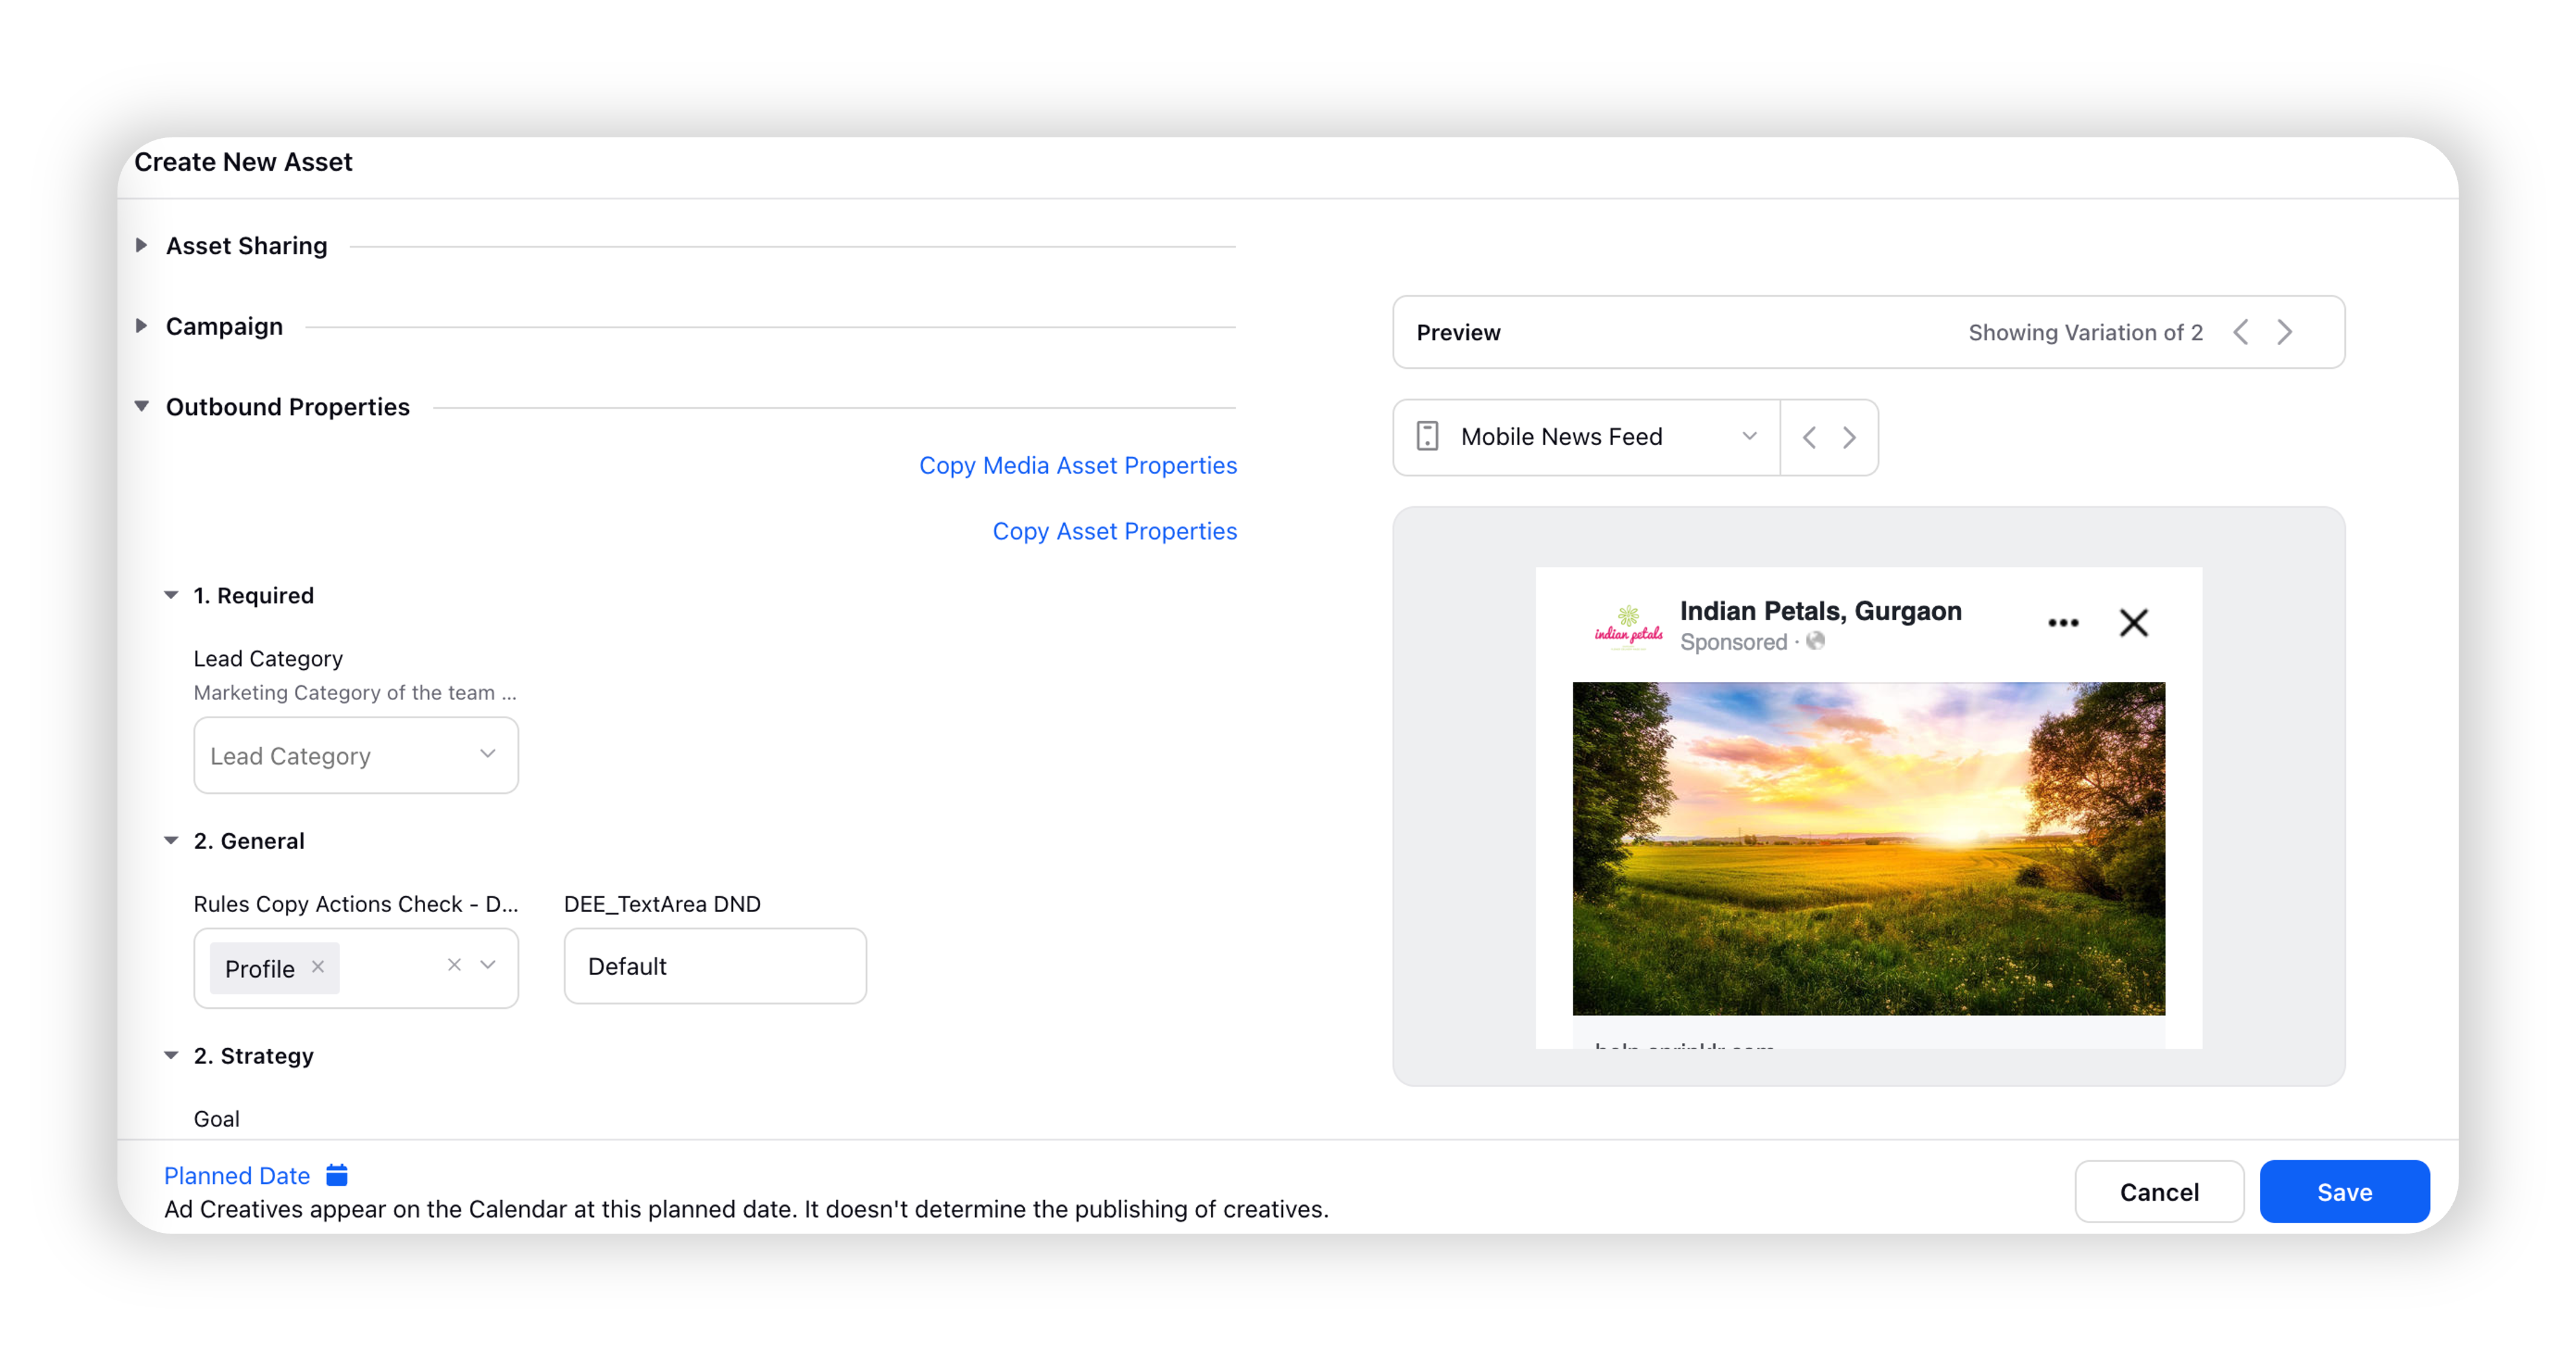
Enter the Outbound Properties per your requirements. If the creative selected is from DAM, you can click Copy Media Asset Properties to tag the new creative with the same custom properties tagged on the asset in DAM.
If you wish to copy the Asset Properties into Outbound Properties, click Copy Asset Properties under the outbound tab.
Note:
For Carousel Ads, clicking on Copy Media Asset Properties will only copy the custom properties of the first creative.
If you have any Ad Creative customizations (PAC, DLO, Location Customization, Dynamic Creative) in place, the outbound properties will only be set for the parent post and not the variations (child posts).
Outbound Properties can't be added for Snapchat, TikTok, and LINE.
Enter the Asset Properties per your needs.
Note:
The Copy Media Asset Properties option is only available for Outbound Properties, and not for Asset Properties. However, if there are any asset property fields similar to the outbound property fields, those fields will get auto-tagged.
Choose the approval path from the Approval drop-down menu within Approval as per your needs. You can select from:
Not required - When approval is not required.
Required by the account owner - Send the creative for approval to the account owner.
Follows an Approval Path - Send the creative for approval to a User, User Group, or an Approval Queue.
Select the User/User Groups to be notified after Approval from the drop-down menu. This is also applicable for posts that are sent for approval via Rule Engine.
Admin Set-up:
You can set the Approval Mandatory permission to enforce the selection of an approval option mandatory for users. This will ensure greater control over the quality of the content that is being published.
Note:
If you have any Ad Creative customizations (PAC, DLO, Location Customization, Dynamic Creative) in place and send the creative for approval, only the Approve as Draft and Reject options will be available as these Ad Creatives cannot directly be published. If these Ad Creatives are sent for approval via the Rule Engine, it will not work, and you will need to select an Approval Path.
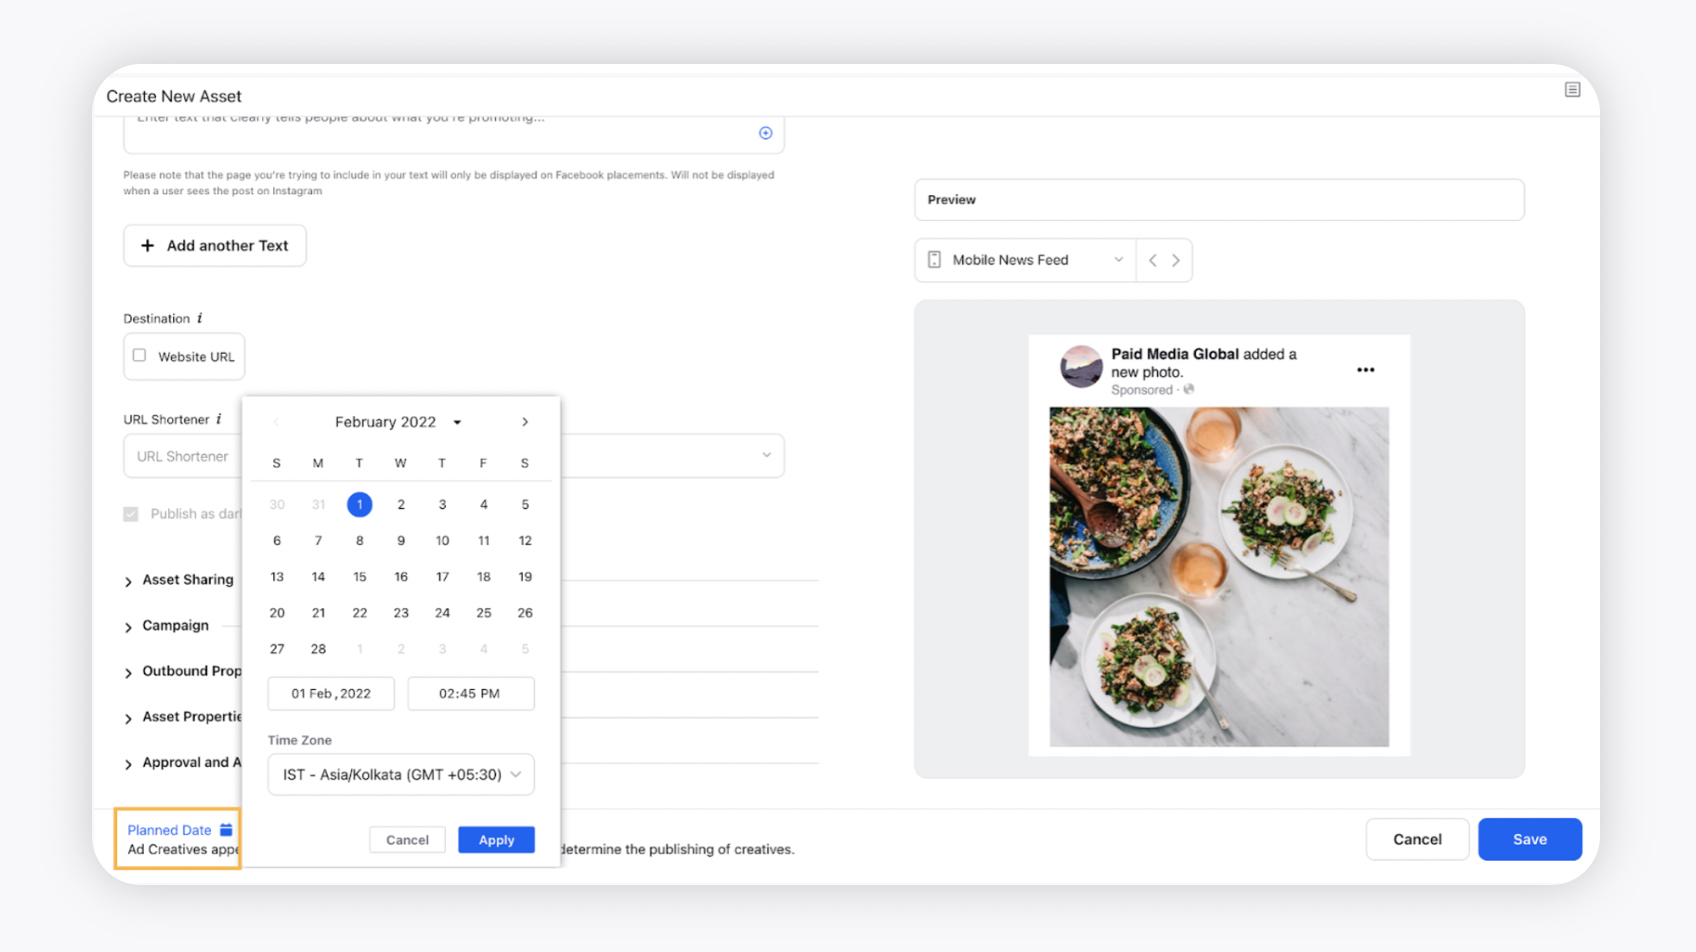
Click Planned Date at the bottom of the form to set a time and date on which your ad creatives should appear on the Editorial Calendar.
Note:
The Ad Creatives will only appear on the Calendar at this planned date. It doesn't determine the publishing of creatives.
Hover over Save in the bottom-right corner and select from the following:
Publish - Publish the creative from the Creative Library itself without creating a campaign.
Save as Draft - Save the creative as a draft.
If you have selected an Approval path, click Send for Approval in the bottom-right corner to save the creative as a draft and send it for approval.