Gather Customer Responses through Voice IVR
Updated
The "Gather customer response" node enables you to take input from the customer. This node is used when you want to take different paths/ actions for different use cases in the IVR.
![]() Pre-requisite for configuring this node in IVR: Sprinklr Voice should be enabled for the environment and your user should have IVR View, Edit or Create permission
Pre-requisite for configuring this node in IVR: Sprinklr Voice should be enabled for the environment and your user should have IVR View, Edit or Create permission

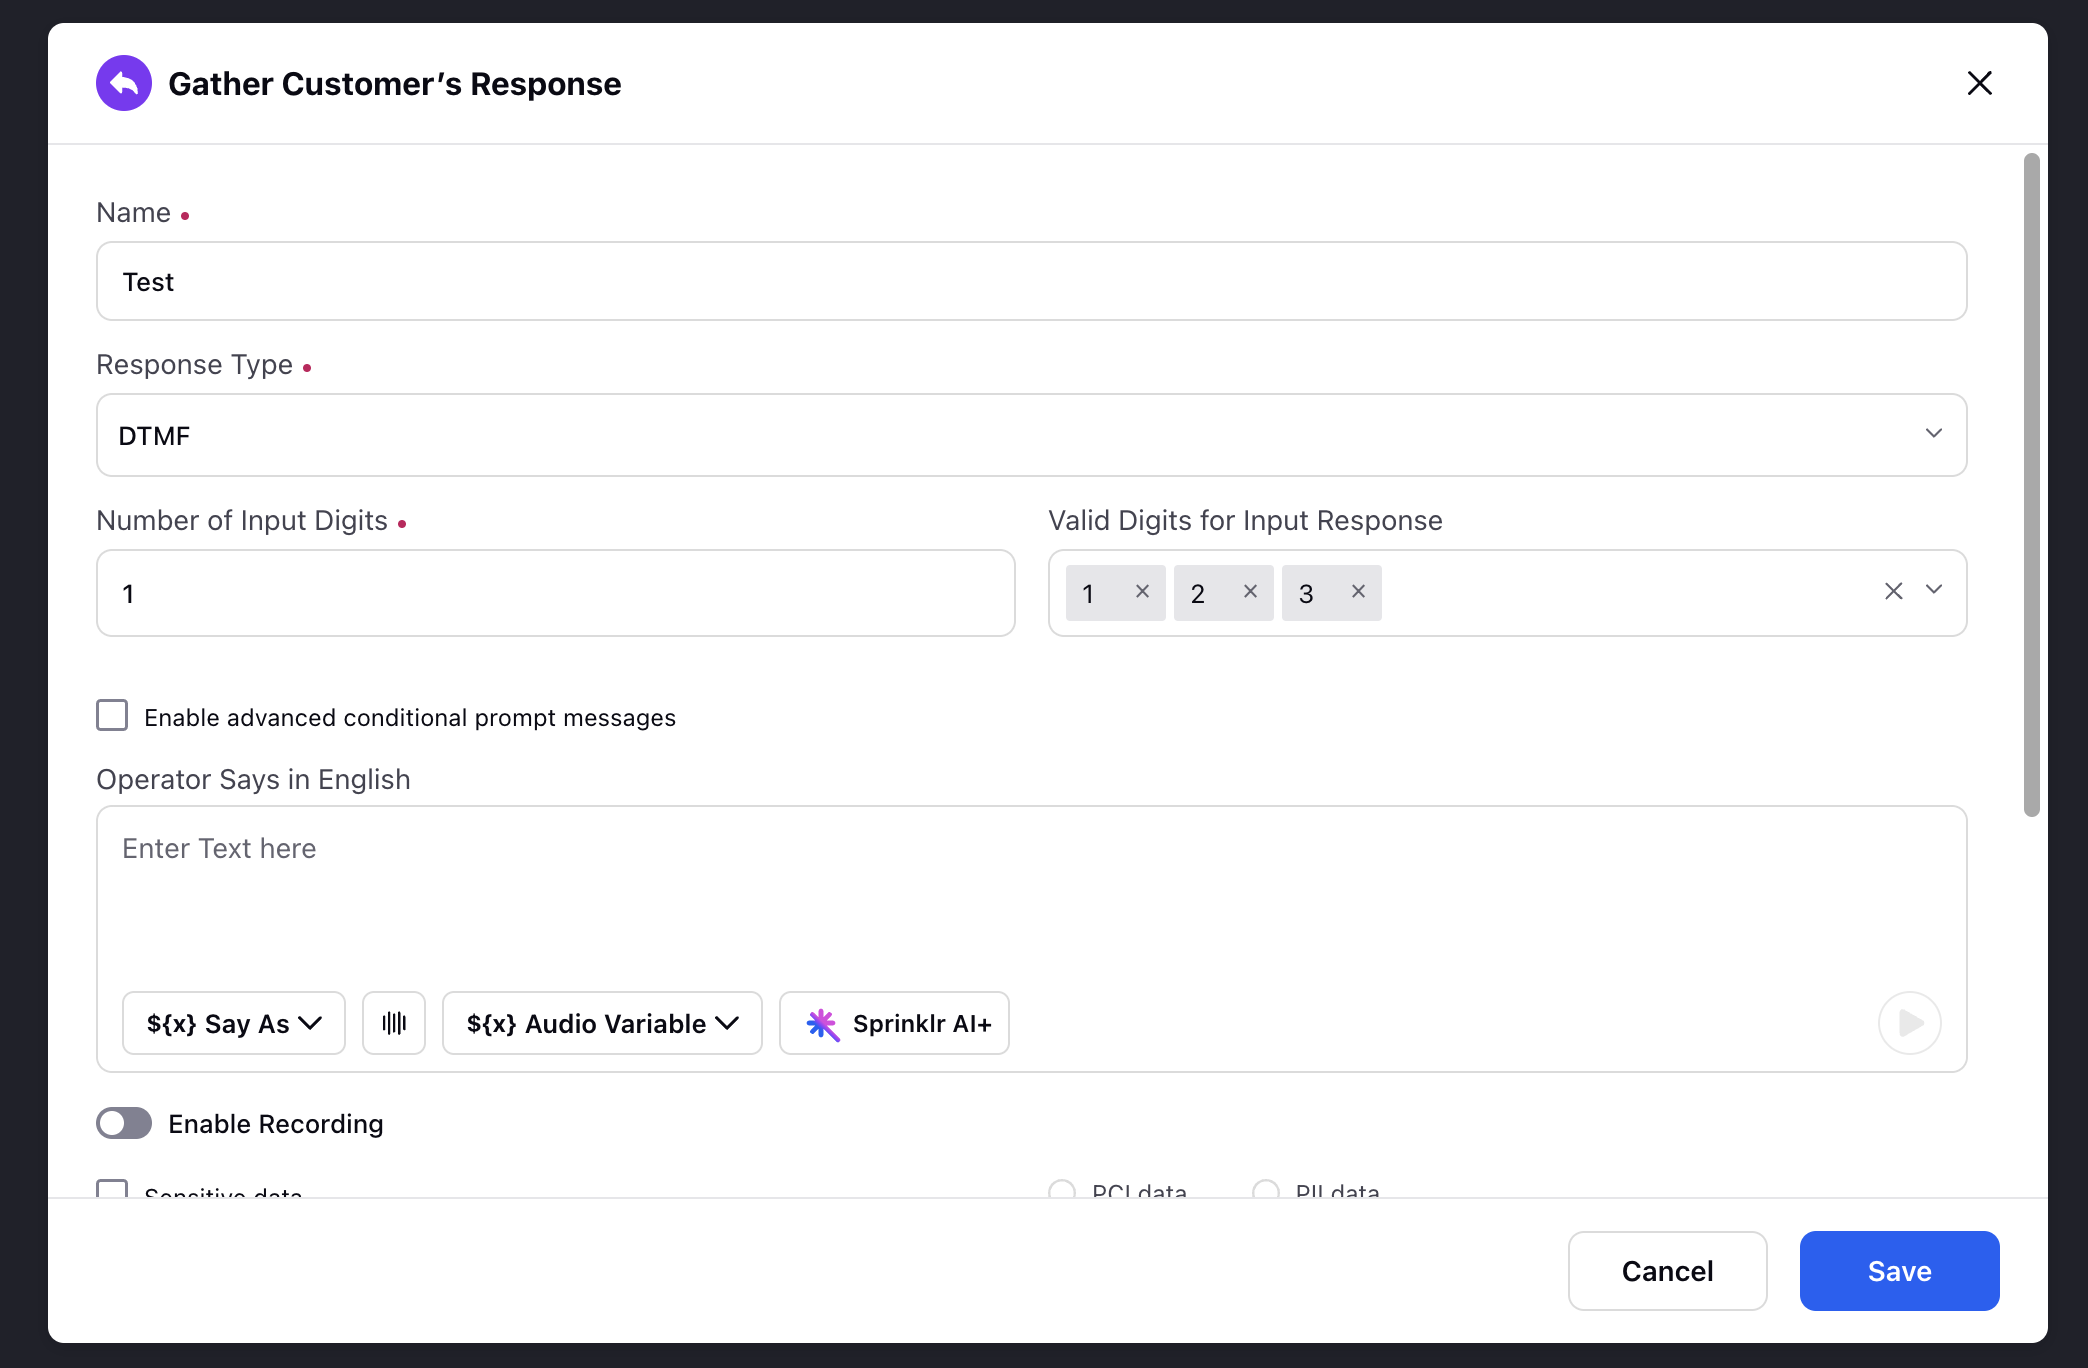
Here is a screenshot of the sample configuration of the Gather Customer Response node.
Components
The gather customer response node major components are:
Response Type: You have the option to define the Response Type as either DTMF, Speech, or both DTMF and Speech.
Enablement note:
The DTMF and Speech option is exclusively intended for utilization with Twilio. To learn more about getting this option enabled, please work with your Success Manager.
Speech Modal: If you choose the Speech or DTMF and Speech option, you can further specify the speech modal as Default, Numbers and commands, or Phone call.
Default: This mode allows for general speech recognition, suitable for capturing a wide range of spoken responses.
Numbers and Commands: In this mode, the system focuses on recognizing numeric values and specific command phrases, which can be useful for capturing digits or simple instructions.
Phone Call: Selecting this mode optimizes the speech recognition for telephony-specific scenarios, enhancing accuracy for spoken responses typically encountered in phone conversations.
Speech Variable: For Speech, you have the capability to include a variable to capture and store the collected value.
Profanity Filter: You can activate this feature to automatically filter and remove offensive or inappropriate language from speech transcripts.
Hints for English: You have the capability to enhance speech recognition accuracy by adding hints, including Alphanumeric Sequence, Alphabet Sequence, and Digit Sequence. Furthermore, you can supplement the recognition with custom words to cater to specific vocabulary or terminology.
Operator Says: Here you need to put the message which will be played to the user while asking for the input. For example - Press 1 for Sales, Press 2 for service
This component work exactly like Operator says node. More details about operator says on what all you can voice out and different use cases- Click here.
Number of Input Digits: This field allows you to specify the desired number of digits that the IVR should accept in a single input. In the example mentioned, the IVR is configured to expect only 1 digit as input since the valid digits are limited to 1 and 2. In other example if we need 10 digit mbile number the value for this field will be 10
Valid digits input: When ‘Number of Input Digits’ is 1, this picklist allows you to define the acceptable input digits for the IVR to continue. For example, if the prompt instructs the user to "Press 1 for Returns or Press 2 for Complaint," the valid digits would include 1 and 2, while any other input would be considered invalid. if ‘Number of Input Digits’ will more than 1 this field will not come, in that case you need to define Process Variable field.
Process Variable: When the "Number of Input Digits" is set to more than 1, this field becomes relevant. In this field, you provide name of the variable that will store the data entered by the user. This variable can then be utilized later in the IVR for various purposes such as making external API calls, voicing out information, and more. For instance,
You can gather the order ID from the user and fetch the order status from an external API using the stored variable.
Collect the phone number for a callback and voice it out to the customer for confirmation.
 Note: Variable name must not start with any special characters(~,`,!,@,#.....) and numbers. Also there must not be any space in between the variable name.
Sensitive Data Checkbox:
Pre-requisite for gathering PCI data in Sprinklr: The CDE (Cardholder Data Environment) server setup should be present in your environment. In order to enable PCI in your enviornment, raise a support ticket to ticket@sprinklr.comThis is designed to collect sensitive data from users. It is used when users are expected to enter personal or sensitive information such as credit card details or date of birth. There are two types of sensitive data that can be gathered:
PCI Sensitive Data: Enabling the PCI data checkbox ensures that the data entered by the caller is securely sent to a separate PCI secured environment (CDE). The encrypted data will be temporarily retained in the Redis cache for a limited time before being removed.
PII Data - When enabling this option, entered data will be masked everywhere on UI, so that agent or any user will not be able to see the data but the data will be stored on backend.
Note: If the PII Process Variable will be voiced out then unencrypted data will be voiced out.
Wait for end of prompt to gather response: If this checkbox is enabled, the IVR will only accept user input after the prompt has finished playing. Any key presses made before the prompt completion will be disregarded.
Add End Key: In scenarios where the number of digits in user input can vary, such as when entering an order ID, the "End Key" field allows you to define the key that signifies the end of user input. Rather than specifying the number of input digits, this approach enables the IVR to capture the user's input until the specified end key is pressed. For example, "Kindly enter your order id followied by # key"
Number of times to play the message: In this field, you specify the number of times the prompt should be repeated if the user provides an invalid input or does not provide any input at all. For example, if you set it to 2, the language selection message will be played a total of 3 times (initial prompt + 2 retries) if the user enters an invalid input or remains silent.
Note: If the number of retries exceeds the defined limit, the default path will be executed if it is enabled. However, if the default path is not enabled, the call will be disconnected.Add default path: If this is checkboxed, you include a default path in the IVR configuration. If the user exceeds the retry limit, this default path will be executed. A separate leg is created through the node on selecting this checkbox to define the required path.
Note: In the default path, you need to set the default language. If you do not select a default language, the first language in the list will be played by default. If the default path is not configured, the call will be disconnected after reaching the defined limit of retries.Timeout Message Checkbox:
By enabling this, you can define a custom message to be played when the user does not provide any input within the DTMF/Speech timeout duration (defined in the voice application settings). Upon checking this box, you can upload recorded prompts or enter your desired message in the "operator says" content box. For instance, you can add a message like "Sorry. I did not capture any input. Please try again."
If the "Timeout Message" checkbox remains unchecked, the timeout message defined at the IVR level (during the IVR creation) will be played instead.
Invalid Input Message Checkbox: Another condition that is possible is that the user gives an invalid input. In this case, we can enter a custom message to be played when user provides invalid input [Works similar to the timeout message].Upon checking this box, you can upload recorded prompts or enter your desired message in the "operator says" content box. For instance, you can add a message like "Sorry. This is an invalid input. Please try again."
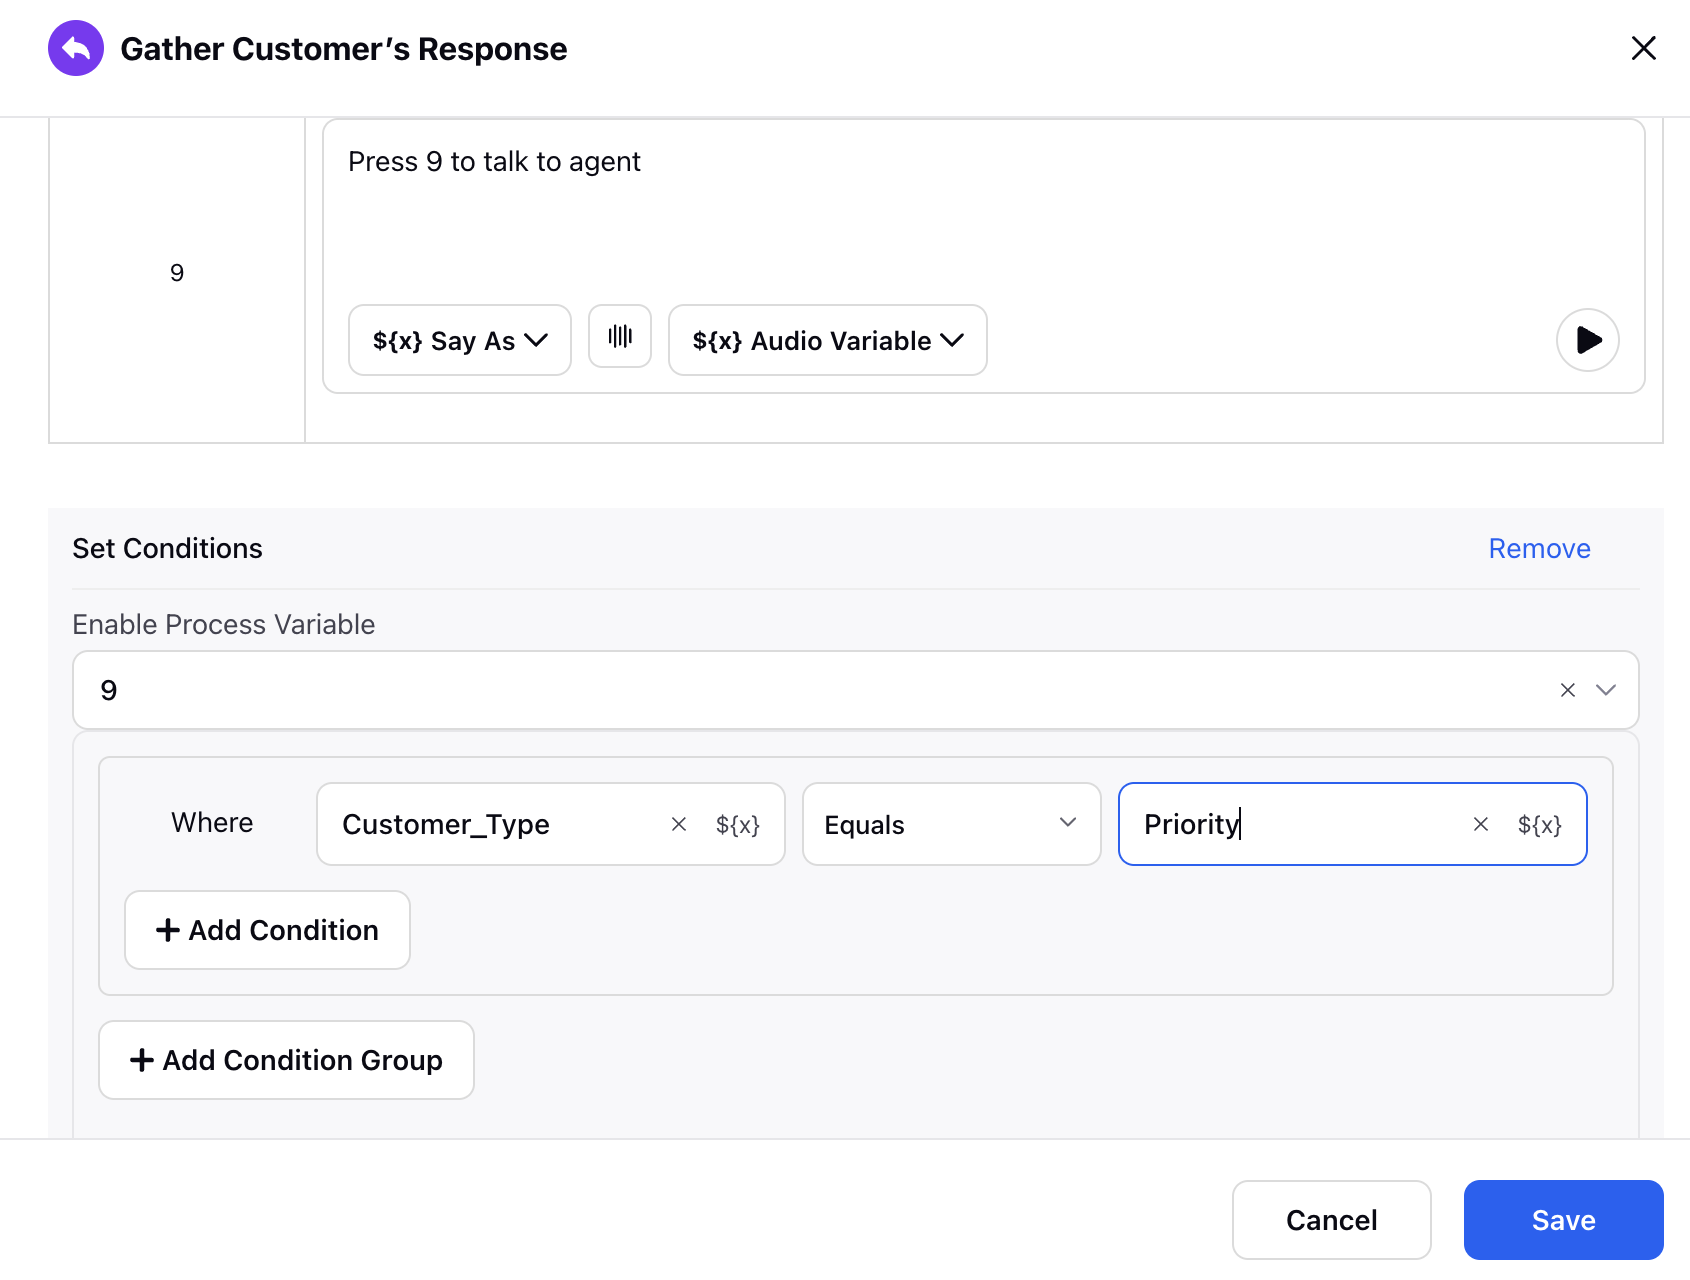
Enable advanced conditional prompt messages: By enabling this feature, users can apply advanced conditions to determine which specific DTMF options should be enabled. This functionality is available when the "Number of Input Digits" is set to 1. Once enabled, users can provide prompts for each DTMF option and utilize the "Add Condition" option to specify the condition and condition group for presenting each option to the user. This capability empowers users to have greater control over the prompt flow based on specific conditions. For instance, in the example below, the DTMF option 9 (Connect to agent) is controlled based on the customer type. If the customer will be a priority customer, the option to connect to an agent will be provided.
![]() Note: This functionality can only be enabled when the number of input digits will be 1
Note: This functionality can only be enabled when the number of input digits will be 1
Record Customer Voice and IVR Prompt
Sprinklr allows you to record both Customer Voice and IVR prompts during interactions. This feature helps in:
Resolving disputes by maintaining a record of conversations.
Verifying customer inputs to ensure accuracy in case of issues.

To enable recording, toggle the "Enable Recording" switch in the GCR node.
![]() Note: Sensitive information will be redacted during recordings.
Note: Sensitive information will be redacted during recordings.