How to Send Communication Over SMS/Email/Whatsapp
Updated
Pre-requisite for configuring this node in IVR: Sprinklr Voice should be enabled for the environment and your user should have IVR View, Edit or Create permission

During an IVR conversation, a brand may need to send various communications to the customer on their preferred channels. This can include sending instructions to resolve issues, invoices via email, or itineraries through email or WhatsApp. To facilitate this, we provide a node called "Send SMS/Email/WhatsApp," which allows you to send messages via SMS, email, or WhatsApp to the customer.
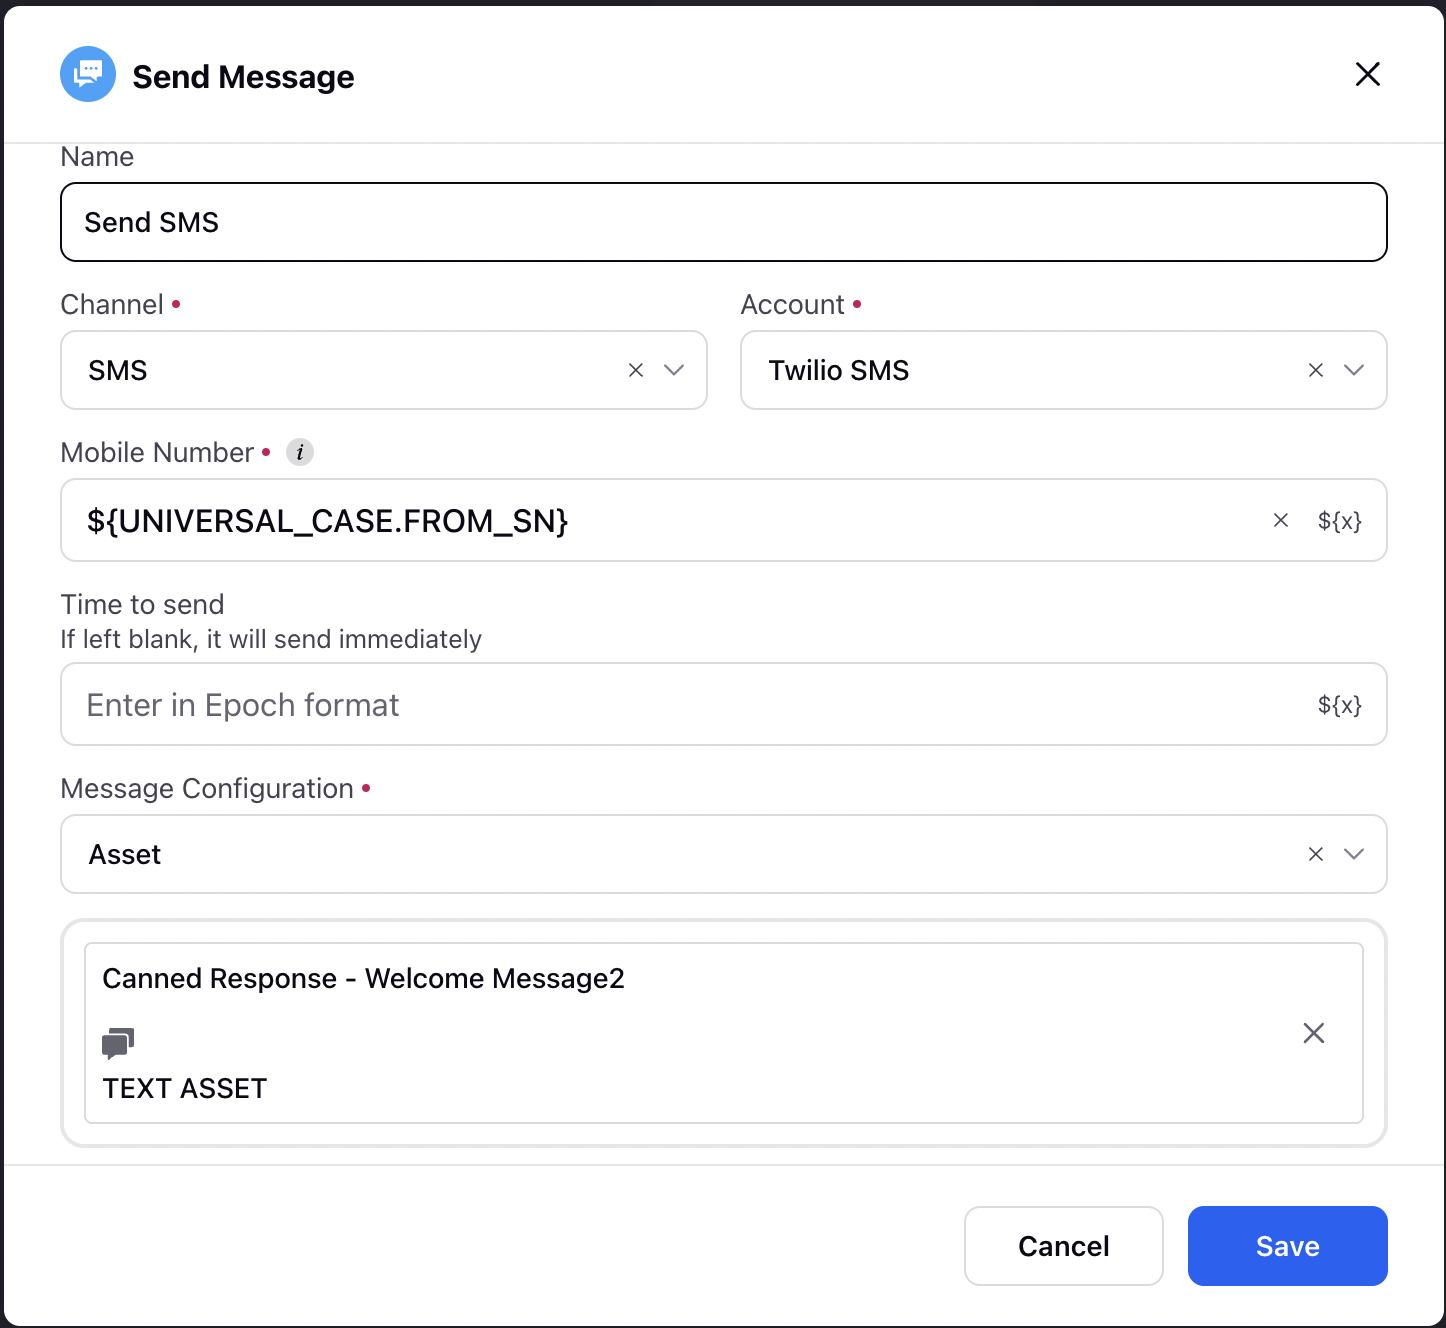
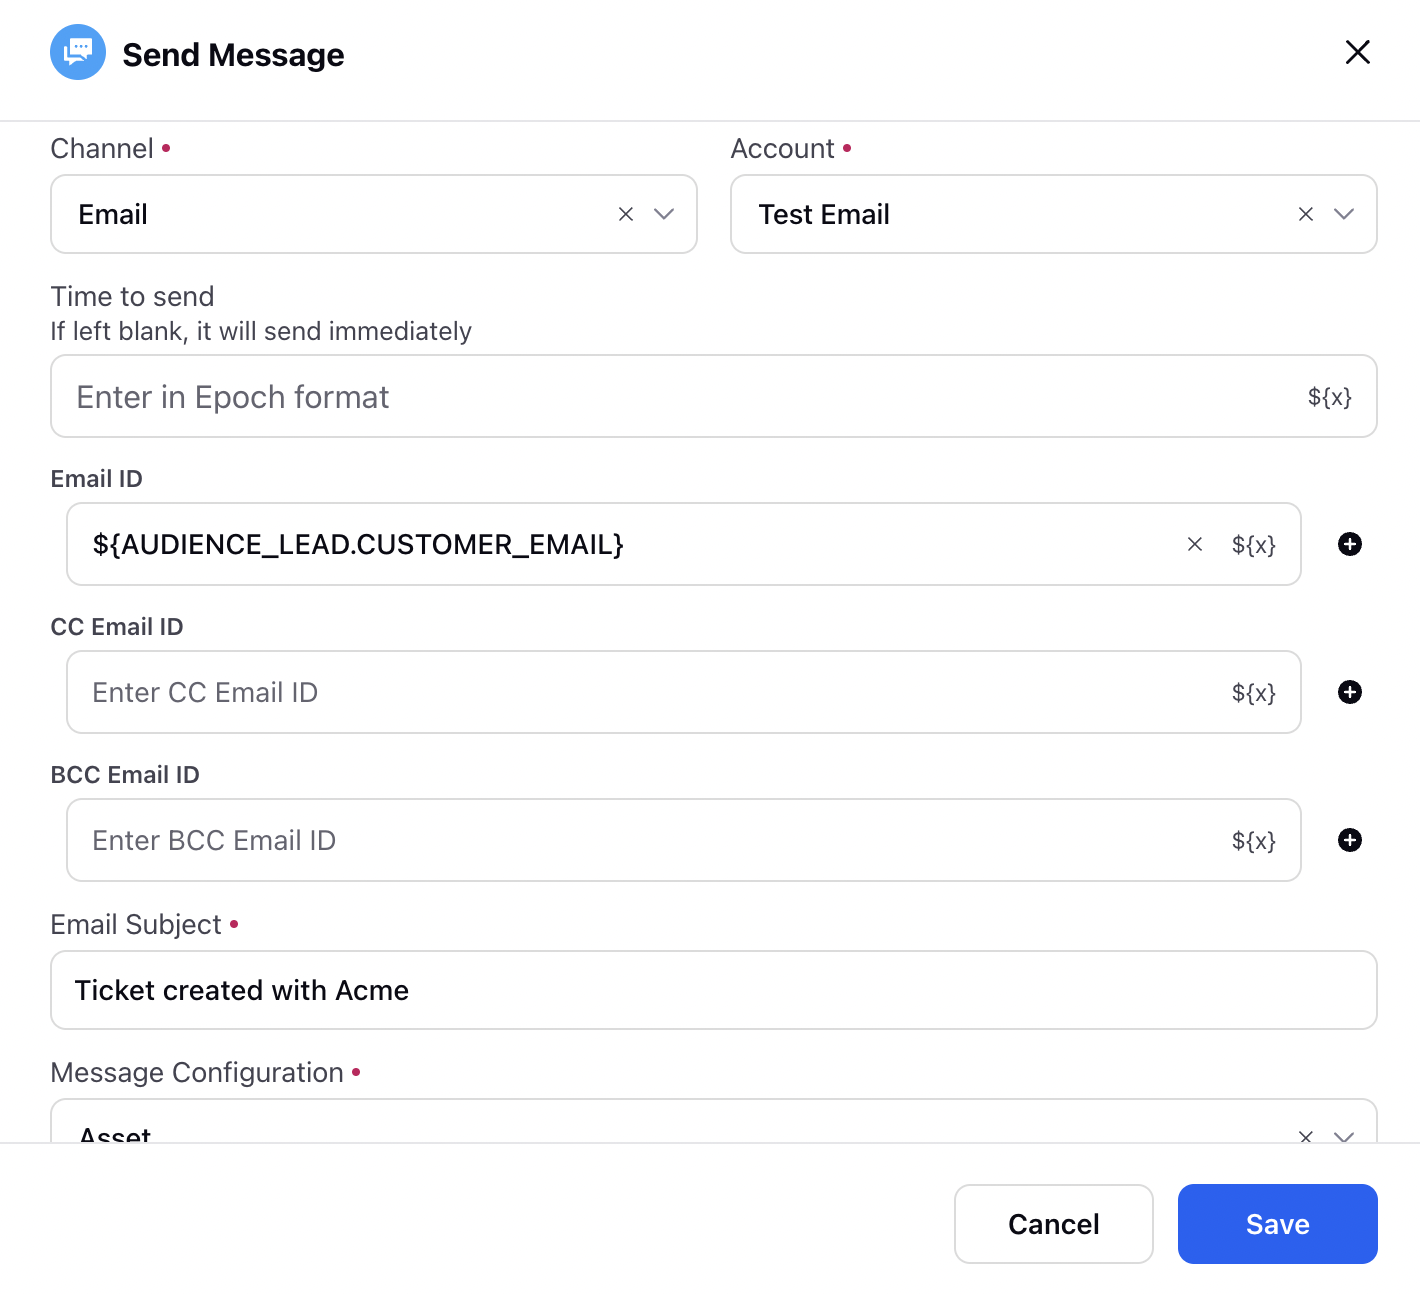
Here is a screenshots of the sample configuration of this node-


Components
The Send Whstapp/SMS/Whstapp node major components are:
Channel: Select the communication channel on which the communication will be sent i.e, SMS, Whatsapp, Email
Account: This dropdown allows you to choose the brand account that will be used to send the message.
Note: You need to add respective account in sprinklr in order to use
Mobile Number: When you select SMS or WhatsApp as the communication channel, you need to provide a mobile number in this field. You can choose the resource for mobile number from the resource menu, which can be accessed by clicking on '${x}' on the right side. In orderr to send the message to caller directly you can choose Caller Mobile Number from the resource menu.
Note: Mobile number variable must not contain + at the start and it should start with the country code.
Time to Send: This field in the Send SMS/Email/WhatsApp node allows you to schedule the delivery of your communication at a specific time. If you will left it blank it will send immediately.
Note: This field accept the time in epoch format only, if any API is returning the date and time in any other format you have to convert it into epoch format using "DATE_UTIL.DATE_TO_EPOCH" function.
Message Configuration: This field allows you to choose how you want to configure the message. You can either type the message manually or select from a pre-configured asset.
Message Configuration: You can create a message to send to the customer. For SMS and Email, you can write custom messages directly in the node. However, for WhatsApp, you must use an approved HSM template from the assets instead of typing a message. Additionally, when sending an email, you will need to provide the subject of the email as well in Subject field.
Note: You can use resources in the content of the message.
Email ID, CC Email ID, BCC Email ID: When you want to send Email, you have the option to enter multiple email addresses for the recipient, CC (carbon copy) and BCC (blind carbon copy) email addresses. You can add these email addresses by using the "${x}" option from a variable or by typing them manually. In each section, you can add multiple email addresses by clicking on the "+" button.