Using disposition plans in ACW screens
Updated
Once you have configured the disposition plans, you need to add them to the ACW.
To add disposition plans in ACW
To do this, open the Add Screen node on the ACW canvas. Click the Add icon on the right and search and select the Call Disposition screen component.
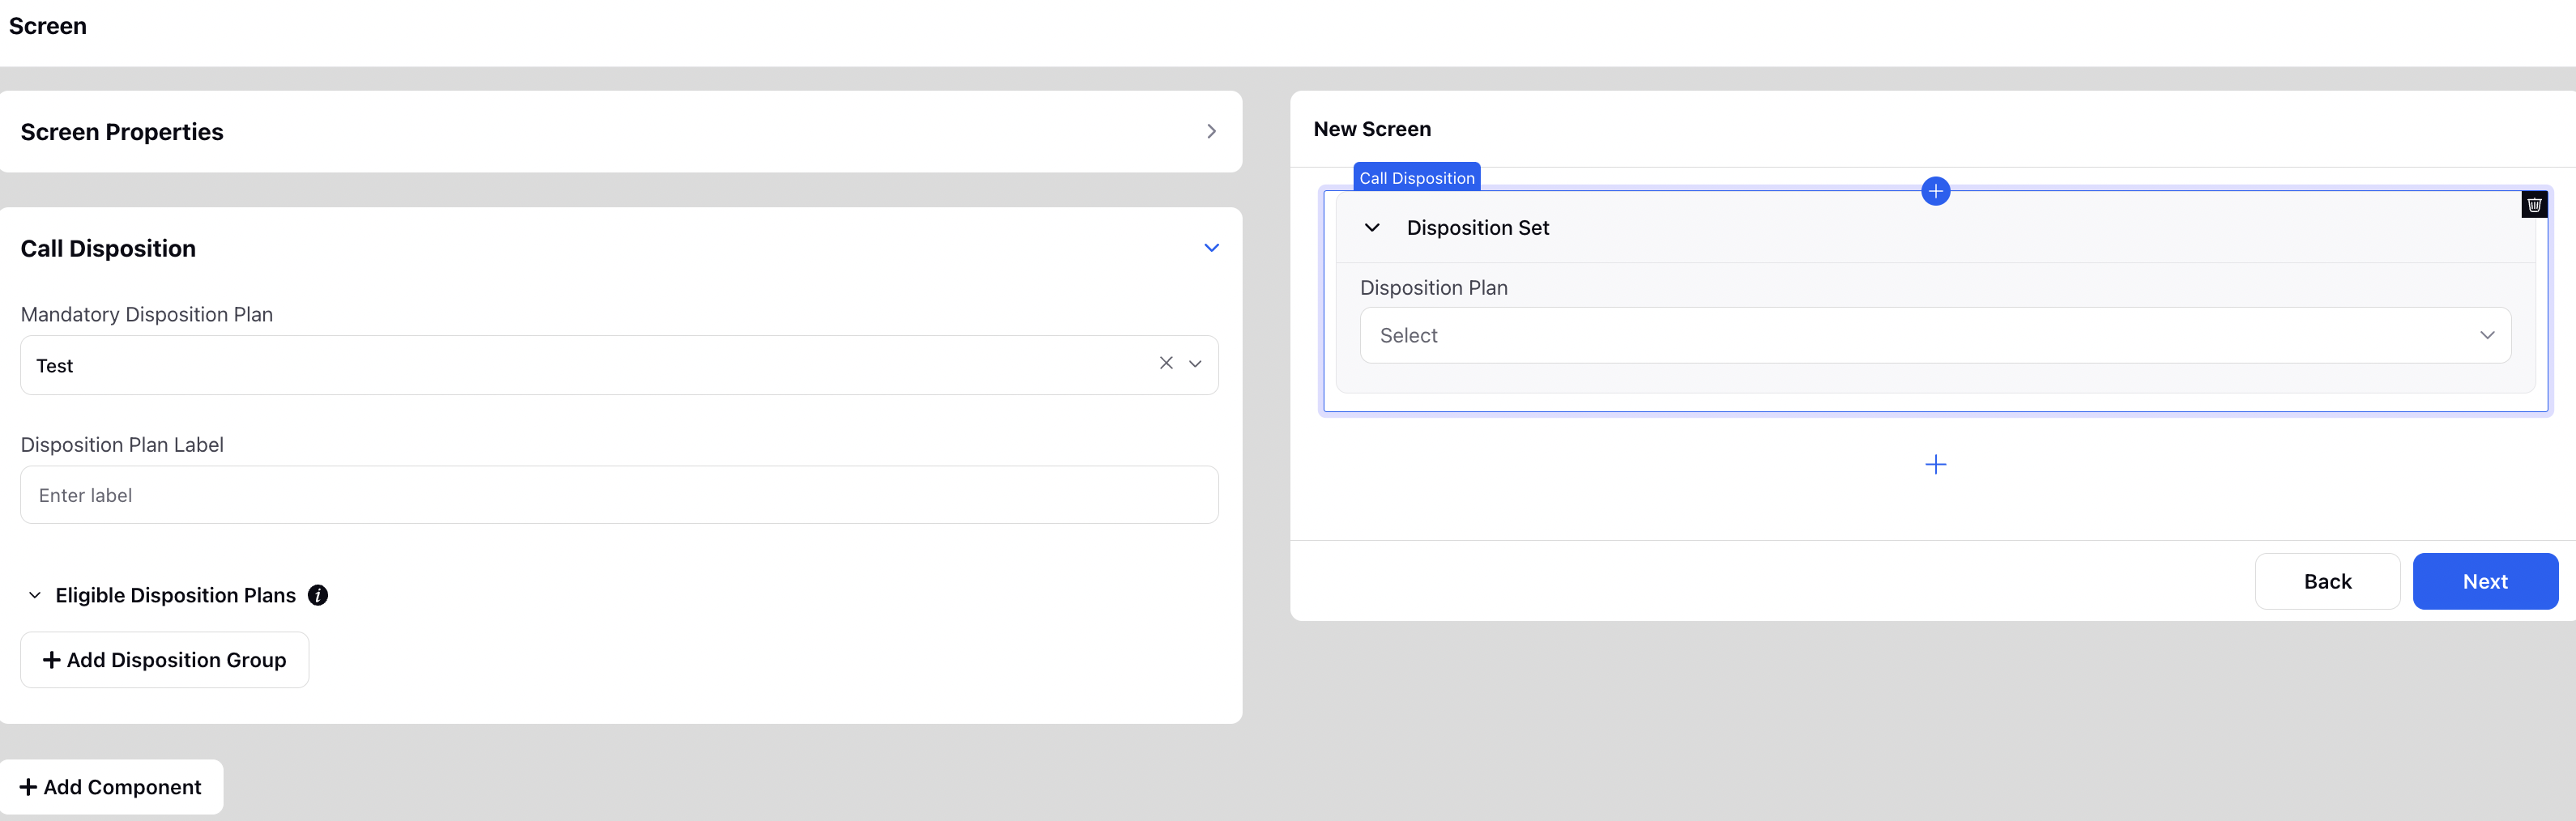
Next, add the following details on the left side of the screen.
Screen Properties: View the screen properties, such as Screen Name, Title Bar Text, and Navigation Bar.
Mandatory Disposition Plan: Select the disposition plan which will be mandatory for the agents to fill while filling the ACW.
Disposition Plan Label: This is the label of the disposition plan that the agents will be able to see.
Eligible Disposition Plans: Access the Add Disposition Group option.
Add Disposition Group: Add a disposition group. A disposition group is a collection of disposition plans that can be filled by the agents. It is useful when an agent has to fill multiple disposition plans. For example, an agent might have to fill out a disposition plan for the resolution of the query and another for generating a sales lead.
On-screen Disposition Plan Label: This is the label that is visible to the agents and is configured in step 3.
Add Component: Add other components to the screen through these buttons.
Multiple disposition plans in an ACW
Multiple disposition plans can be added in an ACW using the Add Disposition Group button. A disposition group is a collection of disposition plans that can be filled by the agents. It is useful when an agent has to fill multiple disposition plans. For example, an agent might have to fill out a disposition plan for the resolution of the query and another for generating a sales lead.
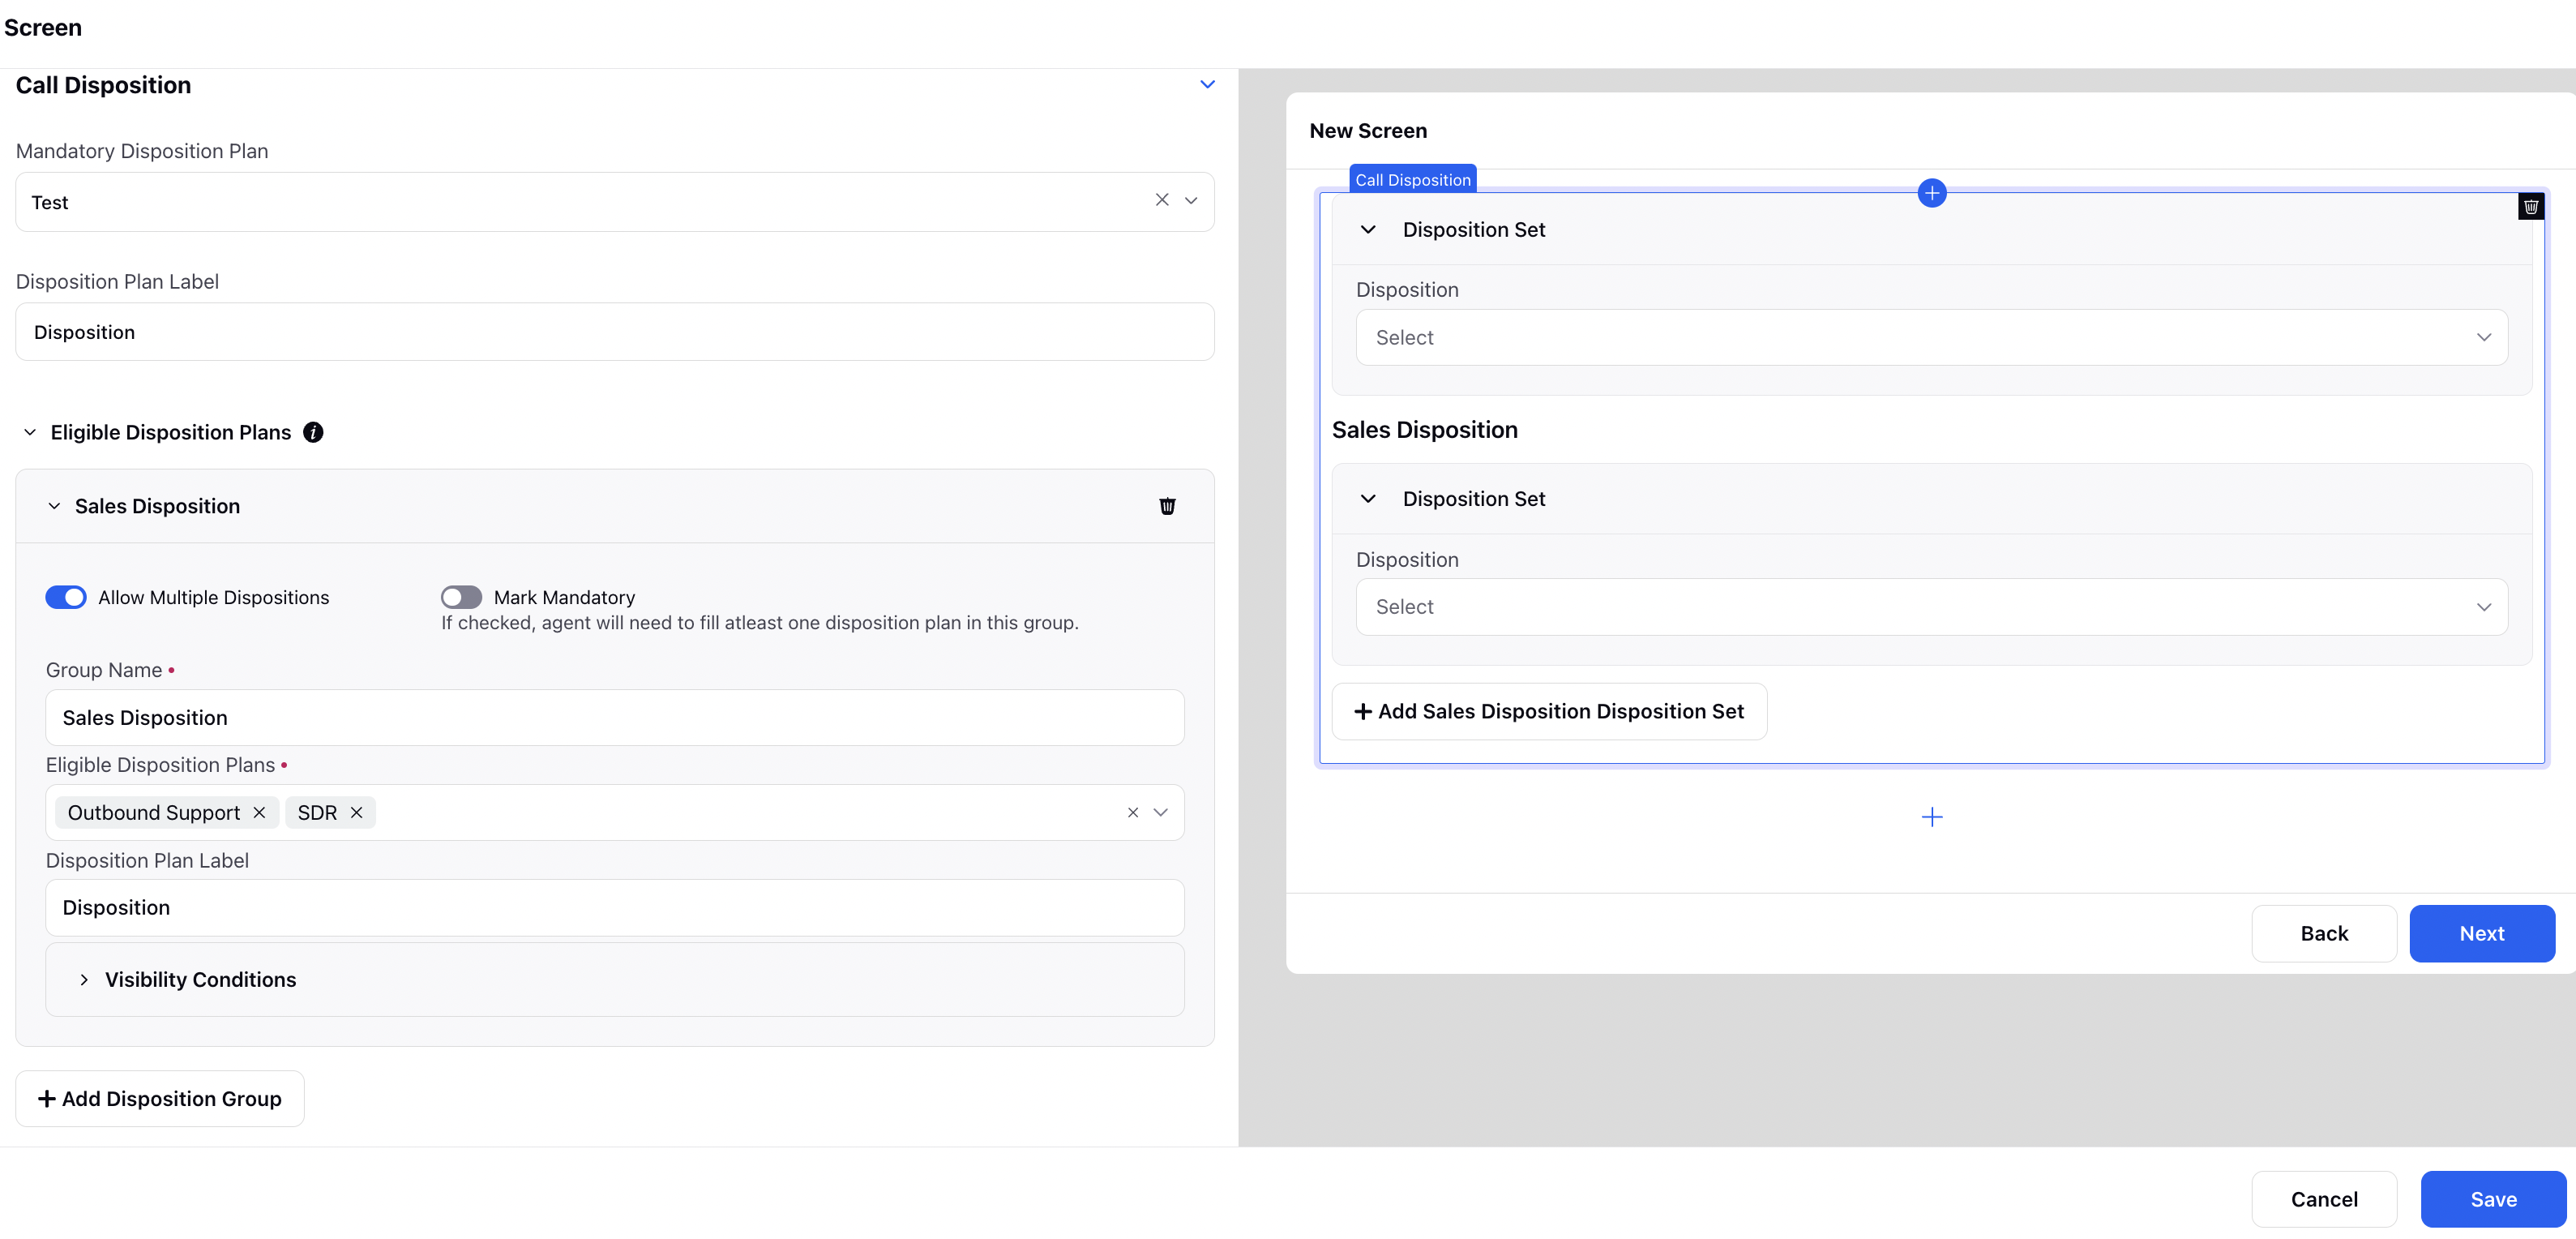
Mandatory Disposition Plan (on-screen): This is the mandatory disposition plan that is visible to the agents on the screen. It is mandatory for the agent to fill this.
Disposition Groups (on-screen): These are the disposition groups that are visible to the agents on their screen. The conditions for viewing and filling these disposition plans are dependent on the user configuring the ACW.
Group Name: Name of the disposition group.
Eligible Disposition Plans: Select the disposition plans that the agents can fill in this disposition group. The selected disposition plans will appear as a drop-down menu for the agents to fill.
The disposition plan dropdown in the ACW interface displays the disposition plans in the exact sequence as defined in the Eligible Disposition Plans dropdown.
Disposition Plan Label: This is the label of the disposition plan that the agents will be able to view on their screen.
Visibility Conditions: These conditions are used to control the visibility of the disposition group to the agents. It is used when the agents need to fill the disposition group only when the certain conditions in the mandatory disposition plan are fulfilled.
Allow Multiple Dispositions: Allows the agents to fill multiple dispositions from the same disposition group. Upon enabling this, the agents get the option to add a “disposition set” from the same disposition group to the ACW they’re filling.
Mark Mandatory: Makes it mandatory for the agents to fill at least one disposition plan from the disposition group.
Delete: Delete the disposition group.
Add Disposition Group: Add multiple disposition groups.