How to Identify Comments as Being from Ad, Dark & PAC Posts
advertising
inbound rules
ad comment moderation
Updated
1 day ago
, by [Redesign] Sprinklr Help Center
In order to help you easily identify all of your ad & dark post comments and view them all in one place, this article will show you how to configure:
Ad Comments Queue & Engagement Dashboard
Dark Comments Queue & Engagement Dashboard
Paid Status Custom Field, Detection Rule & Macro
PAC Status Custom Field, Detection Rule & Macro
Dark Status Custom Field, Detection Rule & Macro
Notes:
These should all already exist in your environment from when it was first configured. If they are missing, please contact your Success Manager, who can quickly import this configuration for you.
If you wish to set this up yourself, you will need to have a system admin level of access.
Comments from PAC / LAC / LocAC ads can be identified as being paid, but it isn't currently possible to know which ads they came from, or to transfer tags from the Ad Variant to the Comment
A message can be any combination of paid / organic and dark / published, hence the two different Fields & Rules; see below:
Paid Status
Dark Status
Example
Organic
Published
Posts published to your brand's Page/Feed
Organic
Dark
Organically Targeted posts not published to your brand's Page/Feed
Paid
Published
Posts that were originally published normally then boosted into an ad
Paid
Dark
Posts that only exist in ads and not on the brand's Page
Ad Comments Queue & Engagement Dashboard
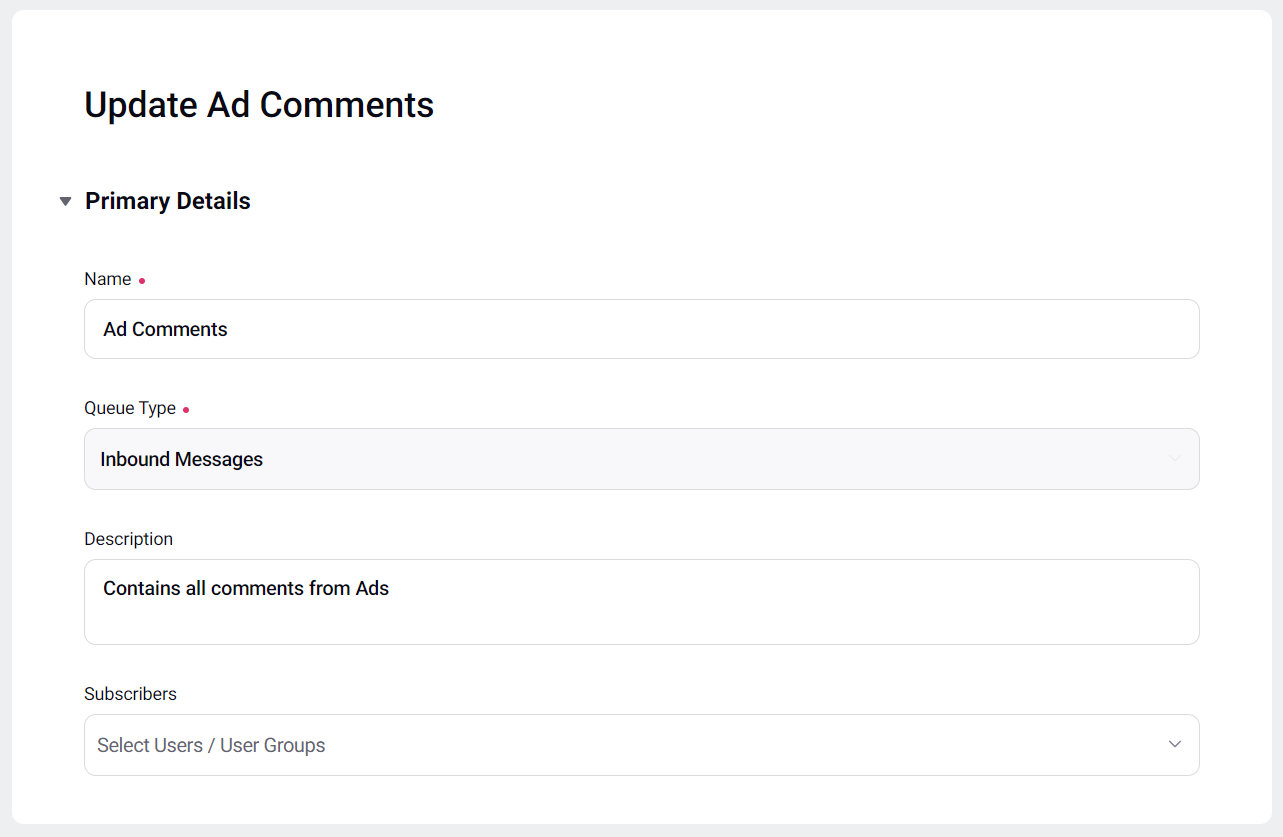
Go to All Settings > Manage Customer > Queues
Add a new Queue and choose "Inbound Messages" as the Queue type
Name the Queue as "Ad Comments", or similar, and add a description if required
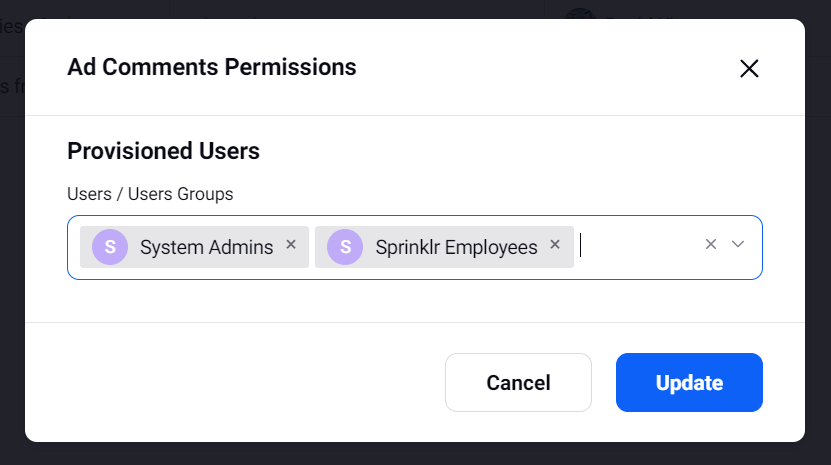
Save the queue, then in the 3-dot menu to go Permissions.
Give access to whichever teams will need to see and/or reply to comments in the queue. It is recommended to also give access to System Admins as well
Make an equivalent Queue for Dark Comments, if desired.
Under Sprinklr Social, go to Engage > Engagement Dashboards > Create Dashboard
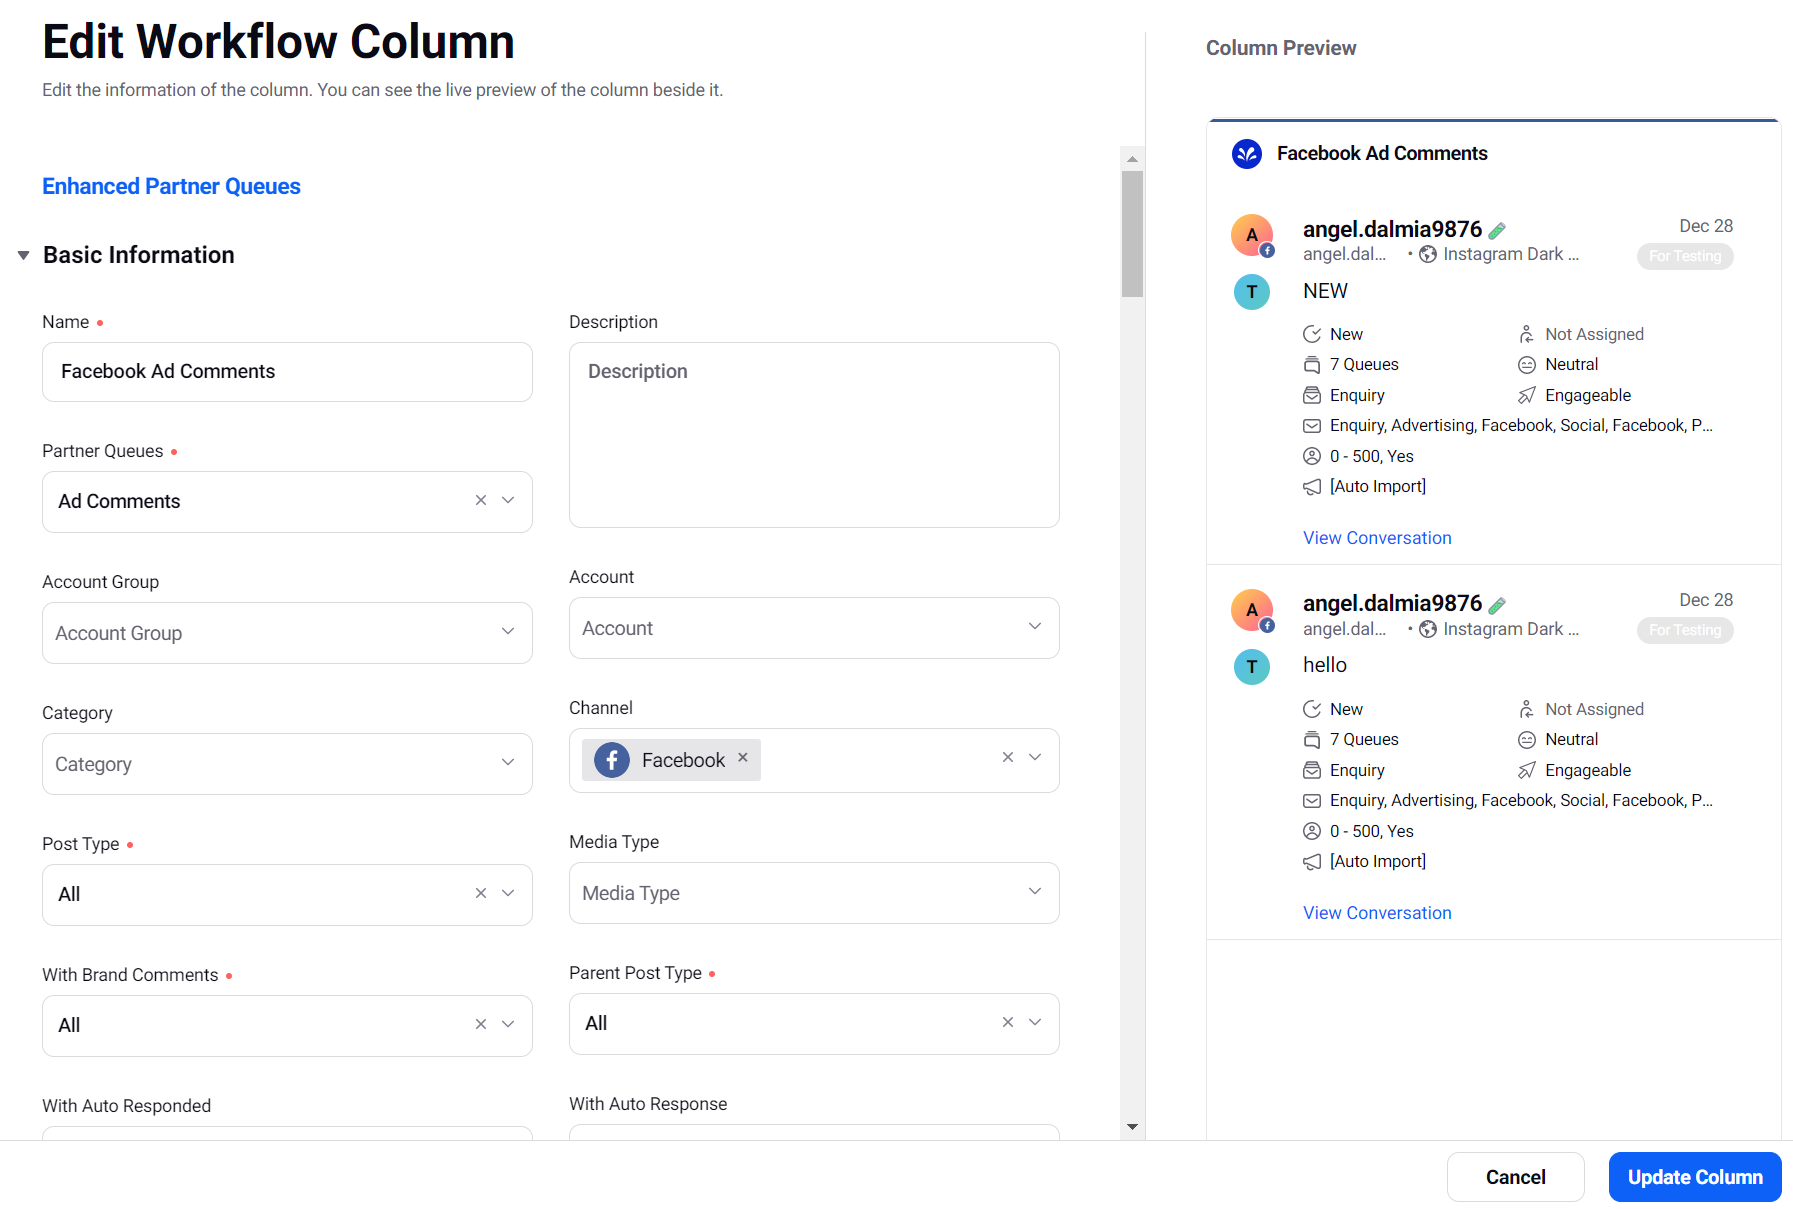
Go to Add Column > Workflow > Enhanced Partner Queues
Name your column, for example "Facebook Ad Comments"
Under Partner Queues, select the Ad Comments Queue made previously
Under Channel, select "Facebook"
Add additional filters as desired, for example [Post Type = Others Post] to only see fan comments
Save the Column and repeat for other channels as desired
The standard Ad Comment Moderation dashboard has columns for Facebook, Instagram, X/Twitter, LinkedIn & TikTok.
Make an equivalent Dashboard using the "Dark Comments" Queue if desired.
Paid Status Detection
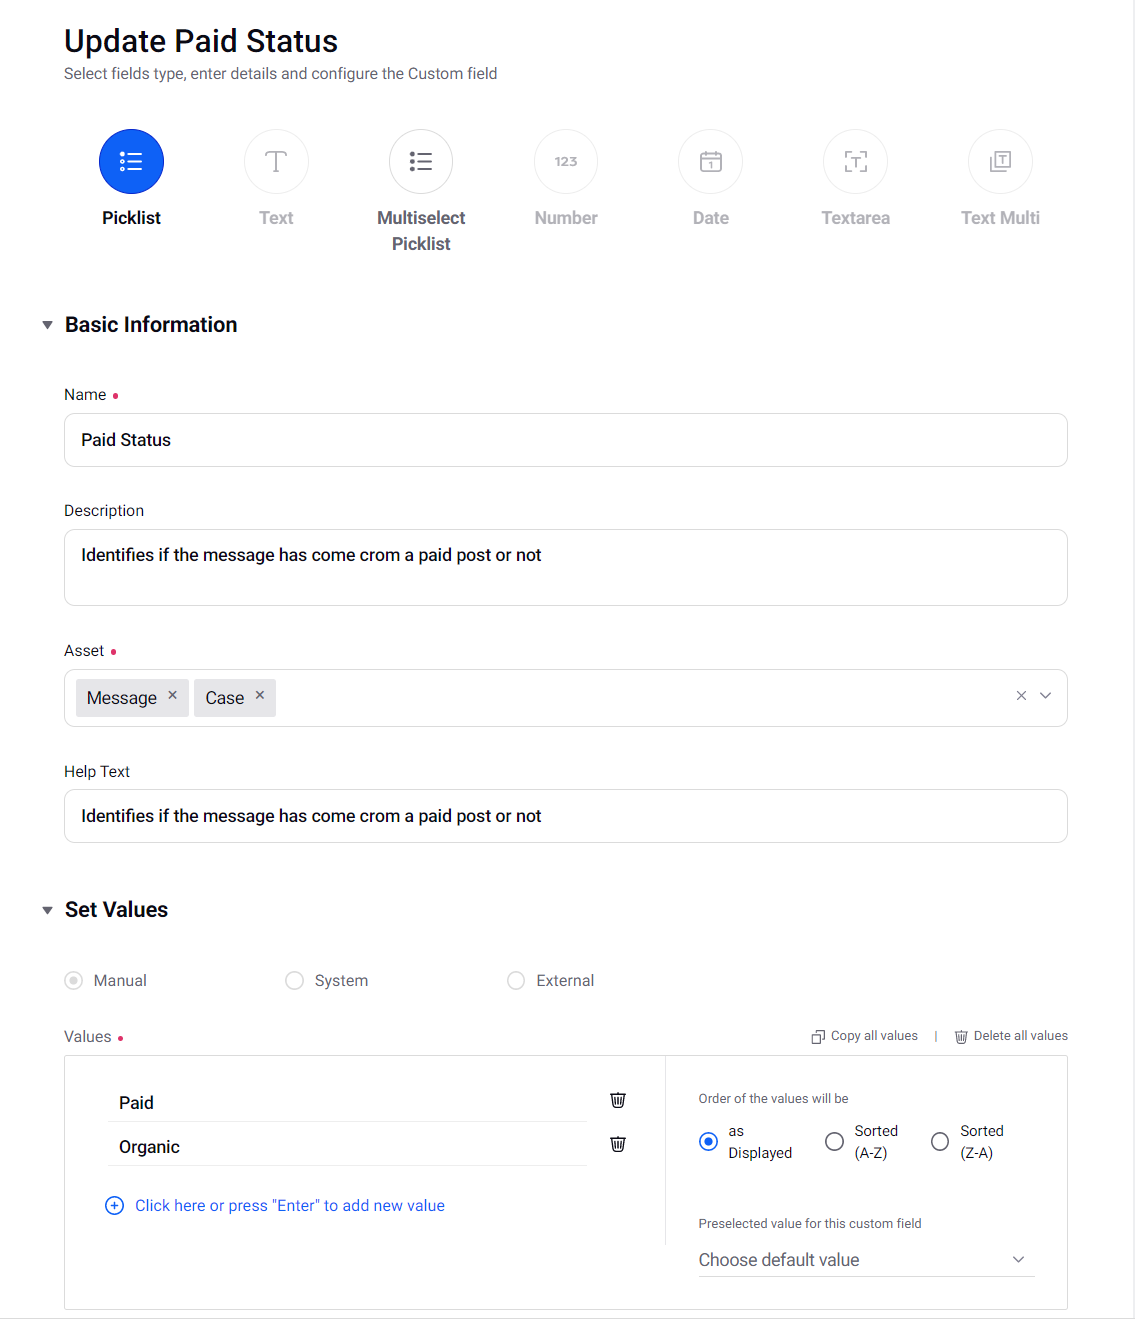
Go to All Settings > Manage Workspace > Custom Fields
Create a Picklist custom Field and call it "Paid Status" (or similar)
The Assets for the Field should be Message and, if you use Case level engagement, Case
The Values in the Field should be "Paid" and "Organic"
Assign a Category to the Field if desired (i.e. Message Source)
Ensure "Include as a part of Filtering / Faceting" is selected and Save
Rule Setup
Go to Sprinklr Social > Triage > Manage Rules
Go to Customer > Inbound and Create New Rule
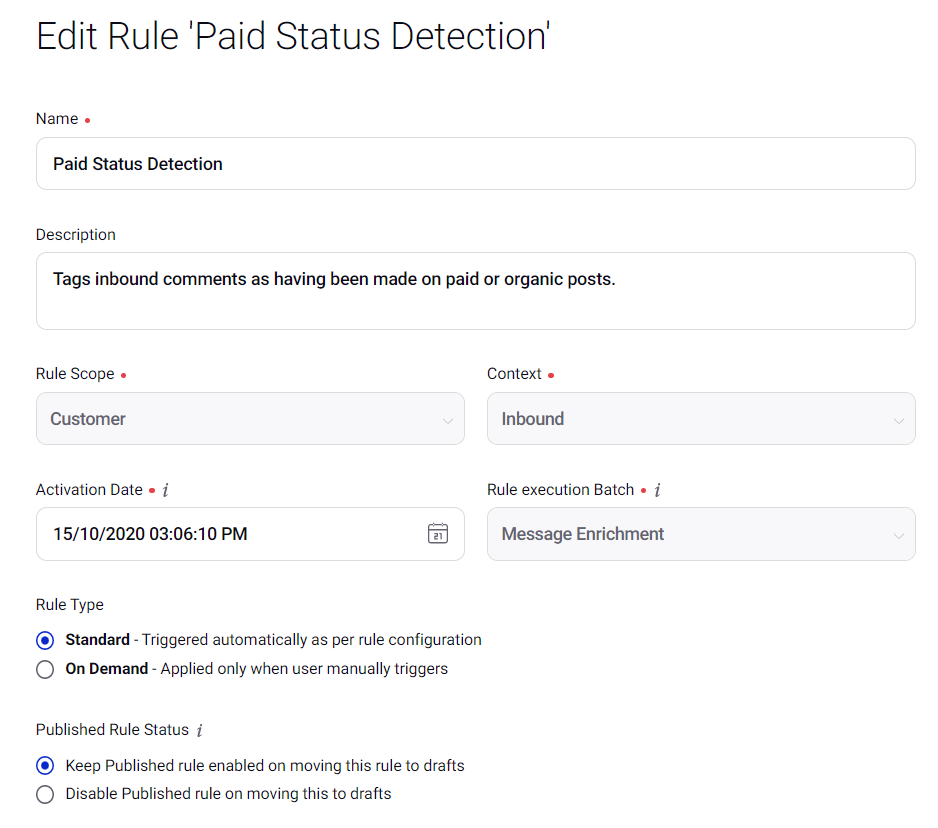
Name the Rule "Paid Status Detection" or similar and add a description if desired
Ideally select "Message Level Enrichment" as the Rule Batch
Rule Structure
Rule Element Details
Element Name
Type
Section
Item
Operator
Values
Connections
Is Sponsored?
Condition
Message Properties
Is Sponsored Post
Is
Yes
If Yes: Tag as Paid
If No: Ad Message Types
Ad Message Types
Condition
Message Source
Messaget Type
Is
Instagram Dark Reply
Instagram Dark Post
Instagram Dark Comment
Facebook Dynamic Ad Post Comment
Facebook Dynamic Ad Post
TikTok Ad Reply
TikTok Ad Comment
TikTok Ad Creative
If Yes: Tag as Paid
If No: Is Sponsored Post Conversation?
Is Sponsored Post Conversation?
Condition
Message Properties
Is Sponsored Post Conversation
Is
Yes
If Yes: Tag as Paid
If No: Is Promotable Post Conversation?
Is Promotable Post Conversation?
Condition
Message Properties
Is Promotable Post Conversation
Is
Yes
If Yes: Tag as Paid
If No: Is Dark Post Conversation?
Is Dark Post Conversation?
Condition
Message Properties
Is Dark Post Conversation
Is
Yes
If Yes: Tag as Paid
If No: Is Ad Conversation?
Is Ad Conversation?
Condition
Message Properties
Is Conversation Initiated from Ads
Is
Yes
If Yes: Tag as Paid
If No: Tag as Organic
Tag as Paid
Action
Message Properties
Paid Status
Set
Paid
Next: Fan Post?
Tag as Organic
Action
Message Properties
Paid Status
Set
Organic
-
Fan Post?
Condition
Message Properties
Post Type
Is
Fan Post
If Yes: Add to Ad Comment Q
Add to Ad Comment Q
Action
Assign to Queue
Add to Partner Queue
-
Ad Comments
-
Finally, save the Rule and Enable it.
Notes on the conditions:
Is Sponsored: has the outbound post been detected as having spend behind it?
Ad Message Types: certain types of inbound message can only come from ads
Is Sponsored Post Conversation: checks if a message is a reply to a sponsored post
Is Promotable Post Conversation: this is specific to X/Twitter dark post ads
Is Dark Post Conversation: this is specific to Facebook PAC/LAC/LocAC ads
Is Ad Conversation: this is specific to private messages responding to "Message" CTAs on click to messenger ads
Go to All Settings > Manage Workspace > Macros > Create Macro
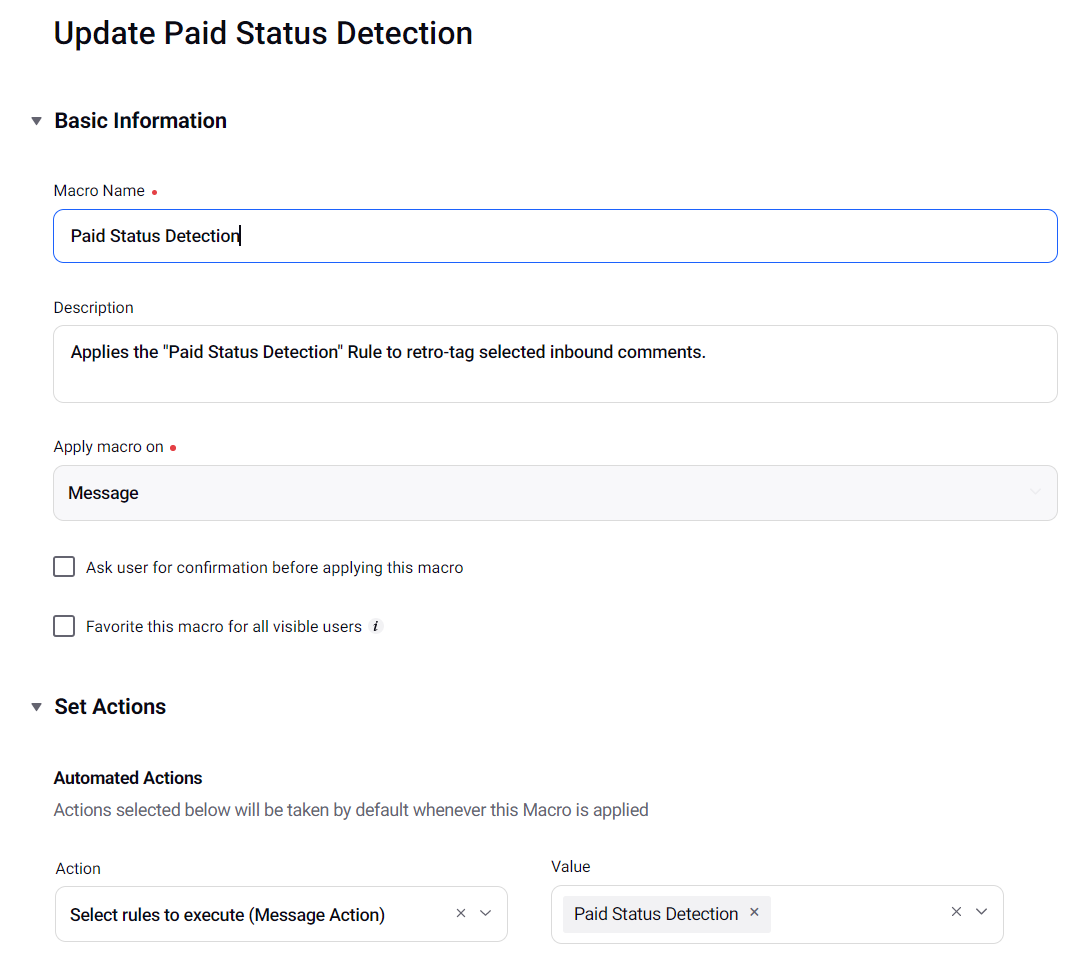
Name the Macro "Paid Status Detection" or similar, and add a description if desired.
Under Actions, go to "Select Rules to Execute" and select the Paid Status Detection Rule just created
Note that the Rule will only be available to select if it is active
Save the Macro
This can now be used in Engagement Dashboards to retroactively tag messages as being from Paid or Organic posts based on the Rule conditions, and add them to the Ad Comments Queue.
PAC Status Detection
Go to All Settings > Manage Workspace > Custom Fields
Create a Picklist custom Field and call it "PAC Status" (or similar)
The Assets for the Field should be Message and, if you use Case level engagement, Case
The Values in the Field should be "PAC Ad Comment" and "Non-PAC Ad Comment"
Assign a Category to the Field if desired (i.e. Message Source)
Ensure "Include as a part of Filtering / Faceting" is selected and Save the Field
Rule Setup
Go to Sprinklr Social > Triage > Manage Rules
Go to Customer > Inbound and Create New Rule
Name the Rule "PAC Status Detection" or similar and add a description if desired
Ideally select "Message Level Enrichment" as the Rule Batch
Rule Structure
Rule Element Details
Element Name
Type
Section
Item
Operator
Values
Connections
Facebook Dark Sponsored Messages
Condition
Message Source
Is Dark Post
Is
Yes
If Yes: No Ad Name
Message Properties
Is Dark Post Conversation
Is
Yes
Is Sponsored Post Conversation
Is
Yes
No Ad Name
Condition
Paid Entities
Ad Variant Name
REGEX
([A-Za-z0-9]*)+
If Yes: Non-PAC Ad Comment If No: PAC Ad Comment
Non-PAC Ad Comment
Action
Message Properties
PAC Status
Set
Non-PAC Ad Comment
-
PAC Ad Comment
Action
Message Properties
PAC Status
Set
PAC Ad Comment
-
Finally, save the Rule and Enable it.
Go to All Settings > Manage Workspace > Macros > Create Macro
Name the Macro "PAC Status Detection" or similar, and add a description if desired.
Under Actions, go to "Select Rules to Execute" and select the PAC Status Detection Rule just created
Note that the Rule will only be available to select if it is active
Save the Macro
This can now be used in Engagement Dashboards to retroactively tag messages as being from PAC or non-PAC posts based on the Rule conditions
Dark Status Detection
Go to All Settings > Manage Workspace > Custom Fields
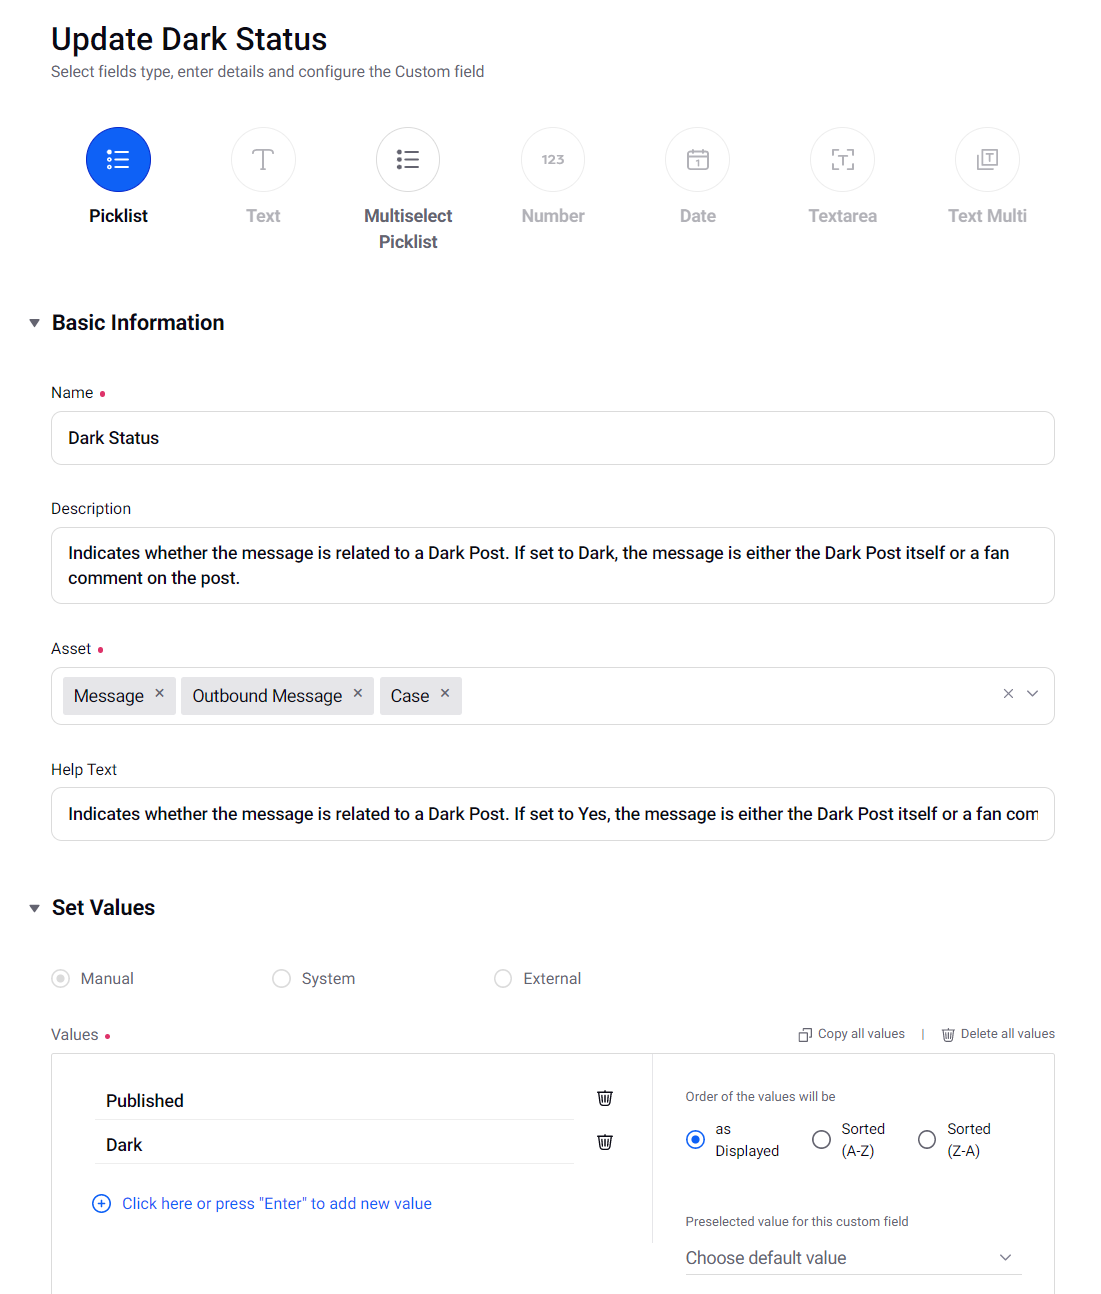
Create a Picklist custom Field and call it "Dark Status" (or similar)
The Assets for the Field should be Message and, if you use Case level engagement, Case
The Values in the Field should be "Dark" and "Published"
Assign a Category to the Field if desired (i.e. Message Source)
Ensure "Include as a part of Filtering / Faceting" is selected and Save the Field
Rule Setup
Go to Sprinklr Social > Triage > Manage Rules
Go to Customer > Inbound and Create New Rule
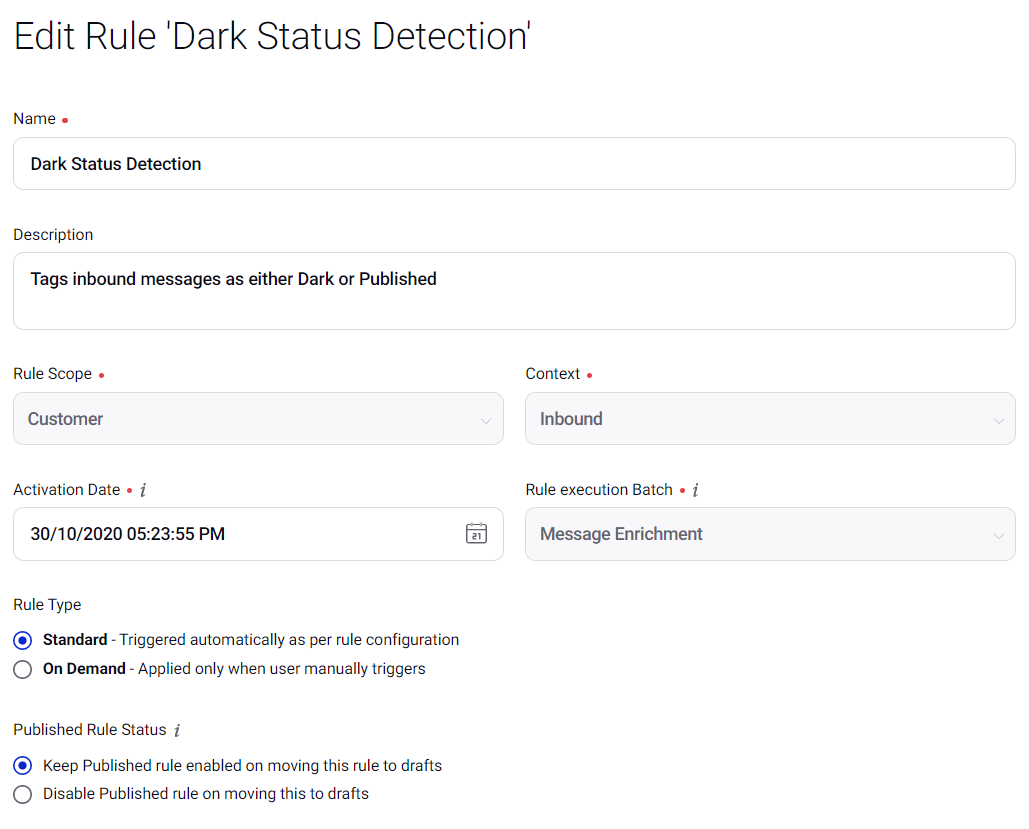
Name the Rule "Dark Status Detection" or similar and add a description if desired
Ideally select "Message Level Enrichment" as the Rule Batch
Rule Structure
Rule Element Details
Element Name
Type
Section
Item
Operator
Values
Connections
Dark Post?
Condition
Message Properties
Is Dark Post
Is
Yes
If Yes: Tag as Dark
If No: UnPublished Post?
UnPublished Post?
Condition
Message Properties
Published Status
Is
Unpublished
If Yes: Tag as Dark
If No: UnPublished Post?
Is Dark Post Conversation?
Condition
Message Properties
Is Dark Post Conversation
Is
Yes
If Yes: Tag as Dark
If No: UnPublished Post?
X Promotable Post Conversation?
Condition
Message Source
Channel
Is
X
If Yes: Tag as Dark
If No: Dark Message Types
Message Properties
Is Promotable Post Conversation
Is
Yes
Dark Message Types
Condition
Message Properties
Messaget Type
Is
Instagram Dark Reply
Instagram Dark Post
Instagram Dark Comment
Facebook Dynamic Ad Post Comment
Facebook Dynamic Ad Post
TikTok Ad Reply
TikTok Ad Comment
TikTok Ad Creative
If Yes: Tag as Dark
If No: Tag as Published
Tag as Dark
Action
Message Properties
Dark Status
Set
Dark
Next: Fan Post?
Tag as Published
Action
Message Properties
Dark Status
Set
Published
-
Fan Post?
Condition
Message Properties
Post Type
Is
Fan Post
If Yes: Add to Dark Comment Q
Add to Dark Comment Q
Action
Add to Queue
Add to Partner Queue
-
Dark Comments
-
Finally, save the Rule and Enable it.
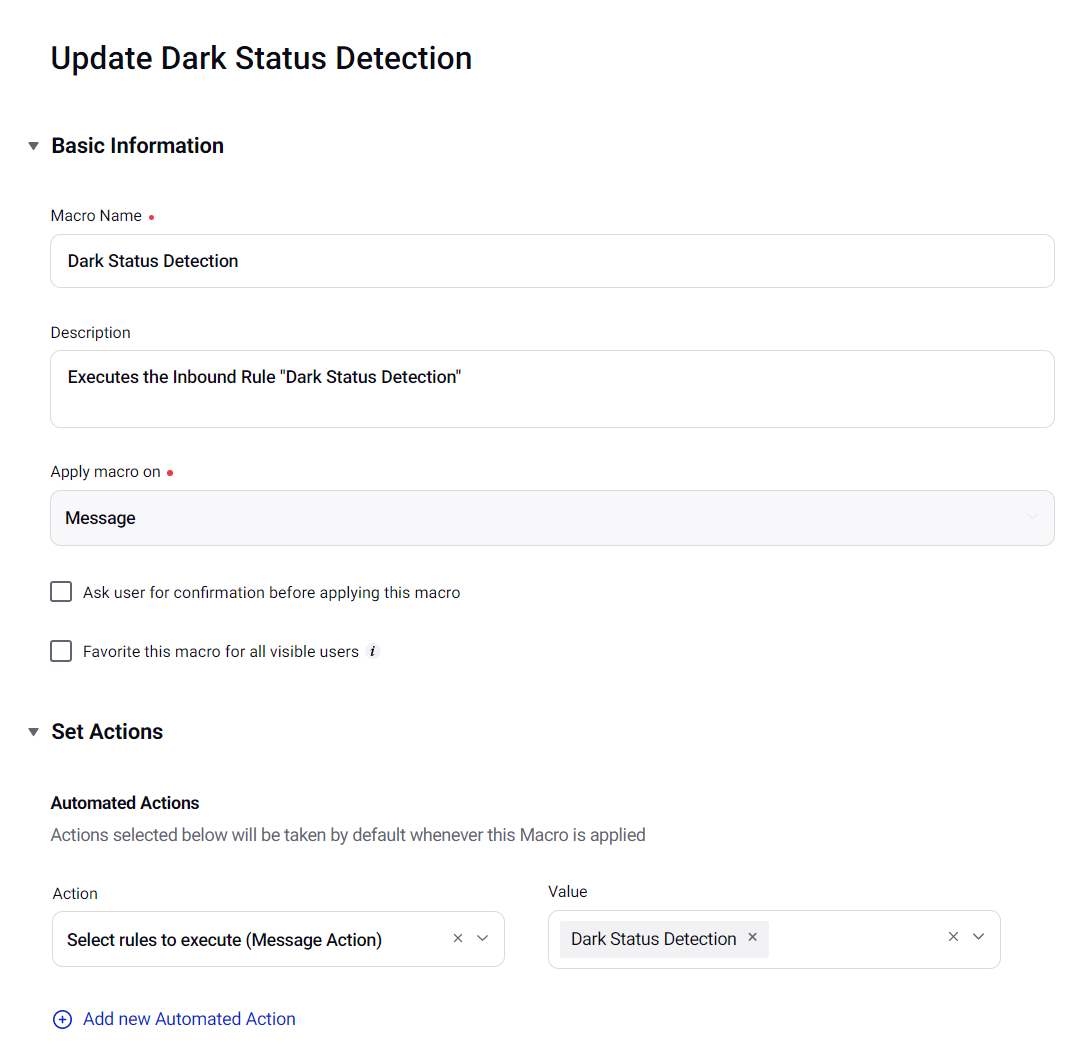
Go to All Settings > Manage Workspace > Macros > Create Macro
Name the Macro "Dark Status Detection" or similar, and add a description if desired.
Under Actions, go to "Select Rules to Execute" and select the Dark Status Detection Rule just created
Note that the Rule will only be available to select if it is active
Save the Macro
This can now be used in Engagement Dashboards to retroactively tag messages as being from Dark or Published posts based on the Rule conditions, and add them to the Ad Comments Queue