Add a Post Asset
Updated
In asset manager, Post Asset allows you to create a complete ready-to-publish asset. These assets closely resemble an outbound message. Like Outbound messages, post assets can include text, media, links, and content placeholders. Post assets can be created specific to social channels including Facebook, Twitter, and Instagram. In this article, we will go through the steps to add a post asset.
Steps to Add a Post Asset
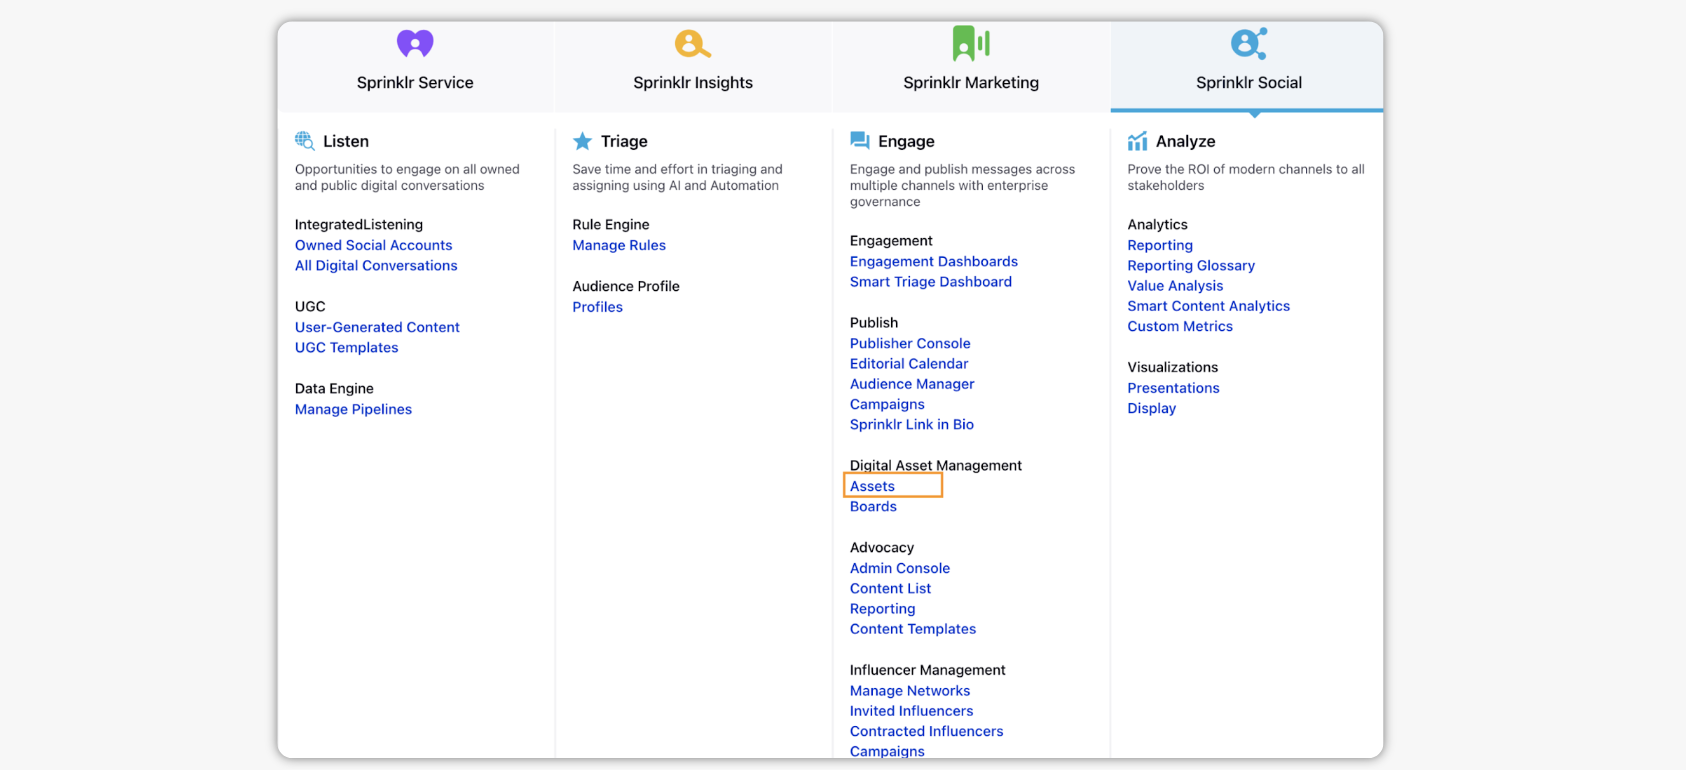
Click the New tab icon
and select Assets under Sprinklr Social.
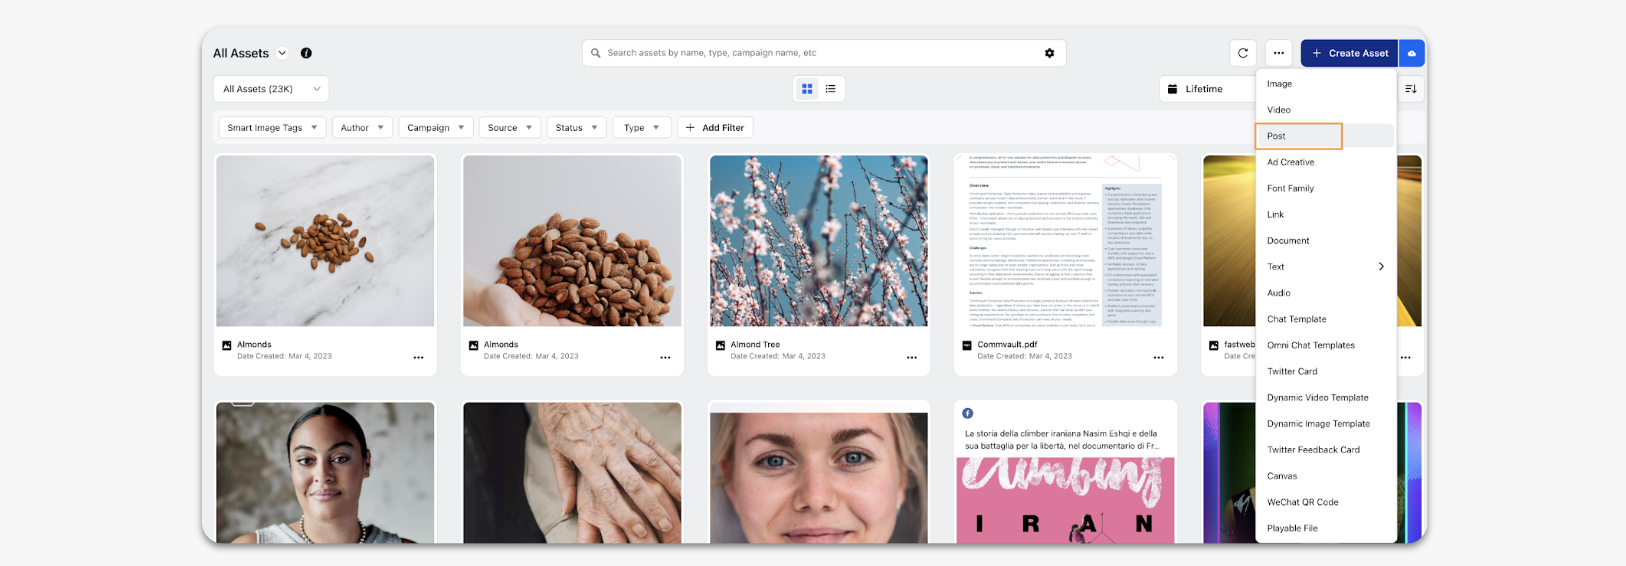
In the All Assets window, click Create Asset in the top right corner.
Select Post from the dropdown.
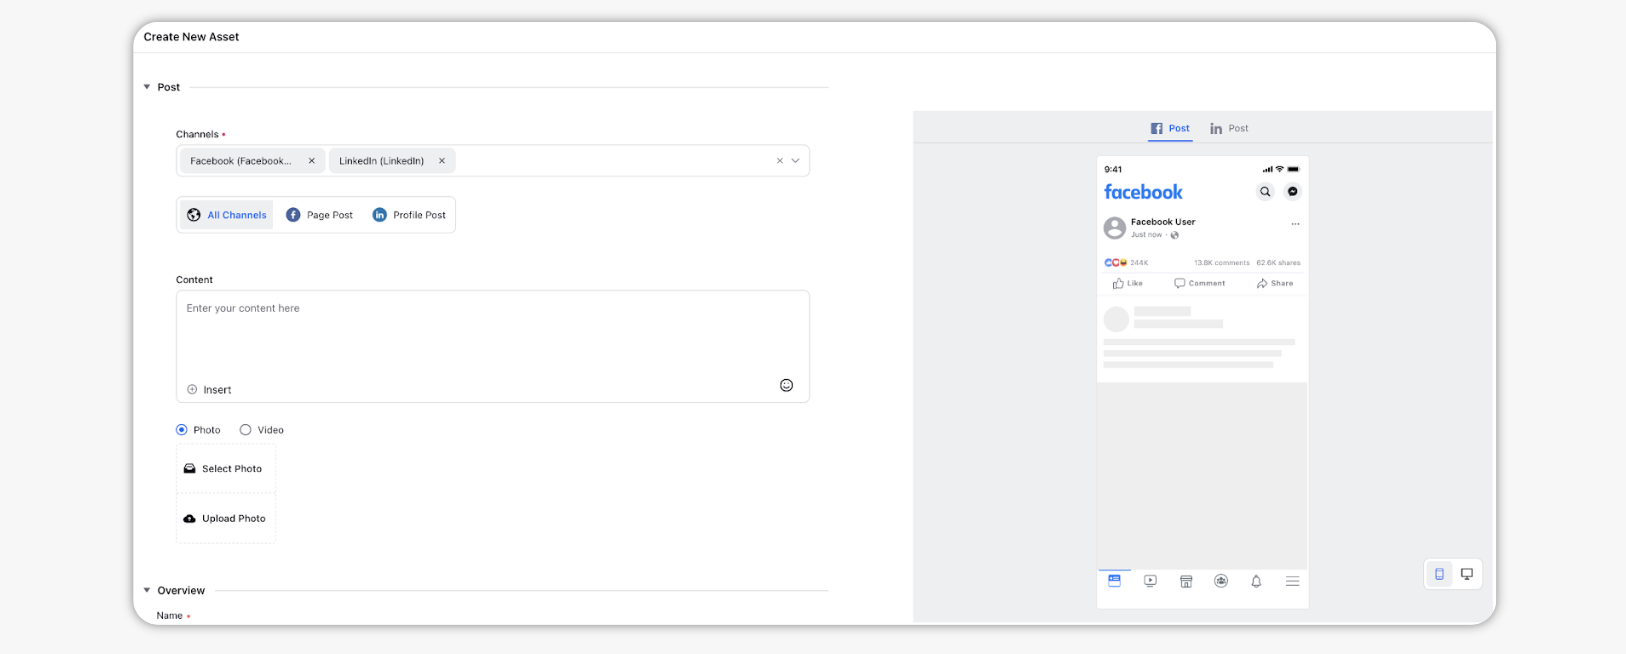
In the Post window, select the Channel from the dropdown.
Under Content, enter the content for the post.
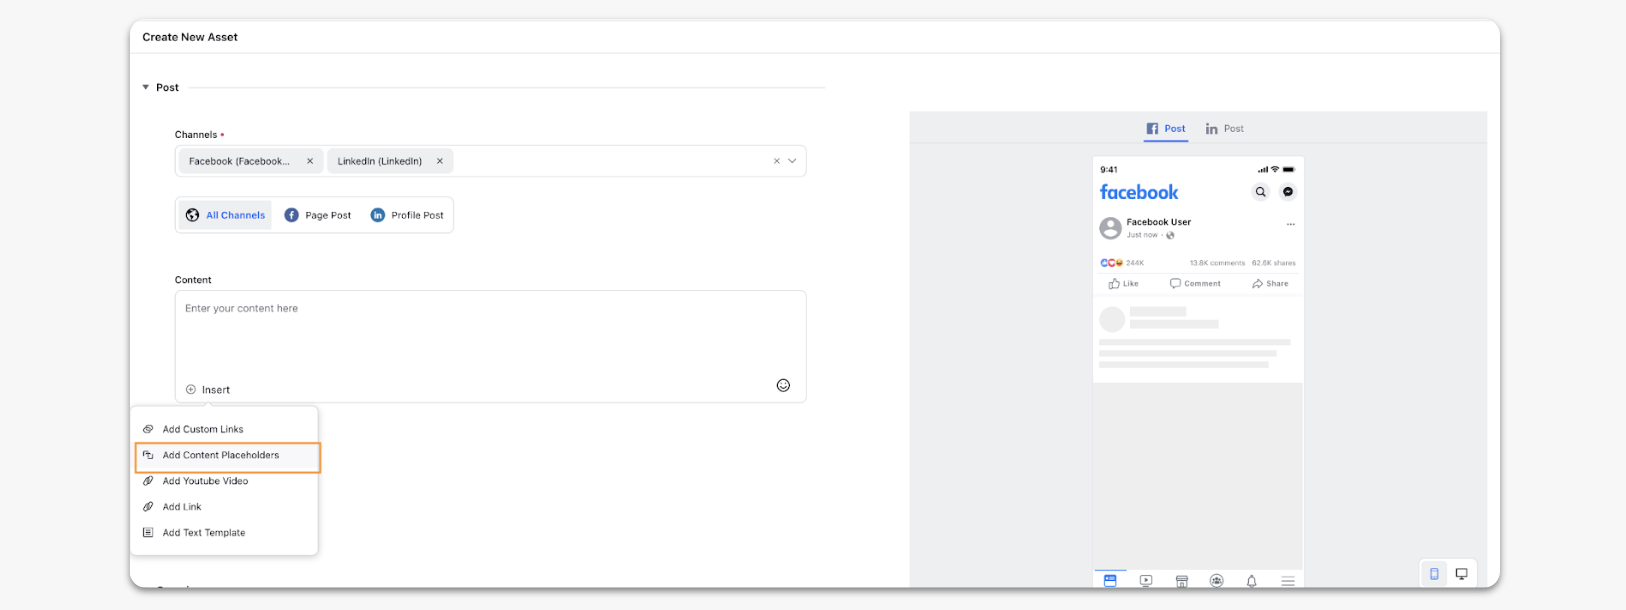
Under the Content section, you can add a content placeholder which allows you to publish content that is dynamic and will update based on the account your content is published from.
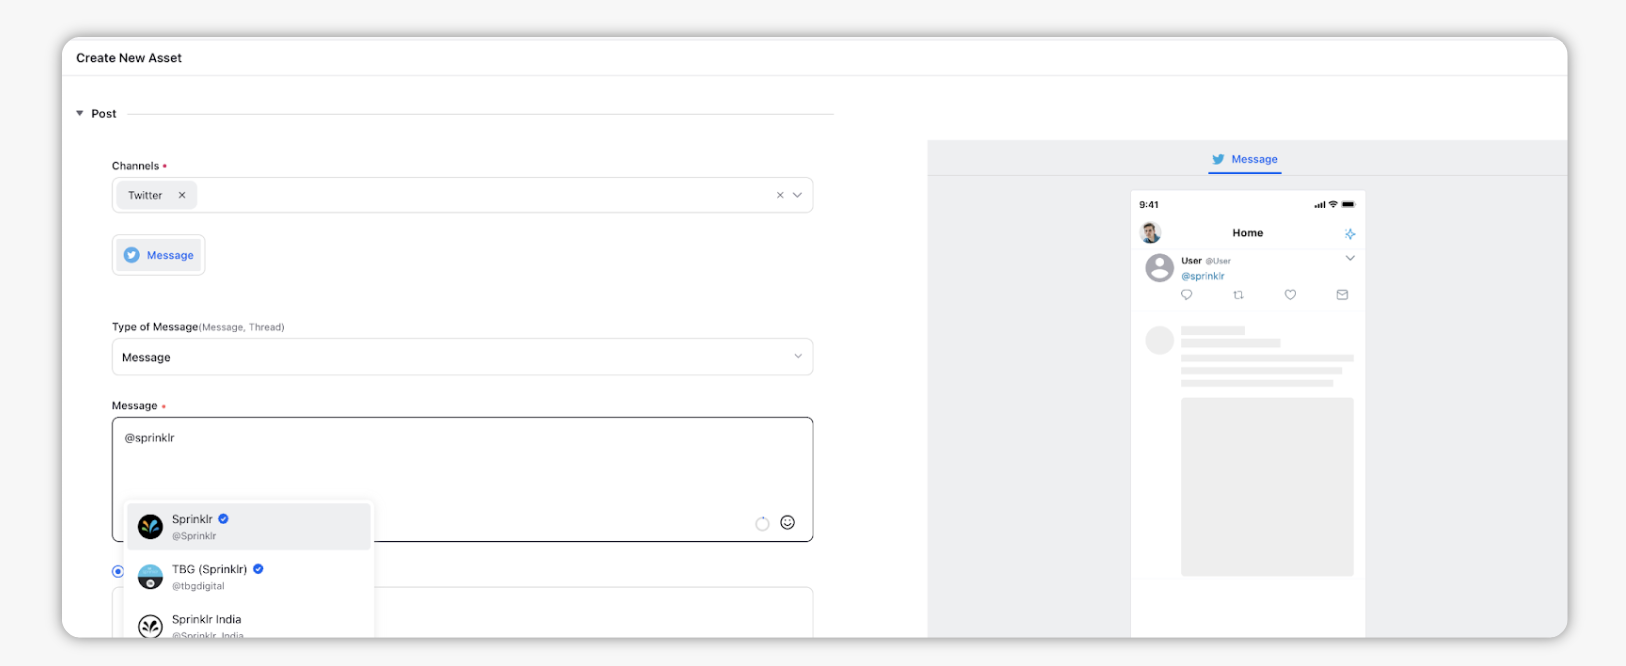
You can @mention Twitter handles in the content section of asset. For example, you may want to ensure that all Post templates you've created for brand events include your marketing team's Twitter account, or that your legal department is mentioned on certain announcements.
Click the AI+ icon and select from the dropdown, based on your requirement.
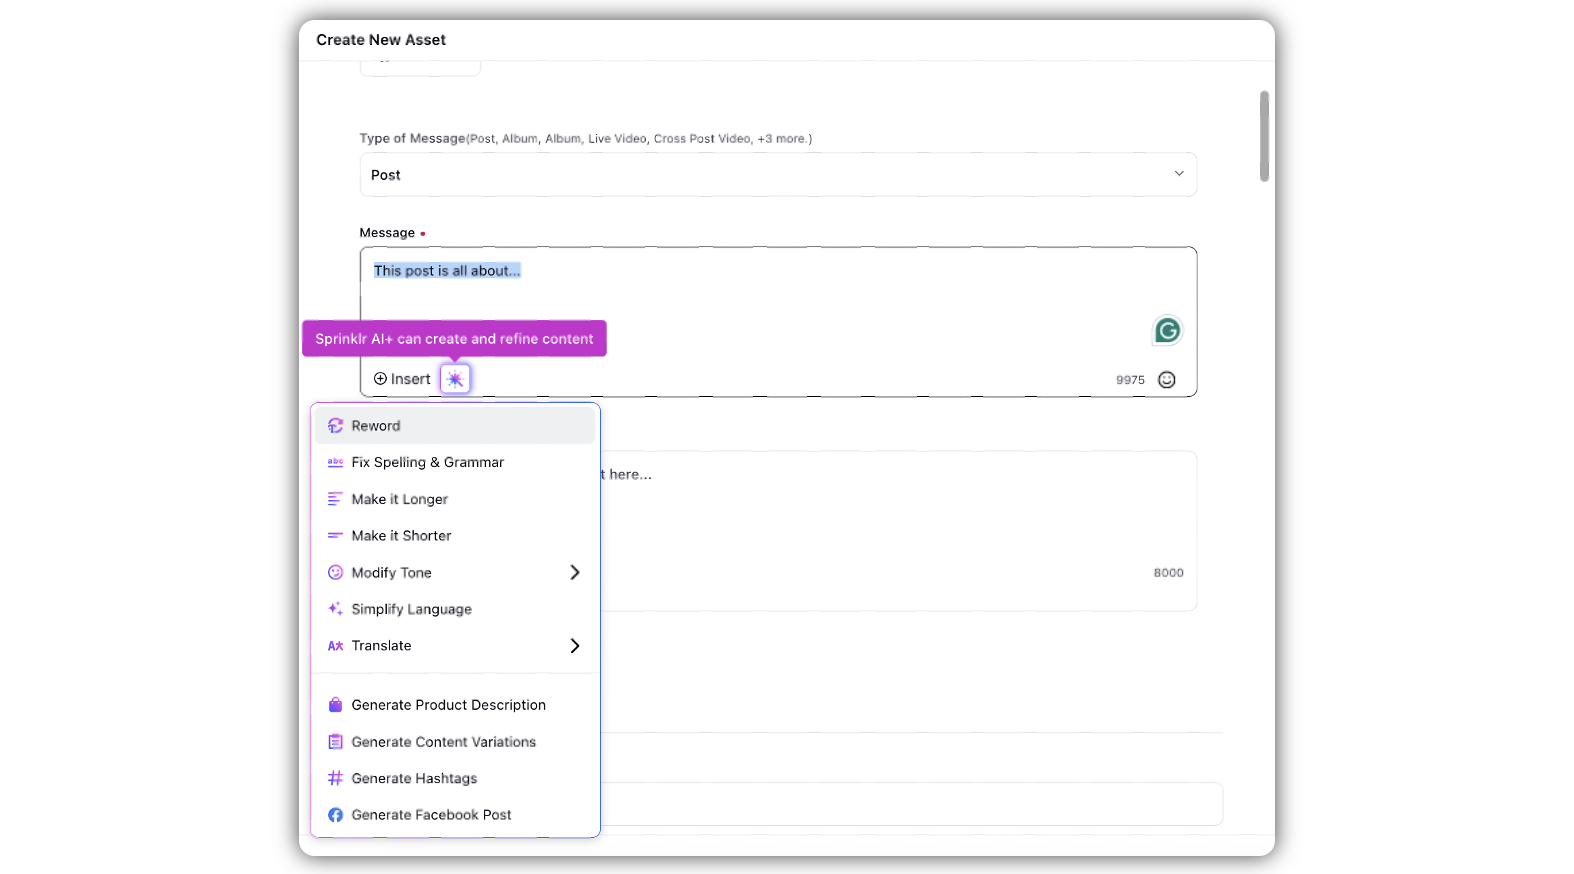
Note: You can use Sprinklr’s AI+ suite while creating post assets. The AI+ suite supports generating and editing captions, fixing its spelling/grammar, altering its length, modifying its tone, simplifying it for translation, etc.
Under Overview, fill in the details in the given fields.
Click Save in the bottom right corner.
Create New Asset: Field Descriptions
Terms | Description |
Name | Enter a name for your template. |
Description | Provide a description of the template. |
Checkbox | You may check the box alongside 'Delete all posts associated with this Asset upon the expiry of Asset'. This helps you prevent losses and litigations due to the unintended violation of intellectual property rights and copyright infringement while using copyrighted assets beyond the expiry date. |
Campaign | Select a campaign to the associated asset |
Sub-Campaigns | Select a sub-campaign to associate with the asset. |
Status | Set status of the asset from Draft, Approved or Expired. |
Available From | Set a date from which the asset will be available. |
Visible from | Set a date from which the asset will be visible to other users. |
Visible Until | Set a date until which the asset will be visible to other users. |
Expires on | Set a date on which the asset will expire |
Schedule time | Schedule your asset by selecting the desired date and time. |
Restricted | Mark your asset as restricted or non-restricted. |
Customer Journey Stage | Select a customer journey stage. They typically include Awareness, Loyalty, Conversion, Considerations, etc. |
Parent Asset | Associate your media asset to a parent asset. |
Information | Provide additional information for the asset. |
Asset Sharing | Share assets with workspaces/User groups |
Visible in all workspaces | Select the checkbox Visible in all workspaces to make your asset visible globally. |
User/User groups | Select Users / User Groups you want to share your asset with. |
Properties | Set desired system and custom fields to your asset. View other details such as WorkflowStatus, Milestone, Review Cycles, etc. |
Note: In the Status field, you have an option to mark your post asset as 'Approved'. If configured in the rule engine, these approved posts can be published/scheduled without having to go through the approval workflow. However, if you edit an approved post, it will go through the approval workflow. |
Note:
When you open a Post Asset in the third pane, and communicate in the Collaborate tab, you can attach files for sharing. File types include images, vidoes, and .zip files that are already available in the DAM.