Create a Text Template
Updated
In asset manager, you can save frequently used messaging for published messages or replies in text template. You can also mark them as canned responses to deliver a faster & consistent response to customers. This article helps you with the steps to create a text template.
Steps to create a text template
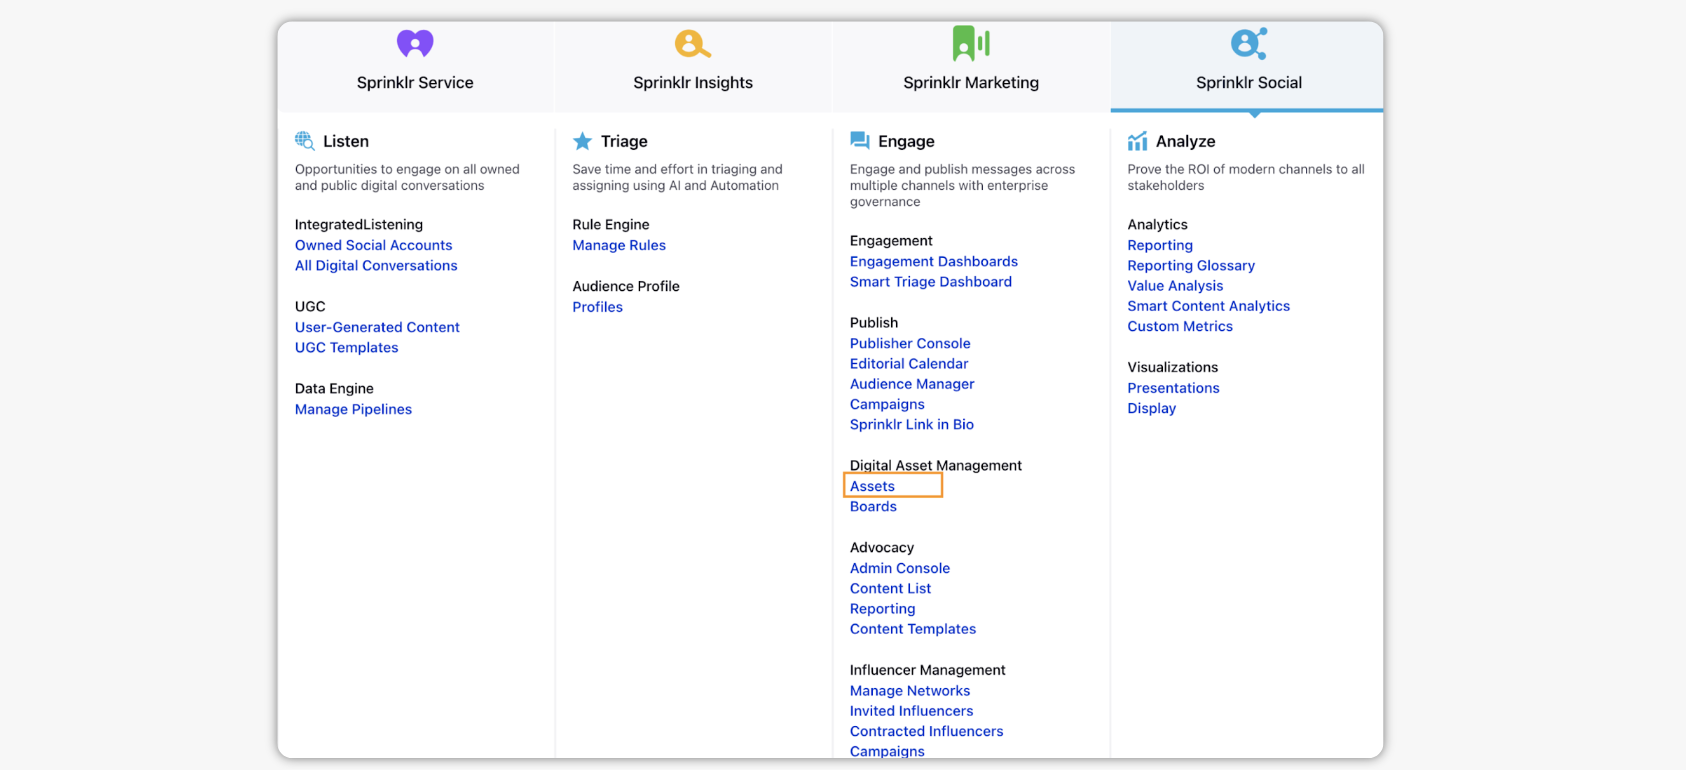
Click the New tab icon
and select Assets under Sprinklr Social.
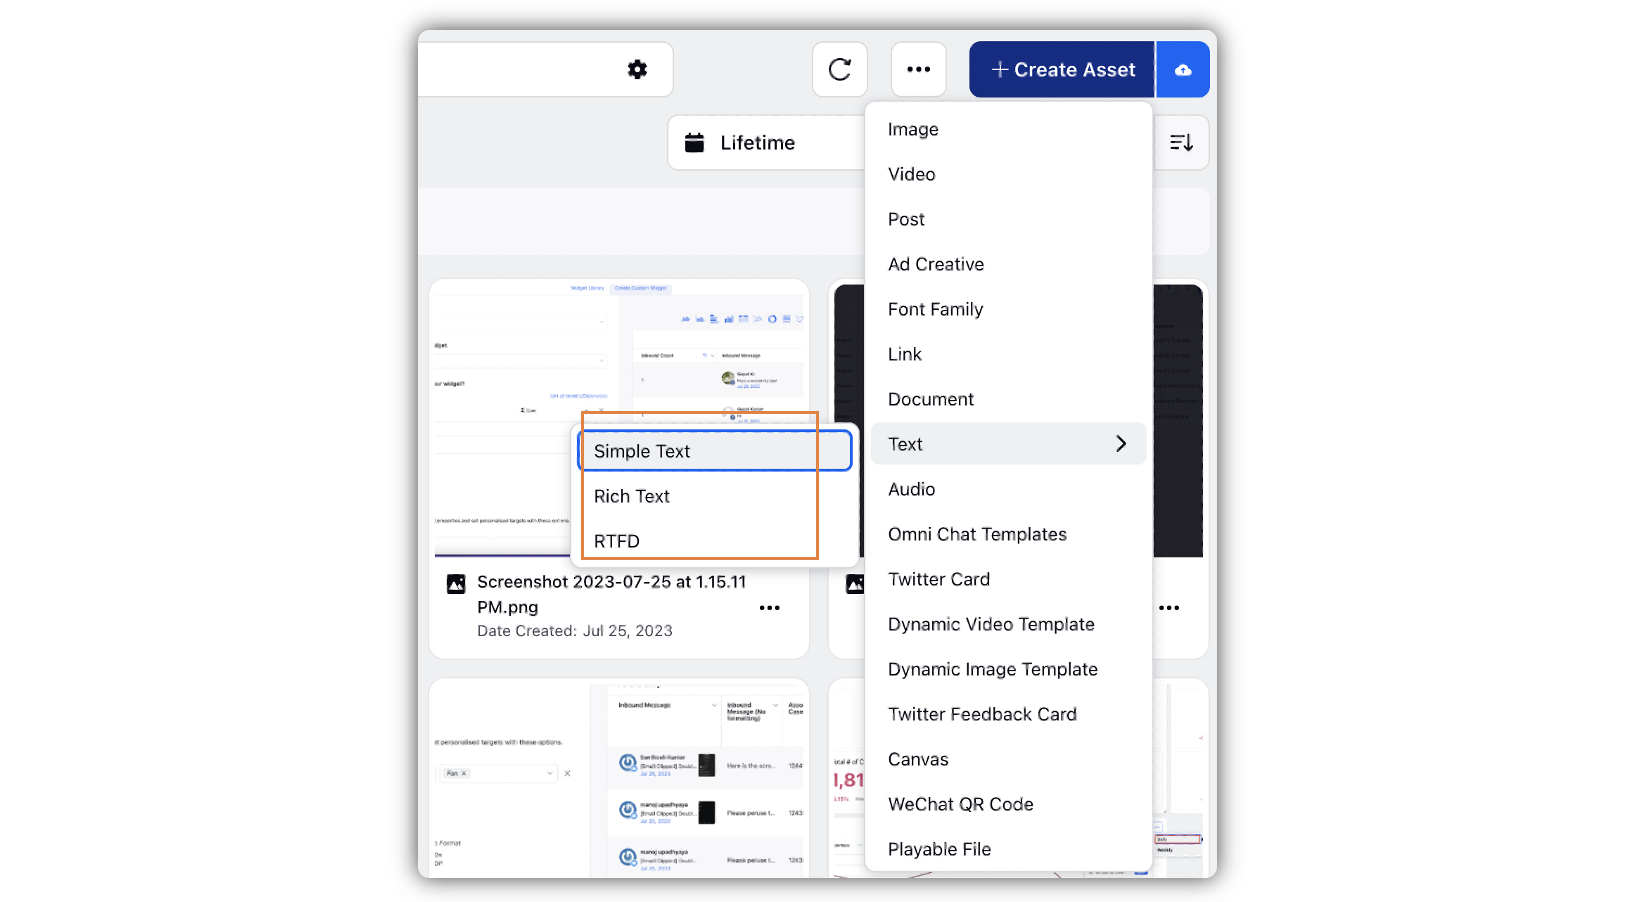
Click Create Asset in the top right corner, and select your type of text asset. You can select either Simple Text or Rich Text or RTFD.
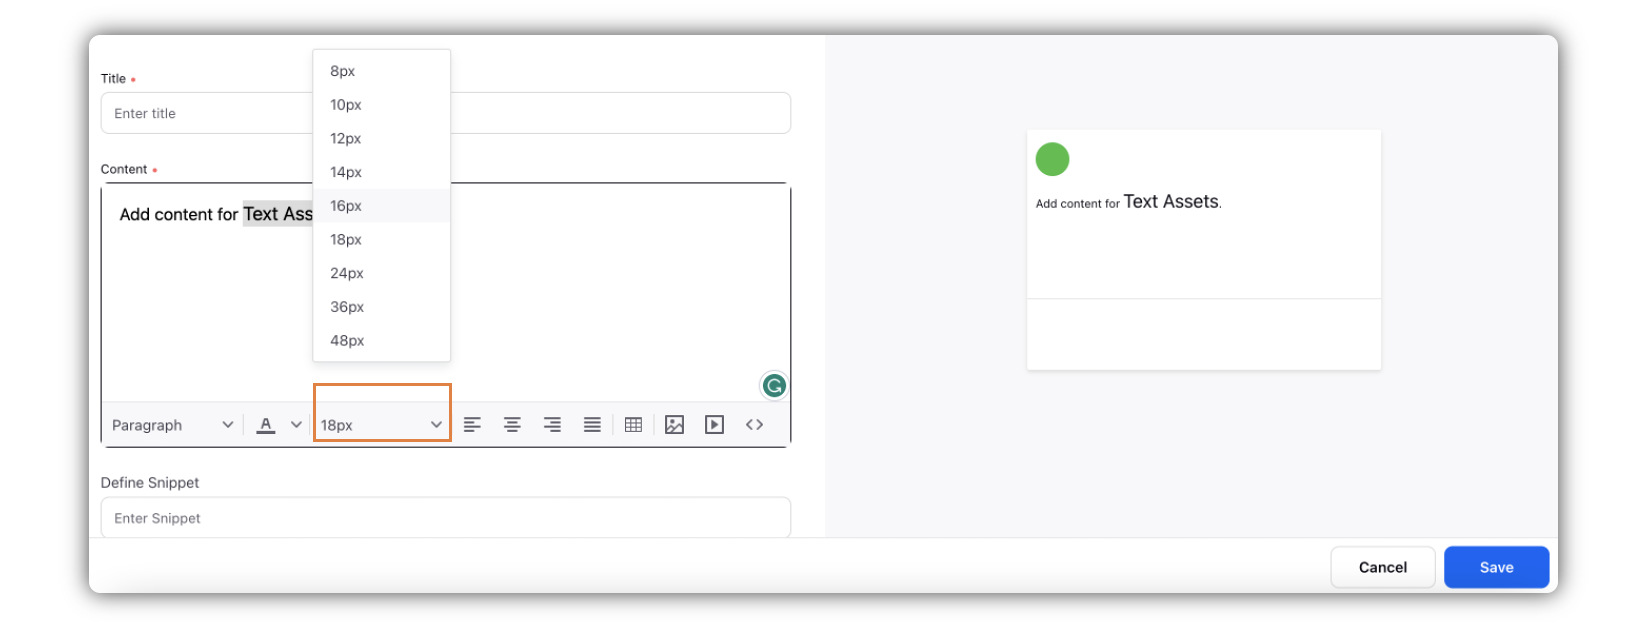
In the Create New Asset window, fill in the required details.
Under Asset Sppecific details, enter the Text in the Content field. Using the tool bar, you can also modify the text formatting. The capability to select font size is specific to the RTFD text asset type.
Click Save in the bottom right corner.
New Text Asset — Field Descriptions
Field | Descriptions |
Basic Details | |
Name | Enter the name of the Text Asset you want to create. |
Description | Enter the optional description of your Text Asset. |
Asset Specific | |
Languages | Select the Language(s) from the drop-down menu. |
Current Language | Choose the current language from the drop-down list. This list is based upon the languages you have selected above. |
Title | Enter the title for the text content for your template. |
Content | Enter the text content for your template. You can also add different placeholders to get replaced with the relevant value while publishing. |
Save as Canned Response | You can opt to save the text template as a canned response by checking the Save as Canned Responses box. |
Asset Details | |
Campaigns | Select a campaign to associate with the asset. |
Sub-Campaigns | Select a sub-campaign to associate with the asset. |
Status | Set status of the asset from Draft, Approved or Expired. |
Available From | Set a date from which the asset will be available. |
Visible From | Set a date from which the asset will be visible to other users. The Visible From field can be used to add a visibility date to your asset. It prevents others from seeing your asset before the visibility date. Only the person who added the asset can see the asset before this visibility date. |
Visible Until | Set a date until which the asset will be visible to other users. |
Expires on | Set a date on which the asset will expire. |
Never Expires | You may check the box alongside 'Never Expires' for the assets having no expiration dates. As you check the box, a default date will be selected which will keep getting extended maintaining the 'Never Expires' status of an asset. |
Schedule Time | Schedule your asset by selecting the desired date and time. |
Restricted | Mark your asset as restricted or non-restricted. |
Automated Tags | Add tags. |
Parent Asset | Associate your media asset to a parent asset. |
Information | Provide additional information for the asset. |
Asset Sharing: This is to specify which Workspaces, Users, or User Groups can access the asset. | |
Visible in all workspaces | Select the checkbox Visible in all workspaces to make your asset visible globally. |
Workspaces | Select Workspaces you want to share your asset with. |
Users / Users Groups | Select Users / User Groups you want to share your asset with. |
Properties: This is to apply custom properties as desired. | |
Custom Properties | Set desired system and custom fields to your asset. View other details such as WorkflowStatus, Milestone, Review Cycles, etc. |
Text Template Types
Text Template | Description |
Simple Text | This can be used if your text does not contain any formatting. |
Rich Text | This can be used if you want to use basic formatting, like making the font bold, adding links, etc. |
RTFD | This can be used if you want to add an image to your text or insert heading styles to your text. |
Placeholders for Text Templates
You can use the following placeholders in the text template assets and either save them as canned responses or as auto-responses.
Asset | Entity | Placeholder | Note |
Custom Fields | Case Custom Fields | %%[case_fieldname:RandomName] | To find the field name of the Custom Field Platform Settings > Manage Workspace > Custom Fields > Options icon alongside the required custom Field > Copy Field Name |
Message Custom Fields | %%[message_fieldname:RandomName] | ||
Account Custom Fields | %%[ACCOUNT_fieldname:RandomName] | ||
Post Custom Fields | %%[post_fieldname:RandomName]ie | ||
Profile Custom Fields | %%[toprofile_fieldname:RandomName] | ||
User Custom Fields | %%[author_customFieldName:] | ||
Profile:Customer Details | User Name | %%[toprofile_USER_NAME:UserNameLabel] | |
First Name | %%[toprofile_FIRST_NAME:FirstNameLabel] | ||
Full name | %%[toprofile_FULL_NAME:Full Name] | ||
User ID | %%[toprofile_USER_ID:UserIdLabel] | ||
%%[toprofile_EMAIL:Email] | |||
Phone No. | %%[toprofile_PHONE_NO:Phone No] | ||
Channel | %%[toprofile_CHANNEL_TYPE:Channel] | ||
User:Agent Details | Agent’s Username | %%[author_user_name:] | |
Agent’s Full Name | %%[author_full_name:] | ||
Agent’s Email ID | %%[author_email_address:] | ||
URL | URL | %urllink% Reach out to support for getting a pre-configured URL list to be added in the placeholder. | Reach out to support for getting a pre-configured URL list to be added in the placeholder. |
Omnichannel Secure Forms | %%[SECURE_FORMπ6secureformid:Secure Form name] | Secure Form ID can be taken from the URL of the form. Open the desired Secure Form in the view or edit mode and copy the ID from the URL. |
Internal Note:
Us this DP: PUBLISHING_DYNAMIC_CONTENT_REPLACEMENT_ENABLED
If PUBLISHING_DYNAMIC_CONTENT_REPLACEMENT_IN_REALTIME_ENABLED is enabled then placeholders will be replaced in real-time on the selection of a response.