Import from Excel into Project Sheet
Updated
Project Management's import functionality is designed to streamline data transfer between different tools, enable bulk creation of tasks, maintain consistency across projects, enhance time efficiency, and minimize errors associated with manual data entry. Within Project Management, users have the capability to import their tasks directly from an Excel sheet into the project task sheet. Supported file formats include XLS and XLSX.
Steps to import from excel into project sheet
This section provides a step-by-step guide on how to import data from an Excel file into a task sheet. We assume that the task sheet's columns are not preconfigured. The emphasis will be on the creation and mapping of columns exclusively during the import process from the Excel sheet.
Open your task sheet where you want to import your tasks.
Click on the three-dot icon in the top right corner and click on “Import”.

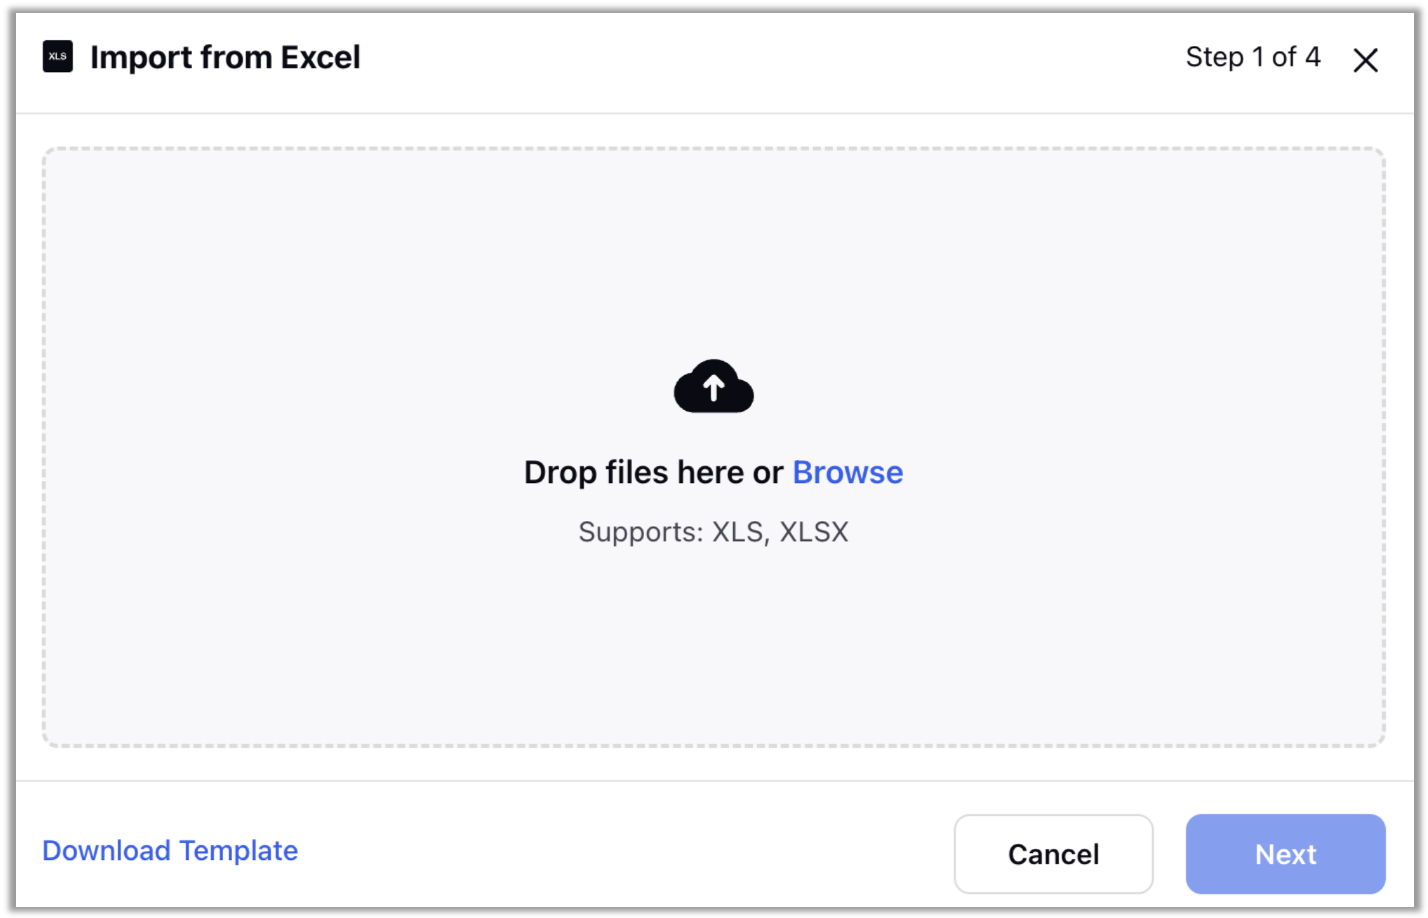
Drop your files to import directly in the import popup or click on “Browse” and select the file from your device. Then click “Next”.

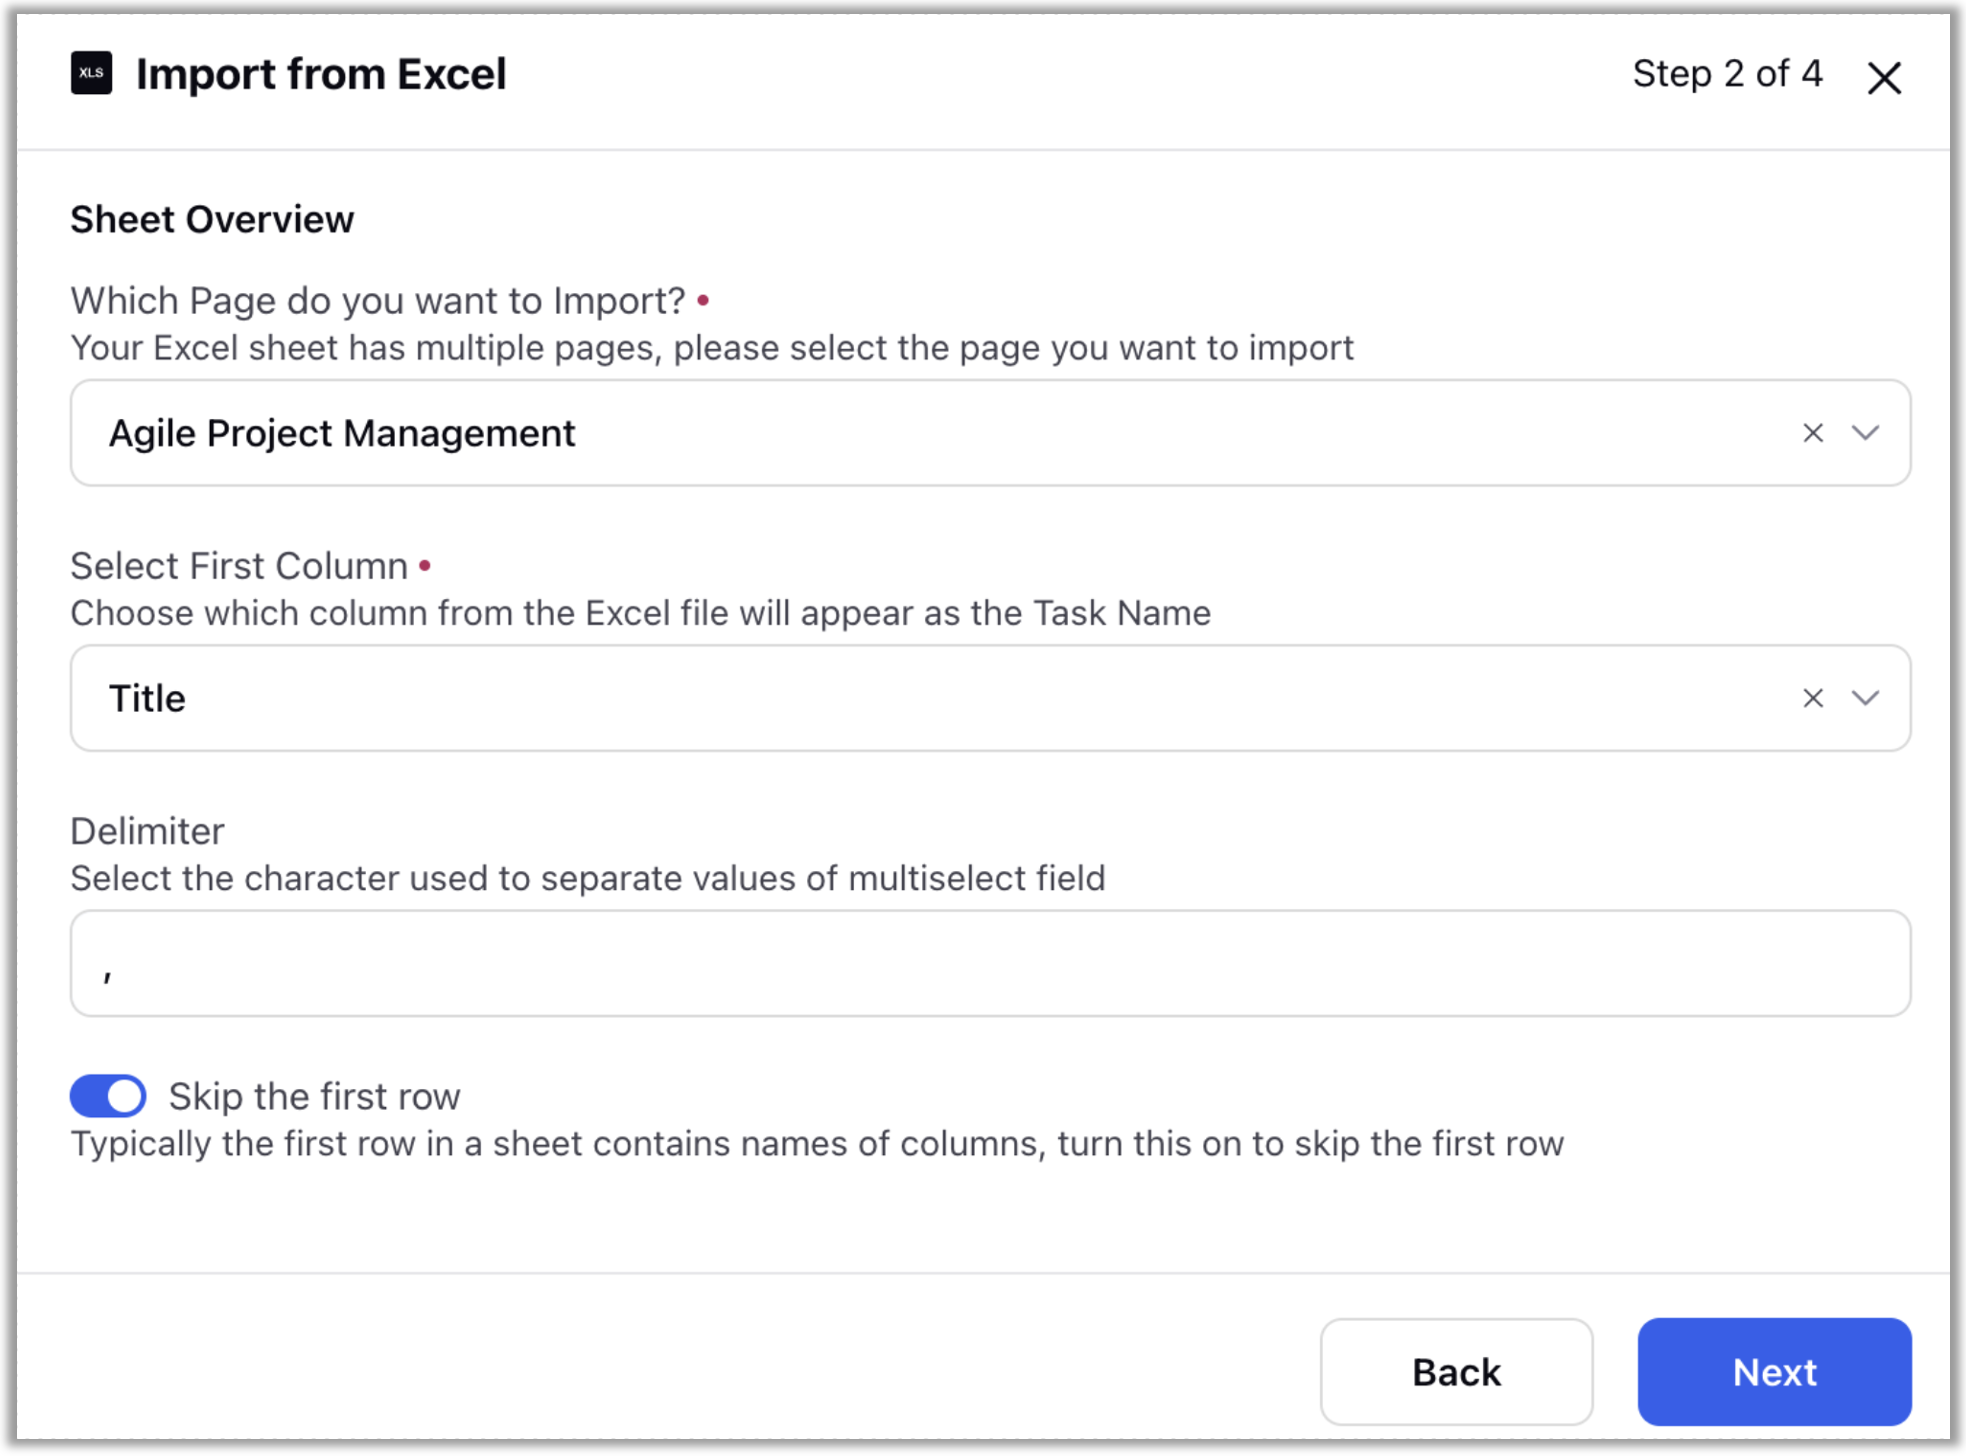
In “Which Page do you want to import?” - Select the page you want to import from your excel sheet if your sheet has multiple pages. By default, the system selects the first page.
In “Select First Column” - Choose which column from your excel sheet will be mapped with “Title” column in task sheet.
In “Delimiter” - Specify the delimiter used in your excel sheet to separate the values of a multiselect picklist fields.
"Skip the First Row" - Turn on this toggle if your Excel sheet has headers in the first row, ensuring the headers are excluded during the import process.

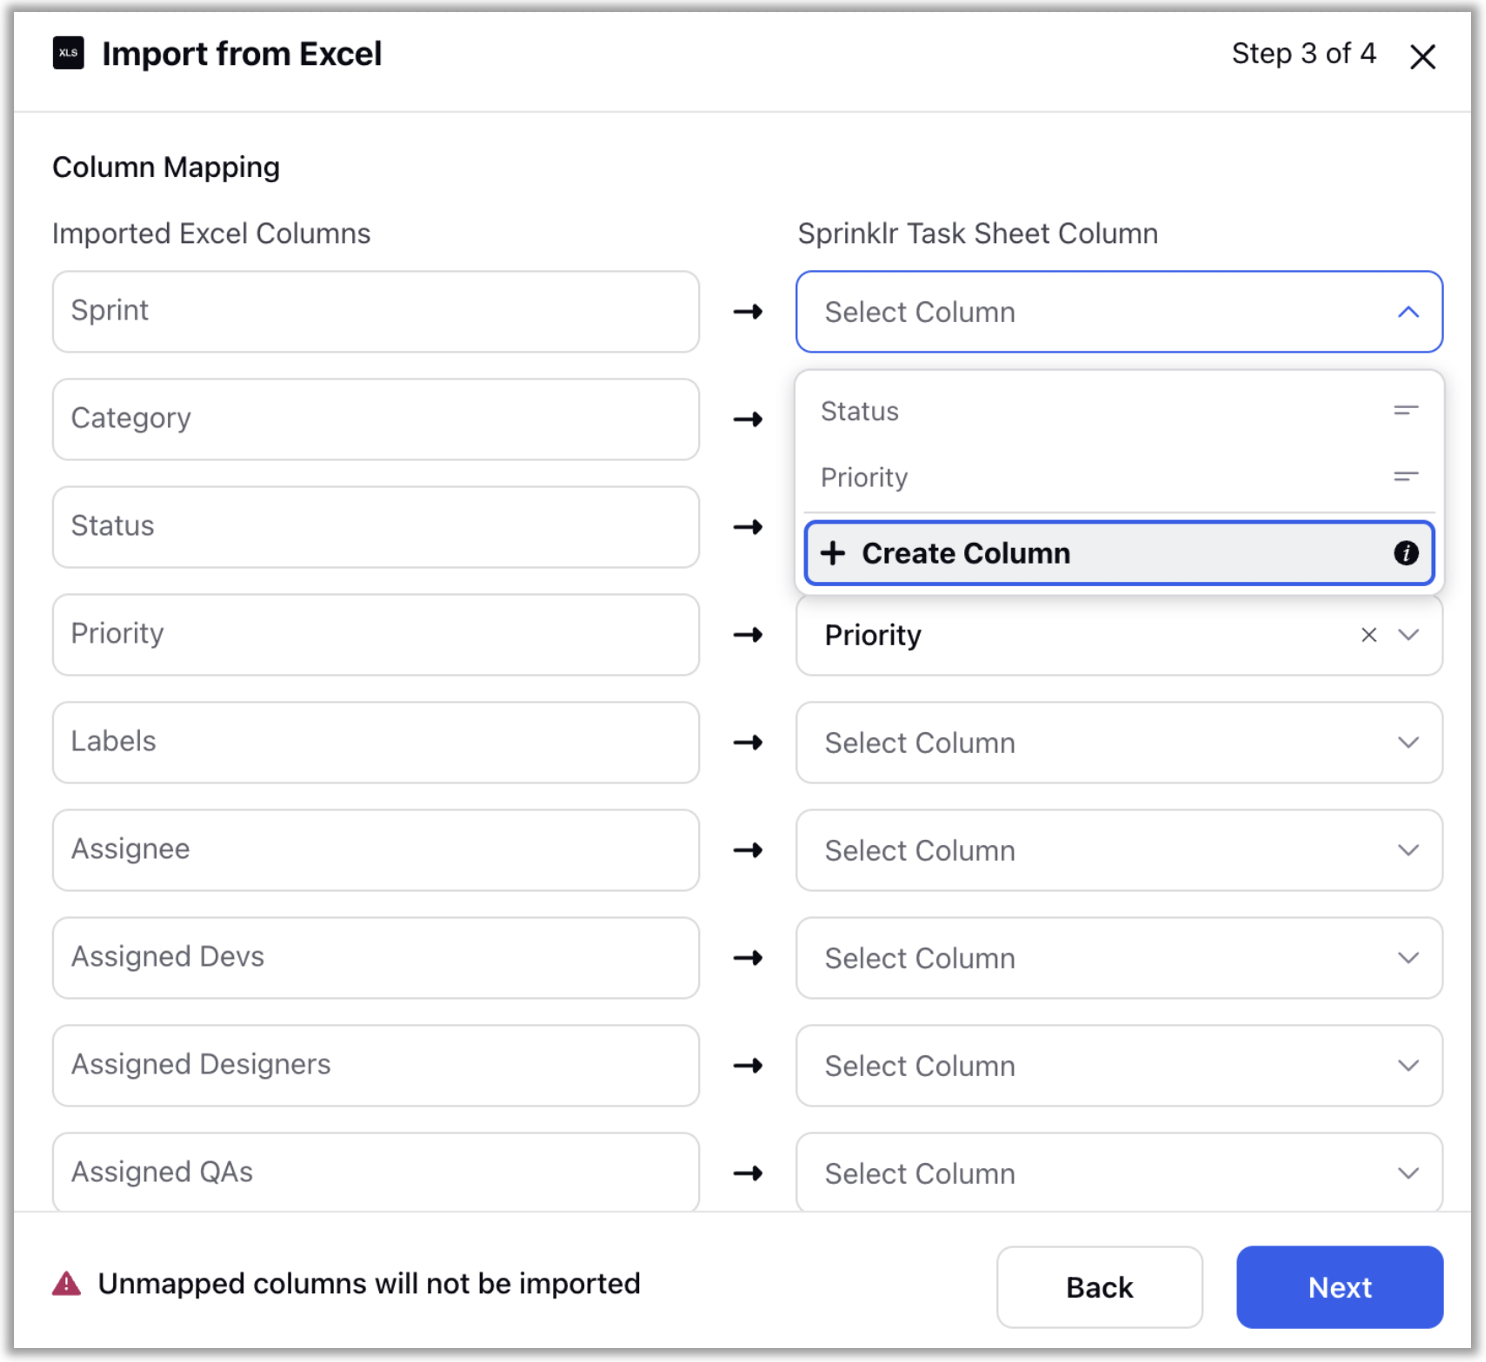
In the "Column Mapping" step, you have the flexibility to map excel sheet columns to pre-existing columns in the task sheet or dynamically create new columns as required. Remember that the unmapped columns will not be imported.

Note that column creation during the import mirrors the process of column creation in the task sheet. Steps to create a custom column in task sheet are discussed in detail in Add New Custom Column article.
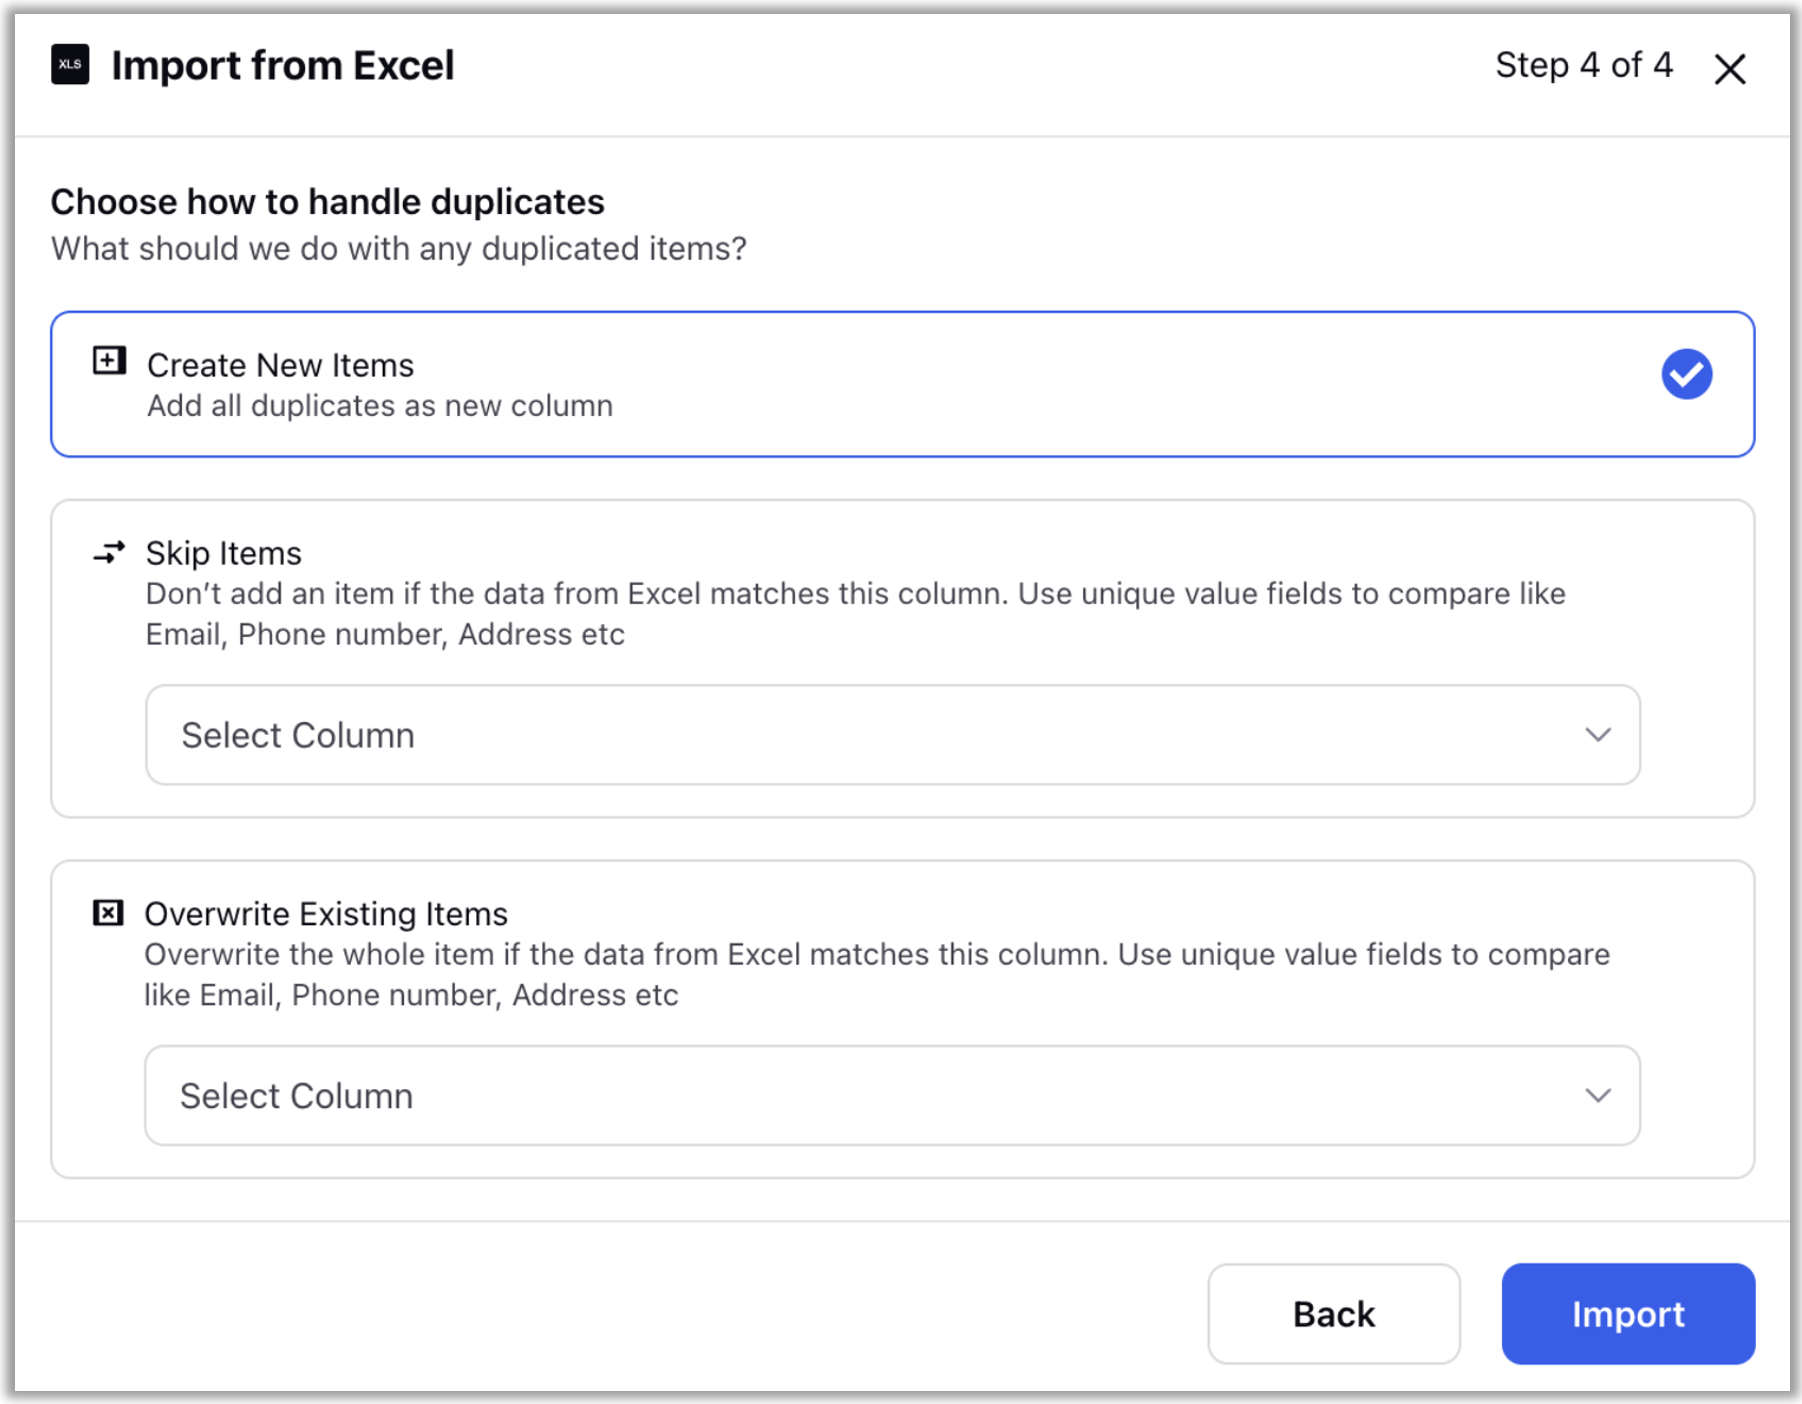
In the last step, you need to choose how to handle the duplicate records.
(a) Create New Items – Add all items and ignore all the duplicates.
(b) Skip Items – Skip the excel record if the data in excel matches with the specified column. You can use unique value fields to compare.
(c) Overwrite Existing Items - Overwrite the whole record if the data in excel matches with the specified column. You can use unique value fields to compare.

Click "Import" to complete the process. Once successful, you'll receive a notification confirming the import.
Note: Ensure the data being imported matches the field type; for example, date-type data should only be imported into a date-type field. |