Integrated Project Planning with Editorial Calendar
Updated
The integration of project planning with Editorial Calendar allows you to view the planned timeline for all your projects, sub-projects, campaigns, and sub-campaigns on a single screen. You can use the Editorial Calendar features, such as calendar boards, color configurations, and project filters to visualize and manage your initiatives. This article covers how to -
View projects in Editorial Calendar.
Filter projects by global custom fields.
Group projects by global custom fields.
Add Color Configurations for project.
Export projects from the Editorial Calendar.
To View Projects in Editorial Calendar
Open a new tab and navigate to Sprinklr Marketing > Marketing > Editorial Calendar.
Click the View option at the top.
Select Project from the dropdown to display all the projects in the selected date/time range.
 Note: Project is available only in year, quarter and month view.
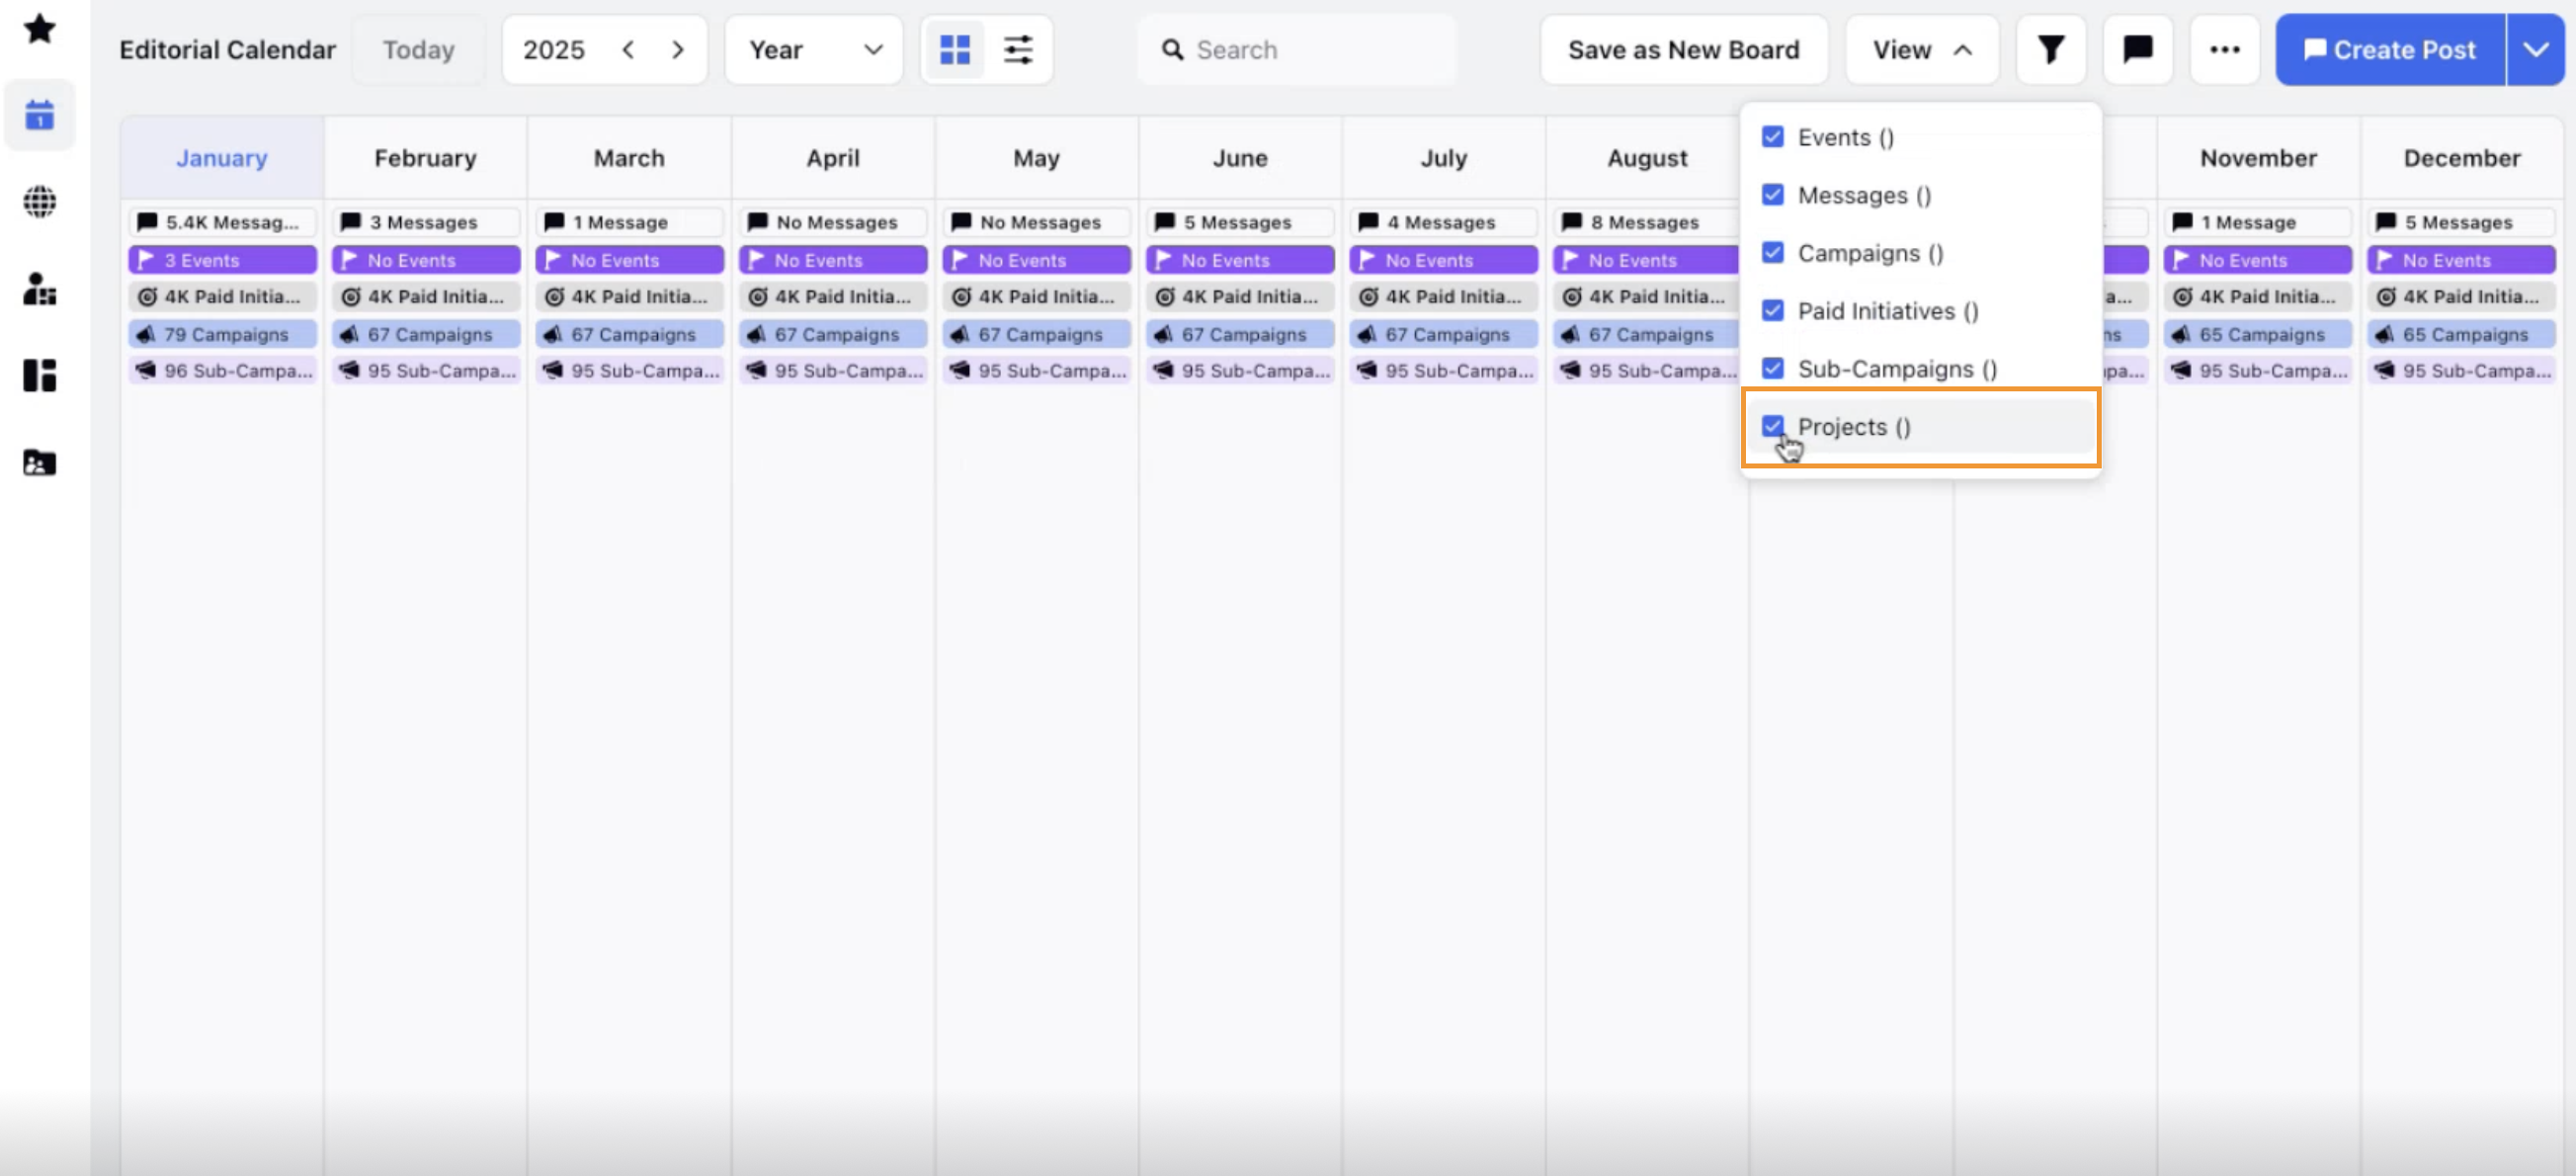
The project bars in the calendar will display the following details -
Poject Name
Start/End Date
Count of linked campaigns
Count of linked sub-projects
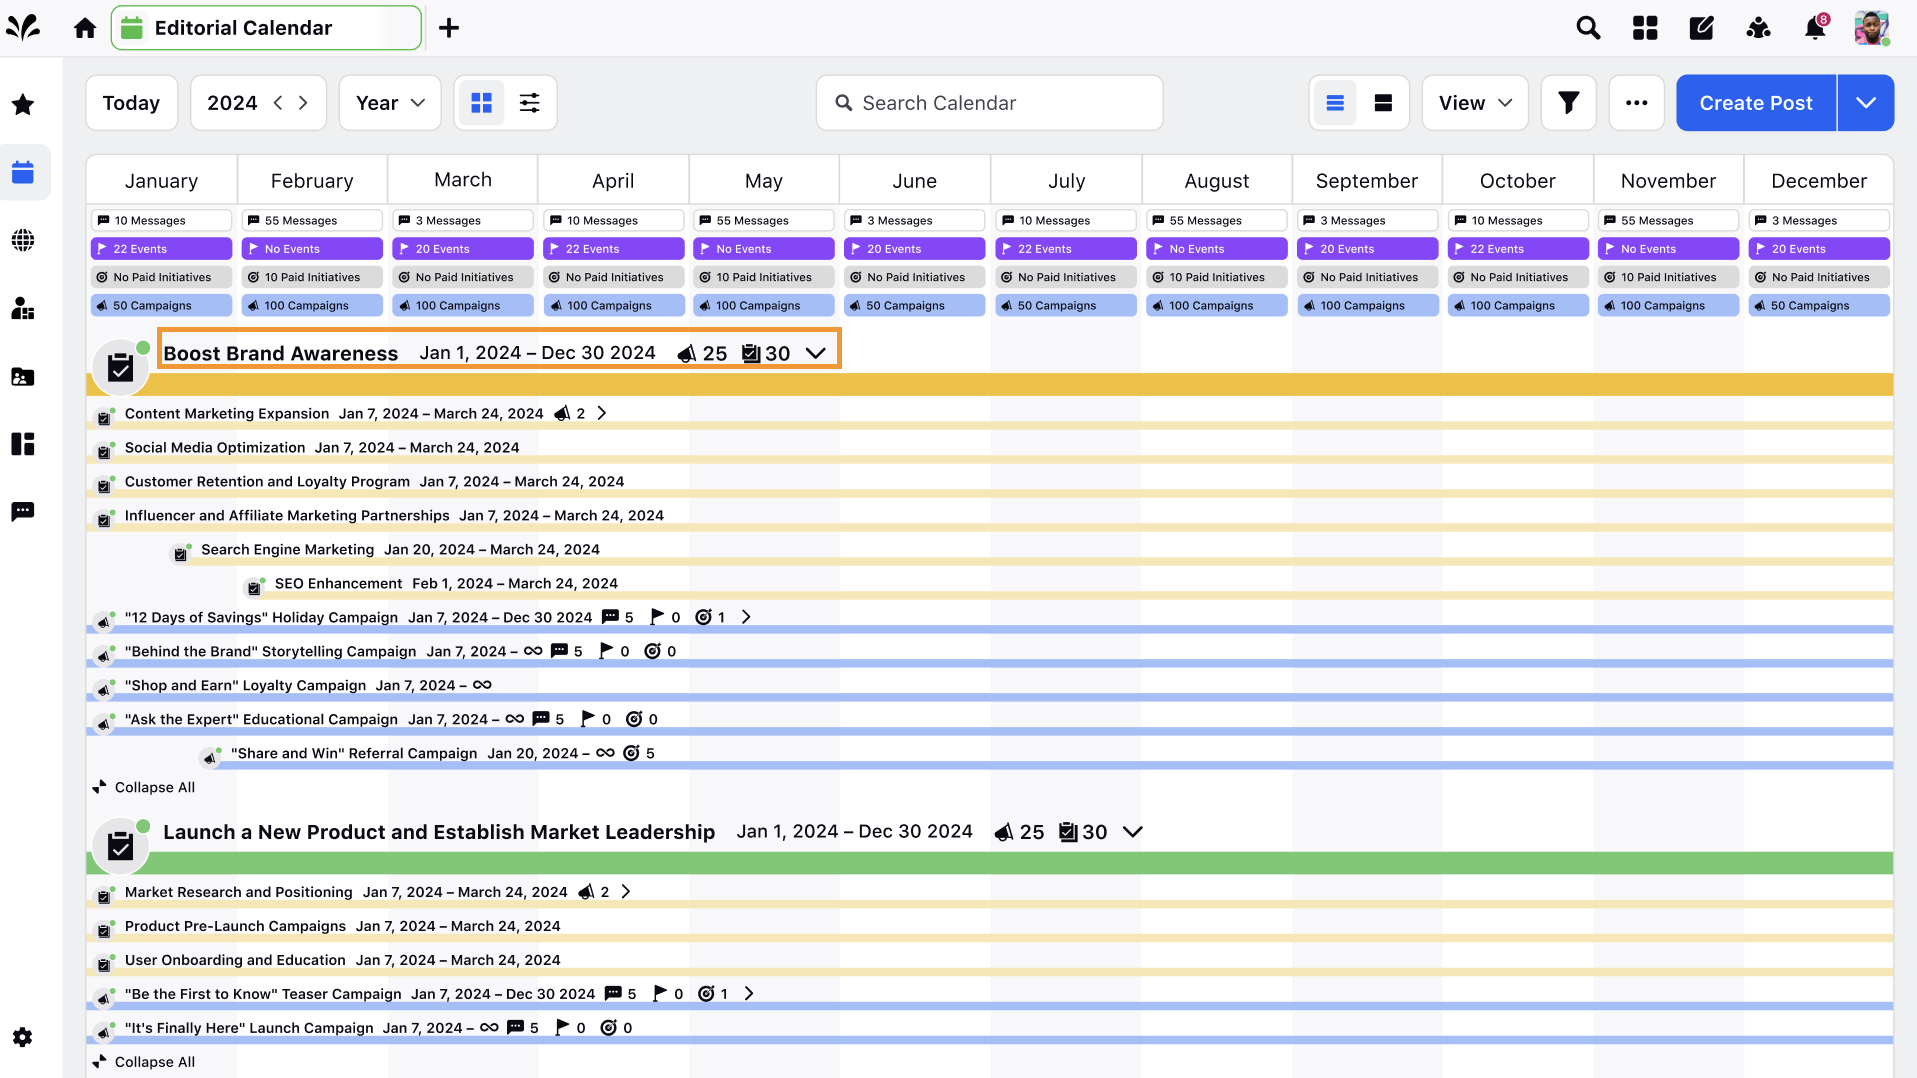
Click the project bar to expand and view all the linked campaigns, sub-campaigns and sub-projects.

Next, click on any campaign, sub-campaign or sub-project to open the third pane and view tasks and messages linked to them.
To Filter Projects by Global Custom Fields
Click +Add Filter at the top.
Select the Project tab to view all global custom fields related to projects.
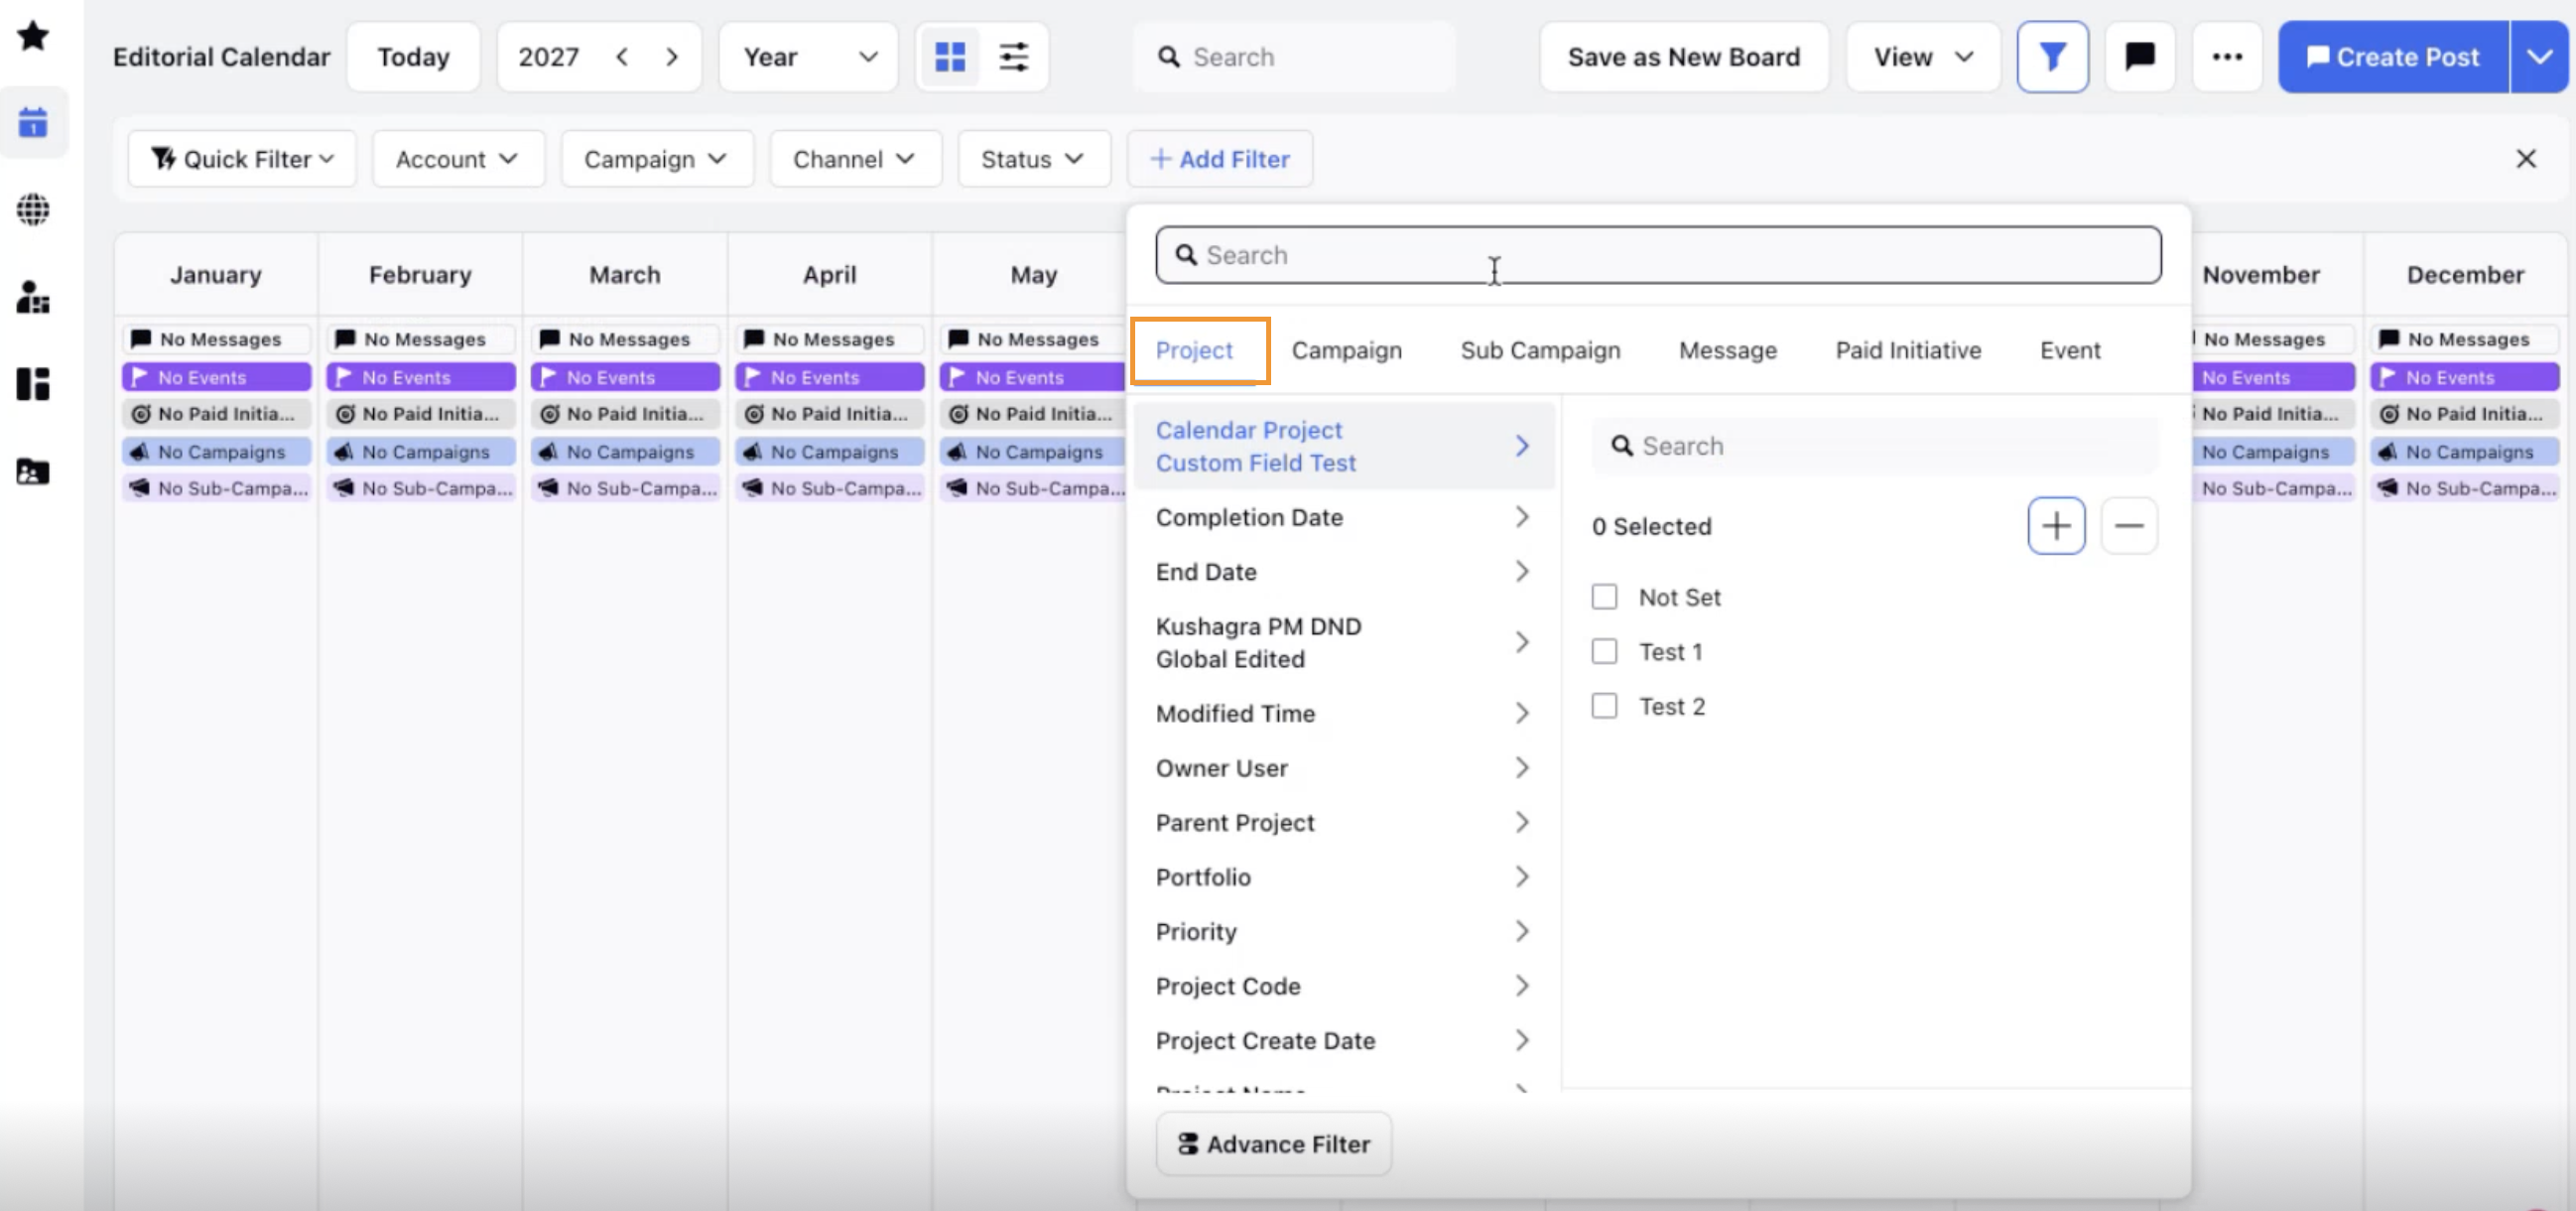
Search for and select the required fields to filter your projects by the selected custom field.
You can also search for a project or any project related entities using the search bar at the top.
To Group Projects by Global Custom Fields
Click the ellipsis (...) in the top right corner.
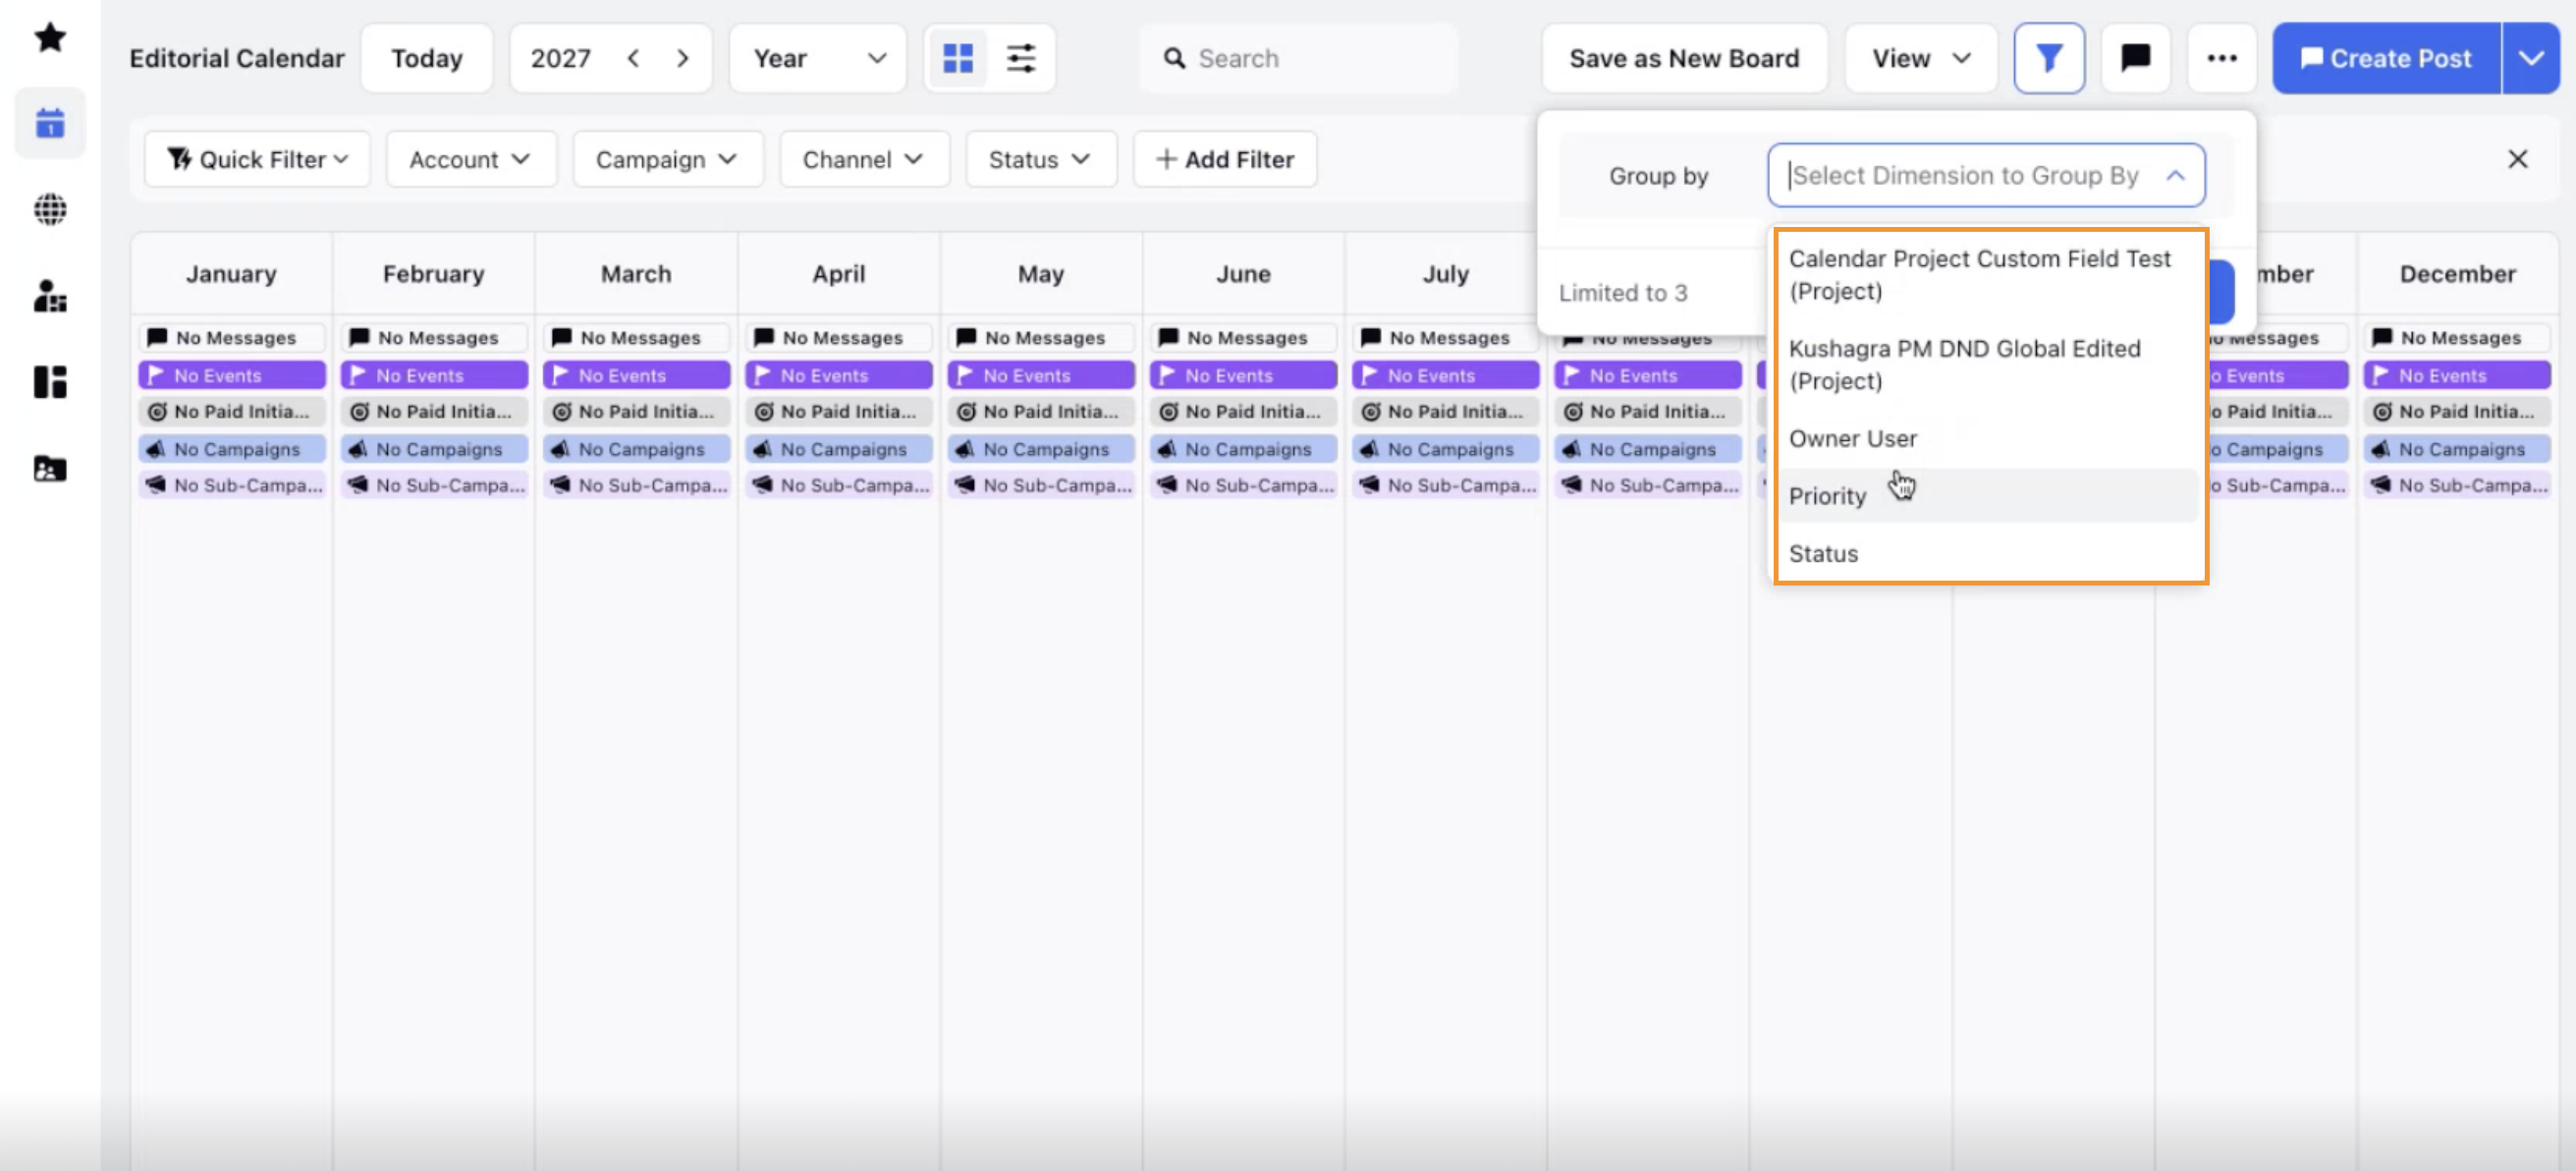
Select Group by from the dropdown.
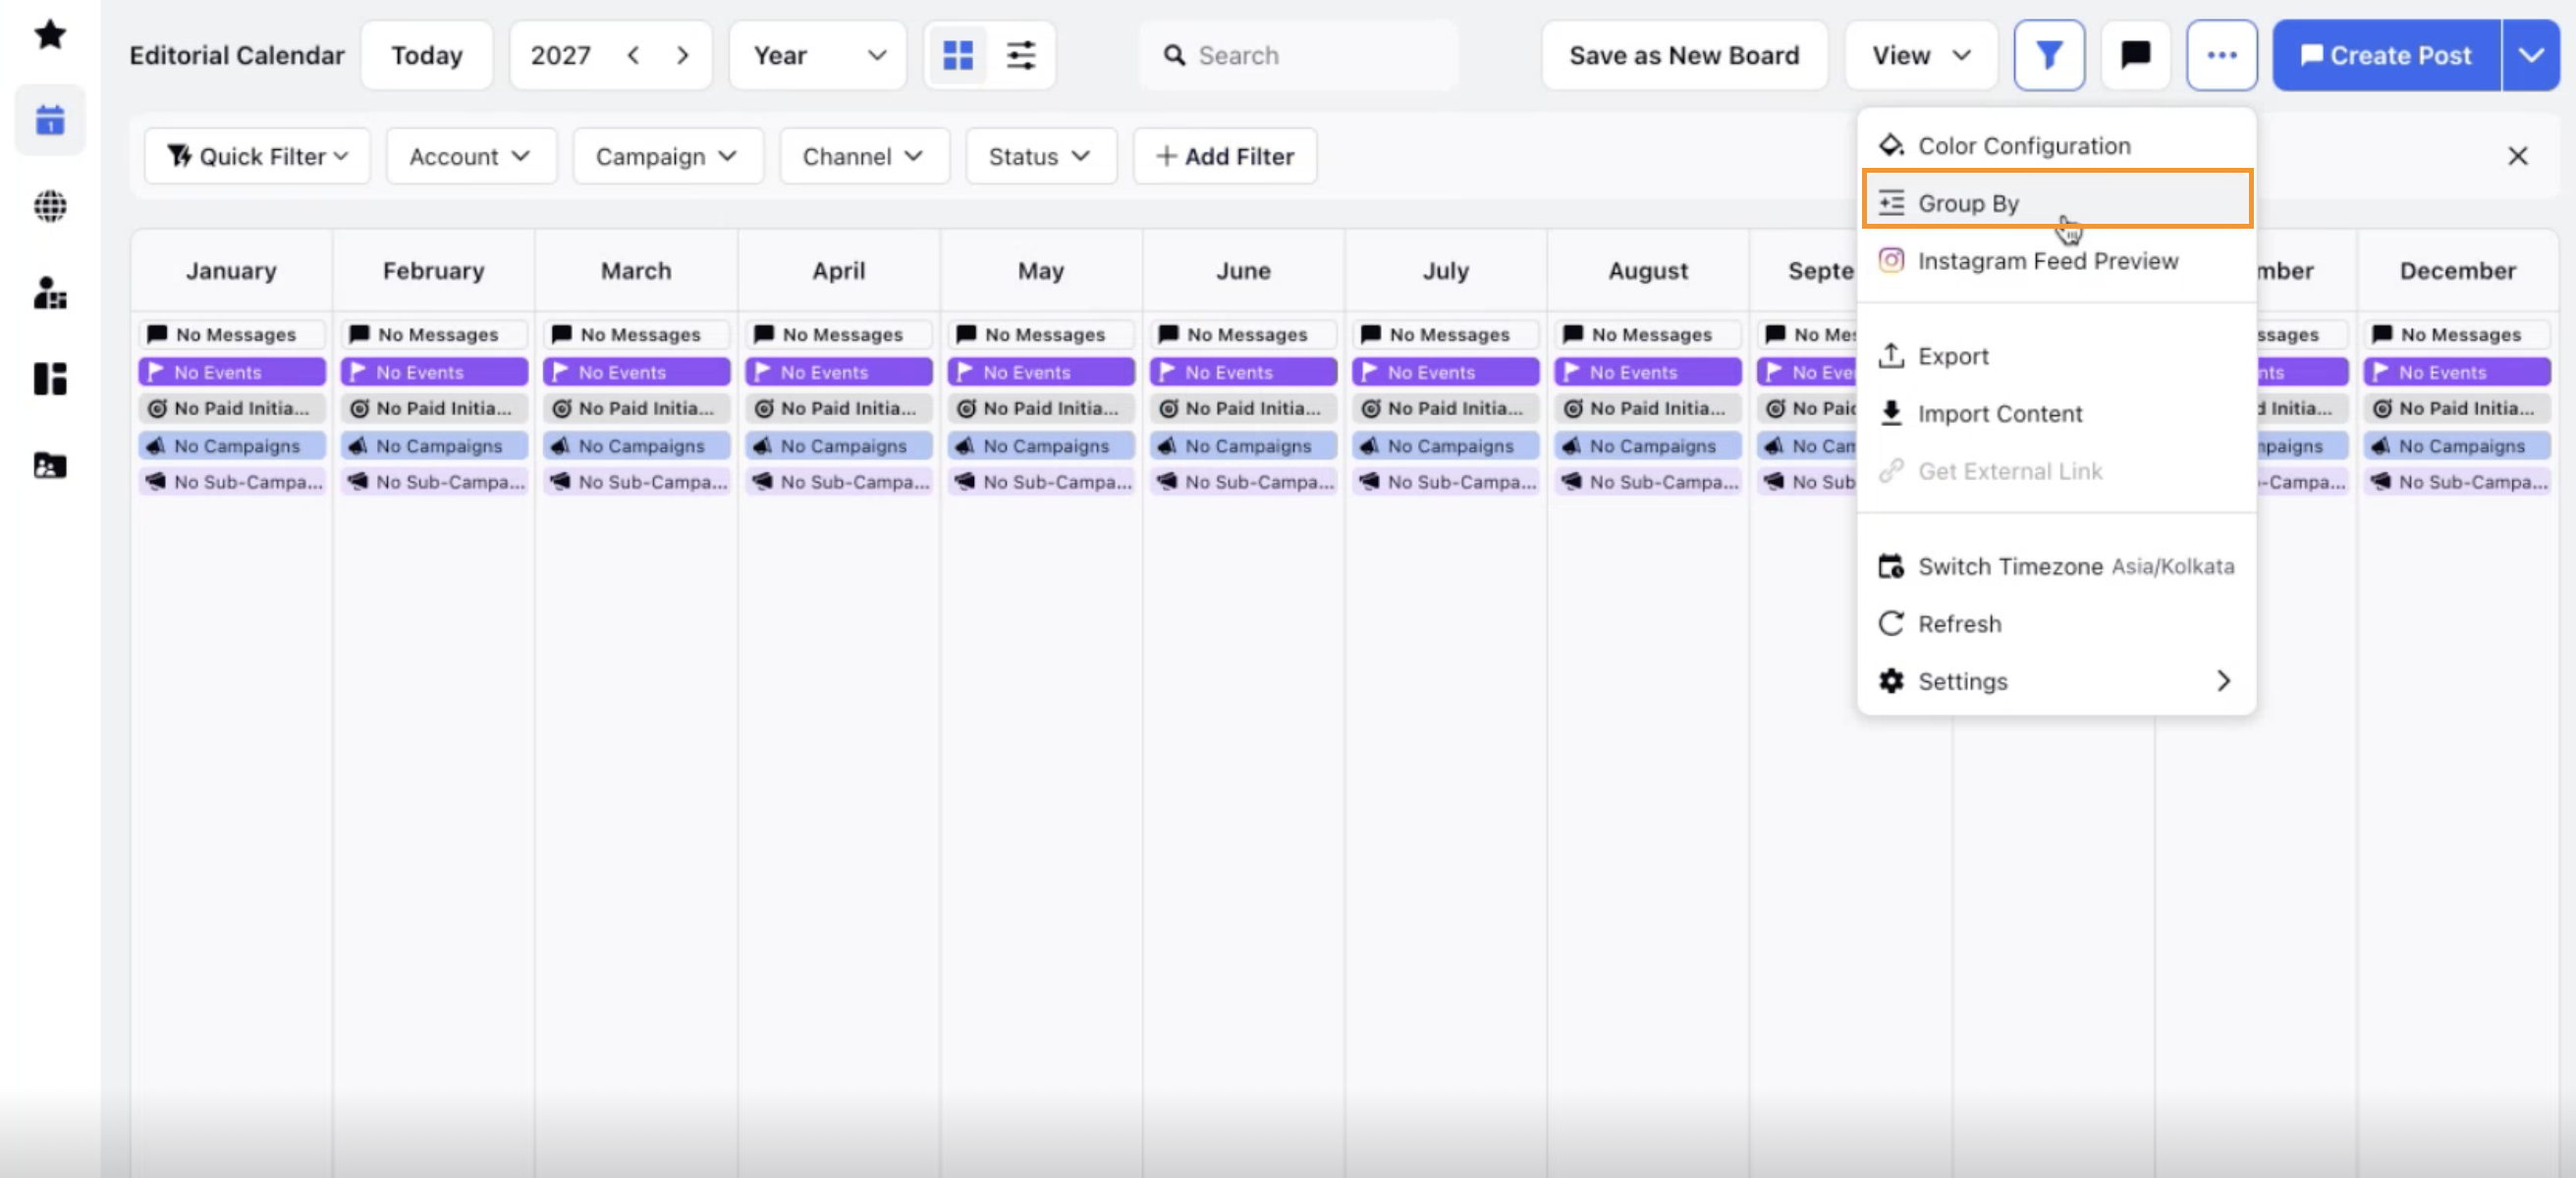
Choose up to three fields by which you want to group your projects.
Click Apply to view your projects grouped by the selected fields.
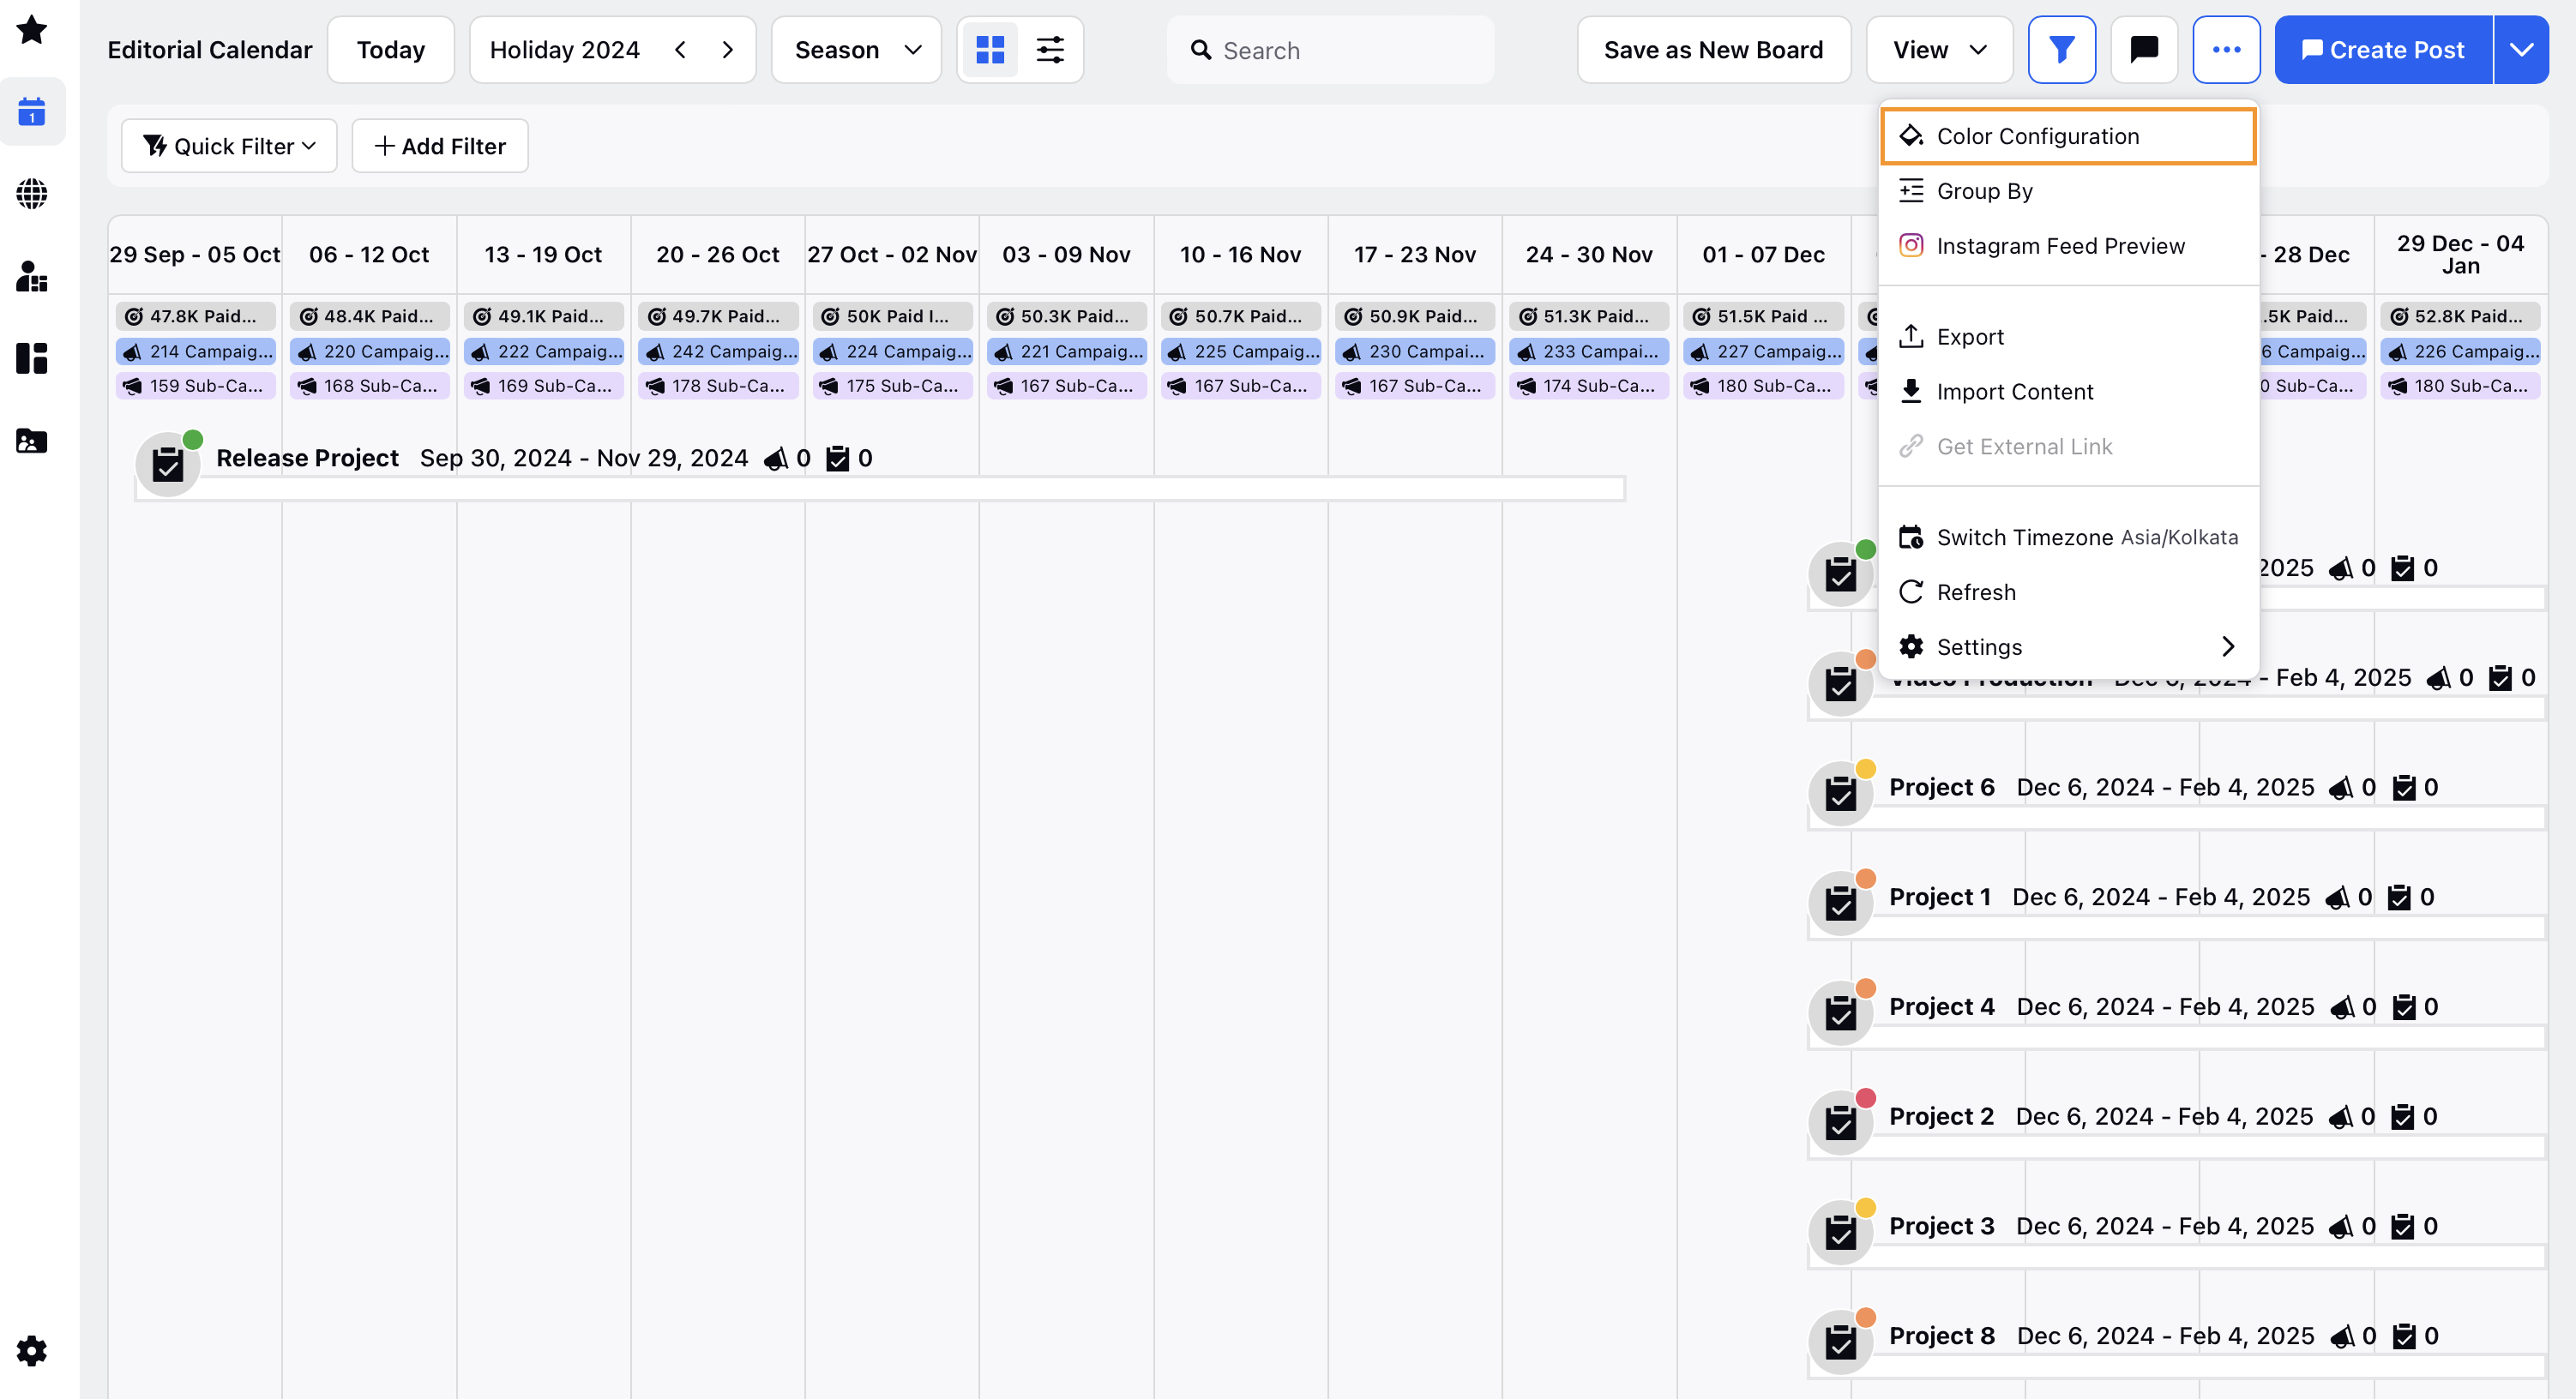
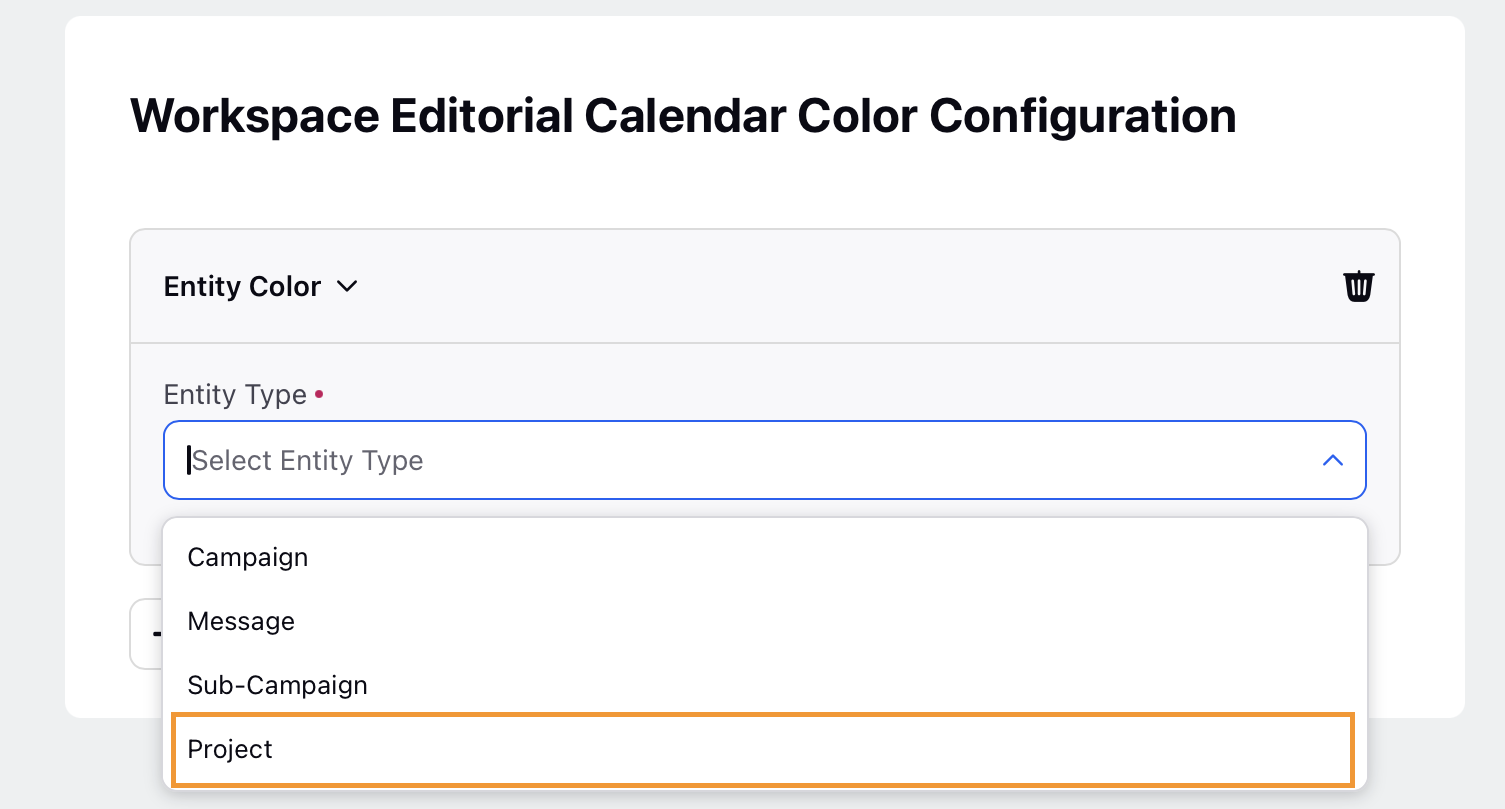
To Add Color Configurations for Projects
Click the ellipsis (...) in the top right corner.
Select Color Configuration from the dropdown.
Click Edit to access the color configuration screen.
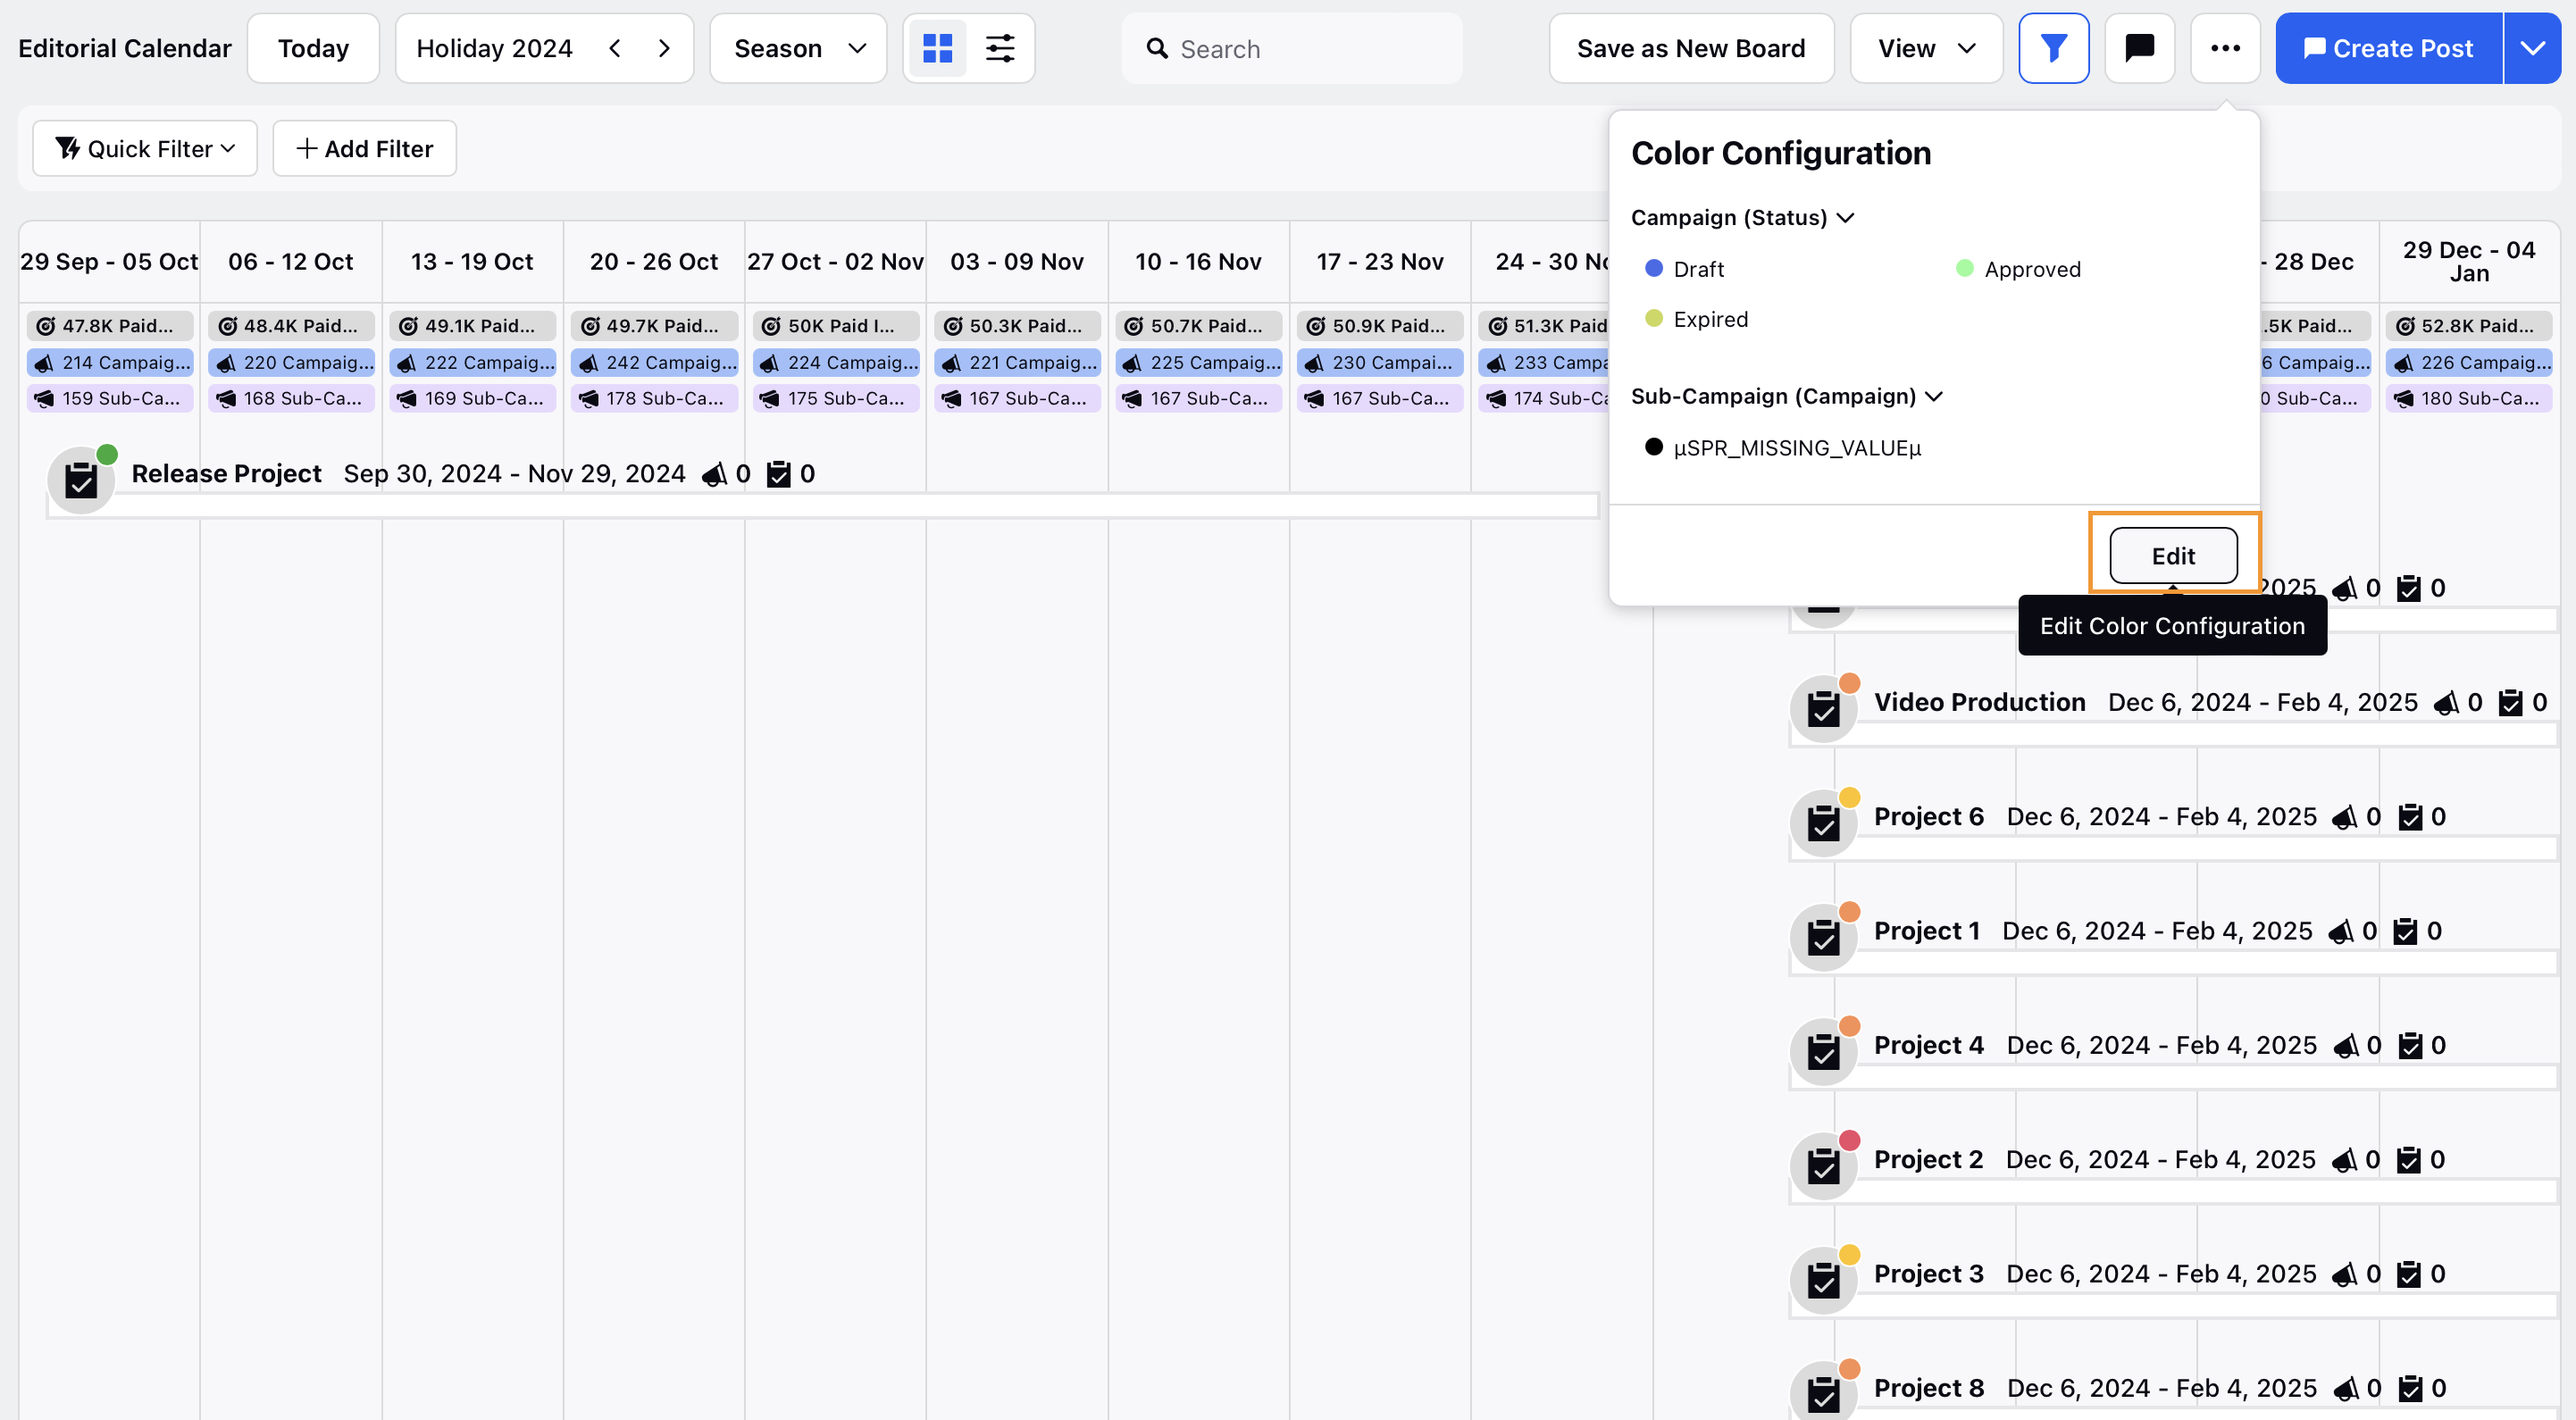
Click on the Entity Type field and select Project from the dropdown.
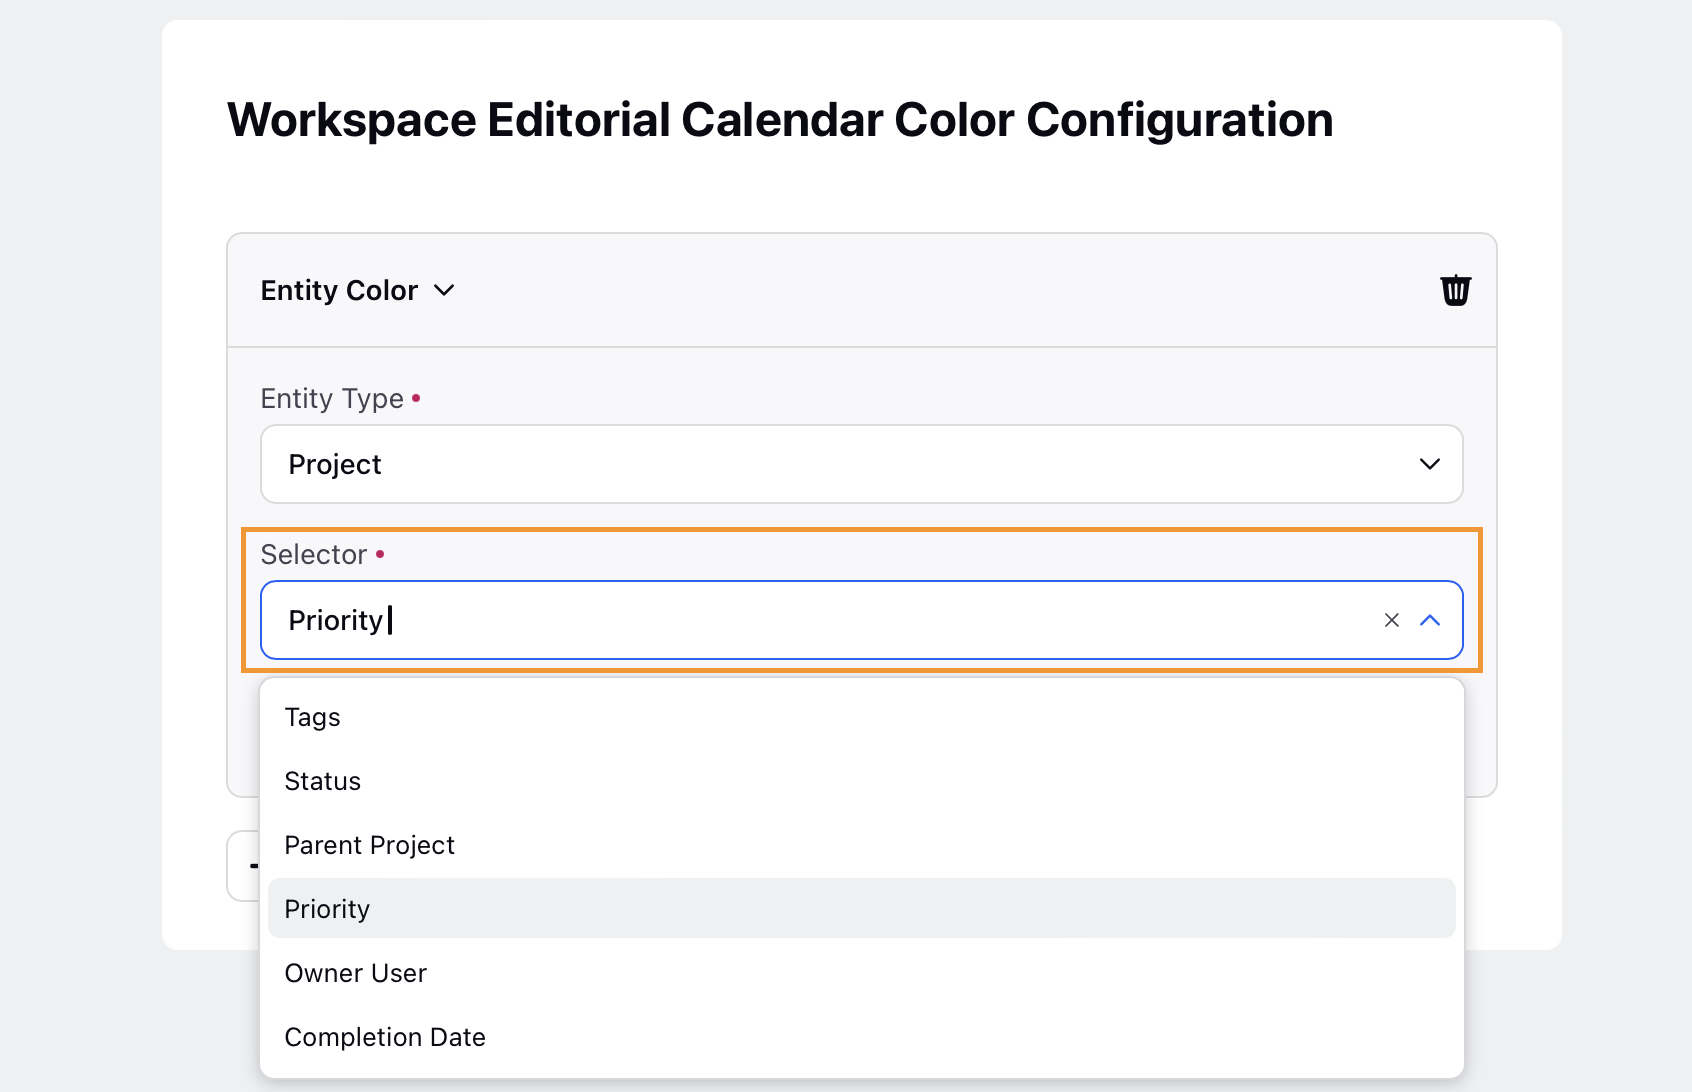
In the Selector field, choose the project field where you want to apply the color configuration.
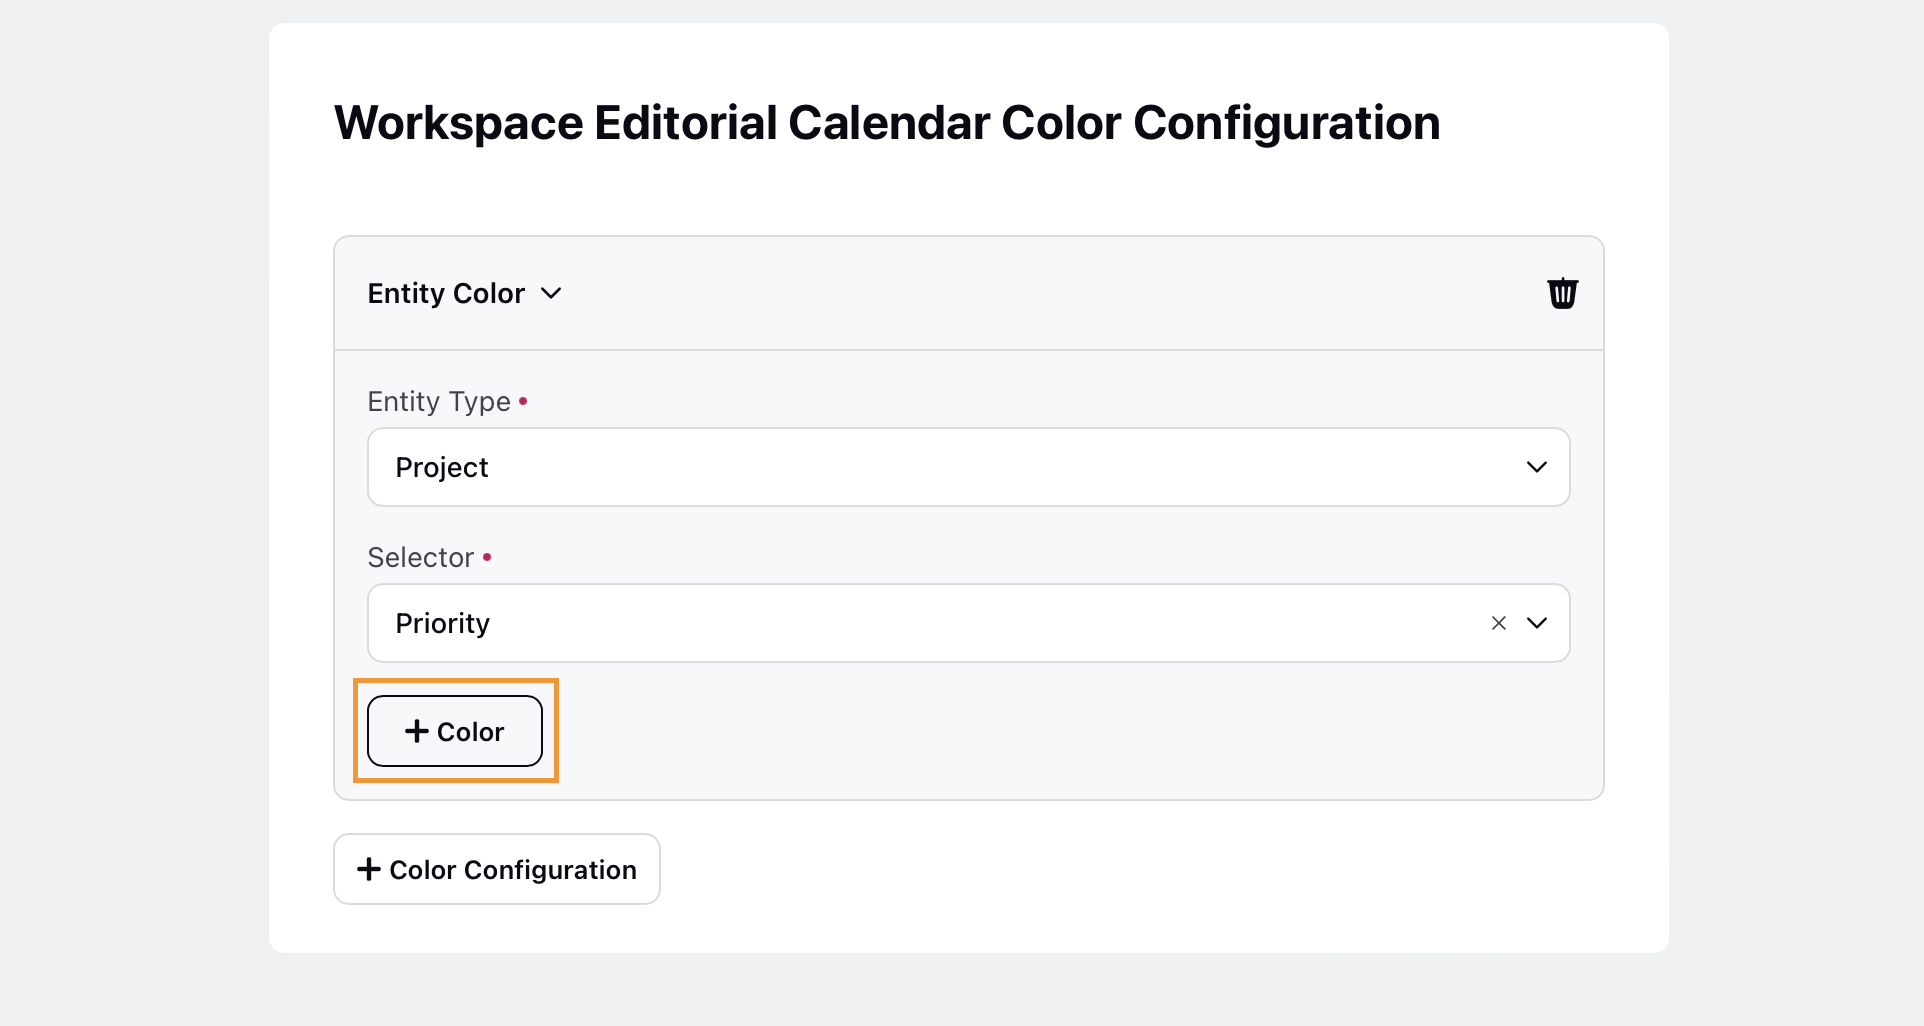
Click +Color to select the fields corresponding to the value selected in Selector field.
Click on the color option on the left to open the color selector and choose the color. For example, if you select Priority as the selector, choose colors for each priority level.
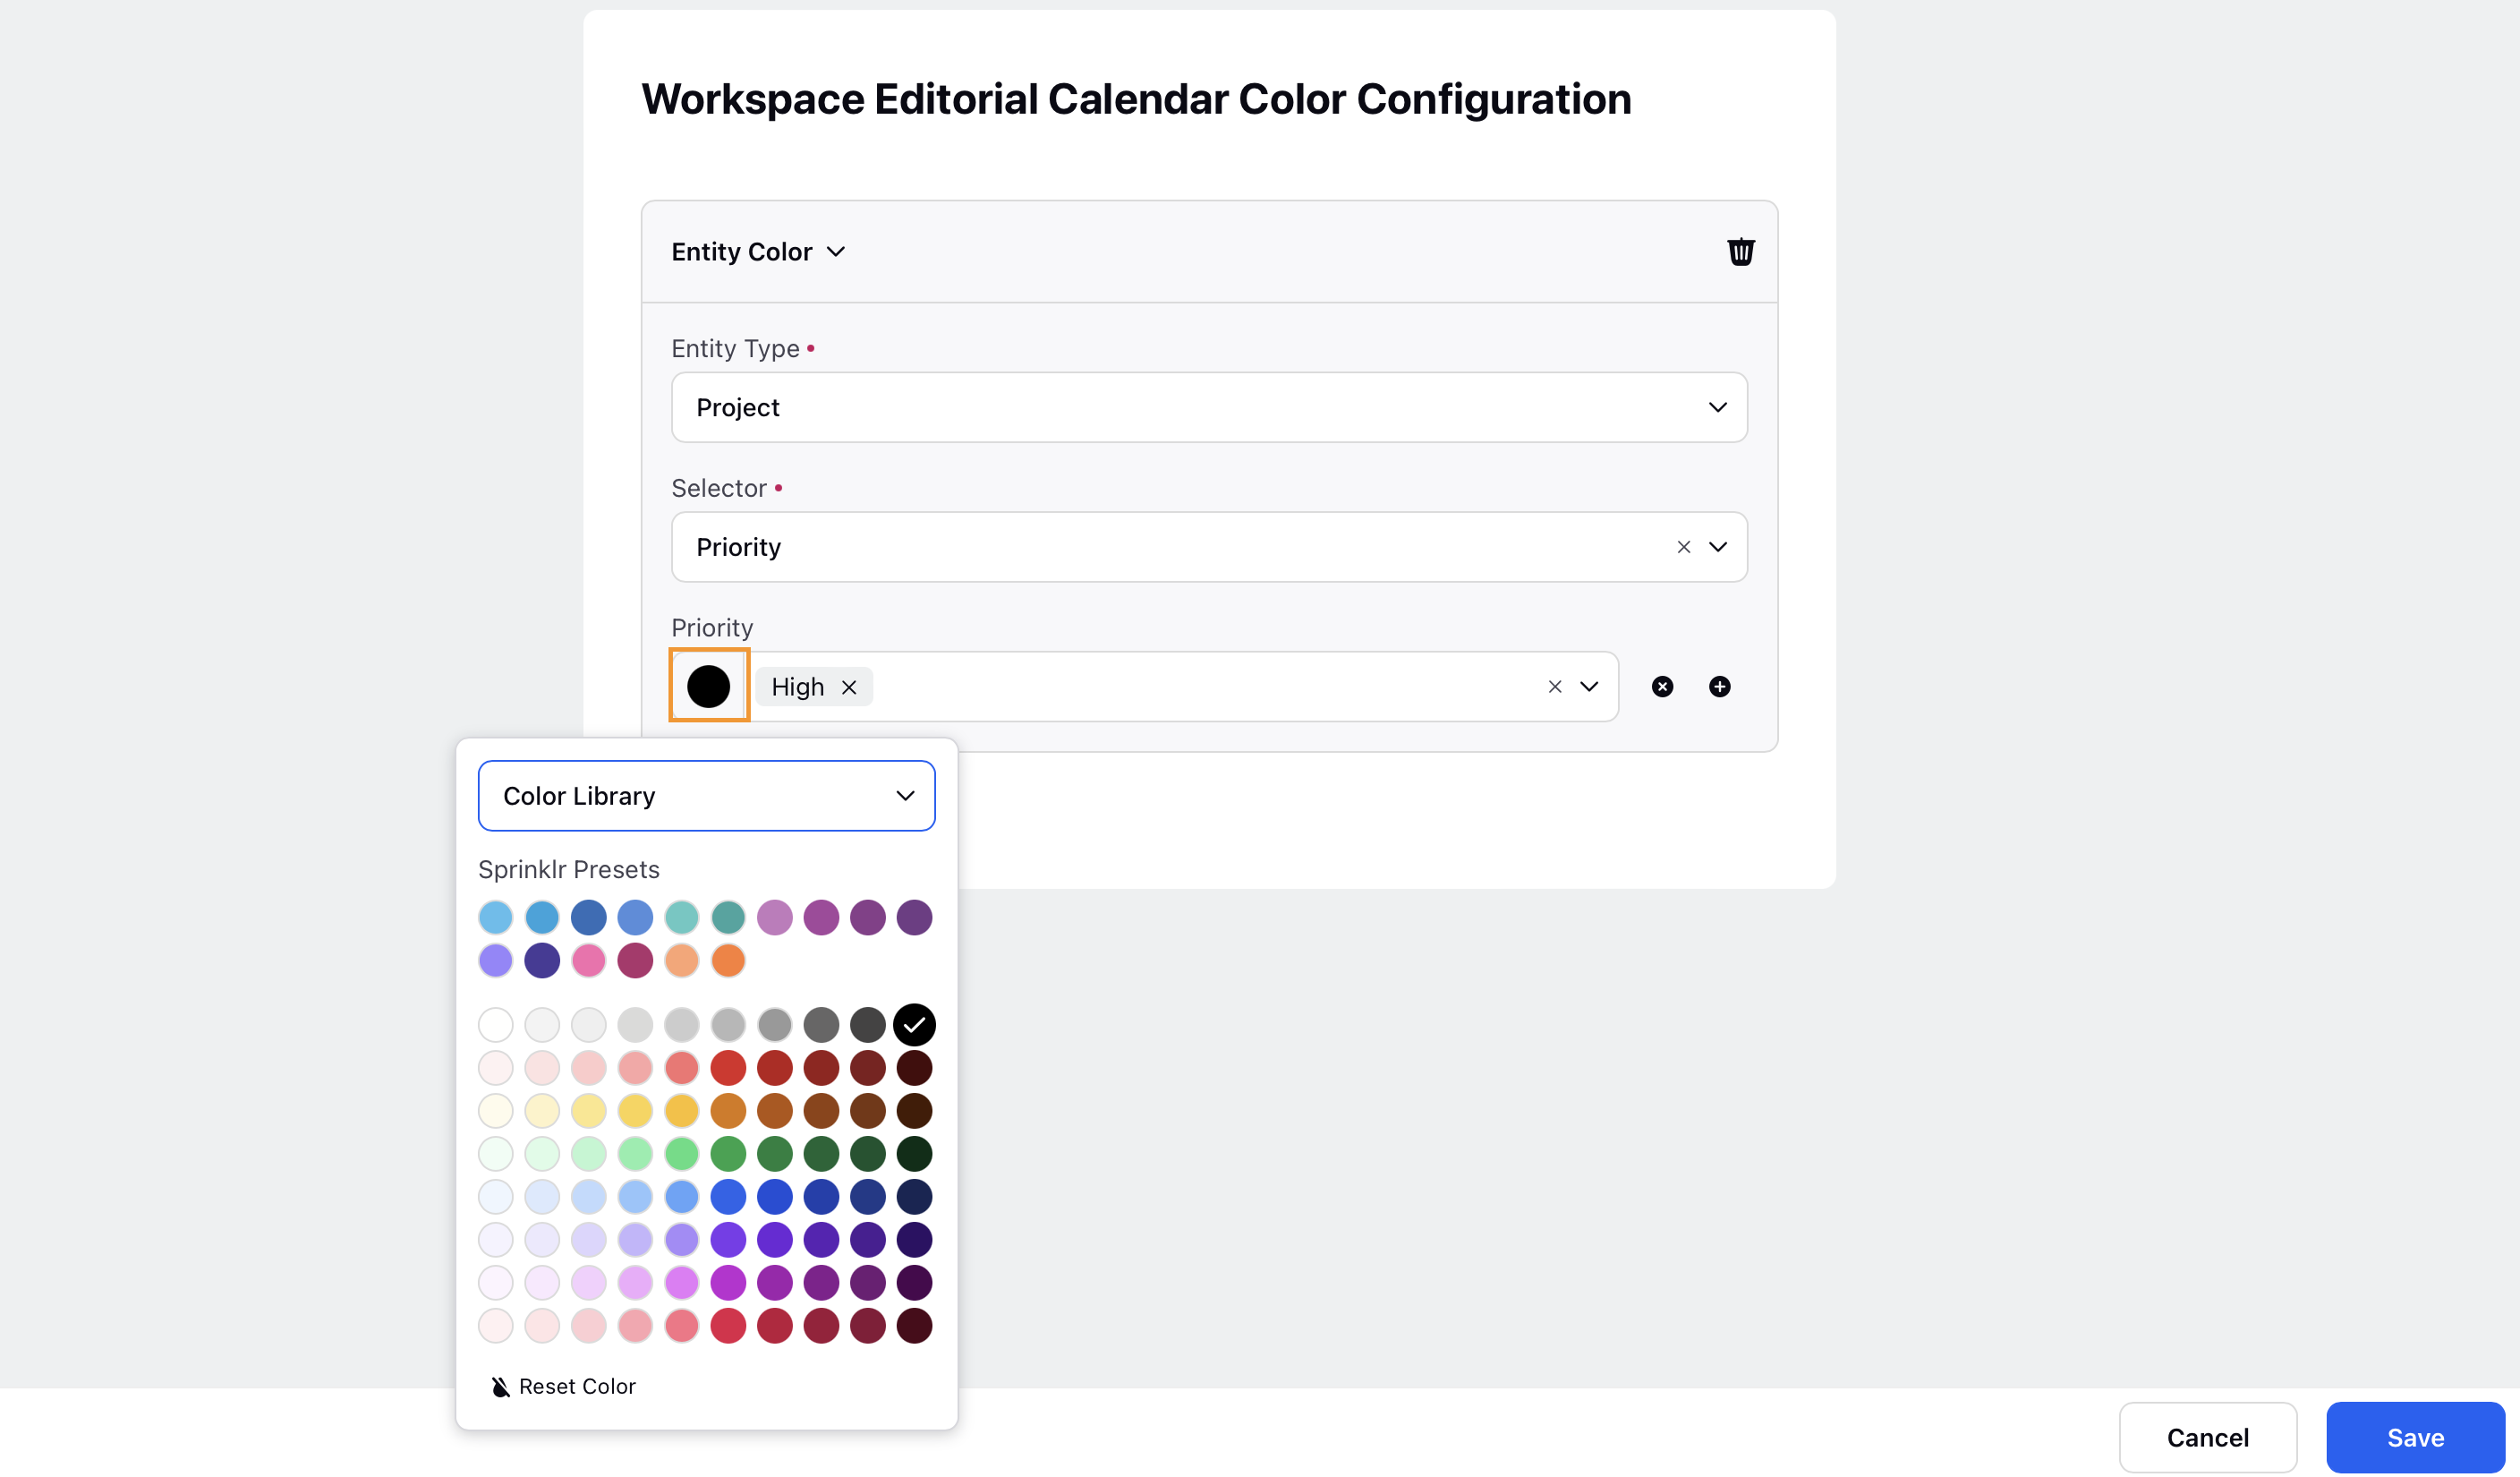
Click the + icon to add more fields and assign additional colors.
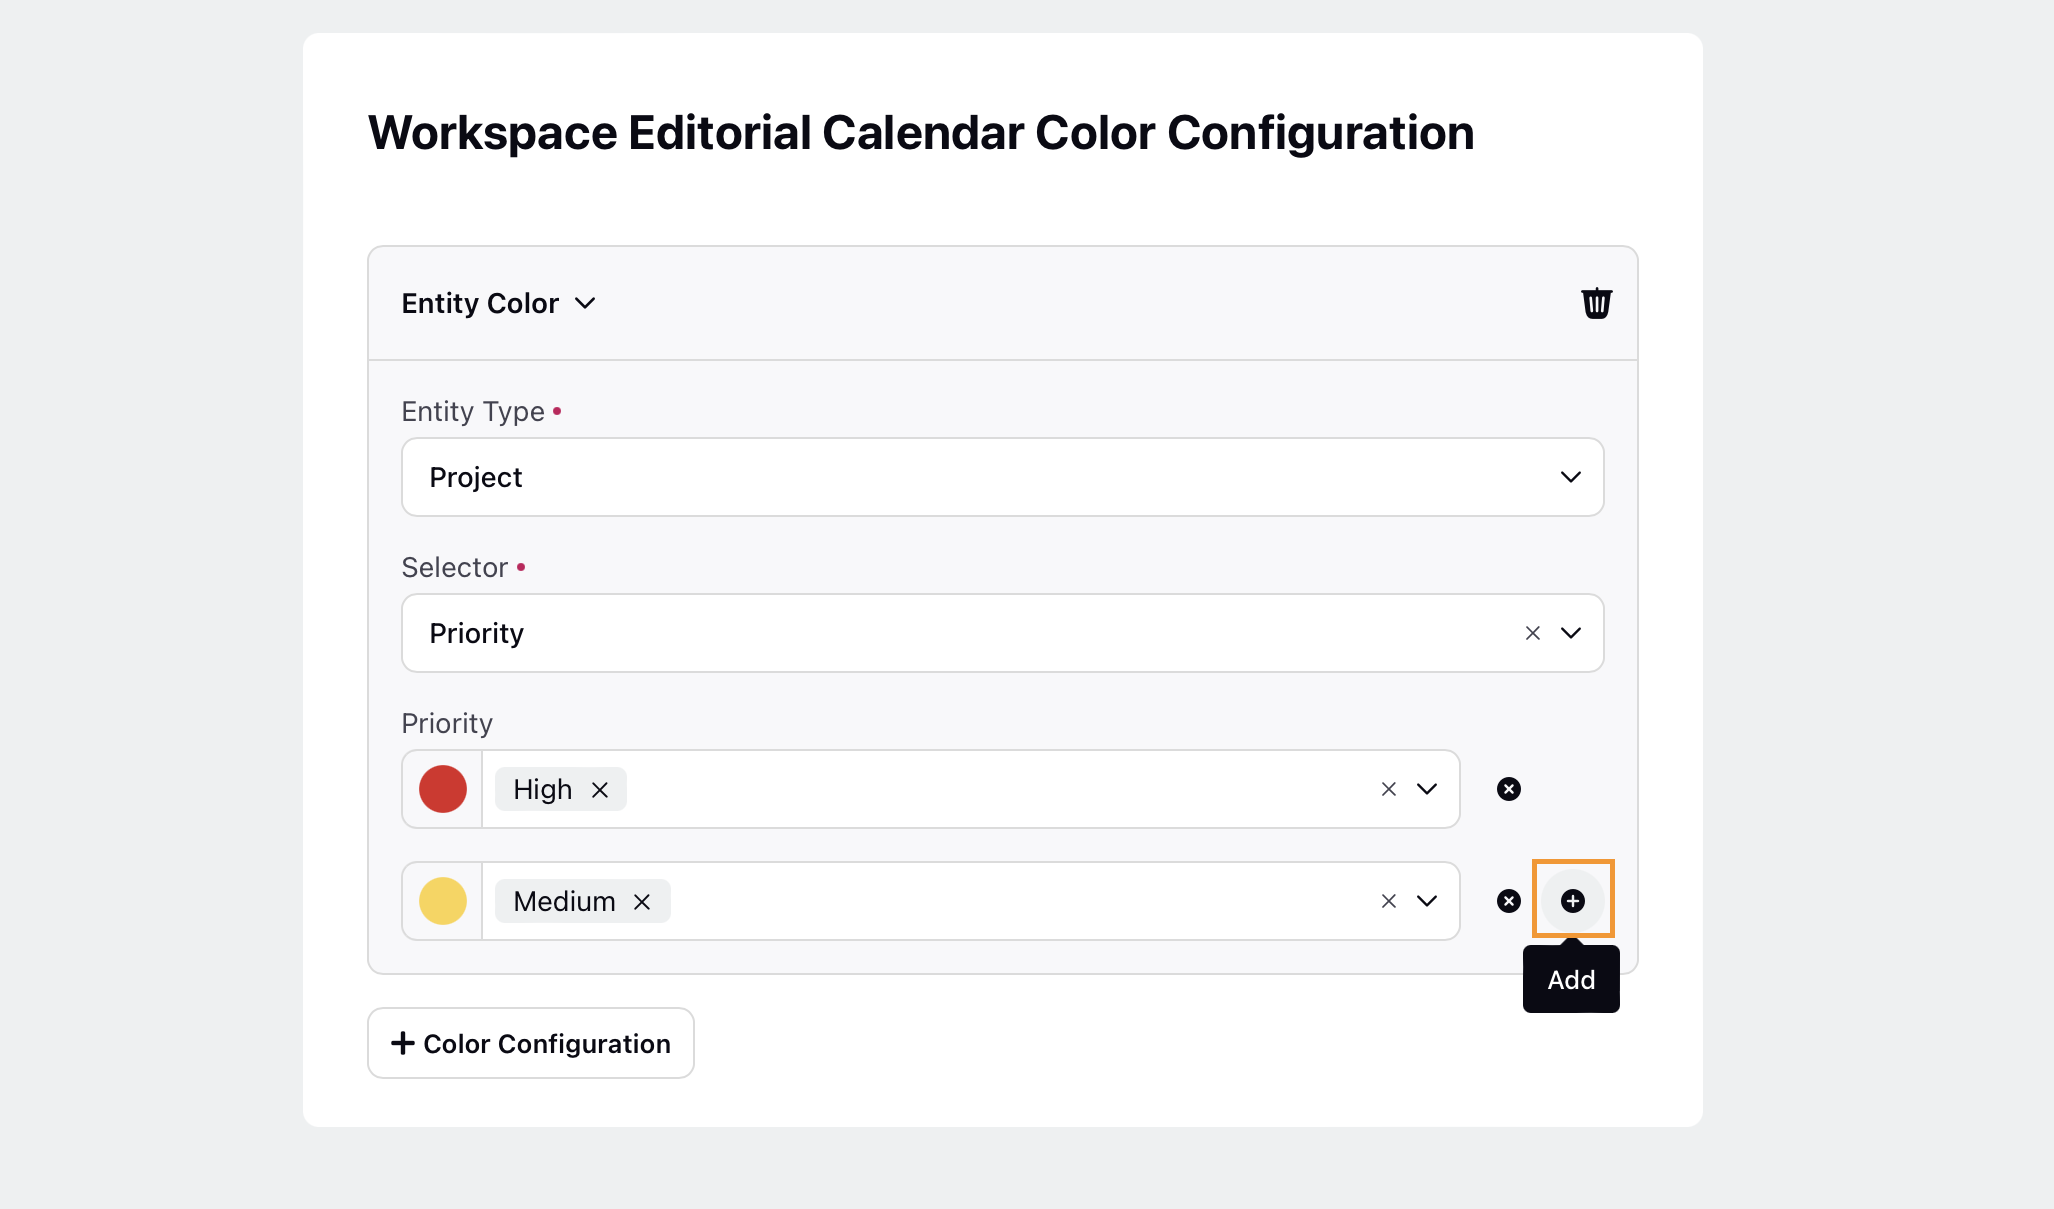
Click Save in the bottom right corner to save your color configuration.
To Export Projects from Editorial Calendar
Click the ellipsis (...) in the top right corner.
Select Export from the dropdown.
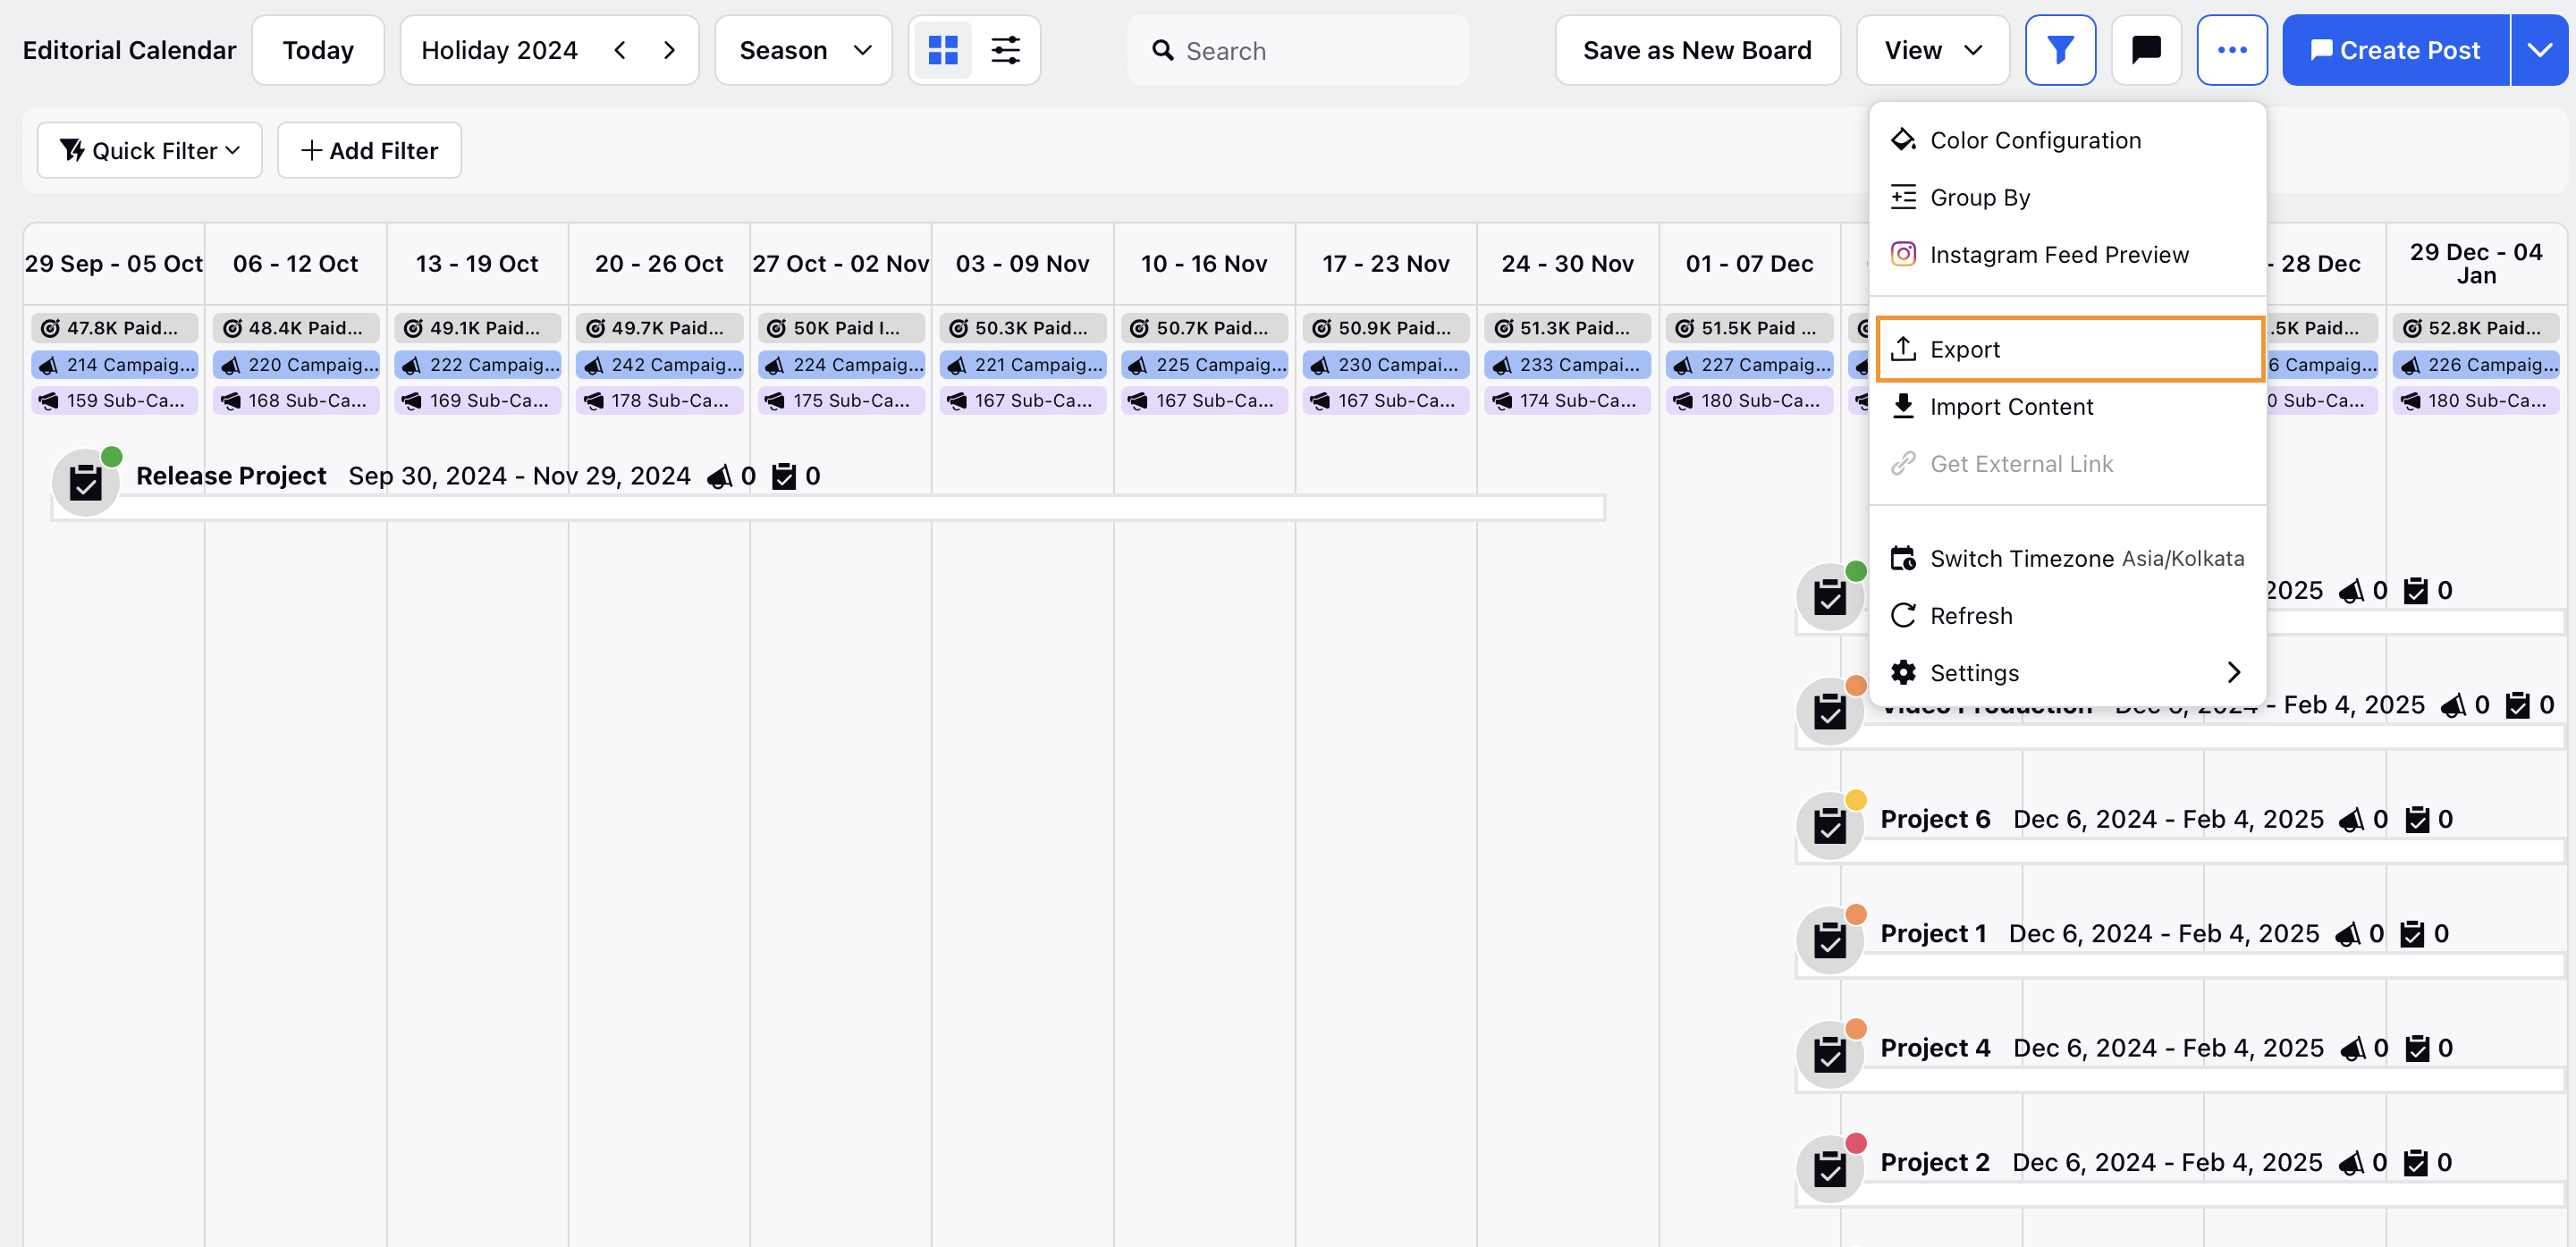
Enter the file name and select the format in the export content pop-up.
Click Export to download the projects from the Editorial Calendar.
By integrating project planning with the Editorial Calendar, you can efficiently manage and track your projects. Use these features to streamline your workflow and ensure successful project execution.