Integrate Snowflake with Sprinklr
Updated
Sprinklr-Snowflake Integration provides instant access to up-to-date Sprinklr data without manually integrating against API endpoints. The connector facilitates automated data synchronization from Sprinklr to Snowflake using an intuitive Sprinklr Marketplace UI.
![]() Note: To learn more about enabling this capability in your environment, please work with your Success Manager.
Note: To learn more about enabling this capability in your environment, please work with your Success Manager.
With this integration, any administrator with access to Snowflake can set up the data sync from Sprinklr Marketplace UI/reporting dashboards and utilize the following capabilities:
Create Datasets: The Integration allows users to create datasets using widgets on Sprinklr Dashboards and send data to Snowflake Tables.
Synchronization Frequency: While creating datasets, the desired frequency and Lookback Period can be defined within the Dataset itself.
Enable/Disable Dataset synchronization: The automated synchronization is enabled by default on the creation of the dataset. This can also be disabled from the Dataset Manager.
Underlying Architecture
The process involves extracting Sprinklr data and exporting it to Snowflake as .csv files via SQL queries using a JDBC connection. The data is stored temporarily in a Snowflake stage, and then transferred to a user-defined Snowflake table using multiple Snowflake commands. This pipeline ensures that data from Sprinklr is effectively captured, processed, and stored within Snowflake for further analysis and reporting.
Integration Flow Diagram
The following diagram shows the integration flow:

Prerequisites
Minimum permission set required on the Snowflake instance for this integration:
Create / Update Snowflake user which is assigned a ROLE with the following permissions:
CREATE FILE FORMAT
CREATE TABLES
CREATE STAGE
INSERT, UPDATE, DELETE ON ALL TABLES IN GIVEN SCHEMA
GRANT usage on database <db_name> to role <role_name>;
GRANT usage on schema <db_name>.<schema_name> to role <role_name>;
GRANT select on all tables in schema <db_name>.<schema_name> to role <role_name>;
ALTER USER <user_name> SET JDBC_QUERY_RESULT_FORMAT=JSON
Integration steps
The Snowflake and Sprinklr integration involves the following steps:
Install the Snowflake app from Sprinklr Marketplace.
Create a dataset to start the data export.
Access dataset manager to view all datasets.
Step 1: Install the Snowflake App from Sprinklr Marketplace
To install the Snowflake app from Sprinklr Marketplace, follow these steps:
1. Go to Sprinklr Marketplace. To do that, click the launchpad icon (![]() ) in the top-right corner and search for Marketplace. Click All Marketplace from the search results.
) in the top-right corner and search for Marketplace. Click All Marketplace from the search results.
2. In Sprinklr Marketplace, search for Snowflake. On the Snowflake application card, click Install.
The installation page opens.

2. On the installation page, enter the Snowflake application details and account details:

The following list describes each field on the installation page:
App Name: Enter a name for the application. Choose a descriptive name that will help you locate the app easily.
Description: Enter a description for the application that describes its the purpose.

Username: Enter the username of the Snowflake account you want to integrate.
Authentication Type: Select an authentication type. You can choose either Private Key or Password.
Private Key: If you chose Private Key as the authentication type, then this field is displayed. Enter the private key you generated for Snowflake authentication.
Password: If you chose Password as the authentication type, this field is displayed. Enter the password of the Snowflake account you want to integrate.
Account Identifier: Unique Identifier for your Snowflake account. For example, https://sprinklrintegrationconnector.switzerland-north.azure.snowflakecomputing.com
Warehouse: Warehouse is where you need to compute the data being sent to Snowflake.
Role: The role for which you need to connect the Snowflake account.
DB Name: The database where you need the Sprinklr data to be exported.
Schema Name: Select the schema (Data Model). Schemas can be individually selected for each dataset.
Stage Name: Stage is a temporary storage area on Snowflake side and can be defined by the user while creating the application.
Request Via Proxy: Use this option if you wish to send the requests via proxy
![]() Note: If the password of the Snowflake account authorized with Sprinklr is updated, then update the password on Sprinklr as well.
Note: If the password of the Snowflake account authorized with Sprinklr is updated, then update the password on Sprinklr as well.
After you fill in all the details, click Next. You are taken to the installed app screen where you can view the details added by the user and manage the visibility of the app.

Step 2: Create a Dataset to Start the Data Export
To create a dataset to start the data export, follow these steps:
1. Open your respective Reporting Dashboard and click the three-dots icon. Then, click Export to Snowflake.

2. Click Create Datasets. The Create Datasets page opens. Fill in the following details:

The following list describes each field on the Create Datasets page:
Dataset Name: Enter the name of the dataset being created by the user.
Dashboard: Enter the dashboard name on which the user needs to select the widget for which they need the Data Export. This is pre-filled for the first mapping.
Application: Application on which the Data Export is needed.
Snowflake Table: Snowflake table name where you want the data to be exported. Note that the user can create a new table in Snowflake directly from the Sprinklr UI as well.
Widget - Tab: Widget - Tab name for which the data needs to be exported.
Lookback Period: The period for which the data needs to be exported in each individual data export run.
Frequency: Frequency of Data Export.
Historic Sync Date: This can help you backfill old data over and above the normal frequency set for your dataset. Note: Historical run creates a new scheduled export. This export runs every 15 minutes and captures the data for a 6-hour period. It keeps on rolling until the time of creation of dataset is reached.
![]() Note: As a best practice, the widgets that you want to be exported to Snowflake should be from the same report.
Note: As a best practice, the widgets that you want to be exported to Snowflake should be from the same report.
Step 3: Access Dataset Manager to View All Datasets
You can access the Dataset Manager from the Reporting Dashboard or the installed Snowflake app.
Reporting Dashboard
To access Dataset Manager from the Reporting Dashboard, click the three-dots icon. Then, go to Settings > Snowflake Dataset Manager.

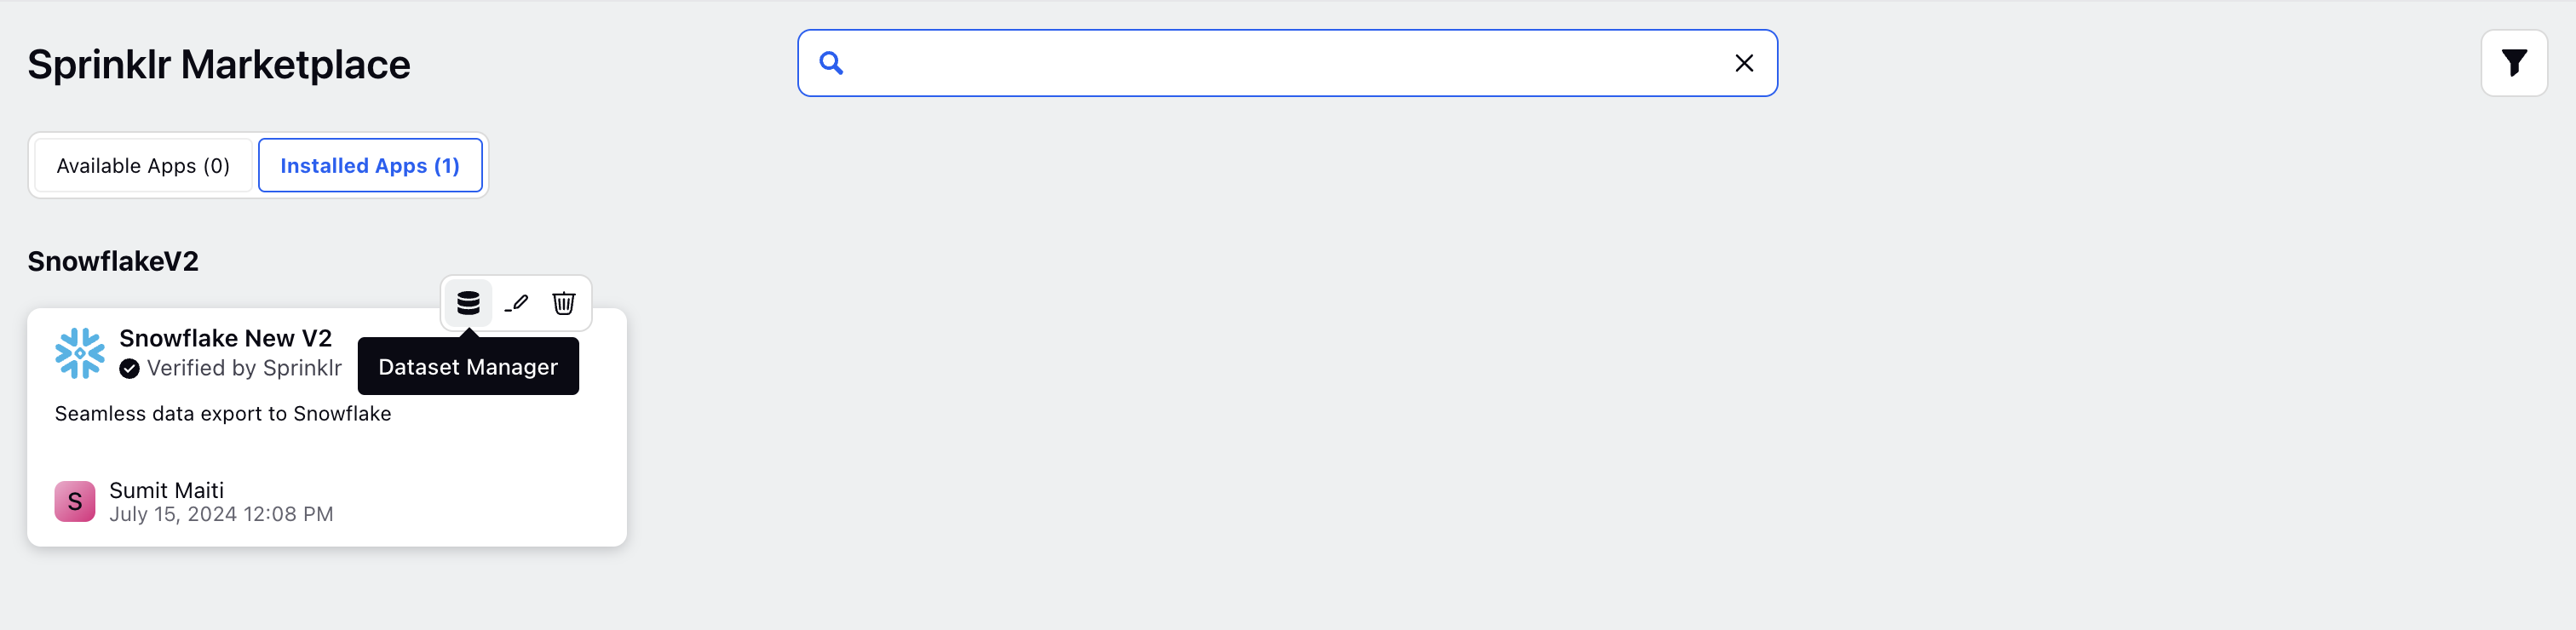
Installed Snowflake App
In Sprinklr Marketplace, go to the Installed Apps section. On the installed Snowflake app, click the Dataset Manager icon.
You have now successfully integrated Snowflake with Sprinklr.