Sprinklr Service On ServiceNow v2
Updated
With an AI-powered, bi-directional integration to ServiceNow, your social team and care agents can use their system of record to provide omnichannel engagement and support to customers and prospects, with a complete picture of the customer’s experience. This will reduce agent costs by leveraging your existing ServiceNow infrastructure with a comprehensive integration to Sprinklr for Modern Channels. Additionally, drive revenue by seamlessly transferring leads to your sales and marketing team
The following new enhancements are available for ServiceNow v2 Integrations:
Servicenow Application in Marketplace:
Application configuration can now be conveniently managed through the Sprinklr marketplace, streamlining the setup process.
To bolster security, we've transitioned from Basic Authentication to OAuth authentication in ServiceNow, ensuring a more robust protocol for user authentication.
Experience seamless data flow with bi-directional field mapping now available in the Case Configuration module, accessible through an intuitive UI.
Elevate agent productivity and interaction efficiency with the upgraded Sprinklr iFrame in ServiceNow, facilitating direct engagement with social posts and messages.
Simplify CRM user mapping with direct setup options available in the import user mapping module within the installed application's UI.
Before You Begin
ServiceNow CSM on cloud London version and above.
Whitelisted Sprinklr IP addresses.
Access to Sprinklr Service is a must for using ServiceNow connector. Additionally, you need to have access to Sprinklr Insights for listening capabilities.
Use Cases
You can create and update ServiceNow cases from social channels and messaging apps.
You can associate cases with contact/account/consumer through search or creating a new record.
You can sync social profile data with ServiceNow contact/account/consumer.
You can engage with your audience from ServiceNow.
You can synchronize standard and custom case fields between Sprinklr and ServiceNow.
Supported Languages
English | French | German |
Spanish | Portuguese | Chinese |
Italian | Japanese | Korean |
To Download and Configure the Sprinklr App in ServiceNow

To configure the Sprinklr App in ServiceNow, reach out to your Sprinklr Success Manager or drop an email at support@sprinklr.com.
Step 1: To Create a Case in Sprinklr
Click the New Tab icon
. Under the Sprinklr Social tab, click Engagement Dashboards within Engage.
On the Engagement Dashboard window, select a message that you would like to create a Case for.
In the top-right corner of the Message details pane, hover over the More Options icon
and select Sprinklr from the drop-down list alongside Create Case.
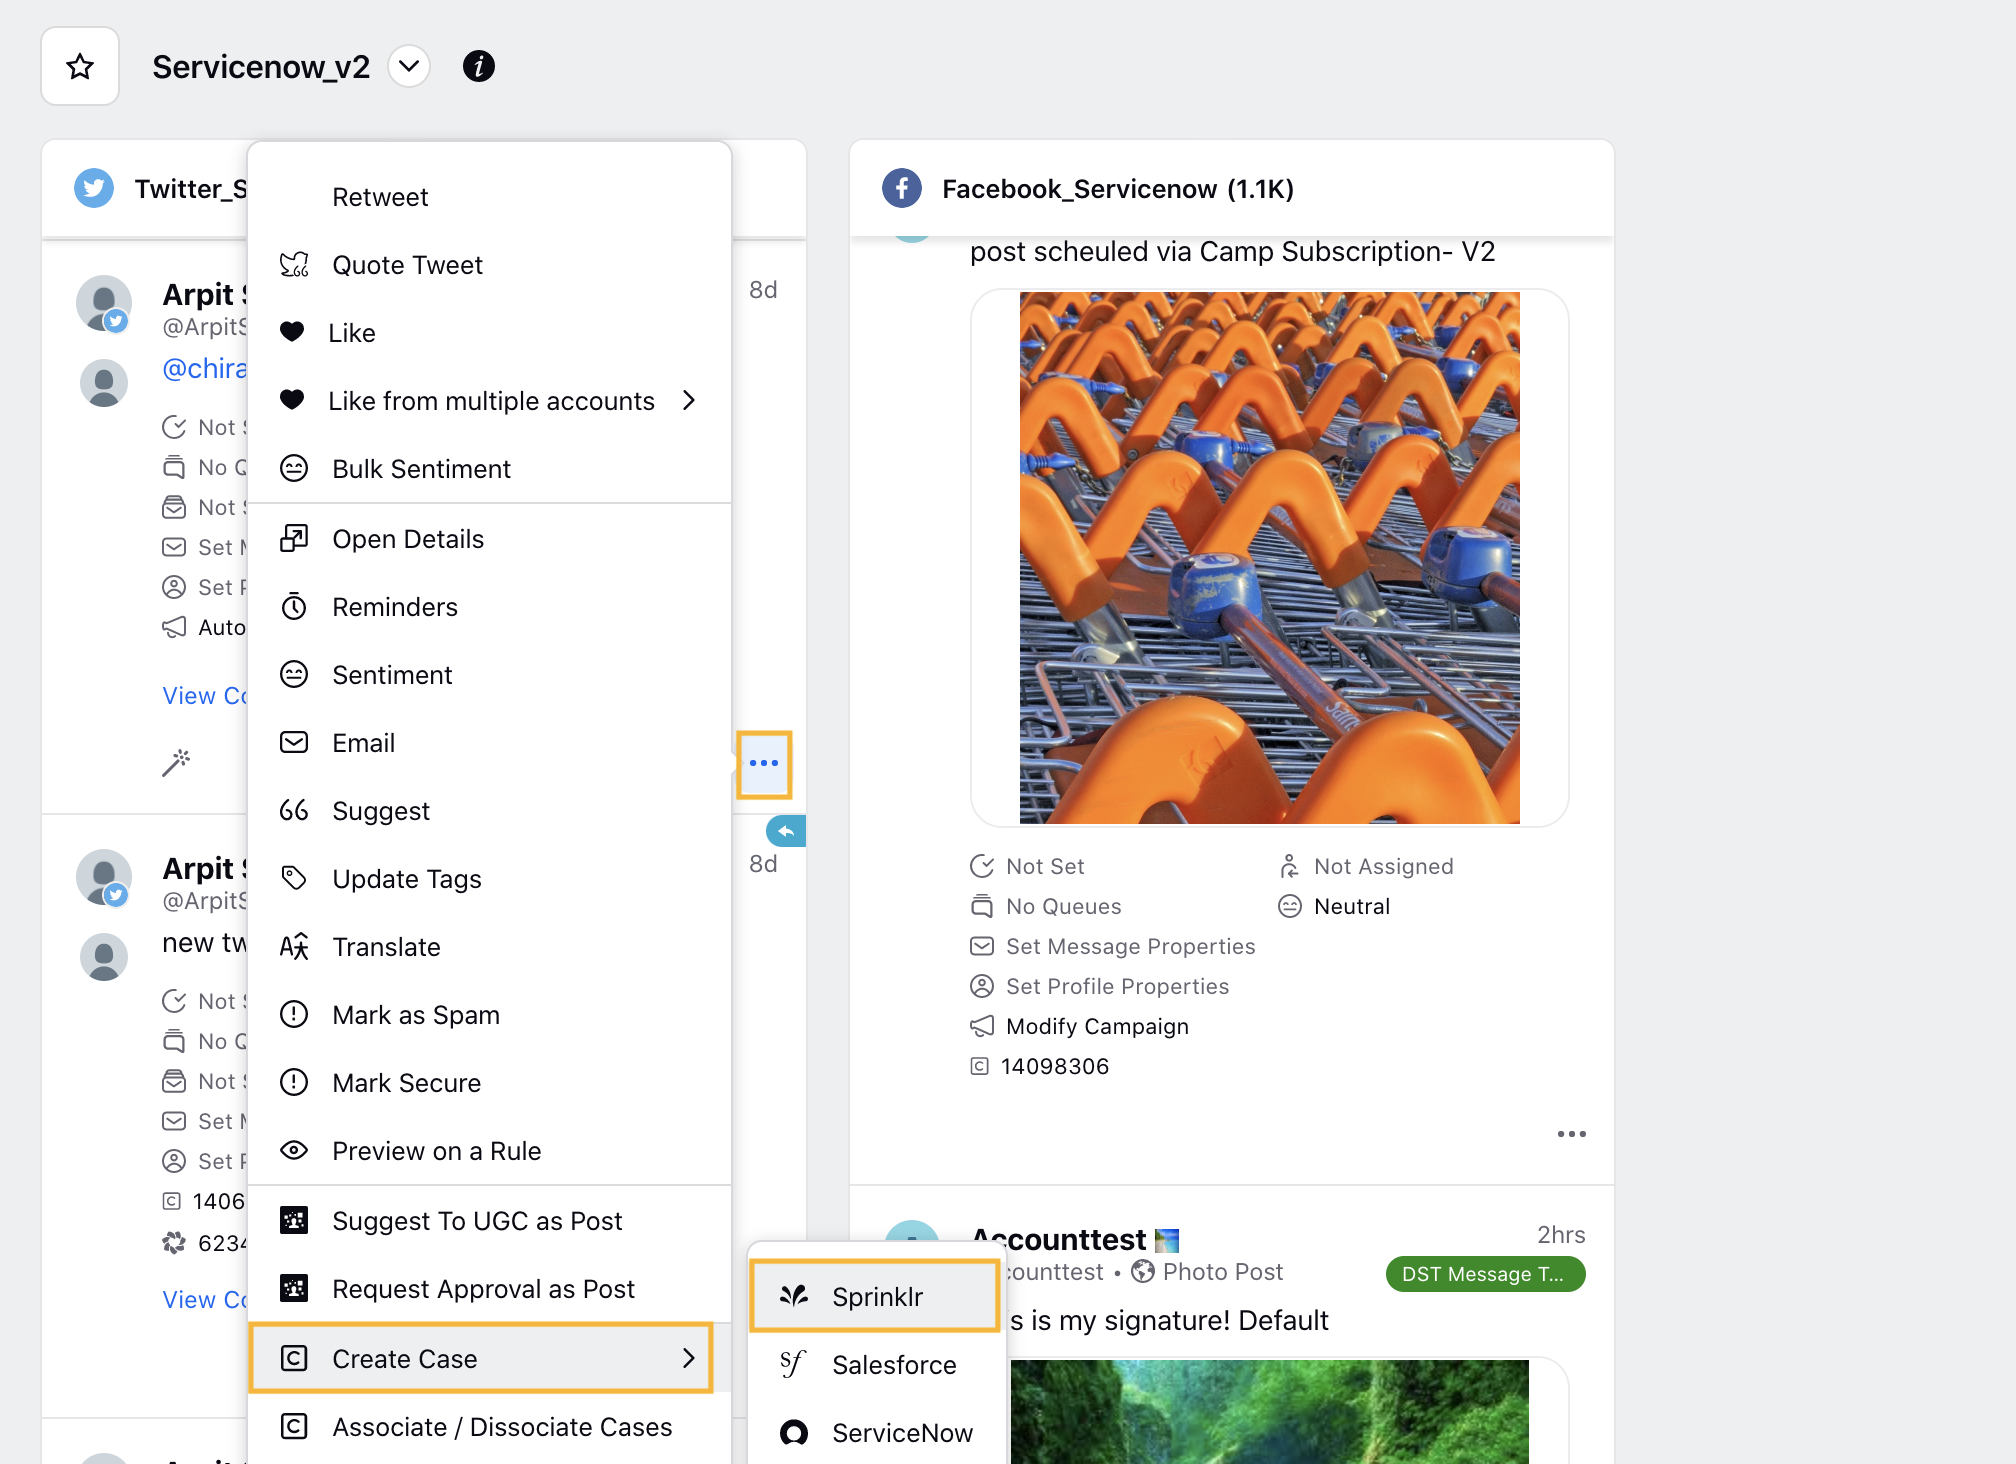
Next, in the Create Case window, fill in the the details as per your requirements and click Create Case in the bottom right corner of the Create Case window.
Step 2: To Push the Sprinklr Case in ServiceNow
Click the New Tab icon
On the Engagement Dashboard window, search the message on which you have created case in STEP 1.
Click on the Sprinklr Case Number to open the third pane.
In the third pane, click the Options icon
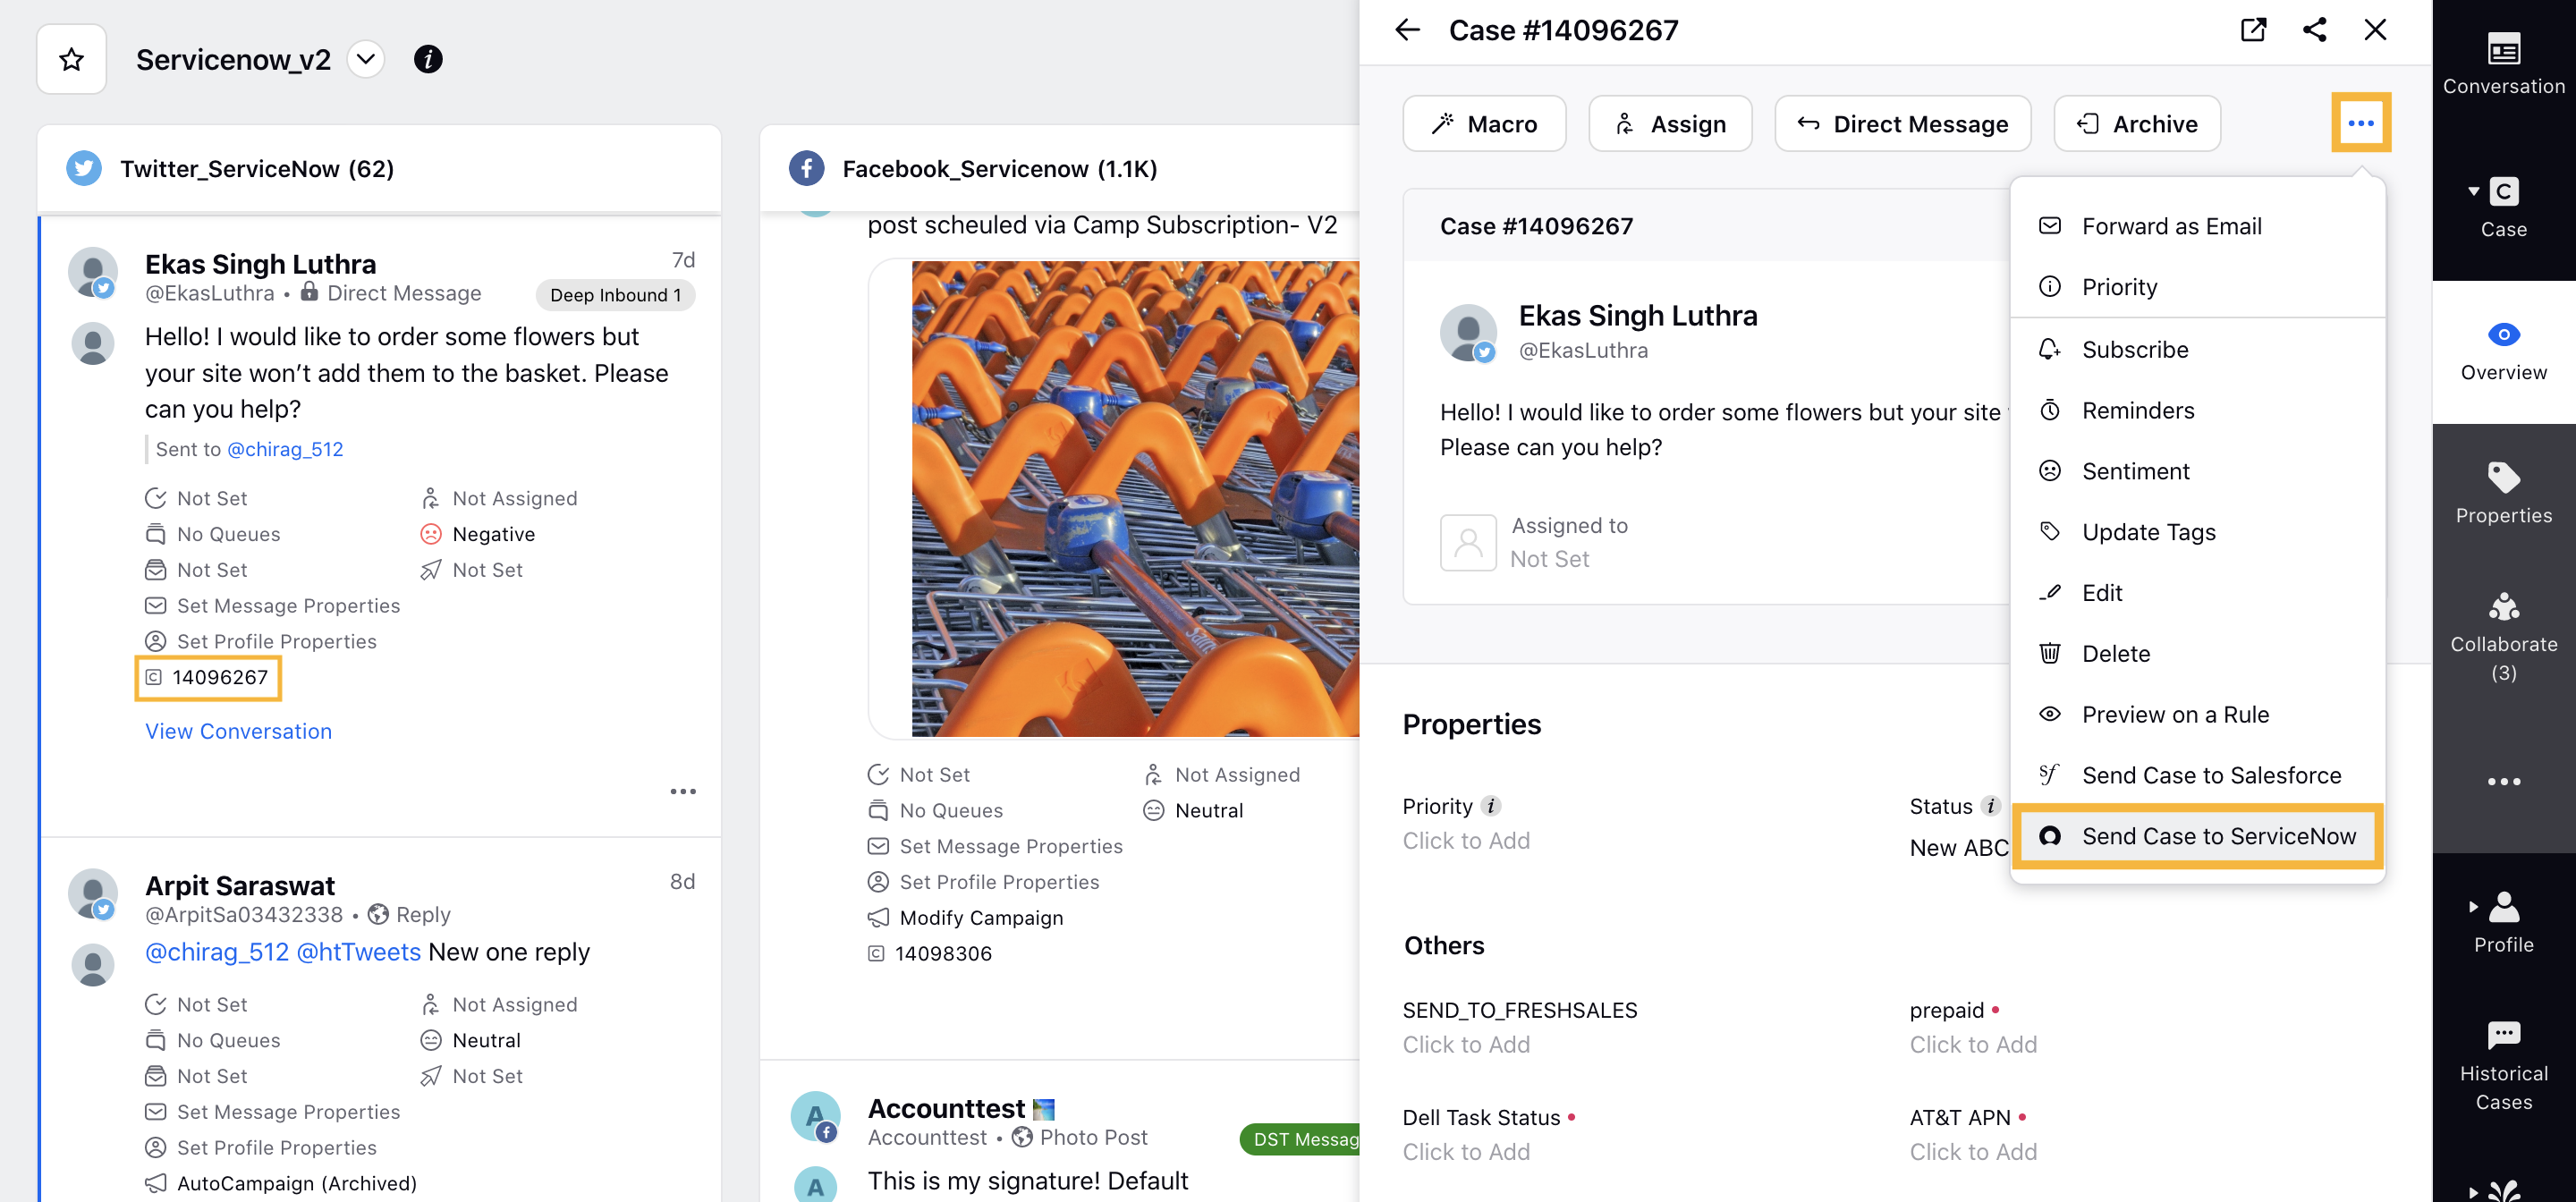
In the Send Case to ServiceNow window, fill in all the details as per your requirements and click Send Case in the bottom right corner of the Send Case to ServiceNow window.
You can choose the Customer Types from the following three options: Consumer, Account, Contact. Note that contact, account or consumer is must for case creation.
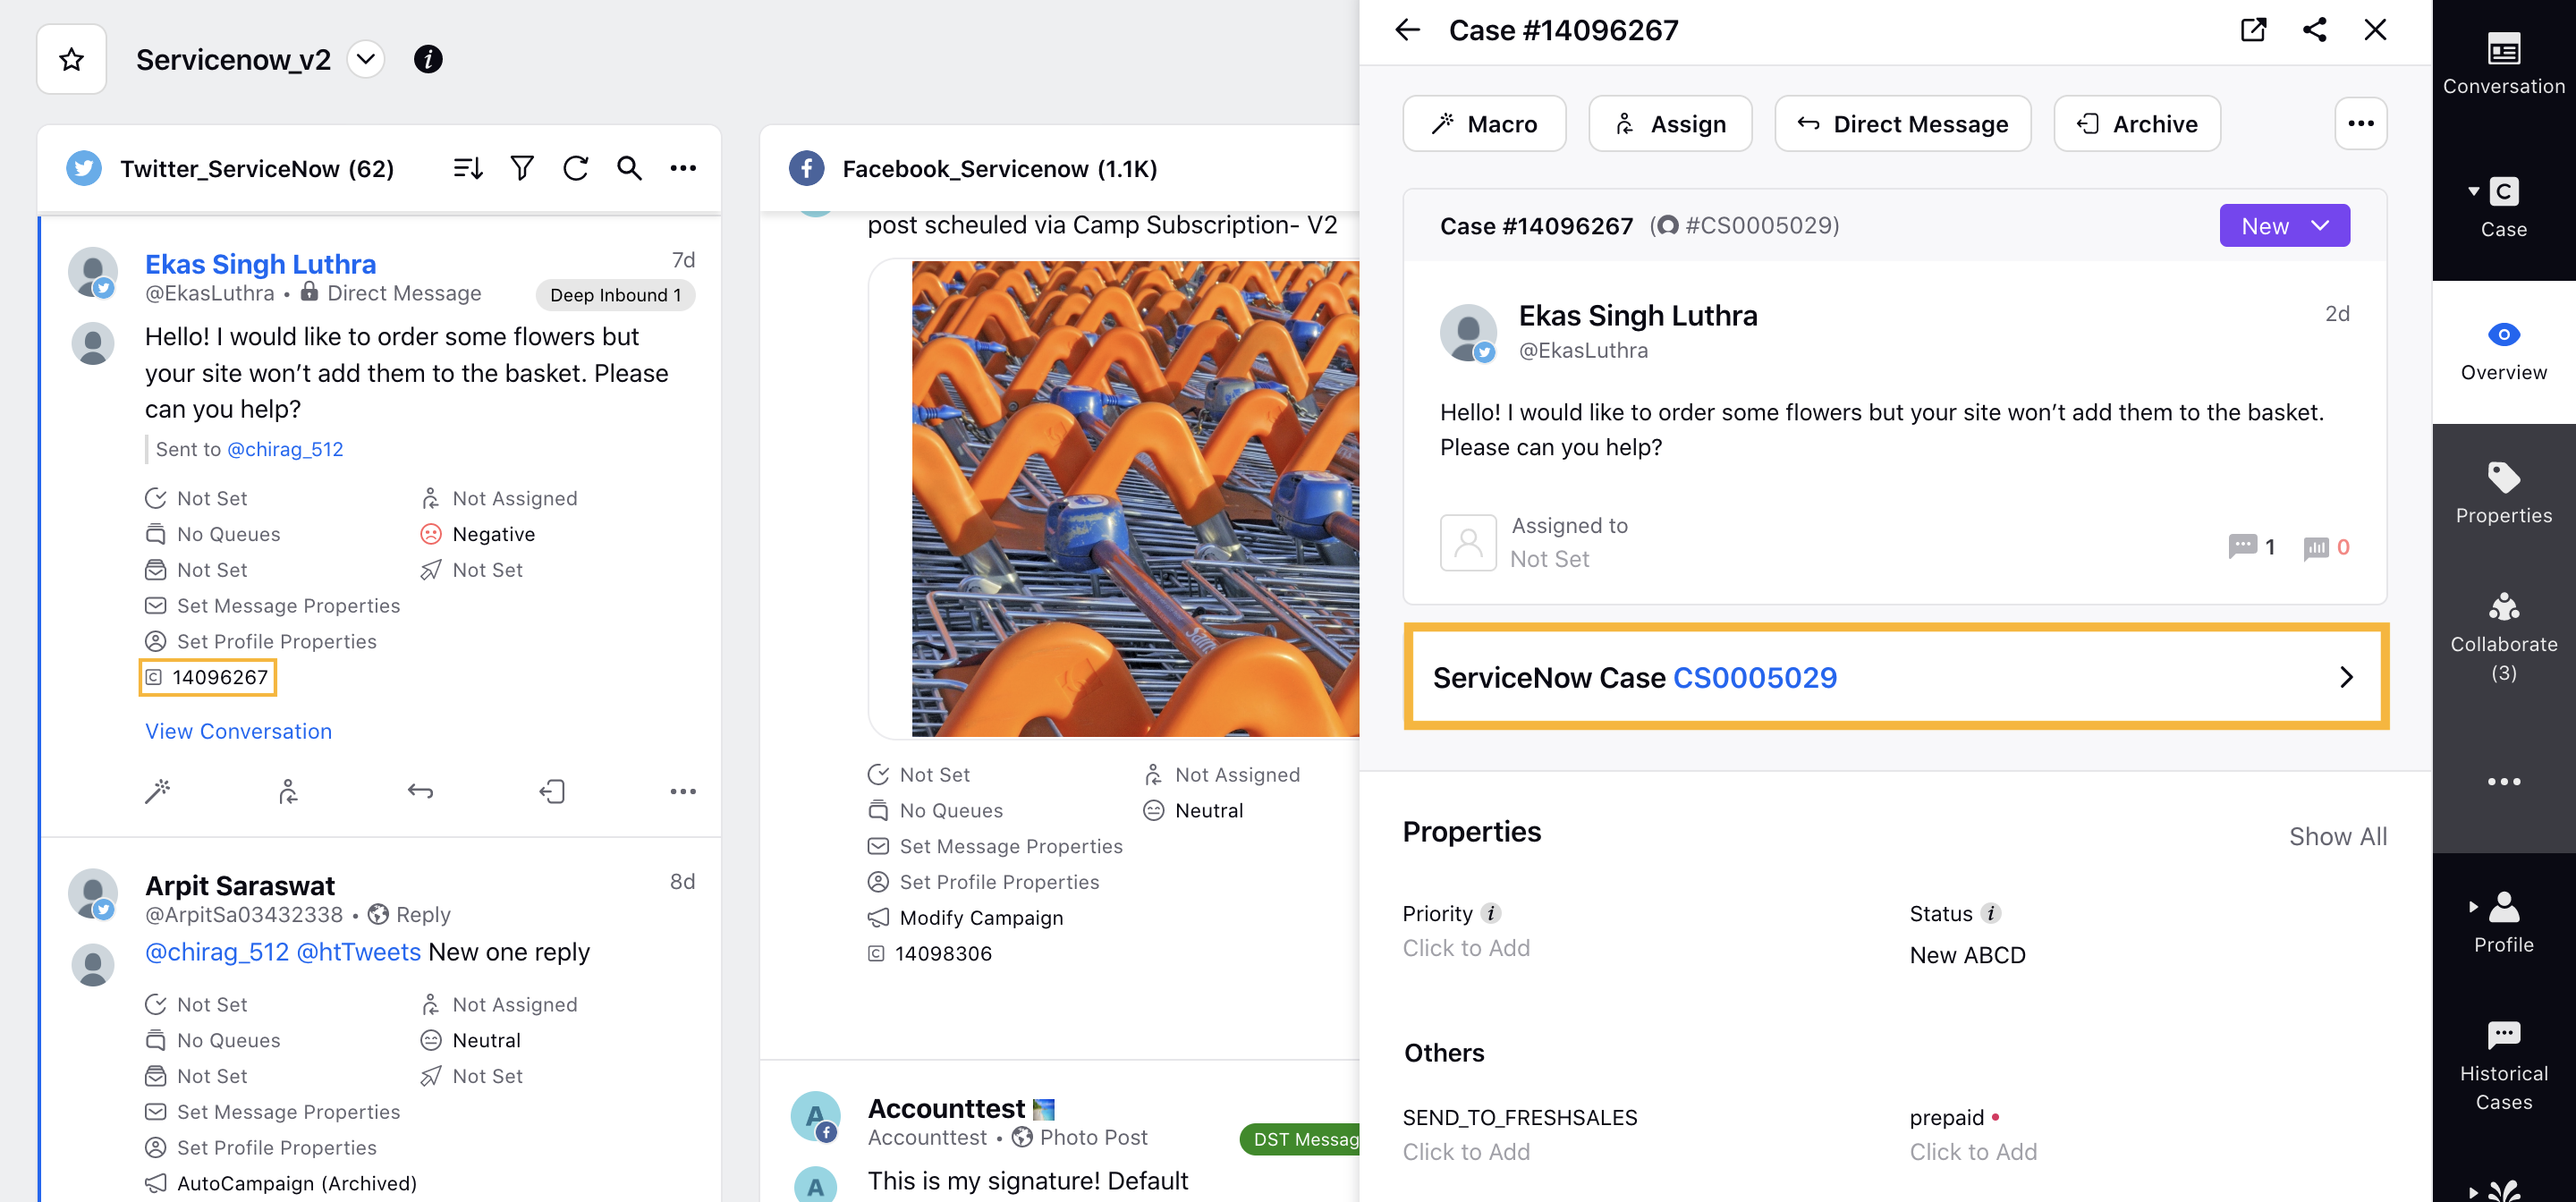
Once your Sprinklr Case is sent to ServiceNow, you will be able to view the ServiceNow Case number in the third pane.
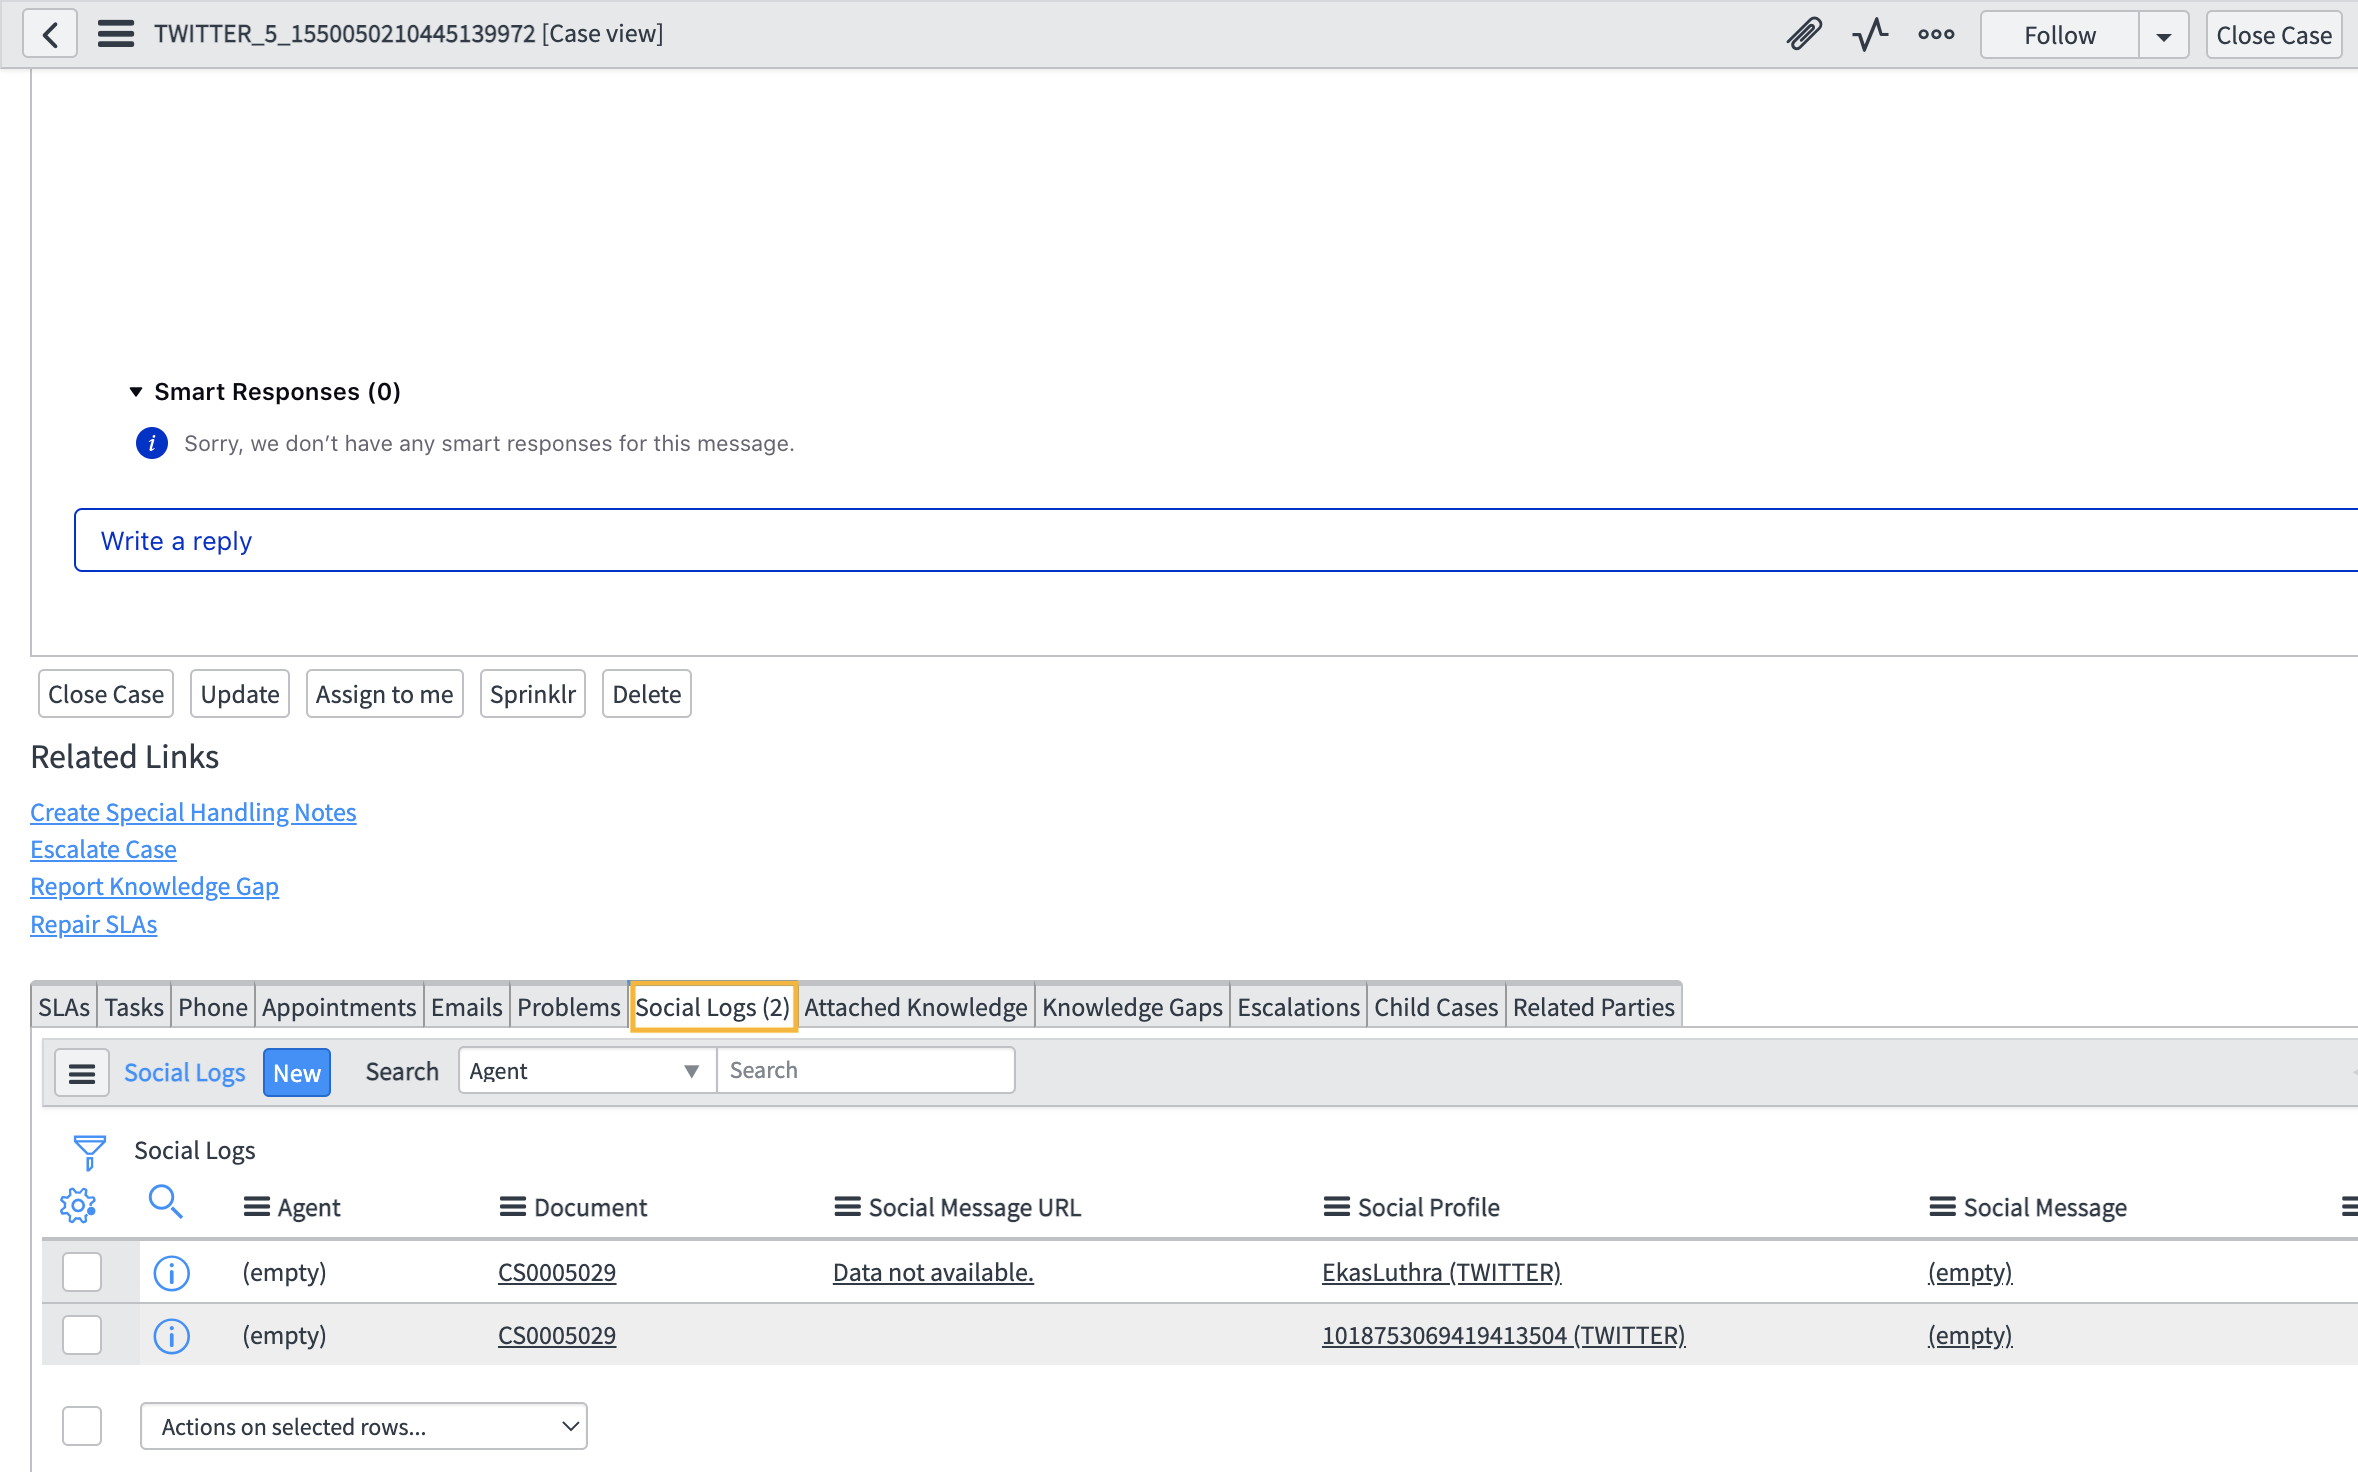
Step 3: To Access Sprinklr’s Case in ServiceNow
Click the New Tab icon
On the Engagement Dashboard window, search the message on which you have generated a ServiceNow Case in STEP 2.
Click on the Sprinklr Case Number to open the third pane. Next, click on the ServiceNow Case number and it will redirect you to ServiceNow website.
.png)
Tip
Keep your ServiceNow login credentials ready, incase you're not logged into the ServiceNow.
In the ServiceNow Case View, you will be able to view all the details related to the case in the Timeline section. Note that you also have the access to edit the details related to the case as per your requirement.
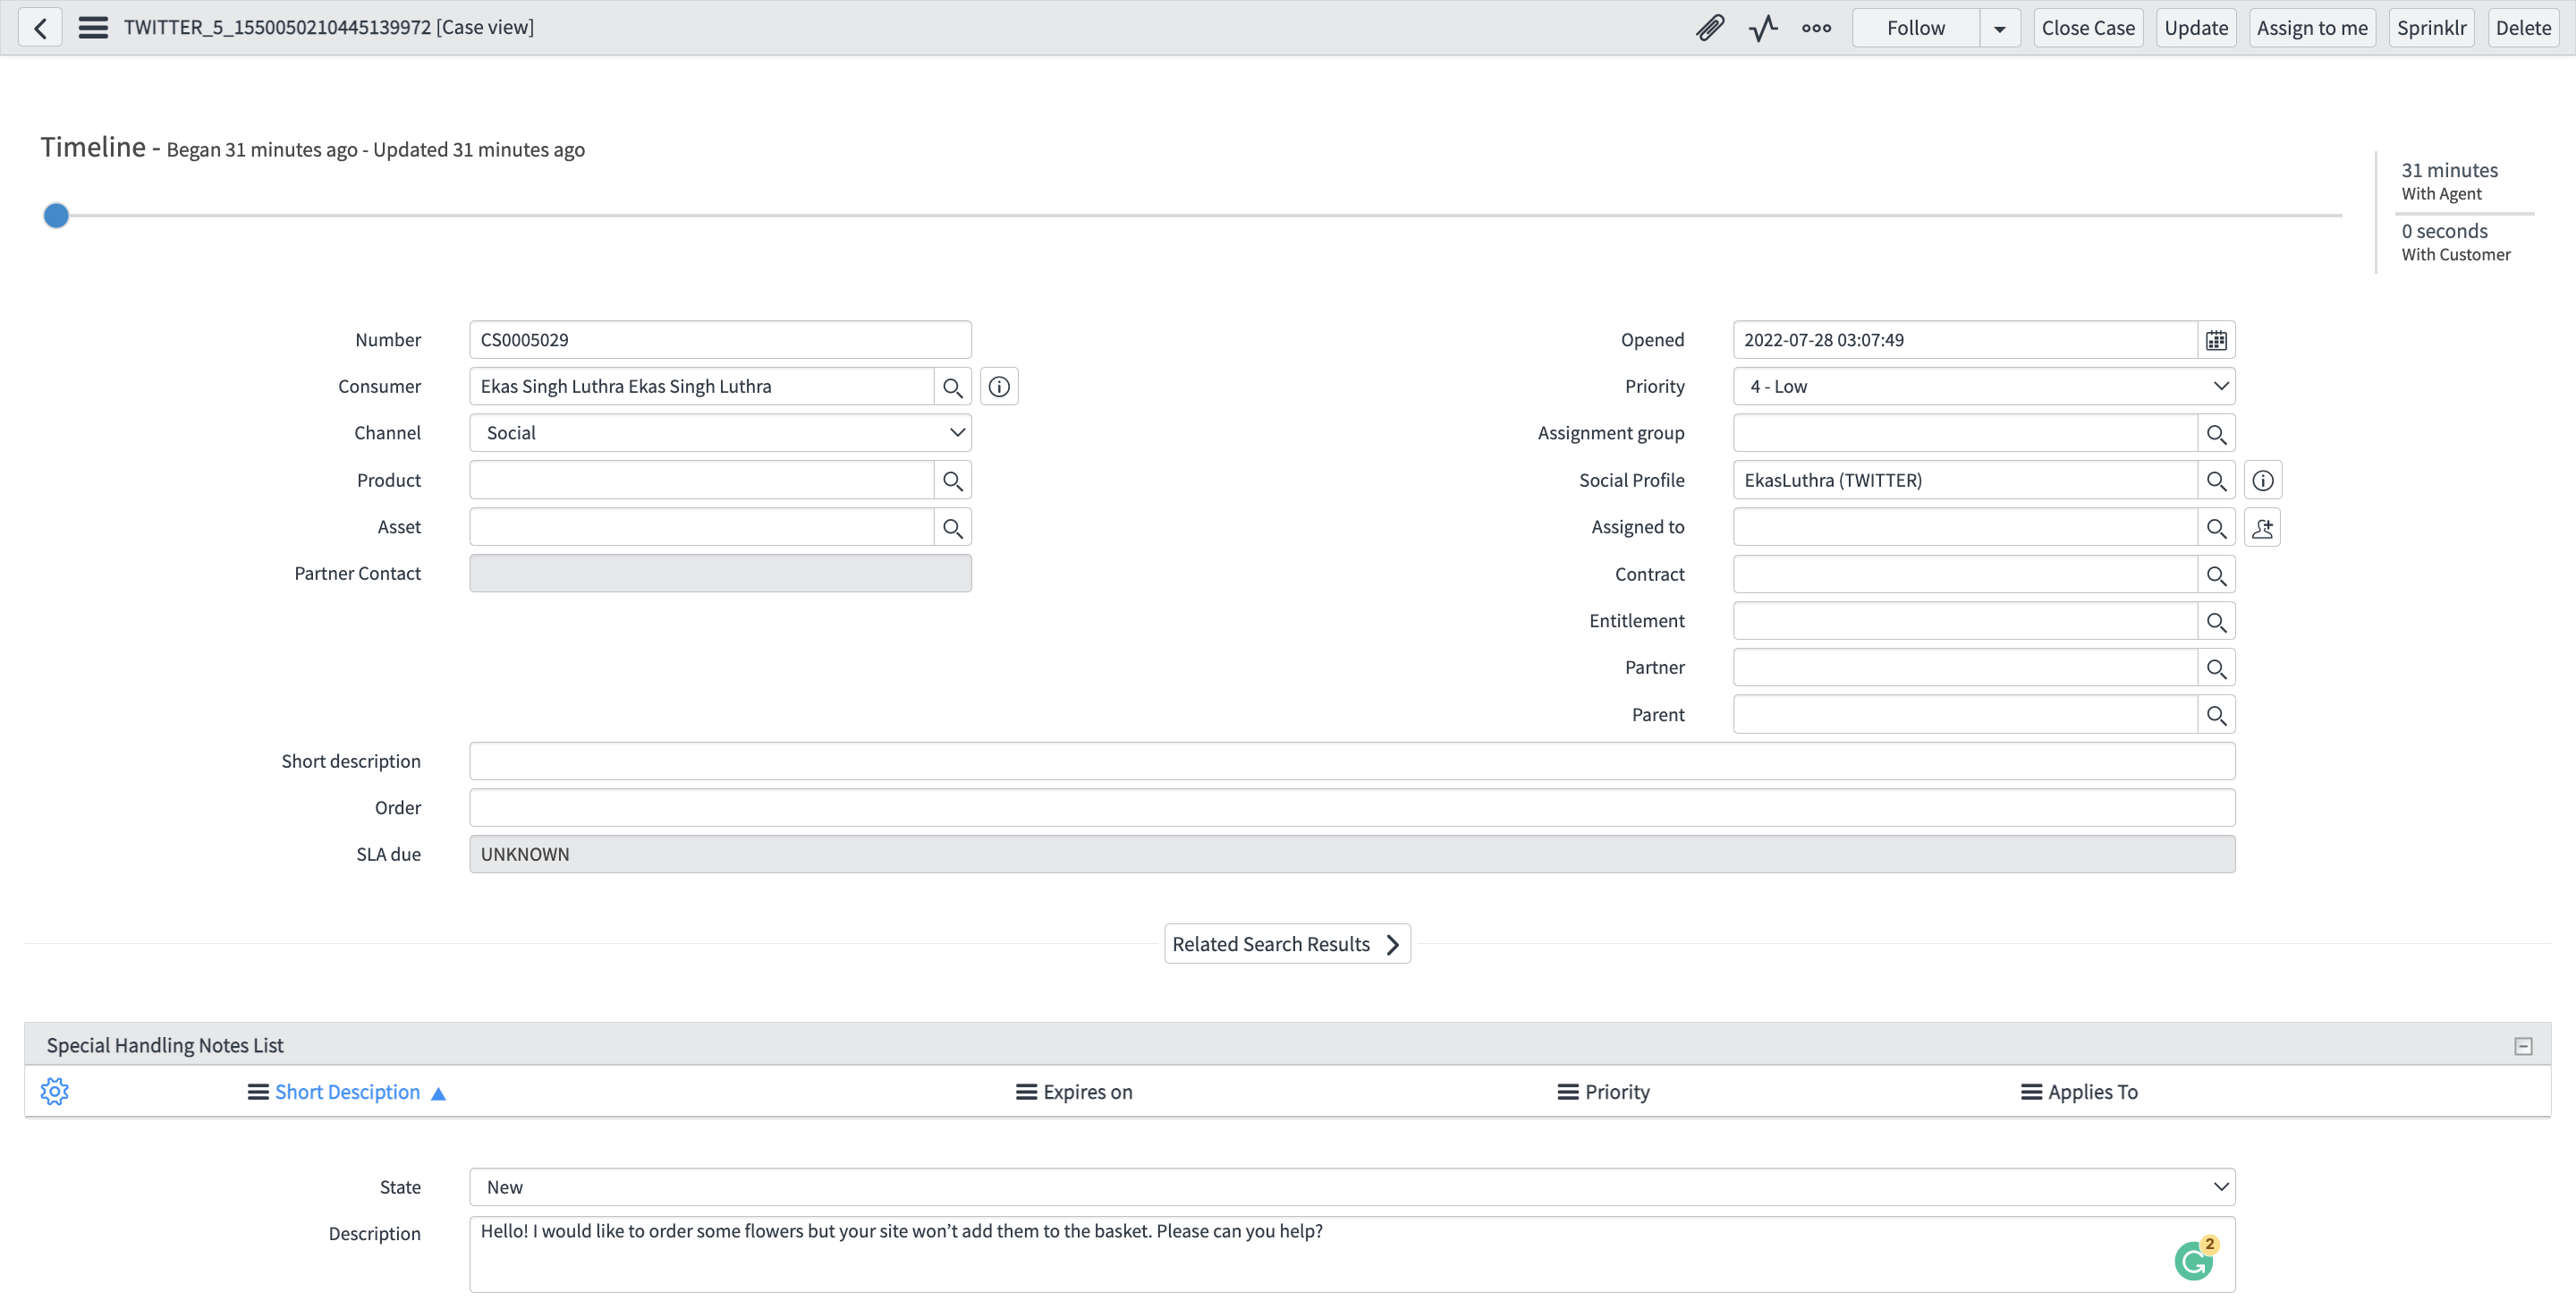
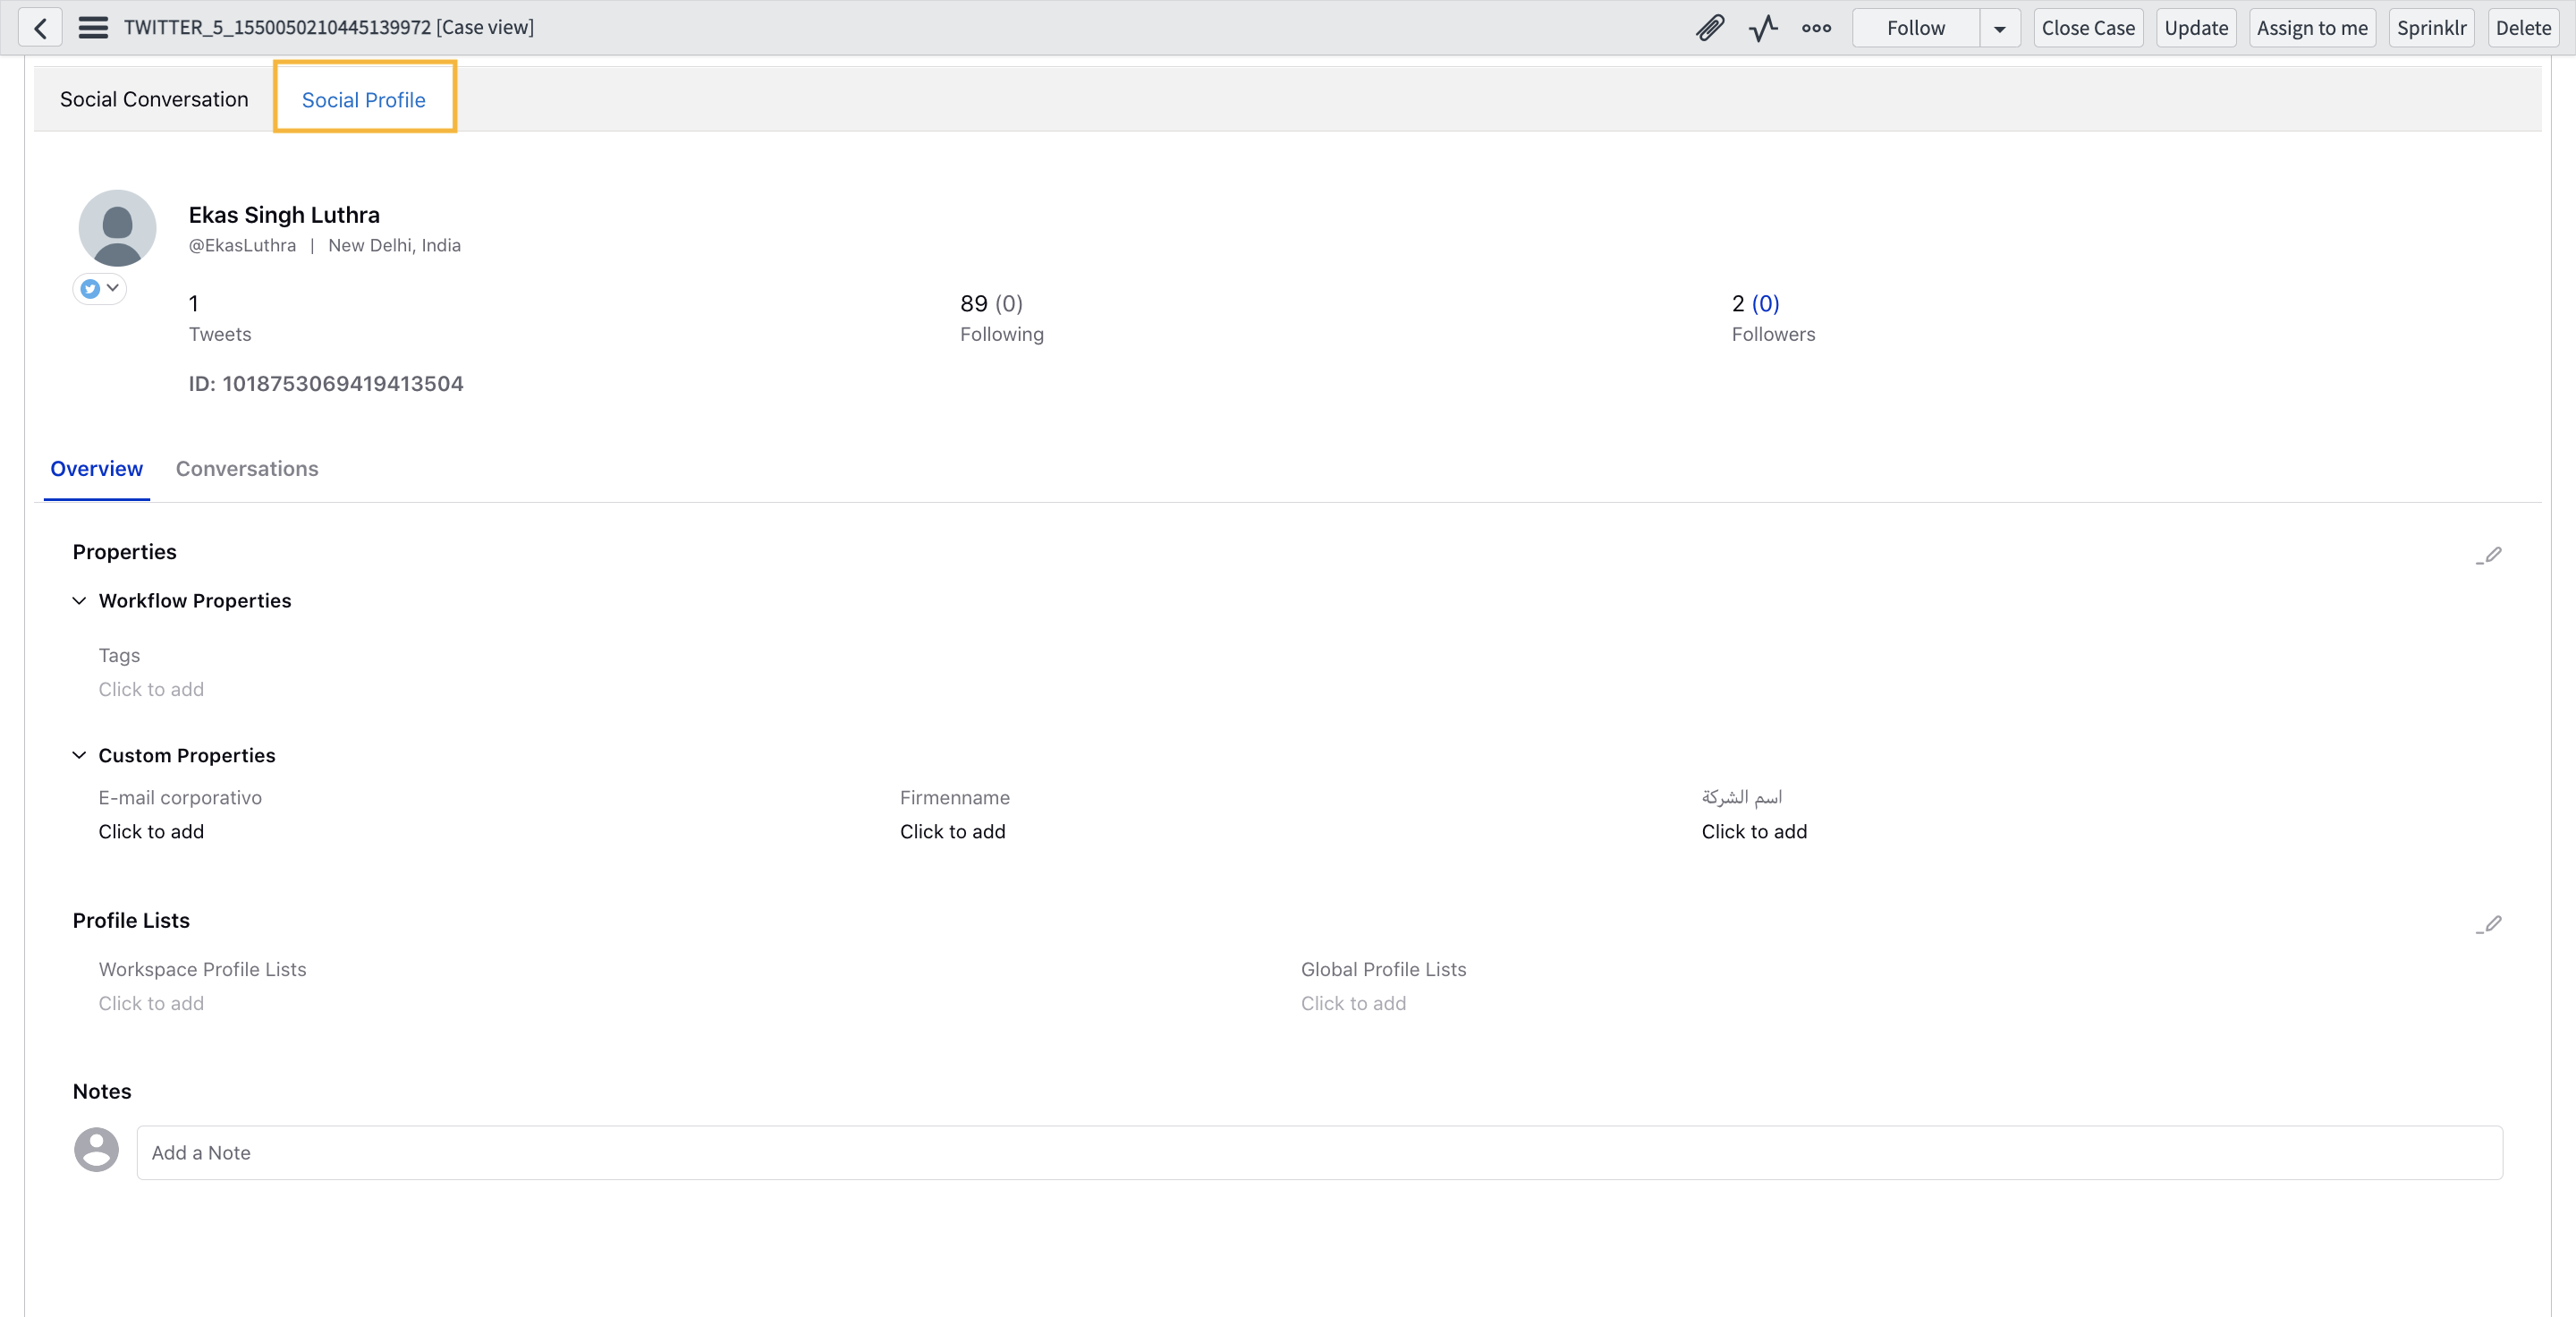
Scroll down to the Sprinklr iframe section to access the Social Conversations & Social Profile.
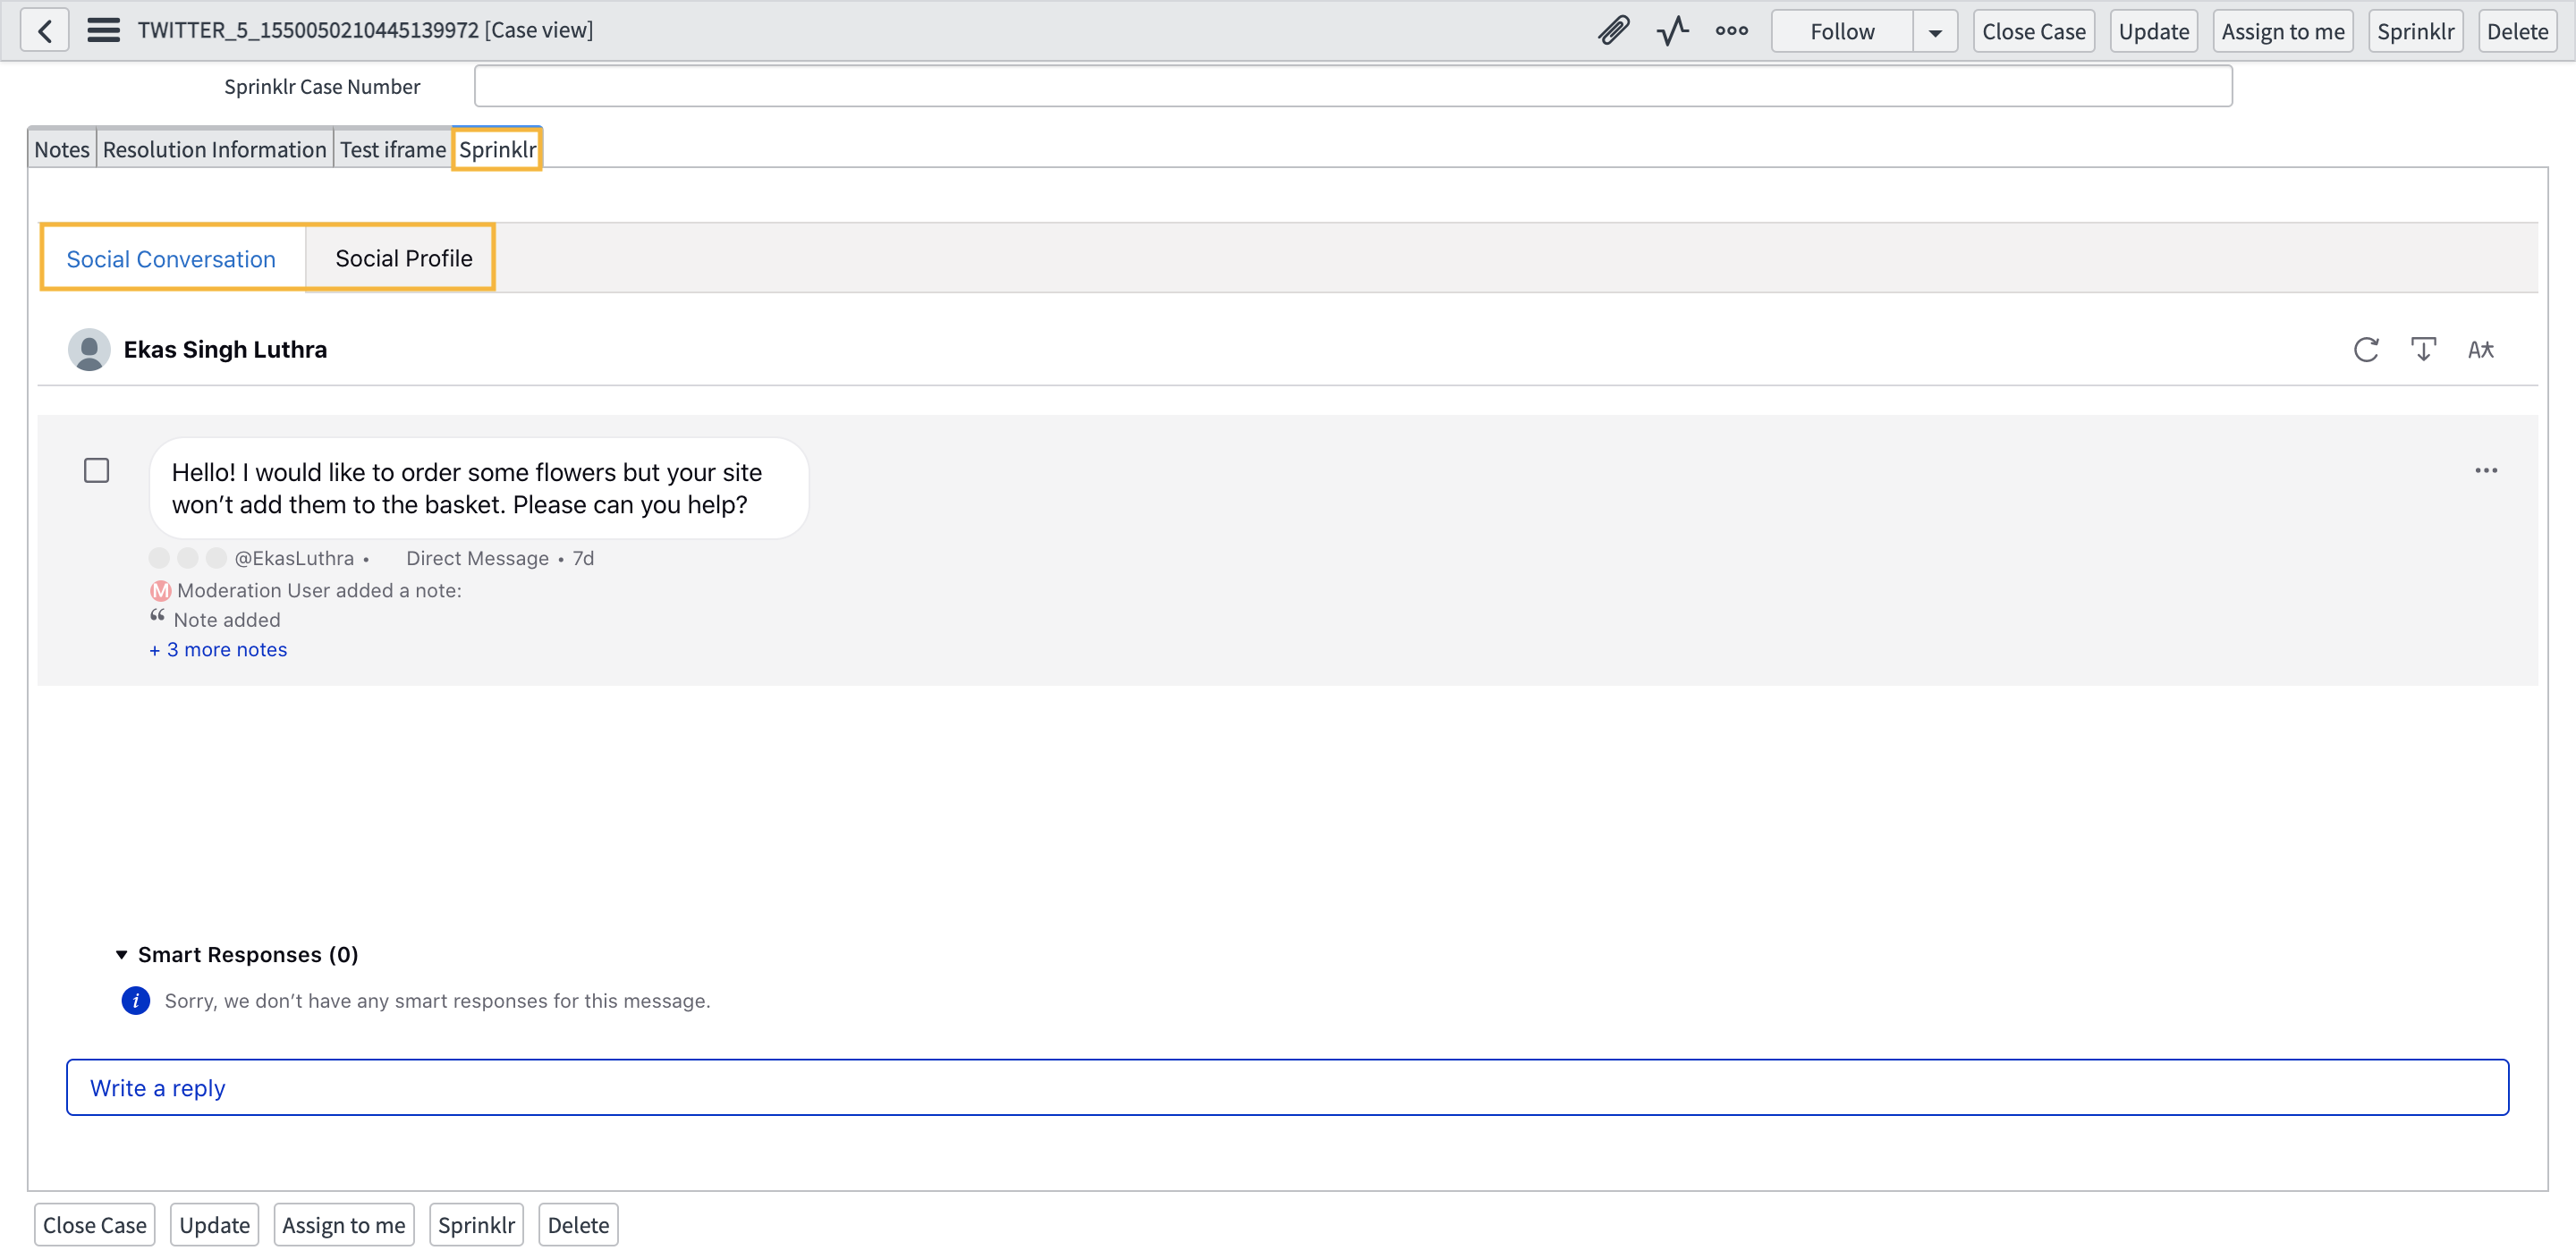
In the Social Conversation tab, select Write a reply to respond directly to the message to the social network.
Similarly, in the Social Profile tab you will be able to view the mapped custom fields from the Sprinklr case.
In the Social Logs section, you will be able to view the associated case message related to the pushed case.