Integration of MS Teams in Advocacy
Updated
Seamlessly integrate your Advocacy site with MS Teams through an iframe, enhancing user convenience and productivity in perfect alignment with your team's workflow.
With the power to embed your Advocacy site directly within MS Teams using an iframe, it enables advocates to access the Advocacy platform without leaving the MS Teams environment.
Advantages of Integrating Advocacy Site with MS Teams
This transformative update allows advocates to utilize all the mainstream Advocacy features within MS Teams, where they spend a significant portion of their day - eliminating the need to switch back and forth between platforms.
How to Integrate Advocacy Site with MS Teams
Step-1: Enabling integration through the Admin Console
Whitelisting Origins:
Log in to the admin console and go to the Overview tab.
Scroll down to the Overview section to find Whitelist Origins.
Locate the Whitelisted Origin(s) for site embed option.
Enter the Advocacy and MS Teams site URLs (https://teams.cloud.microsoft and https://teams.microsoft.com/).
Check the box to activate whitelisting for these URLs.
Save changes and verify if applied correctly.
Save and Publish:
After making the necessary changes, save and publish the site. Please note that it might take up to 2 hours for changes to reflect on MS Teams when adding a page.
Step-2: Create a new advocacy app in MS teams
Adding advocacy app:
Add app using developer portal. For reference check this documentation.
Click Import app by navigating to the Apps” tab present in the top bar in developer portal.
Import the Sprinklr provided zip folder here
Your app will get added.
Admin would need to configure the website URL and the branding icons within the configure tab.
Preview the advocacy site:
Click Preview in Teams in the top right corner of the configuration screen.
Click Add and login into the Advocacy app.
Publish within your organization:
Navigate to 'Publish' and select 'Publish to org' or use the direct 'Publish' button at the top-right within the app.
Click Publish your app.
Post-approval by IT admin, the app appears in Teams store under 'Built for your org' for all employees.
Step 3: Publishing advocacy app by IT Administrator
Publish the advocacy app for all the employees
Go to MS Teams Admin app.
Publish the advocacy site. For more instructions refer to this documentation.
Once published it will now be available to the employees.
Step-4 : Providing with permissions
Permission policies: Permission policies control what apps you want to make available to teams users in your organization. Refer documentation.
Setup policies: It controls how apps are available within Teams to the users
Go to MS Teams Admin app
Click on the subtab ‘Setup Policies’ within “Teams Apps”.
Click on “Add” to setup policy for advocacy app.
On global policy:
Add the advocacy app within installed apps to let the Employees find this app already installed within their teams app.
Add the advocacy app within pinned apps to let the app get pinned for everybody within the organization.
For detailed instructions refer to this document.
Another separate custom policy can also be created for the advocacy app.
After getting published the advocacy app will look like this:
Appendix:
If the admin wants to configure the advocacy site on its own
Configuring the advocacy app in the developer portal via tabs:
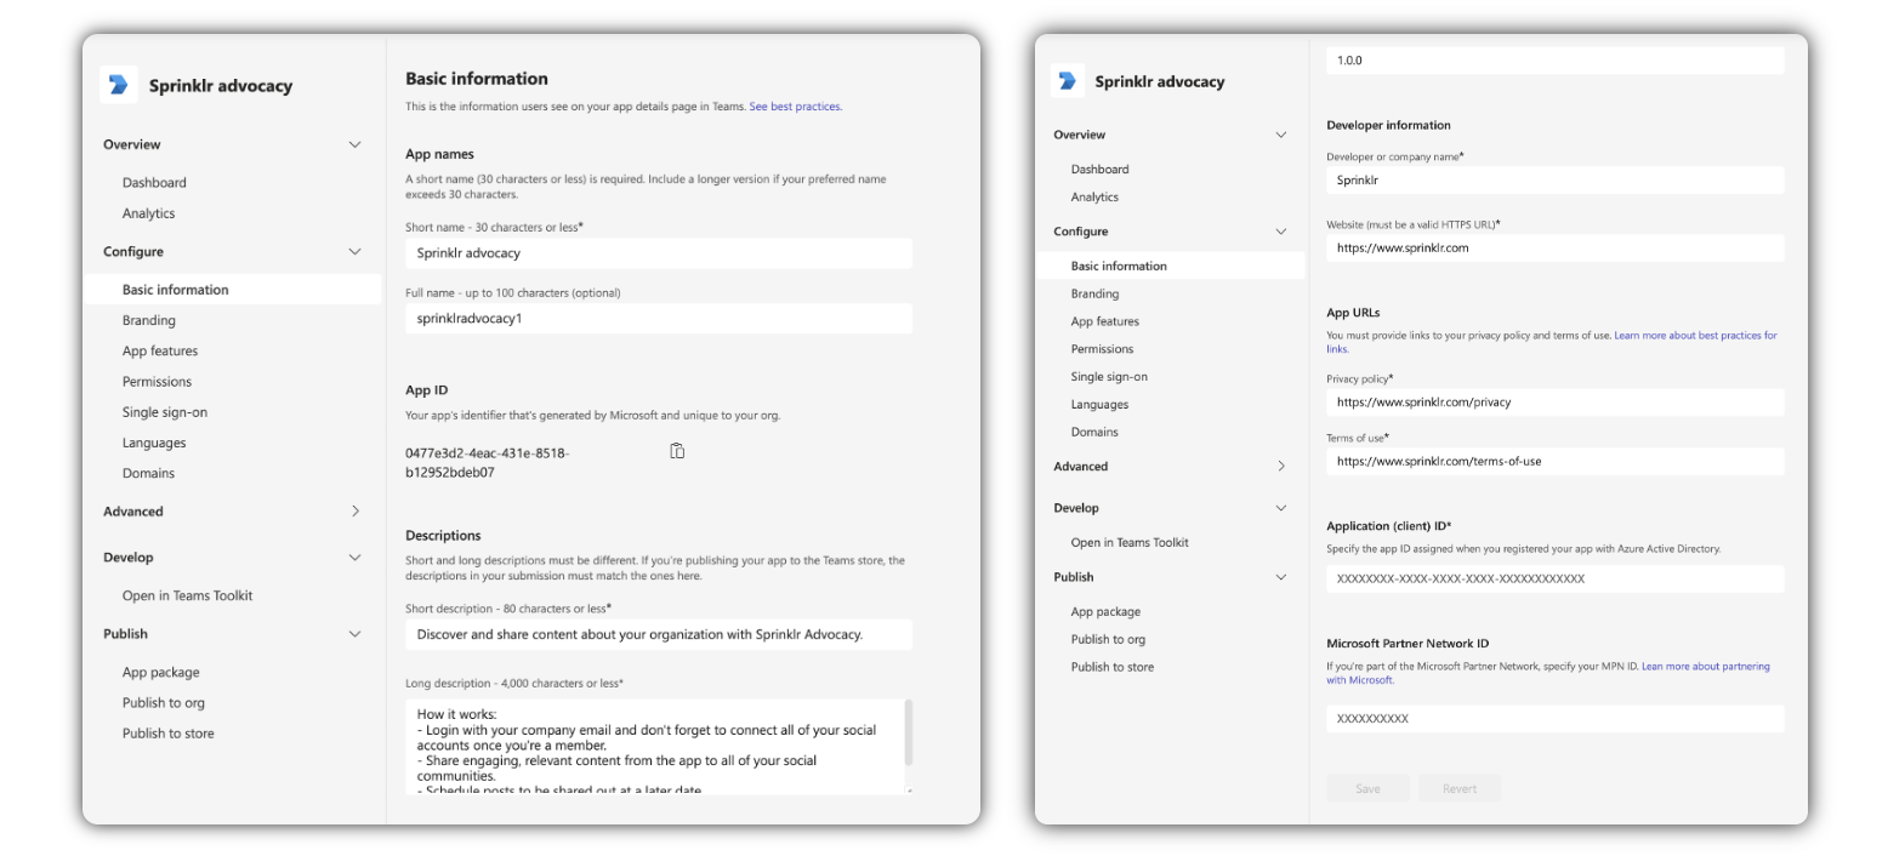
Setting up Basic Information for advocacy app:
Enter "App Names" and "Description."
Under "Developer information," add your organization's name and website.
Provide links to your organization's "Privacy Policy" and "Terms of Use."
Ensure all details are accurate and comply with your organization's policies.

Setting up Branding for advocacy app:
Color Icon: Update to match your brand.
Outline Icon: Change as needed for branding consistency.
Accent Color: Adjust to reflect your brand's theme.
Make sure the updates align with your brand's guidelines.
Creating tabs for advocacy app in App features:
Admin can add multiple tabs in the advocacy app like “Home”, “About”, etc.
To add a tab, click Personal app in App Features.
Click “Create your first personal app tab.”
Enter “Name,” “Content URL” (append “/integration/microsoftTeams” to your advocacy site's link), and “Website URL” (same as Content URL).
Click “Confirm,” then “Save.”
Ensure URLs are accurate and have the correct appended path.
Whitelisting domain names in Teams app:
Admins should go to the Domain tab to add domains for whitelisting during advocacy app configuration.
The Content URL is auto added with a personal app tab creation.
Add necessary domains like *.sprinklr.com and relevant social media domains for seamless app functionality in MS Teams.
Ensure proper domain formats and adherence to MS Teams' policies.
Adding other configurations:
Admins can set permissions, configure SSO, and add languages for UI localization in the advocacy app as needed.
Adding advanced configurations: for full screen mode
Navigate to the App content sub tab within the Advanced tab.
Enable loading indicator to let users know the content is loading.
Enable Full-screen mode to let the employees use the app in full screen mode.