Salesforce Integration (Advocacy)
Updated
Seamlessly integrate your Advocacy site with Salesforce through an iframe, enhancing user convenience and productivity in perfect alignment with your sales team's workflow.
With the power to embed your Advocacy site directly within Salesforce using an iframe, enable advocates to access the Advocacy platform without leaving the Salesforce environment.
Advantages of Integrating Advocacy site with Salesforce
This transformative update allows advocates to utilize all the mainstream Advocacy features within Salesforce, where they spend a significant portion of their day - eliminating the need to switch back and forth between platforms.
How to Integrate Advocacy site with Salesforce
Step-1: Enabling integration through the Admin Console
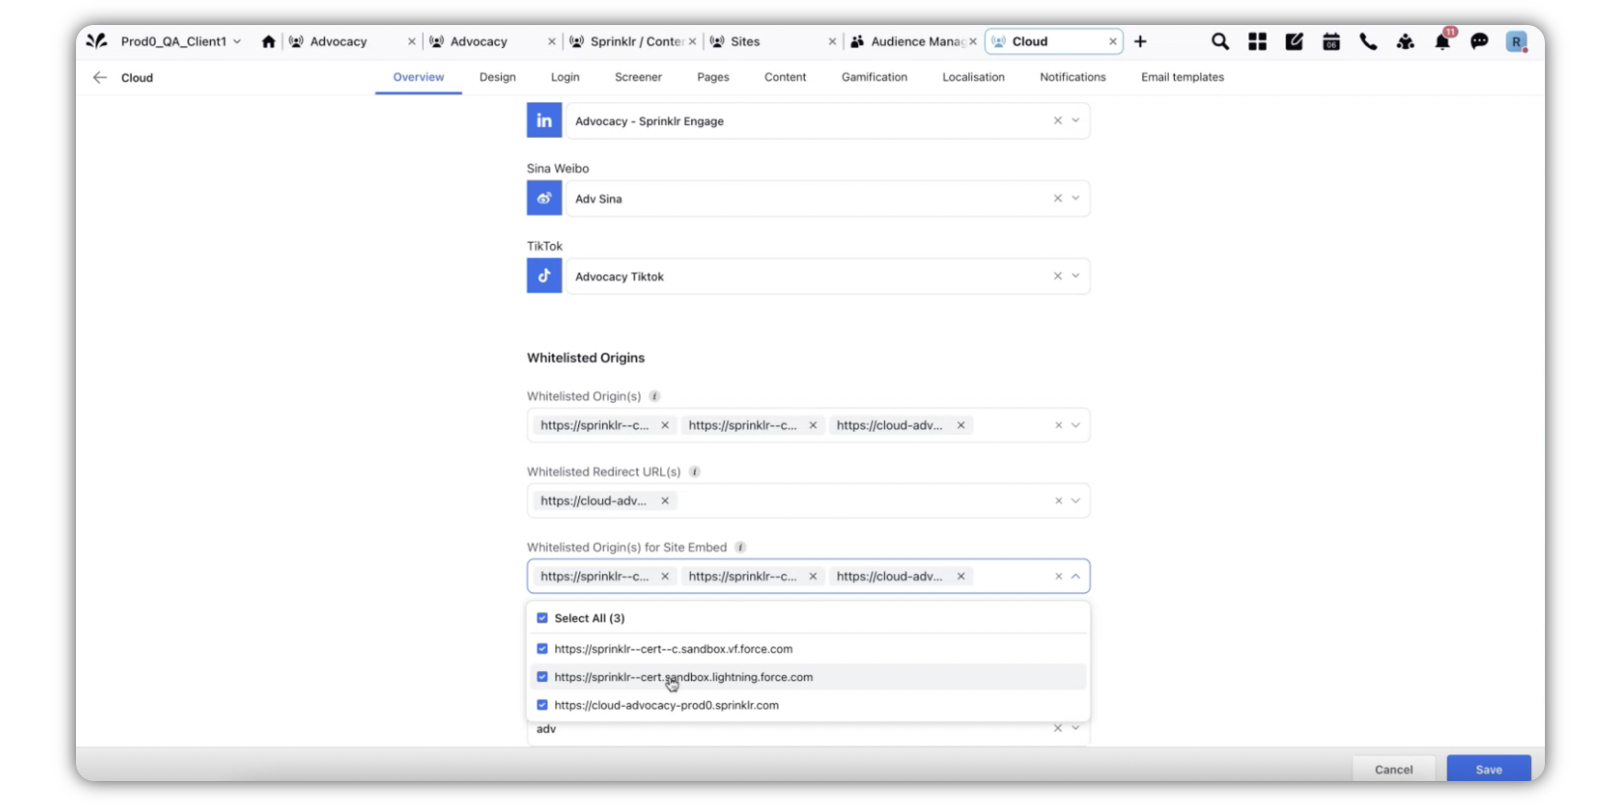
Whitelisting Origins:
Navigate to the 'Overview' tab in the admin console.
Scroll down within the 'Overview' tab until you find the “Whitelist Origins” section.
Here, you will see an option for “Whitelisted Origin(s) for site embed.”
Add your Advocacy site link and Salesforce site link in the provided fields.
Select the checkbox to whitelist both URLs.
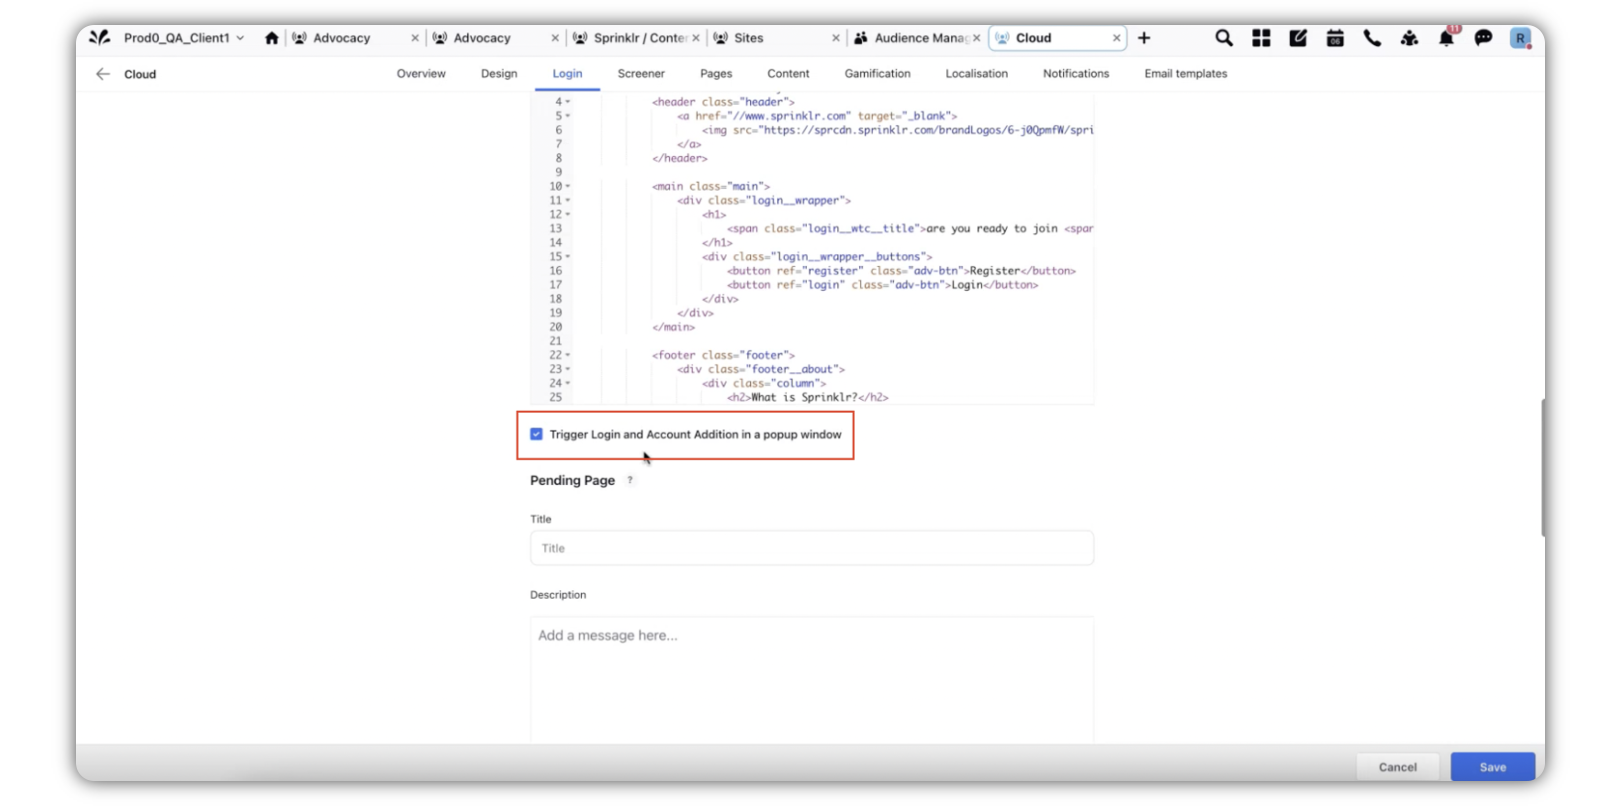
Setting Up Login Pop-Up Window:
Go to the 'Login' tab within the admin console.
Scroll down to find the checkbox labelled “Trigger Login and Account addition in a popup window.”
Enable this checkbox. By doing so, advocates will not be redirected to a new page when adding an account. Instead, they will be able to do that from the Salesforce instance itself using the popup window.
Save and Publish:
After making the necessary changes, save and publish the site. Please note that it might take up to 2 hours for changes to reflect on Salesforce when adding a page.
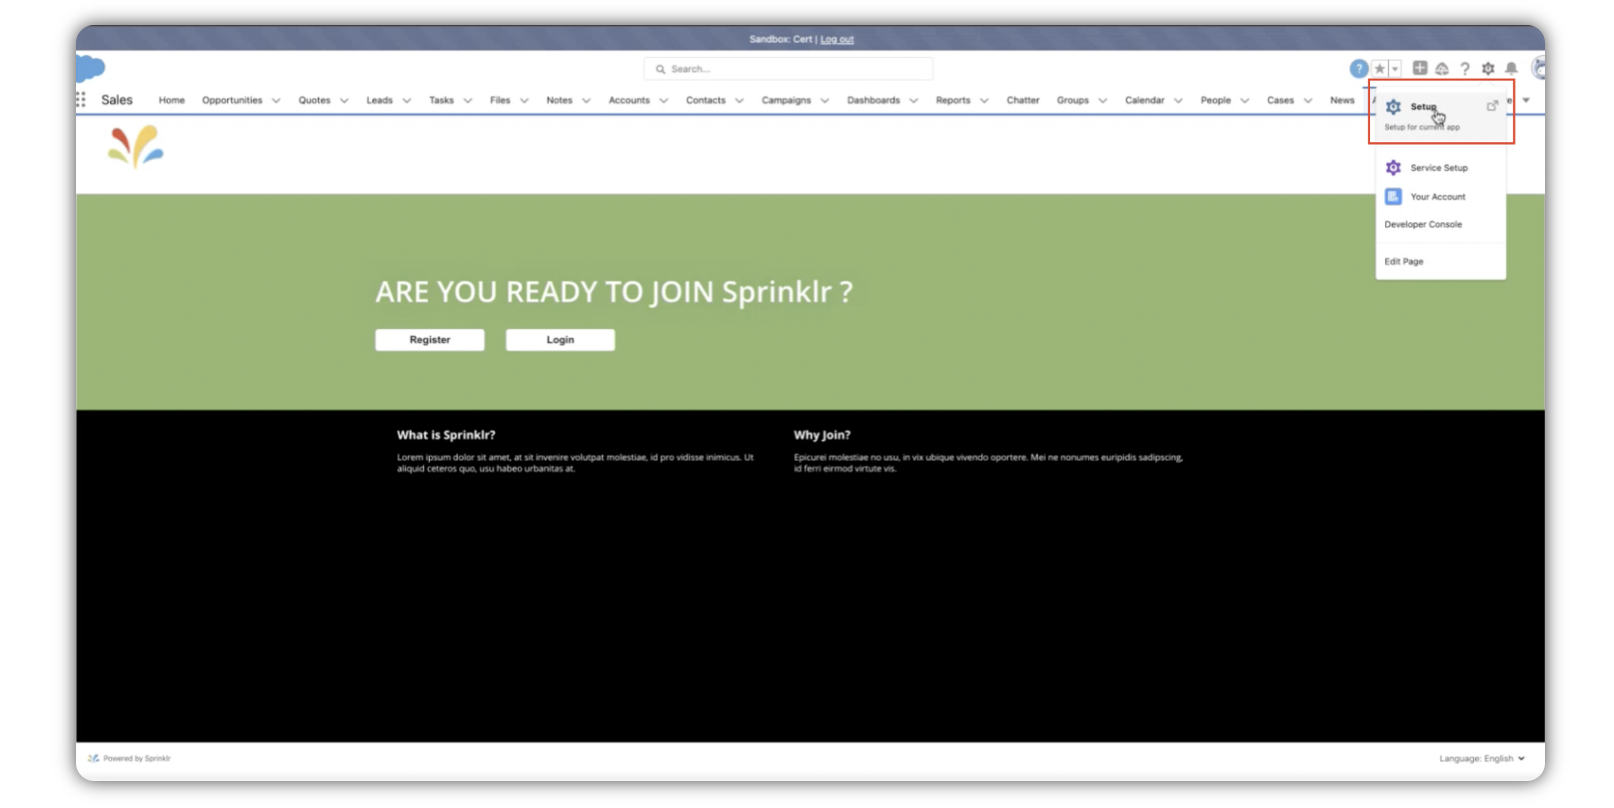
Step-2: Create a New Visualforce Page on SalesforceAccessing Setup:
Log in to Salesforce.
Click on "Setup". This action will redirect you to a new page.
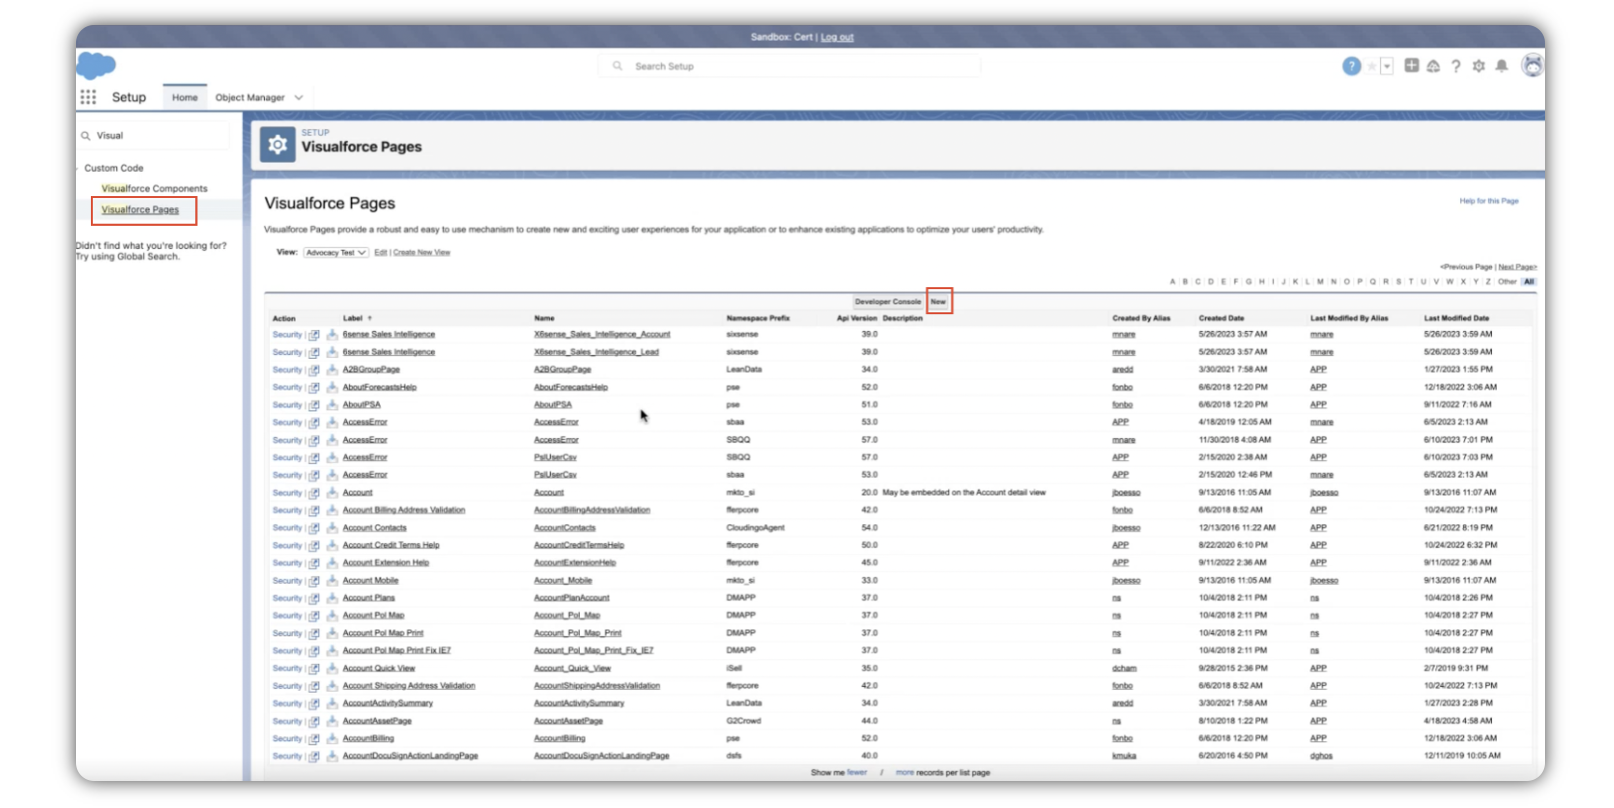
Adding a New Visualforce Page:
Under the "Home" tab, use the “Quick find” search box.
Type in "Visualforce Pages" and select the option that appears.
Click on “New” to create a new Visualforce page.
Configuring the Visualforce Page:
Fill in the fields:
"Label"
"Name"
"Description"
Make sure to check the box for "Available for Lightning Experience, Experience Builder sites, and the Mobile app".
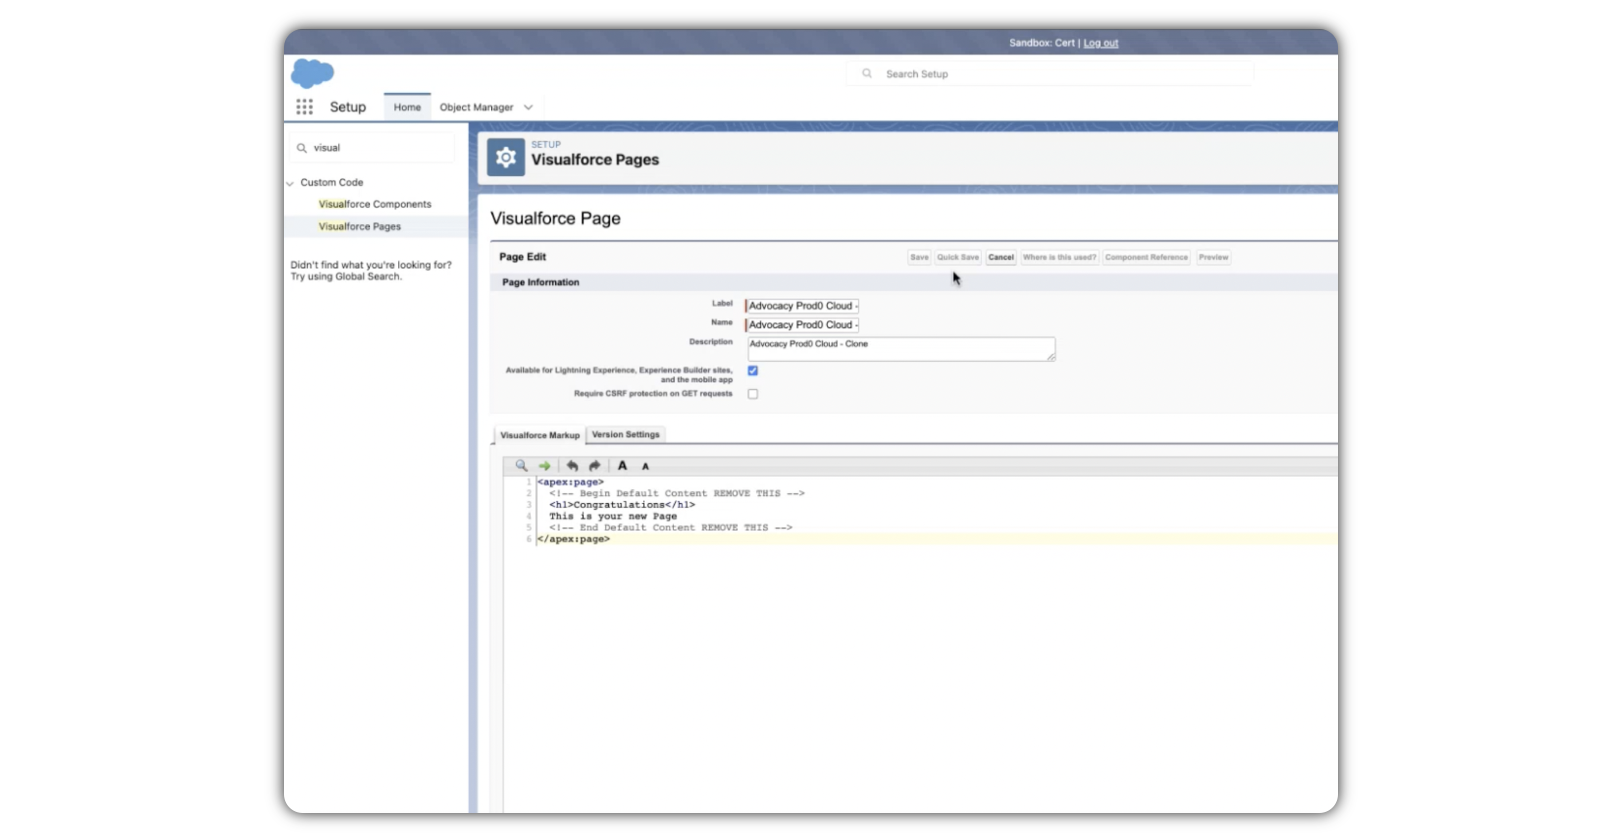
Editing the Apex Code:
You will find an area for “Visual Markup.”
Edit or replace the code present with the desired Apex code for your integration. Here’s a sample markup code that you can use directly-
<apex:page >
<apex:pageBlock >
<apex:iframe src="Advocacy site url" scrolling="true" id="theIframe" />
<script>document.getElementById('theIframe').height = window.innerHeight;</script>
<script>
(function() {
var windowOnresize = window.onresize;
window.onresize = function() {
if (windowOnresize) windowOnresize(); //don't trample the handler; intercept it
document.getElementById('theIframe').height = window.innerHeight;
};
}());
</script>
</apex:pageBlock>
</apex:page>
Step-3: Map the New Page with a Tab on Salesforce
Accessing Tabs Setting:
Under the "Home" tab, use the “Quick find” search box.
Type in "Tabs" and click on the "Tabs" option that appears.
Scroll down until you see “Visualforce Tabs.”
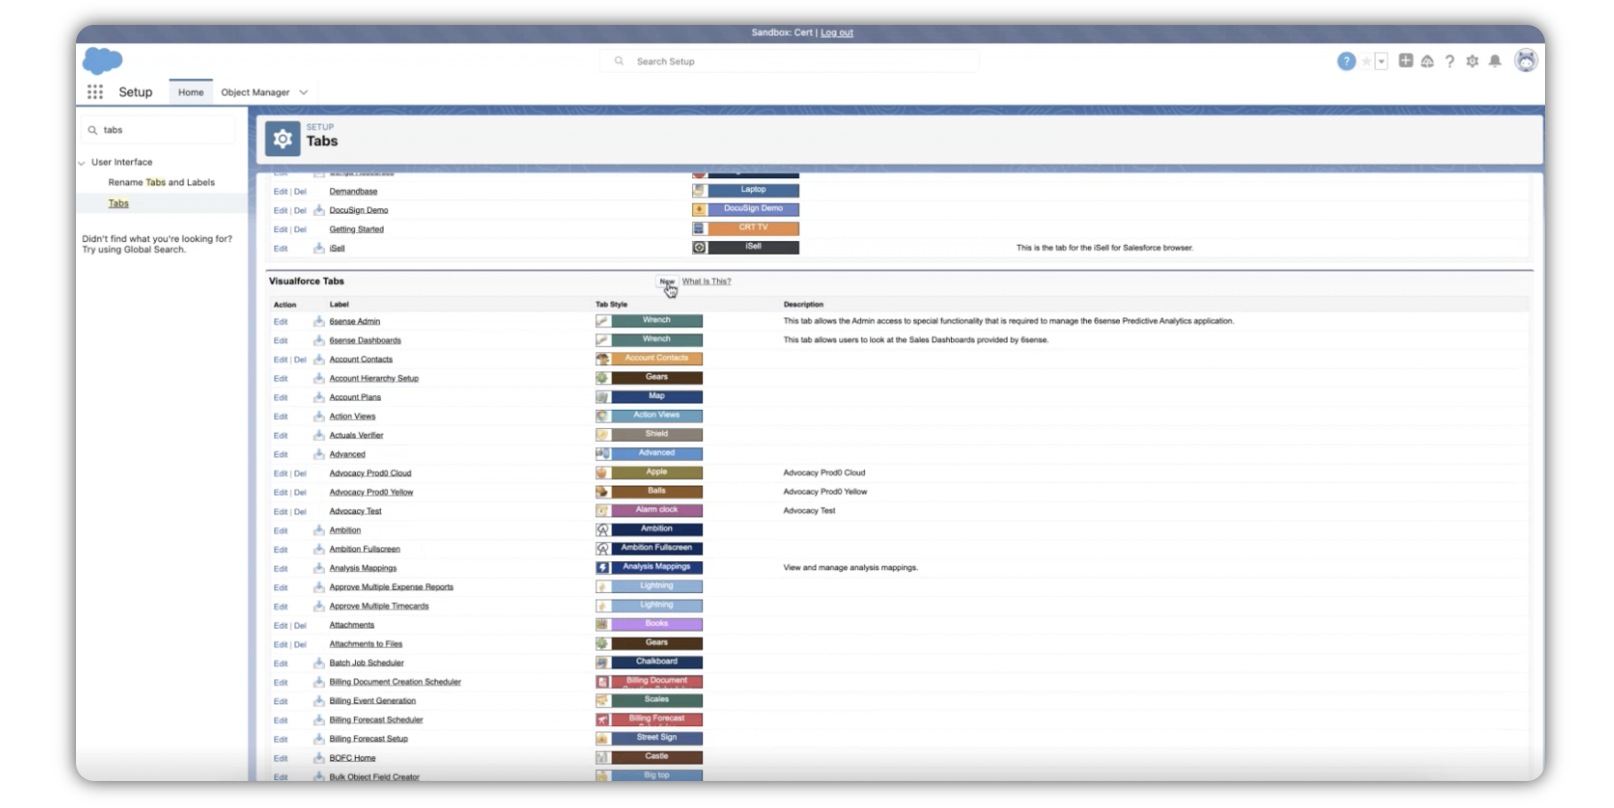
Creating a New Tab:
Click on the “New” option.
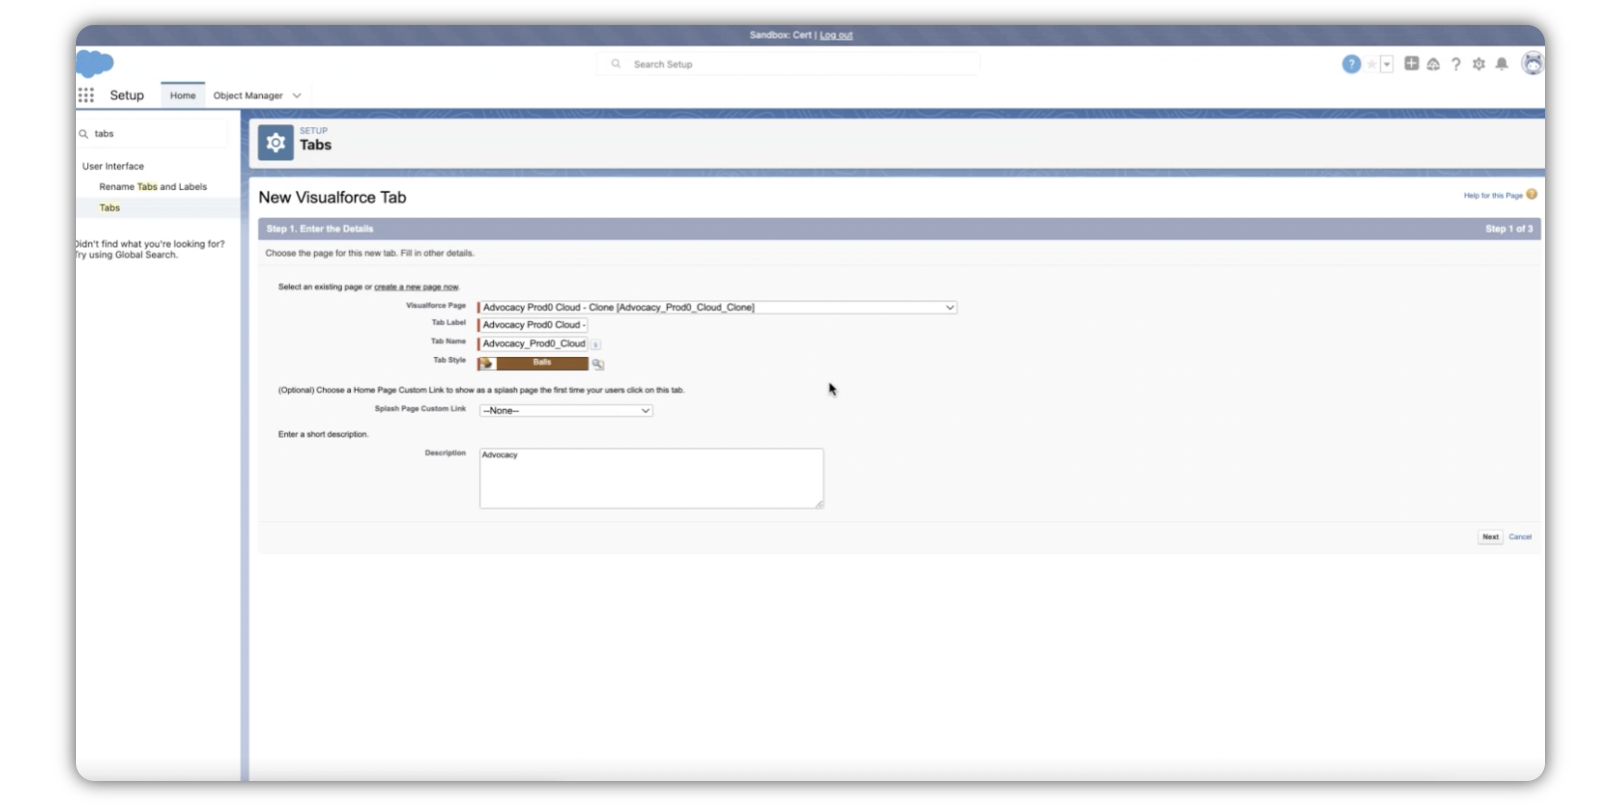
In the "Visualforce Page" dropdown, search for and select the page you created earlier. Provide the following details:
Tab Label
Tab Name
Tab Style
Click on “Next.”
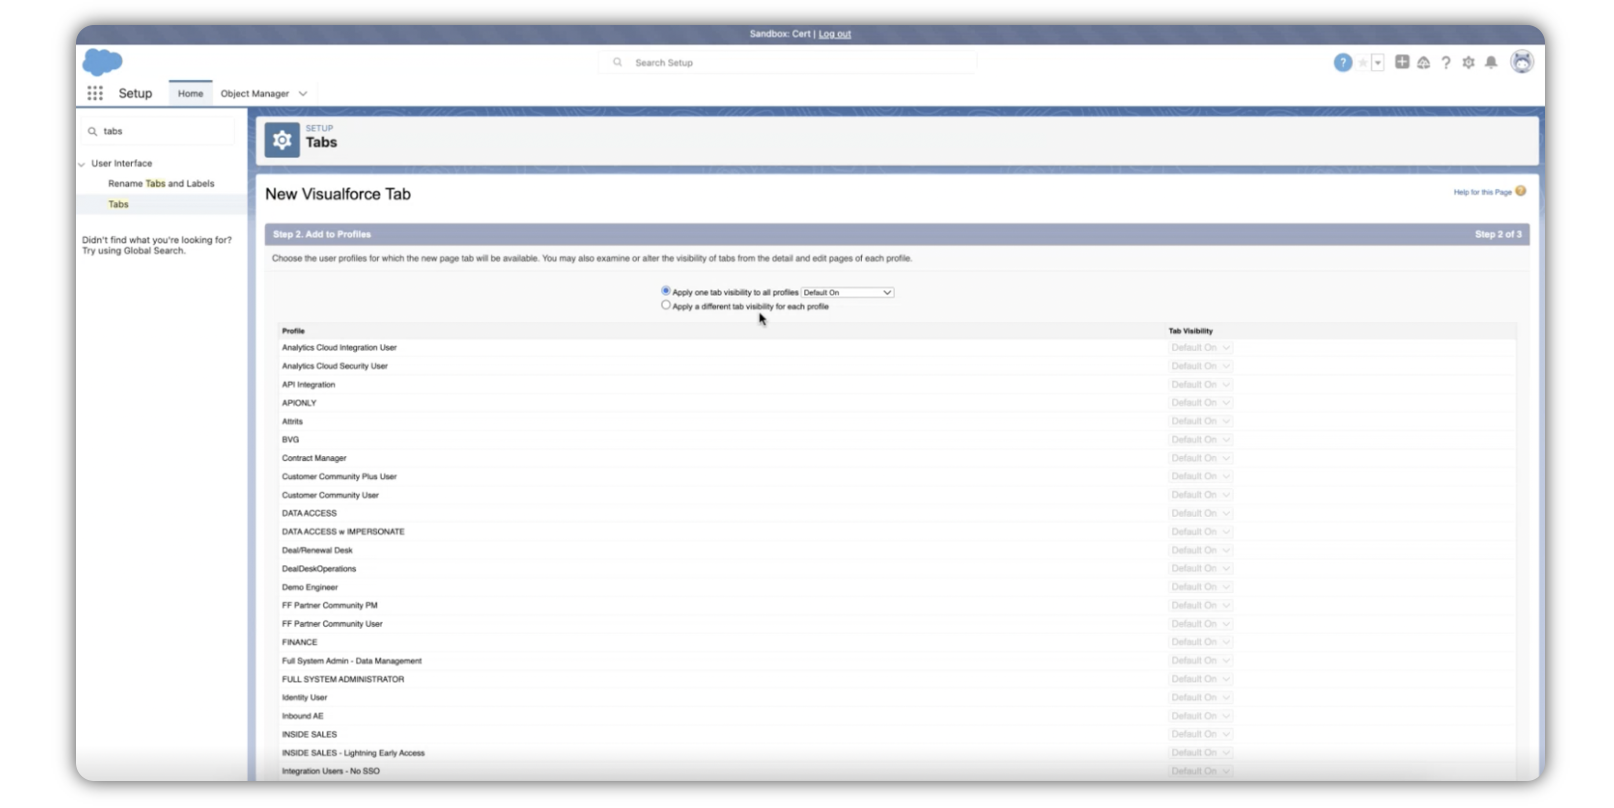
Setting Tab Visibility:
Choose the specific profiles where you want this new tab to be visible. Alternatively, you can set the tab to be visible for all profiles.
Finalizing the Tab:
Once you have configured the tab's settings, it will be created.
Now, you will be able to access the advocacy site directly within Salesforce.
Optionally, adjust the order of the tabs as per your preference.