Configuring an ACW and ACW Builder Components
Updated
The ACW (After Call Work) module automates the after call work processes, allowing businesses to define custom workflows and streamline repetitive tasks. With advanced automation capabilities, agents can update customer records, generate follow-up tasks, and integrate with other systems for seamless data synchronization. This user-friendly module enhances efficiency, accuracy, and customer experiences while optimizing contact center operations.
This article provides information on the following topics:
Pre-requisites and Permissions
To configure ACW, the Sprinklr Voice must be enabled in the user's environment. Also, the user must have After Call Work View, Edit, and Create permission as shown in the following image.

Permission | Description |
View | Allows users to View ACWs without making changes. |
Create | Allows users to create and configure new ACWs. |
Edit | Allows users to edit the existing ACWs. |
Deploy | Allows users to deploy the configured ACWs. |
ACW Callback | Allows users to initiate callback to customers using ACW Redial button. |
View ACW Case History | Allows users to view all the ACWs on Care Console that is triggered for a given case by any agent. This permission is typically granted to supervisors who need visibility into the full ACW history for each case. If this permission is not provided, then by default, a user can only see My ACWs on Care Console. |
Configuring an ACW
From the Sprinklr Service tab, under Resolve and Agent Augmentation, click After Call Work. The ACW Manager page appears.
Click Create New ACW available on the top right corner of the ACW Manager page. The Create New ACW page appears as shown in the following image.

Fill-in the following fields available in the Create New ACW page.
Name - Specify a name for the ACW that you want to configure.
Description - Add a description for the ACW.
Type - Specify the type of ACW that you want to create based on the following descriptions.
Optional: Agents can choose to skip selecting a wrap-up code after the call.. This feature is useful if your organization does not use wrap-up codes and your agents do not need after call work time.
Mandatory ACW: Agents needs to mandatorily fill the ACW in order to free up their capacity.
Mandatory ACW with time limit for agent: Admin sets a maximum ACW time limit, after which agent capacity will be free and agent will get the next call. If they finish after call work early, their capacity will be free as soon as they submit and automatically become available at the end of the time specified.
Mandatory ACW with time limit for agent with no early exit: Agent capacity will get free only after the specified time, even if agent submits the ACW early. This feature is useful to give agents a "cool down" period between interactions.
 Note: The ACW type cannot be changed after the ACW settings have been saved.
After call work timeout - Set the time that the agents have for after call work before they receive more interactions.
Customize Time Settings Toggle - This toggle allows admins to define custom ACW timeout values for specific user groups or case conditions. Once enabled, a new section titled Override Timeout Settings appears with the timeout configuration options. This option is DP controlled. To enable this feature, reach out to your Success Manager.
Override Timeout Settings - This section allows admins to tailor ACW timeout durations based on *user* or *case* custom fields.
You can define one or more filter conditions based on user or case custom fields (for example, User Department = Support or Visually Impaired Agent = Yes). At least one filter condition is mandatory for each override setting.
Assign custom timeout values for each applicable field - Normal Timeout, Autowrap Timeout, Extension Timeout.
Multiple conditions can be defined using *AND* / *OR* logic (e.g., User Department = A AND Case Type = Priority). Each condition group can have its own timeout configuration block.
Example Use Case: A contact center has both standard agents and visually impaired agents working in the same queue. Admins can create a filter where User Custom Field: Visually Impaired Agent = Yes and set a longer timeout duration (e.g., 3 minutes instead of 1 minute). This ensures agents who need additional time can complete their ACW without being rushed.
 Note: If the DP is turned off later, the system reverts to using the global timeout setting. Any saved *customTimeouts* are ignored during execution. Editing the ACW in this state removes existing custom timeout configurations from the backend.
Agent status when timeout happens - You can define the status of the agent when the ACW has timed out and the agent has not submitted it.
Note: This is only applicable for Mandatory ACW with time limit for agent and Mandatory ACW with time limit for agent with no early exit.
Auto Wrap Settings - Enter the designated Auto Wrap Up Time, which can also be configured to match the ACW Timeout. Ensure that the Auto Wrap Up Timeout is equal to or greater than the ACW Timeout duration.
Automated ACW wrap-up addresses the challenge of time and context loss associated with pending ACWs.
By default, the Auto Wrap Settings is enabled.

The following image displays the ACW Auto Wrapup time that will be visible to the Agent when Auto Wrap Up for ACW is configured. It automatically disposes of cases/calls if agents do not take action within the specified auto-wrap up time.

Advanced Settings
Allow ACW during calls - The agents can enter ACW while they are still on the call.
Trigger ACW as soon as call starts - Enable this to trigger the ACW as soon as the call starts. This is only applicable for the voice cases.
Keep Case Assigned After Call - Enable this to keep the case assigned even after the call.
Show ACW for Agent first Outbound calls which are not connected - Displays ACW popup for agents when their outbound calls go unanswered, enabling them to perform necessary workflow actions.
After call work timeout for not connected calls - You can define the timeout for ACW for the calls not connected.
Note: This is only applicable for Mandatory ACW with time limit for agent and Mandatory ACW with time limit for agent with no early exit.Enable Custom Dialer Support in Redialer - Enables the agents to switch to a different dialer when reconnecting with a customer during a redialing process.
Enable AI Prefill Support - Enable this to use AI to prefill ACW. The agents can use the support of AI to prefill their ACWs. For more information, refer to Providing a pre-filled ACW to the Agent.

Extensions Settings
Number of Extensions Allowed Per Call and Extension Time - To minimize the count of pending After Call Work (ACW), you have the option to enable Extensions and configure the number of extensions permitted per call and the time duration for each extension. When extended, it will simultaneously extend both the ACW timer and the Auto Wrap-Up (AUTo) timer.
Enable Extensions for Agent first Outbound calls which are not connected - You can enable this option only when Show ACW for Agent first Outbound calls which are not connected is enabled. Enables ACW pop-up extension for agents when their outbound calls go unanswered, enabling them to perform necessary workflow actions.
Number of Extensions Allowed Per Call for not connected calls and Extention Time for not connected calls - You can enable this option only when Enable Extensions for Agent first Outbound calls which are not connected is enabled. Allows you to configure the number of extensions for not connected calls.

Click Save to save the settings. The ACW is now configured.
ACW Builder Components
The ACW Builder in Sprinklr provides a user-friendly interface for creating and editing ACWs. It features a drag-and-drop canvas where you can easily design your ACW flows. The builder offers a range of modules or nodes, each serving a specific function, which can be seamlessly integrated into the ACW flow. With this intuitive interface, you can efficiently build and customize ACWs to suit your business needs.
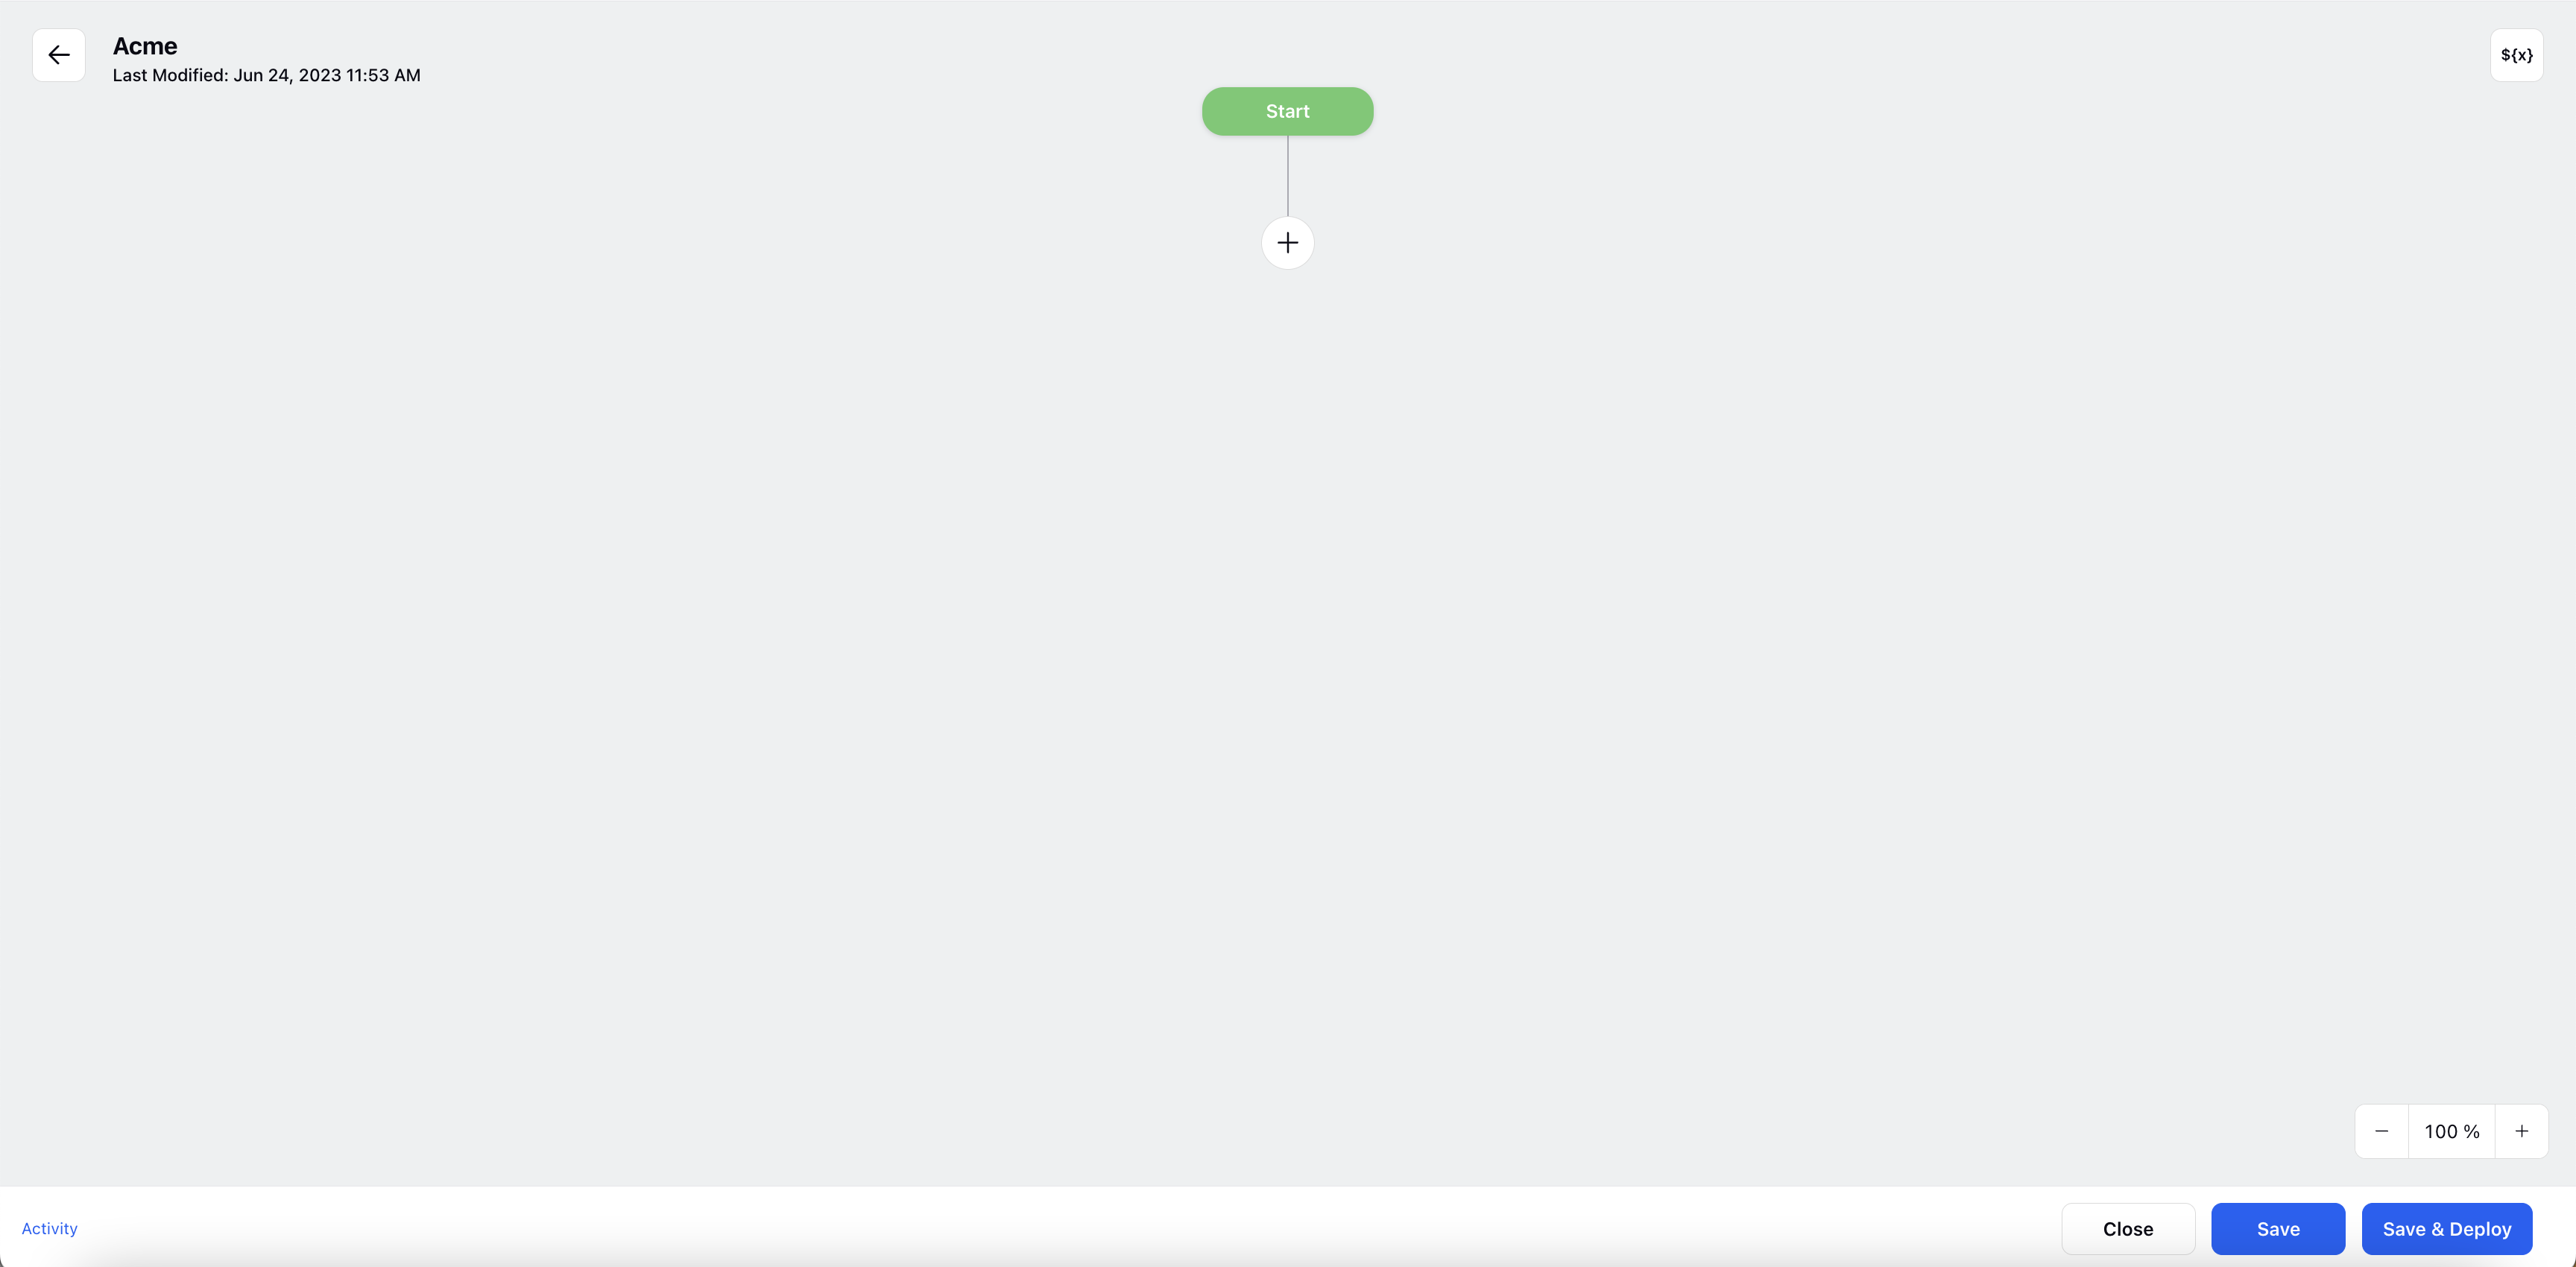
We can divide the whole builder into 6 major components-
Canvas: This is where you design your ACW flow by arranging and connecting nodes.
Add New Node: By clicking the plus sign (+), you can choose from a list to add nodes to your ACW Canvas.
Note: Nodes are blocks of executable actions in the workflow that make various actions like scheduling a callback, adding to a suppression list, etc. Manage Resources: This is a crucial component of the ACW Builder interface. By clicking on the ${x} icon located in the top right corner, you gain access to a comprehensive view of all variables and resources utilized in the ACW. This includes variables that store important information throughout the ACW flow.
Not only can you review the existing variables, but you can also create new variables tailored to your specific requirements. These variables serve as placeholders for data that can be used and manipulated within the ACW.
System variables: These are pre-defined variables that hold important information about the call and can be used within the ACW to enhance its functionality.
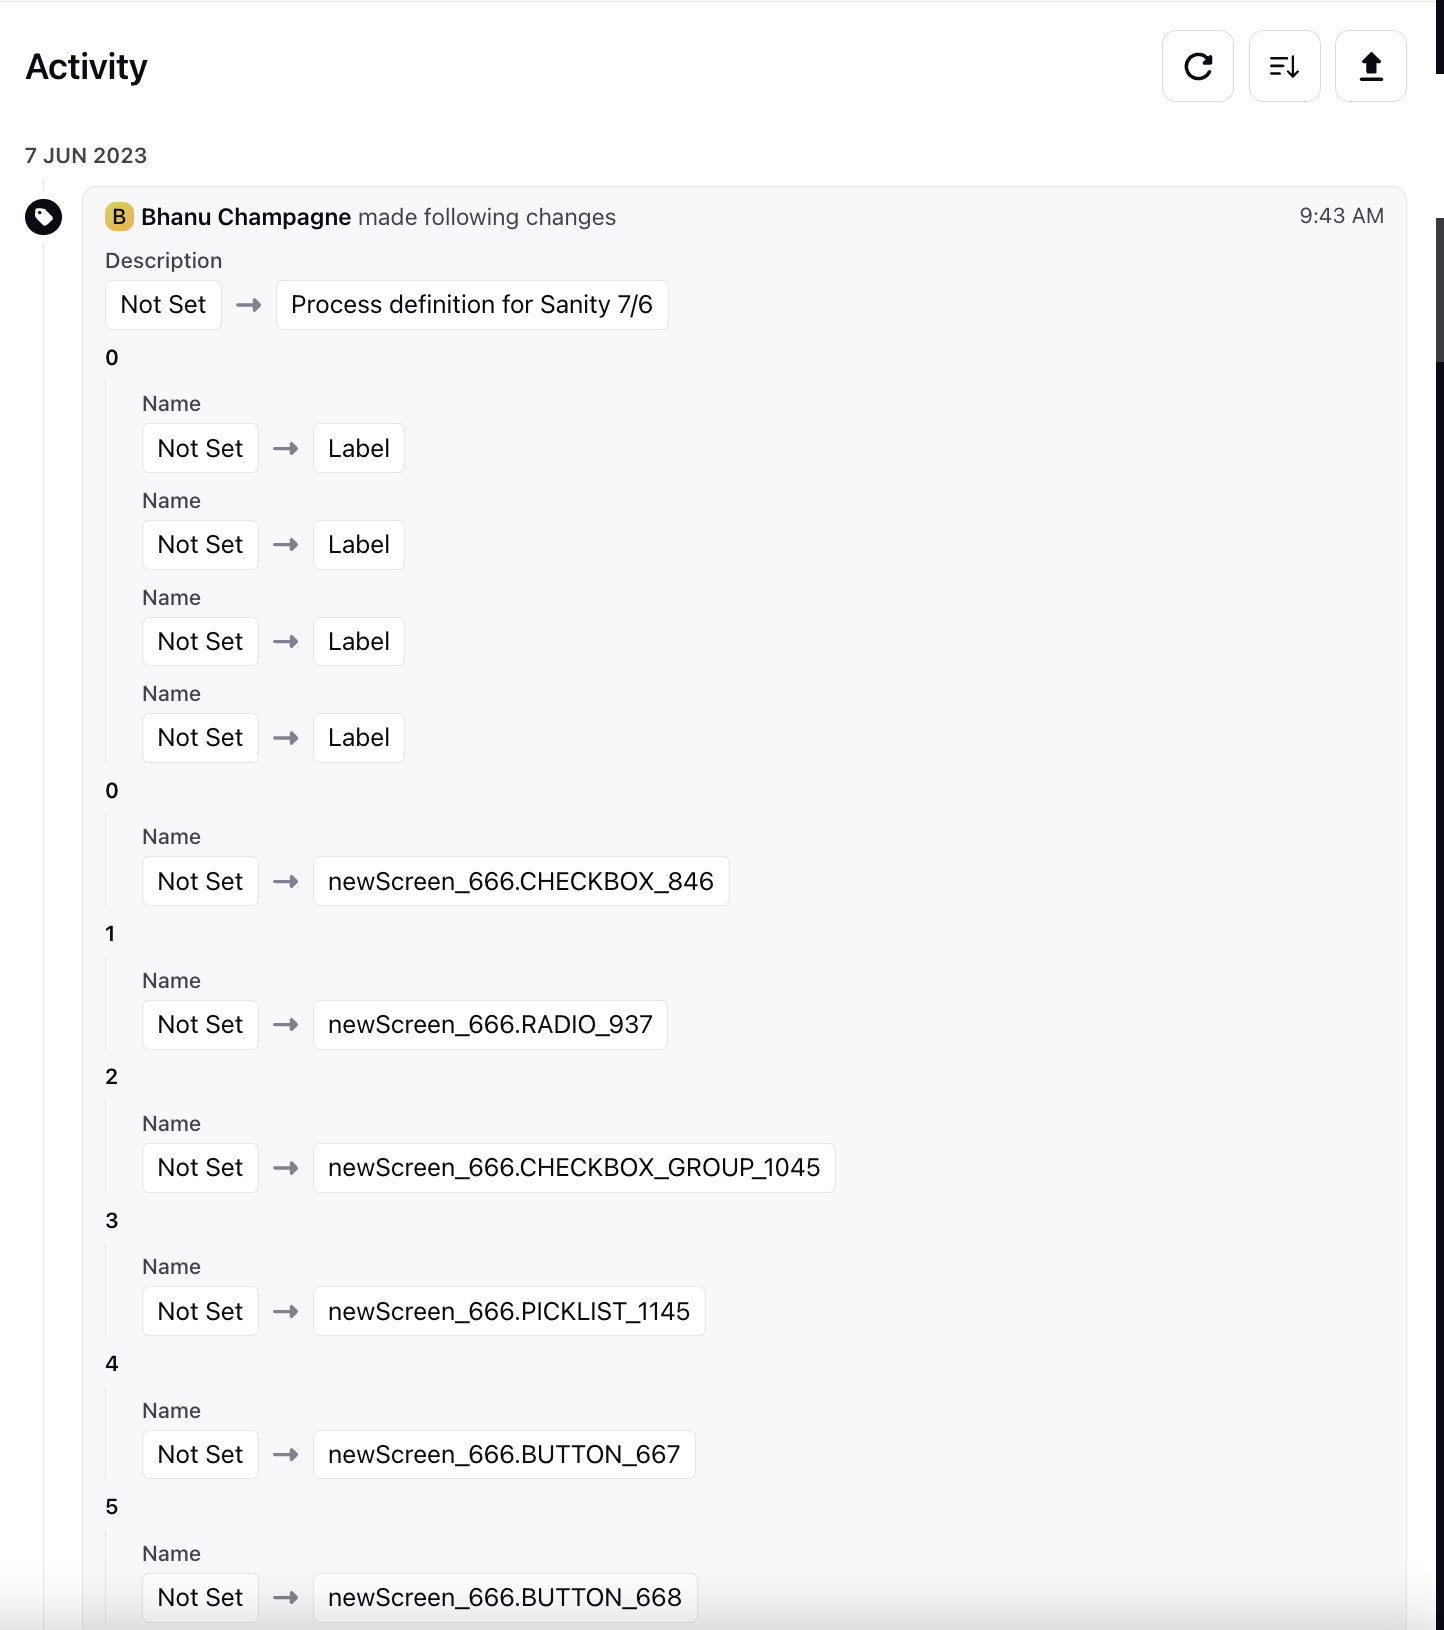
Activity: You can open by clicking on Activity from bottom left corner. This has two section-
ACW activity: This allows you to view the activity log of the ACW, showing a record of all the changes made, including the date, details of the changes, and the user responsible for making the modifications.
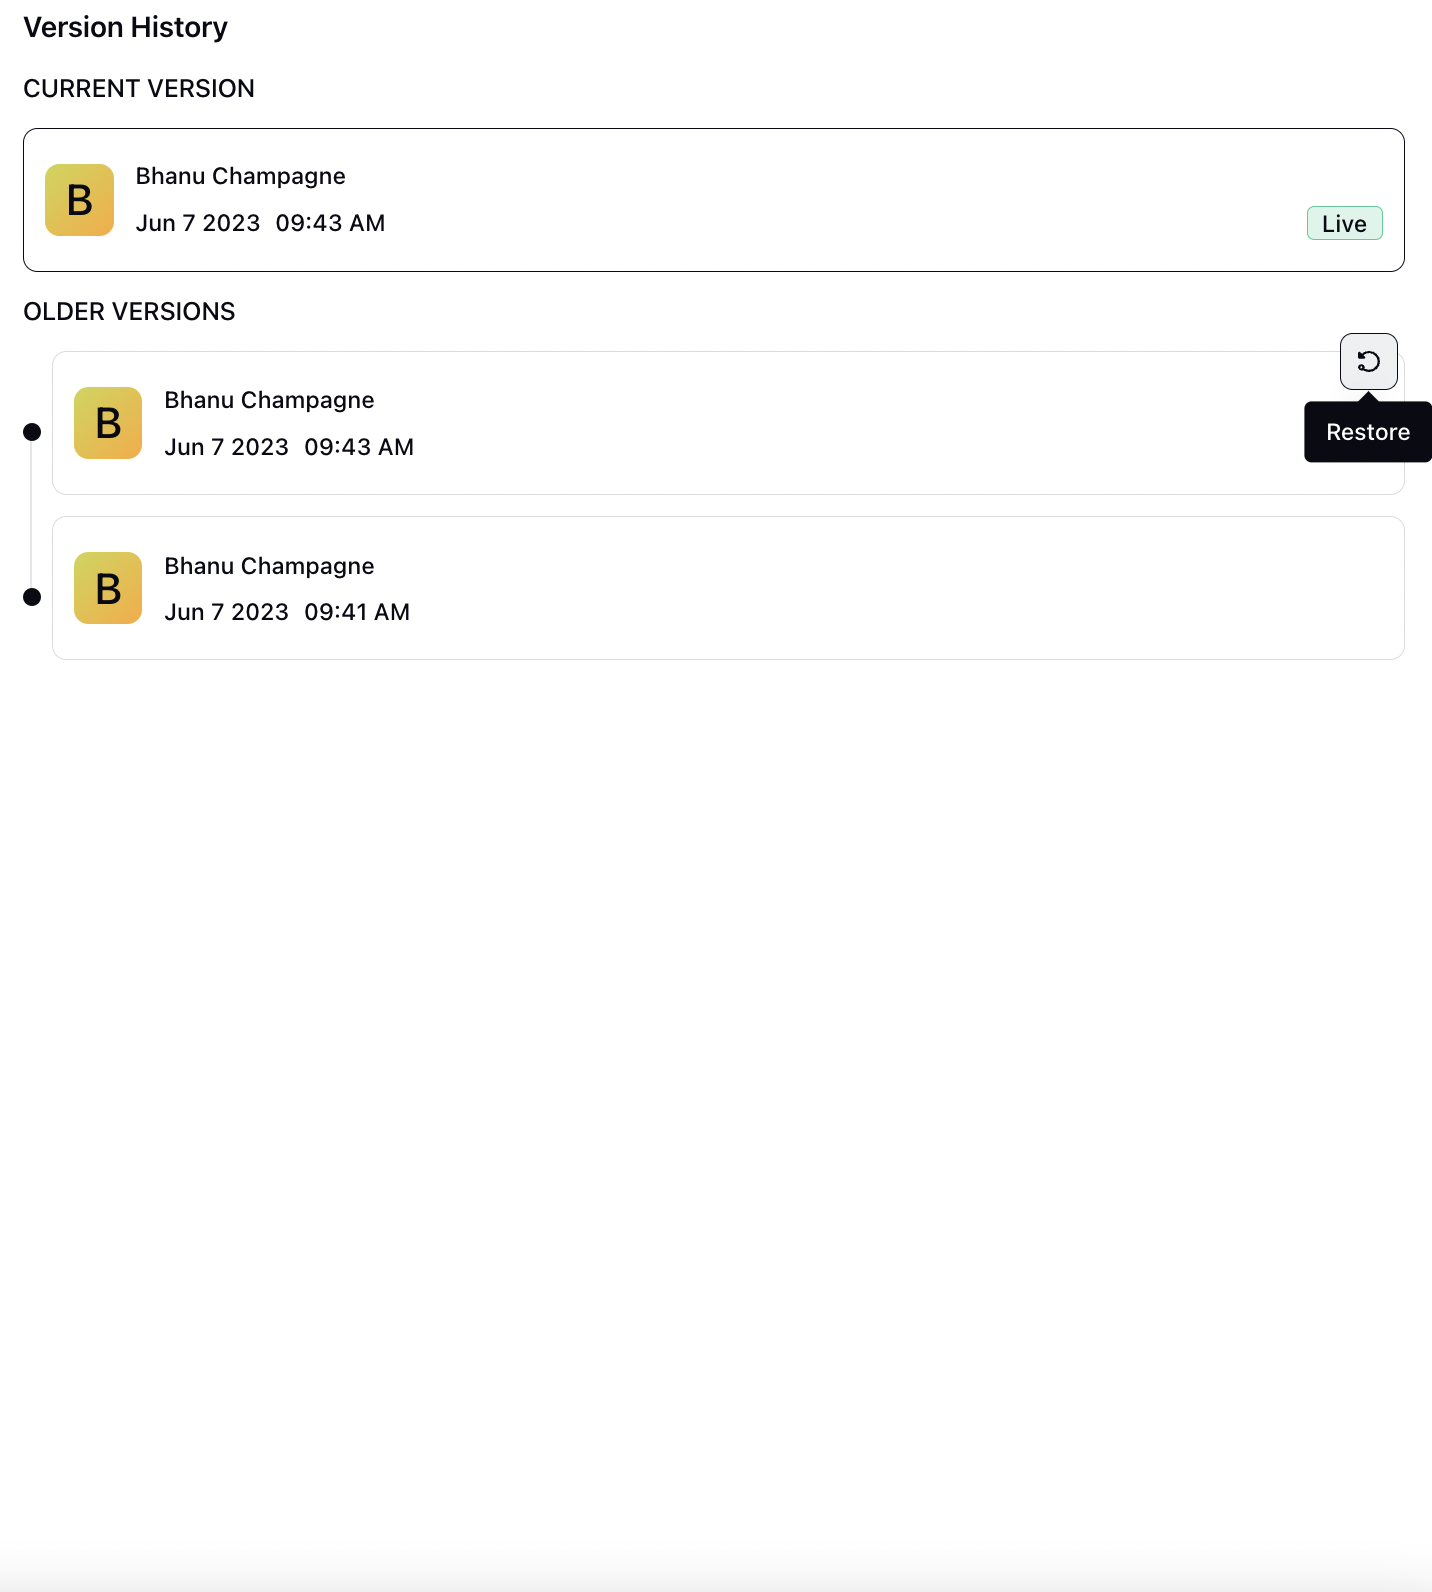
ACW Version History: This tab keeps track of different versions of the ACW that have been deployed. It lists previous versions along with the deployment date, time, and the user who deployed the previous ACW. You also have the option to restore a previous version of the ACW
Nodes and Functionalities
Here you will find information about the different components that can be used while creating an ACW. These actions include callbacks, suppression lists, and the creation of sales leads, sending SMS or email, and more.
To add a new node action, simply click on the plus sign > select the desired node from the available options. Below, you will find comprehensive descriptions of each node action. There are three kind of node-
User Communication nodes
System Nodes
Flow Action
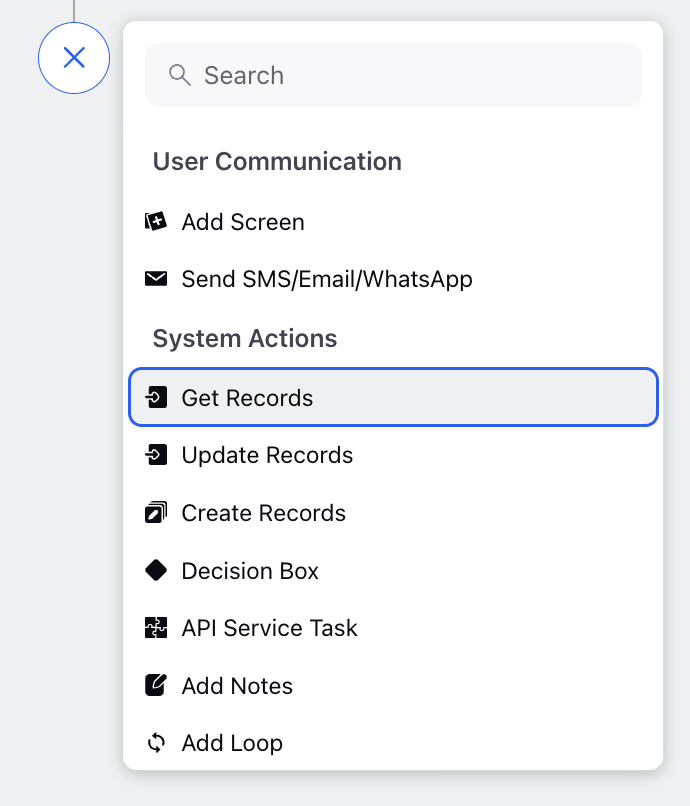
User Communication Nodes:
Screen: This node is used to add a screen that will be visible to the agent. The agent would interact with this screen and fill out all the necessary fields about the call.
Send SMS/EMAIL/Whatsapp: This node allows you to send messages through SMS, Whatsapp or Email to customer wherever required during the IVR Flow.
System Actions Nodes:
Decision Box: in ACW this allows to create multiple paths based on specific conditions. In this you can specify the criteria for selecting a particular path.
Add API: are mini programs that help to fetch data from third party servers or applications. This node helps to pull information using APIs based on specific inputs. This allows us to use the retrieved data in the ACW and use it for automating post call workflow
Custom Field Action: This Node is used to add, remove, merge or in general edit any custom fields for case and profile.
Add or Remove from Queues: This is used to add or remove the current case from a case queue.
What is case queue? Queues in Sprinklr are a collection of entities. A particular case queue is noting but a bucket of cases. Cases can be added or removed in their respective queues either automatically using macros or rules; or manually by agents.Merge Profile: This node facilitates the merging of customer profiles from different channels into a universal profile. By doing so, agents can easily access and view all customer details and past interaction across multiple channels.
Add Notes: This allows you to add custom notes inside the ACW at profile & case level. These notes can be used by the brand for internal reference purposes or can be used to give context to the agents when the case assigned to them or can also be used for debugging your ACW.
Loop: In ACW, when we have a variable list of items, such as a list of accounts or transactions, the Loop node allows us to perform actions on each element of the list automatically.
Break Loop: During the iteration process using the Loop node, there might be certain conditions where we need to stop the loop before reaching the end of the list. The Break Loop node helps us achieve this by ending the loop at a specific element.
Call Another Flow: Sometimes, there are certain flows or inputs that are needed repeatedly in different ACWs, To make things more efficient, we can create a separate ACW for these repetitive processes and call them within the main ACW whenever needed. Once the child ACW completes its task, control returns to the main ACW for further processing.
Schedule Callback: This node helps callers to schedule a callback in ACW for the later time.
Update Properties: This node is used to set the value for some variable/resources in the ACW.
Get Records: This node is used to load properties for any other case, profile, any custom entity present in the Sprinklr into the IVR.
Update Records: This node is used to update properties for any other case, profile, any custom entity present in the Sprinklr from the IVR.
Create Records: This node is used to create a record like case, profile or any other custom entity present in the Sprinklr from the IVR.
Add to Supperssion list: This node is used to add customer phone number to suppression list so that later on this customer can be suppressed from outbound calling.
Execute Action
You can utilize this node to apply a macro, fetch all attachments linked to a case in Care Console and display them within the "Attach File" component of the Screen node, or add the pending cases/calls to the holding queue. Below this node, you'll find two branches: one for "Success" and the other for "Failure."

Flow action node:
End Execution: This is the final node in each branch of the ACW that submits the ACW. If the End Connection node is encountered within a child ACW, the control will go back to parent ACW.
Go To Node: You can connect two nodes using this node.
Save and Deploy ACW
Once you are done with your configuration, you have three options to save the progress.
Save & Deploy: Saves your ACW and deploys it i.e. puts it in ‘Active’ state. Only after deployment, ACW can be used.
Pre-requisite for deploying ACW: Your user should have ACW Deploy Permission.
Note: It's important to note that if you plan to use the ACW in a "Call Another Flow" scenario, the child ACW also needs to be in the active state for the option to add it to the main call flow to appear.Save as Draft: Choosing this option saves your ACW configuration as a draft version, which sets its status to "Paused." This allows you to save your work and make further modifications at a later time without activating the ACW immediately.
Close: Clicking on this option closes the ACW configuration interface without saving any changes. It is essential to note that closing the ACW without saving will result in the loss of any unsaved progress.
ACW Actions
After creation, hover over the Options icon next to the ACW to take any of the following actions:
Edit: Allows you to modify the nodes or workflow of the ACW actions.
Edit Settings: Enables you to adjust specific basic settings for the ACW workflow like Name, Description, ACW Type, ACW Time, etc.
Clone: Creates a duplicate copy of the ACW. This can be useful if you want to create a similar set of actions without having to recreate them from scratch. You can also choose to edit parameters like the name, type, or any other relevant settings before finalizing the cloning process.
Share: Allows you to grant access to the ACW actions to other users or groups within your organization.
Delete: Removes the ACW actions permanently.
Pending ACWs
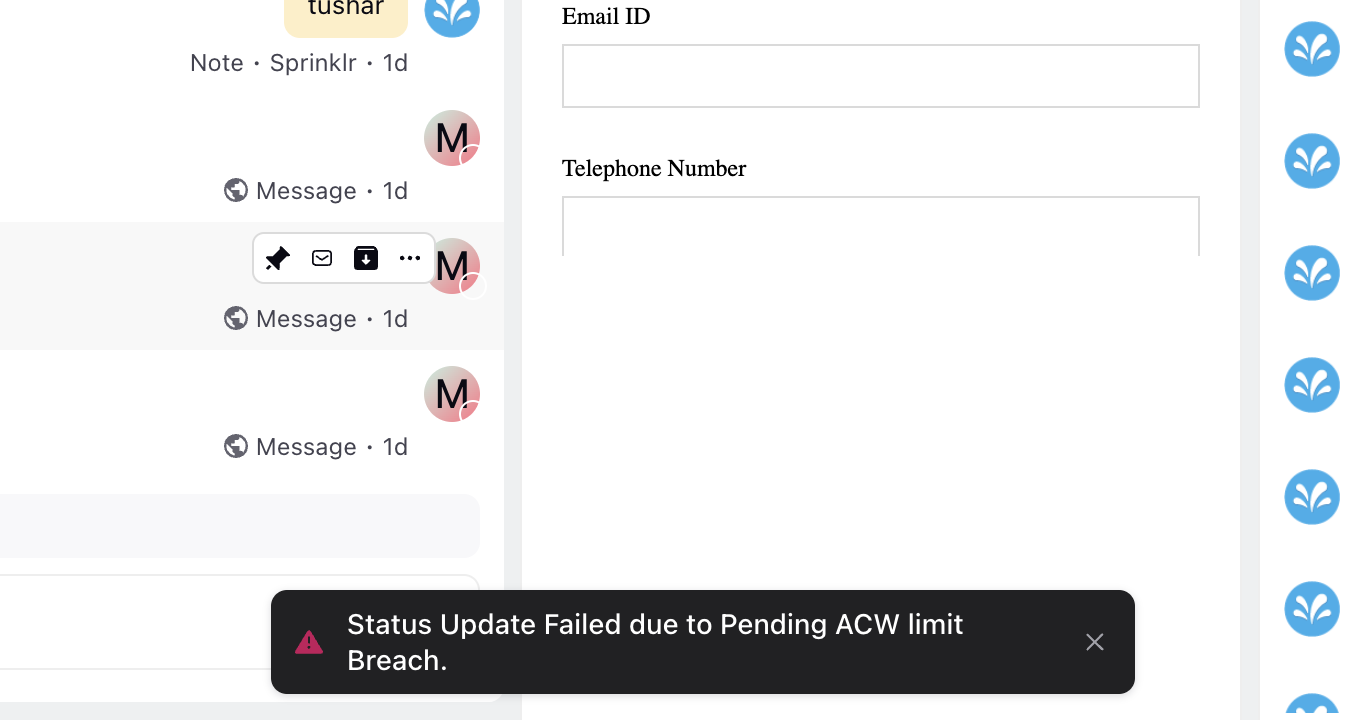
You can apply a limit on the number of pending After Call Work (ACWs) tasks a user can have. When this limit is breached, the user's status will automatically change to a specified status. The user will not be able to change their availability status to a productive status when the pending ACW limit is exceeded, and an error message will be displayed. Productive statuses are those defined in the queue and dialer shared with the user. This notification informs the user that they have reached the pending ACW limit and are unable to receive calls.
Automatic deletion of ACWs older than 90 days - Sprinklr automatically deletes all ACWs (After Call Work) records older than 90 days from the system. This reduces the Support team effort to manually clear them upon receiving a support ticket.
![]() Note: To learn more about getting this capability enabled in your environment, please work with your Success Manager and provide the desired status to which the user should be moved when the pending ACW limit is reached.
Note: To learn more about getting this capability enabled in your environment, please work with your Success Manager and provide the desired status to which the user should be moved when the pending ACW limit is reached.
![]() Note: Use these DPs:
Note: Use these DPs:
PREVENT_STATUS_CHANGE_IF_ACW_LIMIT_REACHED ("prevent.status.change.if.acw.limit.reached", BOOLEAN, PARTNER)
STATUS_FOR_ACW_LIMIT_REACHED ("status.for.acw.limit.reached", STRING, PARTNER)
ACW History in Care Console
The Agents and Supervisors can view the ACWs and Dispositions associated with the case in Care Console.
The ACW tab in the Care Console displays all dispositions and sub-dispositions associated with the case including those from multiple ACW submissions, without requiring any additional configuration. The ACW tab is available by default.

Users with permission to view All ACWs can see every ACW triggered for a given case by any agent. This permission is typically granted to supervisors who need visibility into the full ACW history for each case.

Users must have the View ACW Case History permission to view All ACWs.
Users without this permission will only see the My ACWs tab, which display the ACWs they have personally triggered. The My ACWs tab is visible to all users.
