How to Create and Manage All Your IVR
Updated
![]() Pre-requisite for configuring the IVR: Sprinklr Voice should be enabled for the environment and your user should have IVR View, Edit or Create permission
Pre-requisite for configuring the IVR: Sprinklr Voice should be enabled for the environment and your user should have IVR View, Edit or Create permission

In this knowledge article, we will explore the process of creating and managing all aspects of IVR (Interactive Voice Response). From designing call flows to configuring settings, this guide will provide you with valuable insights and step-by-step instructions to effectively manage and create your IVRs.
How to open an IVR manager?
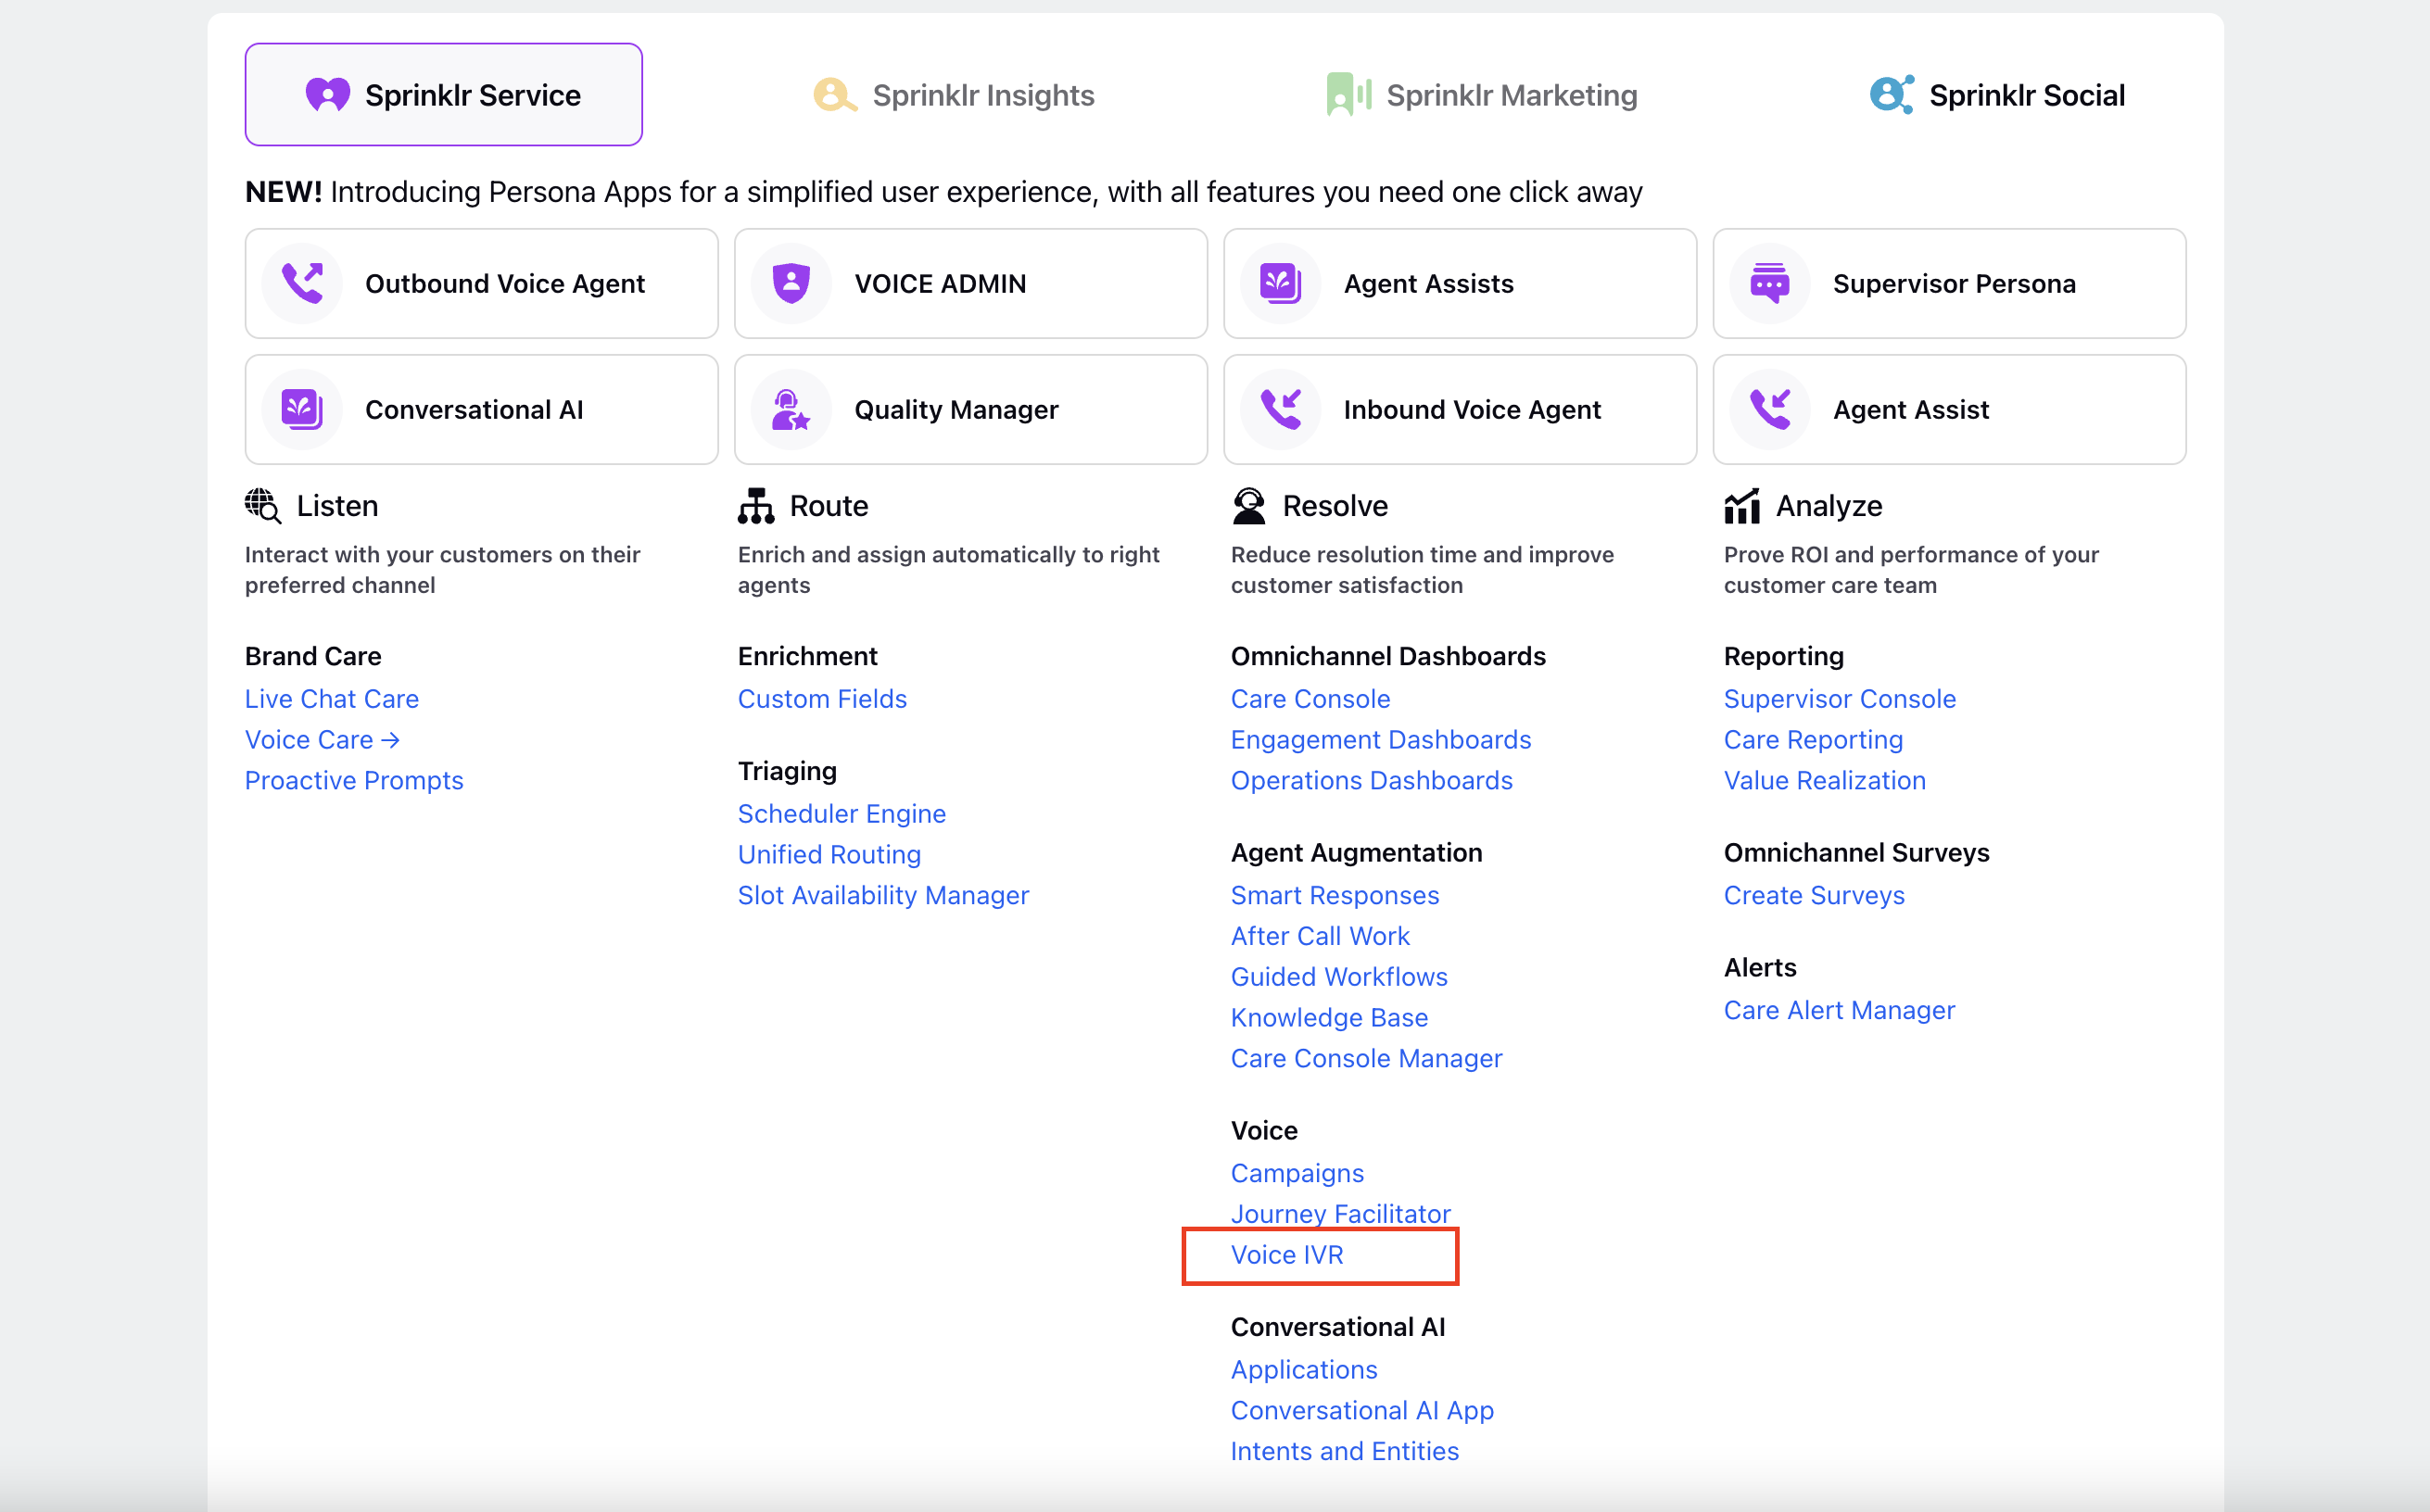
Once you have appropriate permissions, and you are using launchpad, you can see Voice IVR in the launchpad under Sprinklr Service > Resolve > Voice.
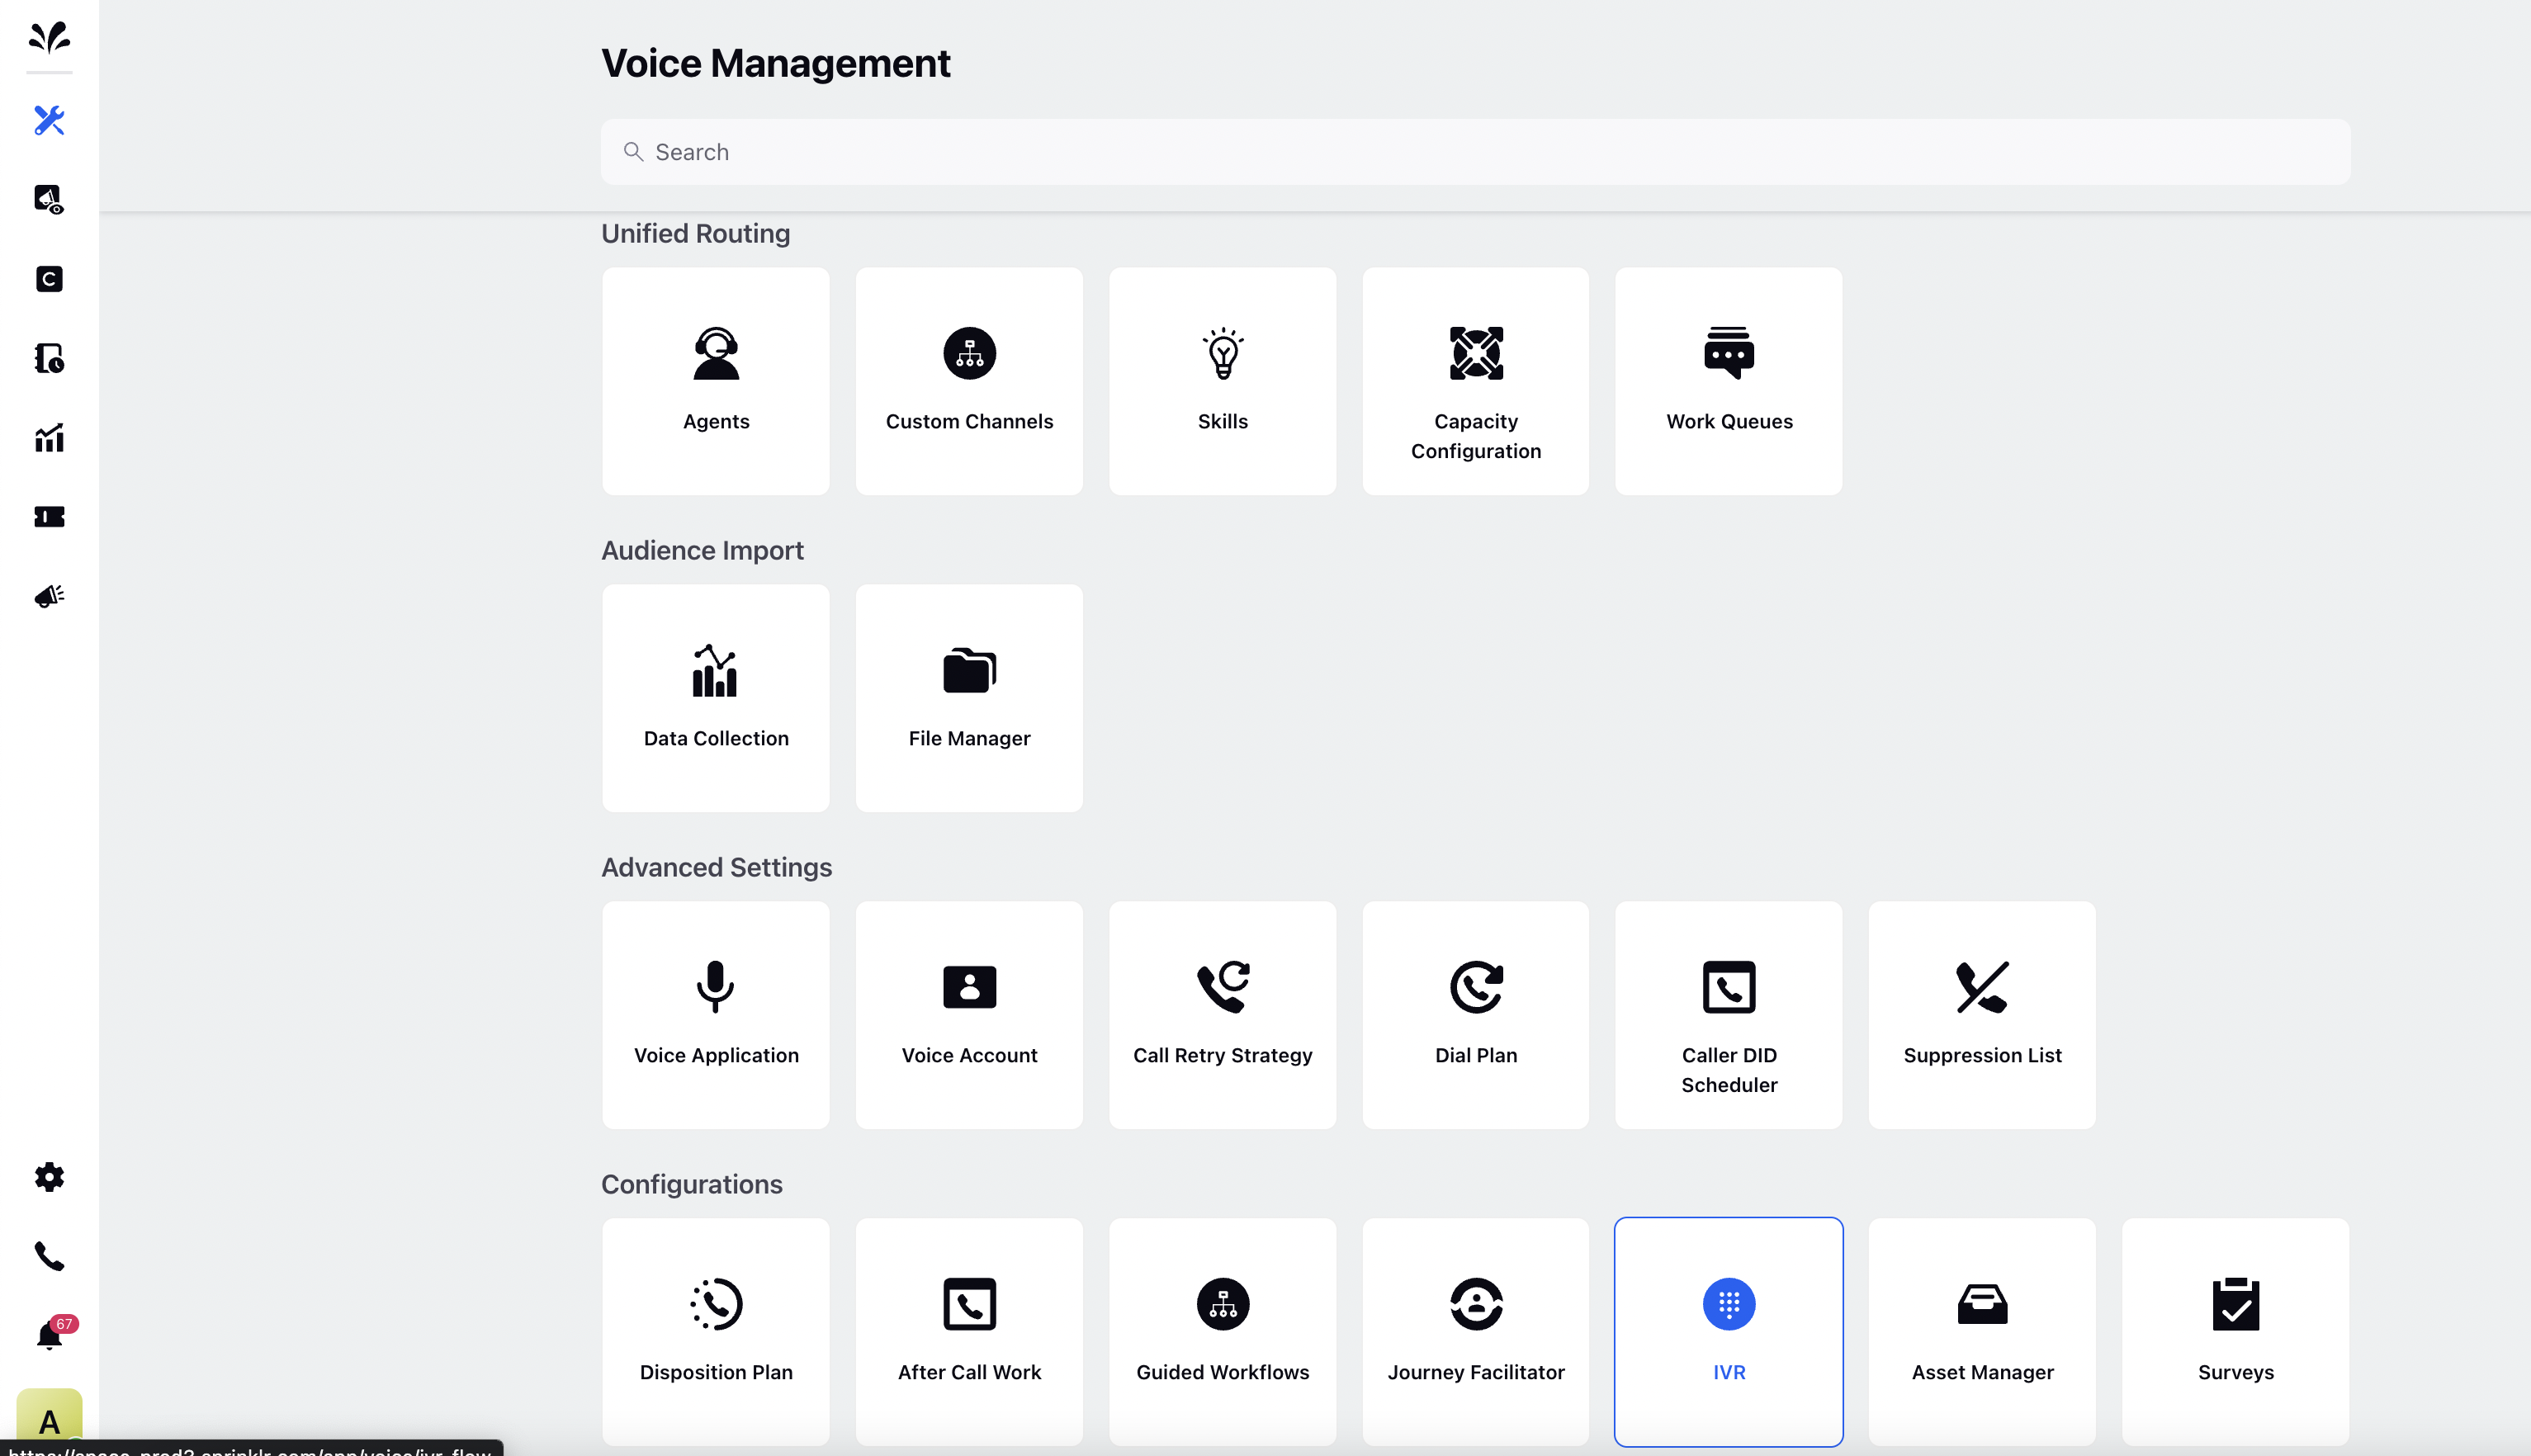
If you are using Voice Admin persona, you can see Voice IVR inside Tools menu on left navigation under Tools > Configuration > IVR.
IVR Flow Manager
You’ll land on the page shown below. This interface is used to create and manage multiple IVRs.
Once you open Voice IVR, you will see a list of all IVRs already made. On this window, you can view, search, edit your previous IVR or create a new one.

From this IVR workflow manager, you can take following actions:
Filter the IVR on the basis of IVR status (Paused and Active).
Soft Refresh to refresh IVR workflow list
Manage Columns to customize the view of the IVR Manager by selecting the columns that need to be visible on the page, also allowing you to reorder them.
Select multiple IVRs to perform bulk actions such as moving them to a folder and updating speech profiles and disconnect journeys.

Create New Folder
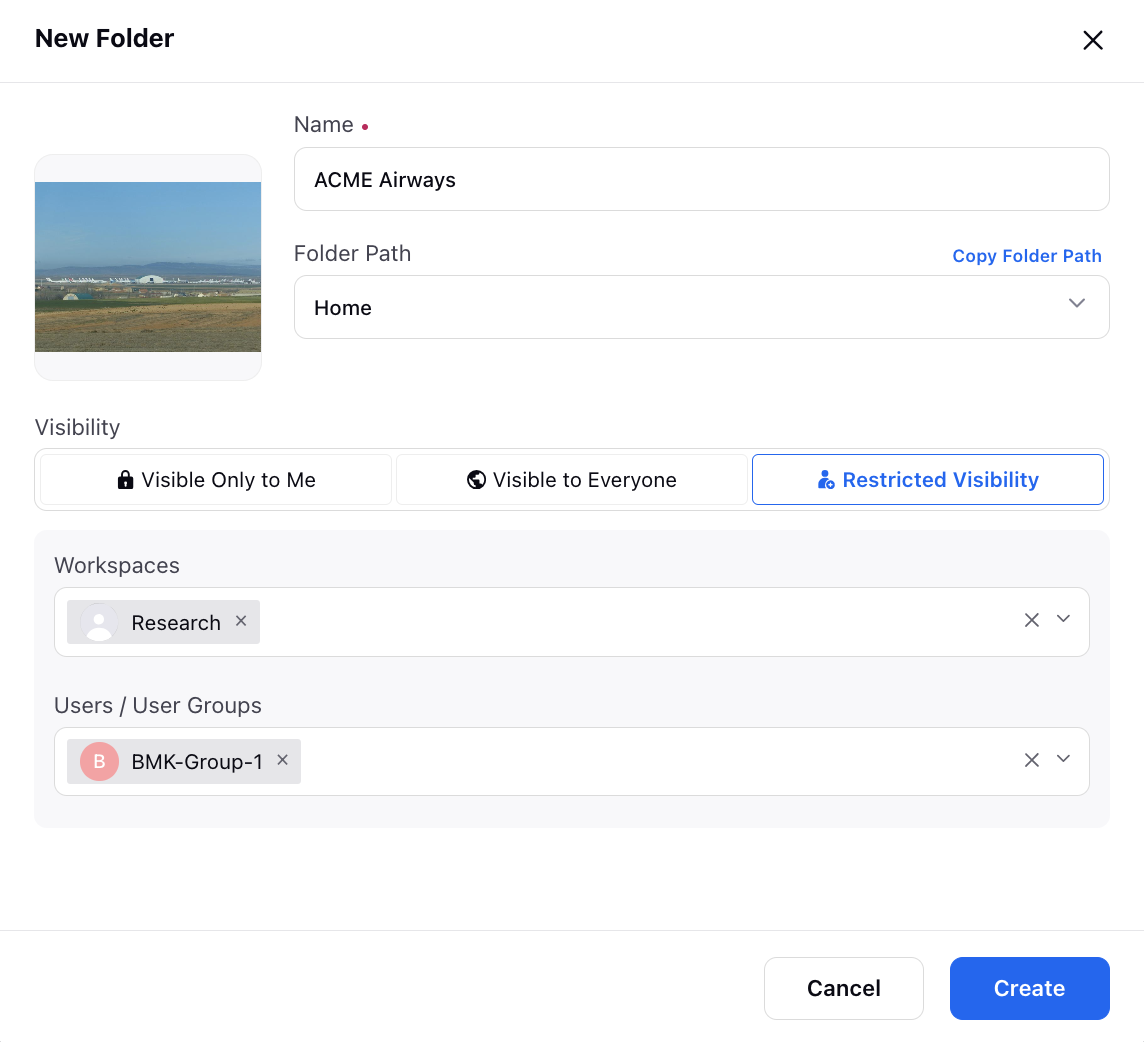
Facilitate the management of numerous IVRs by organizing IVR flows into separate folders for better organization and ease of access. To create a new folder, click on the dropdown icon located in the top right corner and select Create Folder.

On the New Folder window that appears, upload an image for the folder, enter a name and path for the folder. Finally, choose the desired visibility settings to make it visible to specific users as needed.
Create New IVR
To create a new IVR flow, click "Create IVR flow" located on the top right of the page. Once you cick on Create IVR you enter into IVR flow settings page. This is the place at which you can define basic settings for the IVR workflow like Name, Description, IVR type, Language, Timeout and Invalid message, Disconnect journey, Sharing setttings.
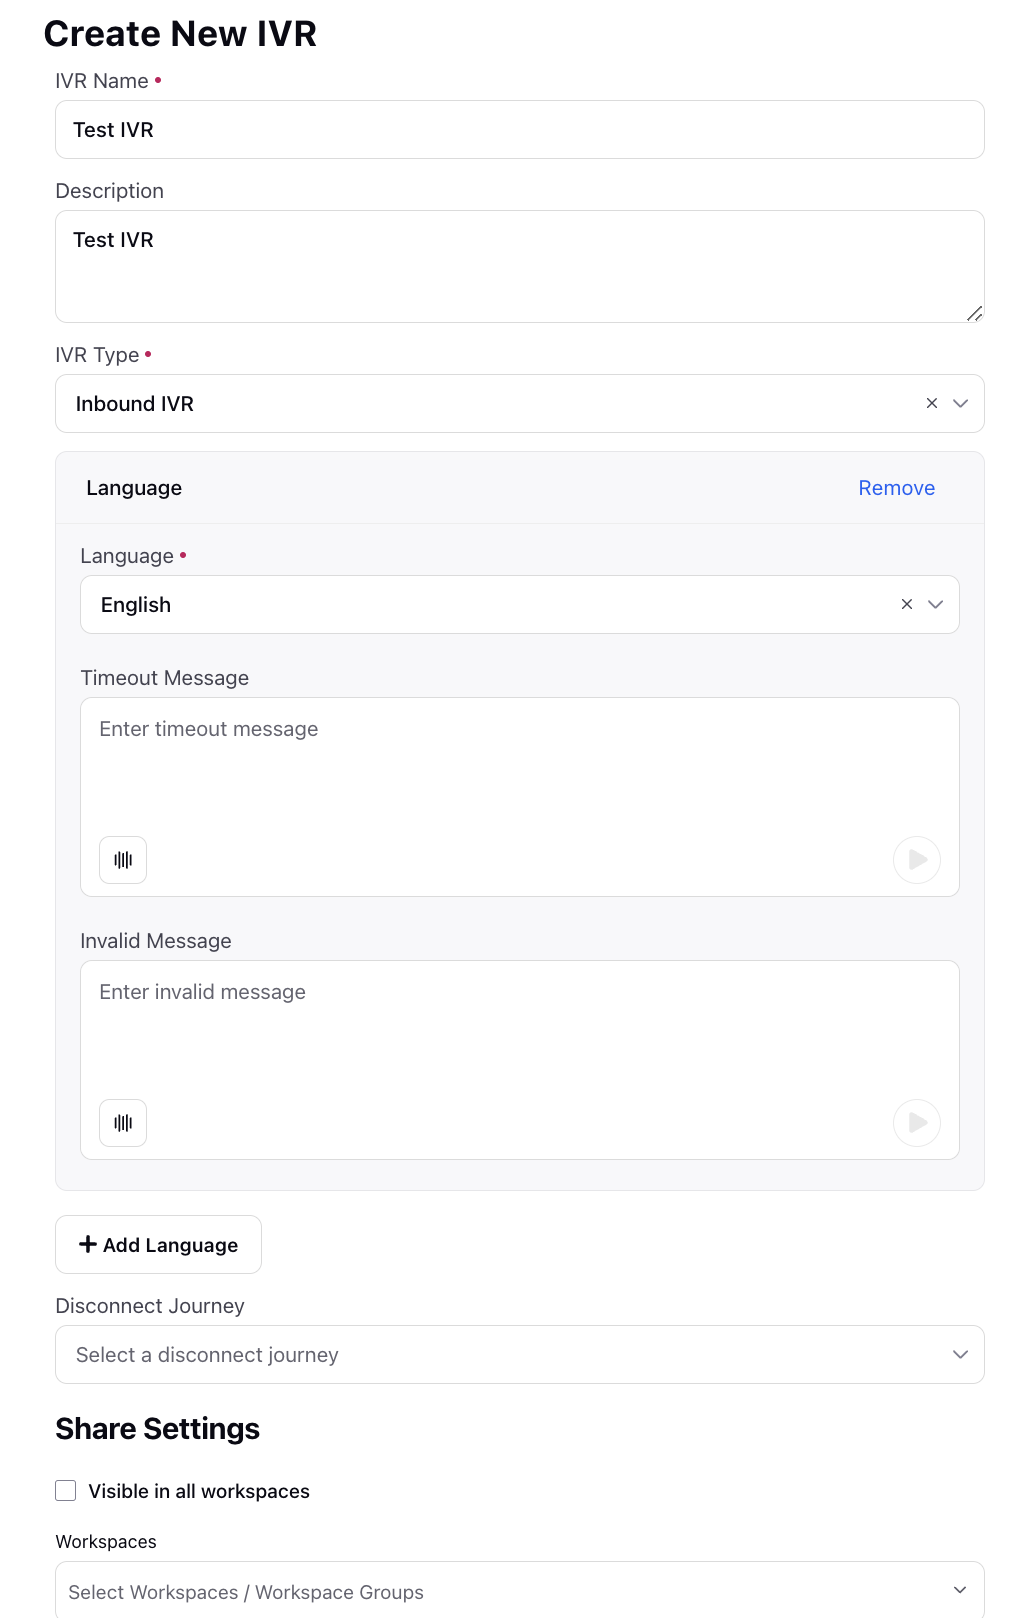
IVR Name: This name will be used internally in the Sprinklr platform to help identify your IVR worklow.
 Best practice: While naming IVRs, ensure to follow a fixed naming convention. For example - write the use of IVR (Common IVR, journey IVR, Identification etc.). This helps in identifying the IVR while migrating IVRs from sandbox to production env.
Description: Used to add additional information about the IVR.
IVR Type: This is used to define the type of IVR, all type are-
Inbound IVR: This type of IVR will connected to the Voice application and the inbound call will be landed to these kind of IVR.
WaitTime IVR: This workflow IVR will be used when the caller will be in queue waiting for agent. This is used to voice out messages like wait time, queue position or running any promotional ads to the caller while waiting for the agent.
Note: Wait time IVR is only suported in Twilio.IVR Transfer: Only these kind of IVRs will be available for the Agents as an option while transfering the call to IVR. These IVRs will be available under both type of transfer - End call and Connection back transfer of IVR.
IVR Transfer - End Call: Only these kind of IVRs will be available for the agents as an option while doing End call transfer to IVR. Once transferred on these IVRs the call for agent disconnects and caller will be transferred to the IVR.
IVR Transfer - Connect Back: Only these kind of IVRs will be available for the agents as an option while doing connect back call transfer to IVR. Once transferred on these IVRs then agent will be put on hold until caller completes the IVR.
IVR Conference: Only these kind of IVRs will be available for the agents as an option while doing conferencing to IVR. Once conferenced with the iVR both caller and agent can give Input in the IVR.
Note: Any IVR to come for agent in Transfer/Conference list, there are two criteria's - 1. IVR type should be correctly set in IVR settings
2. The IVR is shared with that user
IVR Conference is supported only on Ozonetel, IVR conference support with Twilio and other telephony partner is in the roadmap.
System IVR: These IVRs are system default IVRs which are used to provide functionality like Blind Transfer etc. Such IVRs are not to be Updated and are hidden from the flow manager.
Outbound Dialer: IVR which is connected to an Outbound Dialer and is used when an outbound call through IVR dialer or IVR dialer with agent is picked by the caller then this IVR is triggered. When selecting iVR on dialer only these type of IVRs will be available,
IVR Languages: This opens up a multi-select picklist to select the required languages for the IVR. You can also define the default Timeout and Invalid message corresponding to each language for this IVR.
Timeout Message: This is the default message that is to be played to the caller if no input is given from the caller and there is no timeout message is confiured on that particular node.
Invalid Message: This is the default message that is to be played to the caller if Invalid / wrong input is given from the caller and there is no invalid message is confiured on that particular node.
Note: The first language that is selected becomes the default language for the IVR.
Disconnect Journey: Here you define a workflow which will be executed when caller ends the call abruptly or call gets disconnected due to network issue in between the IVR. This is useful when a brand wants to take some actions on journey incompletion. Here you select a journey which you have to create using Journey facilitator module of Sprinklr which is used to define the outbound journey for customer.
Note: If you have defined transactions inside IVR, then disconnect journey will only trigger if any transaction will be incomplete.
Share Settings: This allows you to define the sharing rights with user, user groups., even you can share it with all the workspac. Also one can control the visibility
Note: If any IVR is not visible to an user, please check the sharing settings with a super user or global admin or raise a request with the support team team, to share the IVR with relevant workspace or user / user groups.
Manage previous IVR:
Inorder to take action on any IVR Click on three dot, you will get following options-
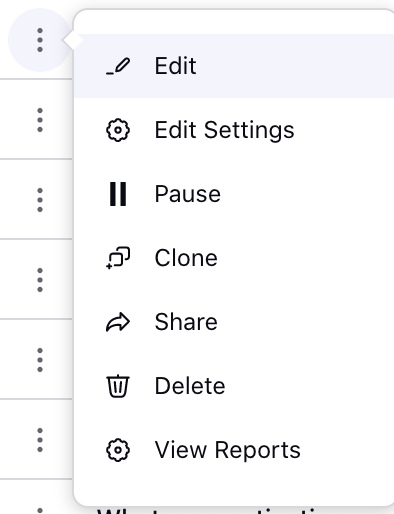
Edit the IVR builder
Note: Edit option will only come when your user have edit permission for Voice IVREdit Settings to edit the basic settings of the IVR like name, description or languages, It opens up
Pause/ Activate: This is to pause or activate any IVR. An IVR can only be used with a voice application if it is in Active state.
Clone: Used for cloning the IVR
Share: Used for sharing IVR with different user, user groups and workspace(s)
Delete: Used to delete the IVR. Becareful as this can’t be undone.
View Reports: Used to view IVR flow reports. This Report provides a visual representation of call volume and helps track the number of calls on each leg of the IVR flow. This also allows you to track the journey of each and every call, providing insights into what happens at each step. This detailed tracking helps in understanding the call flow, identifying any bottlenecks or errors, and ensuring optimal performance of the IVR system.
Note: In order to view and track any particular call, put the filter using case number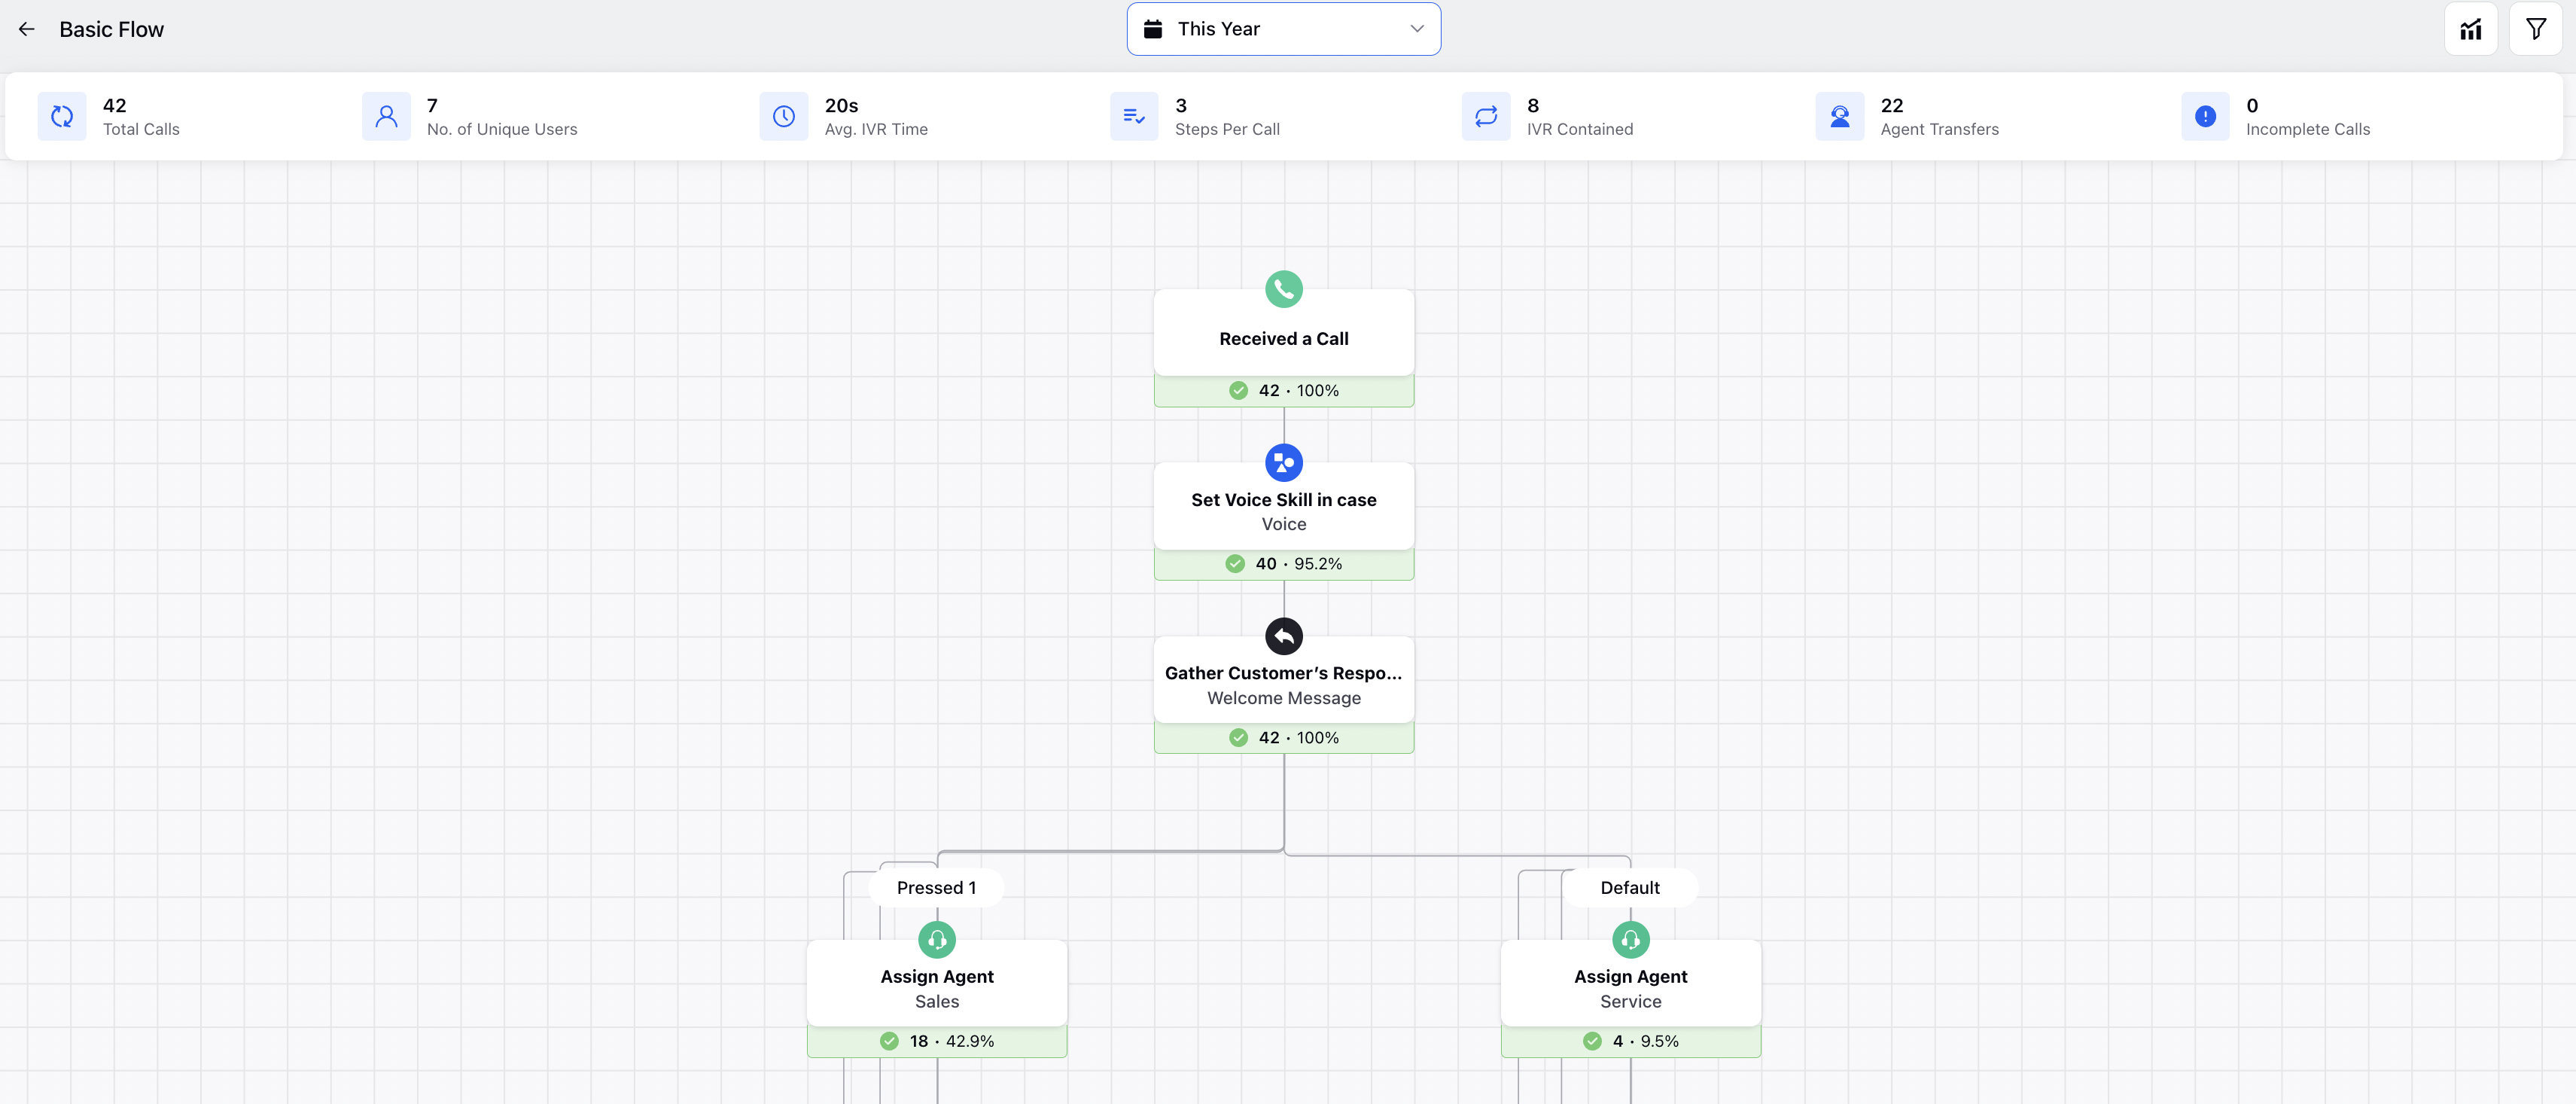
Few important metrics in IVR flow report-
Total Calls: Sum total of all calls that landed on that IVR in the selected time period
No. of unique users: Number of unique callers that called the IVR in the selected time period
Avg. IVR Time: Average time spent by callers on the IVR in the selected time period
Steps Per Call: This is the average number of steps completed per call in the selected time period. Each node is counted as step including the first & last node [Received Call & End Connection]
IVR Contained: These are the number of calls that were completed within IVR itself in the selected time period i.e. it was not transferred to any agent.
Agent Transfers: These are calls that were transferred to the agent in the selected time period
IVR Dropouts: Calls that got disconnected in between the IVR in the selected time period