Overview of Scheduler Engine
Updated
Scheduler Engine helps you easily create scheduled automations to run asynchronous workflow tasks at scale. These actions can be singular or recurring based on the Schedule Action Time that you set.
Use Cases of Scheduler Engine
Scheduler Engine can be used to schedule cases/messages using Scheduler Queues instead of a trigger which is a comparatively easy and short process as making a queue and defining rules/actions that are to be taken on that queue in a specific order will be done on one page only.
You can execute multiple On-Demand rules to run on any parent rule at one point in time which means all the rules will be run after a specified time simultaneously.
To Add a Queue
Under the Sprinklr Service tab, click Scheduler Engine within Route.
On the Scheduler Engine window, click Add Schedule Queue in the top right corner.
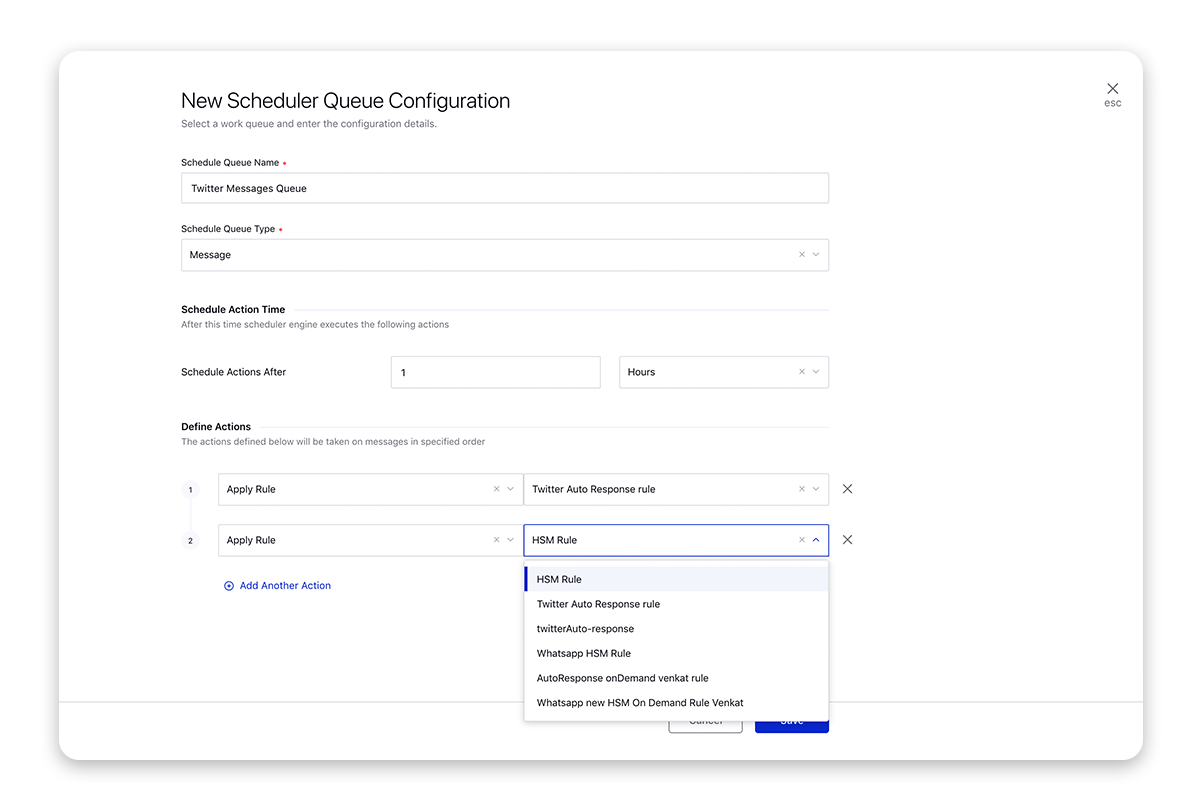
On the New Scheduler Queue Configuration window, enter a Schedule Queue Name.
Next, select the Schedule Queue Type as Message or Case as required.
Under Schedule Action Time, enter the time after which the scheduler engine will execute the actions on messages/cases.
Under Define Actions, select Apply Rule from the dropdown and the rule that you want to run on the messages/cases from the corresponding dropdown. Click Add Another Action to add as many actions/rules as you want to run on the queue.
Select the actions in the order you want them to run on the message/case queue.
After creating a queue, create a rule in Rule Engine through which the messages/cases will be pushed in the queue on which you want to run rules/actions.
To Push Messages to the Scheduler Engine via Rules
Under Governance Console, click Rule Engine within Collaborate.
On the Rule Engine window, click Create New Rule in the top right corner.
On the New Rule window, provide a Name and an optional Description for your new rule and set the Rule Scope to Workspace.
From the Context drop-down menu, select Inbound.
If required, modify the values for Activation Date and Rule Execution Batch.
Select the Rule Type as Standard.
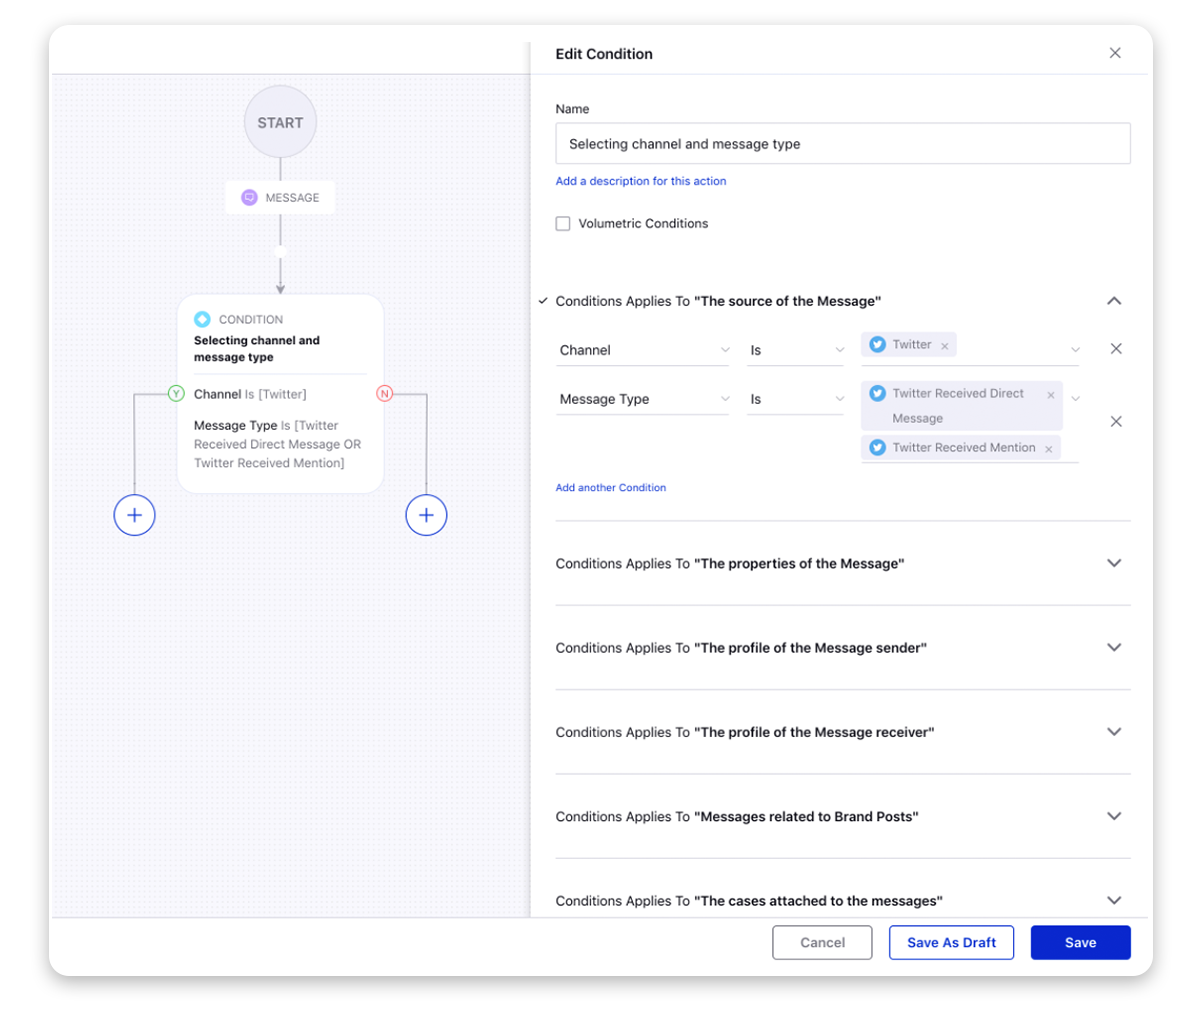
Under Conditions Applies To "The source of the Message", select Channel from the Condition dropdown and the desired channel from the corresponding dropdown.
Click Add another Condition and select Message Type from the Condition dropdown and the desired message types from the corresponding dropdown.
On the Rule Builder window, click the icon on the Yes branch of the condition and select Add Action.Under Actions To "Schedule Actions", select Add to Scheduler Engine from the Action dropdown menu and the queue that you created in the Scheduler Engine from the corresponding dropdown.