Campaign - Visual Briefs
Updated
Overview
The Visual Brief tab in the Campaign Details window, lets you leverage Sprinklr AI+ to create Visual Briefs for Campaigns. This feature can be used to collaborate on and share campaign ideas visually. You can easily create and share a creative vision and tone for any campaign.
You can add images to your Visual Briefs directly from your device or through DAM. Visual Briefs also integrate with the new Sprinklr AI+ powered Image Editor. You can use text prompts to create new images or use AI to edit existing ones. You can also search and add, or import images to Visual Briefs.
You can download your Visual Brief as an image or PDF or export it in PPT format.
Note: Please contact your Success Manager for full access to Sprinklr AI+ based features.
Create a Visual Brief
1. Click the Visual Brief icon and then click the Create Visual Brief button.
2. You can add assets and objects to your Visual Brief through Widgets. You can add Static Images, Static Text, and Shapes as Widgets.
3. Click the Static Image option and then click the Widget that appears to add an image. When adding a Static Image, you'll have the option to upload from your device, DAM or to generate a unique image through AI.
4. To generate an image through Sprinklr AI+, select the Generate Image option and enter a text prompt that matches your needs. You can also select the aspect ratio for the generated images. The AI generates multiple images, select any one image to add to your Visual Brief or create variants of the images.
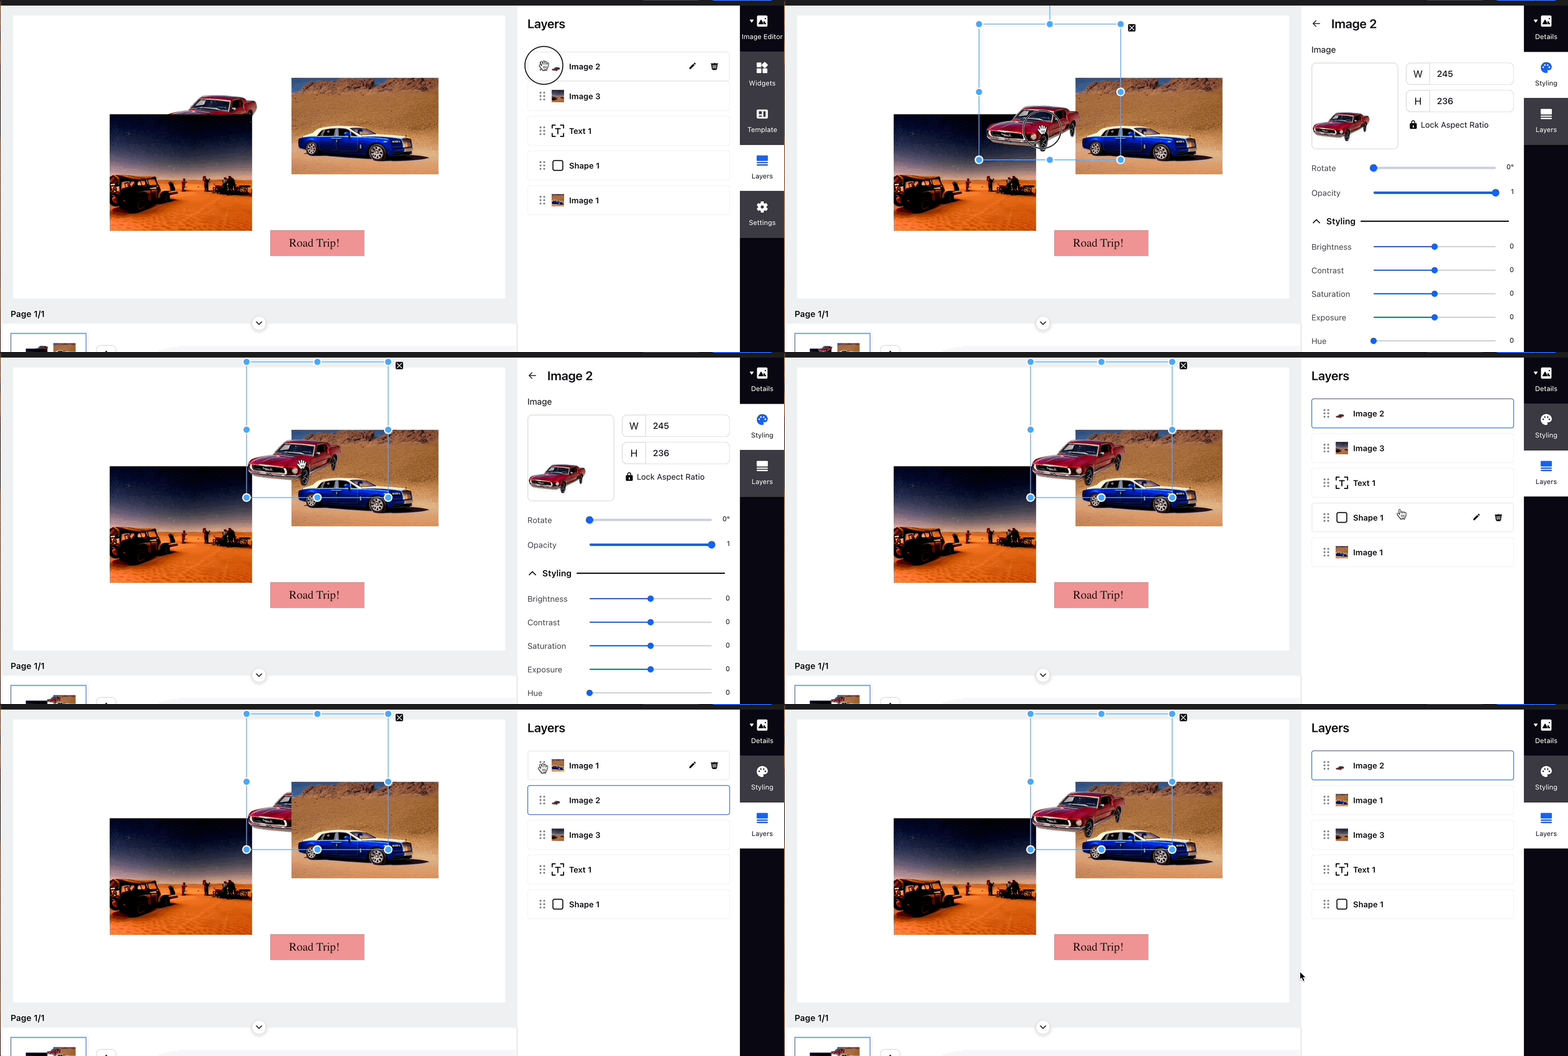
5. You can click and drag the Widgets around and arrange them according to your needs. The Layers tab lets you use drag and drop to arrange Widgets in layers, one on top of the other. Click the Pencil icon to rename a Layer or click the Delete icon to remove it entirely.

6. Click any Widget to access AI-editing options including generative fill, background removal and replacement. You can also create variants of your image.
7. You can enter a text prompt to replace you image's background to something more relevant to your requirements or remove the background altogether. You can work on other Widgets while the AI is editing your image but you cannot use AI-editing on two Widgets at once.
8. Click on any Widget and then click the X icon to remove it.
9. Click the + icon at the bottom of the window to add more pages to your Visual Brief.
Manual Image Styling
1. Click any Static Image Widget to style and edit it manually using the Image Editor.
2. You can manually adjust the height and width of you image by dragging out its edges. You can also enter values into W (width) and H (height) fields for more precision. Selecting the Lock Aspect Ratio option ensures that the existing aspect ratio of the image is maintained when adjusting its size.
3. You can use the Rotate bar to rotate your image or adjust its opacity using the Opacity bar.
4. Styling options allow you to adjust Brightness, Contrast, Saturation, Exposure and Hue. You can also Sharpen your image, add Noise, Gamma effects, Sepia tones and Stack Blur.
5. You can also add various preset Filters to your images.
Shape Widgets
1. Select a Shape Widget to add to your Visual Brief. You can add a Rectangle, Circle, Star or Triangle.
2. You can use the Rotate option to rotate the shape.
3. The Rectangle Shape Widget comes with a Border Radius option that lets you adjust the edges of the shape to create a rounded rectangle shape.
4. You can enter values in the W and H fields to adjust the width and height of your shape. The Lock icon lets you lock the aspect ratio of the shape.
5. You can select a Background Color to fill the interior of the shape and Stroke Color to determine the color of the border of the shape. You can also adjust the width of the stroke or shape border and the opacity of the background.