Leave Management Overview
Updated
Supervisors can leverage leave management to enable their employees to raise leave requests in just a few steps. Supervisors and department heads can approve or reject these requests instantly.
The supervisors can use the Leave Management capability of Workforce Management to automate the leave request process, making it hassle-free for both the management and the employees. You can seamlessly handle all the stages of a leave management process: application, approval/rejection, filing leaves, managing leave balance, and analysis.
Use cases
Agents can request time off from the Sprinklr system.
Supervisors can approve the time off requests raised by the agents.
For Supervisors
View Time Off Requests
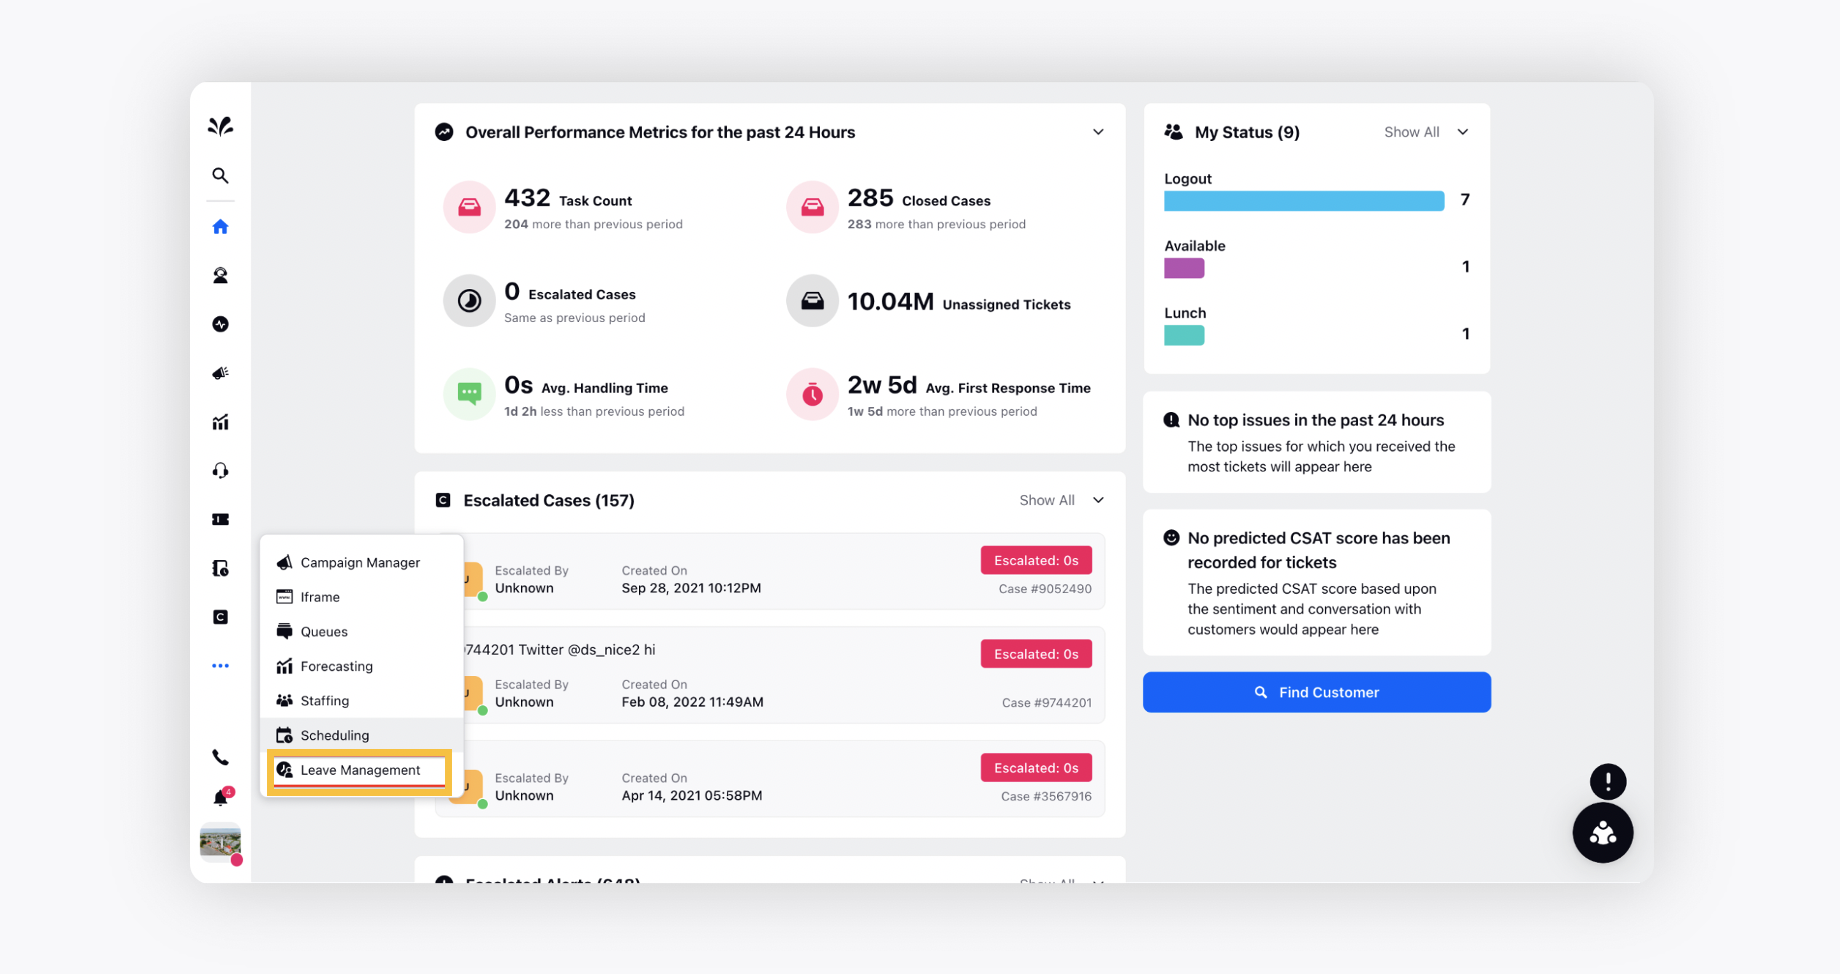
Click Leave Management from the left pane of the Supervisor Console.
On the Leave Management page, supervisors can view all the leave requests along with their statuses in the calendar view.
Requests that are yet to be reviewed are highlighted in Yellow.
Requests that are reviewd (Approved/Rejected) are highlighted as Grey.
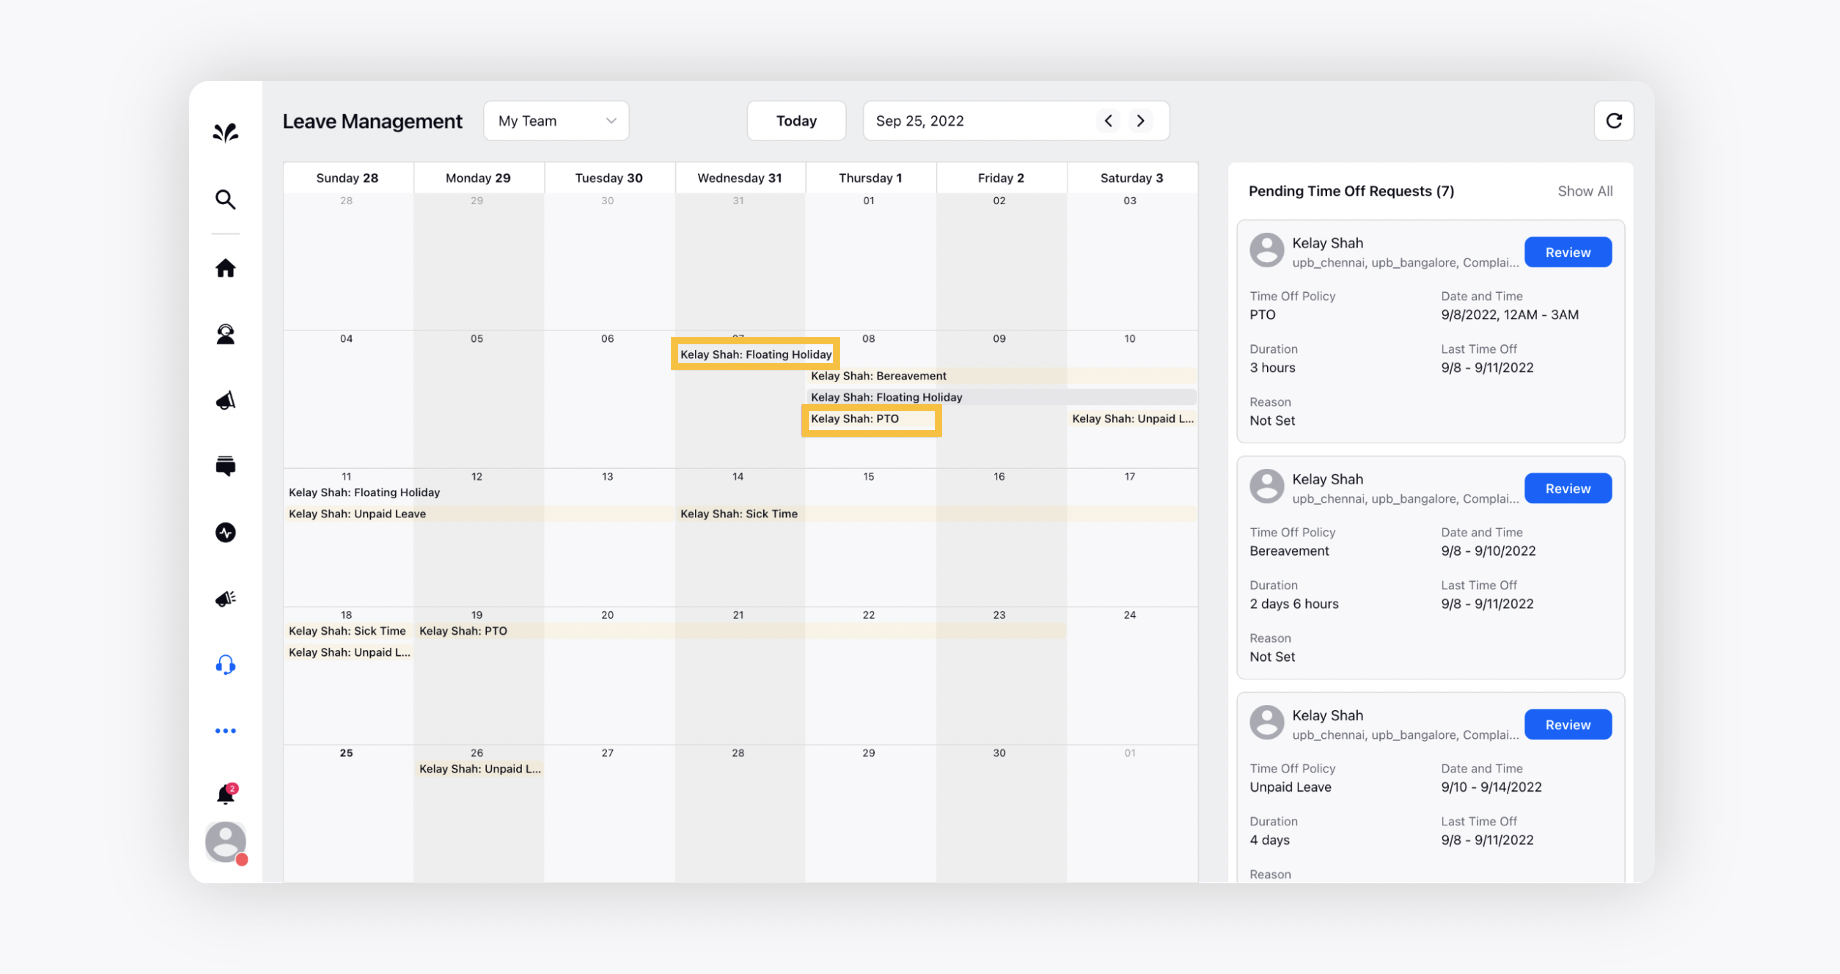
To view the time off requests for all the agents, you can select All Agents from the dropdown at the top. If you want to view team specific requests, select My Team.

Manage Time Off Requests
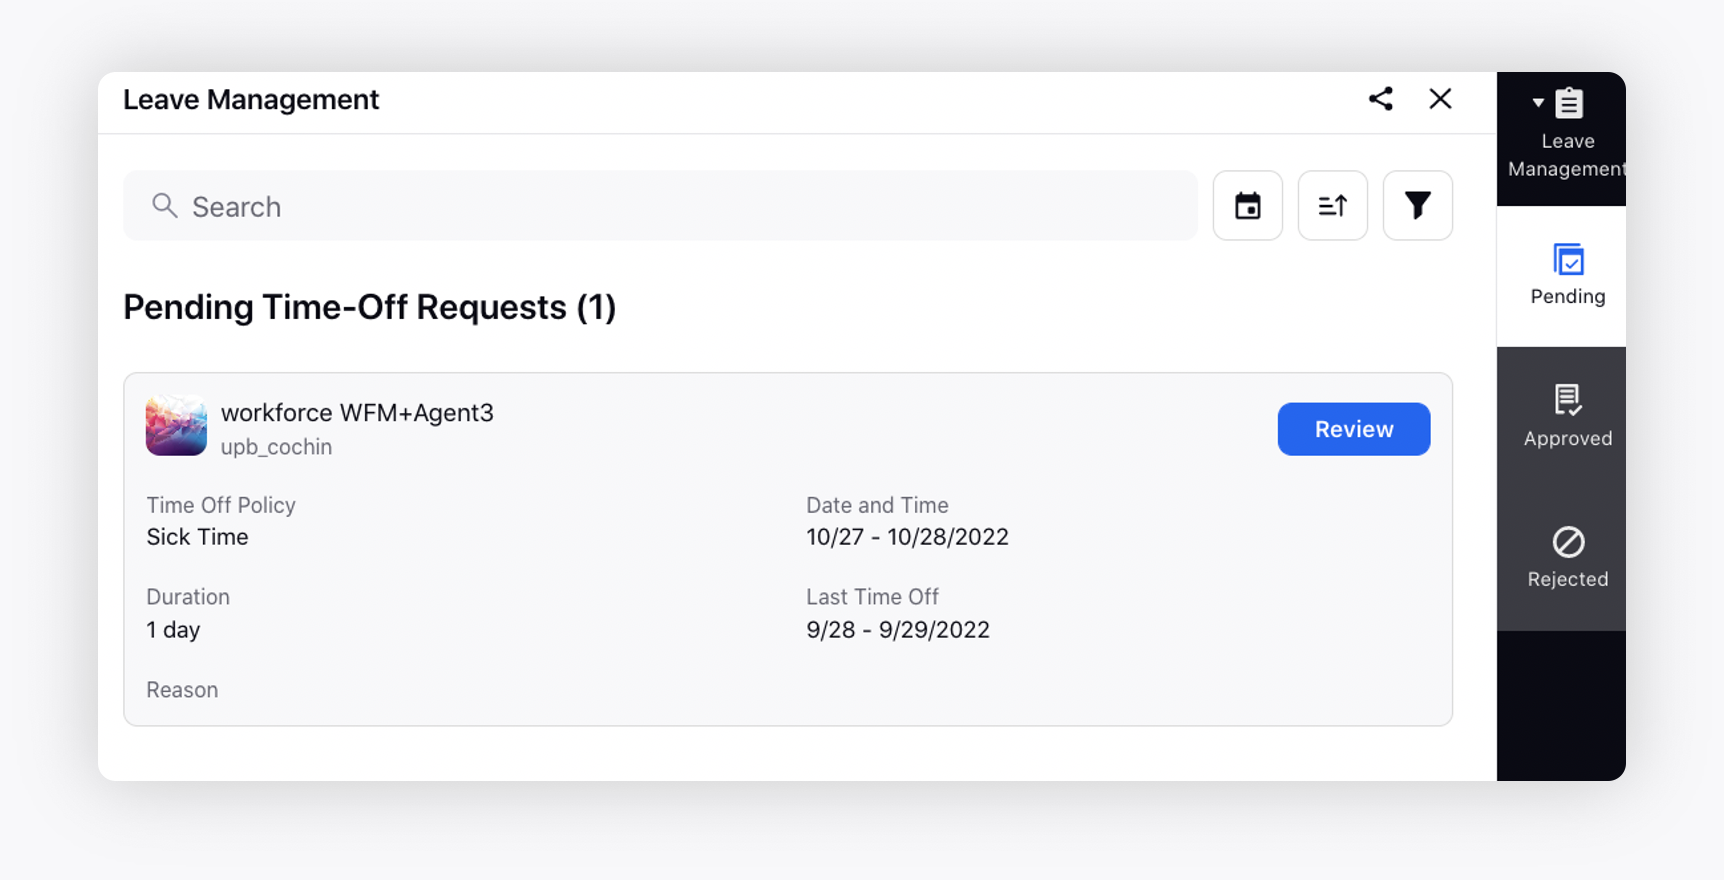
On the Leave Management page, review the pending leave requests on the right.
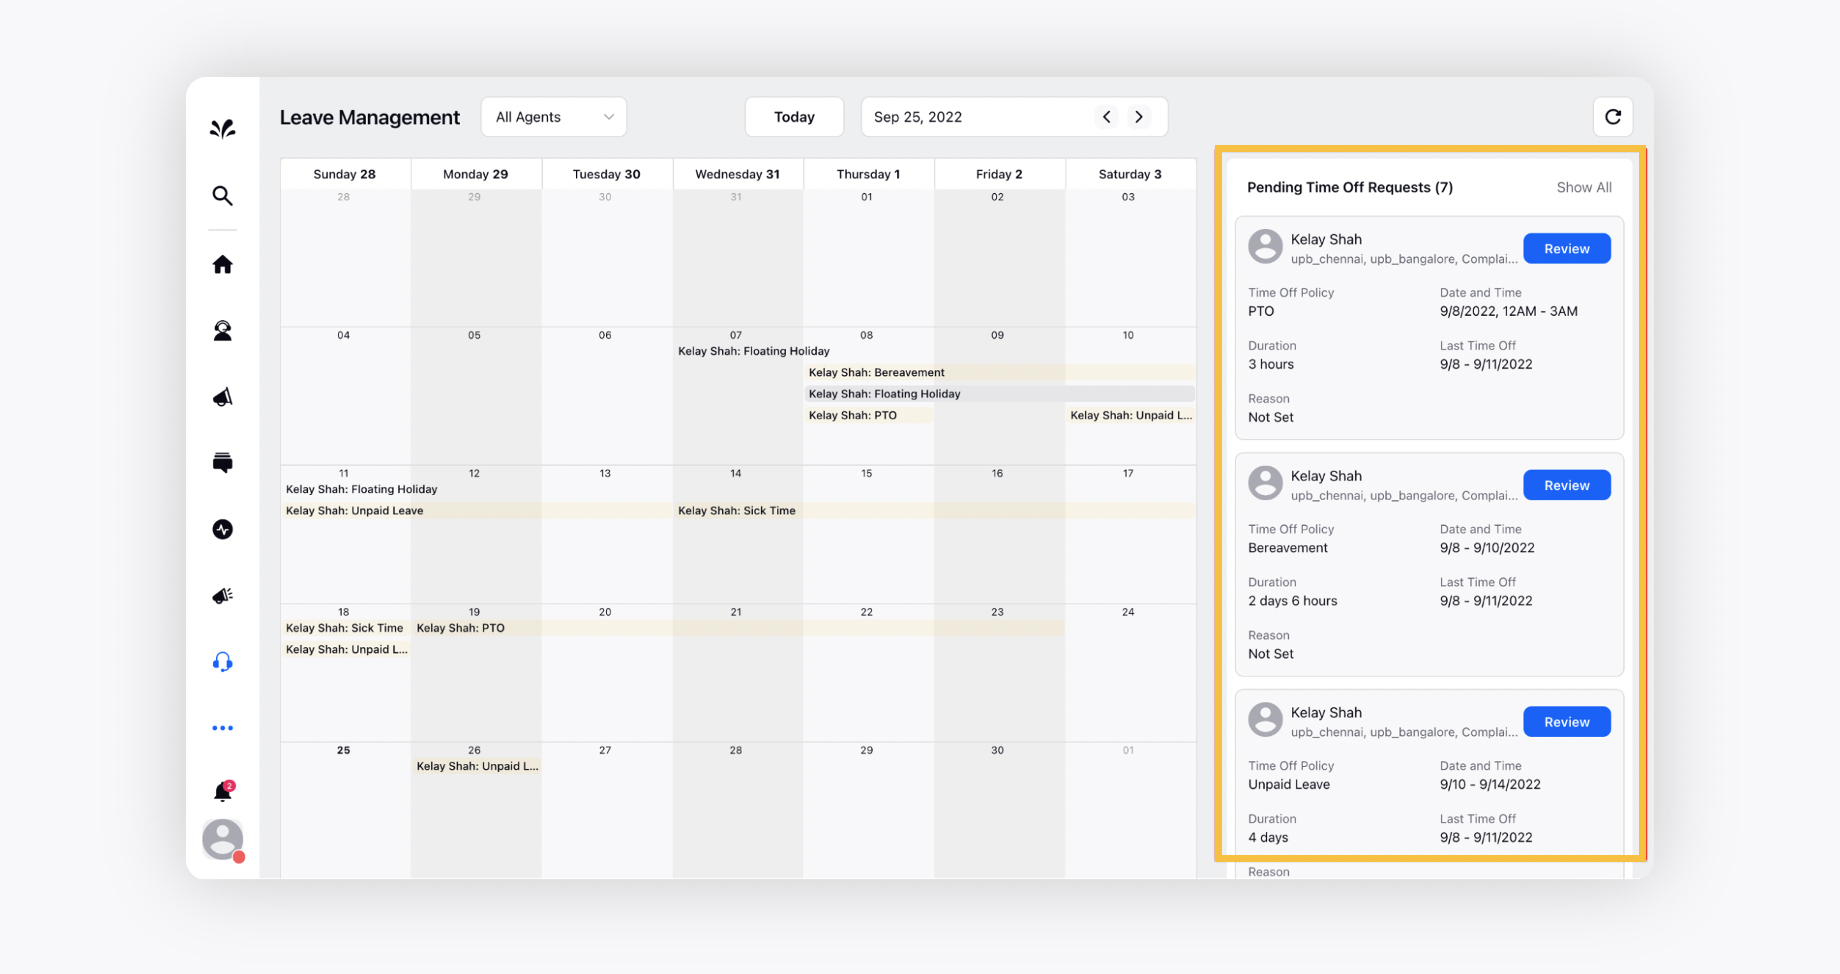
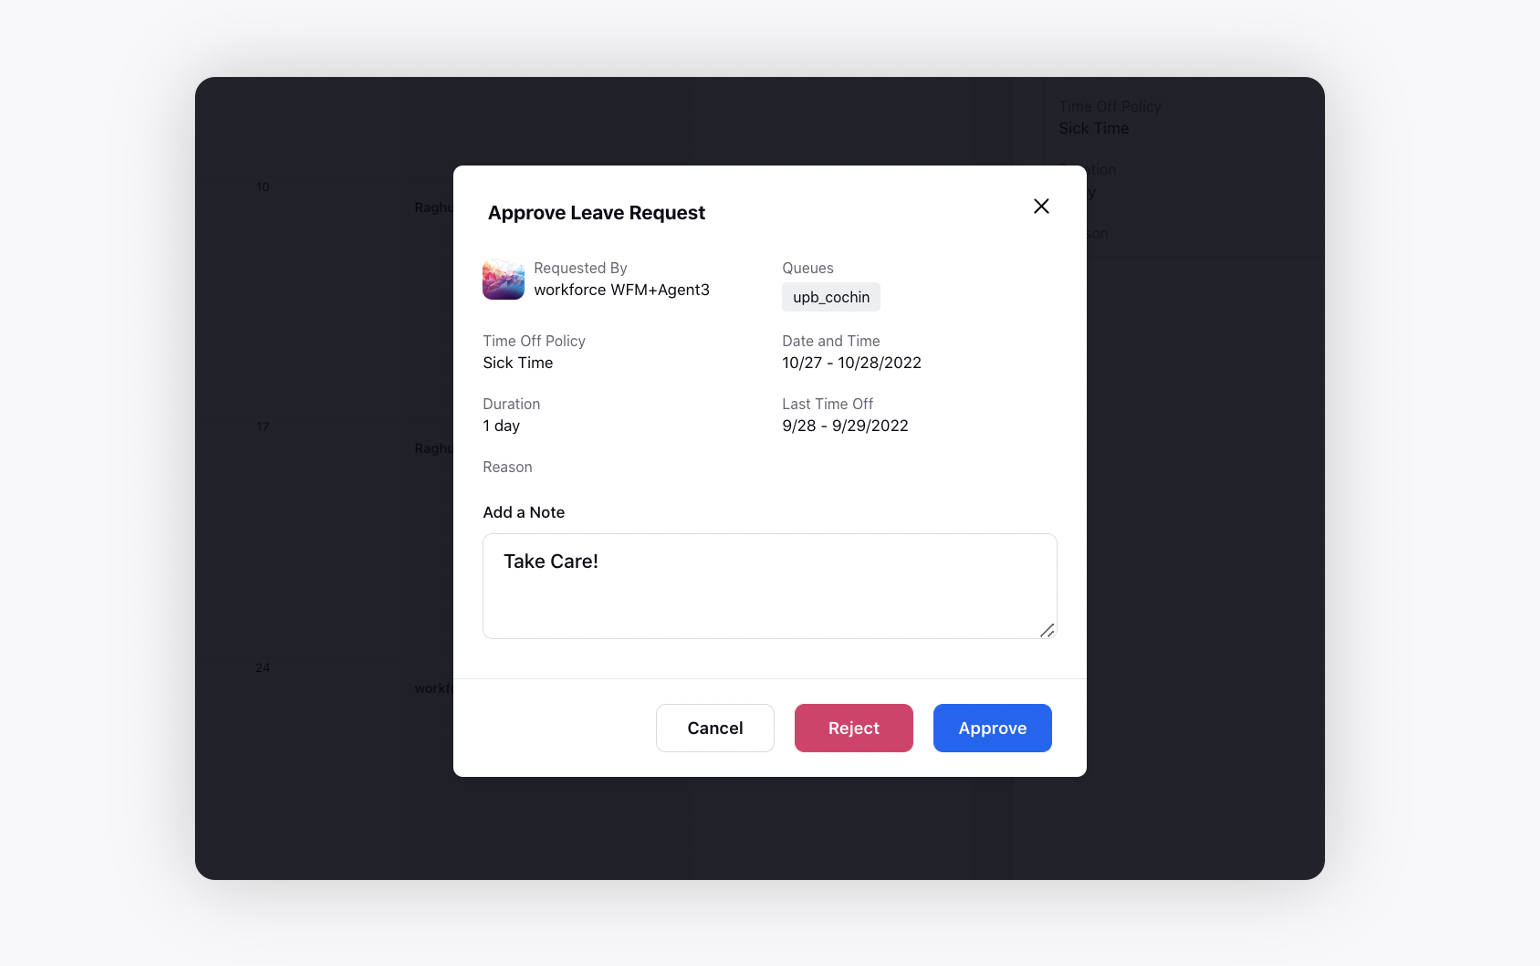
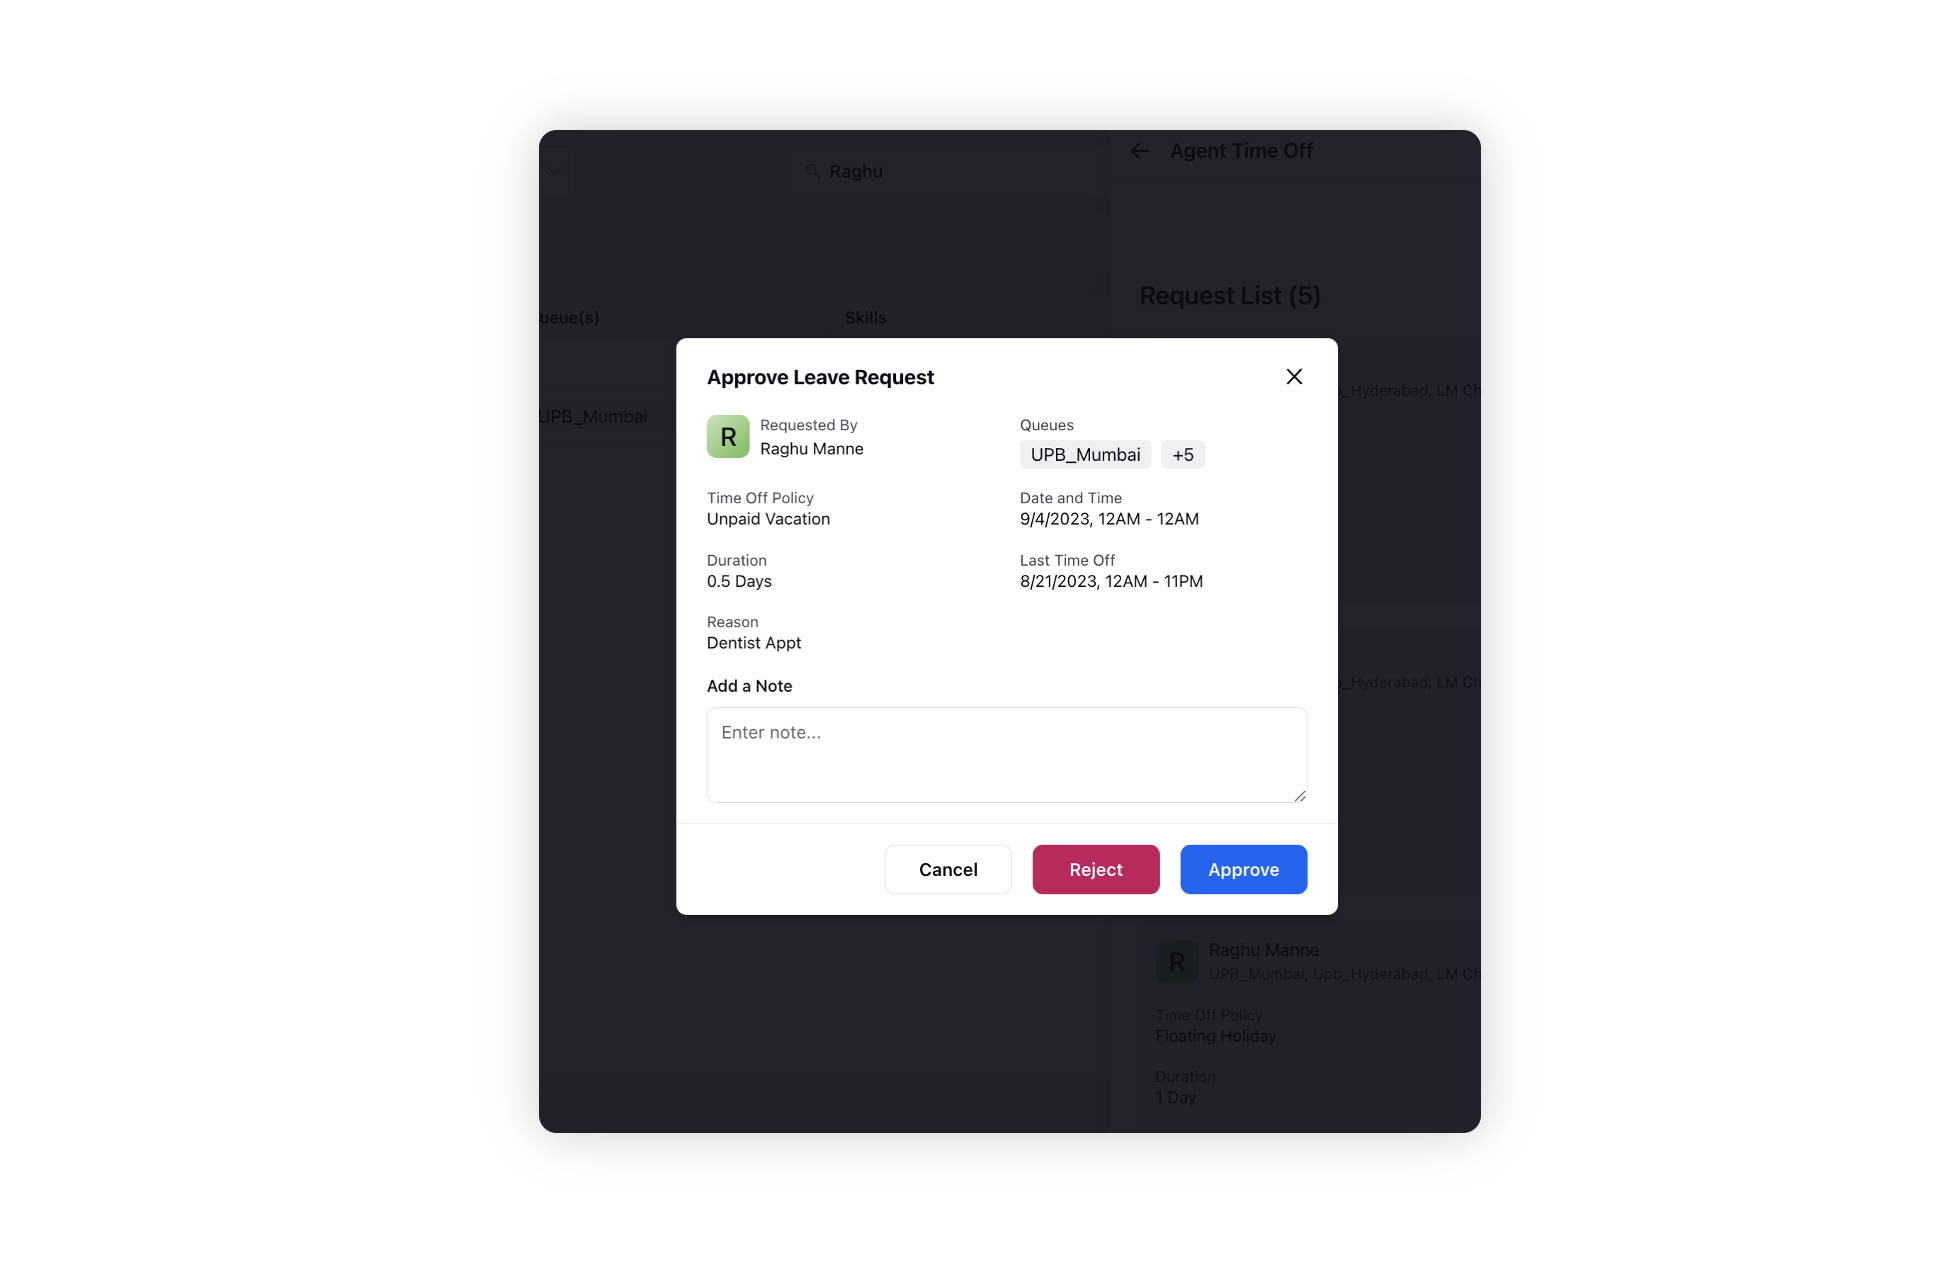
Click Show All to view all the the requests in the third pane where you can sort, search and filter the requests for a particular date range. Click Review to approve or reject it.
You can either Approve or Reject the request and also add a note. You will see the following details while approving the leave request.
Requested By - Shows the name of the agent who requested the time-off.
Queues - Shows all the queues that the agent is part of.
Time Off Policy - Shows the time off policy that the agent has selected.
Date and Time - Show the start and end date of the time-off request.
Duration - Shows the duration of the time-off request.
Last Time Off - Shows the details of the last time-off request.
Reason - Shows if the agent has mentioned any reason.
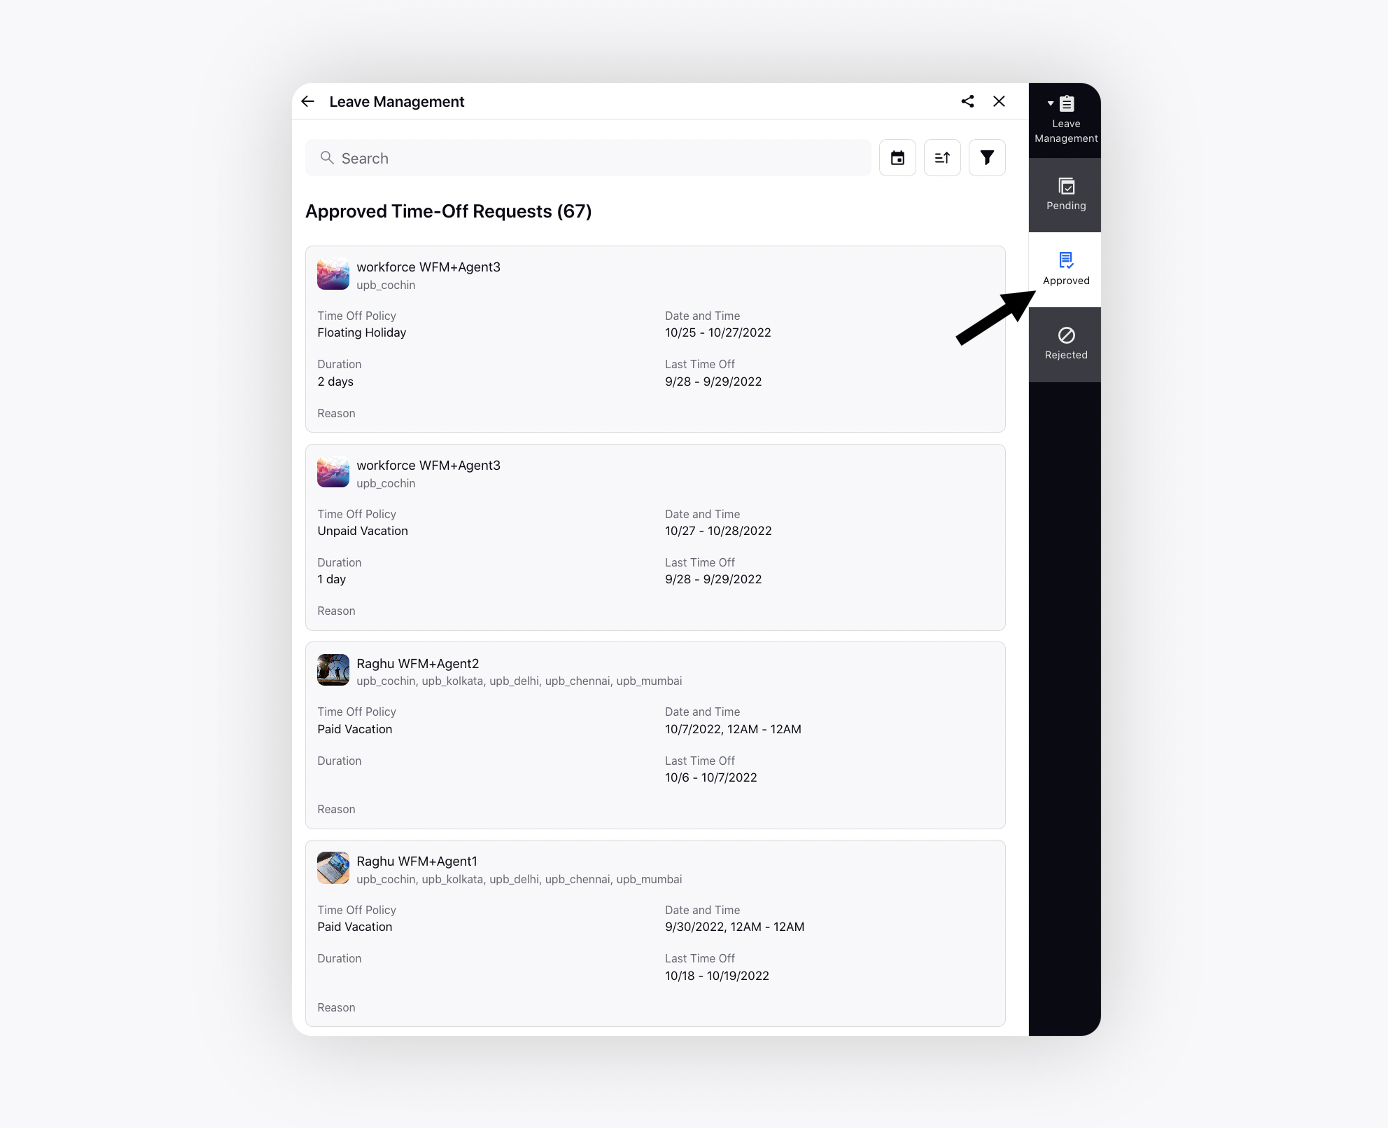
Click Approved/Rejected tabs from the third pane to view the respective requests. You can also filter the requests if required.
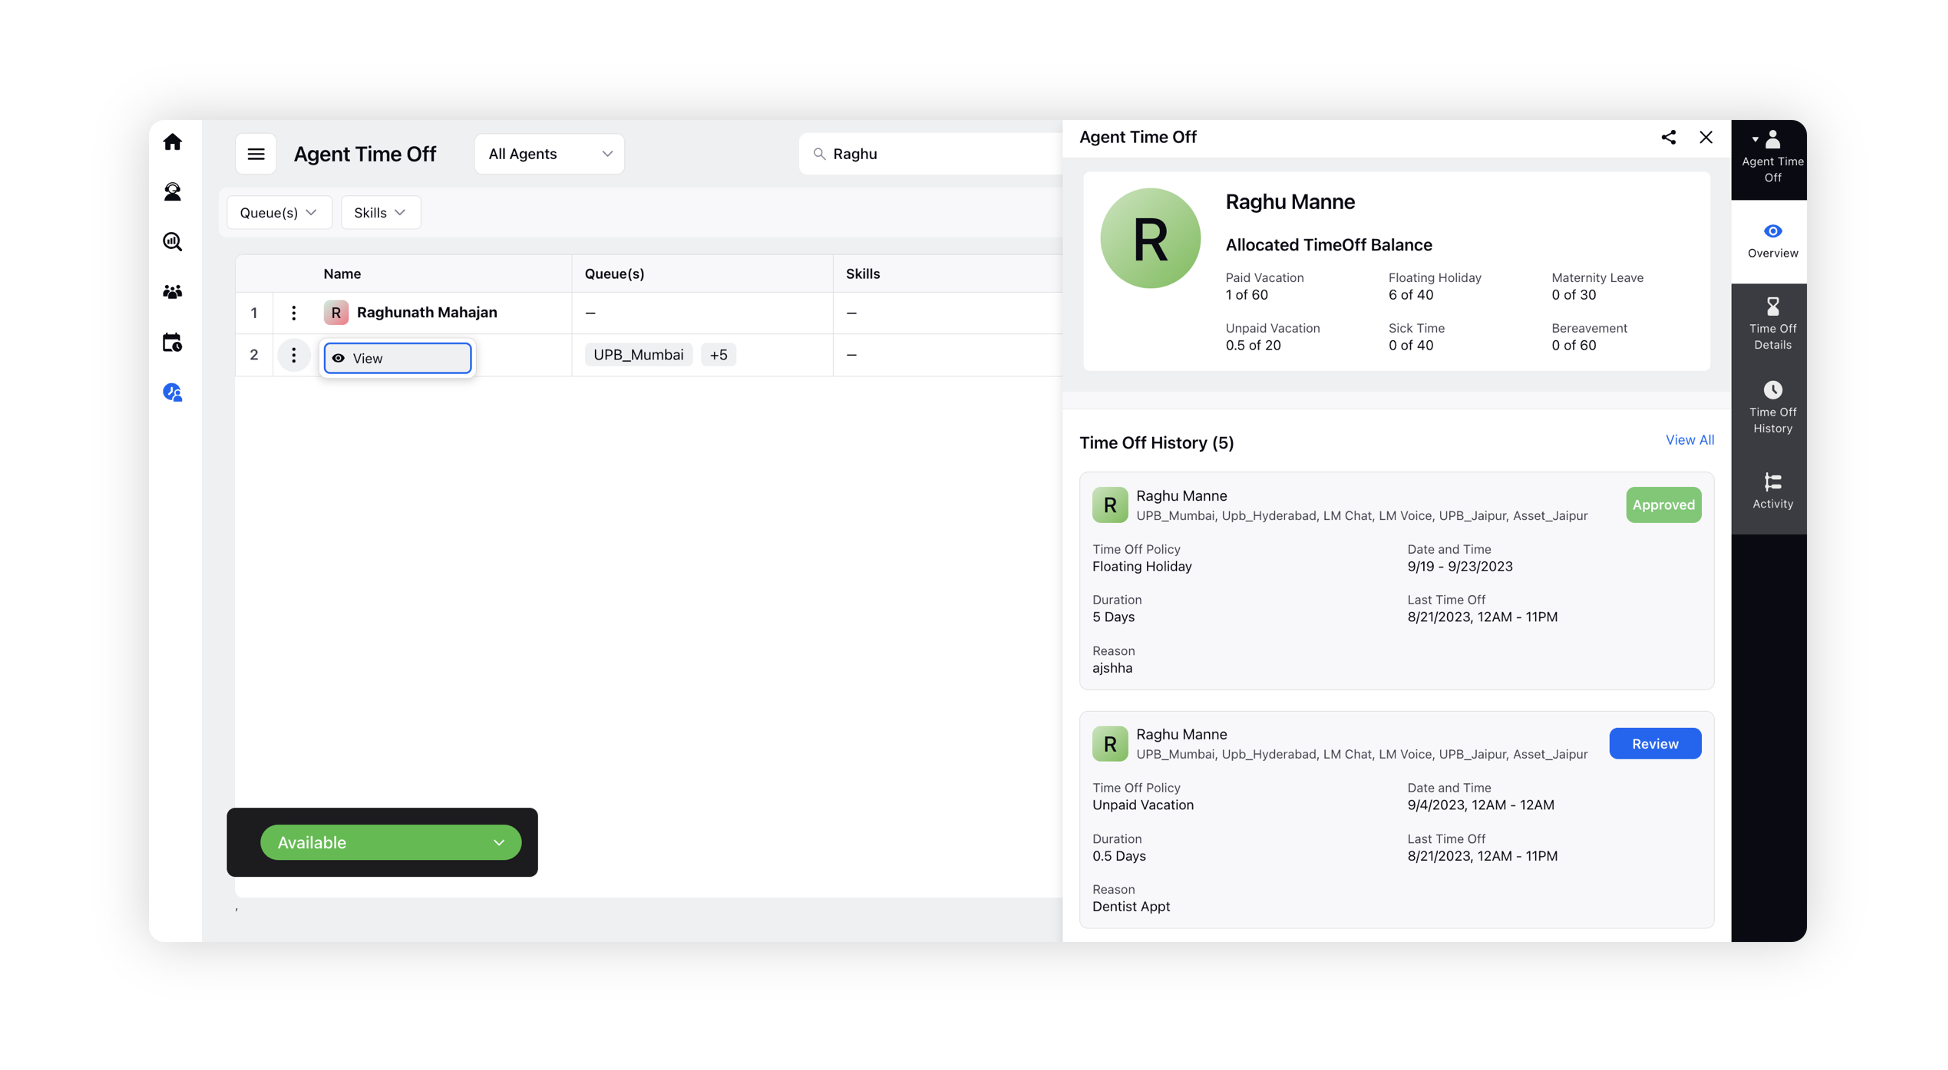
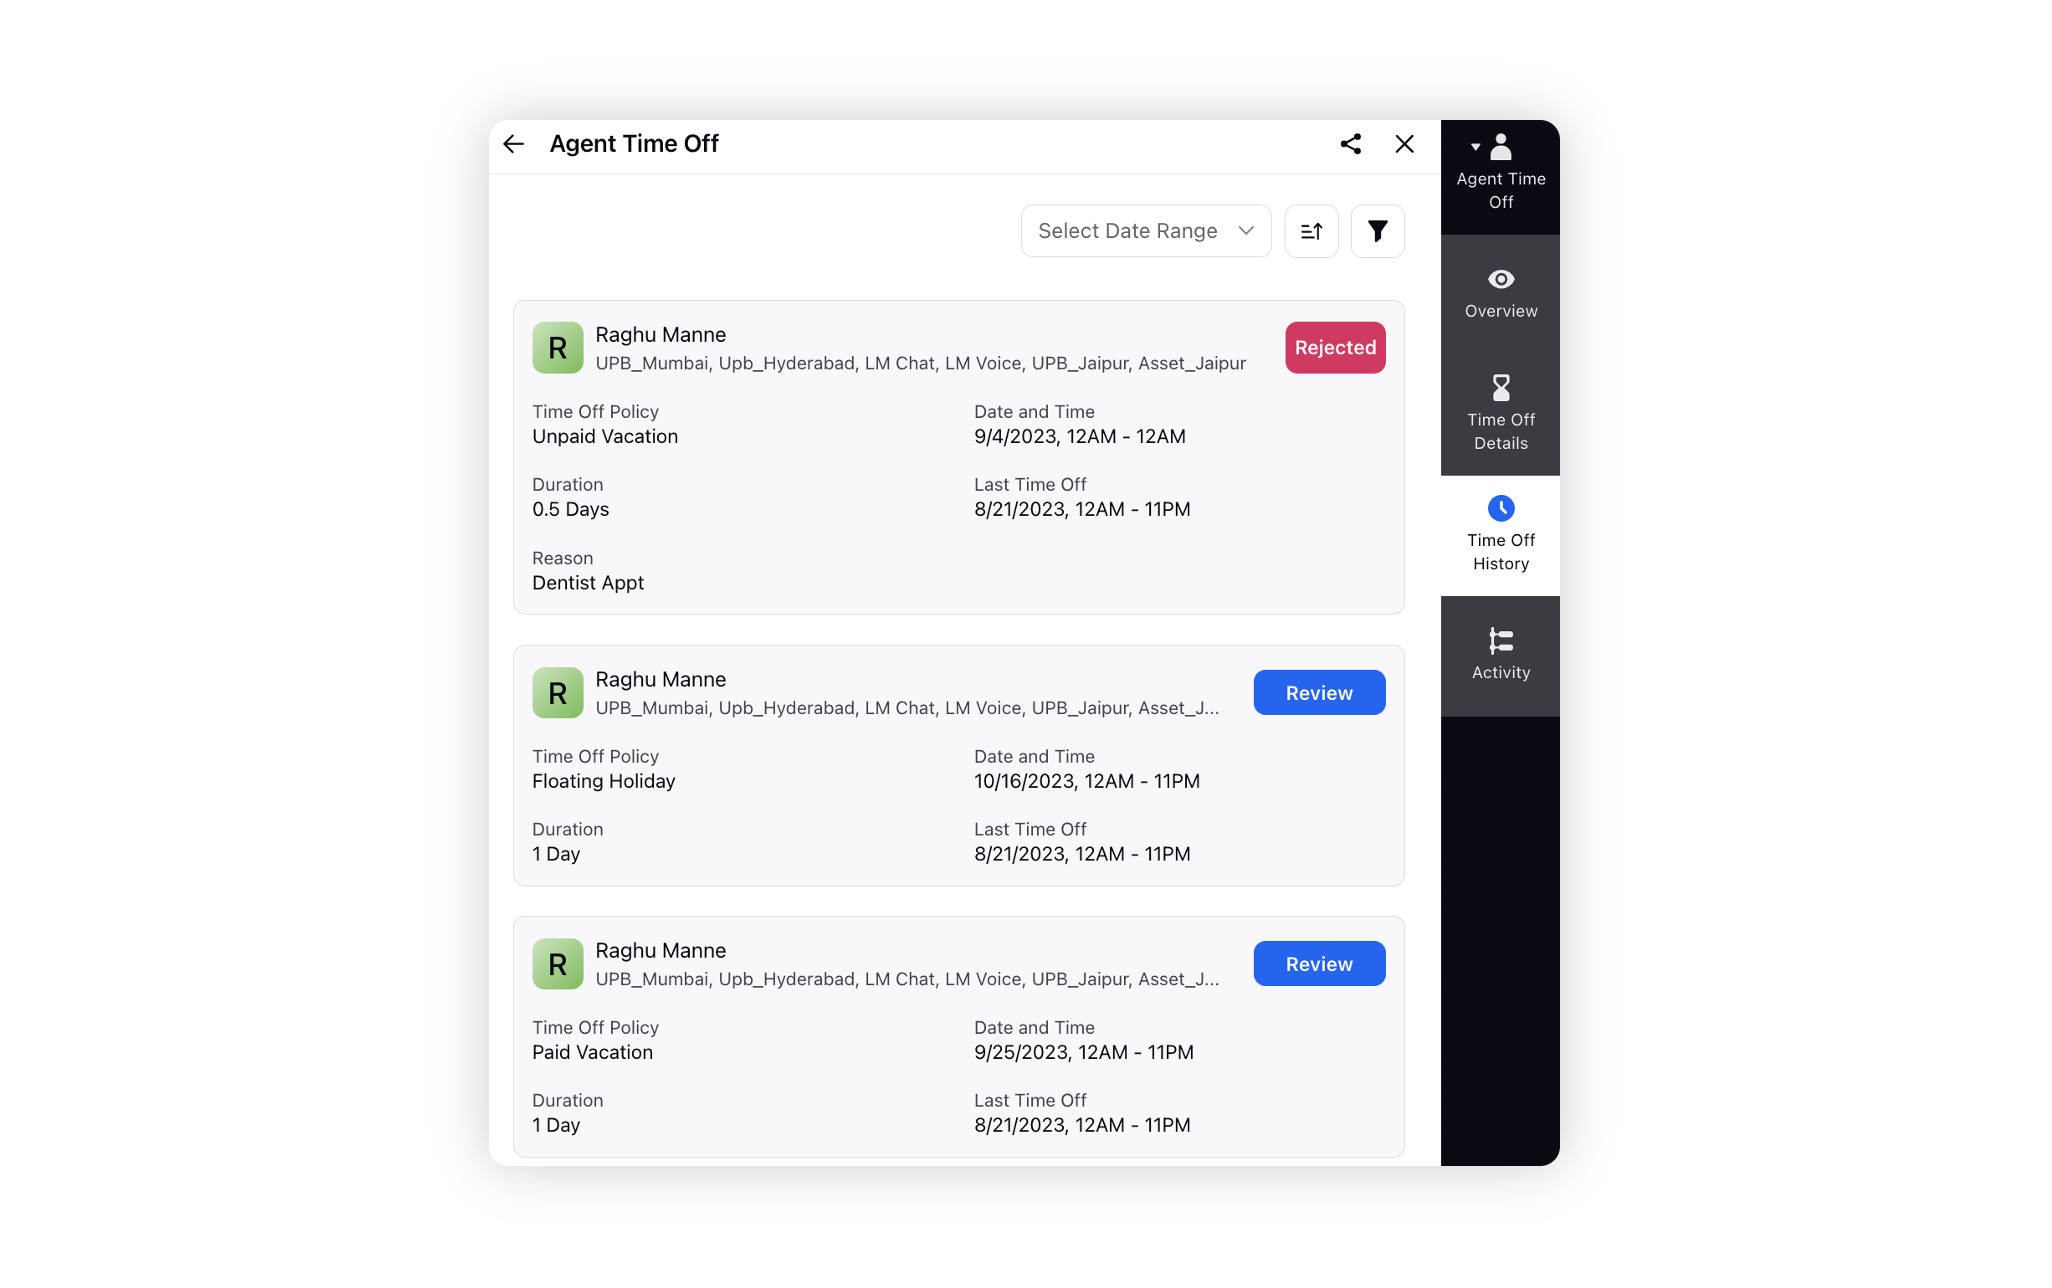
View Agent Time Off
Navigate to the Agent Time Off view by clicking on the top-left corner. In this view, you can access time-off requests and balance of all agents under your supervision.
![]() Note: To get this capability enabled, please reach out to our support team at tickets@sprinklr.com.
Note: To get this capability enabled, please reach out to our support team at tickets@sprinklr.com.
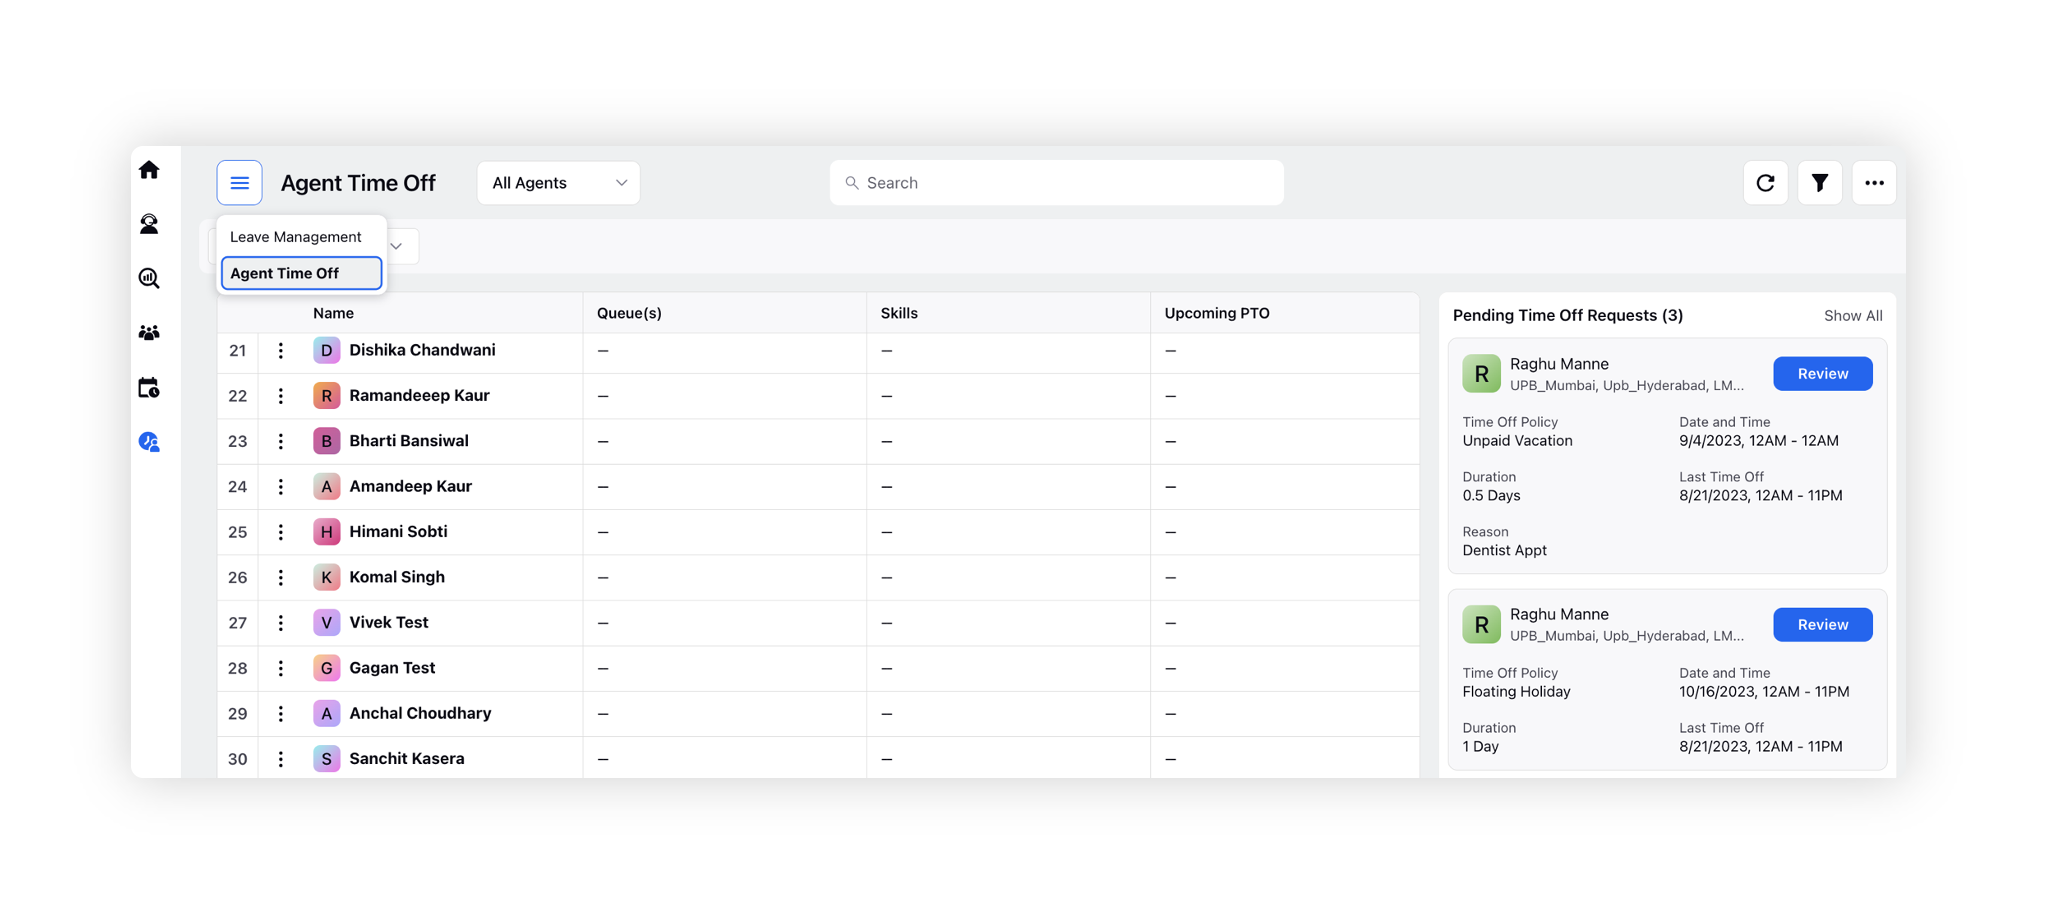
Hover over the Options icon next to the agent's name you're interested in and click View. This action opens the Agent Time Off third pane. In the Overview tab, you'll find the agent's time-off balance along with their time-off history. Click Review on the time off request to either approve or reject them.
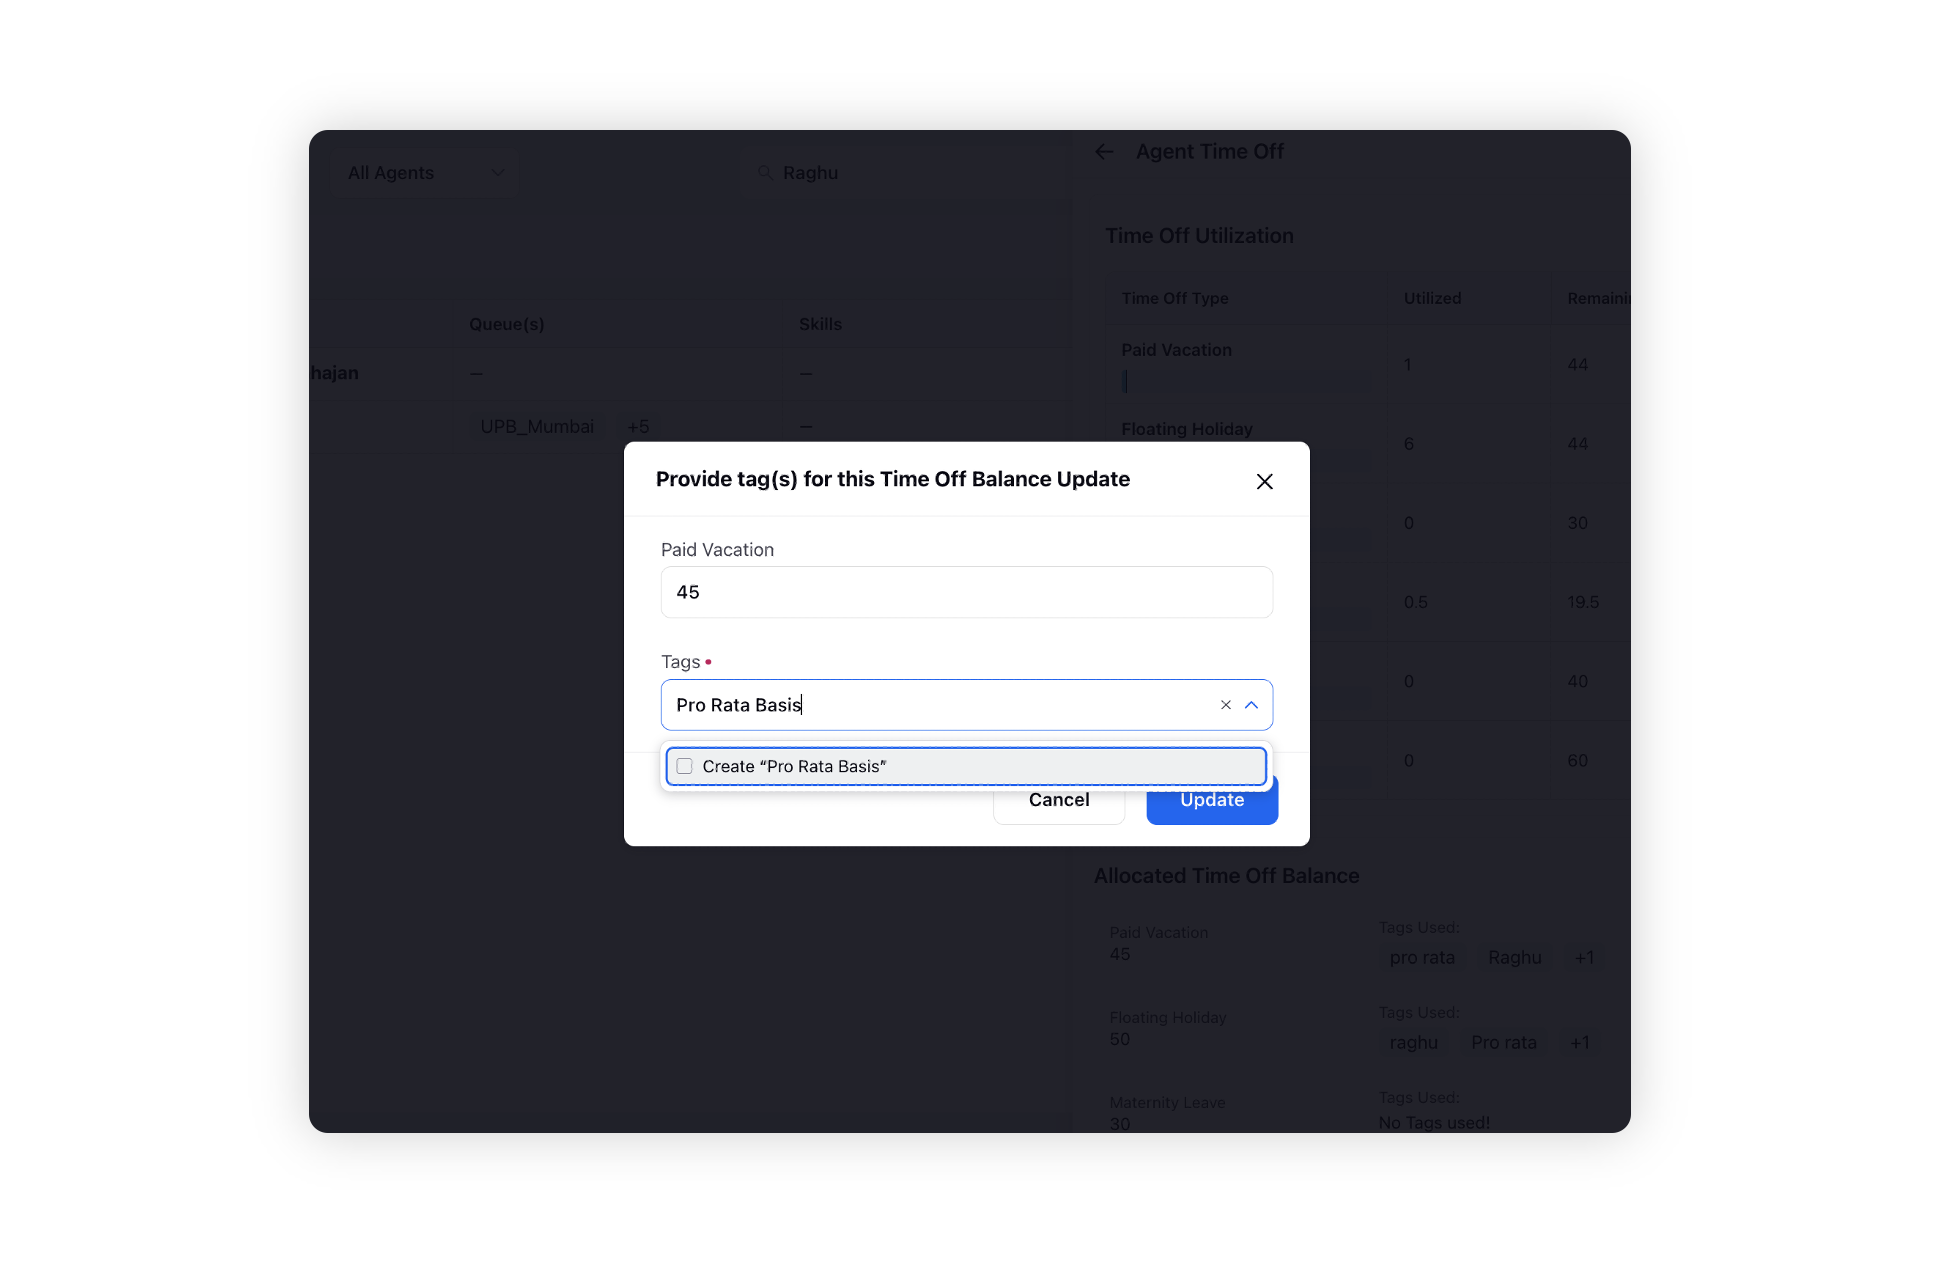
Go to the Time Off Details tab to examine time-off utilization and balance of agents. Hover over the desired leave type and choose the Edit option to adjust the leave count by increasing or decreasing it.
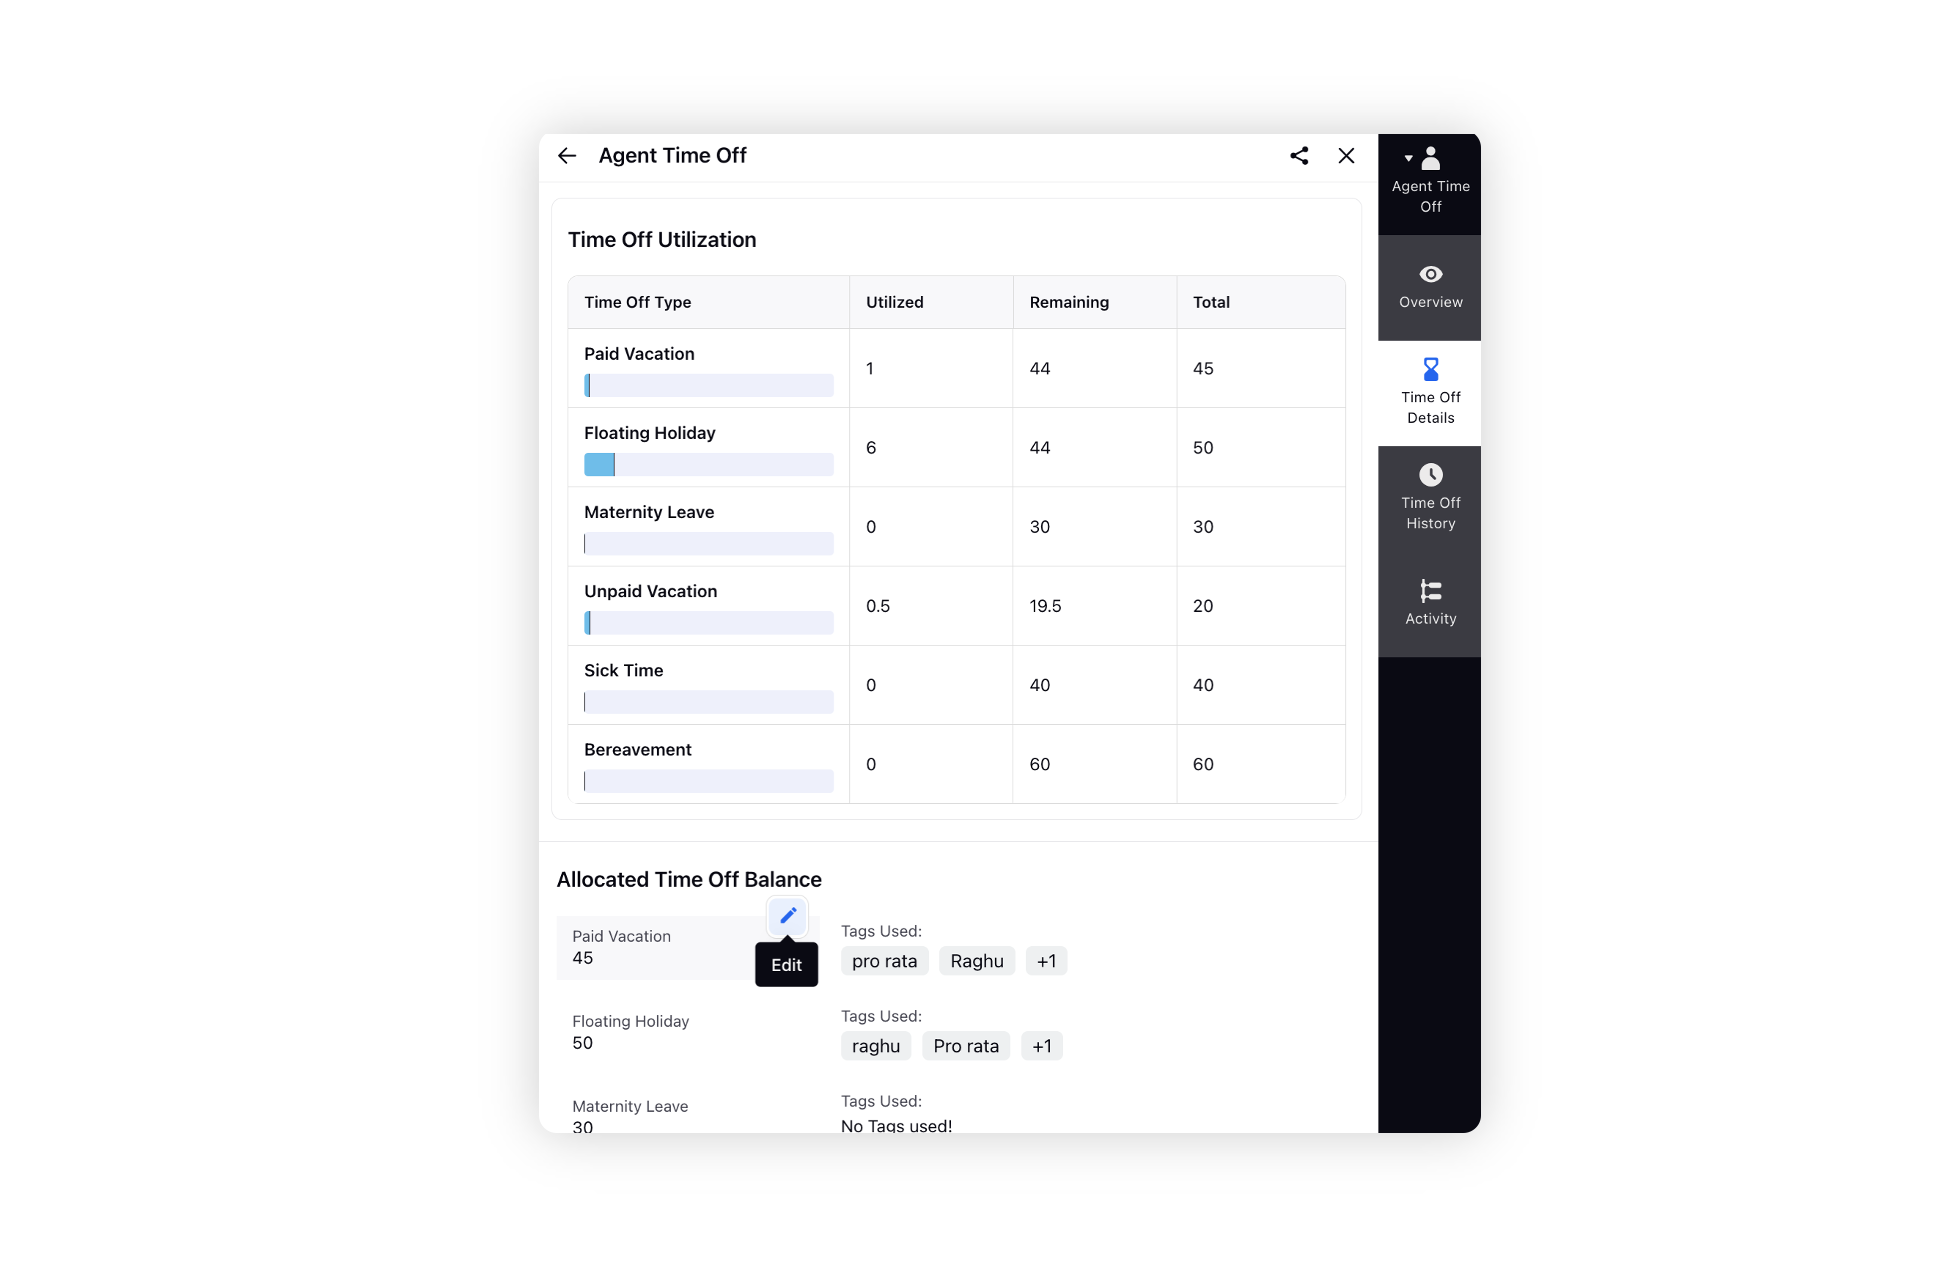
When making changes, ensure you include appropriate tags for reporting purposes.
The Time Off History tab allows you to observe all the time off requests that are pending, approved, or rejected. The Activity tab showcases a chronological record of all actions executed by the supervisor, including timestamps.
For Agents
Create Time Off Request
Click My Schedule from the left pane.
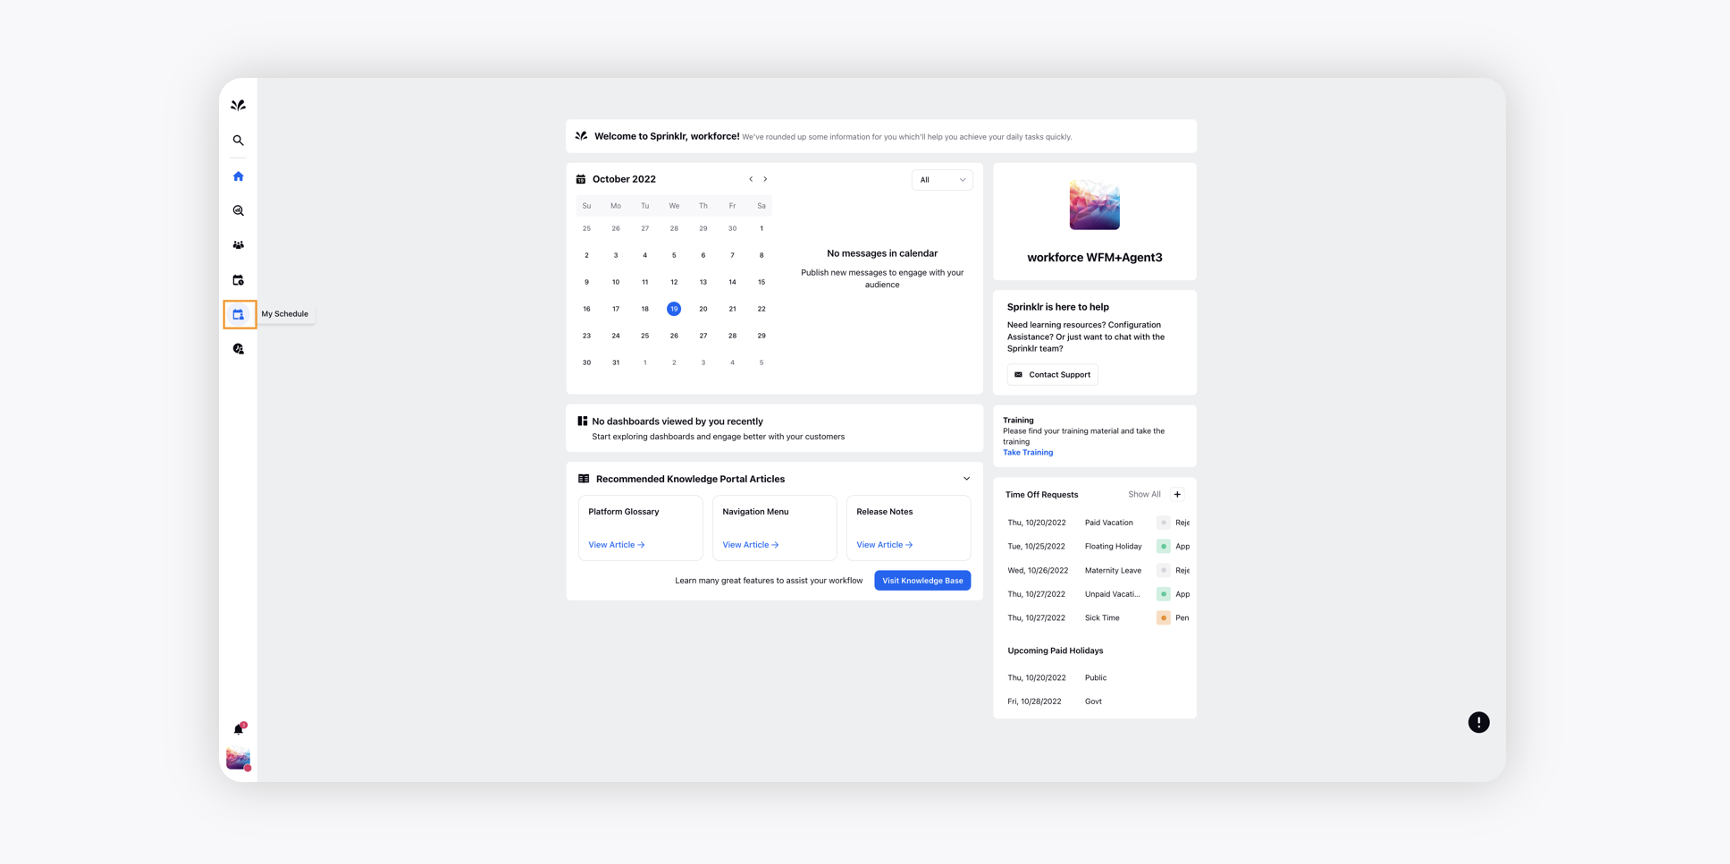
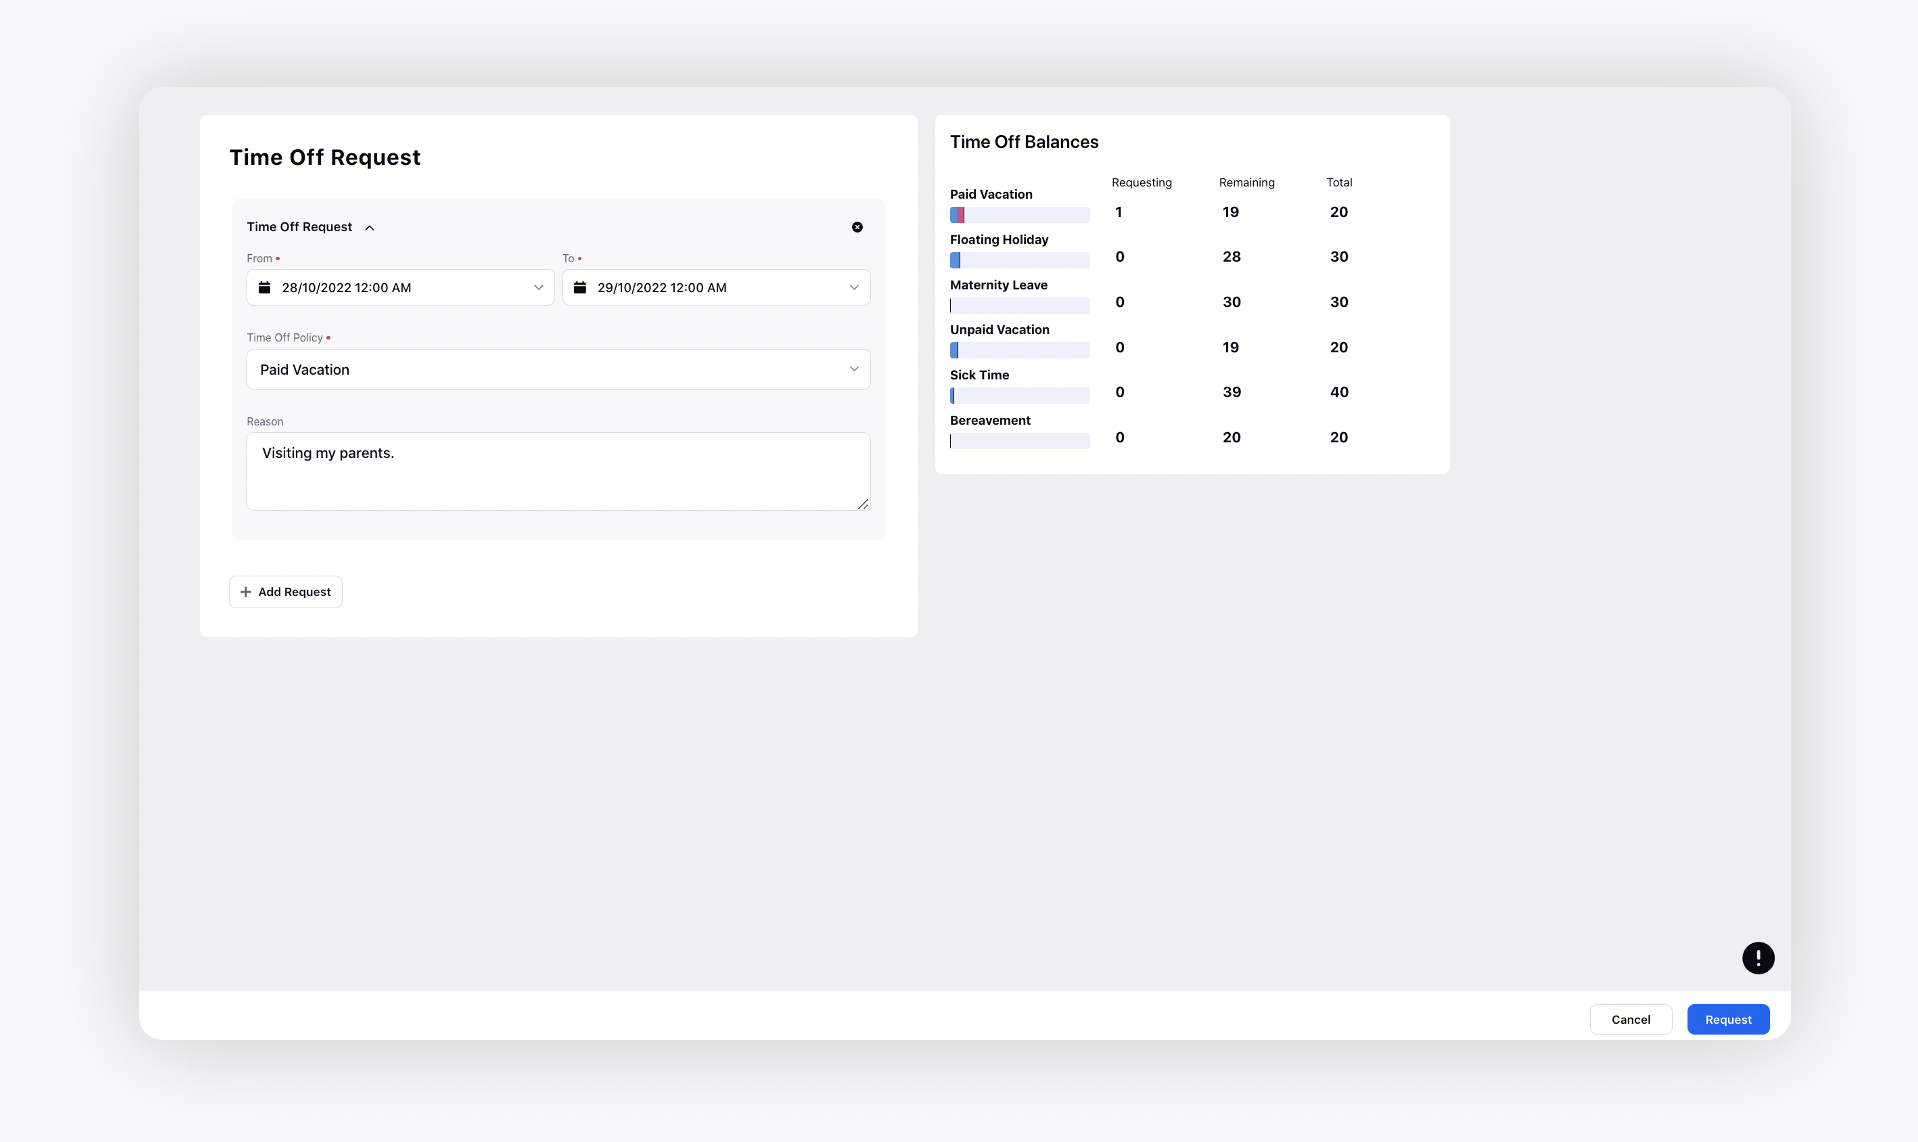
On the My Schedule page, agents can click the Plus icon + alongside the Time Off Requests widget on the right to open the Time Off Request form.
On the Time Off Request form, provide the following details:
From: The start date & time of the time off request.
To: The end date & time of the time off request.
Time Off Policy: Select the applicable time off policy.
Reason: Optionally specify the time off reason.
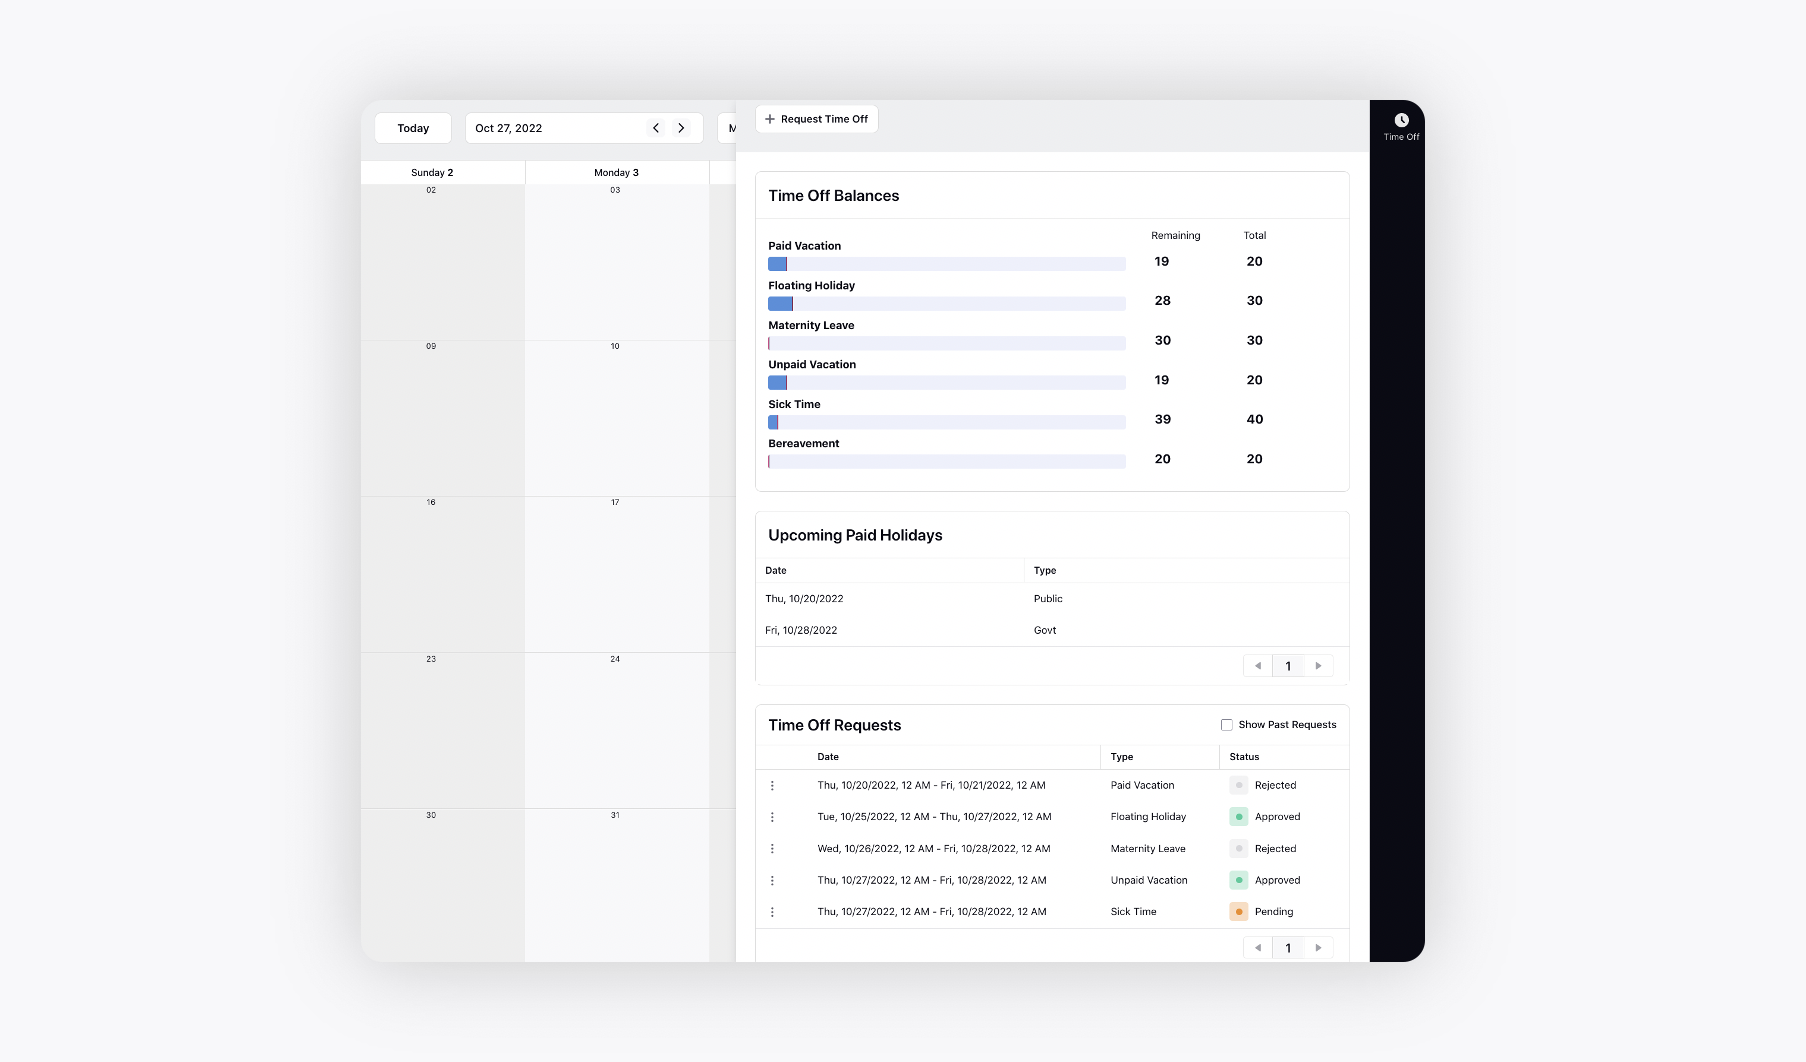
Agents can also view the Time Off Balances on the right side.
Request for multiple time off by clicking Add Request. Once the request details are filled, click Request at the bottom right.
Update Time Off Request
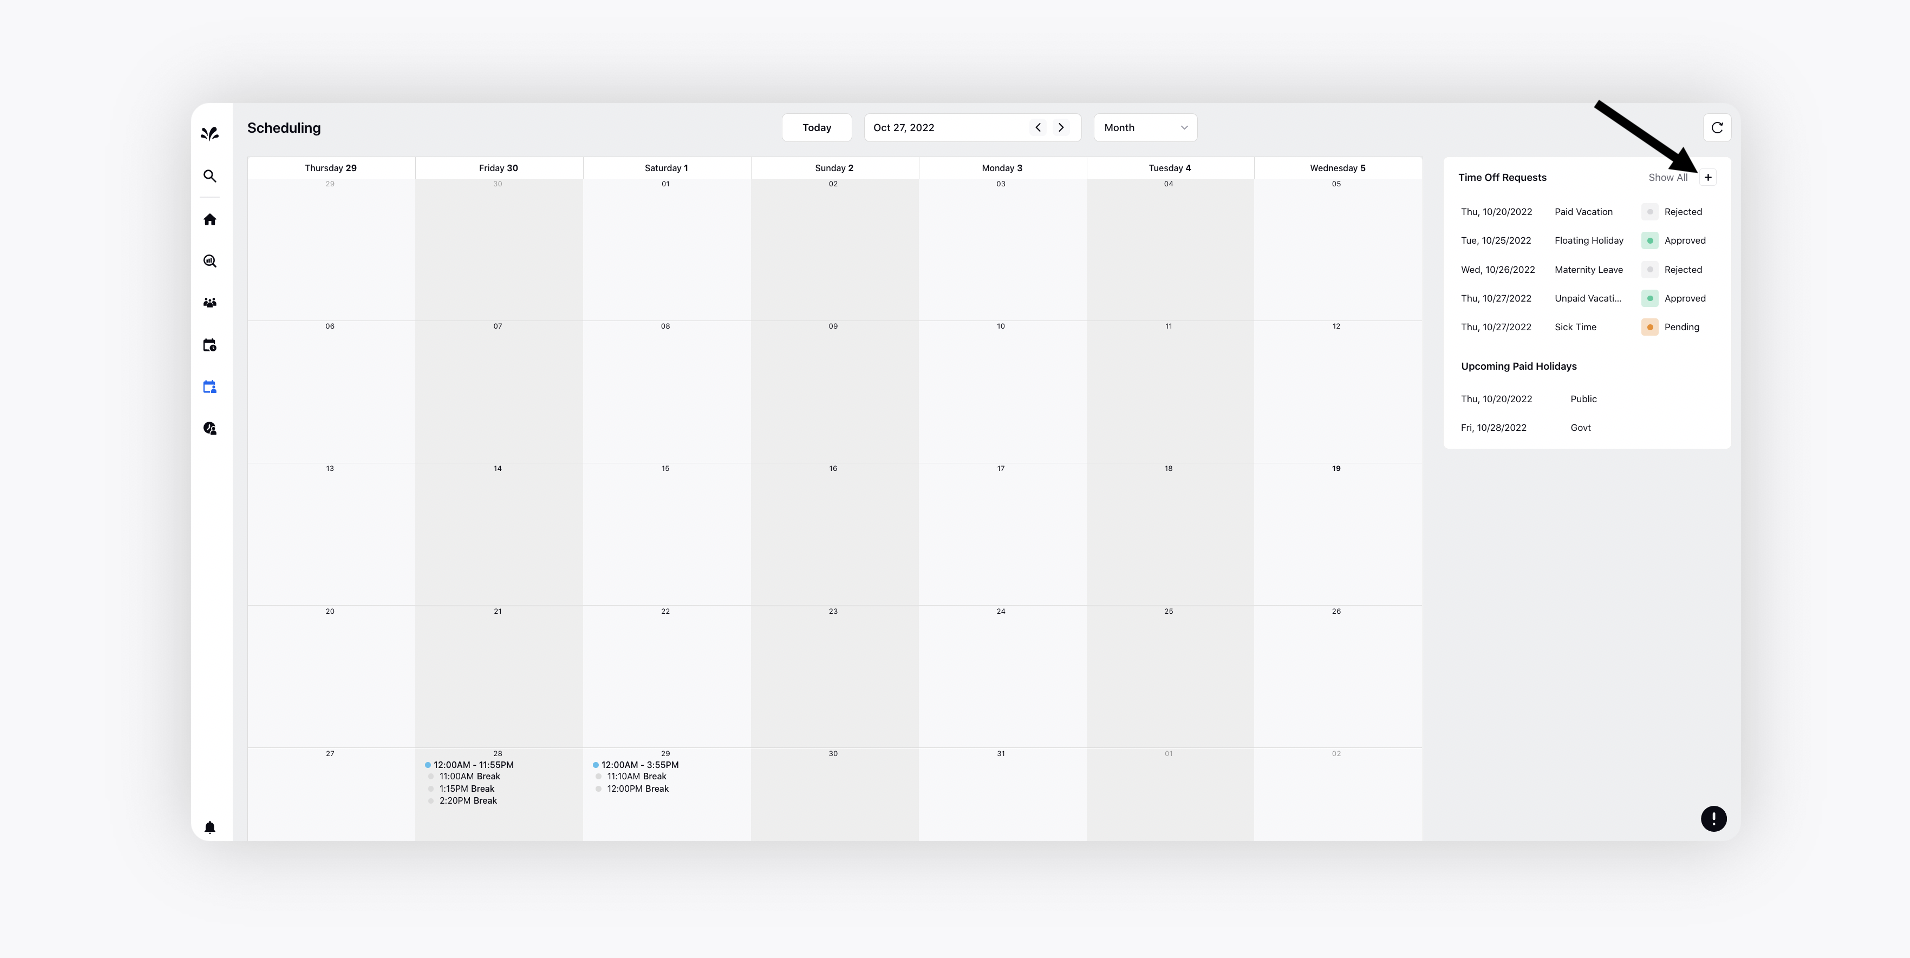
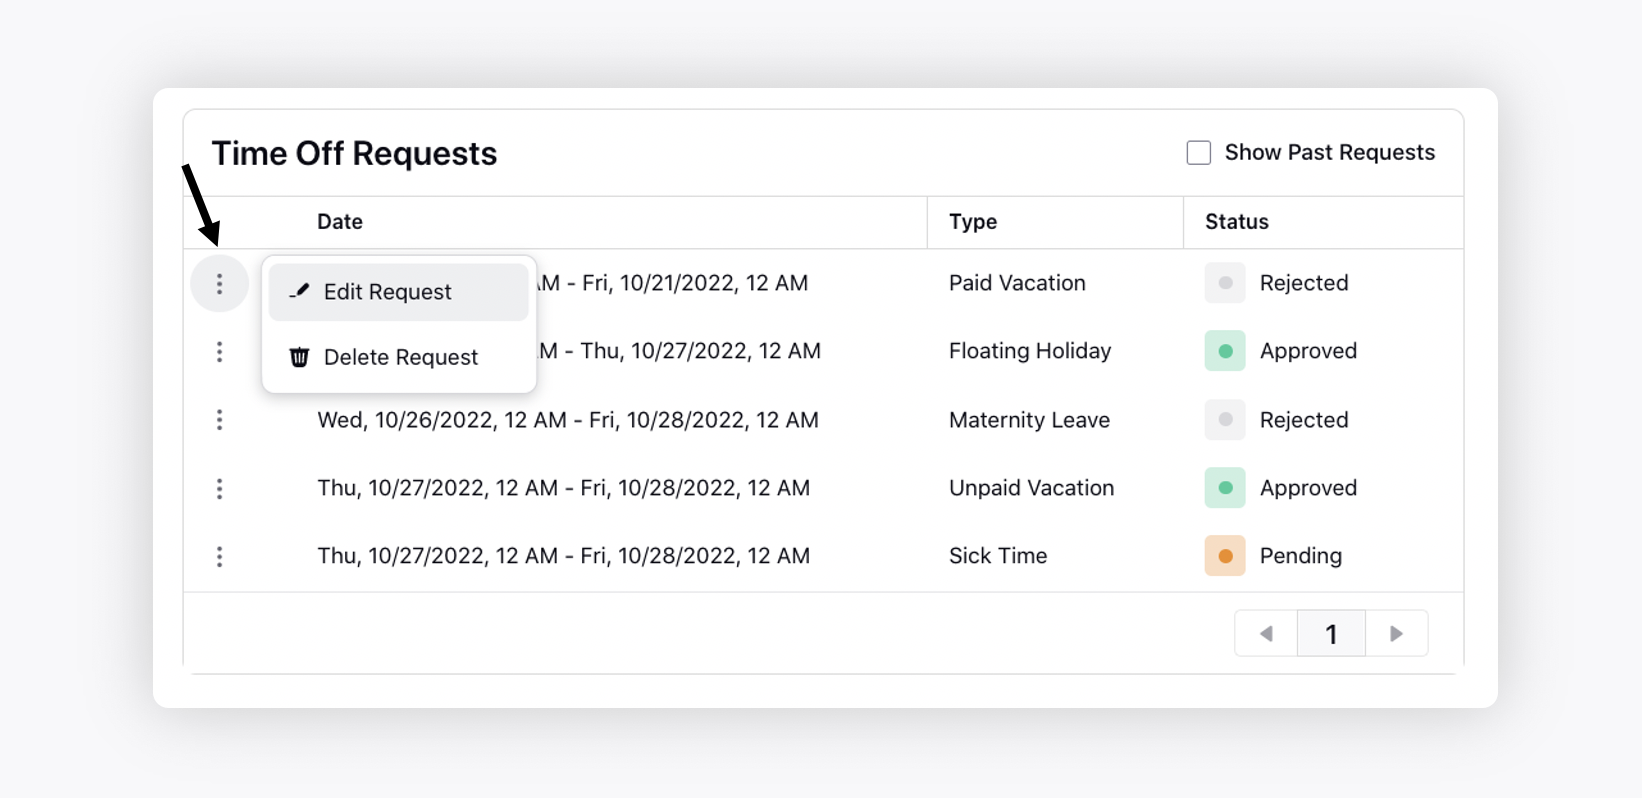
From My Schedule page, agents can click Show All alongside the Time Off Requests widget to open the Time Off third pane.
Navigate to the Time Off Requests section and hover over the Options icon to either edit or delete the request.
View Time Off Balance and Requests
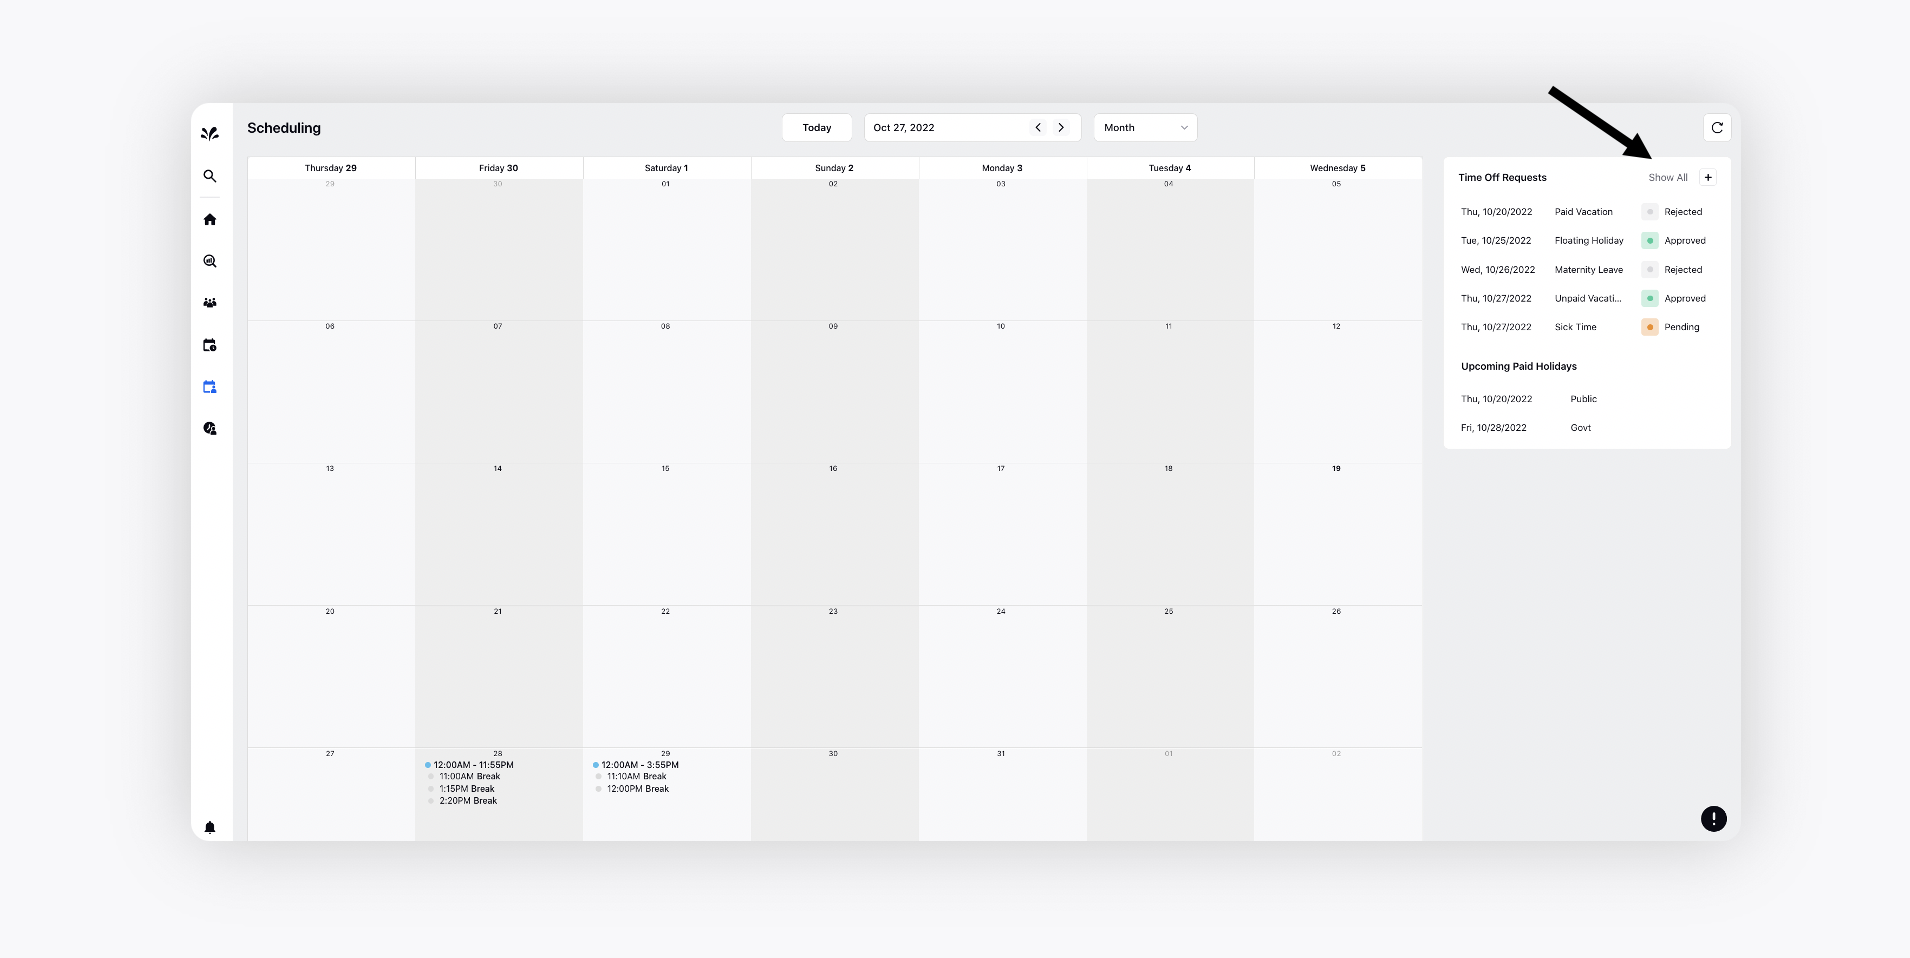
From the My Schedule page, agents can click Show All alongside the Time Off Requests widget to open the Time Off third pane.
Agent can view their Time Off Balances, Upcoming Paid Holidays, and Time Off Requests in the third pane.
Time Off Balances - Agents can know precisely what type of leaves & how many leaves have been allocated to them & how much are remaining.
Upcoming Paid Holidays - Agents can view the upcoming business holidays to plan their time offf better.
Time Off Requests - Agents can view all the time off requests that they have raised along with the statuses (Pending/Approved/Rejected). They can also edit or delete the time off requests from here and view their past requests by selecting the Show Past Requests checkbox.