Create Custom Rich Menus for LINE
Updated
A rich menu is a customizable menu that is displayed on the chat screen to help users interact with your LINE Official Account. It helps the user to understand the bot’s basic functions clearly.
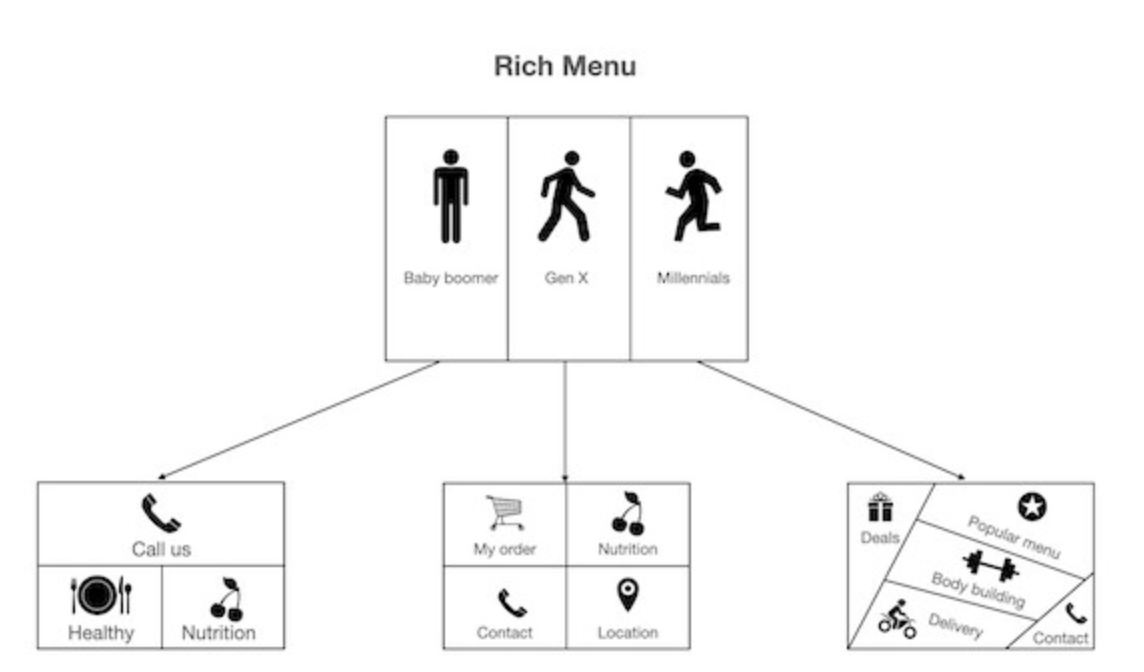
A rich menu is a set of rich menus that can be changed by the user’s action individually. There are several ways we adapt a dynamic rich menu to improve user experience. Imagine that we are building a restaurant bot. We have 3 groups of customers which are Baby Boomer, Gen X, and Millennials. They are generally different in terms of their perspective, needs, and limitations. To smoothly serve these 3 groups in one bot, we need to design our bot’s flow for each group. In this article, we are focusing on a rich menu. Therefore, we should have at least 3 rich menus. For example, Baby boomer should have a big font size and healthy food on a rich menu. Gen X should have informative functions. Millennials should have a stunning design and trendy food as shown in the image below.
There can be 3 parts to a rich menu:
Image: Only JPEG or PNG format. Recommended size 2,500 x 1,686 pixel
Tappable area: It is able to be assigned actions, for example, a postback event. You can create a tappable area of up to 20.
Chat bar: To open or close the rich menu.
Staps to Create a Custom Rich Menu
Click the New Tab icon
. Under the Sprinklr Social tab, click Owned Social Accounts within Listen.
In the Accounts (Settings) window, click All Channels in the top left corner of the section bar to filter the accounts by LINE.
Hover over the account's Options icon
 and select Custom Rich Menu.
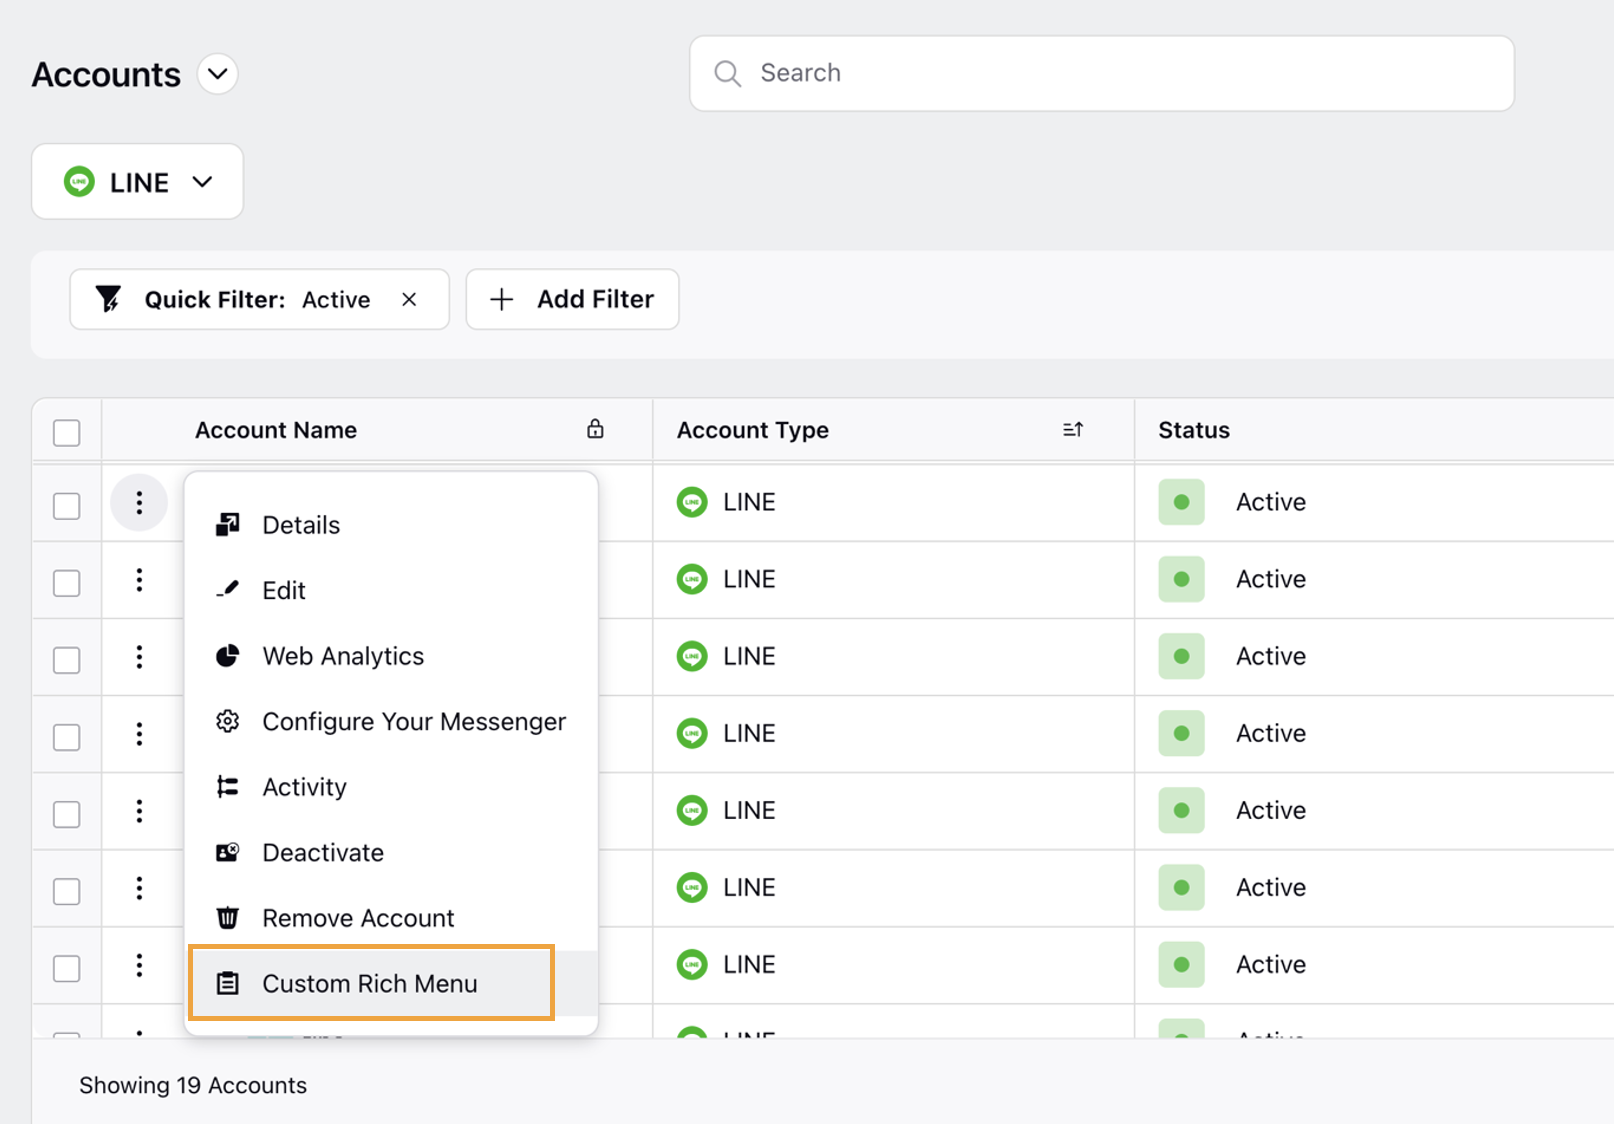
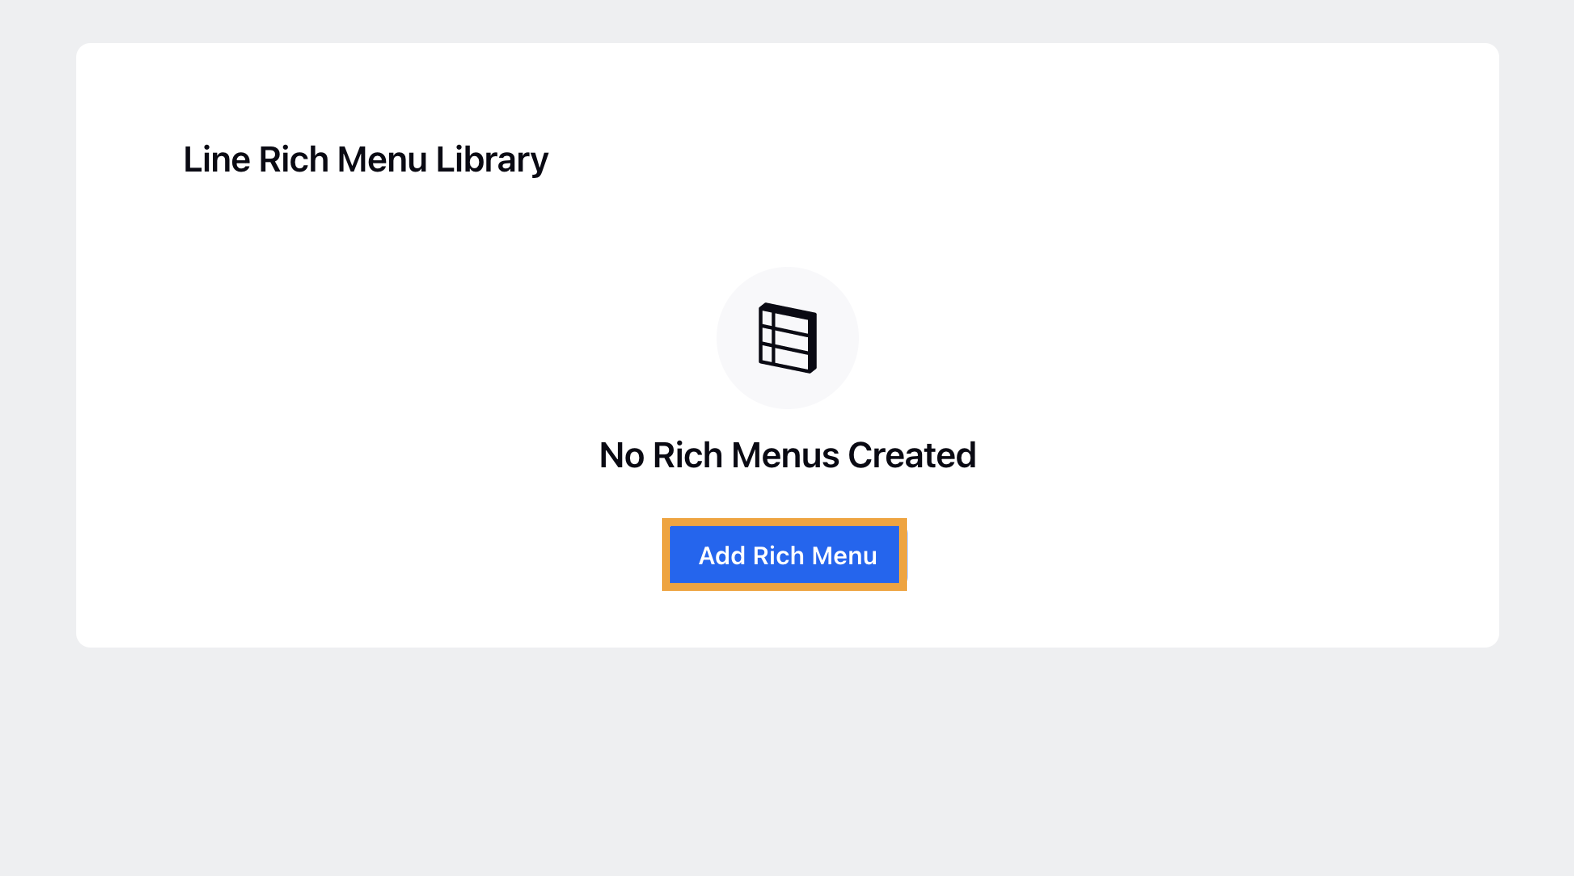
In the Line Rich Menu Library window, click Add Rich Menu in the top right corner or in the middle of the window (if no custom rich menus have been added).
In the LINE Rich Menu Configuration window, fill in the details as per your requirements. For more information, see LINE Rich Menu — Field Description.
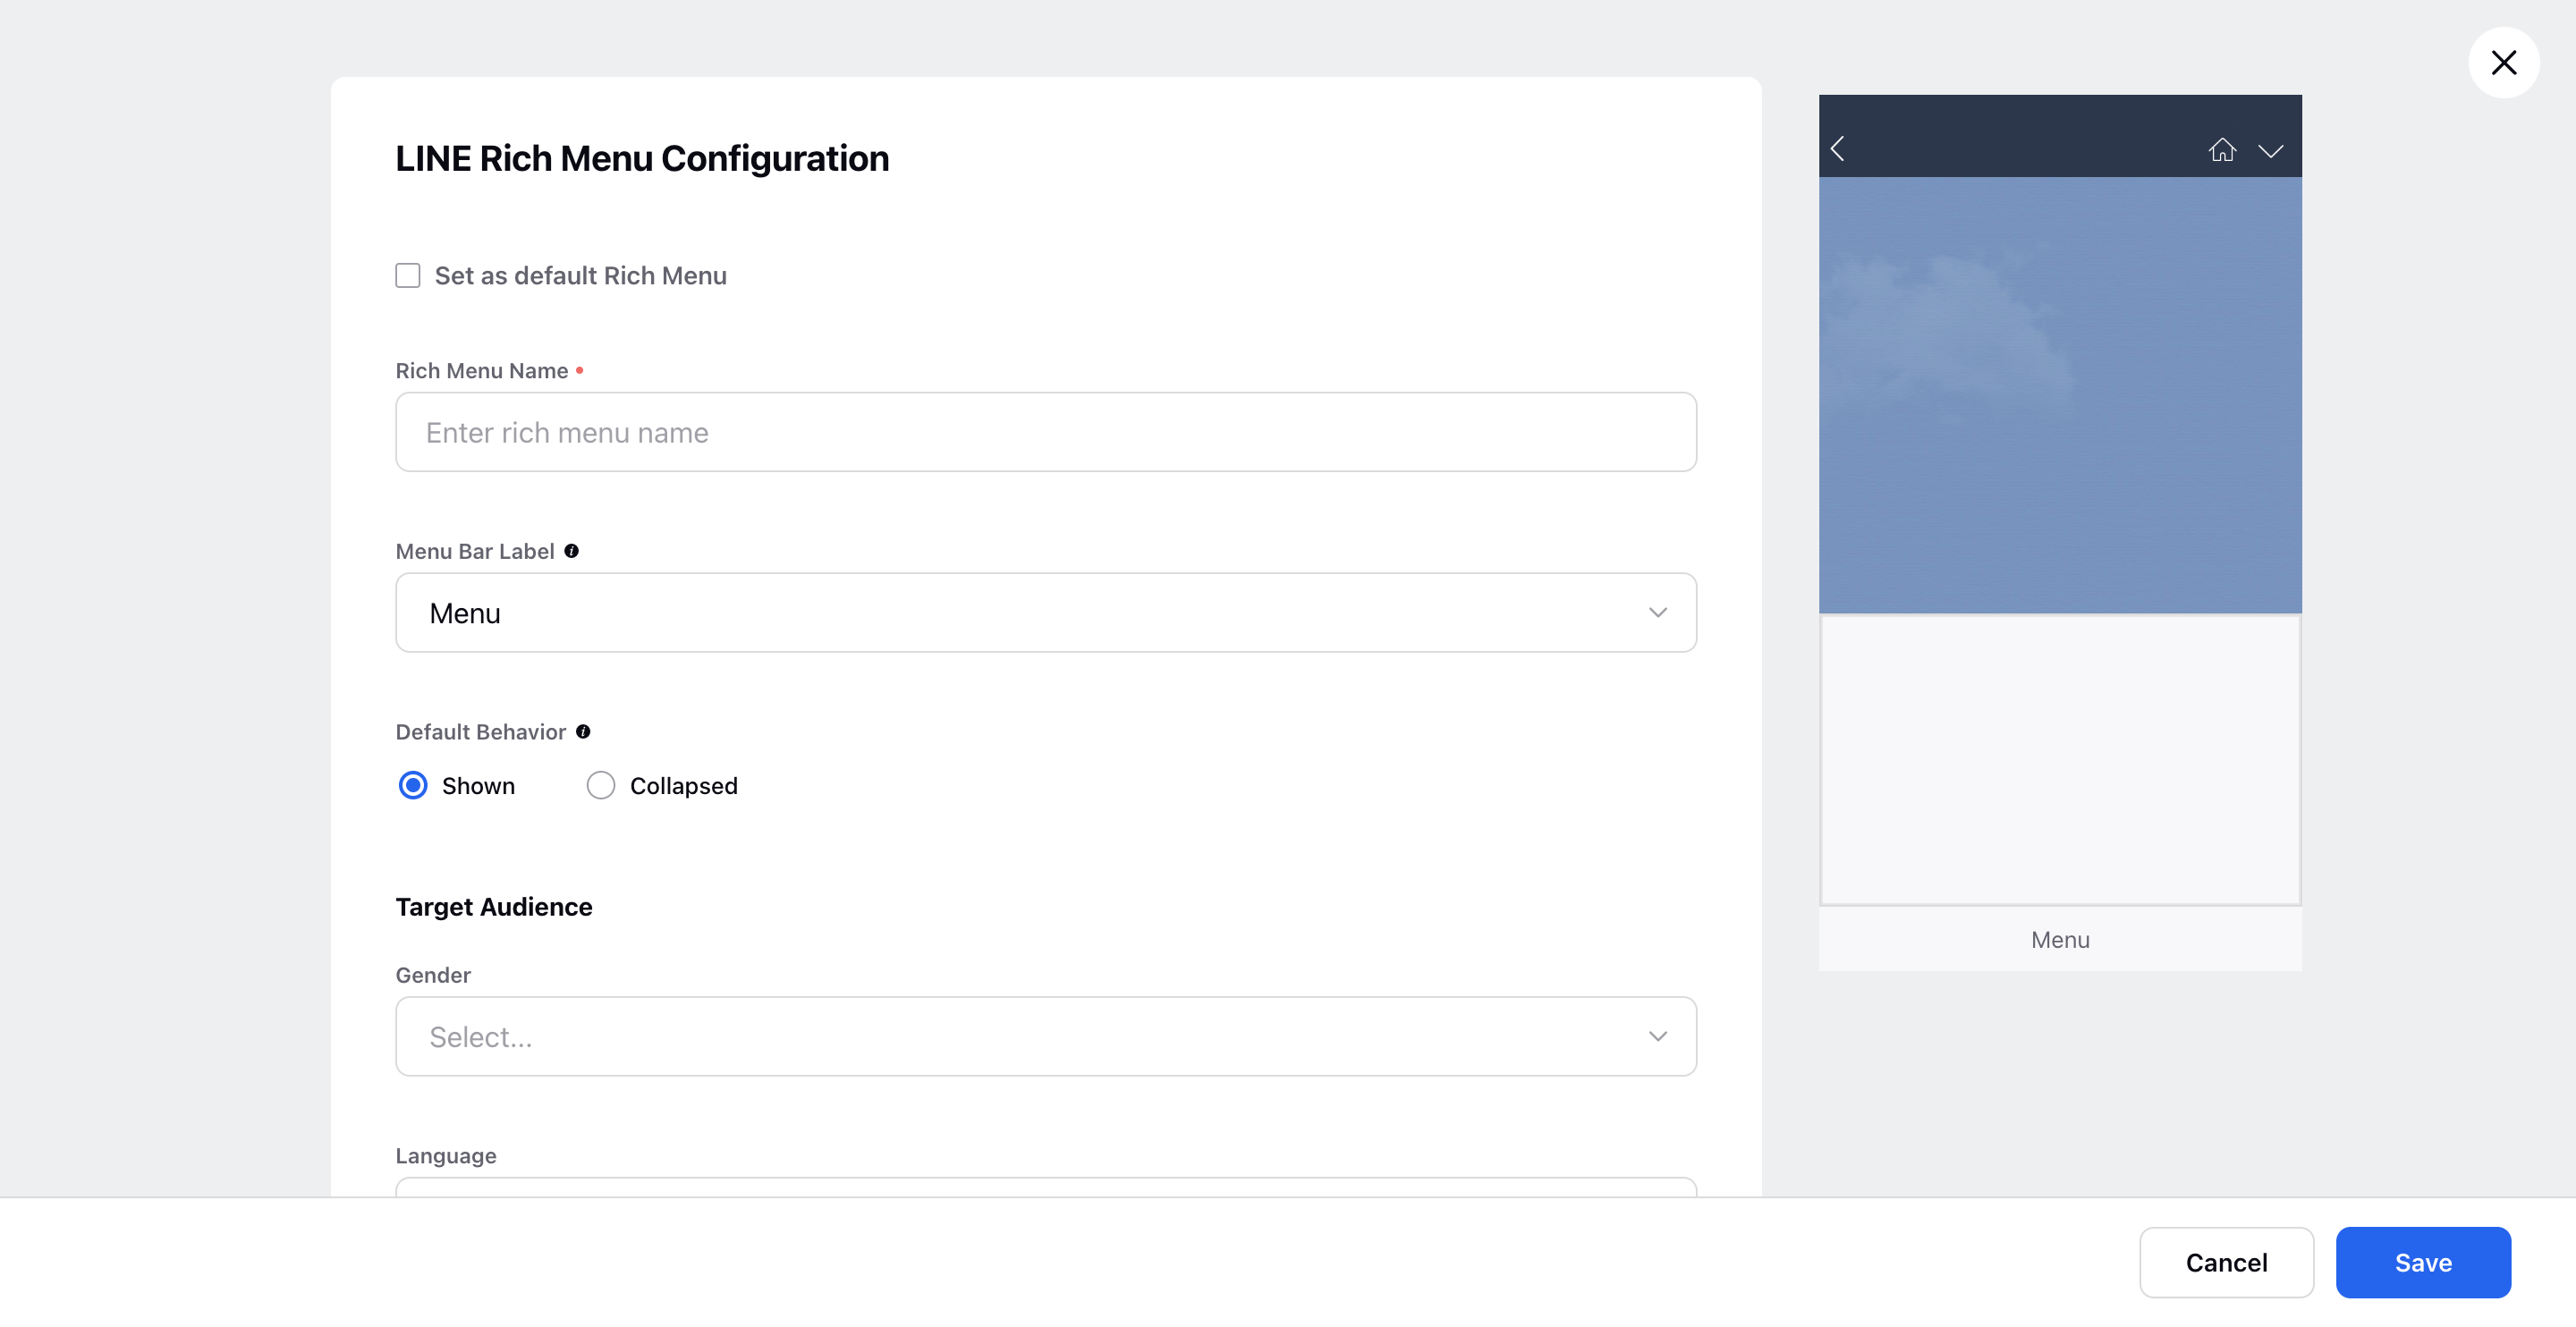
Click Save in the bottom right corner of the LINE Rich Menu Configuration window.
LINE Rich Menu — Field Description
Field | Description |
Set as a default Rich Menu | Check the box, if you wish to set the rich menu as default. NOTE: Don't check box the default Rich Menu option, incase you are targetting LINE Rich Menu on Gender, Language and Profile List. |
Rich Menu Name | Enter your desired name for the Rich Menu. |
Menu Bar Label | Select the desired Menu Bar label from the drop-down list. Note that this label is shown on the menu bar at the bottom of the chat screen. The following options are available in the drop-down list:
|
Default Behaviour | Choose whether or not to have your rich menu shown by default when the user opens the chat screen. The following options are available:
|
Target Audience | |
Gender | Select the Gender from the drop-down menu. |
Language | Select the desired language from the drop-down menu. |
Client Profile Lists | Select the desired client profile list from the drop-down menu. |
Partner Profile Lists | Select the desired partner profile list from the drop-down menu. |
Rich Menu Content | |
Menu Template | Select the desired Image template from the drop-down list. |
Design Template | You can download the design templates to help you match your image to your preferred template. |
Upload Image | Using the Media Uploader window, you can either upload an image from your computer or add an image using the Asset Manager. |
Action Type | Select an action from the drop-down list. The following action types are available:
|