Auto boosting recommendations for Organic Posts in the Editorial Calendar
Updated
Get automatic recommendations on what posts should be boosted to gain maximum campaign profit.
In the Sprinklr Editorial Calendar, you can view events, campaigns, outbound messages, and tasks in a centralized view. You can also change how you want to sort data in this calendar by selecting from various Editorial Calendar Views. The Auto boost recommendations feature helps you identify the organic posts in the editorial calendar that are the most suitable for boosting and will increase ROI.
Persona and use cases
Persona | Problem | Solution |
Ads Media Practitioner and Ads Media Planner |
|
|

How it works
Rules for evaluating posts and creating boosting recommendations
The Auto boosting feature works by first identifying posts as "recommended" based on a certain set of rules and then Auto boosting posts qualifying these criteria. These rules are:
The post should be organic.
The post is not already boosted on native or on Sprinklr.
The live duration of the post is less than or equal to 7 days
The post should fall under the 25 percentile when checked using the engagement rate metric (the definition of engagement rate metric definition will vary by channel and post type)
The post should be compared against posts published on the same page in the last 30 days (if the number of posts in the last 30 days is less than 10, then increase the number of days to 60)
The post should not lie in the bottom 10% when organic reach is selected as the metric and the time period is 60 days. This is to avoid recommending posts that might have high engagement artificially but no reach.
The posts that have an upward trend of engagement rate.
If any post is recommended by the algorithm as a top performing post, then it would take four or more days of negative trend data to mark the post as non-recommended
The table for channel-wise engagement rate definition is given below.
Channel | Media Type | Metric | Metric Definition |
Image | Custom Metric | (Facebook Post Stories Like + Facebook Post Story Angry Reactions+ Facebook Post Story Wow Reactions + Facebook Post Story Haha Reactions + Facebook Post Story Love Reactions + Facebook Post Story Sad Reactions + Facebook Post Stories Comment + Facebook Post Stories Share) / Facebook Post Reach Filter: Is Sponsored - False | |
Video | Custom Metric | Facebook Video Organic Views / Facebook Post Organic Reach Filter: Is Sponsored - False | |
Carousel | Custom Metric | (Facebook Post Stories Like + Facebook Post Story Angry Reactions Facebook Post Story Wow Reactions + Facebook Post Story Haha Reactions + Facebook Post Story Love Reactions + Facebook Post Story Sad Reactions + Facebook Post Stories Comment + Facebook Post Stories Share) / Facebook Post Reach Filter: Is Sponsored - False | |
Link | Custom Metric | (Facebook Post Stories Like + Facebook Post Story Angry Reactions Facebook Post Story Wow Reactions + Facebook Post Story Haha Reactions + Facebook Post Story Love Reactions + Facebook Post Story Sad Reactions + Facebook Post Stories Comment + Facebook Post Stories Share) / Facebook Post Reach Filter: Is Sponsored - False | |
Image | Custom Metric | (LinkedIn Company Post Likes + LinkedIn Company Post Comments + LinkedIn Company Post Shares)/ LinkedIn Company Post Impressions Filter: Is Sponsored - False | |
Carousel | Custom Metric | (LinkedIn Company Post Likes + LinkedIn Company Post Comments + LinkedIn Company Post Shares)/ LinkedIn Company Post Impressions Filter: Is Sponsored - False | |
Video | Custom Metric | LinkedIn Video Views/LinkedIn Company Post Impressions Filter: Is Sponsored - False | |
Link | Custom Metric | (LinkedIn Company Post Likes + LinkedIn Company Post Comments + LinkedIn Company Post Shares)/ LinkedIn Company Post Impressions Filter: Is Sponsored - False | |
Text | Custom Metric | (LinkedIn Company Post Likes + LinkedIn Company Post Comments + LinkedIn Company Post Shares)/ LinkedIn Company Post Impressions Filter: Is Sponsored - False | |
Photo | Custom Metric | (Instagram Post Likes + Instagram Post Comments + Instagram Post Saves) / Instagram Business Post Reach Filter: Is Sponsored - False | |
Video | Custom Metric | Instagram Video Views /Instagram Business Post Reach Filter: Is Sponsored - False | |
Photo | Custom Metric | (Twitter Post Likes + Twitter Post Replies + Twitter Post Retweets ) / Twitter Post Estimated Reach Filter: Is Sponsored - False | |
Text/Status | Custom Metric | (Twitter Post Likes + Twitter Post Replies + Twitter Post Retweets ) / Twitter Post Estimated Reach Filter: Is Sponsored - False | |
Video | Custom Metric | Twitter Video Views/ Twitter Post Estimated Reach Filter: Is Sponsored - False | |
Link | Custom Metric | (Twitter Post Likes + Twitter Post Replies + Twitter Post Retweets ) / Twitter Post Estimated Reach Filter: Is Sponsored - False | |
Photo | Custom Metric | (Pinterest Likes + Pinterest Comments + Pinterest Saves) / Pinterest Pin Last 90 Days Impressions Filter: Is Sponsored - False | |
Link | Custom Metric | (Pinterest Likes + Pinterest Comments + Pinterest Saves) / Pinterest Pin Last 90 Days Impressions Filter: Is Sponsored - False | |
Craousel | Custom Metric | (Pinterest Likes + Pinterest Comments + Pinterest Saves) / Pinterest Pin Last 90 Days Impressions Filter: Is Sponsored - False | |
Video | Custom Metric | (Pinterest Pin Last 90 Days Video Views)/ Pinterest Pin last 90 Days Impressions Filter: Is Sponsored - False |
To identify recommended posts and boost posts in the Editorial Calendar
Click the New Tab icon. Under the Sprinklr Social tab, click Editorial Calendar within Publish.
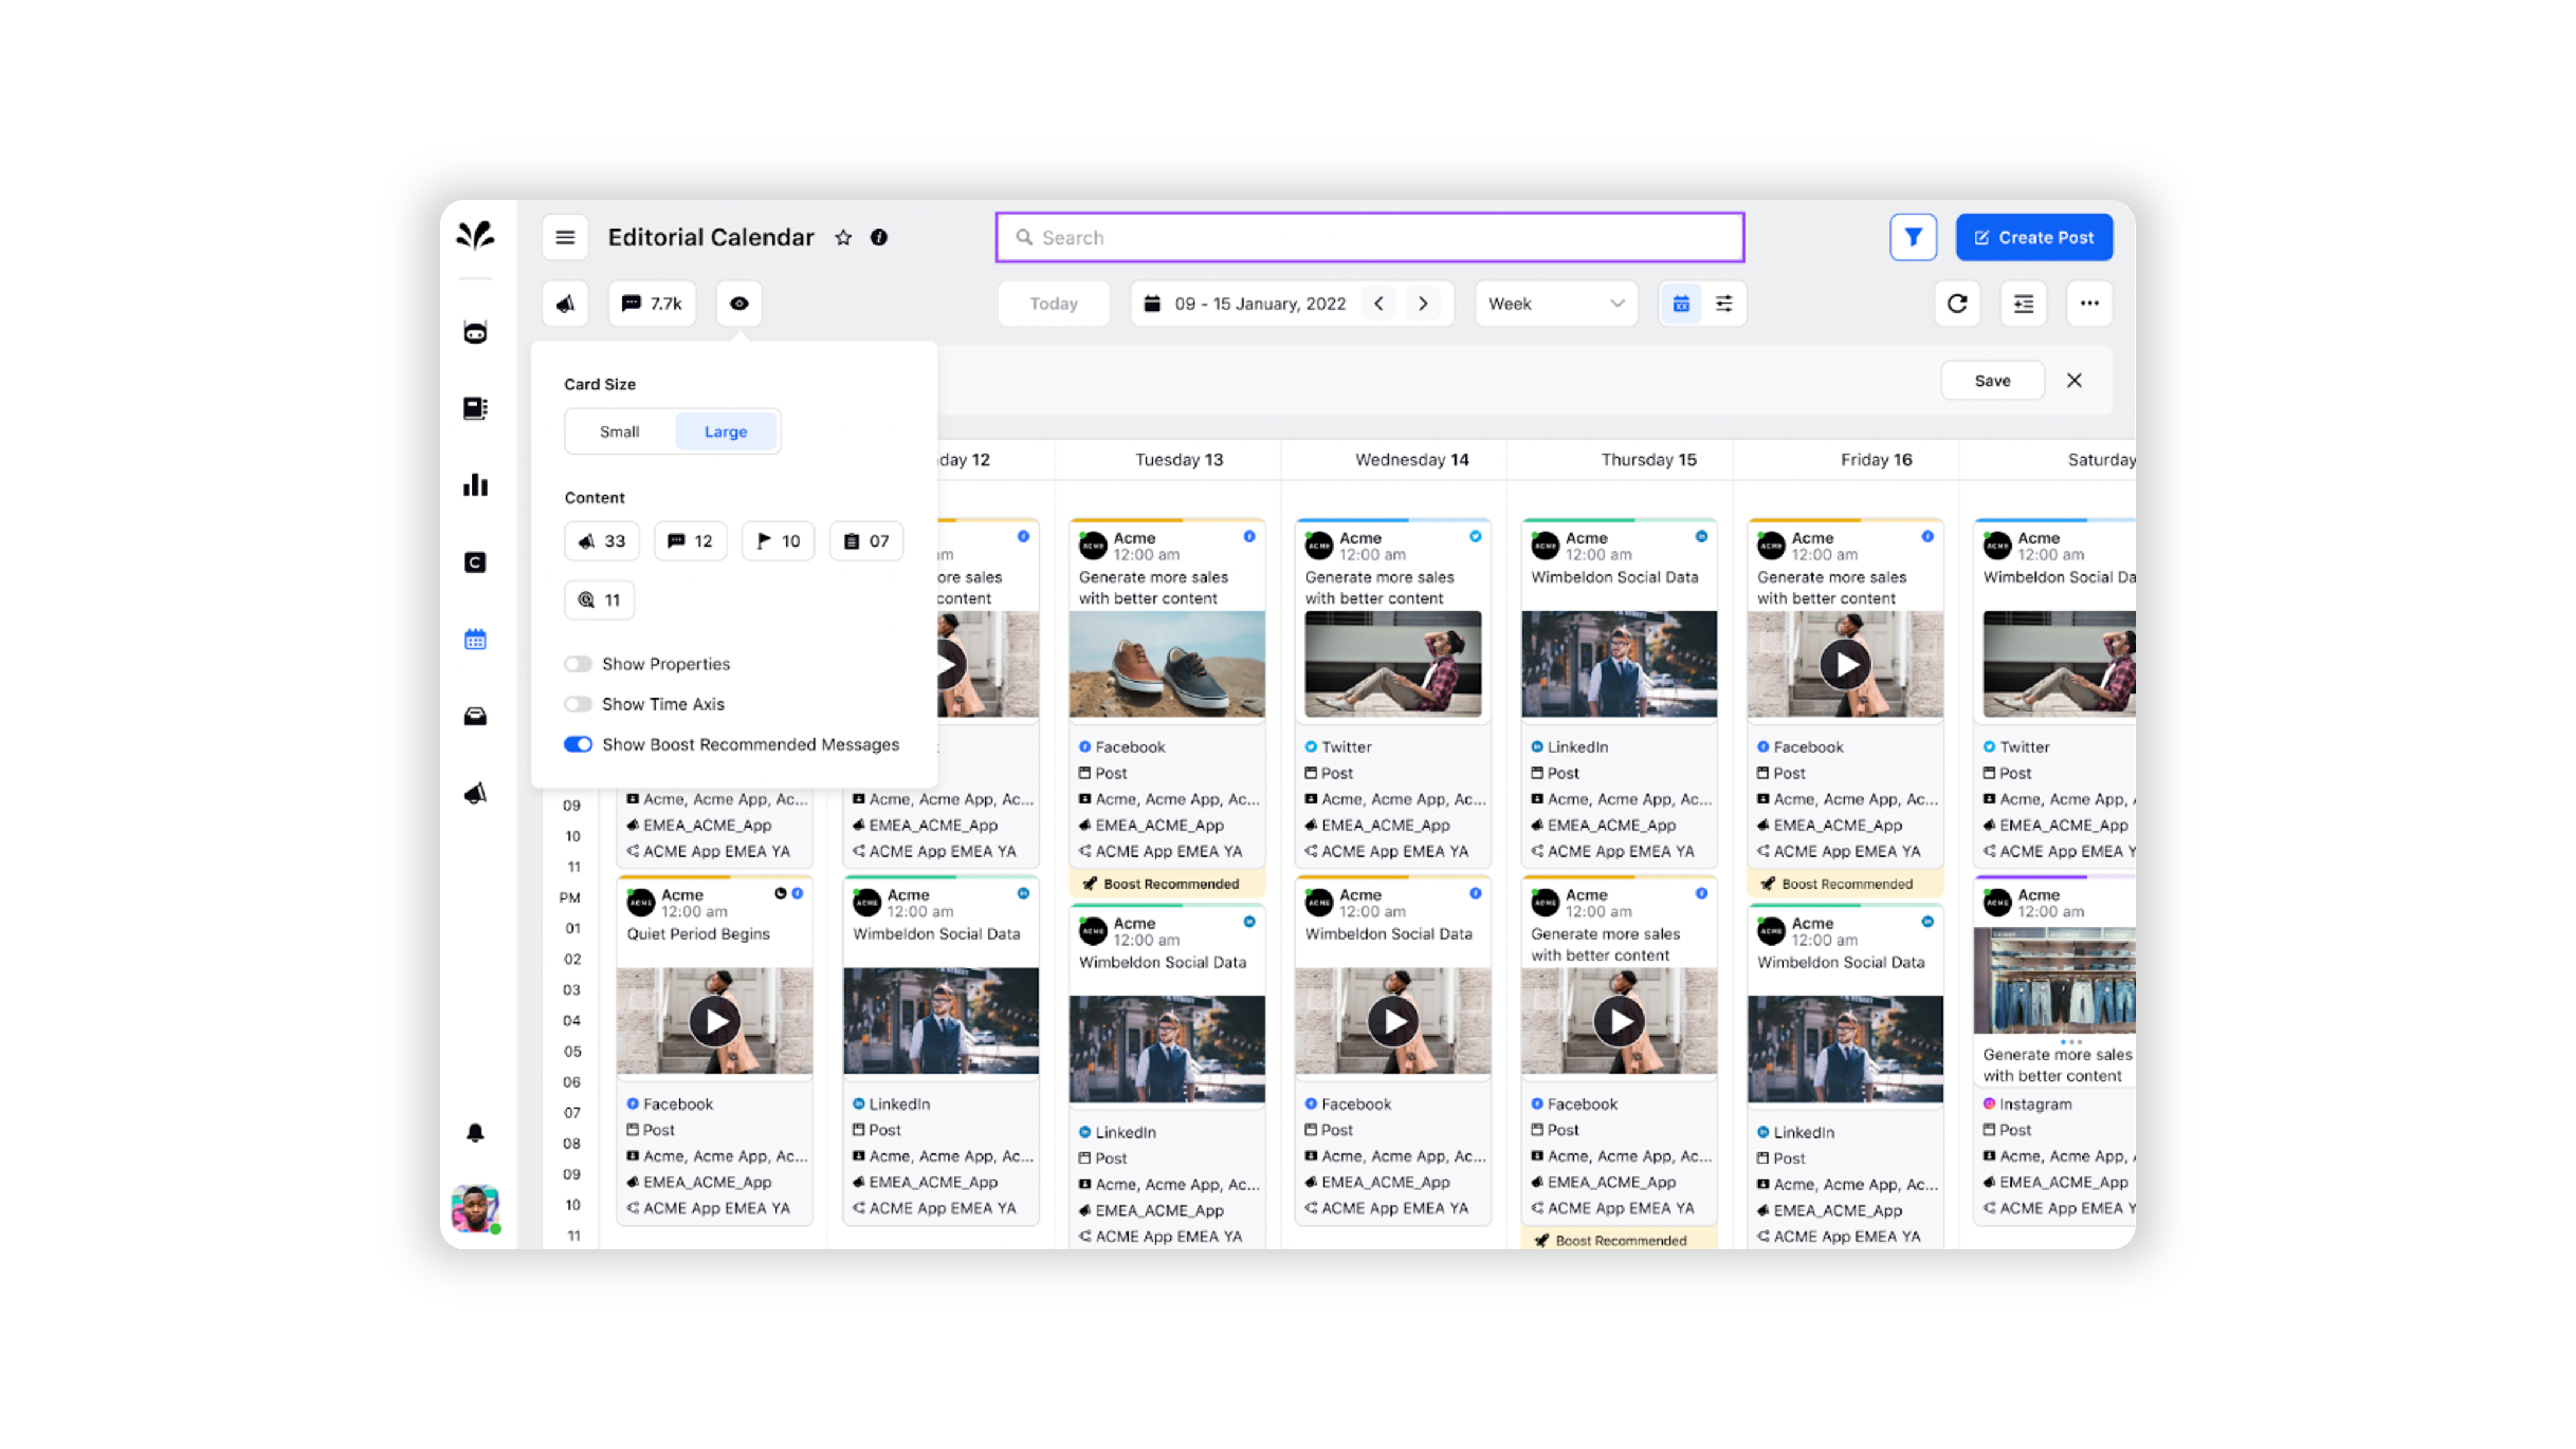
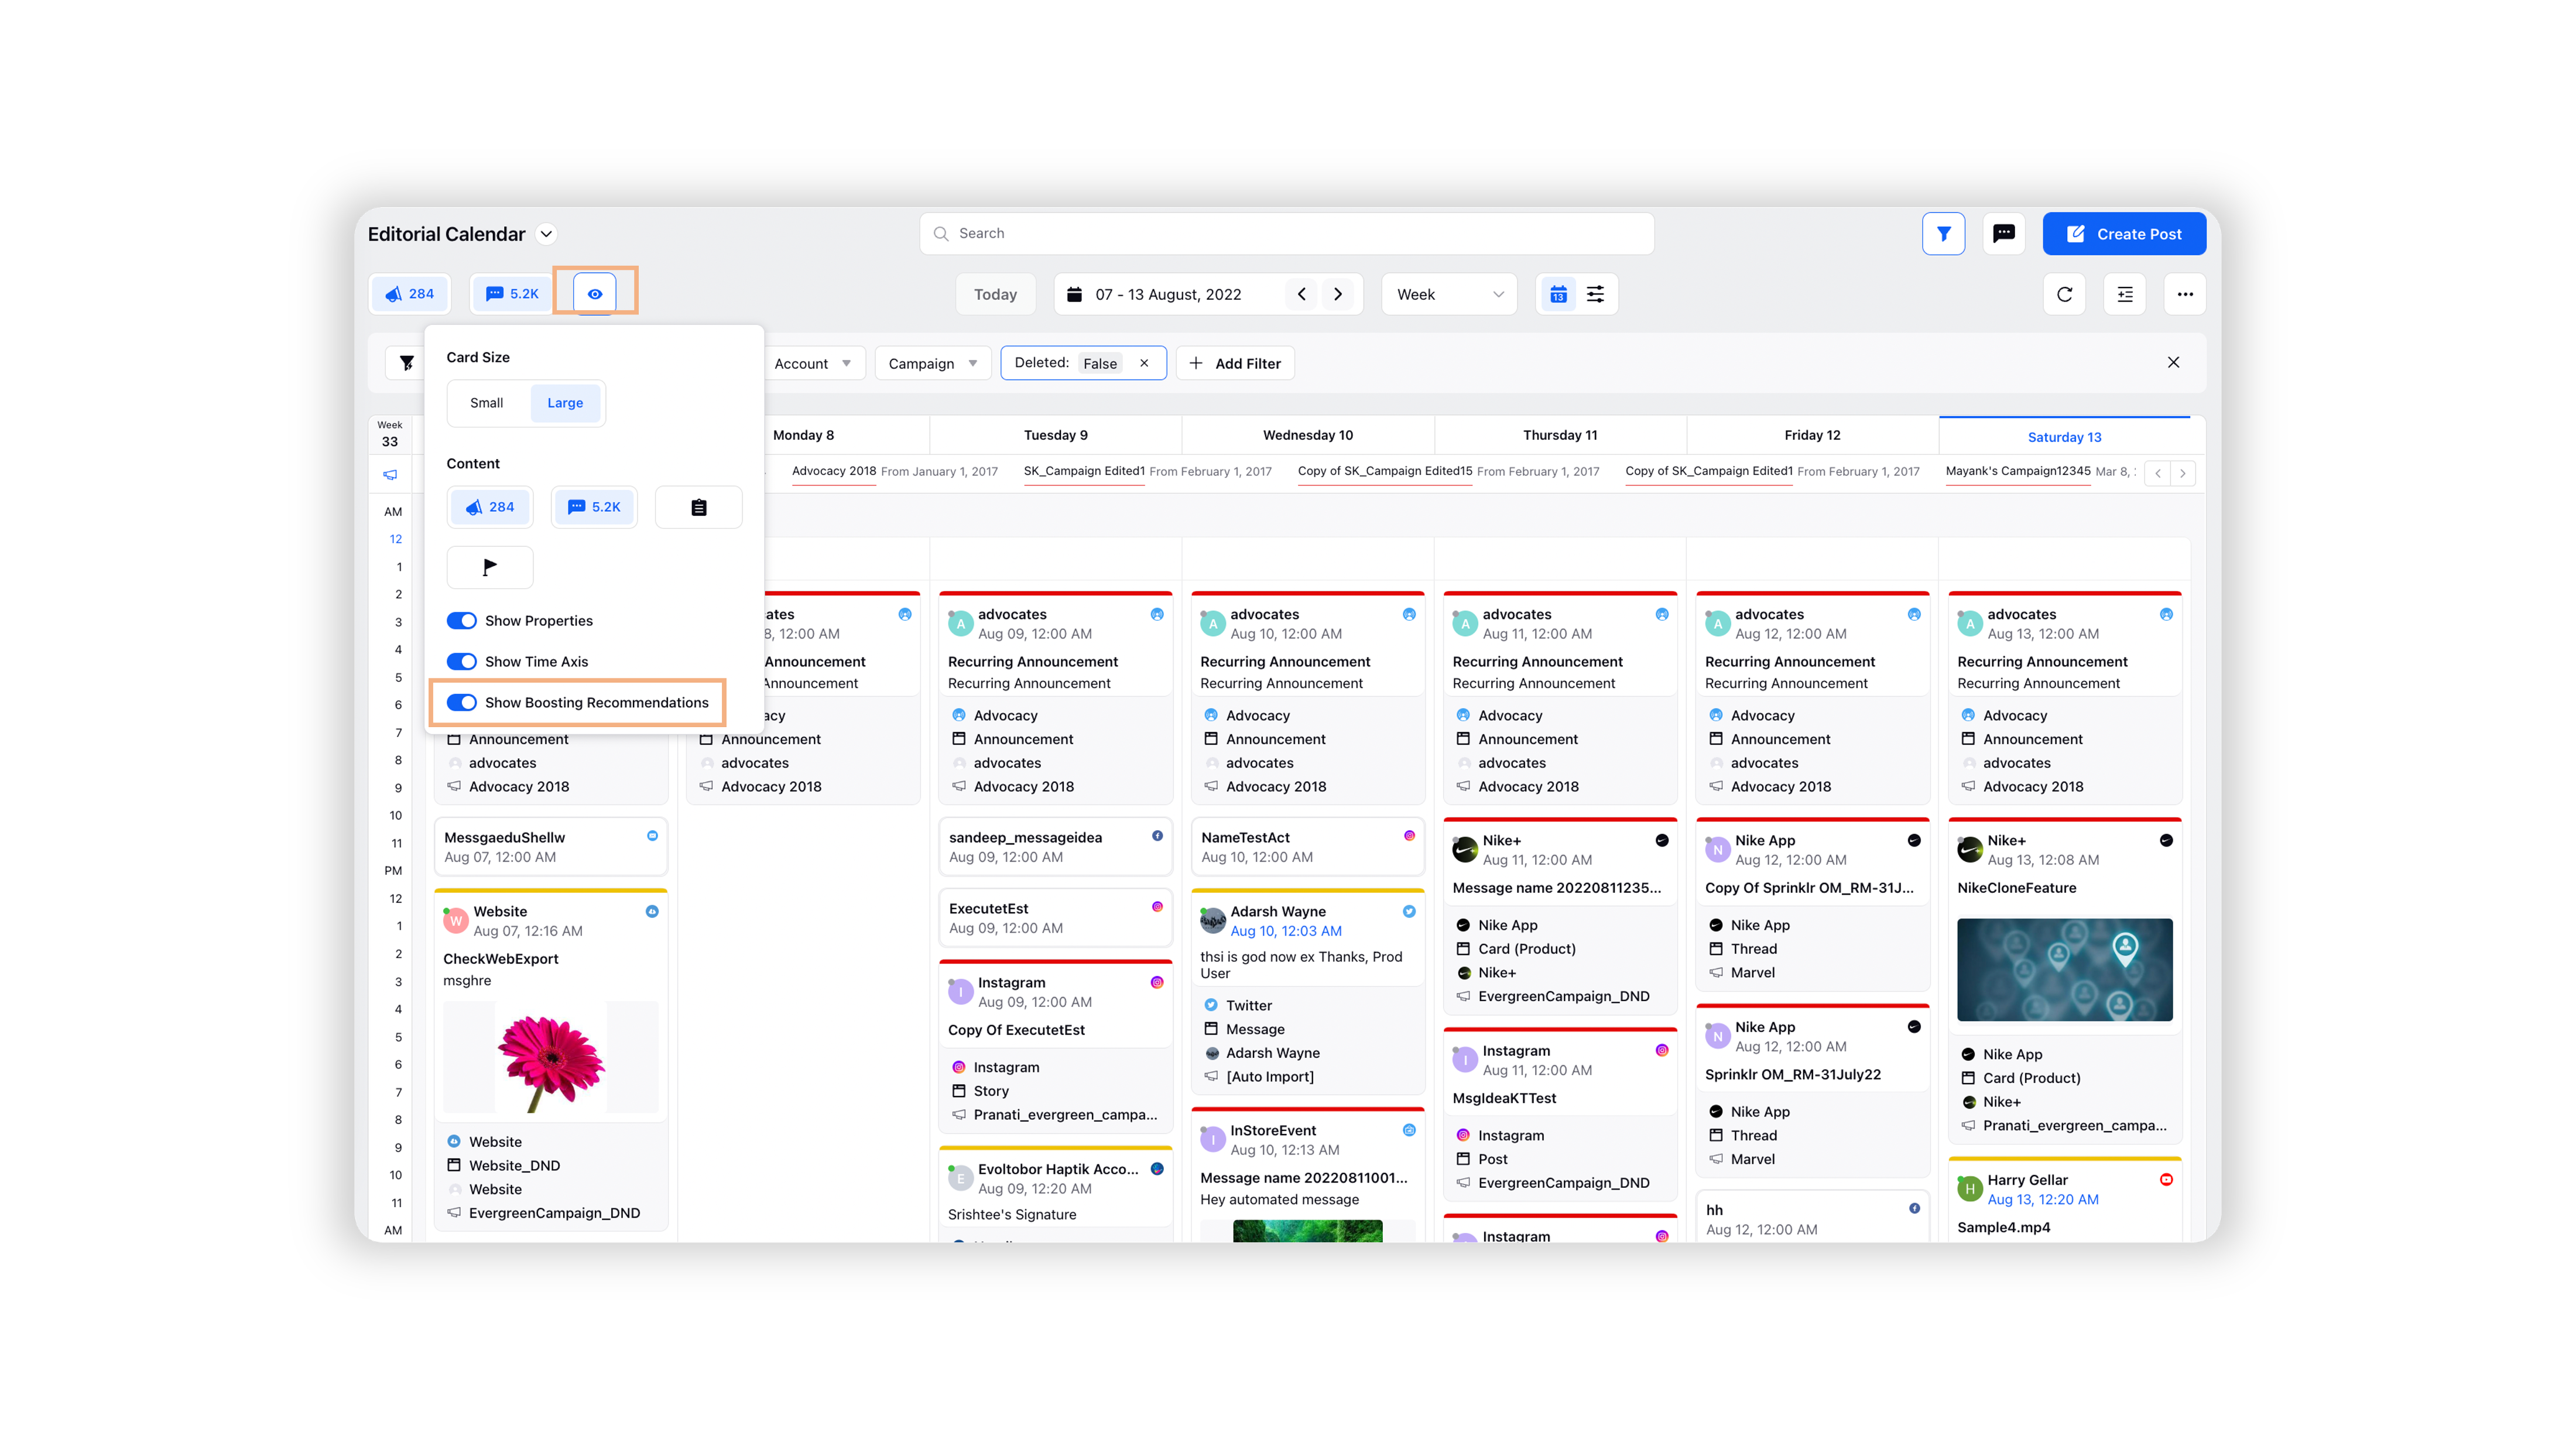
Click on the eye icon in the top left corner and turn on the Show Boosting Recommendations toggle.
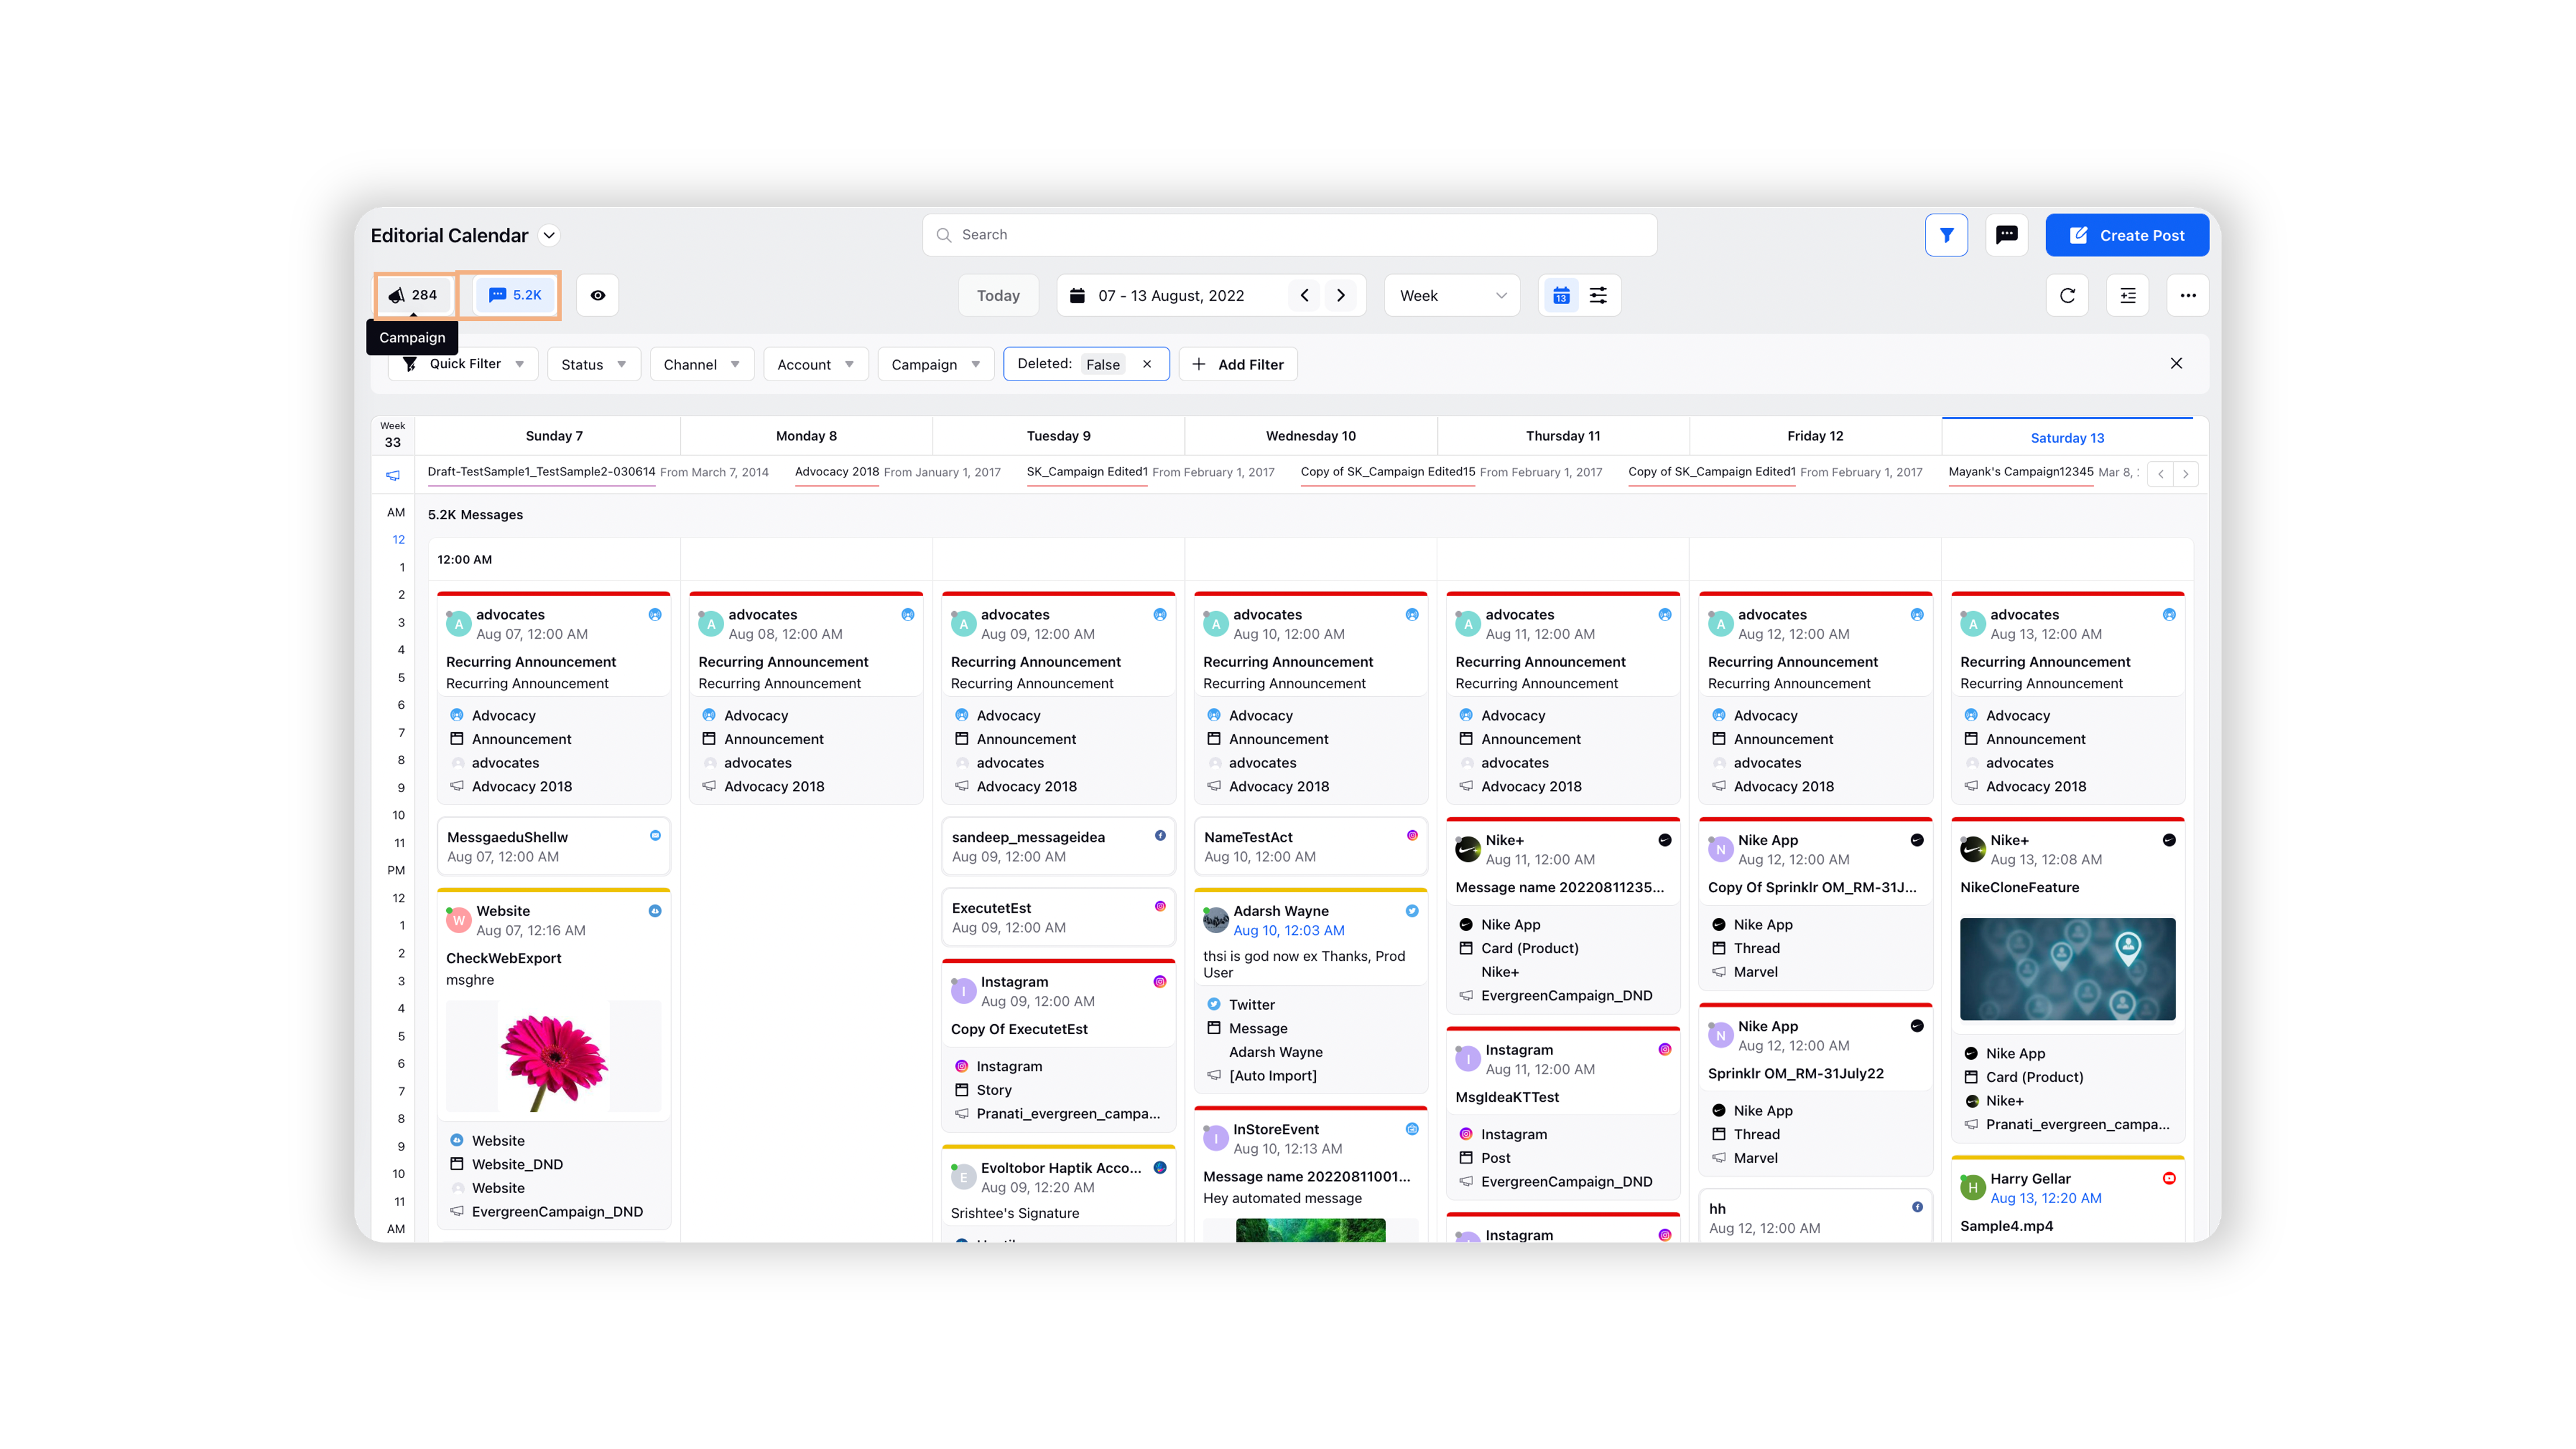
Turn off the campaign mode by clicking on the loudspeaker icon in the top left corner and enable the messages mode.
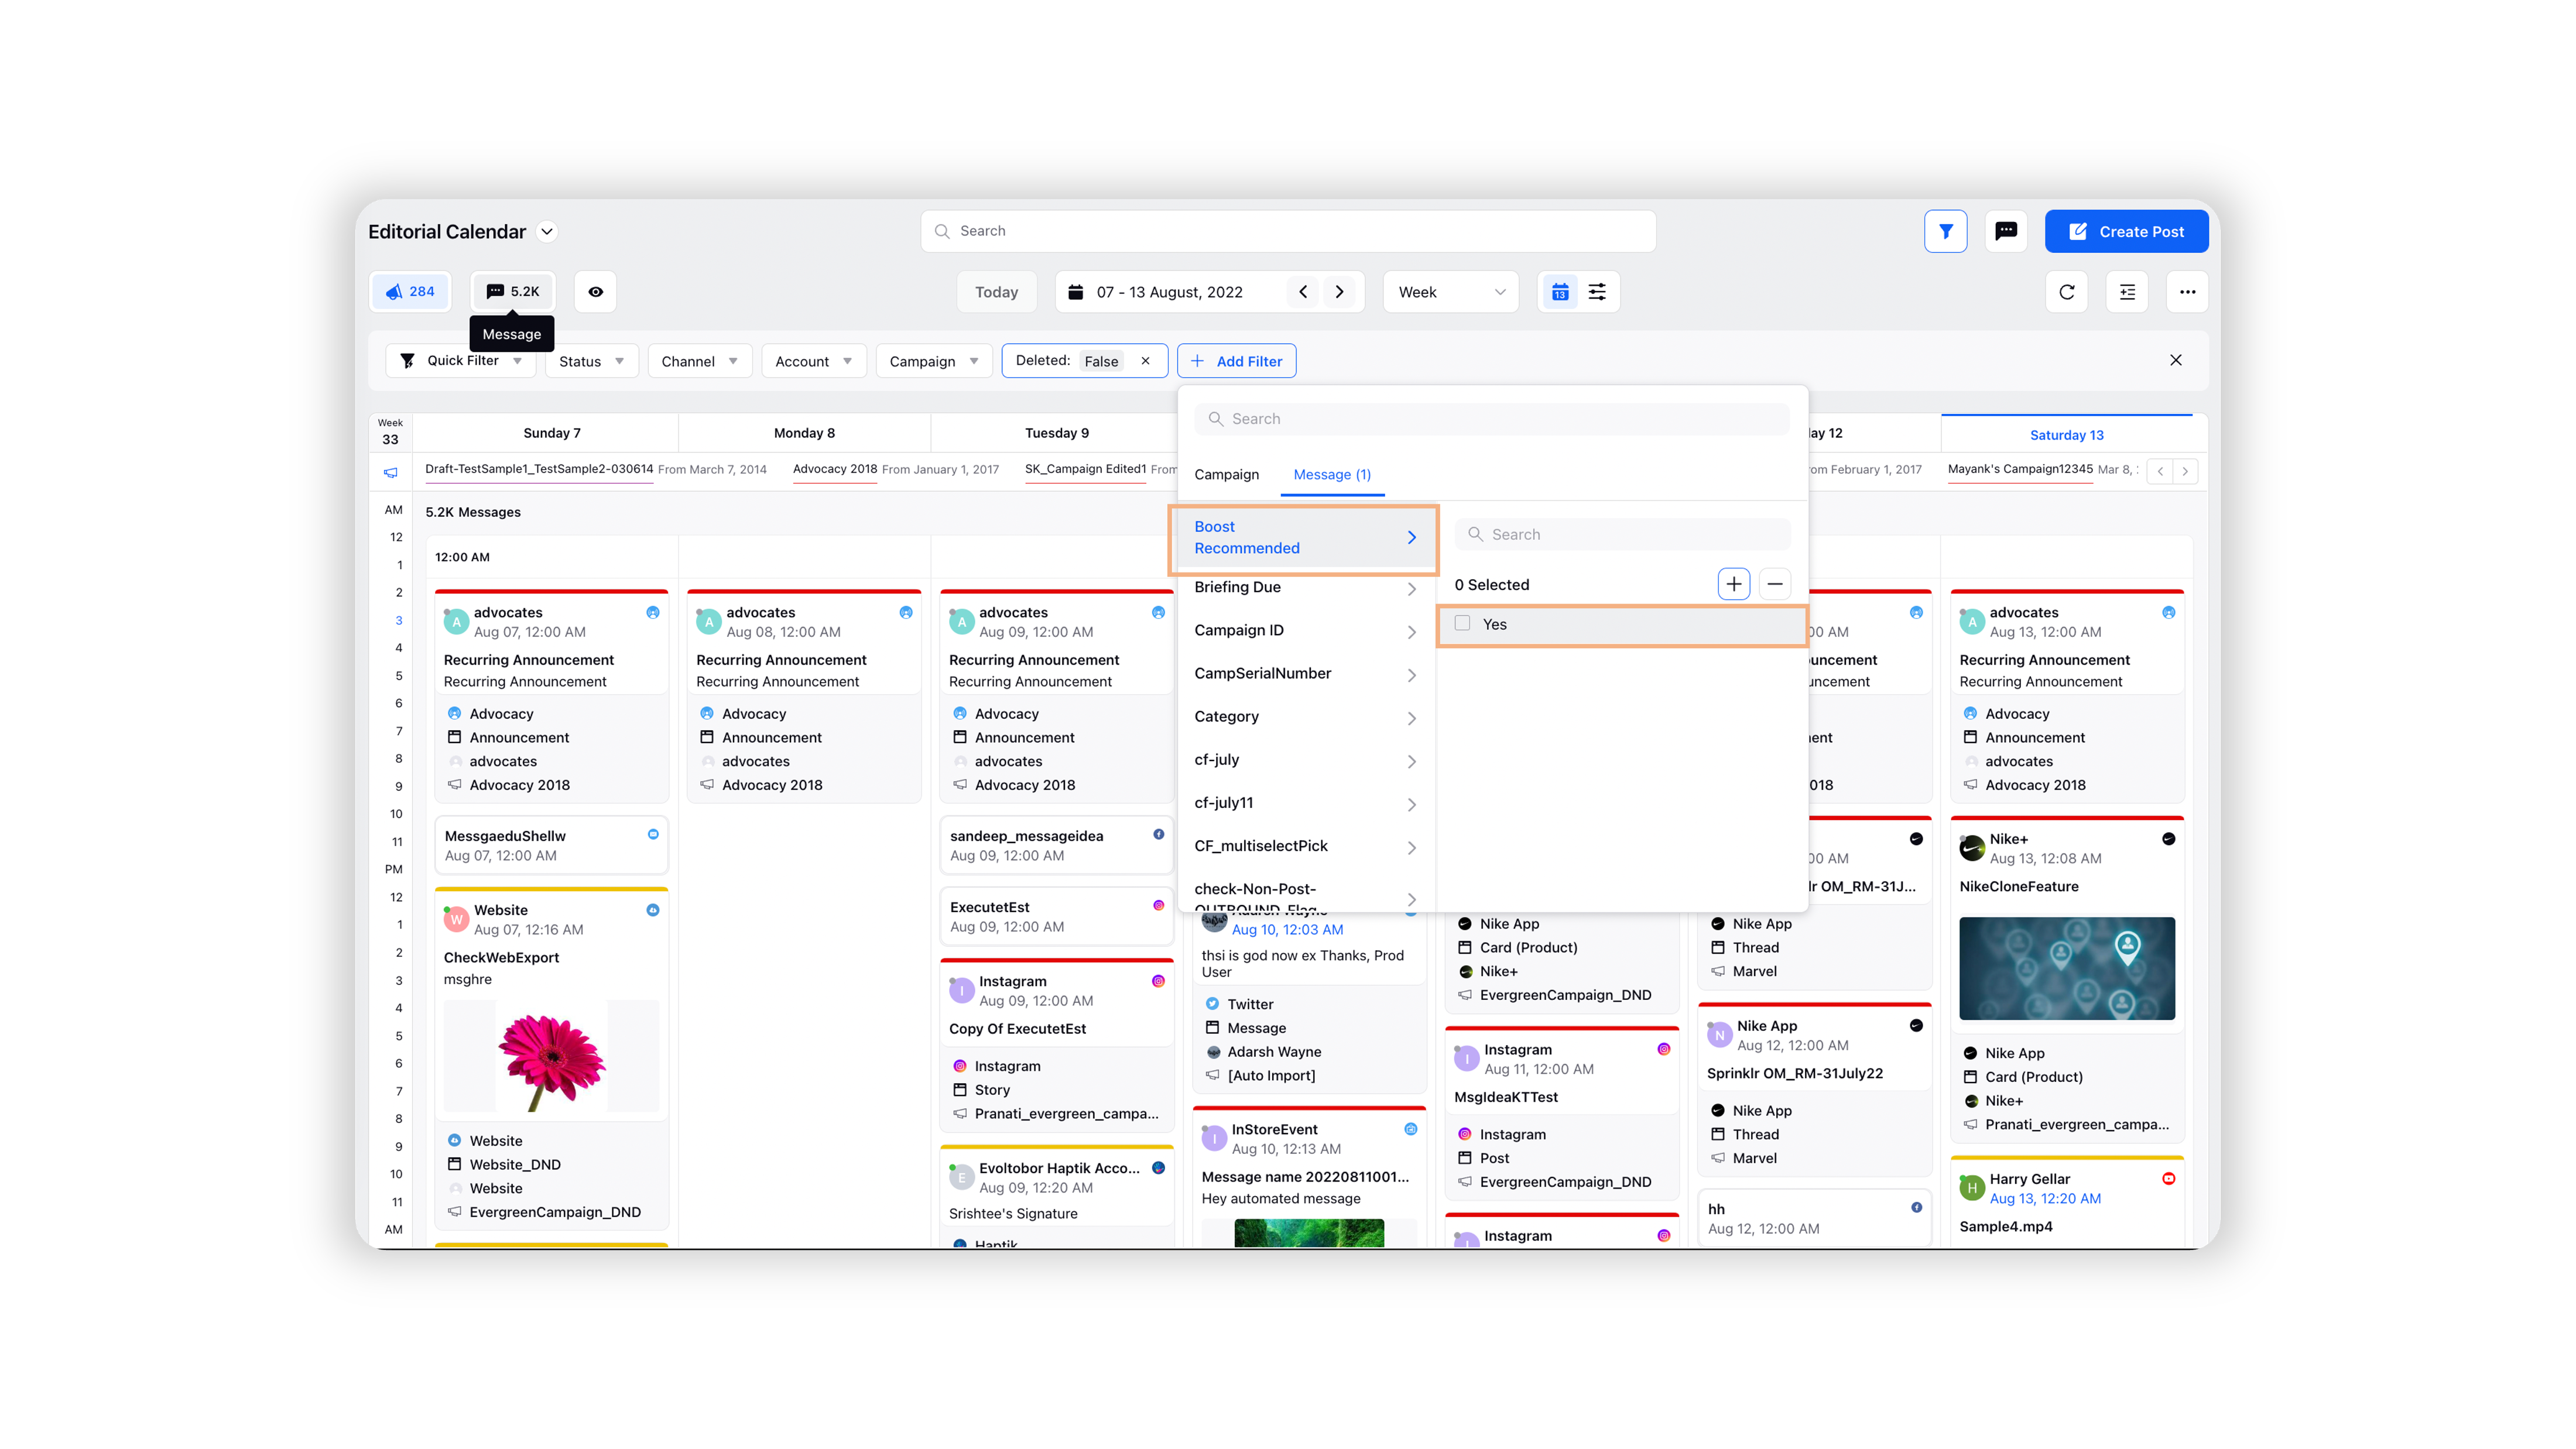
Click Add Filter on the top and search for Boost Recommended and select Yes from the options on the right. You will see all the posts recommended for boosting in the calendar.
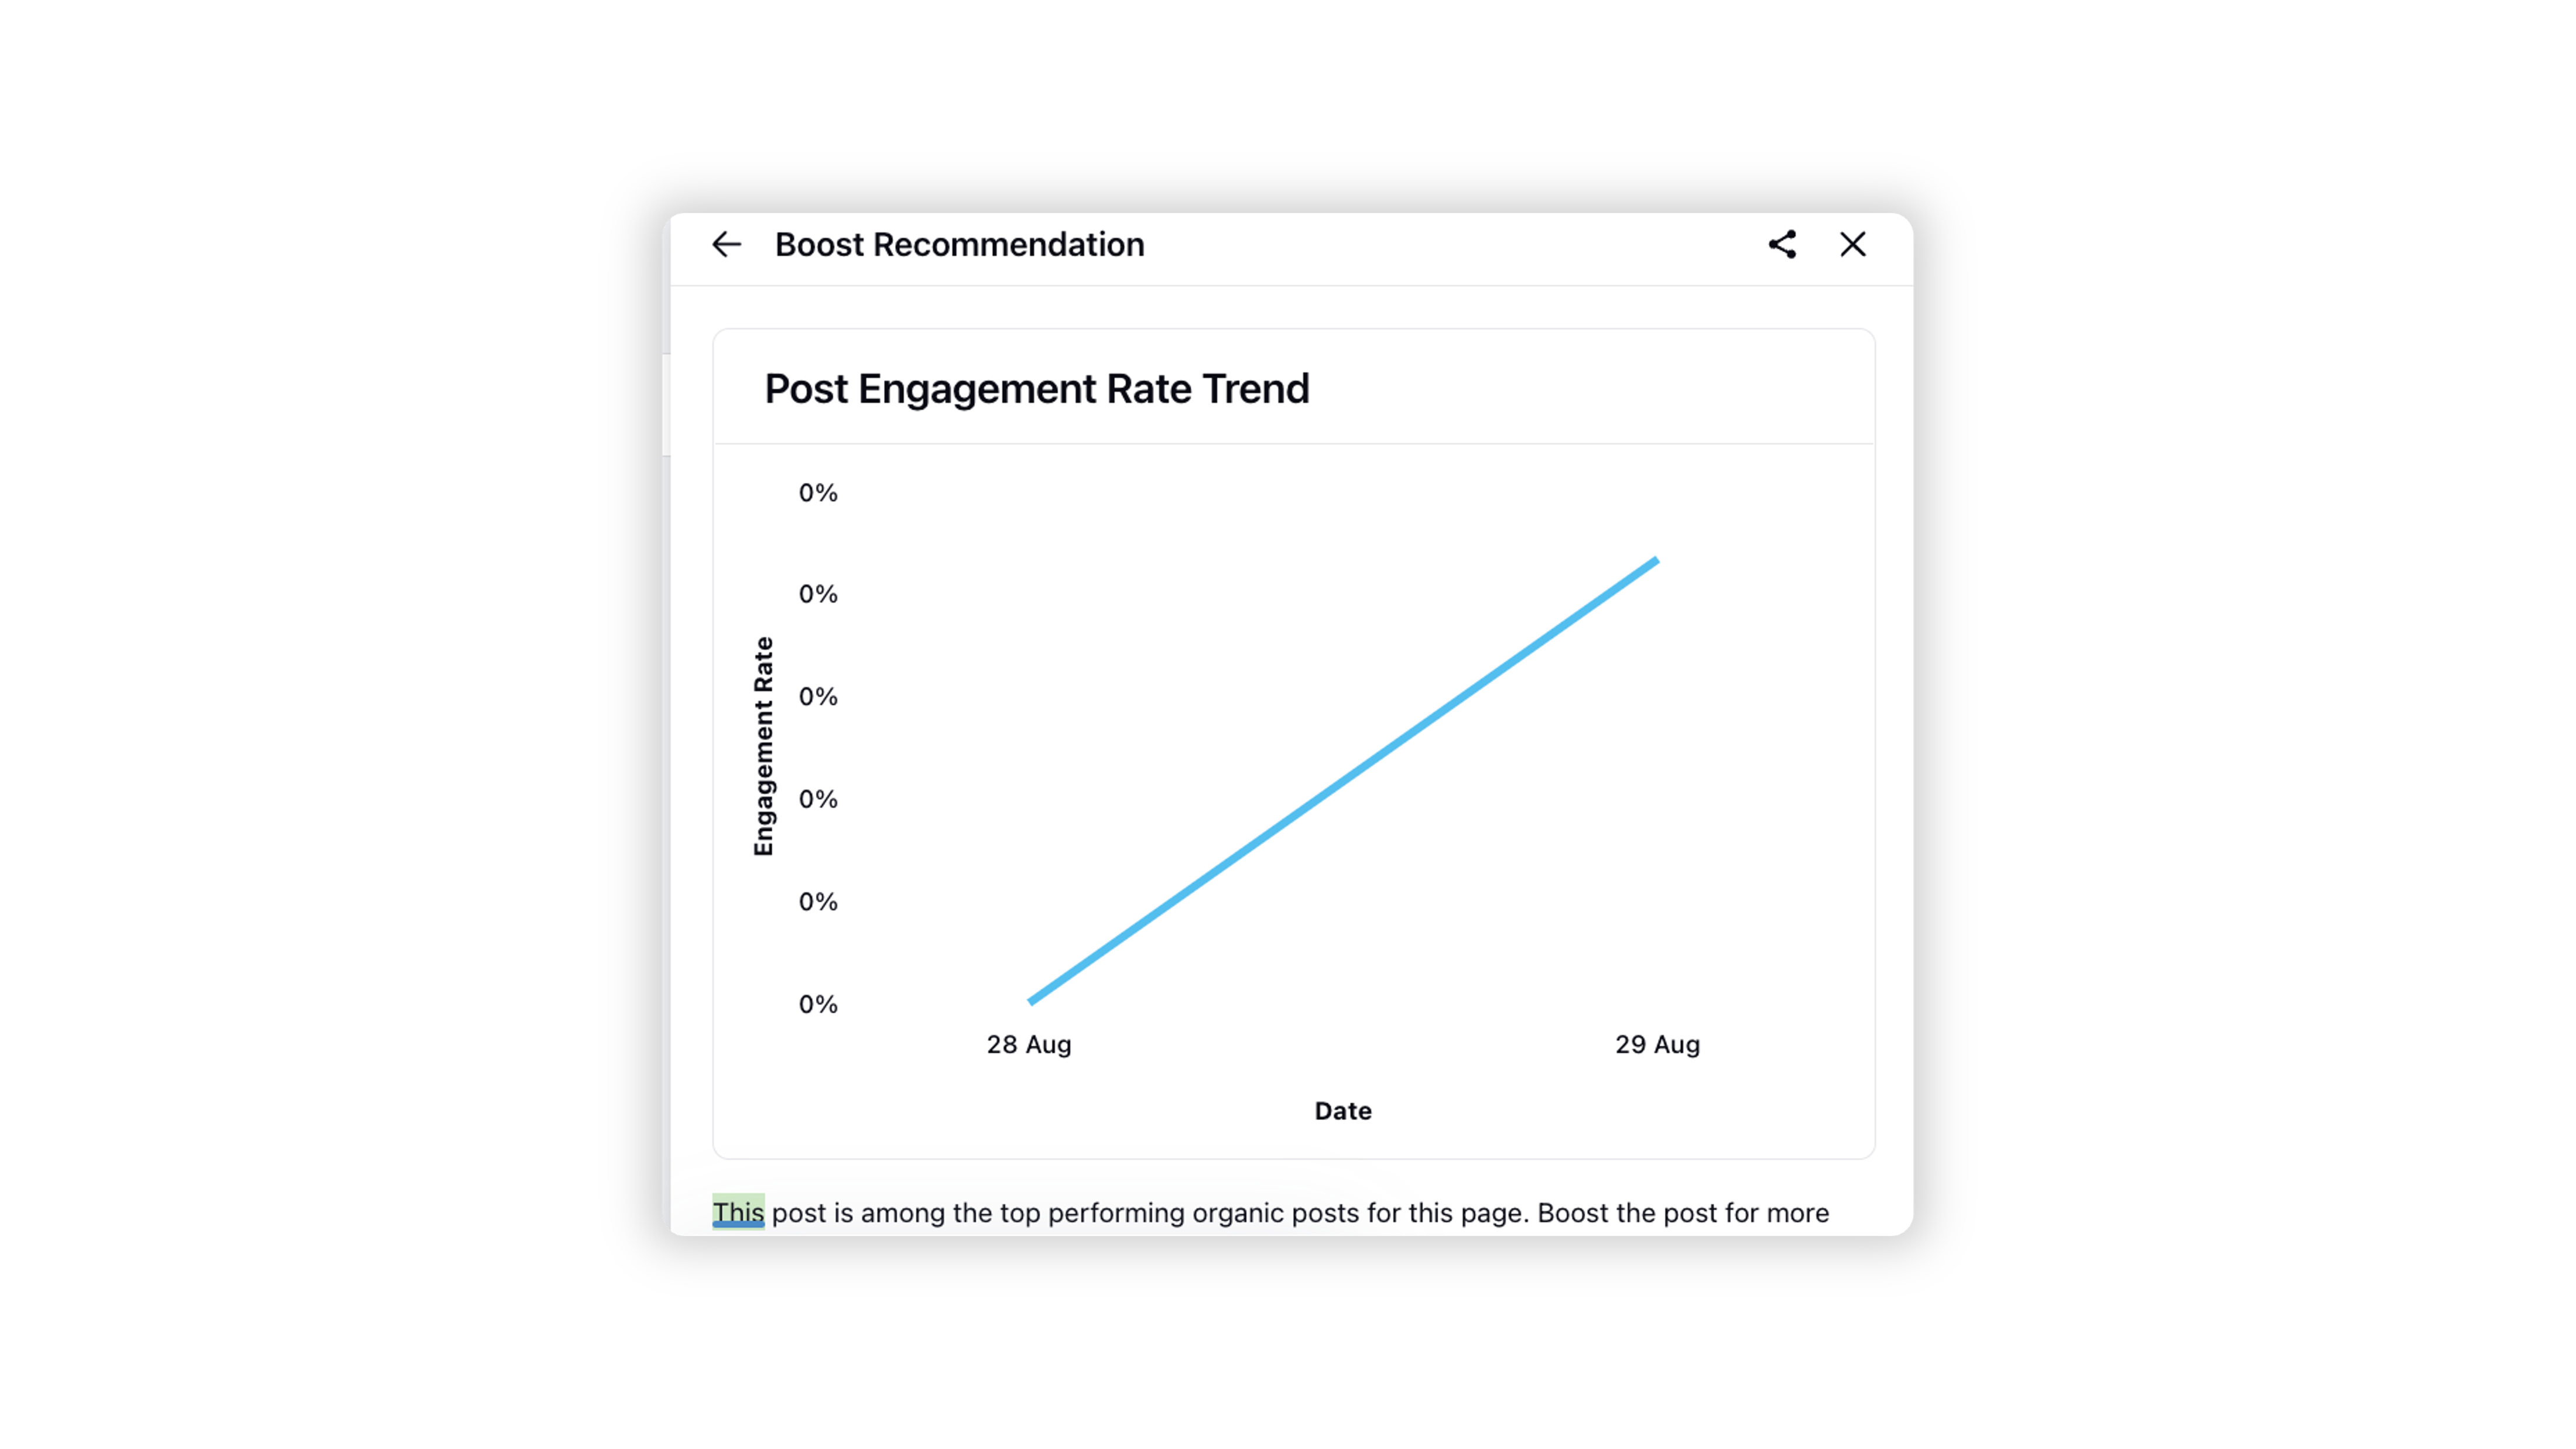
Double-click on any of the posts to see boost recommendations for that post. Here you will see the Boost Engagement Rate Trend, which is a graph that represents how engaging is the post.


If you think the post is appropriate for boosting, you can click Boost Post, and the post will be boosted from within the Editorial Calendar.
To identify and boost recommended posts in the Engagement Dashboard
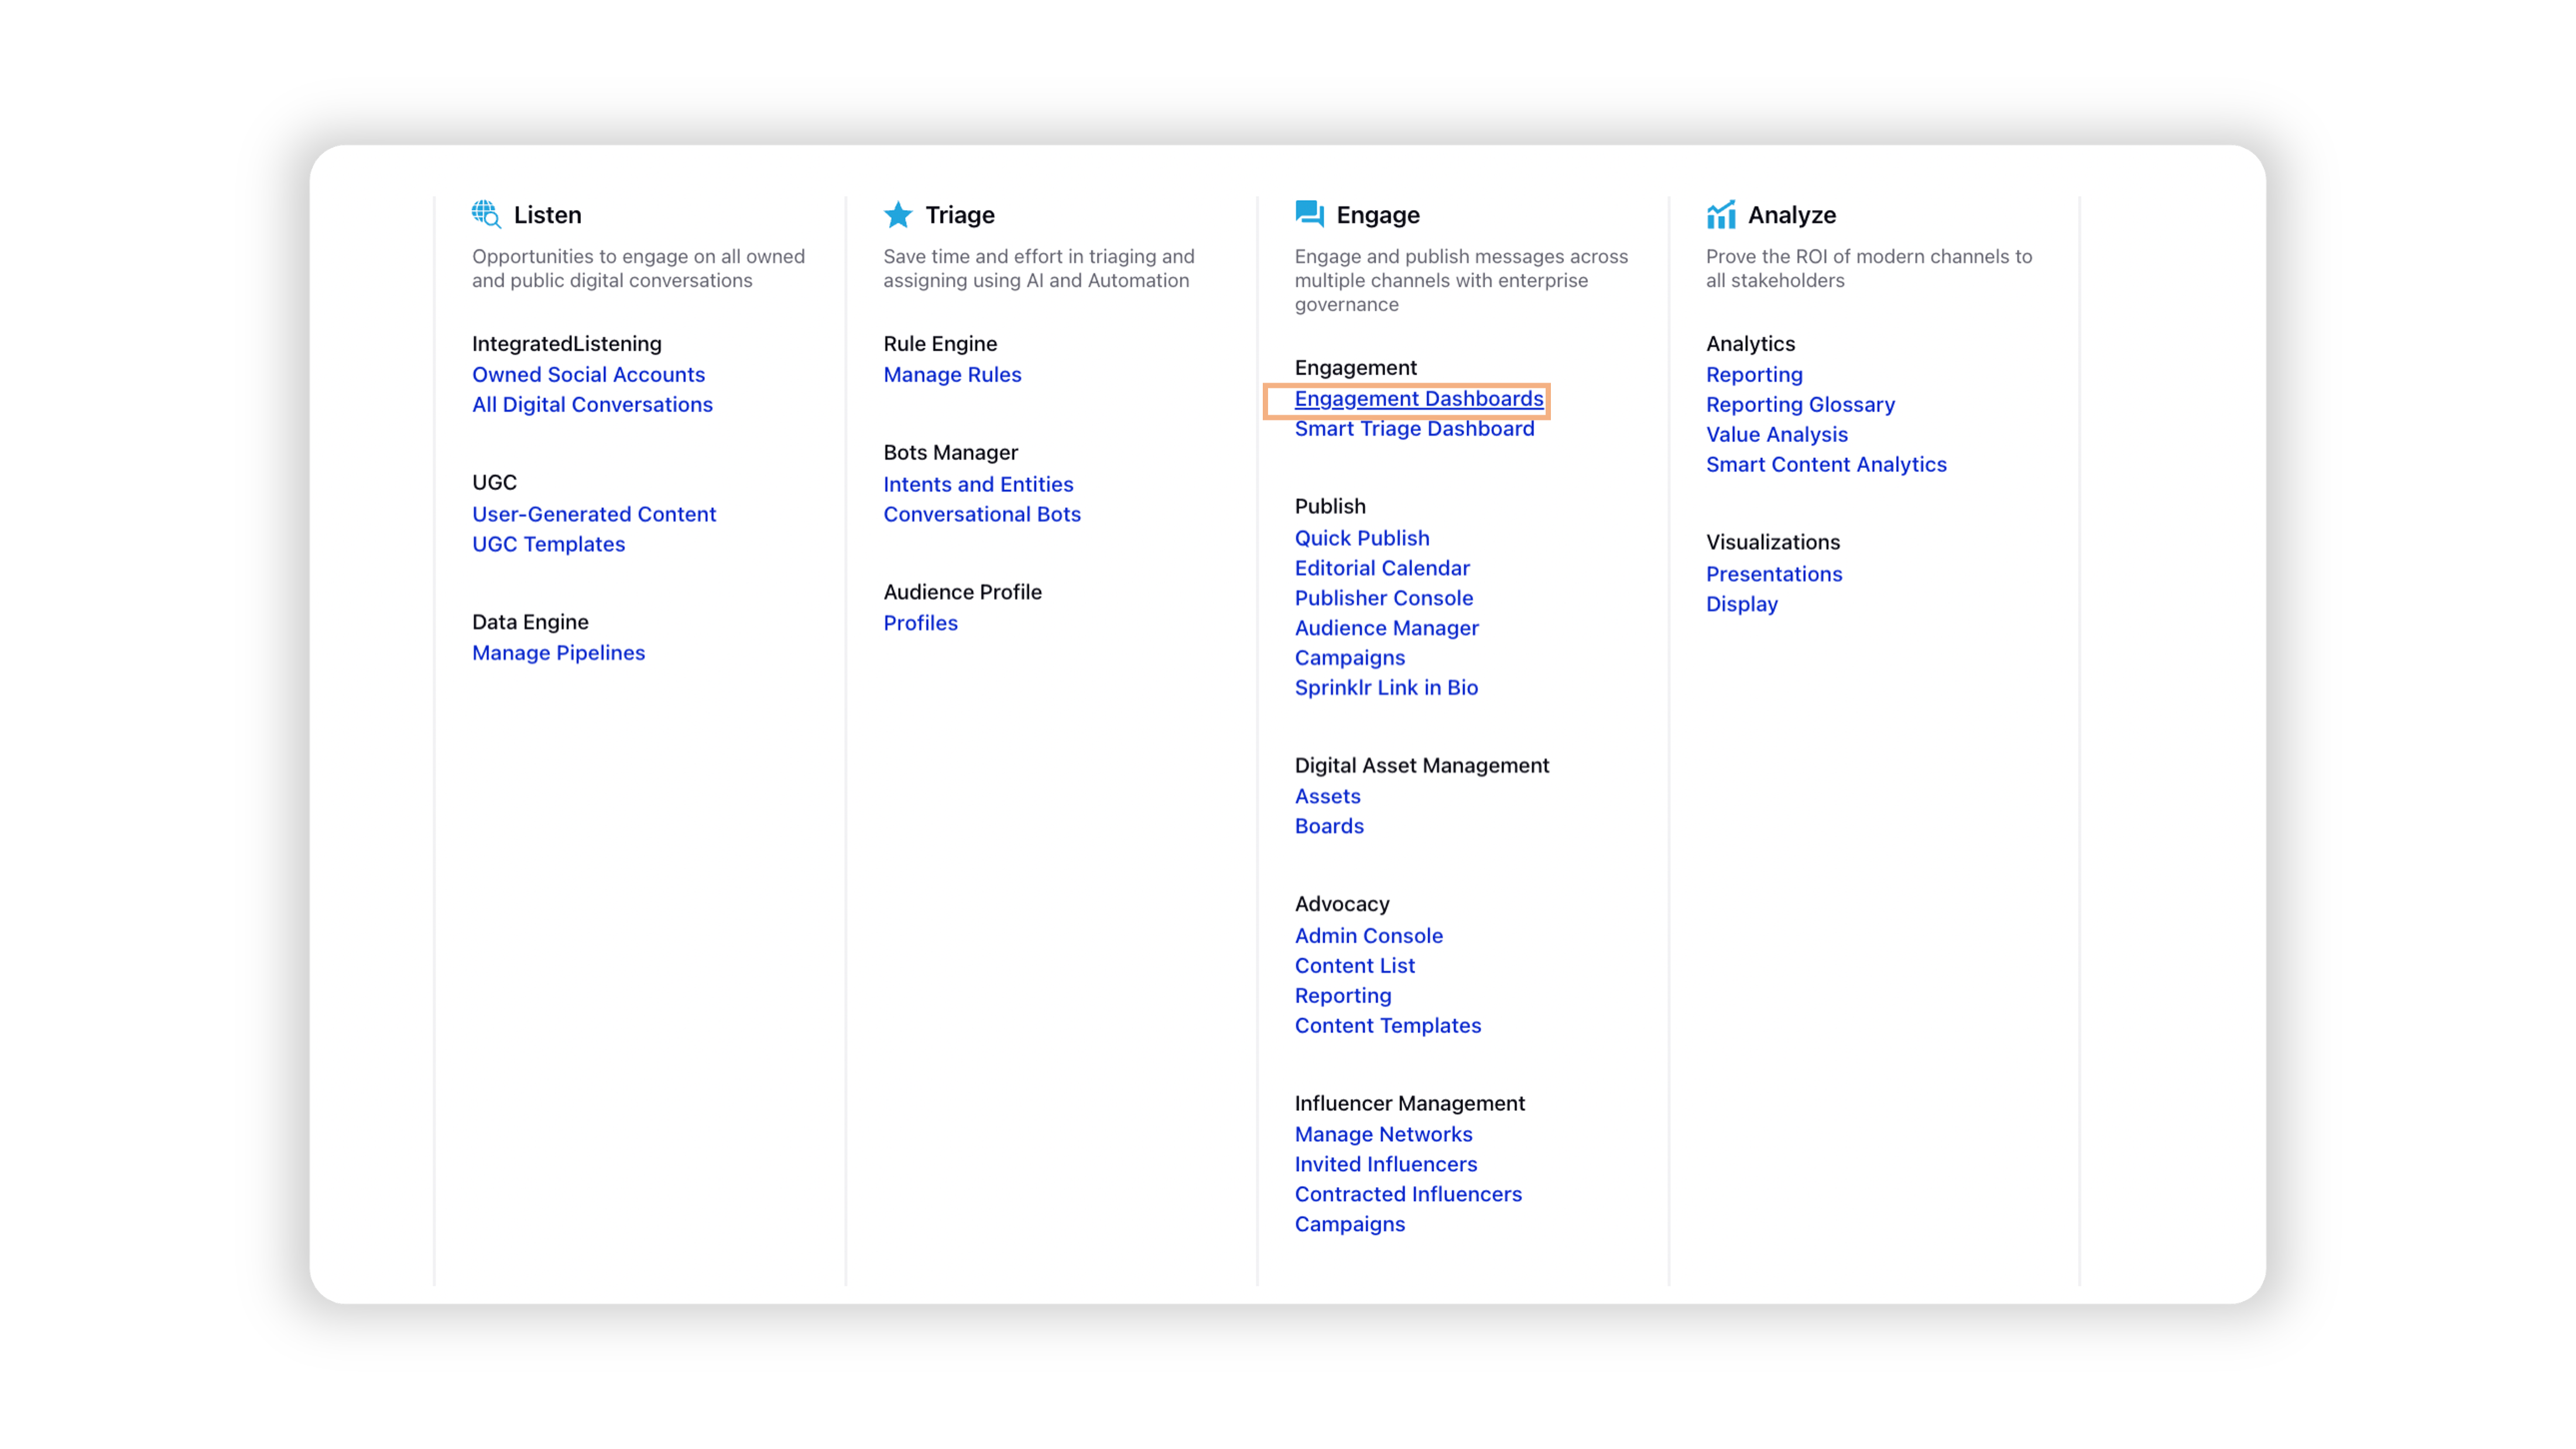
Click the New Tab icon. Under Sprinklr Social, click Engagement Dashboards within Engage.
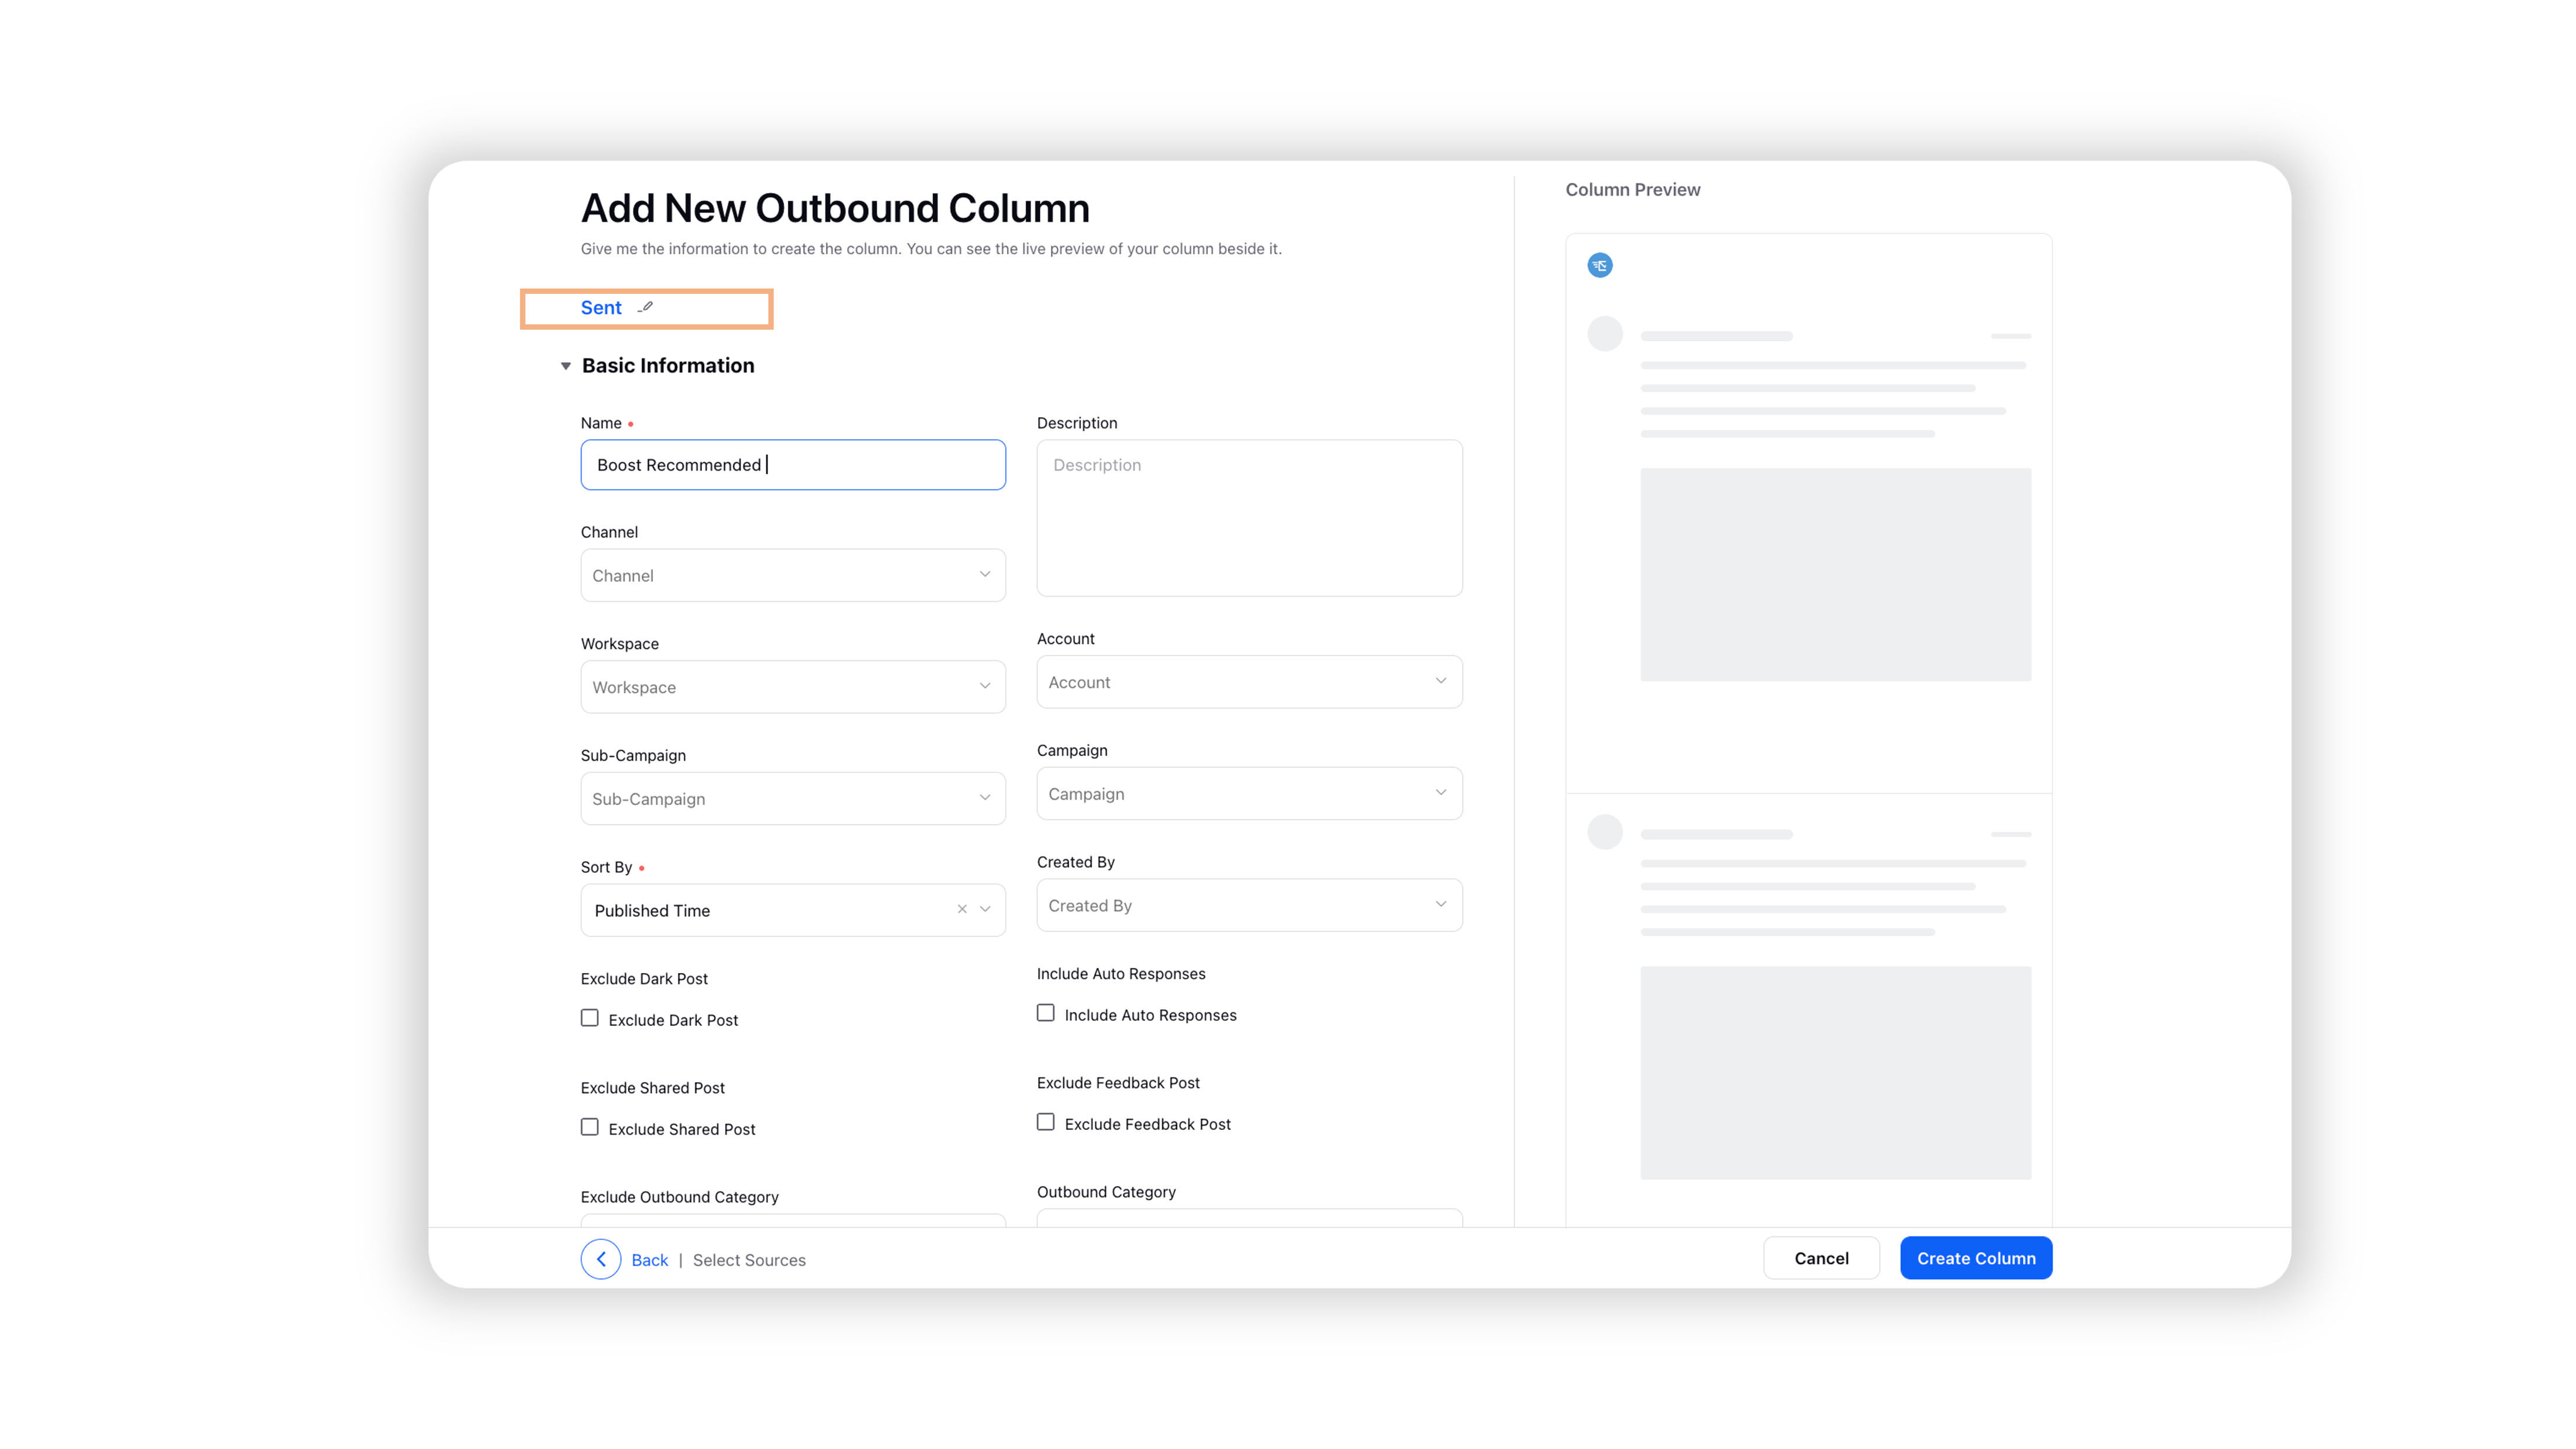
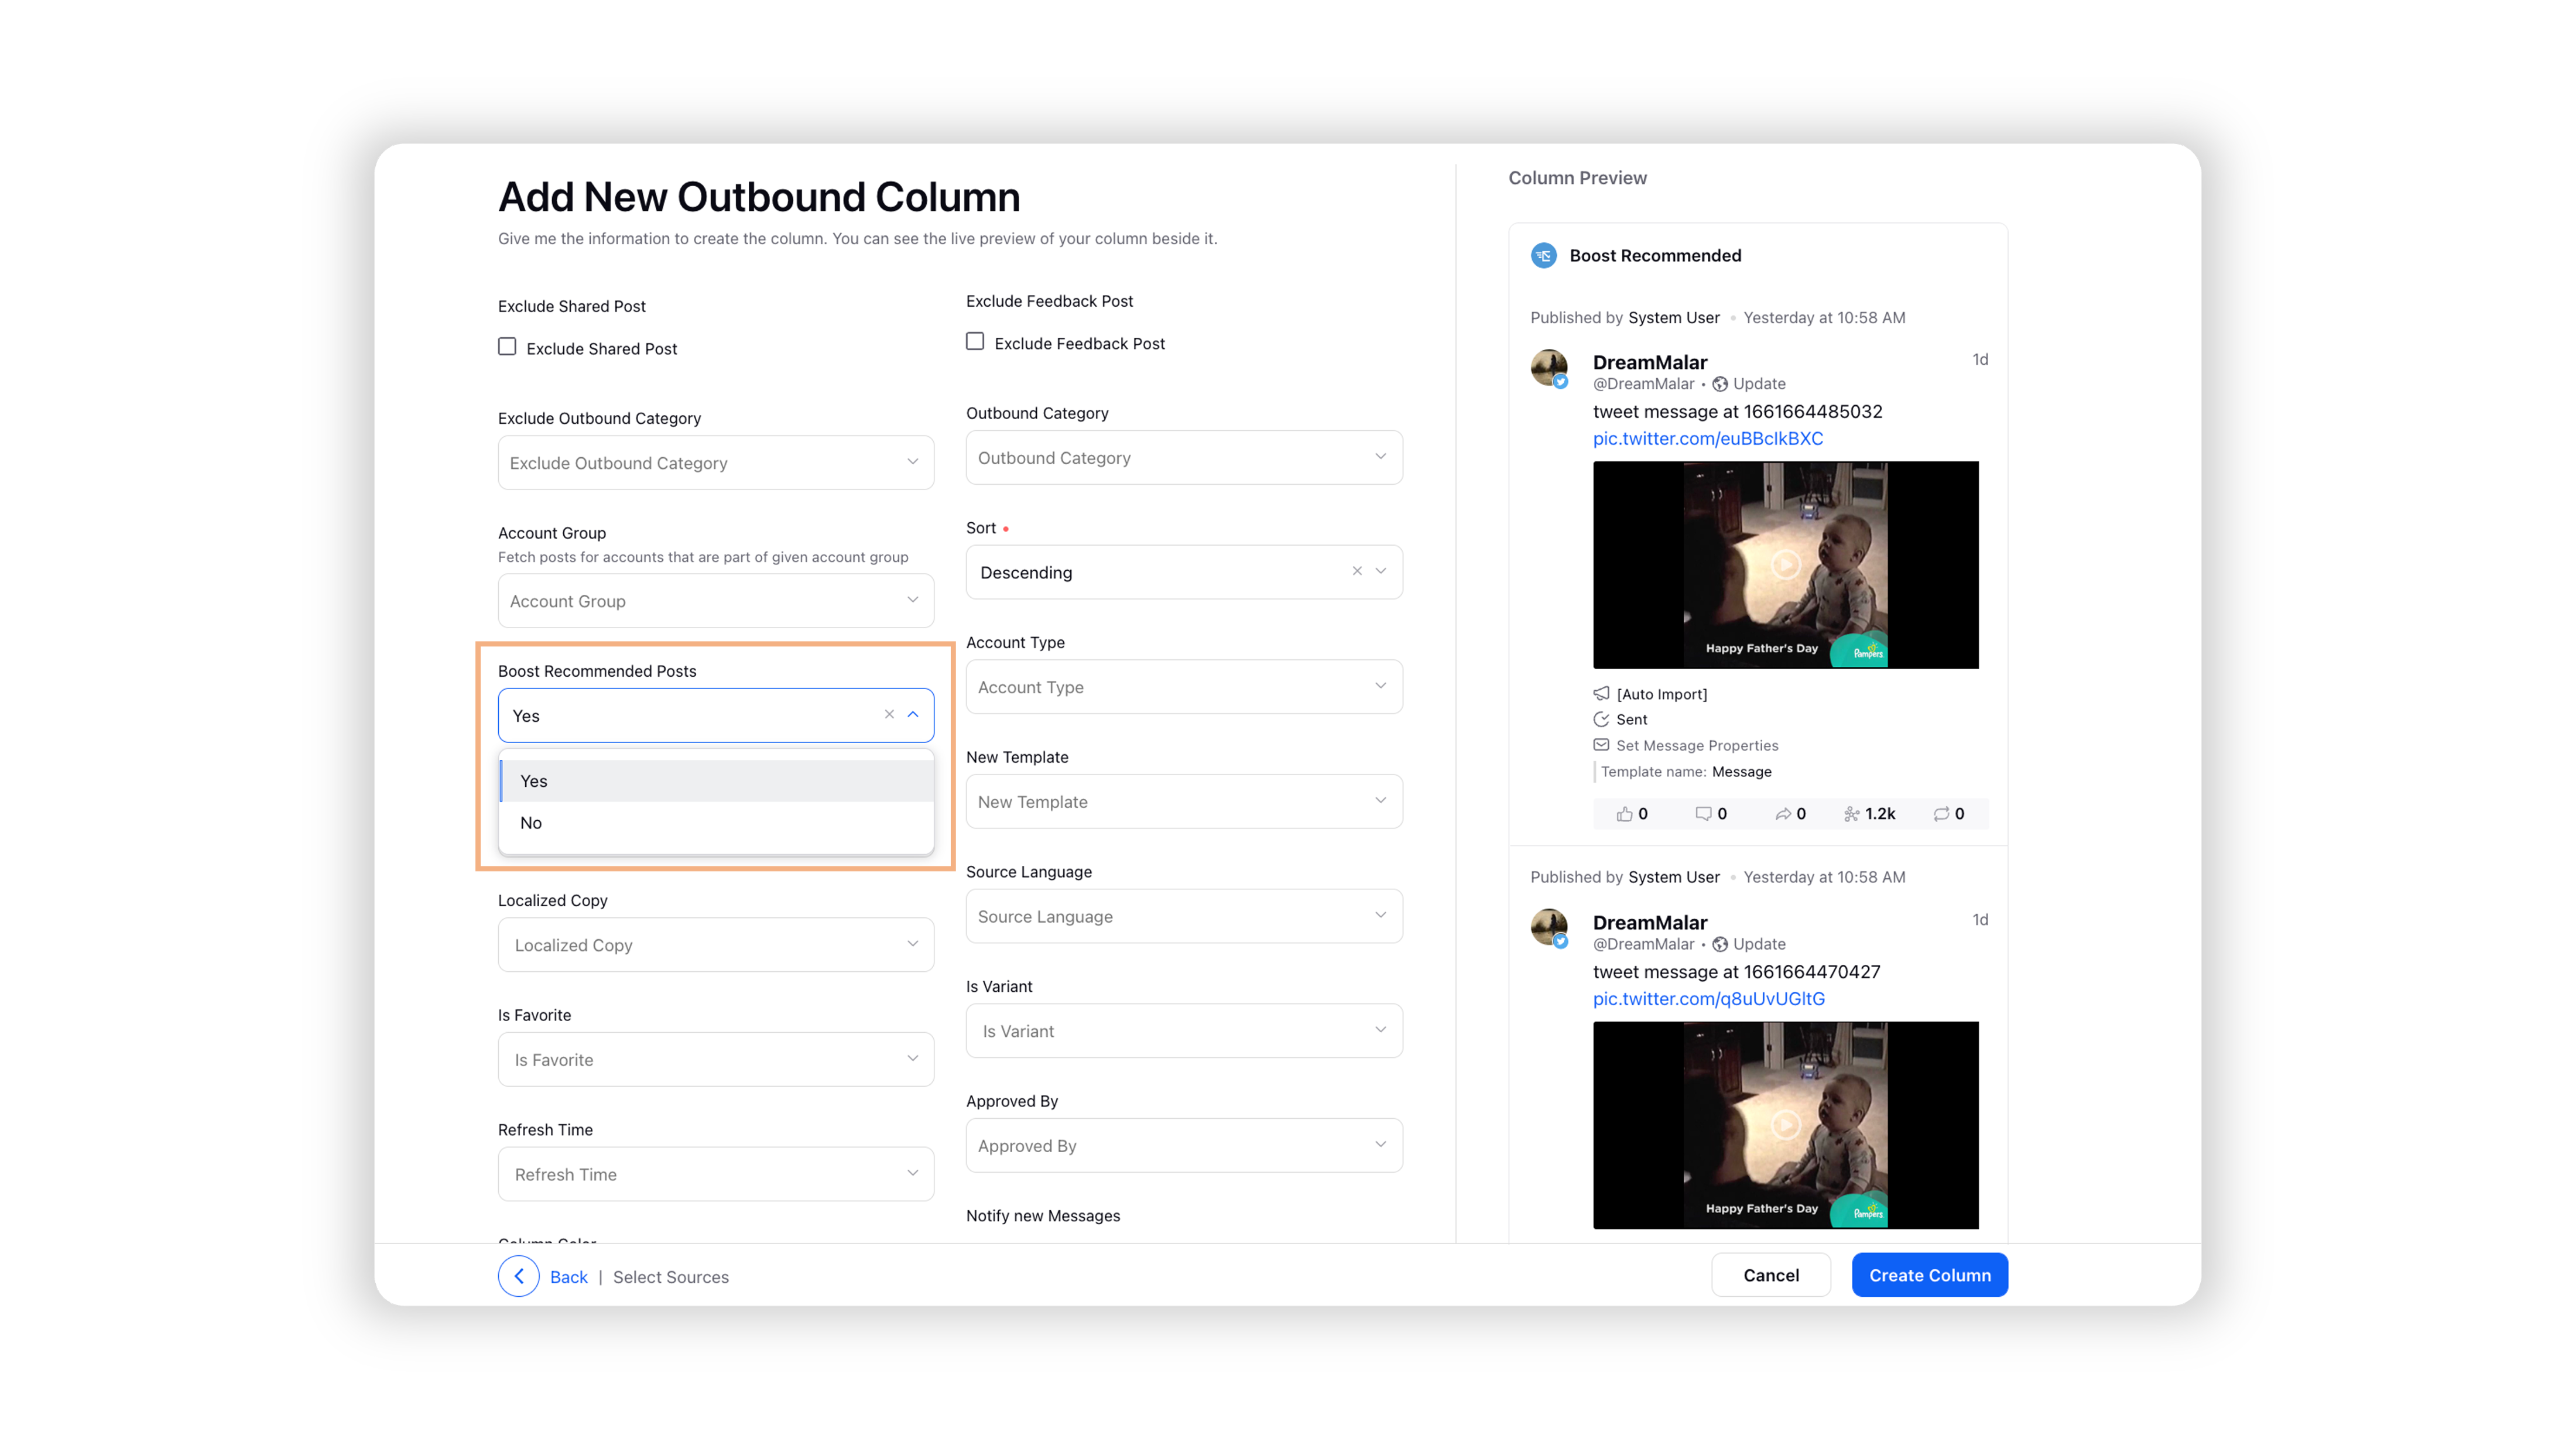
Create a new Outbound Sent Column by clicking on the Add Column button in the top right corner of the Engagement Dashboard and selecting Sent from the options under Add new outbound column. Fill in the column name and make sure that the filter by Boost Recommended Posts is set to Yes.
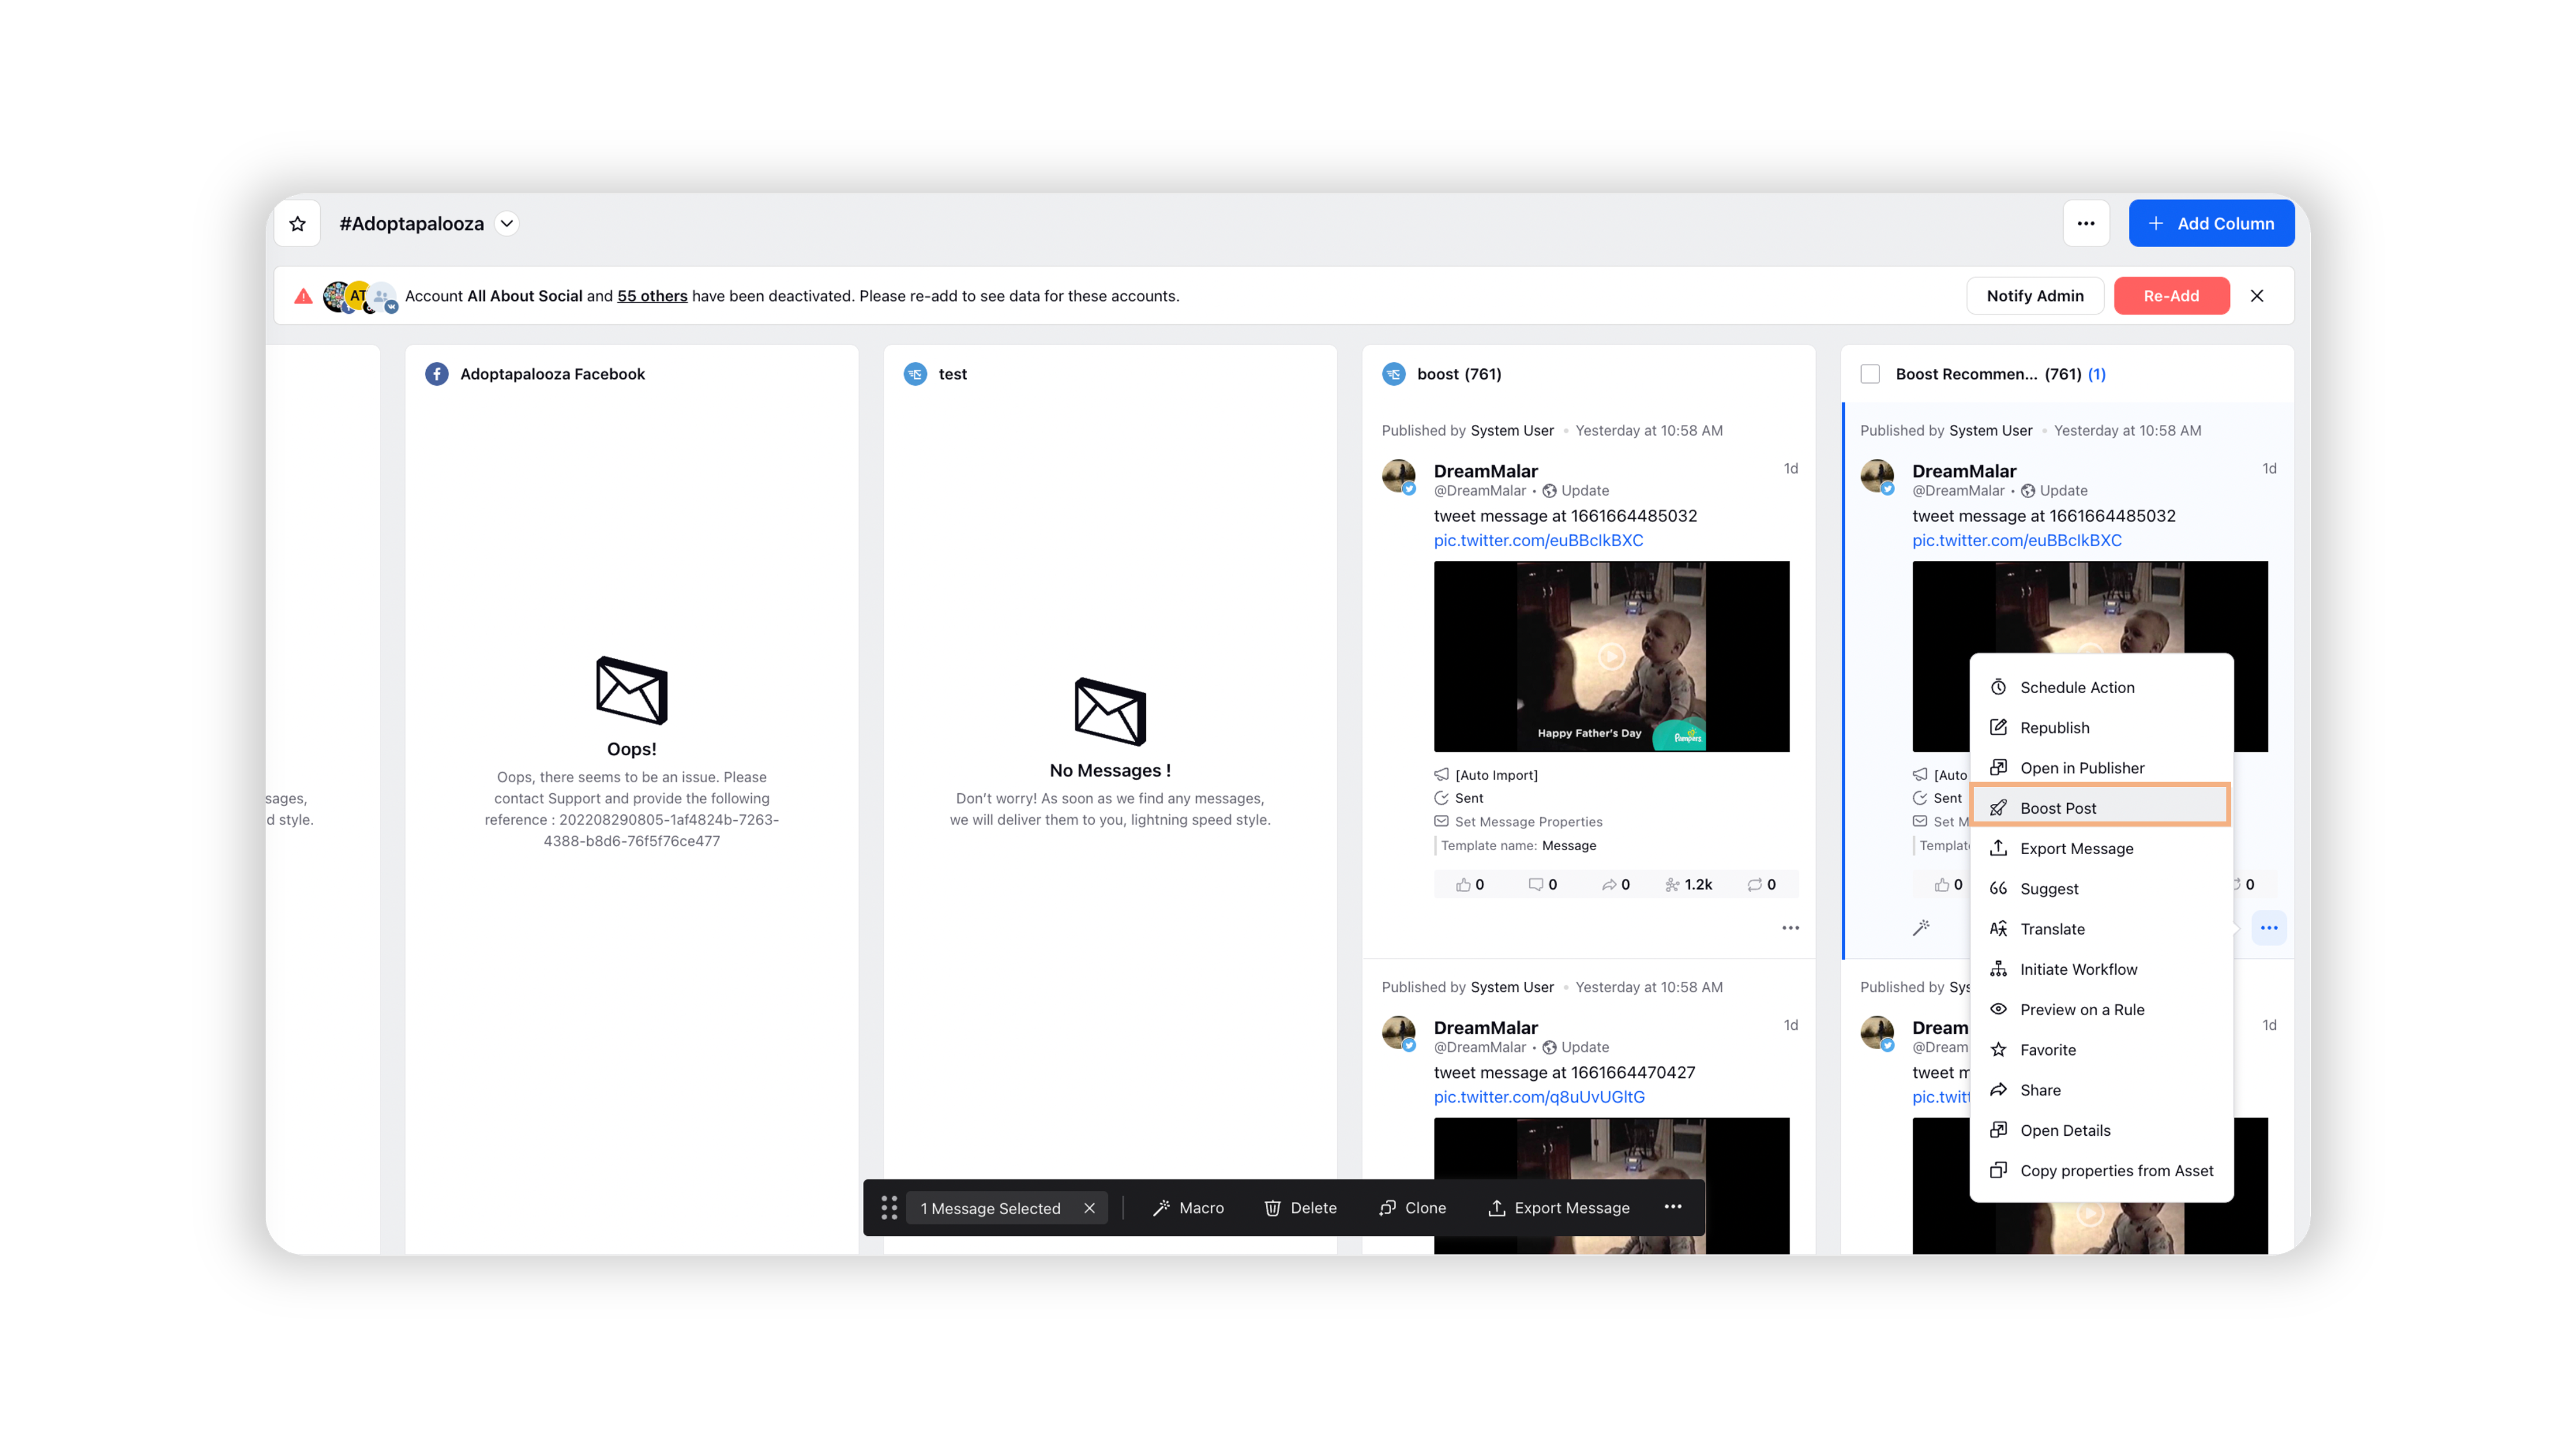
In the newly created column, you can see all the boost recommended posts and boost them by clicking on the Options icon at the bottom of that card. Select the Boost Post option from the menu.
On the Boost Post window, select the boost type and the Ad account from which you want to boost the post. You can also choose between creating a new and selecting an existing Paid Initiative and enable campaign benchmarking if needed.
You can select the audience you want to target or create a new audience for this post. Here, you can also see an audience reach estimate for the audience you select or create. Once finished, click the Boost button. You can also set up your campaign using the Quick Ad Publish option at the bottom left.

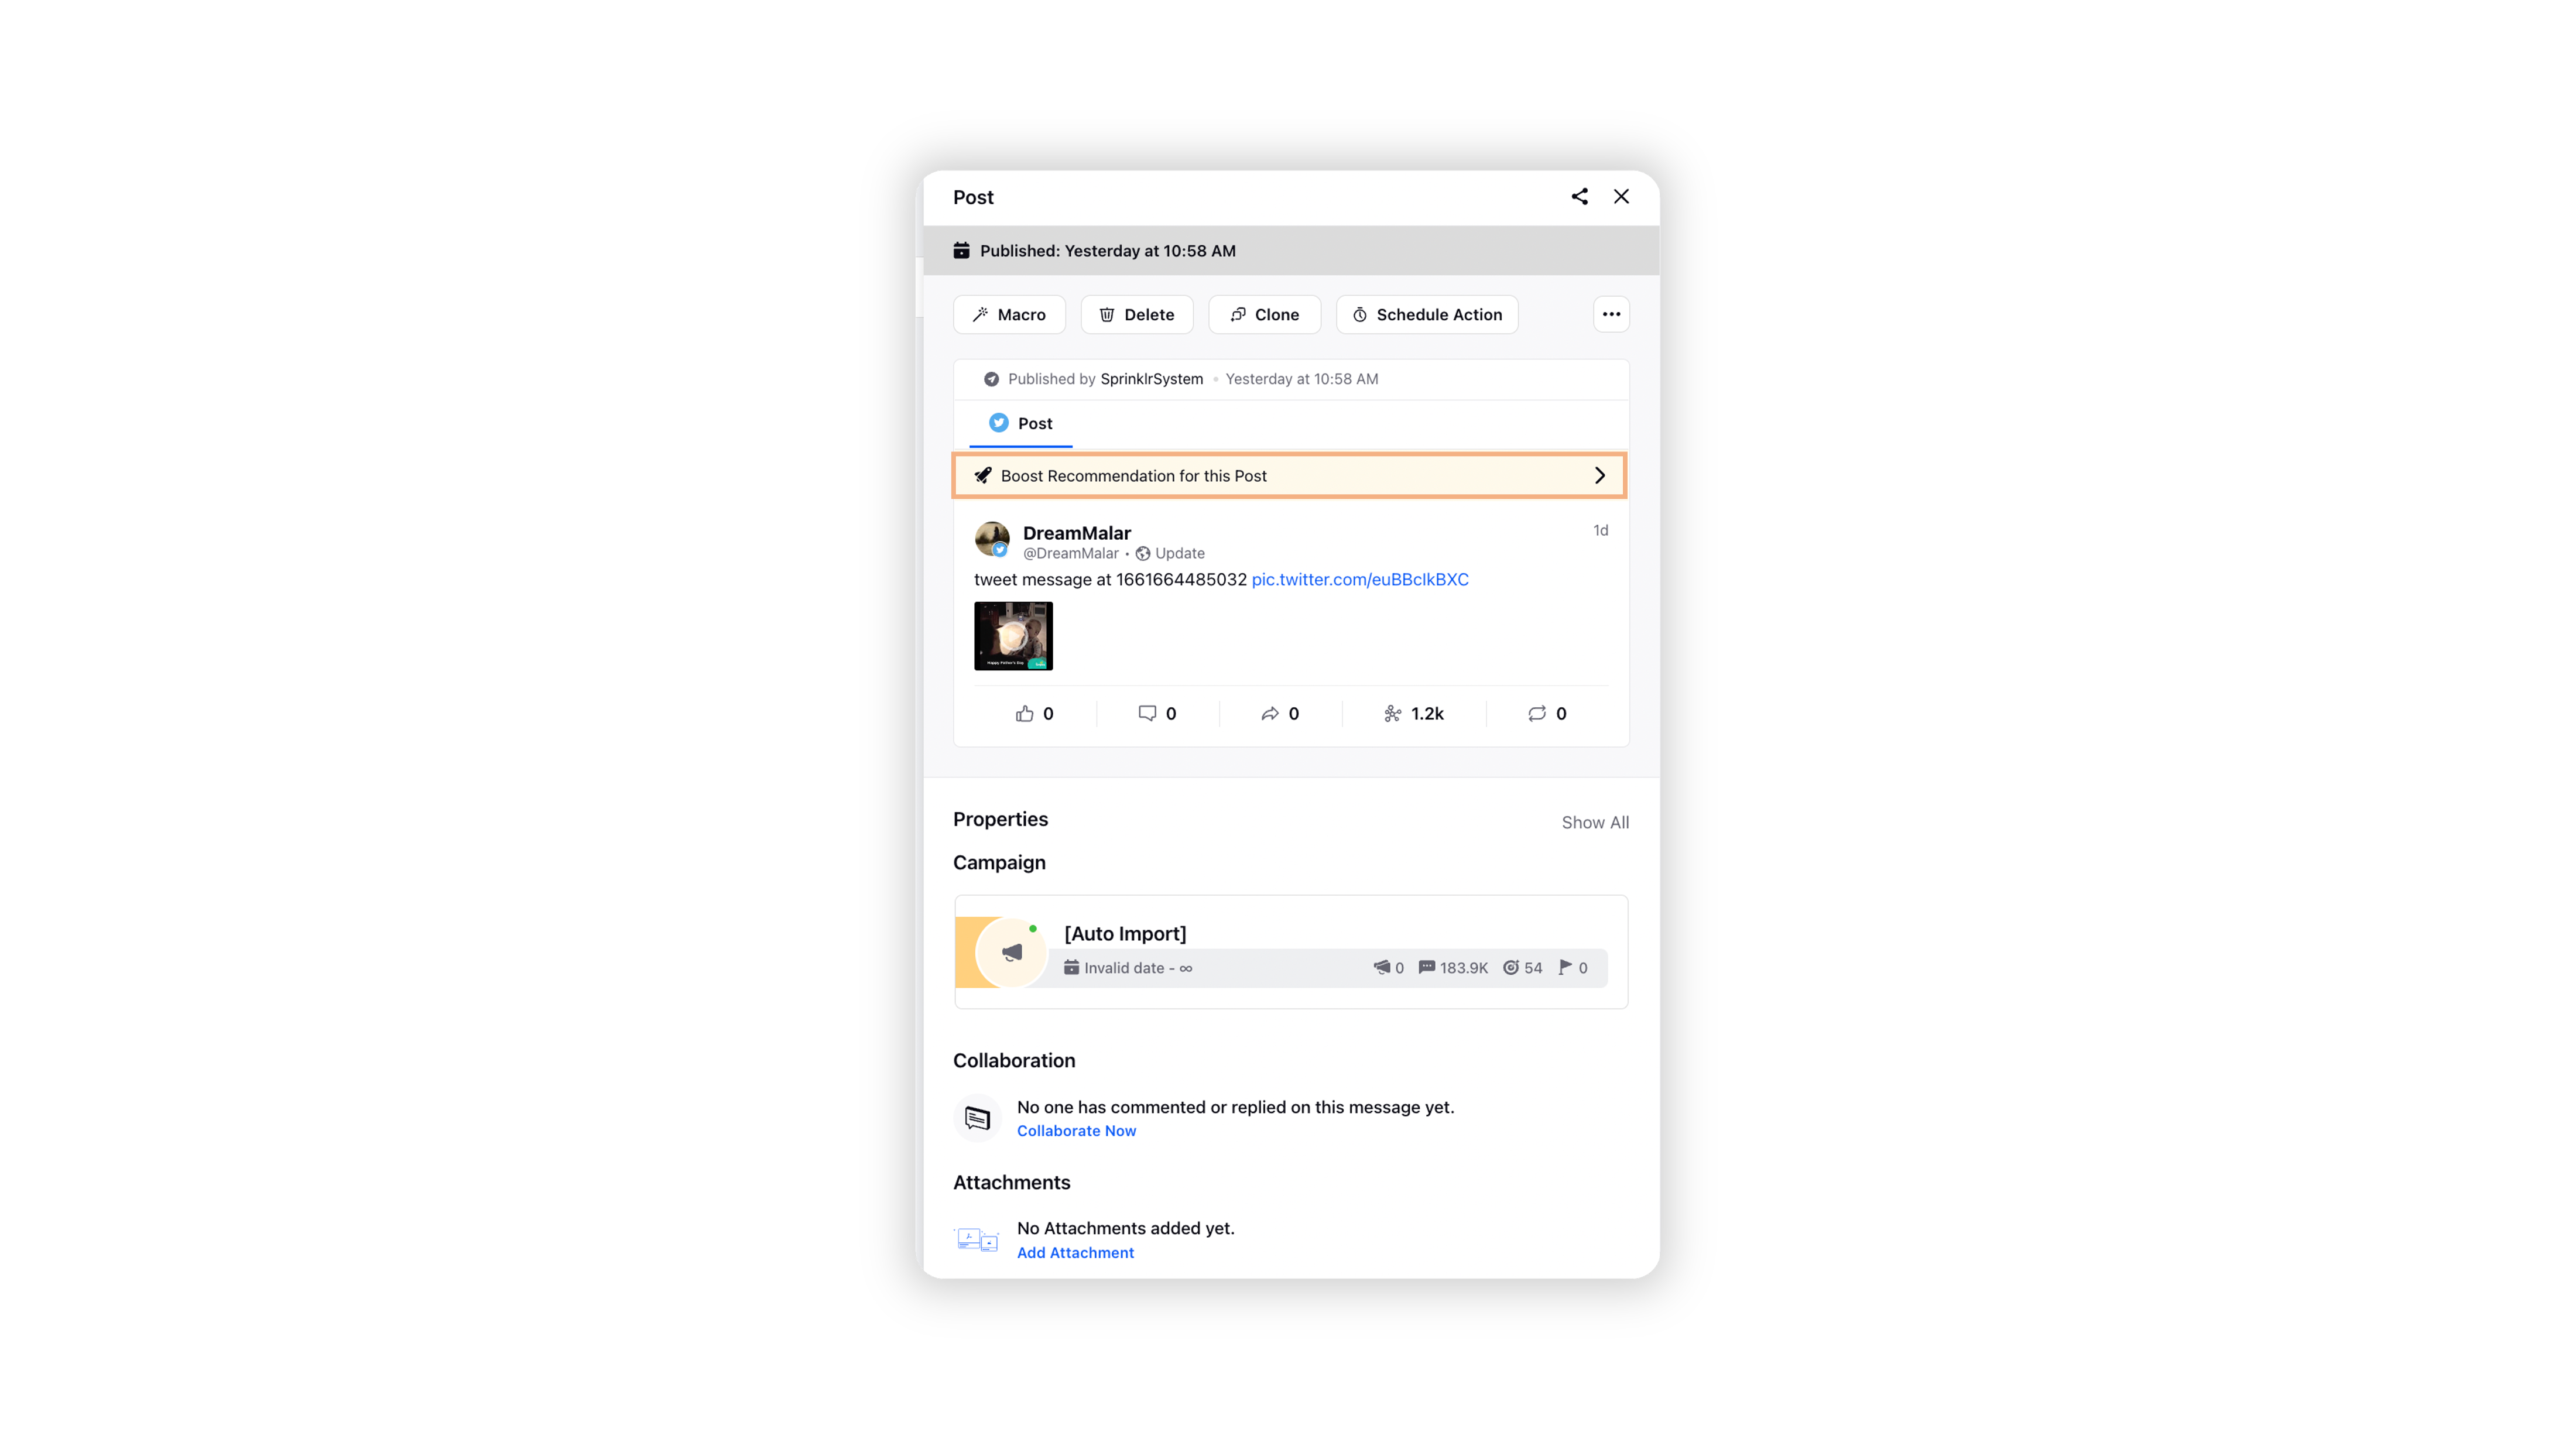
You can also click on the post and then boost it in the new pane that opens up. Click the Options icon in the top right corner, and you'll find the option to boost post in the drop-down menu. Here you can also check the Post Engagement Rate Trend in this pane by clicking on the arrow next to Boost Recommendation for this Post.
 To create Auto boost rules in the Rule Engine
Sprinklr's Rule Engine allows you to create and automate workflows.
Click the New Tab icon. Under Sprinklr Marketing (Ads), click Manage Rules within Rule Engine.
On the Rule Engine Dashboard, click on the Main Menu in the top left corner and select Auto Boost within Customer.

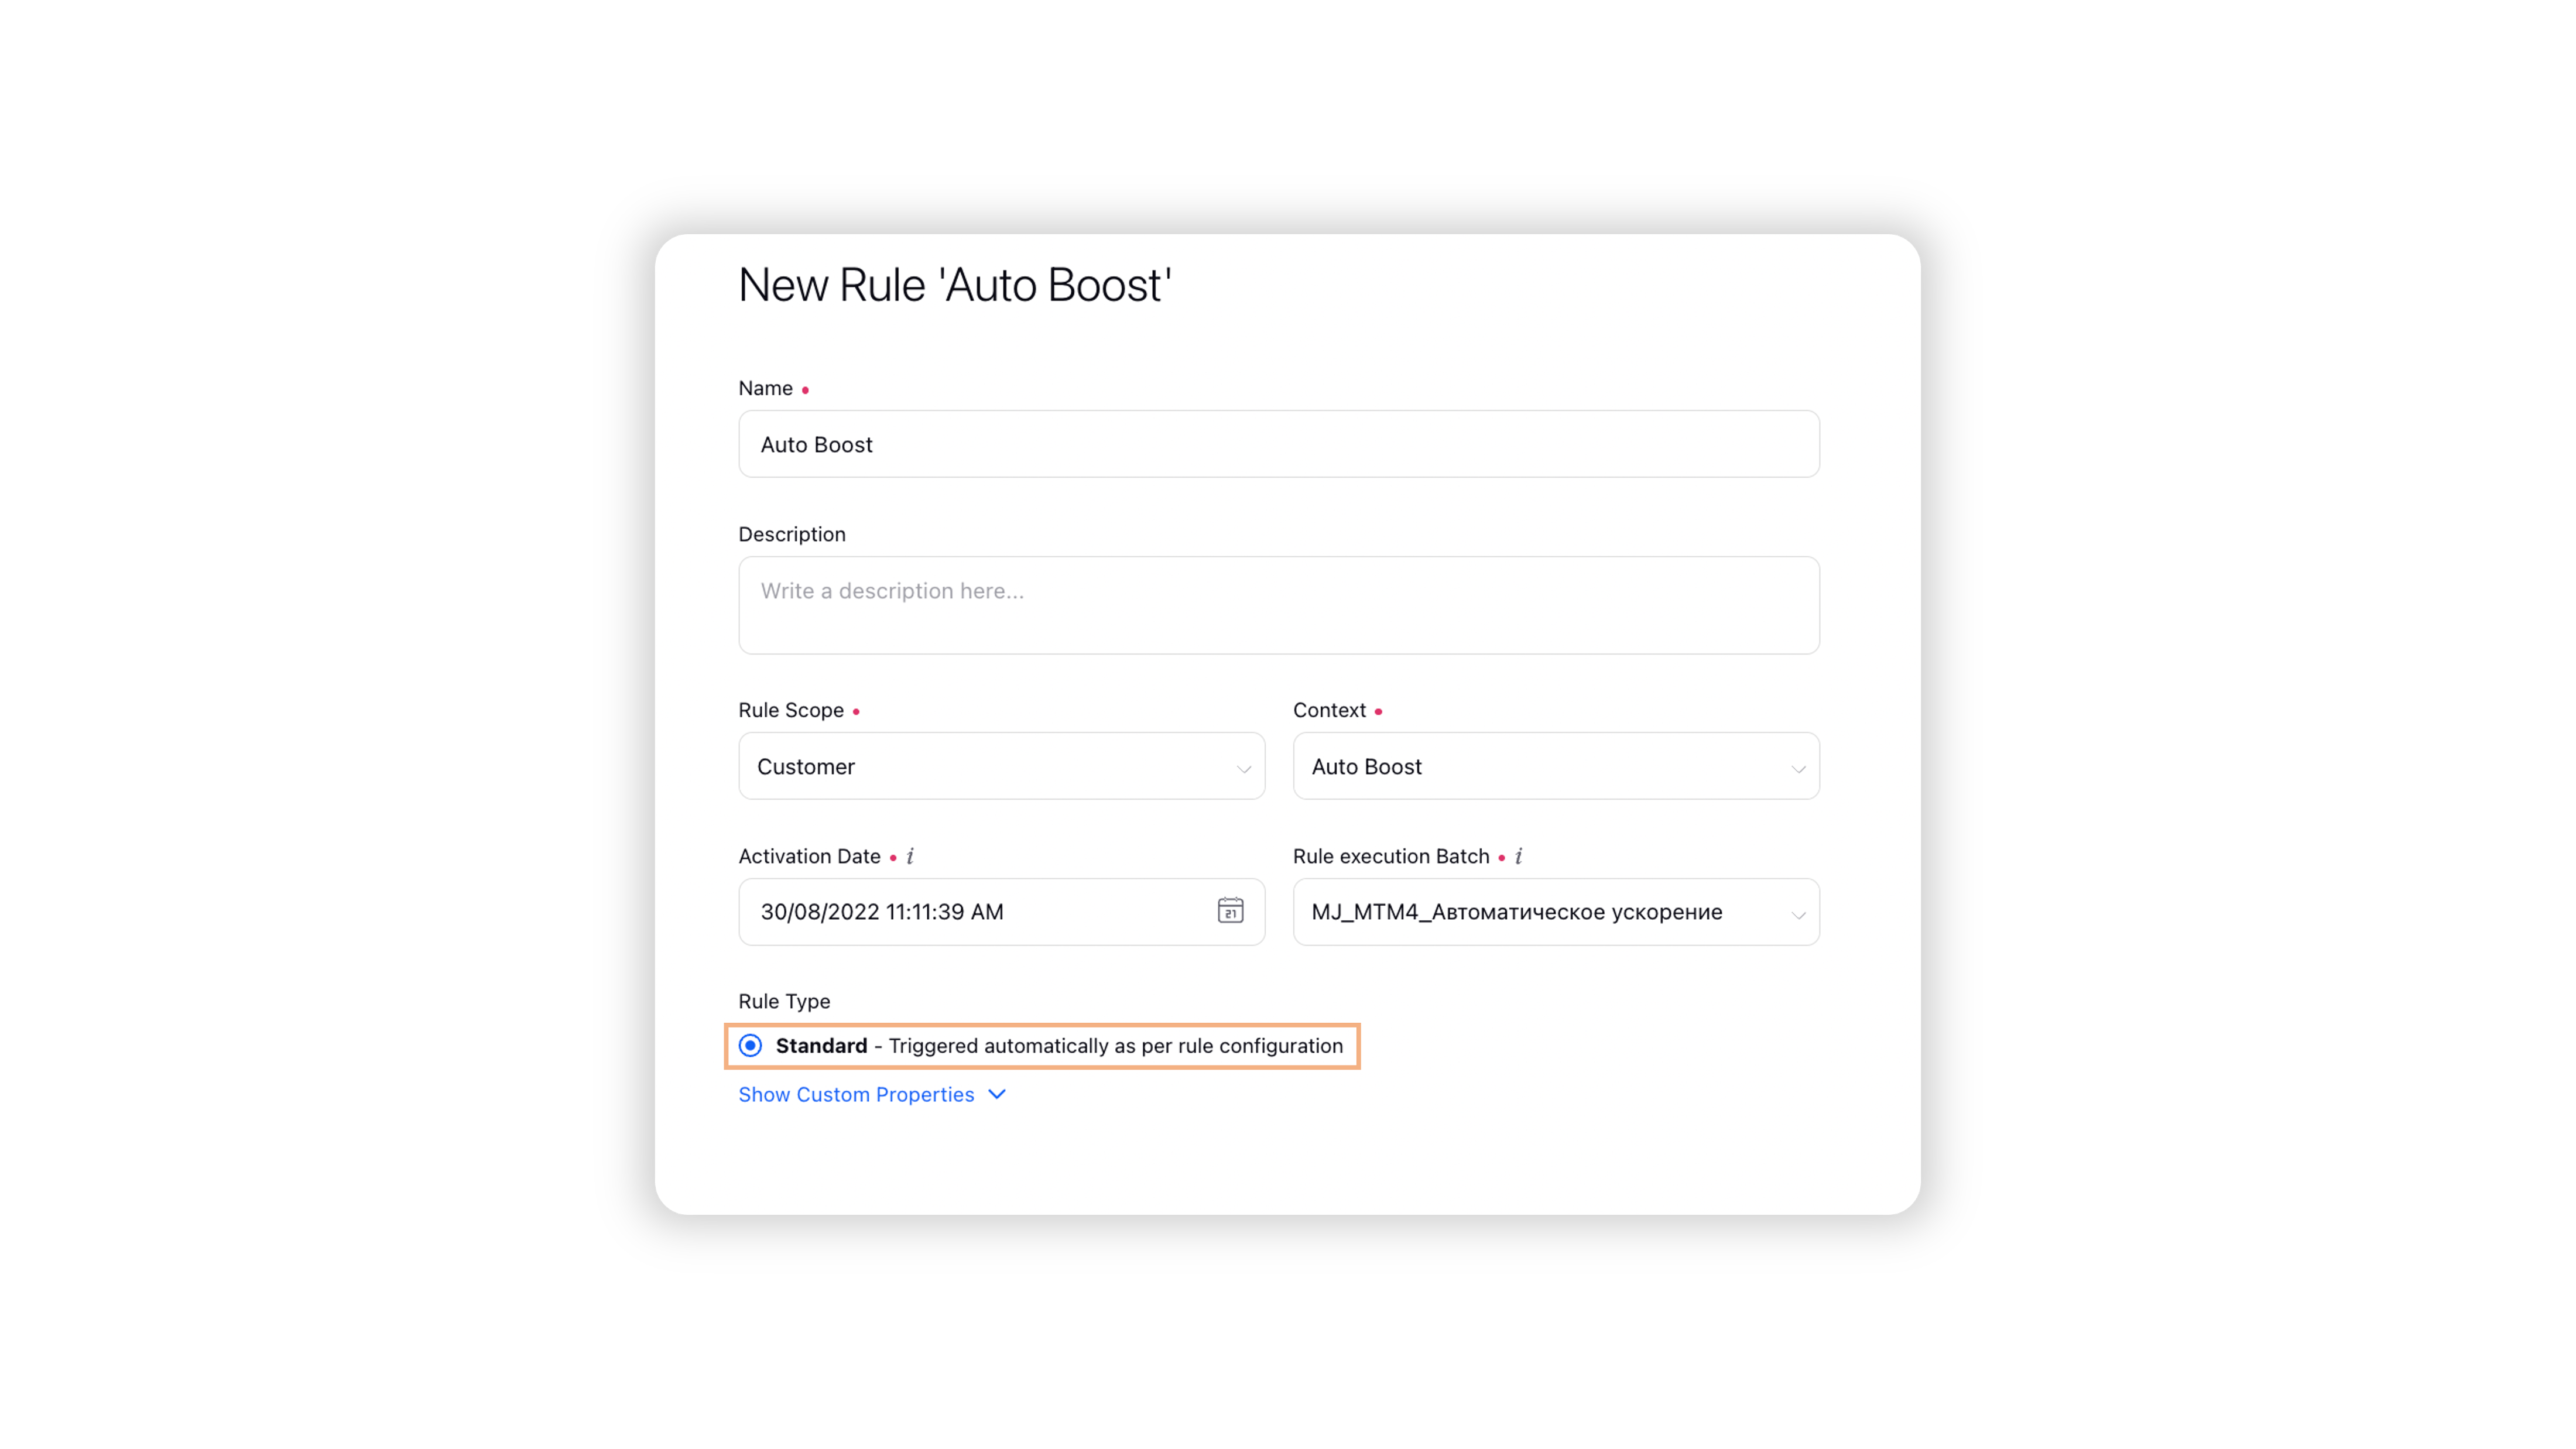
On the New Rule window, fill out the fields. To set up the Auto boost, select the rule type as Standard. Learn more about creating a new rule in the Rule Engine in this article.
In the Rule Engine Builder, set up rules to identify posts as "Boost Recommended" and Auto boosting such posts if some specified conditions are met.


For more clarity on creating Auto boost rules, you can refer to this video tutorial.