Approving and Managing Reward Requests on Site
Updated
This article guides admins through viewing, approving and rejecting reward requests within the Reward Engine. It explains what happens when requests are rejected, how tokens are handled and how admins can efficiently manage requests using filters and sorting. By following these steps, admins can manage reward redemptions smoothly and ensure a transparent experience for users.
Learn how to Approve or Reject Reward Requests
Access the Reward Management Section
Log in to the Advocacy Platform: Use your credentials to access the site.
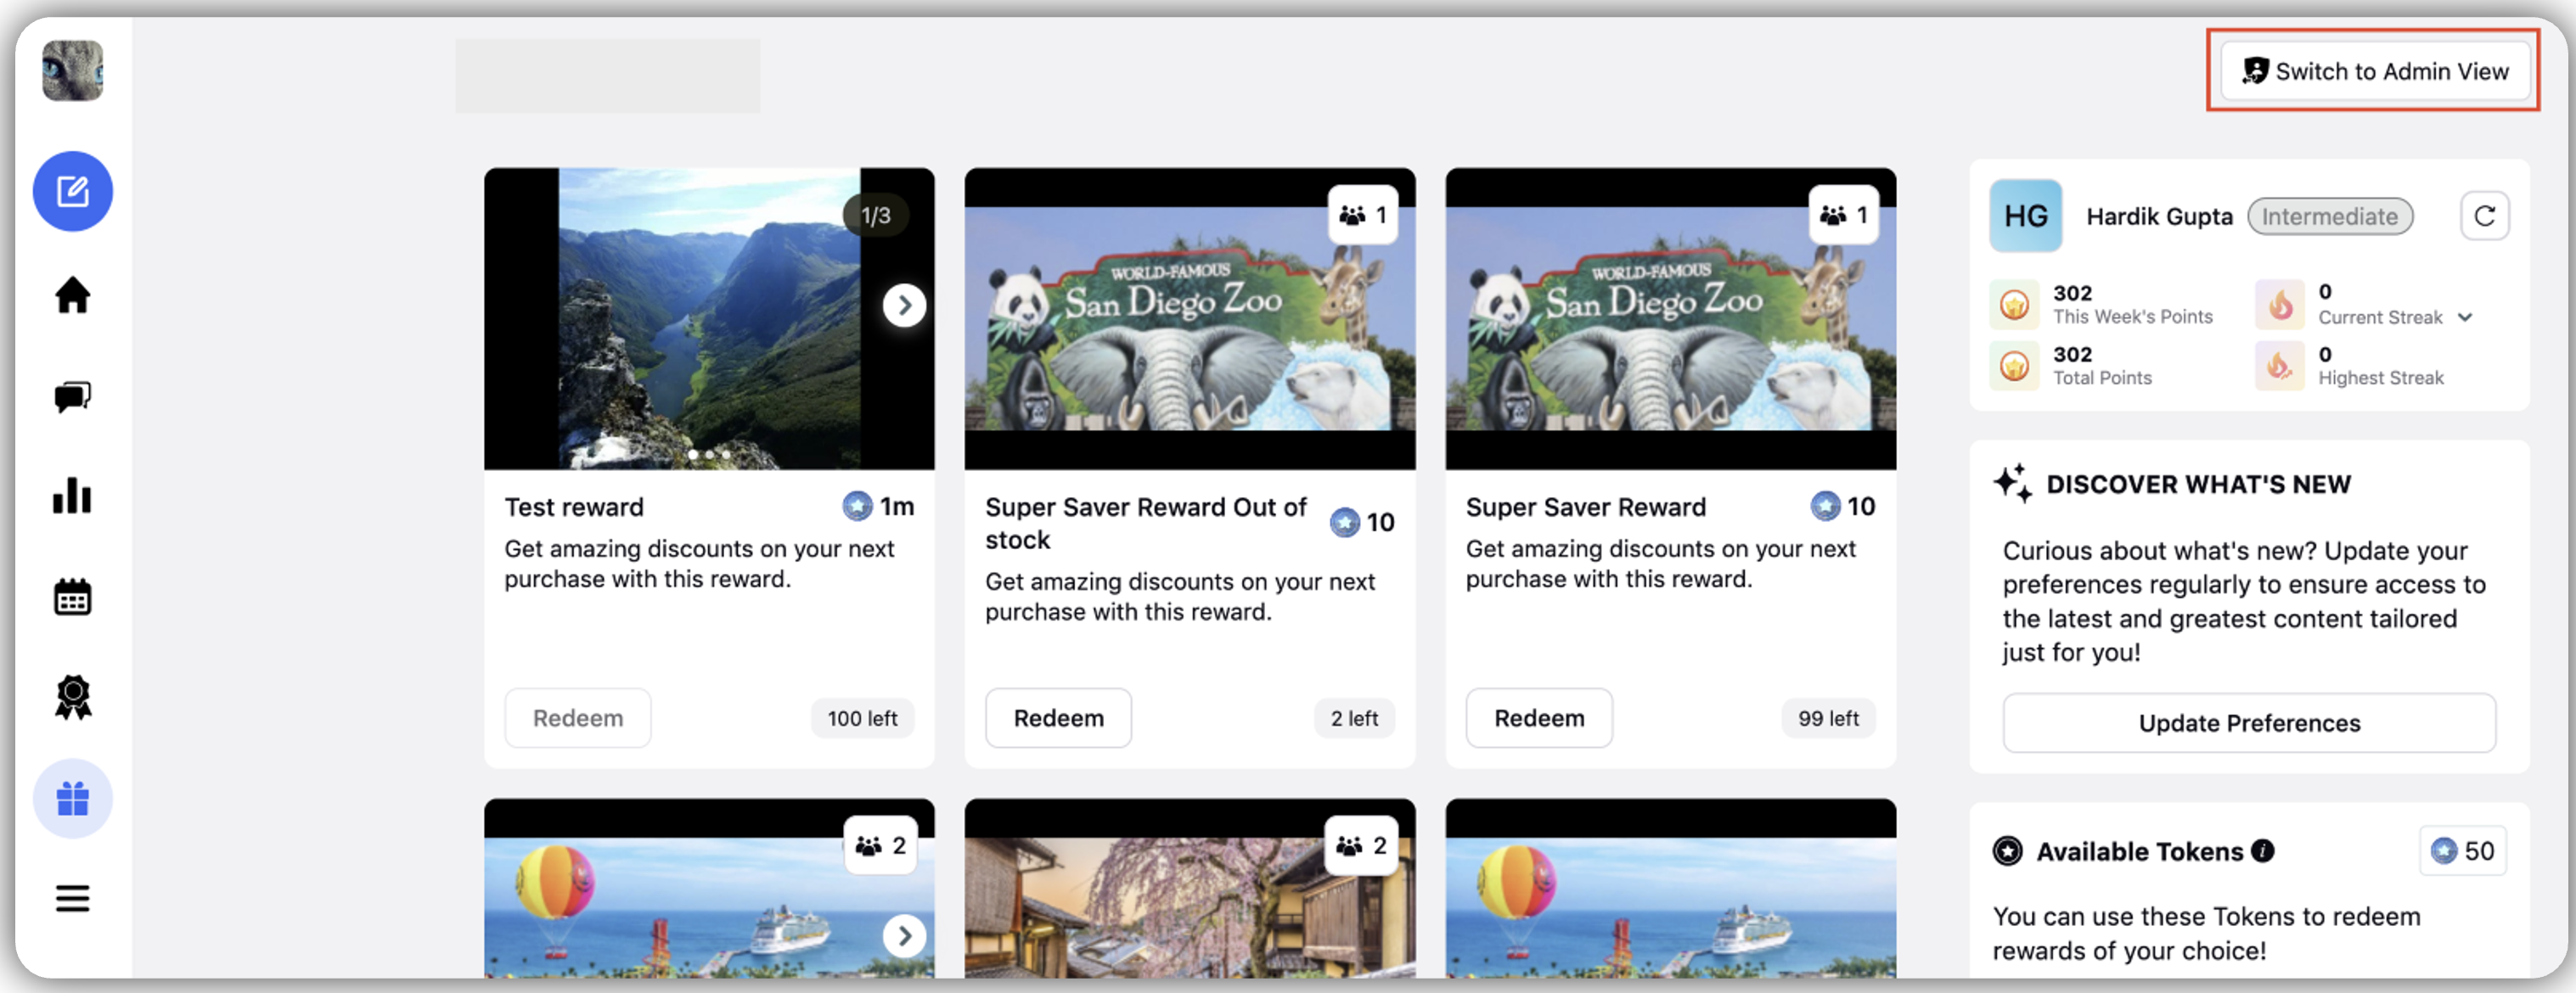
Navigate to the Reward Engine: Click on the Reward Engine icon on the left navigation rail.

Switch to Admin Mode: On the top-right corner of the Reward Engine screen, click Switch to Admin Mode.

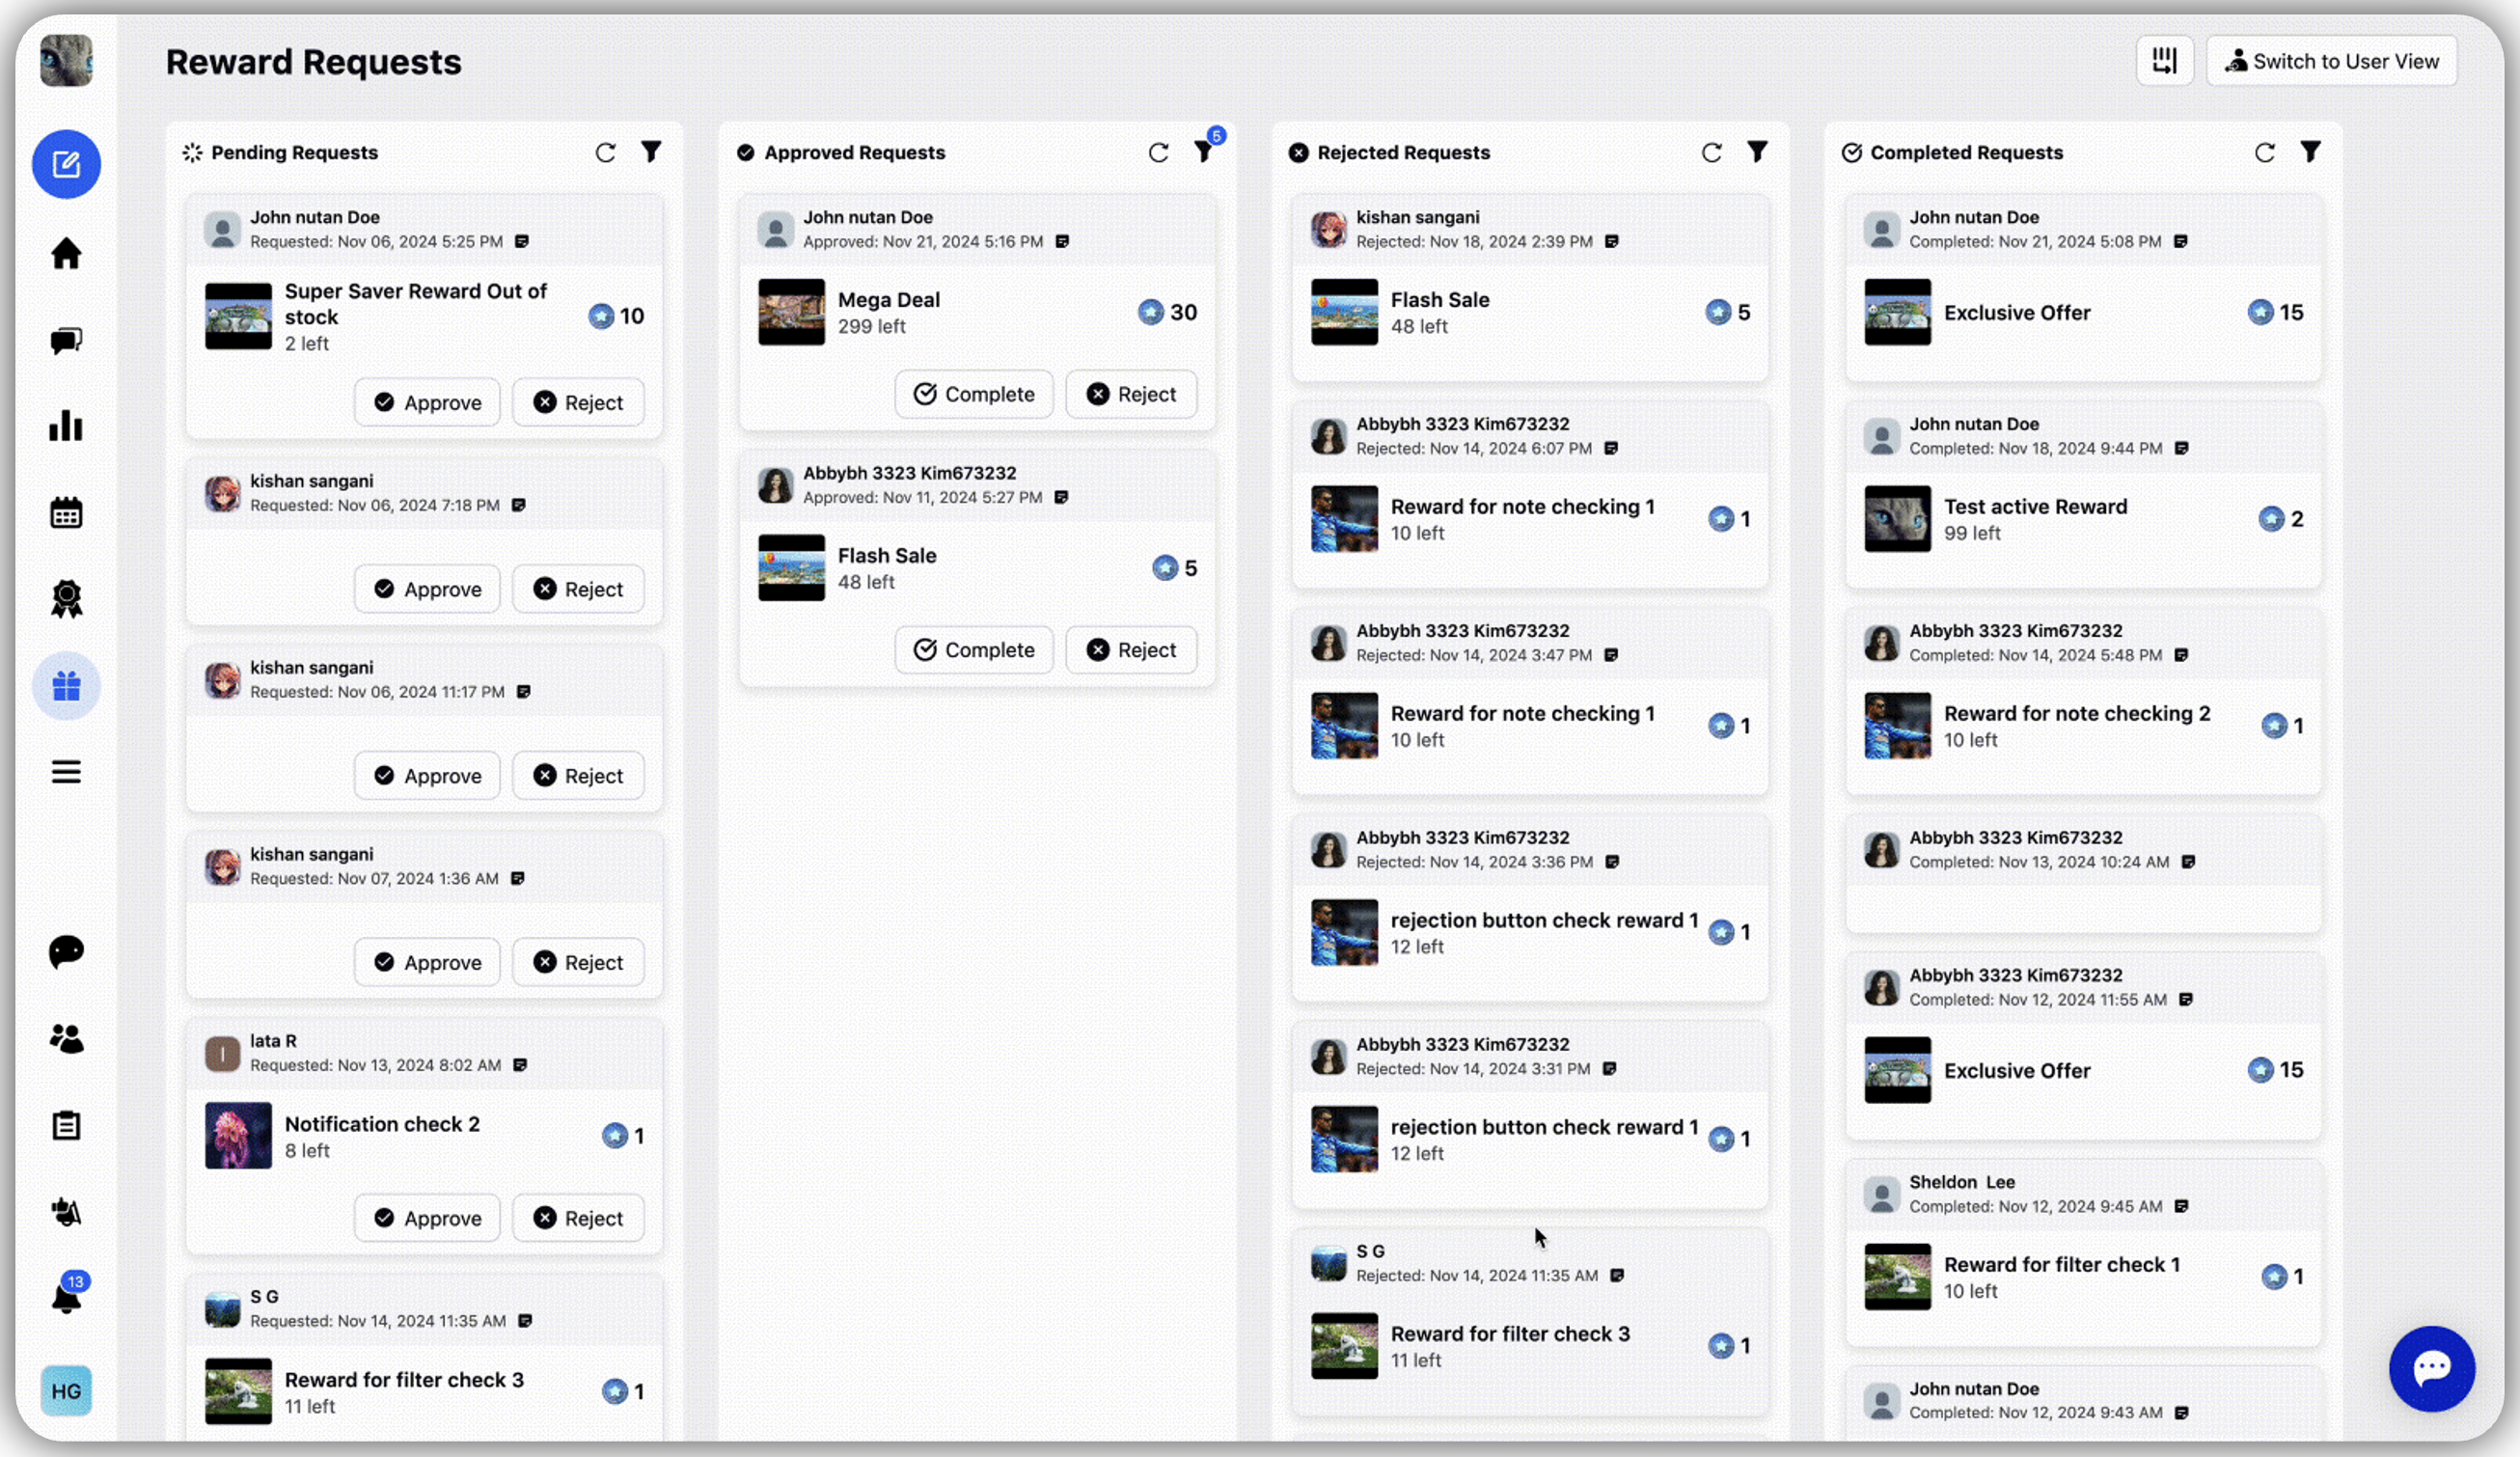
This will display the Reward Management Section with four columns or according to the roles and permissions set for your user:
Pending: Requests awaiting admin approval or rejection
Approved: Requests that have been approved and are awaiting fulfillment or completion.
Rejected: Requests that admins have denied.
Completed: Requests that have been fulfilled and marked as complete.

Use Request Status Columns
Each column in the Reward Management Section is designed to help manage reward requests efficiently.
Pending Requests:
Displays all requests awaiting action.
By default, sorted as the oldest request at the top, so that user who redeemed first can be approved first.
Approved Requests:
Shows all approved requests awaiting fulfillment.
Requests in this column can be marked as Completed or moved to Rejected if necessary.
By default, sorted as the latest approved request at the top, so that admins can manage the requests efficiently.
Rejected Requests:
Lists all denied requests, along with the mandatory rejection notes.
By default, sorted as the latest rejected request at the top, so that admins can manage the requests efficiently.
Tokens from these requests are automatically returned.
Completed Requests:
Displays all fulfilled requests, which are either delivered or the process for the reward is completed.
Filter Option
Reward Name: Filter requests with a specific reward to see all related requests in one view.

Approve or Reject a Request
Review Request Details:
Click request in the Pending column to view:
Reward name and description.

User details, including tokens used and previous reward history.

Any notes added by other admins.
Approve a Request:
Click Approve to move the request to the Approved column.
You will see the reward marked as Redeemed in their history.
Reject a Request:
Click Reject to deny the request.
Add a rejection note explaining why the request was denied (this is mandatory).
The rejected request moves to the Rejected column, and the tokens are returned to the user.
The user will see the request marked as Rejected in their history, and the Redeemed button on their Reward card will revert to Redeem, allowing them to submit a new request.
Managing Rejected Requests
Token Return: Tokens from rejected requests are automatically credited back to your account and reset with a new expiry period.
User Eligibility for Reattempts: You can submit a new request for the same reward after rejection.
Tracking Rejected Requests:
Admin View: Rejected requests remain in the Rejected column with the associated rejection notes.
User View: Rejected requests appear in your reward history with a clear status.
Managing Requests for Specific Users
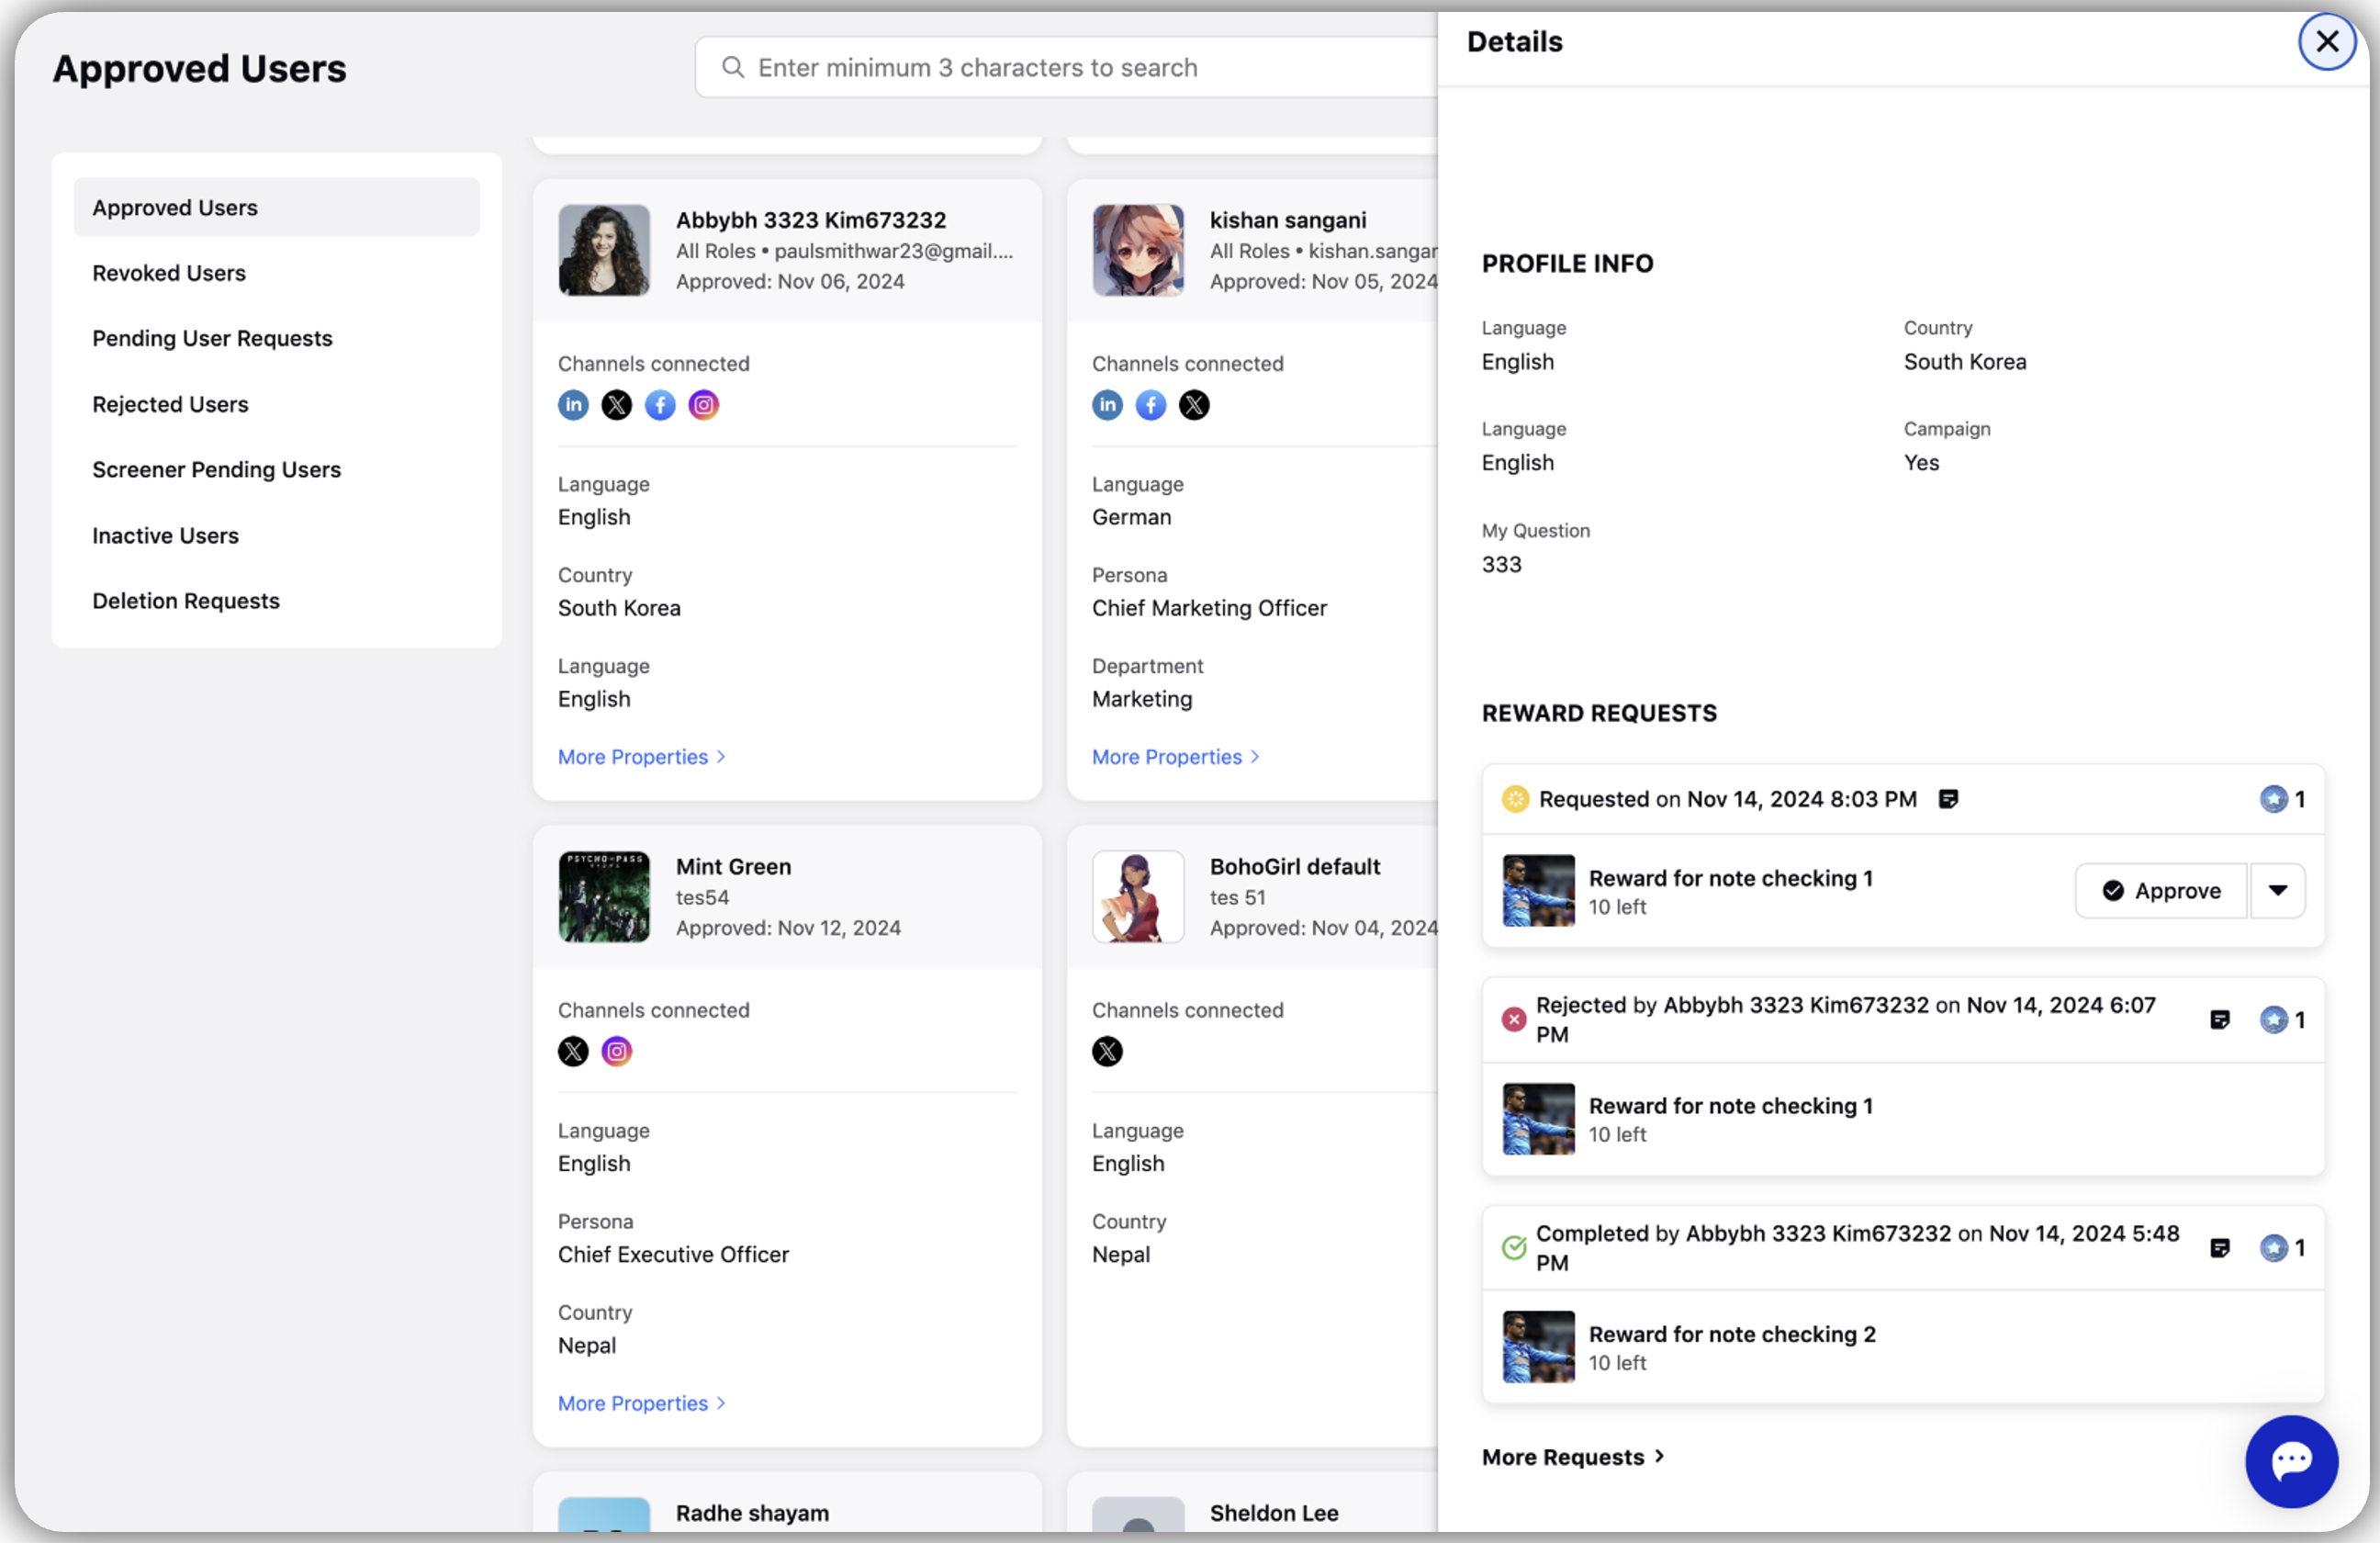
Admins can view all reward requests submitted by you through the User Management section. This provides a complete history of their interactions with the Reward Engine.
Access User Management:
Navigate to User Management in the left pane of site.
View User Reward Requests:
Search for the user by name.
Open the user’s profile to view all their reward requests, categorized by status (Pending, Approved, Rejected, or Completed).
Check details like the reward name, request date, and tokens used.
