Manage Shift Patterns in Sprinklr WFM
Updated
Sprinklr WFM’s Shift Patterns allow Administrators and Workforce Managers to create and manage structured weekly Shift templates for agents. Patterns involve scheduling employees for different Shifts at varying times throughout the week, which ensures continuous operations, prevents employee burnout, and balances work-life demands.
This section outlines the essential steps for managing Shift Patterns, including:
Creating Shift Patterns
Importing Shift Patterns
Edit Shift Patterns
Clone Shift Patterns
Delete Shift Patterns.
Note: This feature is currently Dynamic Property (DP) controlled. Contact your Success Manager to enable it in your environment.
Navigate to the Shift Patterns Record Manager
Follow these steps to create a Shift Pattern:

Go to the Workforce Manager Persona App on the Launchpad.

Select Settings from the Left Pane to open the Governance page.
Go to Shift Patterns to open the Shift Patterns record manager.
Create Shift Patterns
Prerequisites for creating Shift Patterns:
Sprinklr WFM should be enabled for the environment.
You must have access to the Workforce Manager Persona App.
Follow these steps to create a Shift Pattern:
Navigate to the Shift Patterns record manager.

Click the +Shift Pattern button at the top right of the page to open the Create Pattern page.
Fill in the required fields on the Create Pattern page. Fields marked with a red dot are mandatory. Below are the descriptions of the fields on this page:
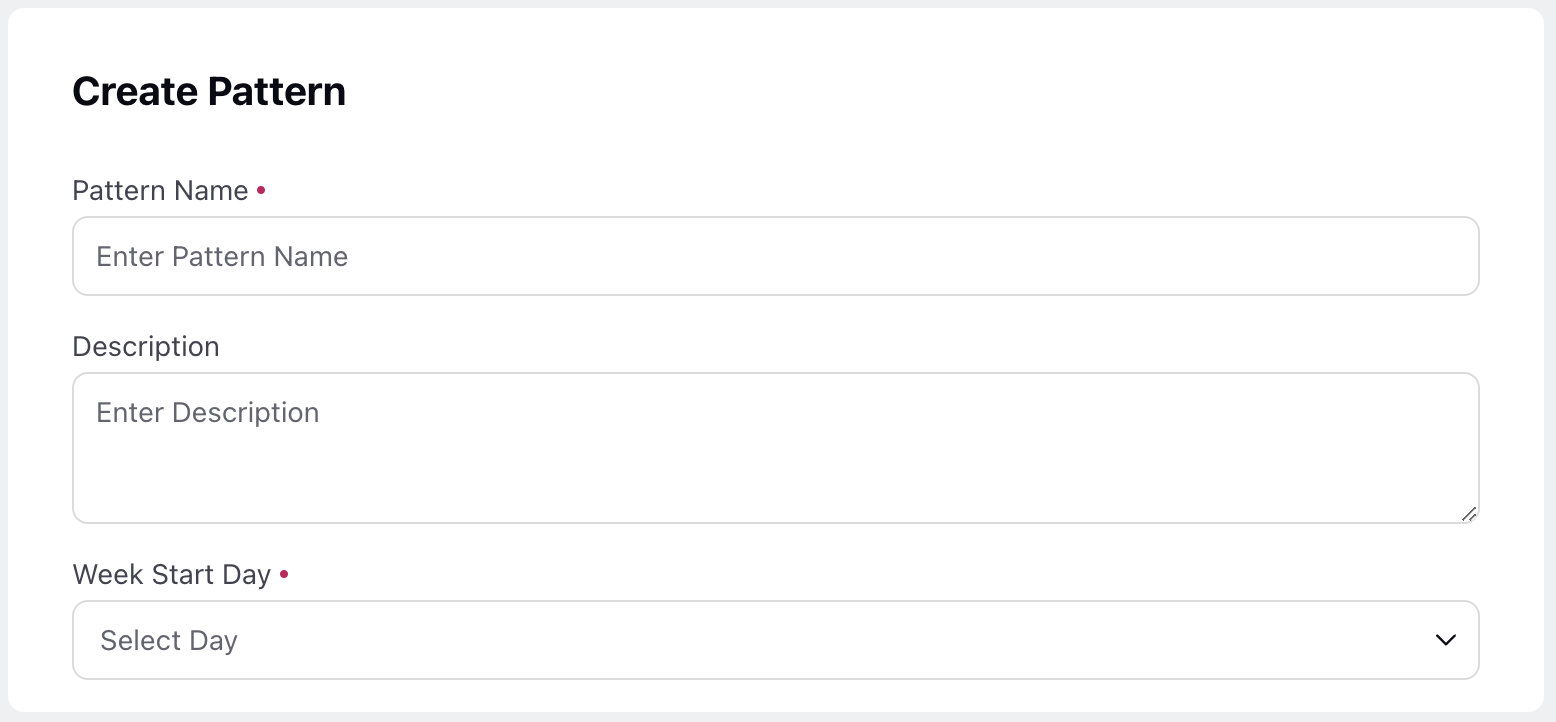
Pattern Name: Enter a descriptive name for the Shift Pattern. (Required)
Description: Provide a brief description of the Shift Pattern.
Week Start Day: Select the day of the week on which the Shift Pattern will start. (Required)
Click the Next button at the bottom right to open the Weekly Layout page.
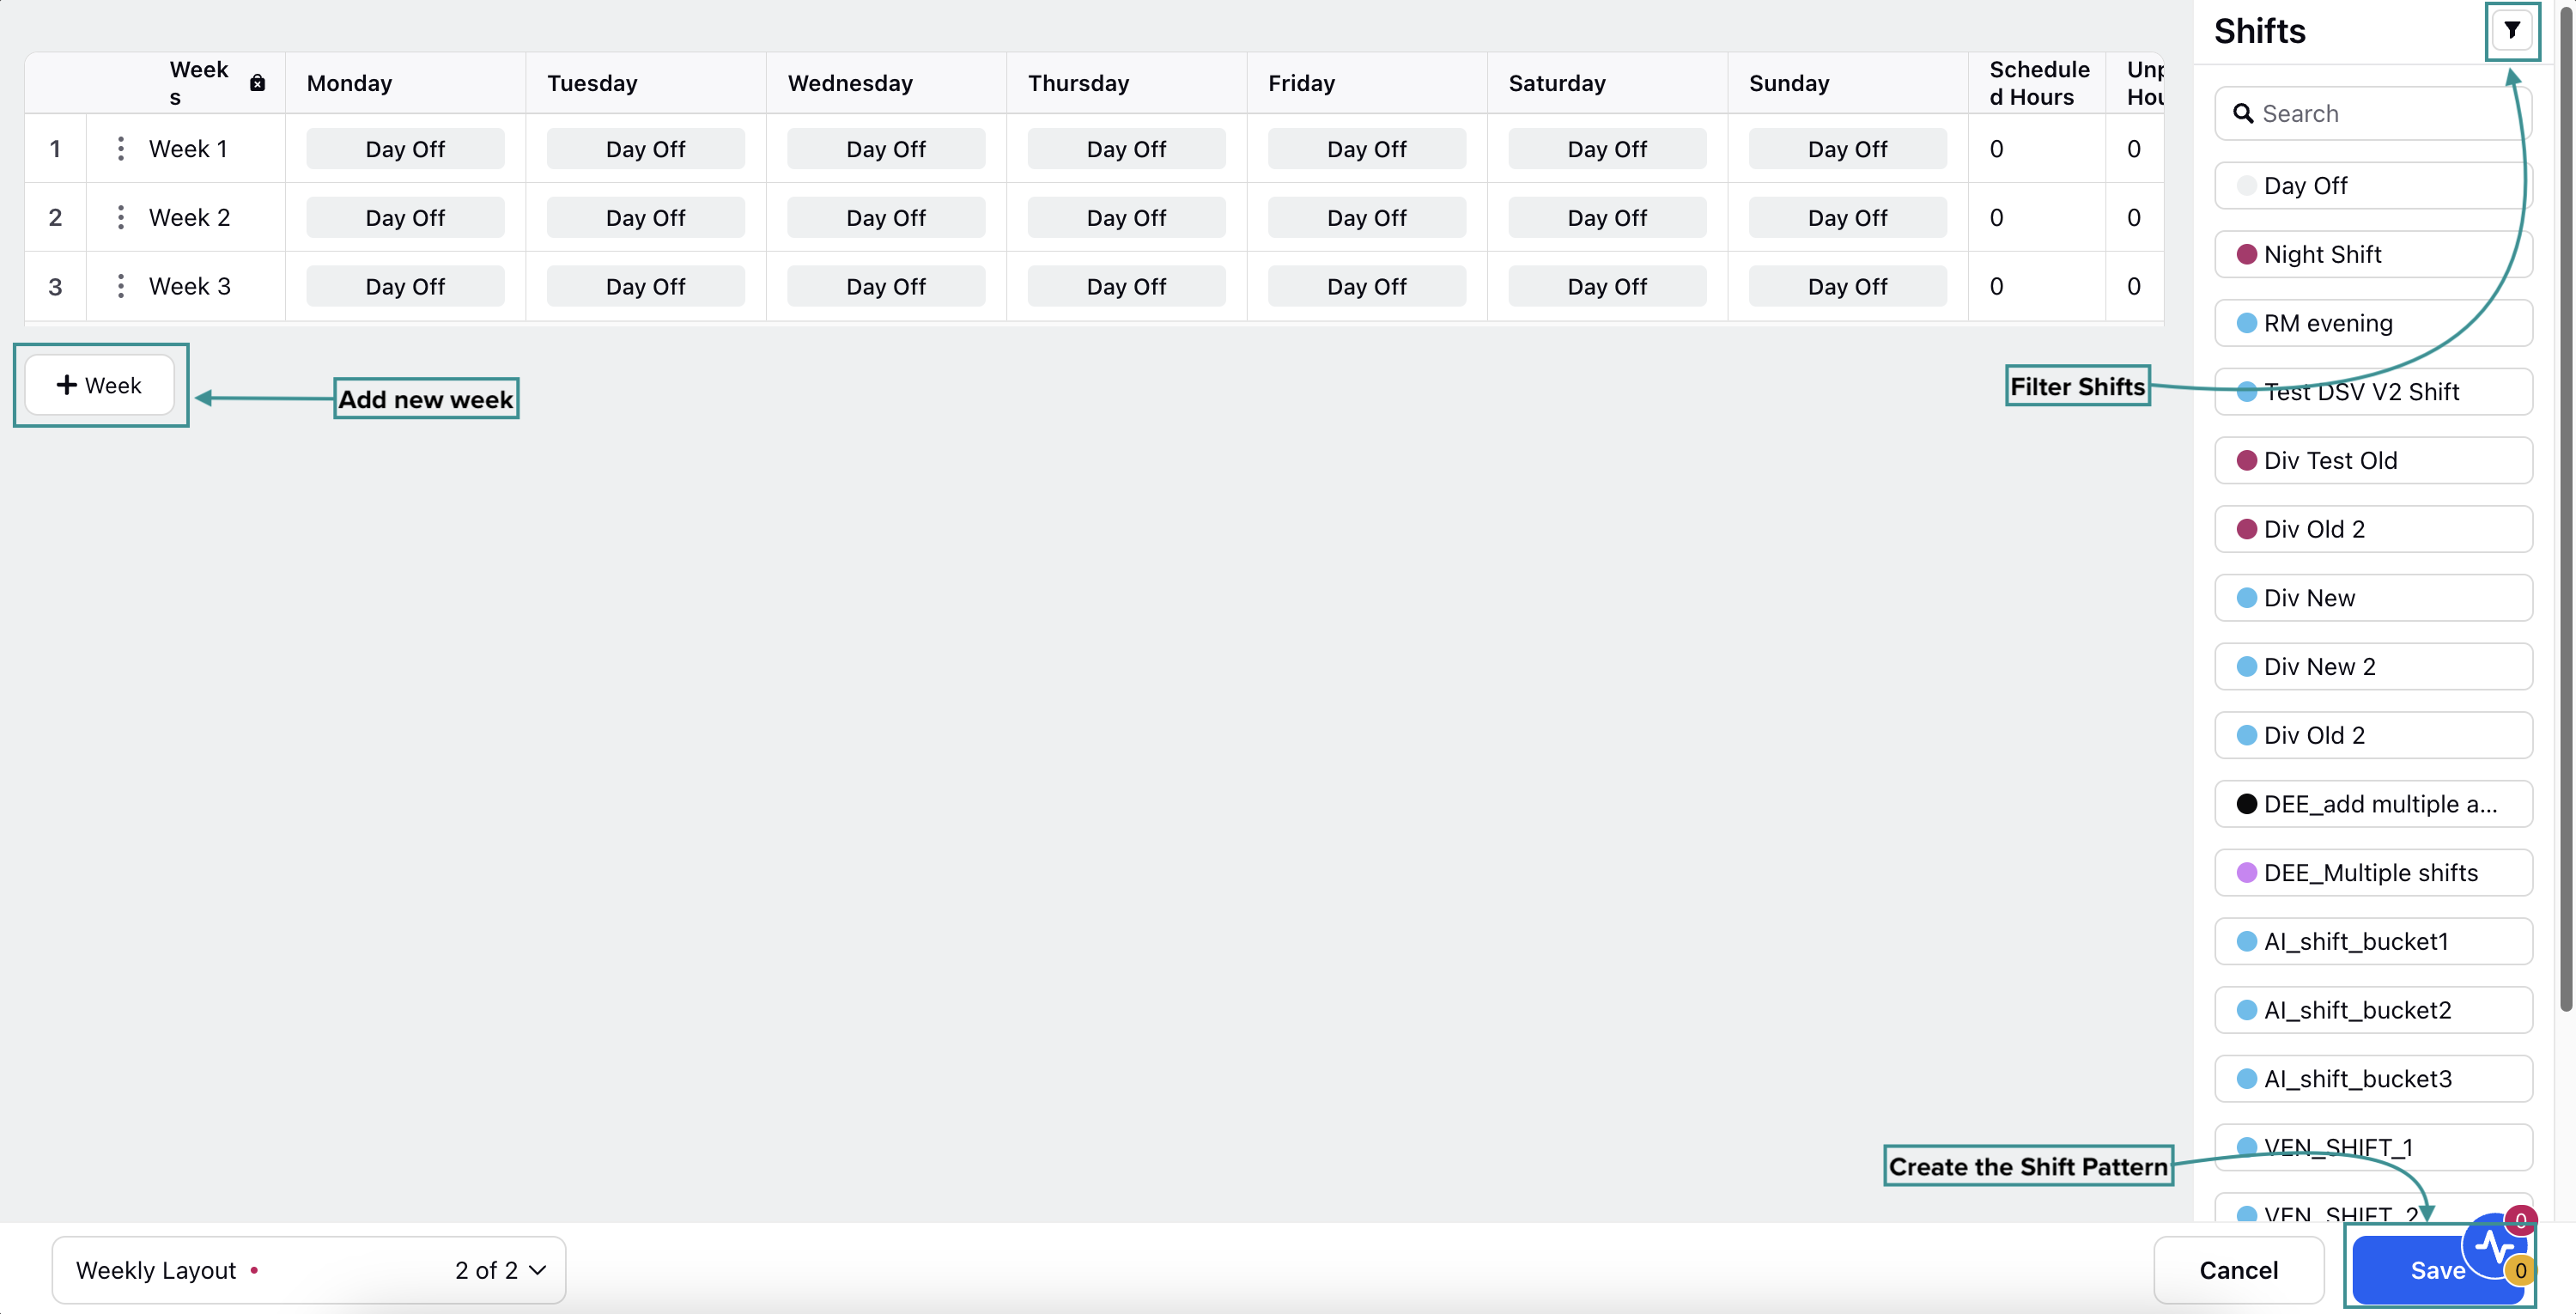
On the Weekly Layout page, you can assign any existing Shift to specific days of the week to create the Shift Pattern. Each day of the week has its own column and multiple Shifts can be assigned for each day of the week. You can also have multiple weeks with different patterns under a single Shift Pattern by clicking the “+Week” button.
Note: Day Off Shift is applied to all slots by default.
Note: You cannot assigned multiple Shifts on a Day Off.

There are two ways to assign Shifts to specific days of the week. You can either drag and drop the required Shift from the list of Shifts on the right side of the page or click the respective slot to display a list of all available Shifts and select the desired options.
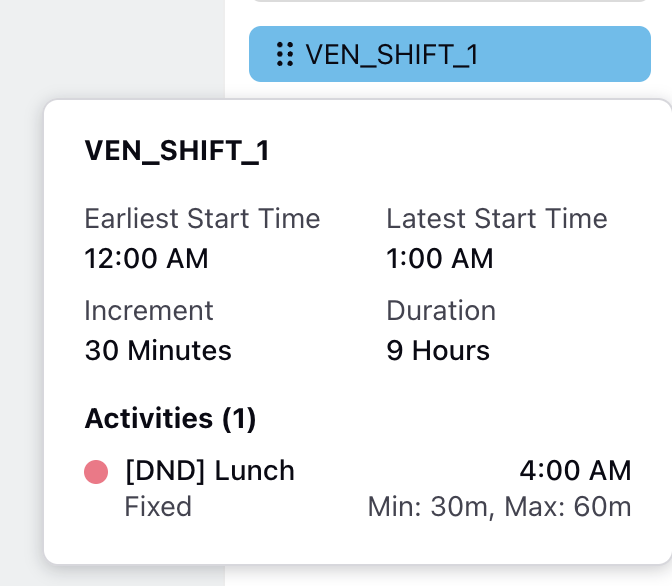
The list of Shifts allows you to search for the required Shifts. The list can be filtered based on the Tags and Duration associated with each Shift to narrow down the search. You can hover over any of the Shifts to show a hovercard that provides the details about the Shift, such as Earliest Start Time, Latest Start Time, Increment, Duration, and details of any assigned Activities.

Once you have assigned your desired Shifts to all the days of the week, you can clone the week. This will create a new week with the same Shift assignments as the original. Hover over the vertical ellipsis (⋮) icon corresponding to the week you want to share. This will show a list of options. Select Clone from the list of options to add another week with an identical Shift assignment. You can also delete a week by selecting Delete from the list of options.

This page also has the following columns:
Total Scheduled Hours: Displays the minimum and maximum Shift durations scheduled for the week.
Total Paid Hours: Displays the number of minimum and maximum hours from the scheduled hours spent on Paid Activities for the week.
Total Unpaid Hours: Displays the minimum and maximum hours from the scheduled hours spent on Unpaid Activities for the week.
Note: The values in these columns are shown as a range because they are calculated using the minimum and maximum durations of the Shift and related Activities. In other words, they reflect the Earliest Start Time and the Latest Start Time for each day of the week.
As you proceed to assign Shifts to the required days of the week, these columns also get updated in real-time. For example, if Shifts with a duration of 8 hours have been assigned from Monday to Friday, with Saturday and Sunday marked as Days Off, the total scheduled hours will be 40.
Click the Save button at the bottom right of the page to create the Shift Pattern with the specified configurations.
This completes the process of creating a Shift Pattern.
Import Shift Patterns
You can import mulitple existing Shift Patterns to Sprinklr's system using the import feature. By following the provided template, you can ensure all necessary information is correctly formatted and easily uploaded through the UI, saving time and reducing potential errors.
Follow these steps to import Shift Patterns:
Navigate to the Shift Patterns record manager.

Click the Import Shift Patterns button at the top right of the record manager. This will open the Import Shift Patterns dialog box.
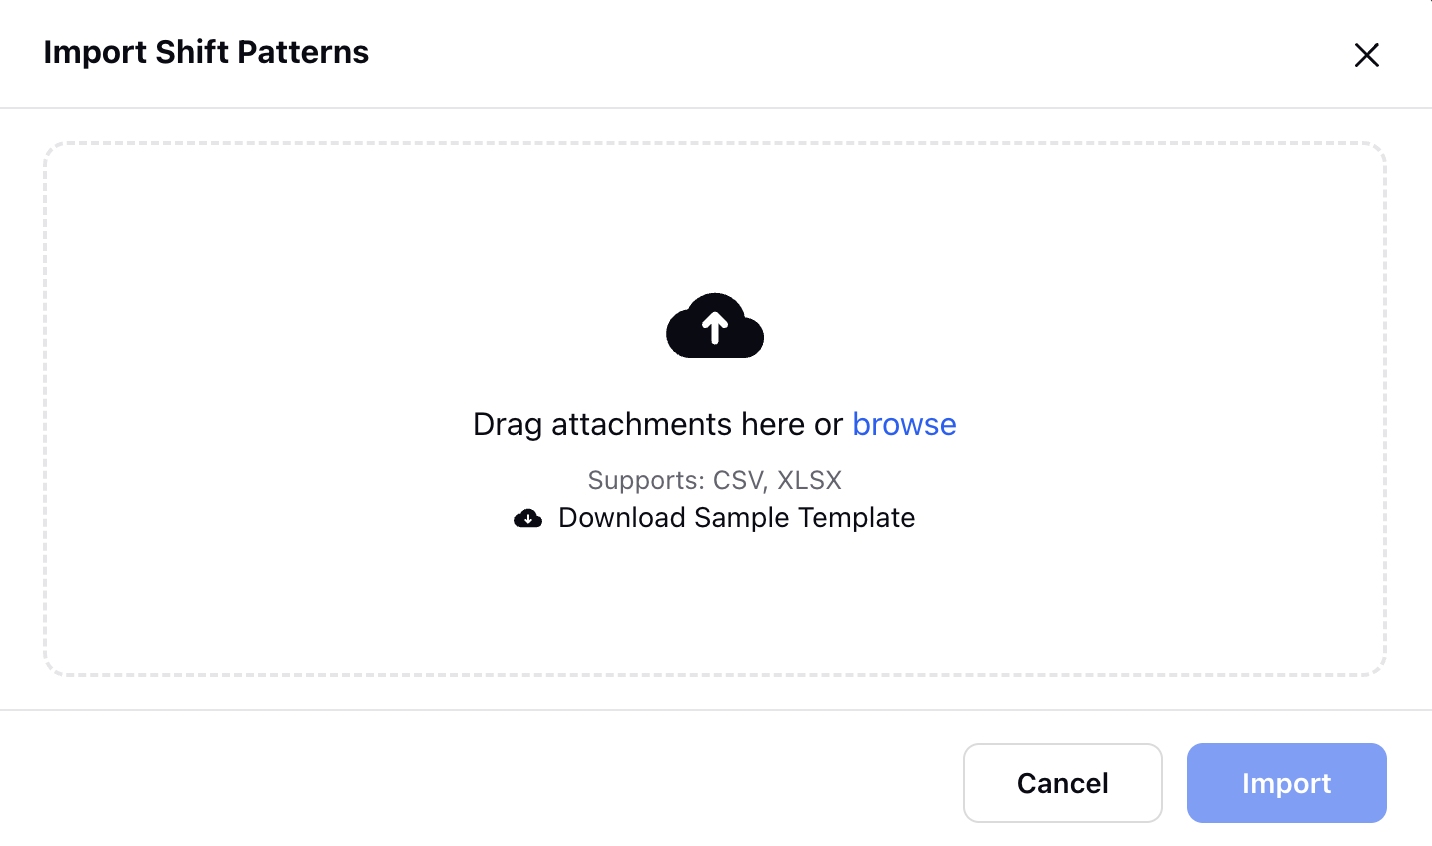
Upload the template file containing Shift Pattern details by either dragging and dropping it into the dialog box or browsing your local system to select the file. Refer to the Important Considerations for Importing Shift Patterns section below for details on the headers of the data import template.
Click the Import button import the Shift Patterns.
This completes the process of importing Shift Patterns. If the data in the template file is error-free, the Shift Pattern(s) will be created accordingly.

If any errors are detected, you will receive a system notification containing a link to an error file. This file will specify the erroneous cell(s) along with the corresponding error type, such as missing data or incorrect data format.
Important Considerations for Importing Shift Patterns
CSV and XLSX are the supported file formats.
Each row of the template file must contain details of that particular Shift Pattern.
The following headers are mandatory in the file (Do not modify the header, including their case):
Parameter | Header | Remarks |
Pattern Name | patternName | It is a mandatory header. |
Description | description | It is an optional header. |
Week Start Day | weekStartDay | Must be a valid day of week. It is a mandatory header. |
Number of Weeks in the Shift Pattern | weeks | Must be a positive integer. It is a mandatory header. |
Sunday's Shift | sunday | Must be a valid, existing Shift or "Day Off". It is a mandatory header. |
Monday's Shift | monday | Must be a valid, existing Shift or "Day Off". It is a mandatory header. |
Tuesday's Shift | tuesday | Must be a valid, existing Shift or "Day Off". It is a mandatory header. |
Wednesday's Shift | wednesday | Must be a valid, existing Shift or "Day Off". It is a mandatory header. |
Thursday's Shift | thursday | Must be a valid, existing Shift or "Day Off". It is a mandatory header. |
Friday's Shift | friday | Must be a valid, existing Shift or "Day Off". It is a mandatory header. |
Saturday's Shift | saturday | Must be a valid, existing Shift or "Day Off". It is a mandatory header. |
Edit Shift Patterns
Follow these steps to edit a Shift Pattern:
Navigate to the Shift Patterns record manager.

Hover over the vertical ellipsis (⋮) icon corresponding to the Shift Pattern you want to edit. This will show a list of options.
Select Edit from the list of options to open the Shift Pattern updation page.
Update the desired details for the selected Shift Pattern. The fields are identical to those used when creating Shift Patterns.
Click Save at the bottom right of the page.
This completes the process of editing Shift Patterns.
Clone Shift Patterns
Follow these steps to clone a Shift Pattern:
Navigate to the Shift Patterns record manager.

Hover over the vertical ellipsis (⋮) icon corresponding to the Shift Pattern you want to clone. This will show a list of options.
Select Clone from the list of options to open the Clone Shift Pattern dialog box.

Enter the name of the to be given to the cloned Shift Pattern in the Pattern Name field.
Click the Clone button to create a duplicate Shift Pattern with the specified name.
This completes the process of cloning a Shift Pattern.
Export Shift Patterns
Prerequisites for creating Shift Patterns:
Workforce Management should be enabled for the environment.
You must have access to the Workforce Manager Persona App.
View permission under the Shift Pattern Policy section in the Workforce Management module.
Follow these steps to export a Shift Pattern:
Navigate to the Shift Patterns Record Manager.
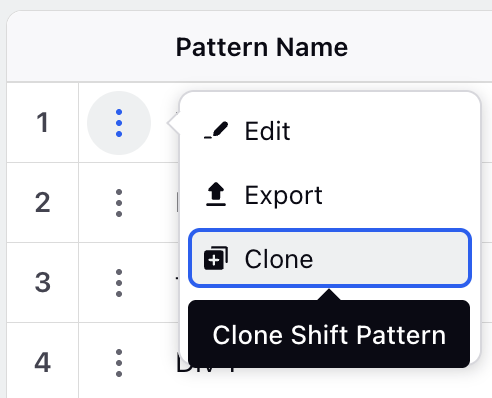
Hover over the vertical ellipsis (⋮) icon corresponding to the Shift Pattern you want to export. This will show a list of options.
Select Export from the list of options.
This will create an export request for the selected Shift Pattern.
Delete Shift Patterns
Follow these steps to delete a Shift Pattern:
Navigate to the Shift Patterns record manager.

Hover over the vertical ellipsis (⋮) icon corresponding to the Shift Pattern you want to delete. This will show a list of options.
Select Delete from the list of options to open the Delete Shift Pattern confirmation box.

Select Submit to delete the Shift Pattern.
This completes the process of deleting a Shift Pattern.