How to Configure Shifts using Shift Builder
Updated
In the dynamic environment of contact centres, managing the workforce efficiently is crucial to ensure seamless operations. One integral aspect of WFM is the creation and configuration of shifts. Shifts refer to the designated time periods during which agents work, ensuring that organizations can maintain continuous and effective customer service.
Prerequisites to Setup Shifts:
Sprinklr WFM should be enabled for the environment and your user should have access to Workforce Planner Persona along with View, Create, Edit, Delete and Clone permission under the shifts section in the workforce management module.

Setting Up Shifts:
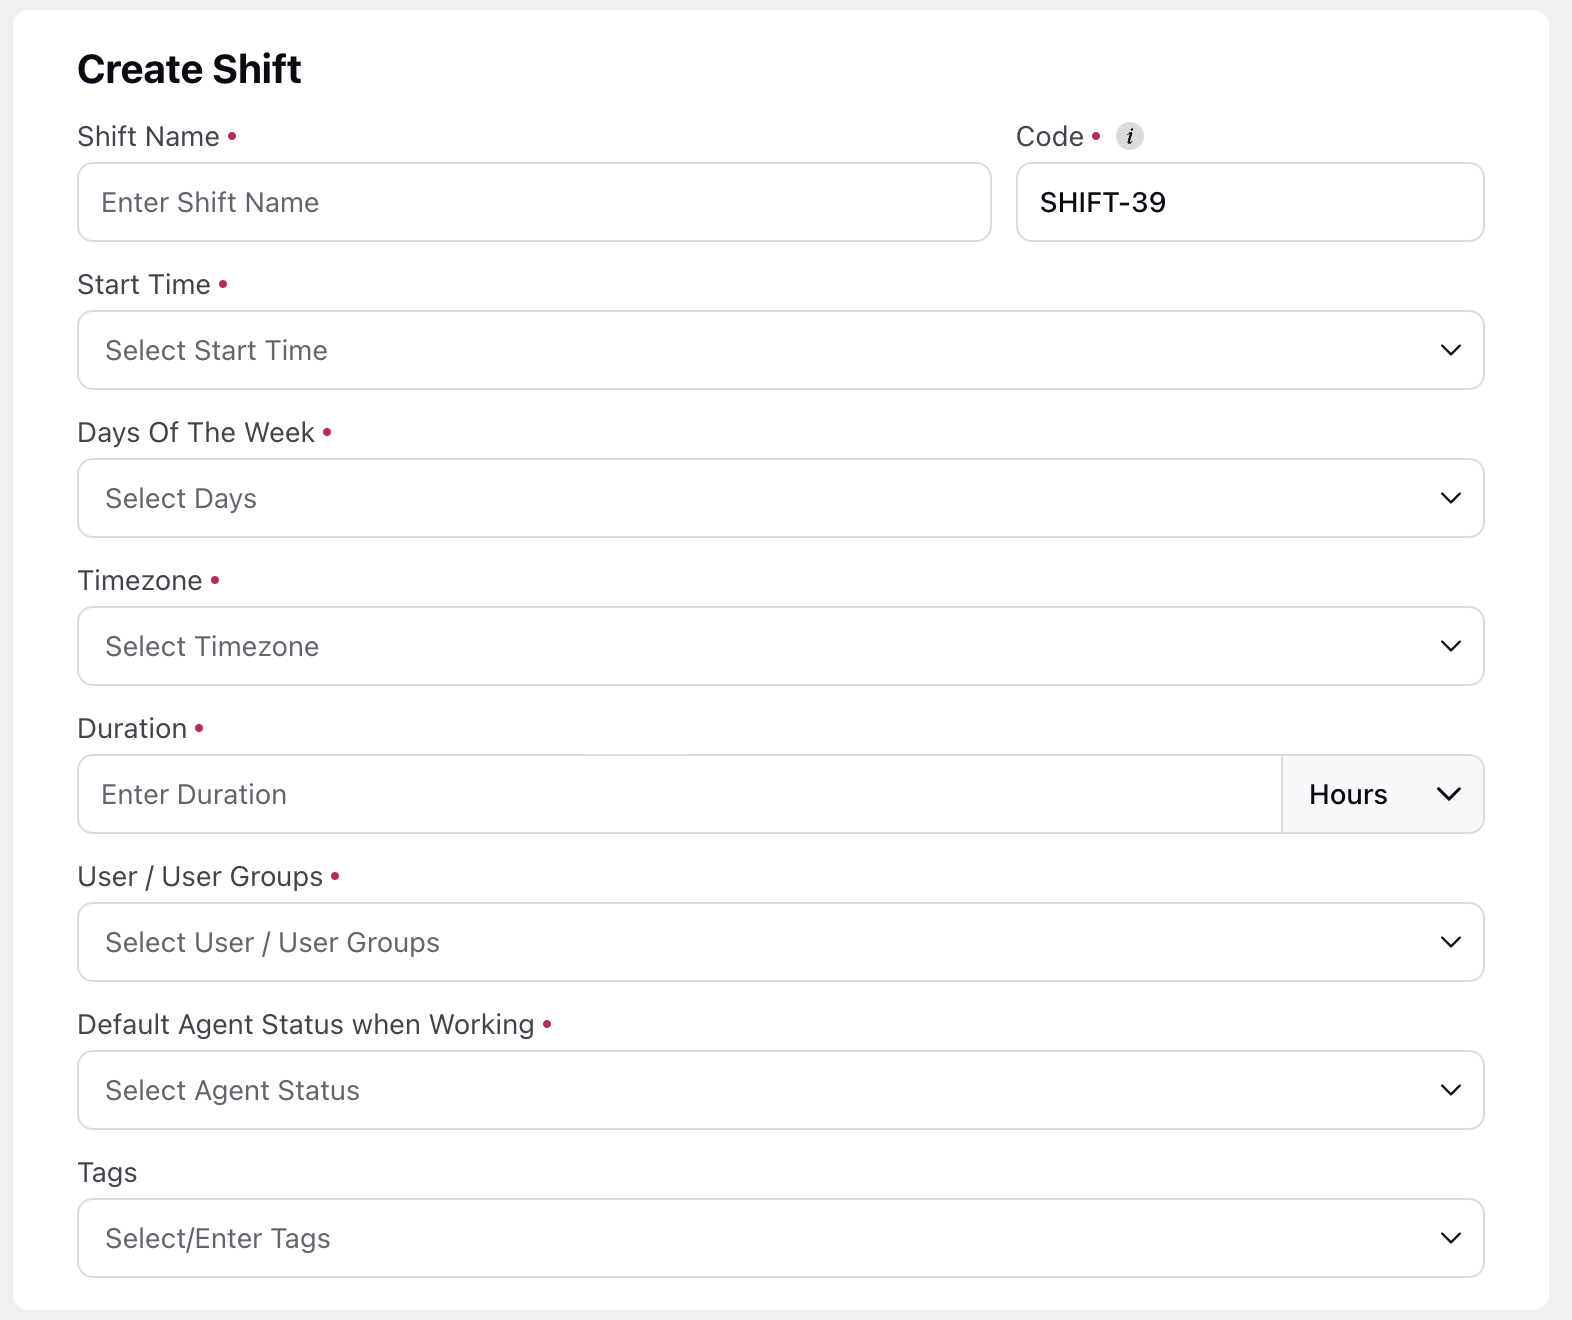
Supervisors can navigate to the settings tab from the left rail in the Workforce Planner persona and access Shifts. They can find the Create Shift button at the top right side which leads to a creation form.

Supervisors play a pivotal role in configuring shifts, tailoring them to the specific needs and requirements of the contact centre. They can fill in the following details to create a shift:
Name: Each shift could be assigned a unique and easily identifiable name for clarity.
Code: This field will automatically generate a unique alphanumeric code for the Shift, such as SHIFT-62, for easy identification. However, you can also enter your own unique code if needed. (Required)
Start Time: Start time of a shift determines when agents are expected to begin their work.
Days of Week: Supervisors can select the specific days of the week on which the shift will be active. This flexibility allows for customized scheduling based on business needs.
Timezone: Considering the global nature of businesses, specifying the timezone is crucial to maintain accurate and synchronized schedules across different regions.
Duration: The duration of the shift defines the total time agents are expected to be on duty. This helps in efficient resource planning and allocation.
User / User Groups: Assigning shifts to individual agents or user groups ensures that the right personnel are scheduled during each shift, taking into account skills and workload distribution.
Default Agent Statuses: They can further select the default working statuses associated with the shift, enabling the system to track and assess adherence to the assigned tasks.

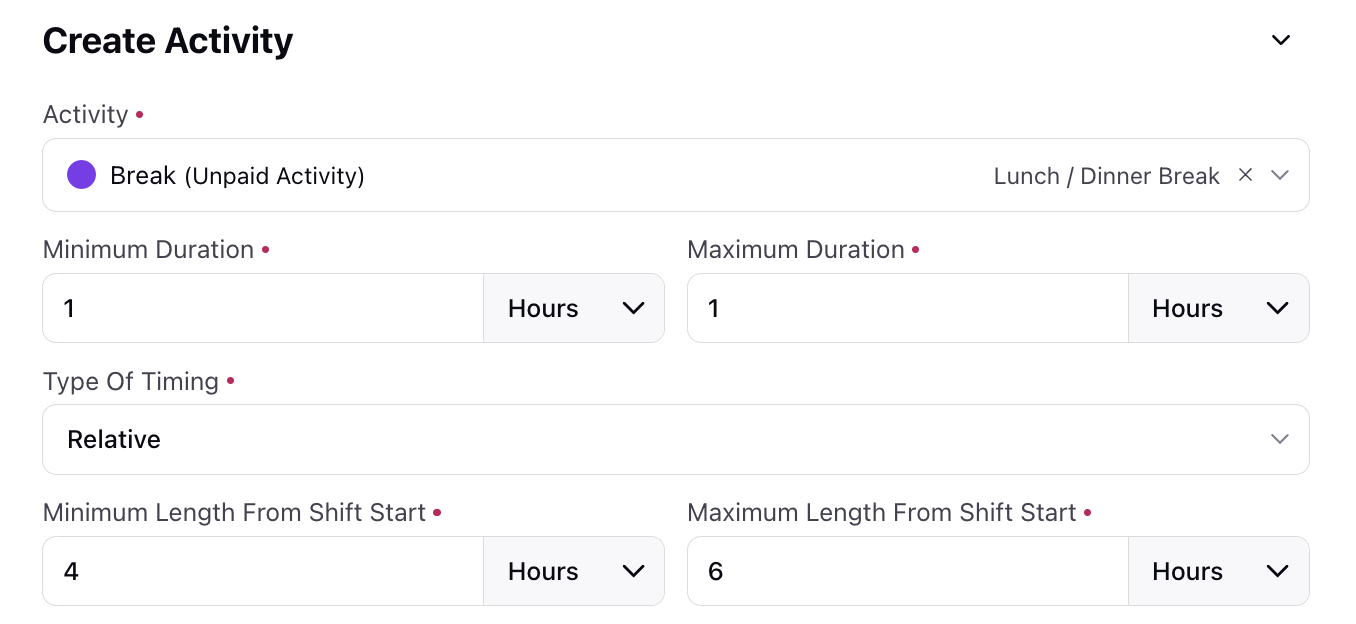
On the next page, supervisors can include activities within the shift from the Activities module by filling in the following primary details:
Activity Name: Activity, along with its type, can be chosen from the Activity builder's drop-down menu.
Minimum & Maximum Duration: They can set the minimum and maximum duration of the activity within the shift times for AI to assign the activity to agents within the range.
Timing Type: They have the option to choose between fixed and relative timing for activity assignment.
If fixed timing is selected, the activity is expected to start at a specific, predetermined time within the shift. Alternatively, if relative timing is chosen, the activity's start time is determined based on shift's start time. This provides a more dynamic and adaptable approach to scheduling.

Managing Shifts:
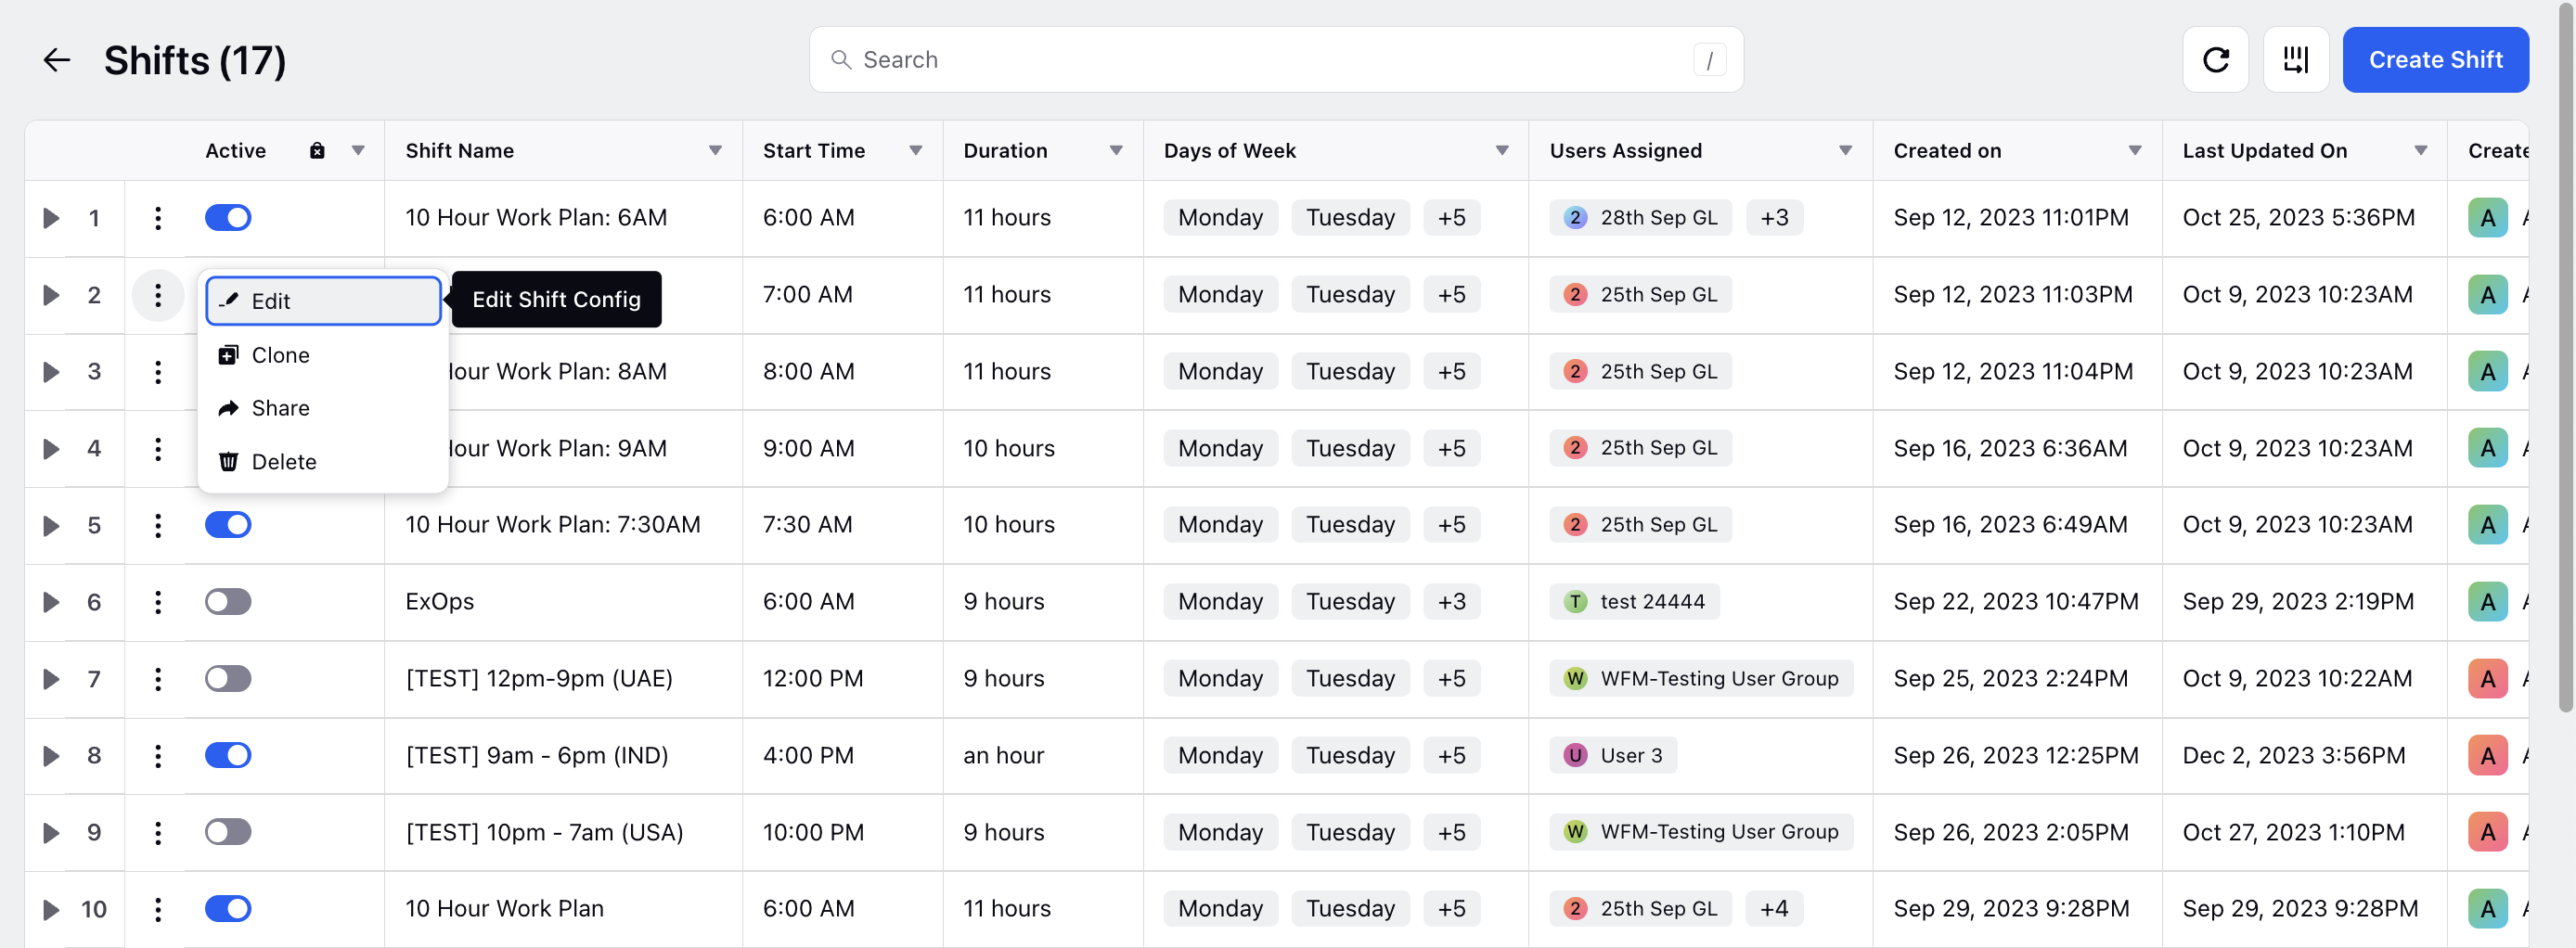
Supervisors can activate or deactivate the shift using the toggle switch beside the name. They can also hover on the 3-dot menu beside shift's name to edit or delete the shift.

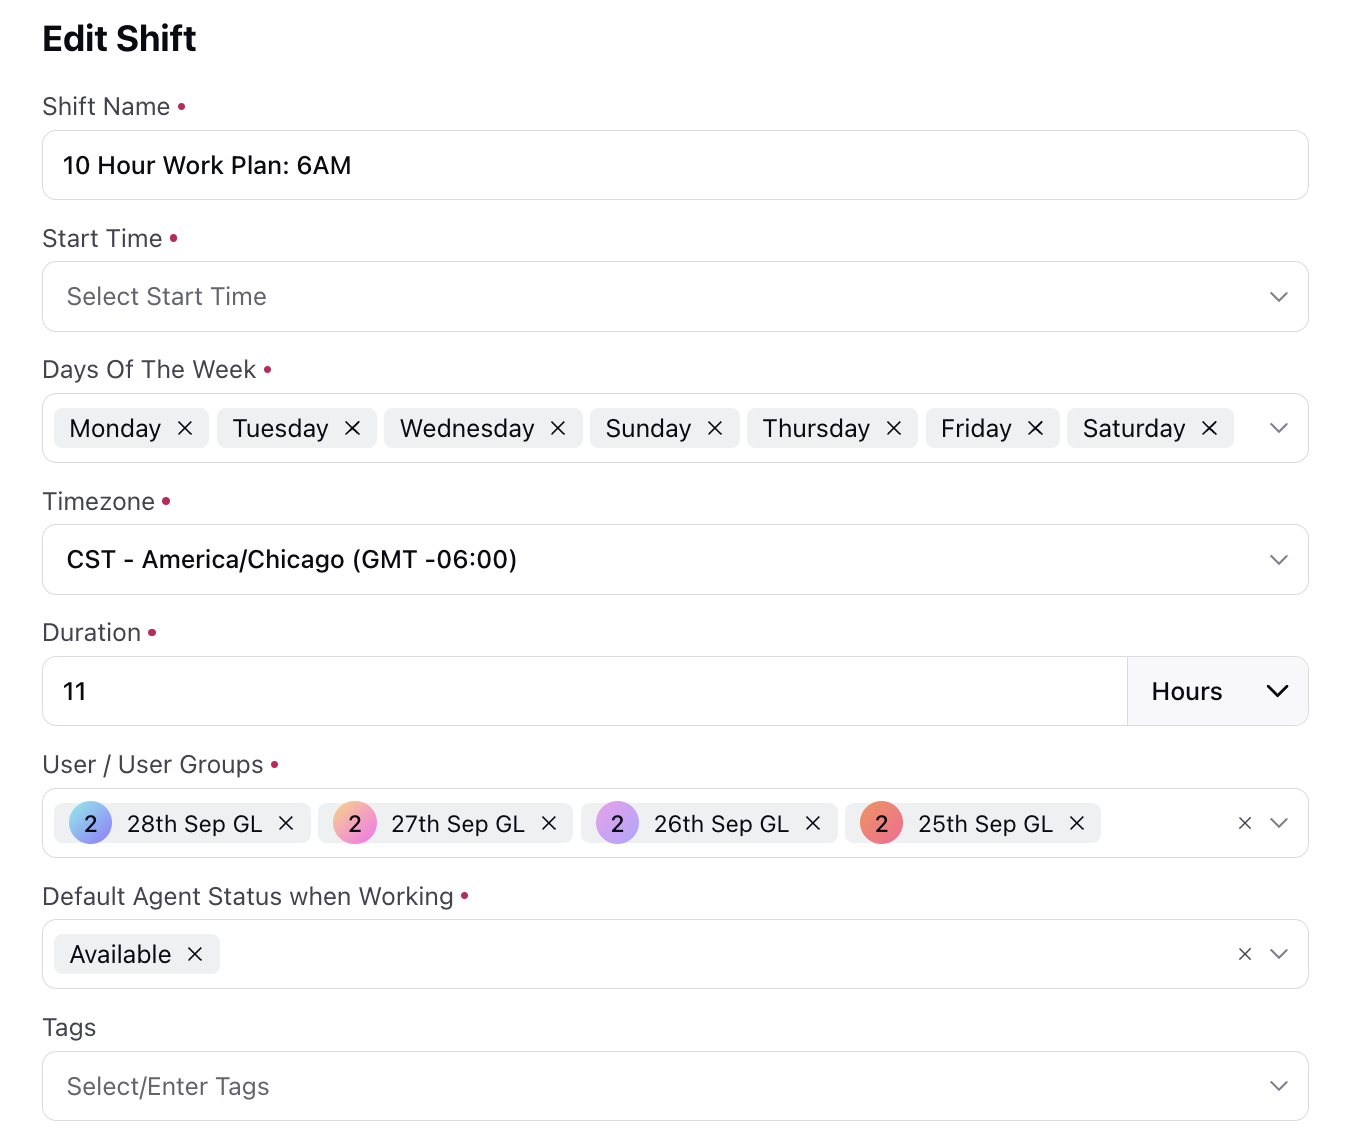
Editing Shift: Shifts can be edited to update information such as name, start time, days of week, timezone, duration, user / user groups and default agent working statuses to accommodate dynamic changes in operational requirements.

Deleting Shift: Deleting a Shift is a critical action that cannot be undone. Supervisors should exercise caution and confirm their decision before permanently removing a shift from the system.
