How to Create Ads Unique Metrics
Updated
To configure Unique Metrics
1. Click the New Tab icon. Under the Sprinklr Marketing - Advertising tab, click Ads Reporting under Analyze.
2. On the Ads Reporting Home, click the Options icon in the top-right corner and select Unique Metrics. 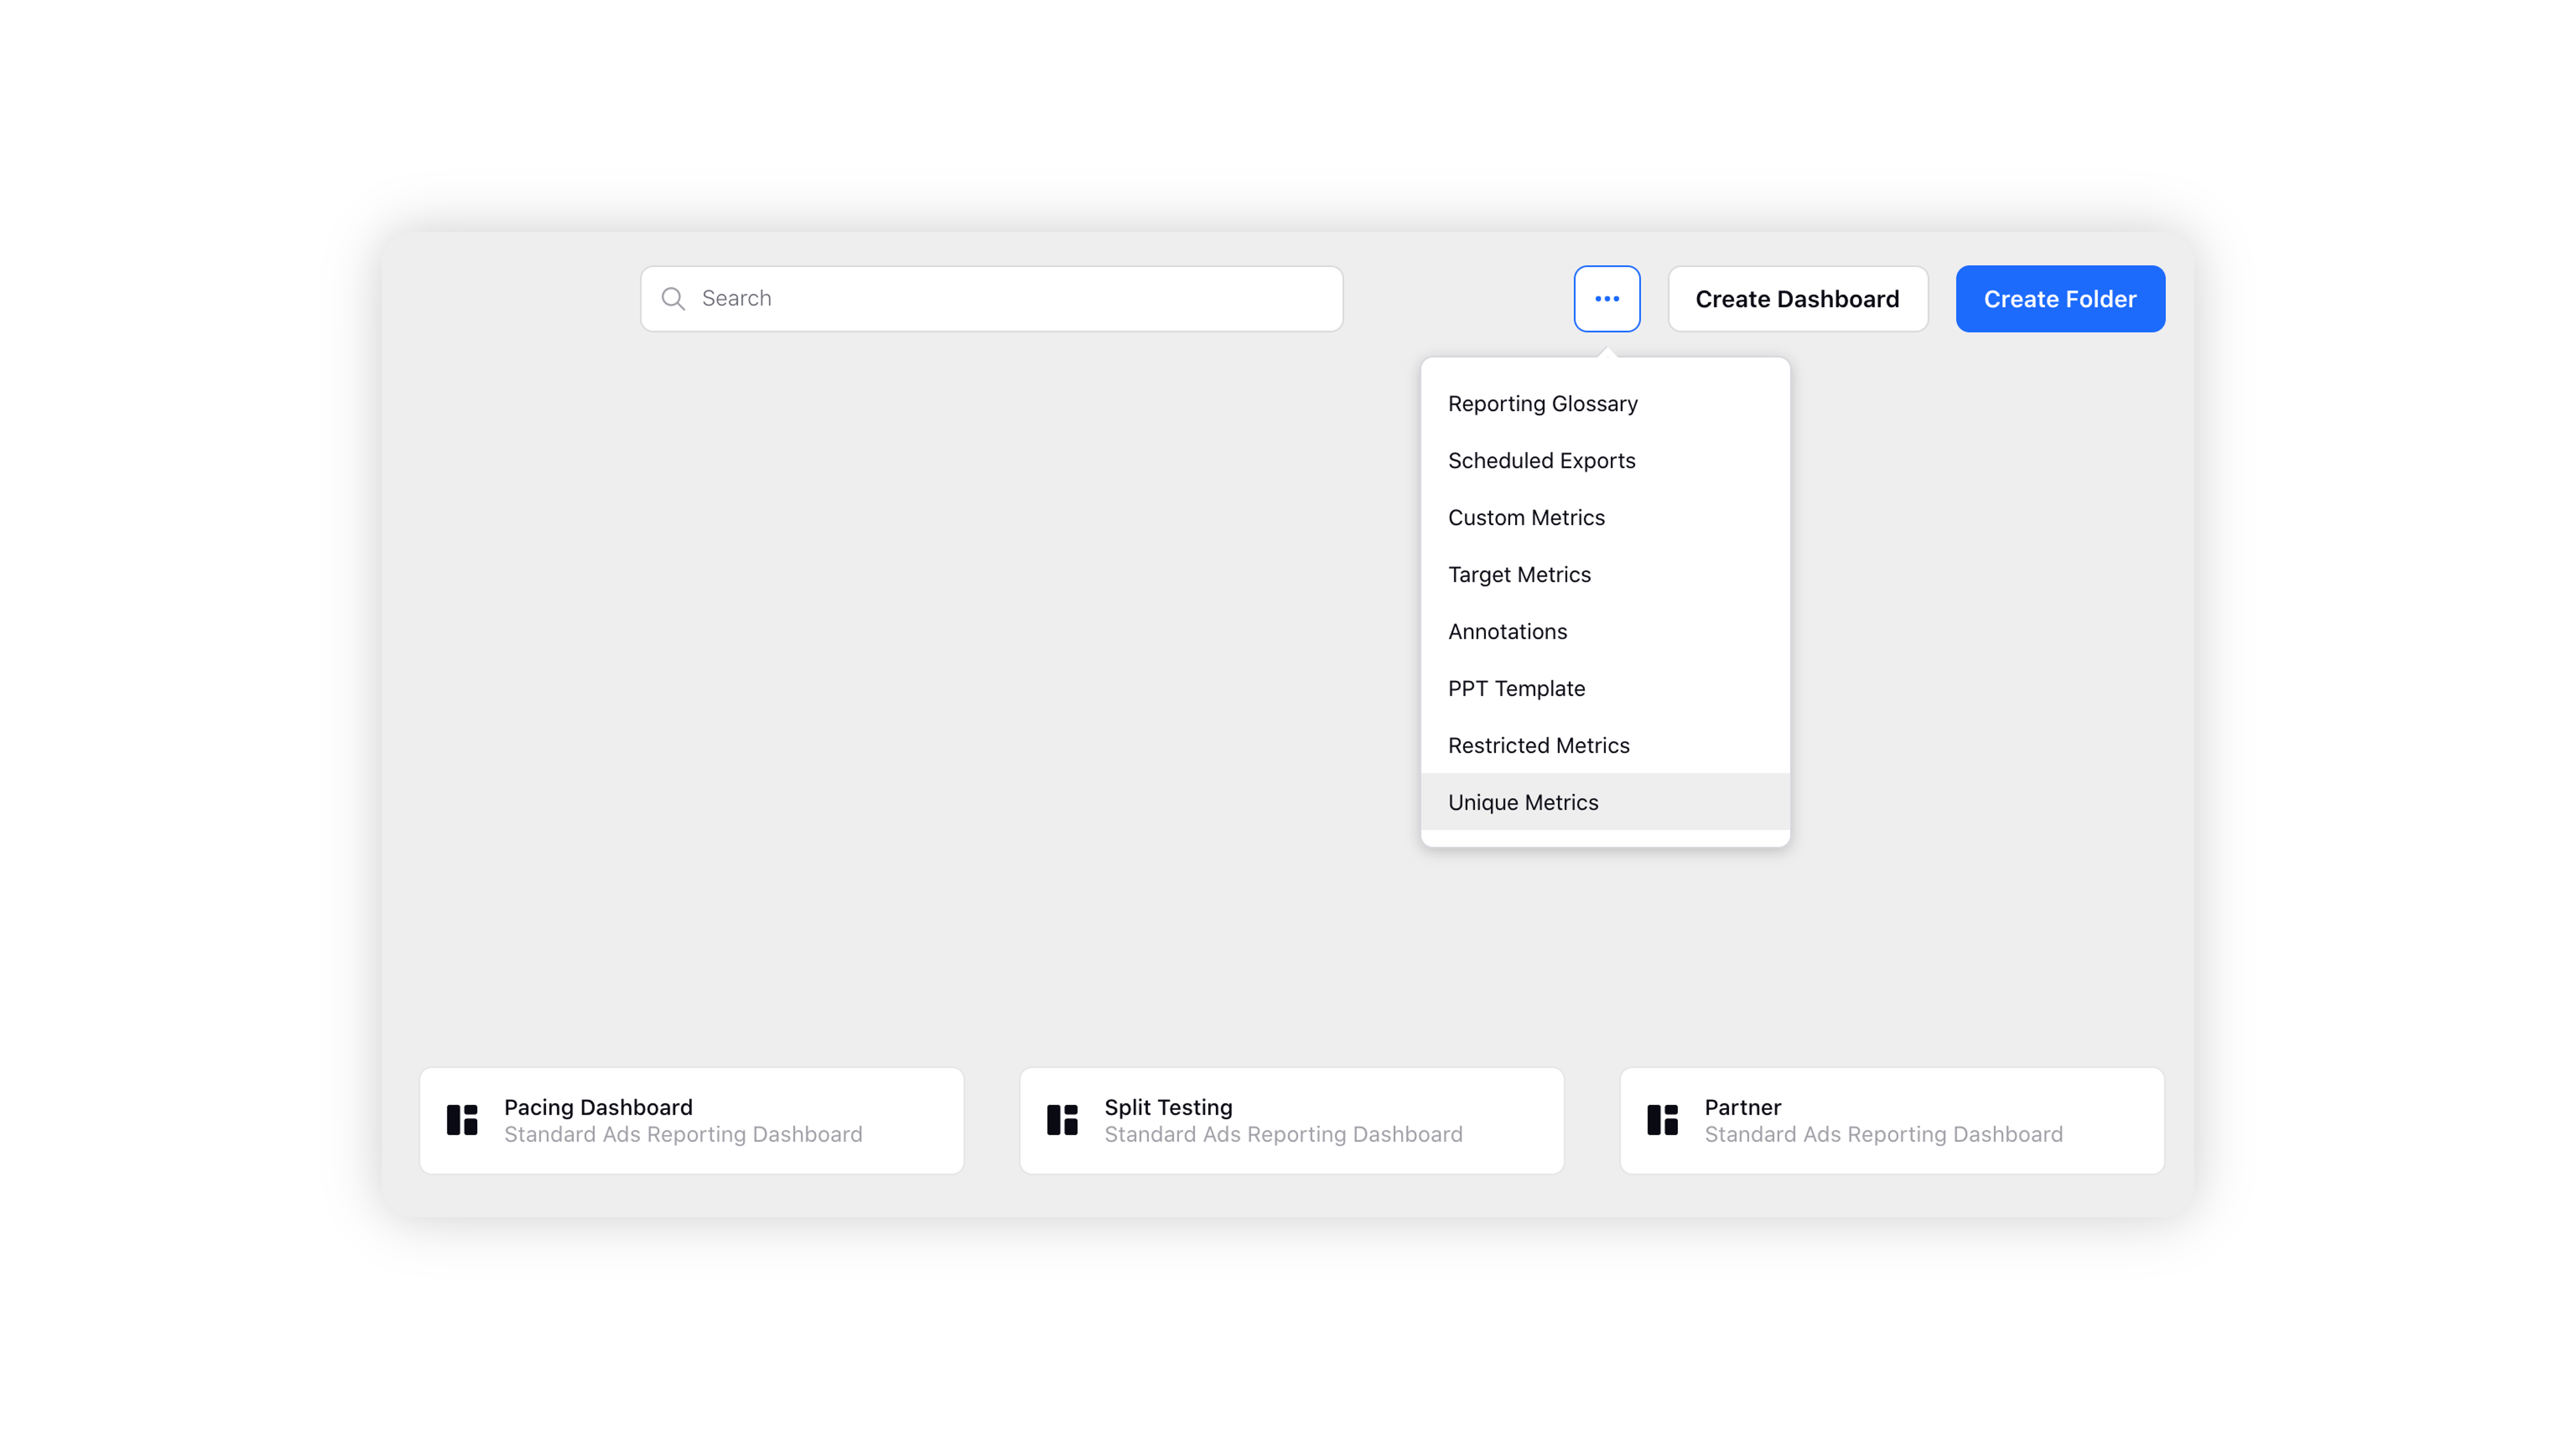
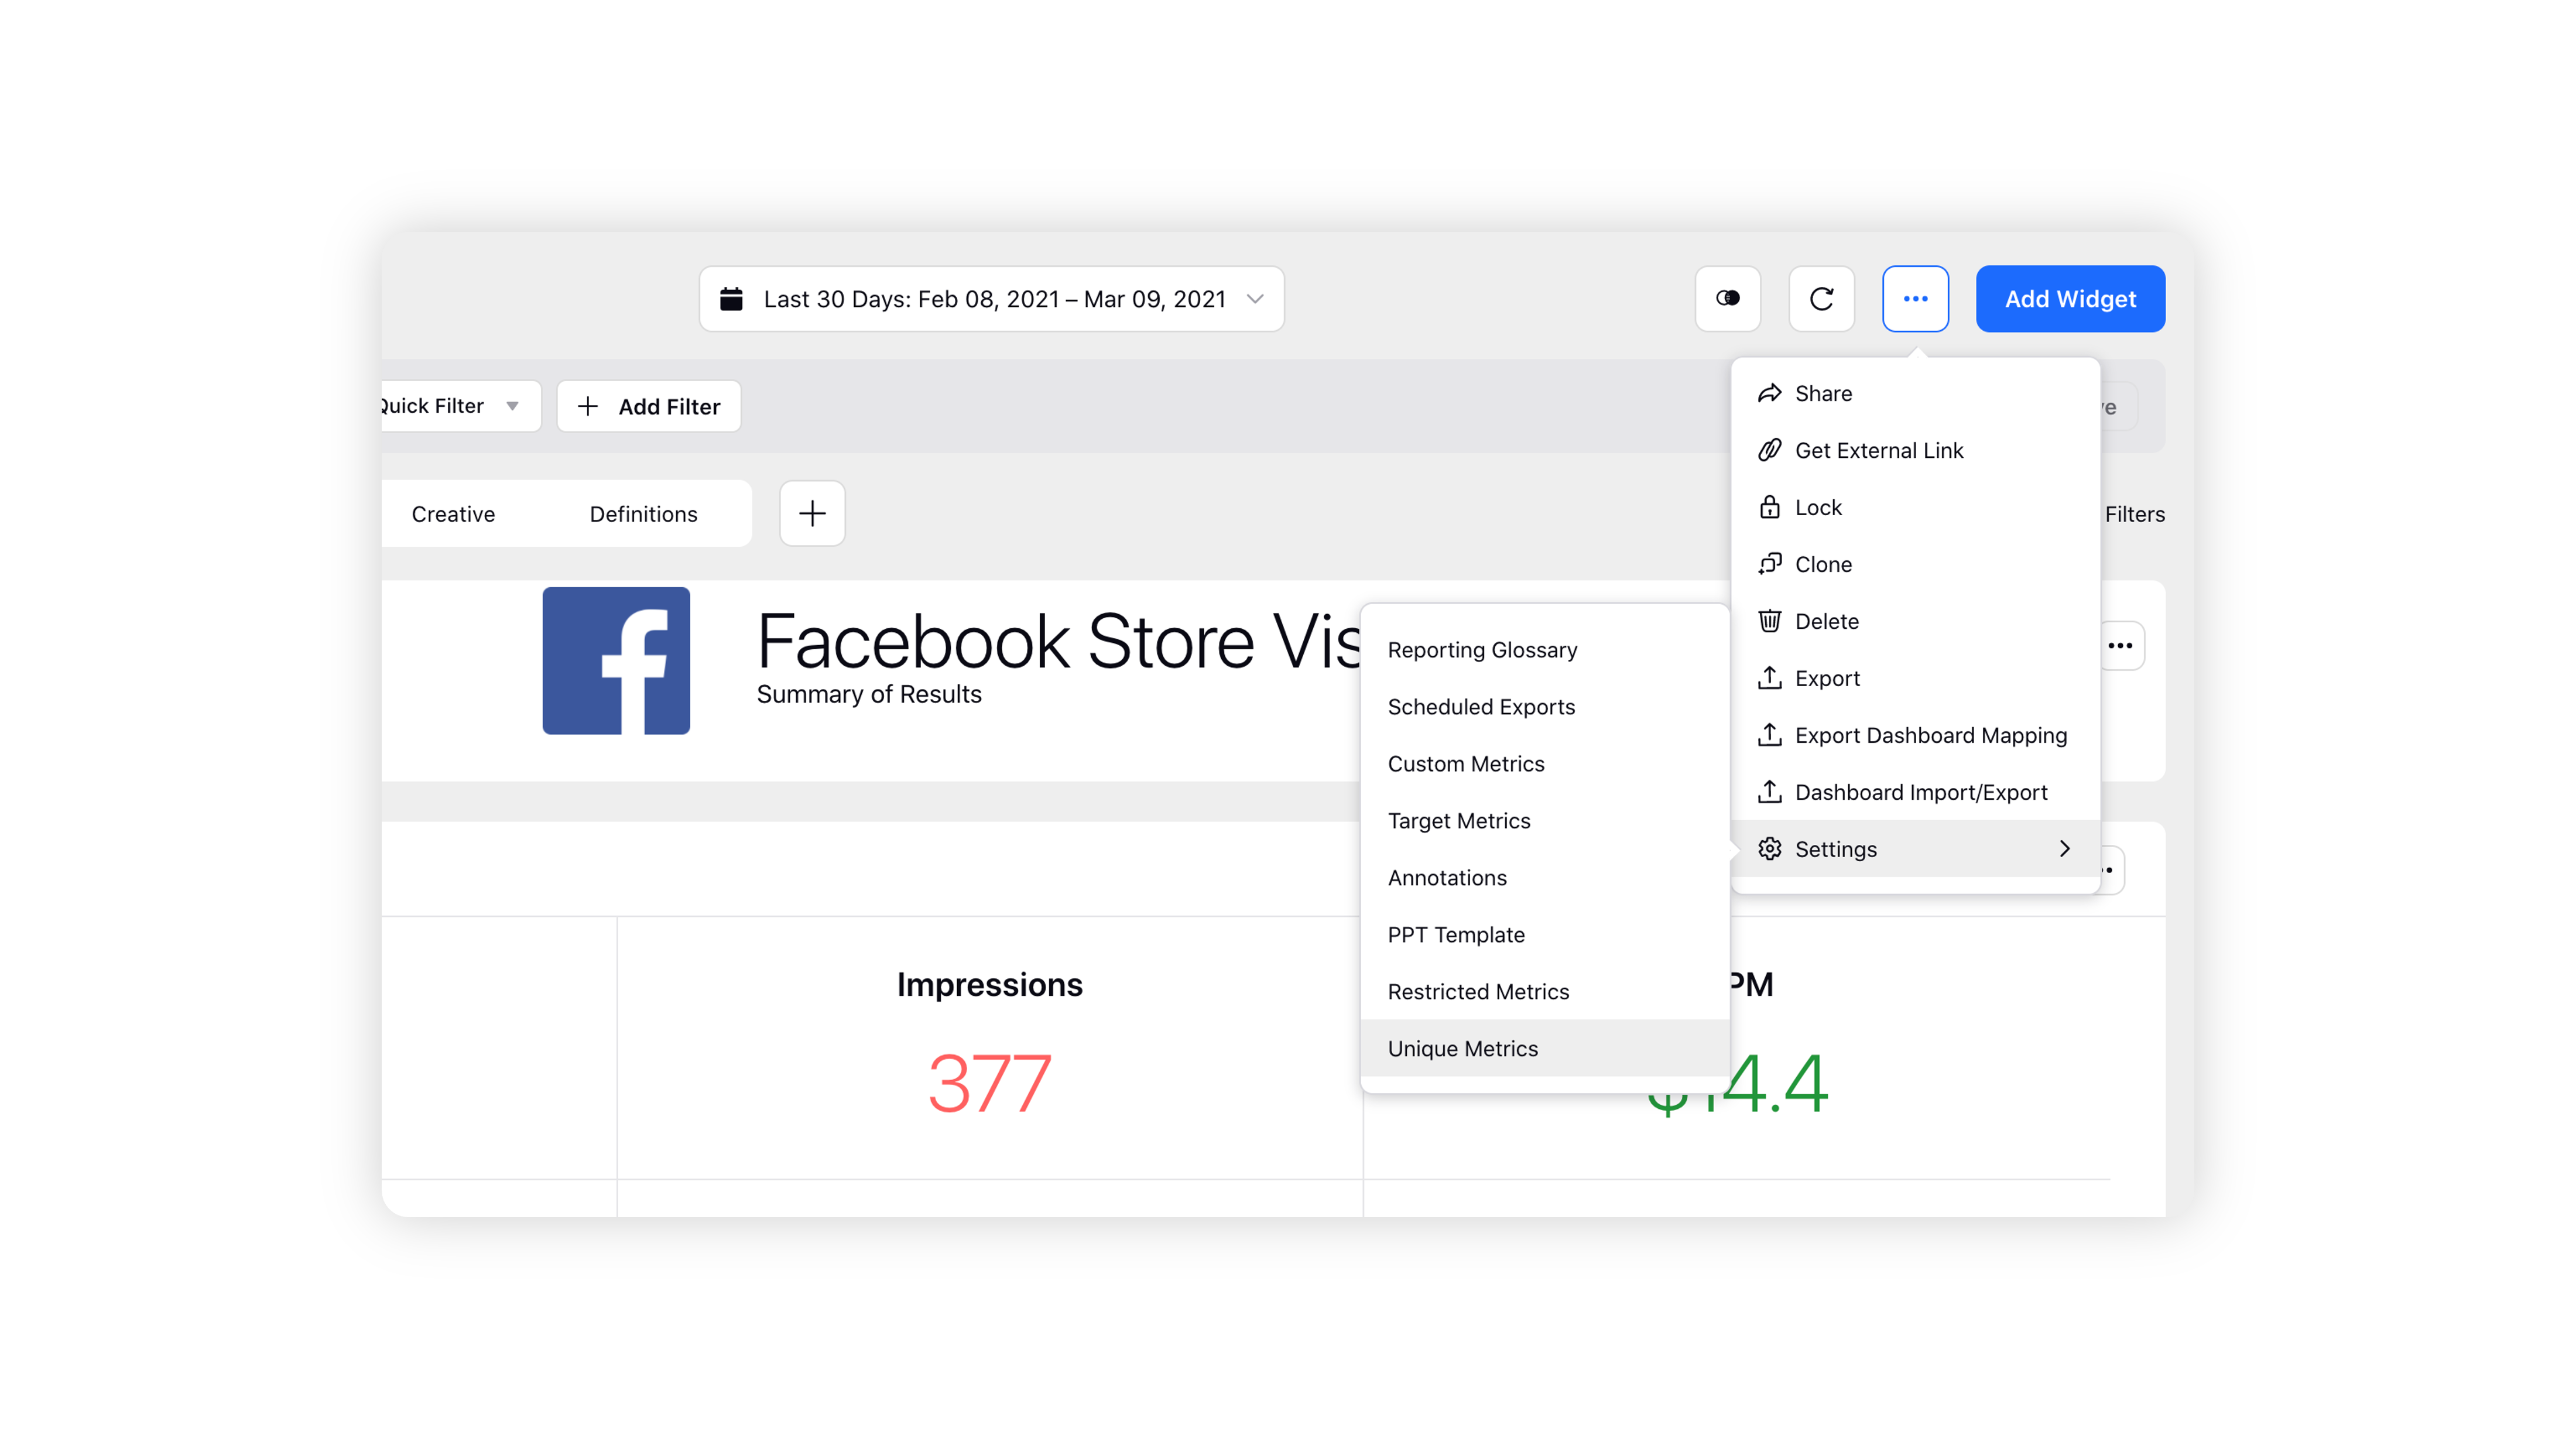
If you are on a Reporting Dashboard, click the Options icon in the top-right corner and scroll down to Settings. Hover over Settings and select Unique Metrics.
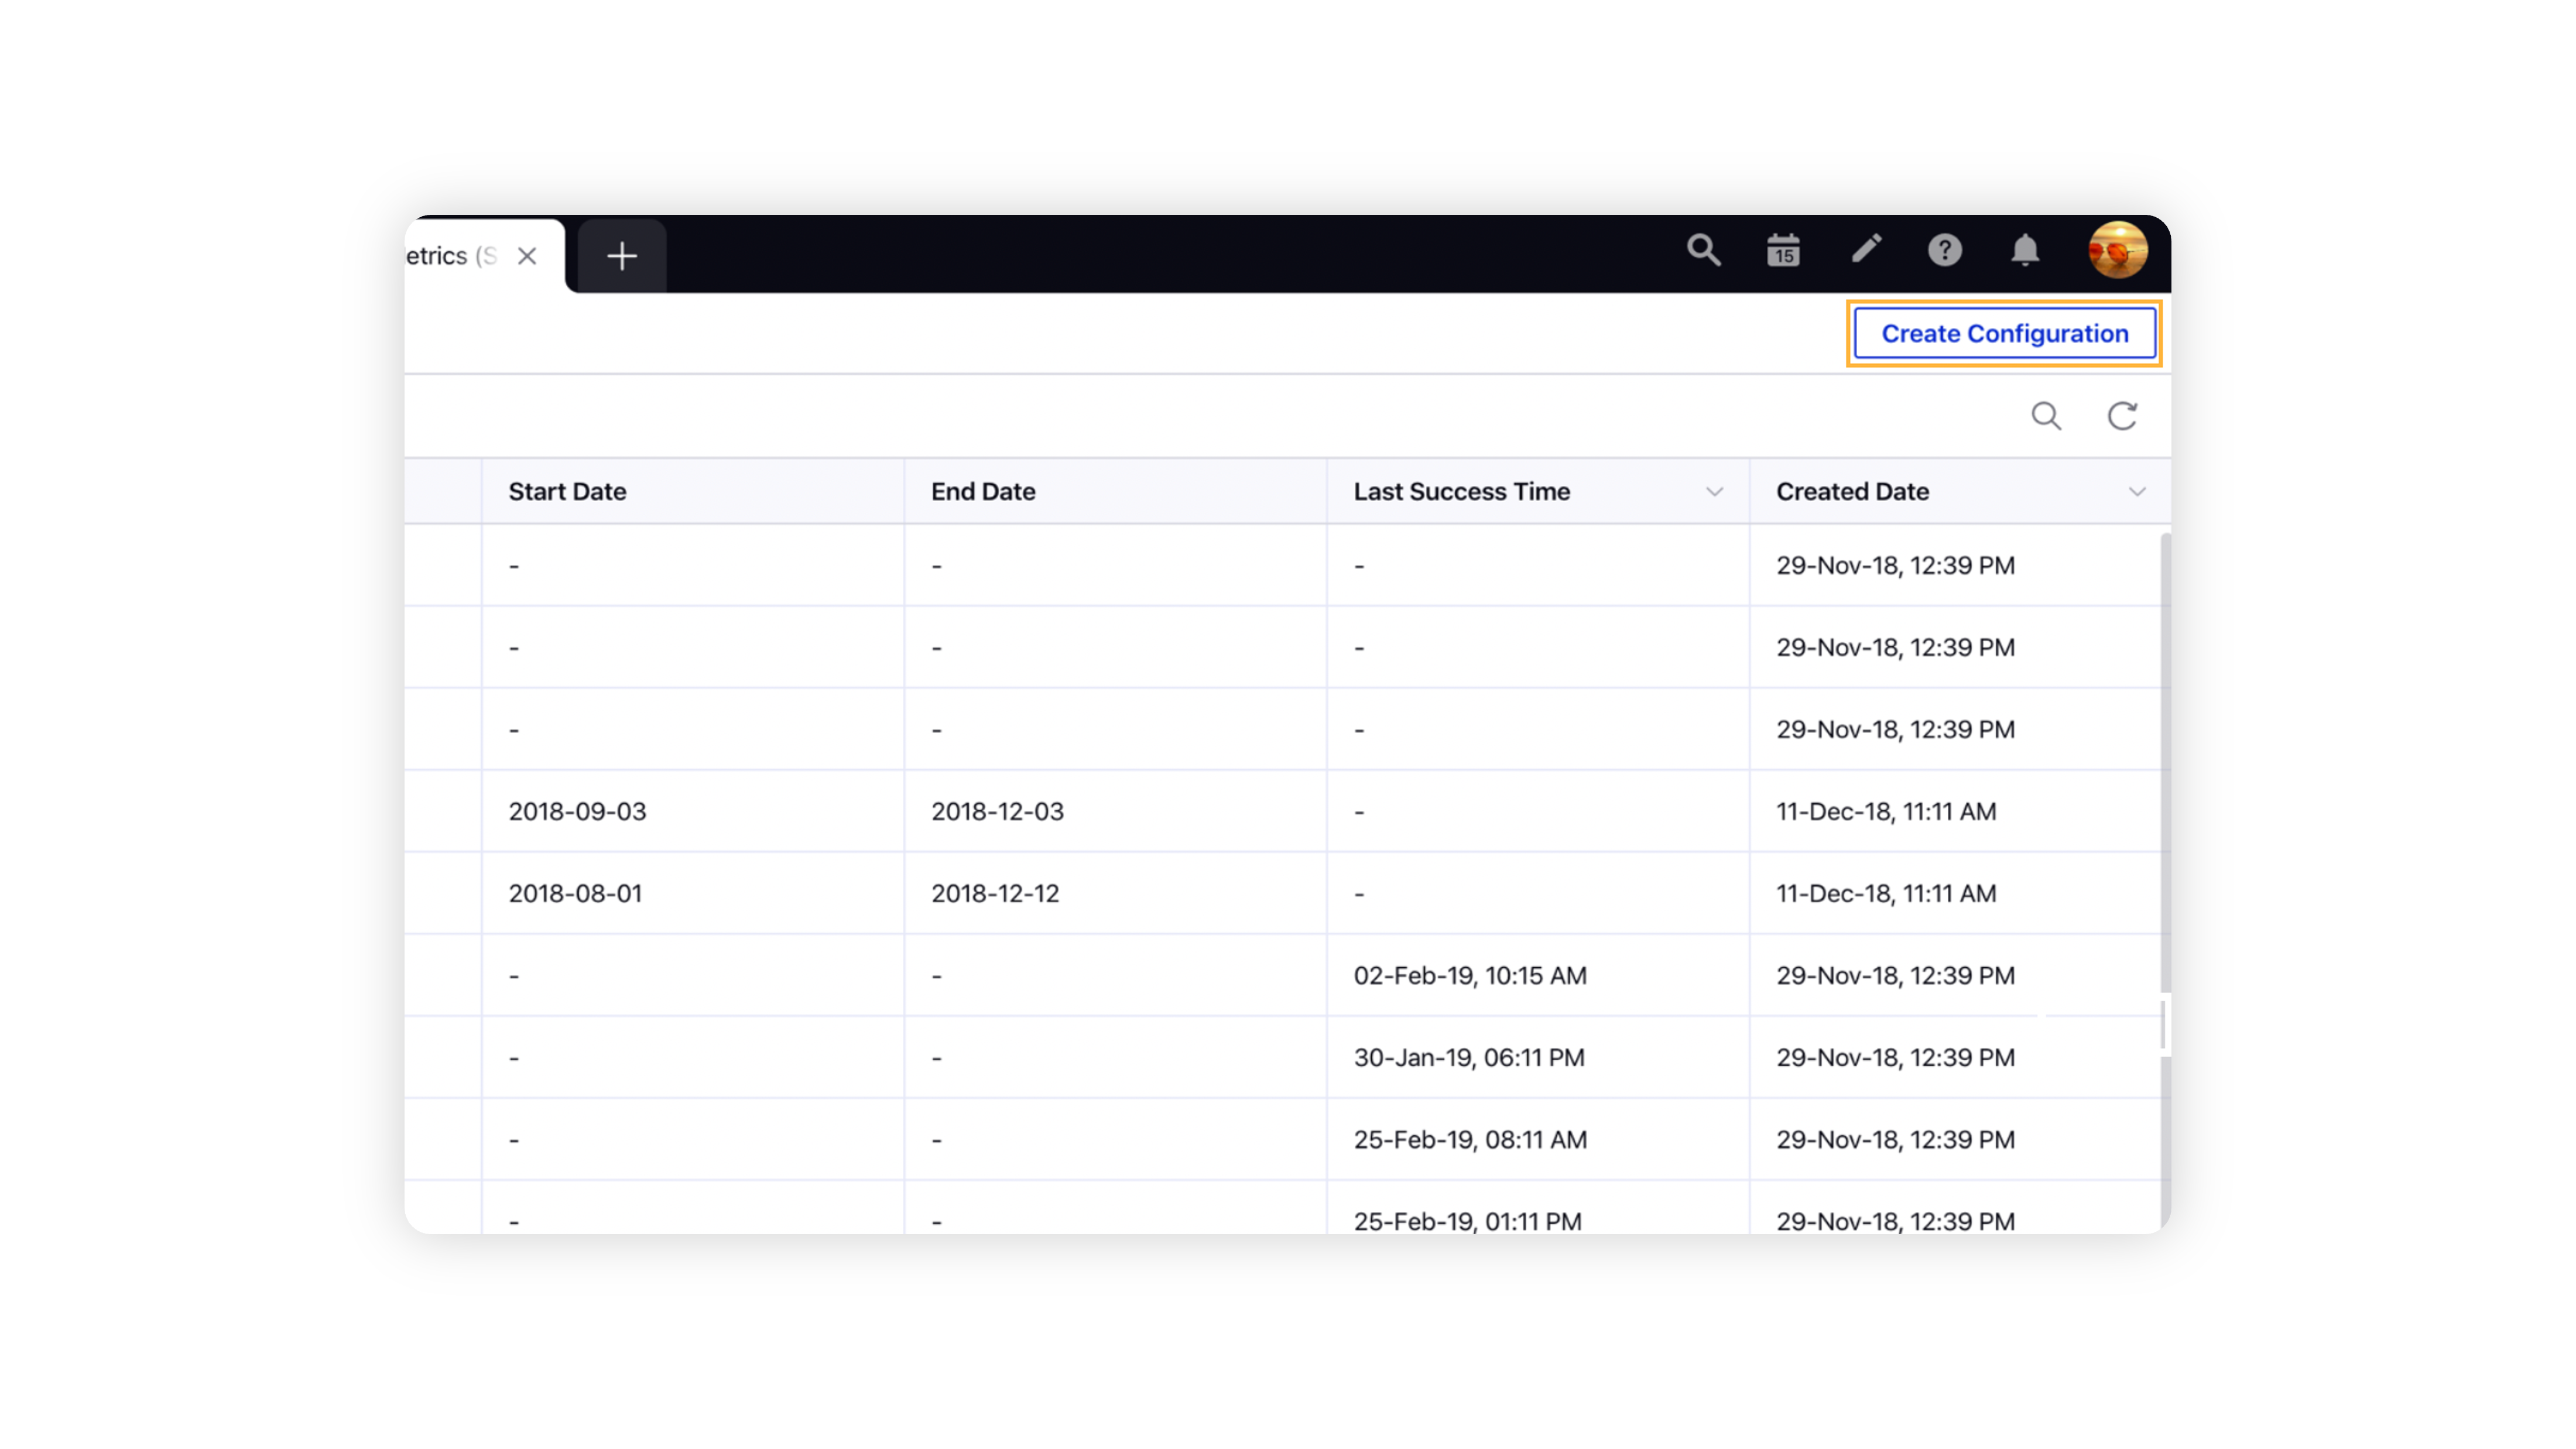
3. Click Create Configuration in the top right corner of the Unique Metrics window.
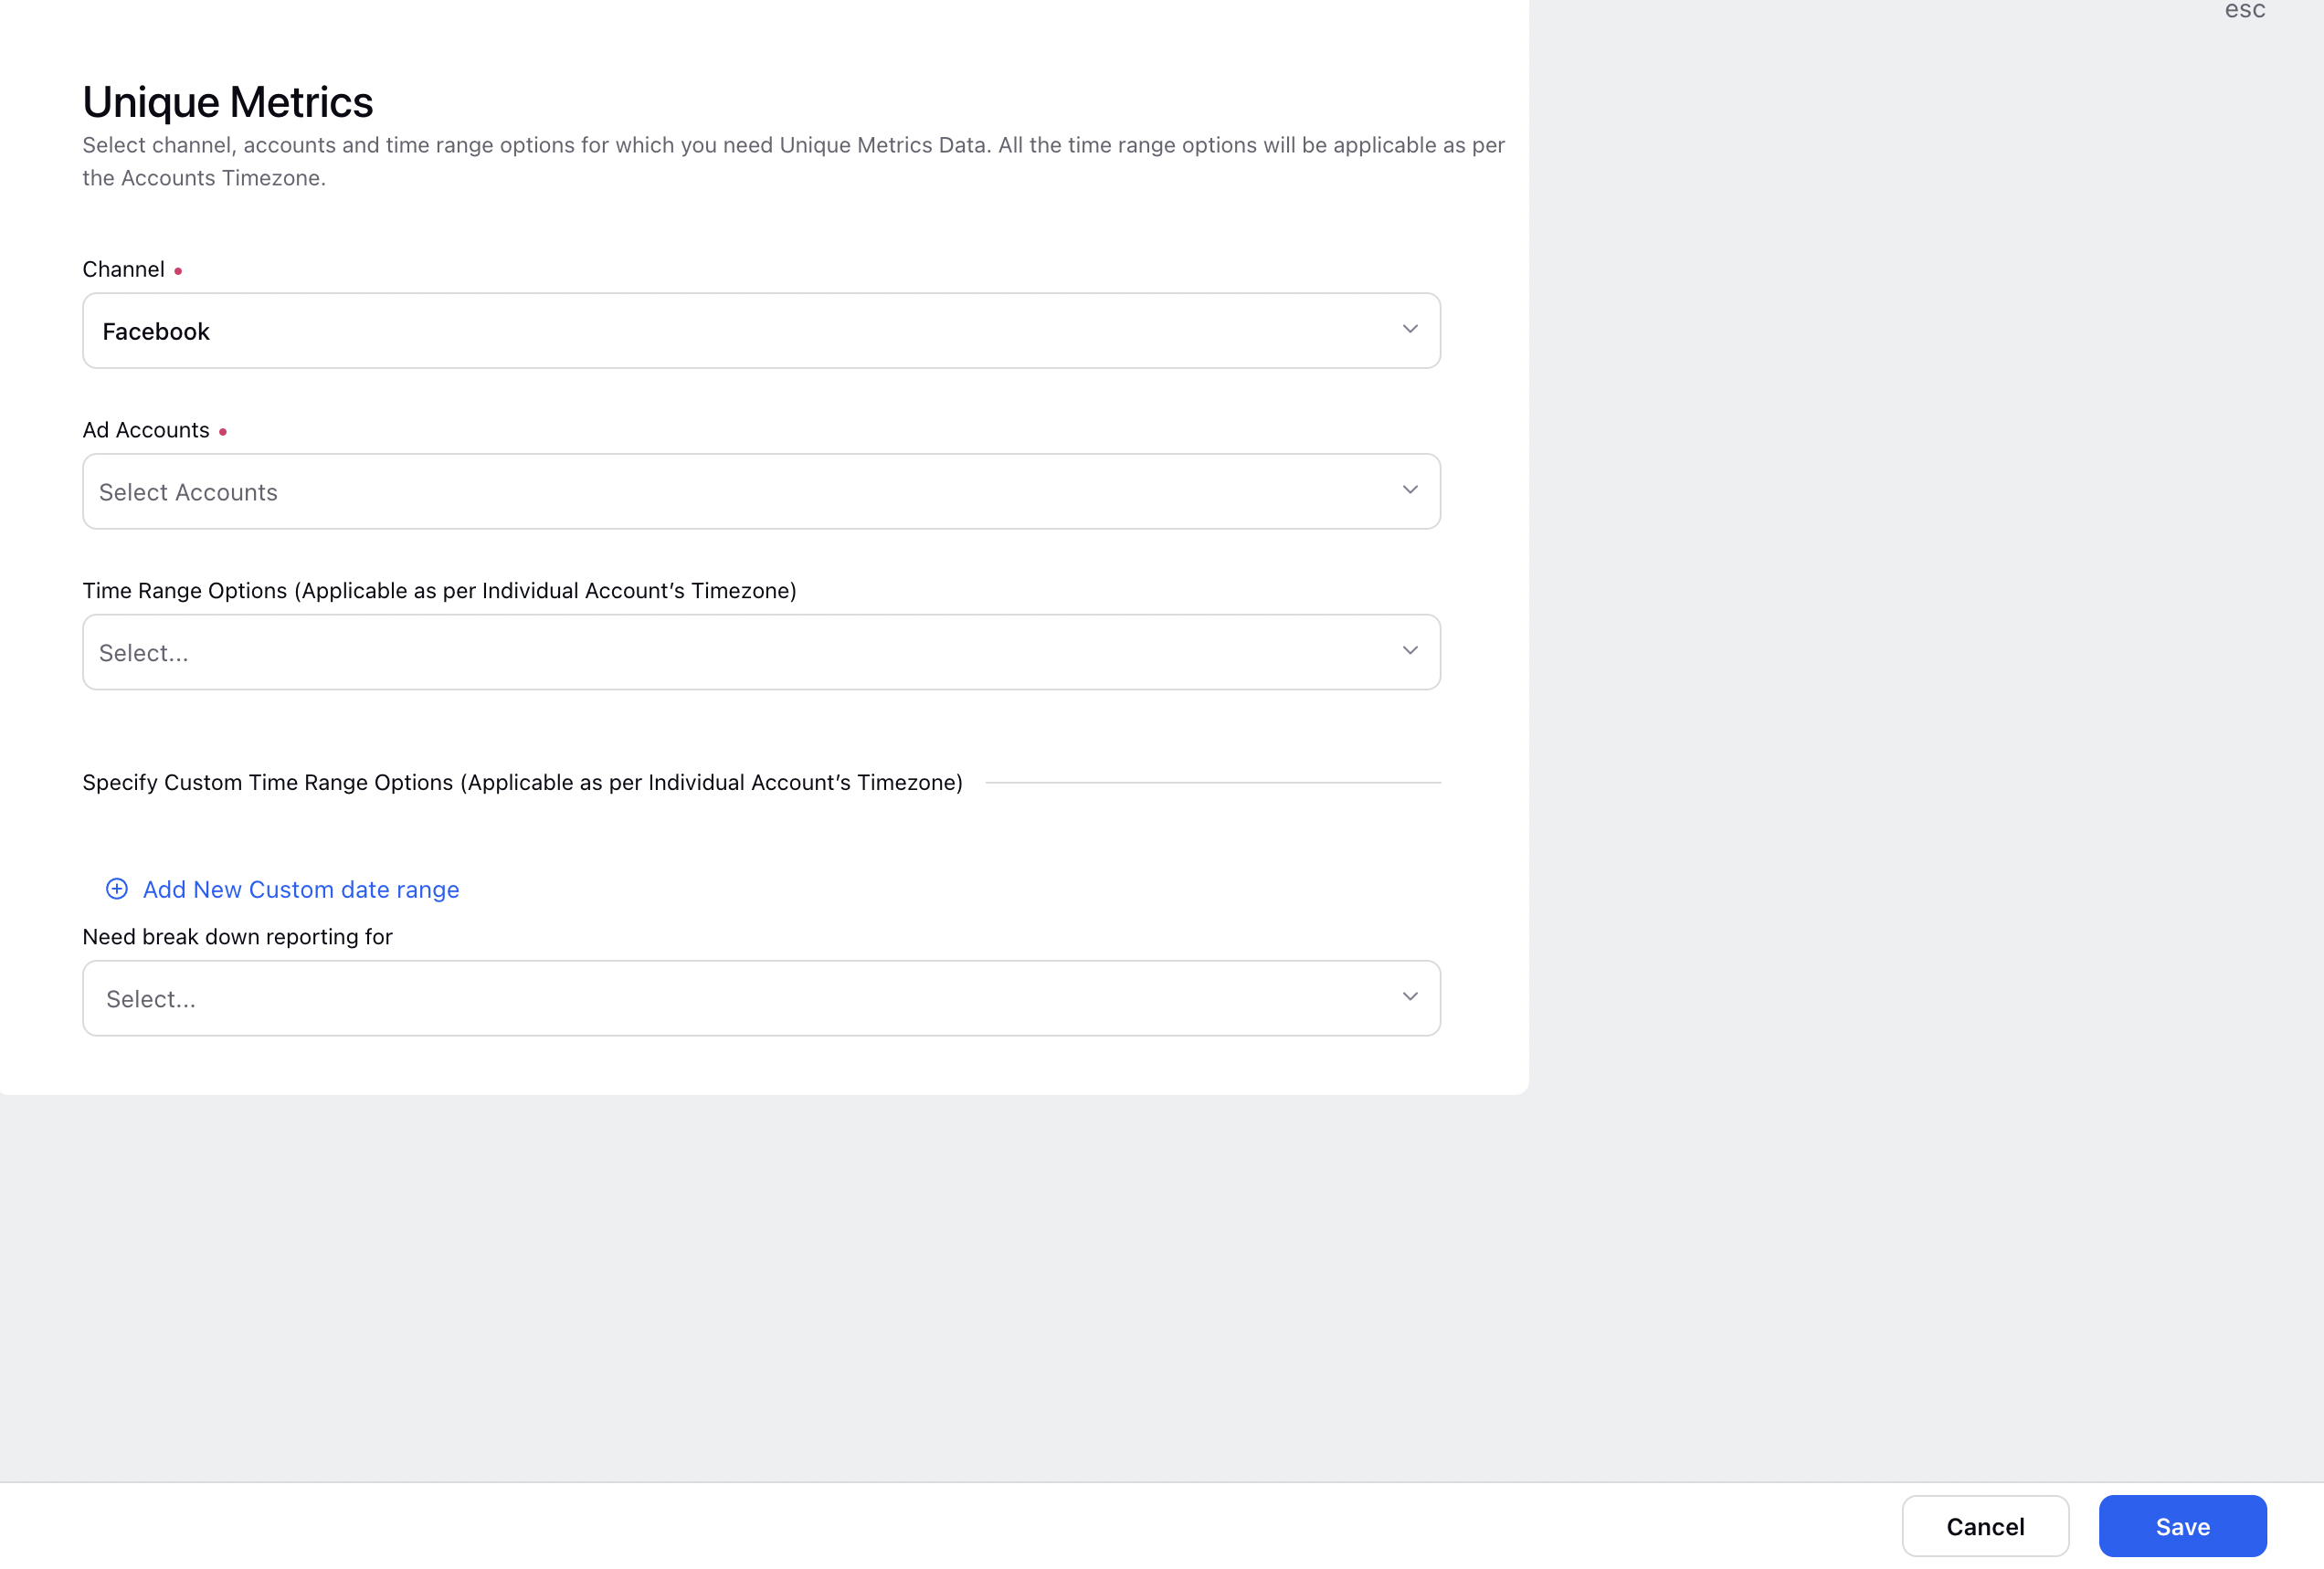
4. On the Unique Metrics window, choose a channel from Facebook and LinkedIn, and fill in the details for which you need unique metrics data. See Field Descriptions at the end of this article.
5. Click Save in the bottom right corner to complete the process.
Sprinklr starts pulling in data for the corresponding Ad Accounts based on your configuration after you save. Once the data is fetched, you can plot a widget using the unique metrics in any widget.
Note:- When plotting the widget, use the Account/Paid Initiative/Ad Set/AdVariant filter for which you want to view the data is mandatory and the time range should be the same as the time range selected during the configuration of the unique metric. 
Unique Metrics — Field Descriptions
Terms | Description |
Channel | Select a channel for which you need unique metrics data from the below options:
|
Ad Accounts | Select the Facebook OR LinkedIn ad account(s) from the drop-down. |
Time Range Options | Select the time range for which you need Unique Metrics data from the drop-down. You can select multiple time range options. The following are the time range options to select from:
Note
|
Custom Time Range | Select the custom date range by clicking Add New Custom date range and entering the Start and End Date as desired. |
Break Down Reporting | For Facebook Channel, Select the desired option from the drop-down if you want to break down the report to gain more insight. Following are the options:
|
Position | Support Reach for Facebook at Placement level |