Setting up and configuring Leave Policies (Business Holidays/Business Hours)
Updated
Setting up and configuring Leave Policies is a crucial pre-requisite to get started in setting up the leave management module for the workforce planner. Defining the businnes holidays and business hours as a part of operation differs amongst different organizations and hence needs to be custom-defined before having to define the activities and schedules for the agents. Sprinklr's leave policies are easy to setup and edit as per business requirements. This articles will primarily deal with the setting up and configuring of the leave policies on the Sprinklr Platform:
Step 1: As a workforce Planner, on the Sprinklr service launchpad, use the global search box to type and redirect to "All Settings".
Step 2: On the Platform Settings landing page, Click on "Manage Customer" module. On the manage Manage Customer landing page, click on the Business Hours icon.
Step 3: On the Business Hours module's landing page, the planner would be able to view two sections:
Business Hours
Business Holiday List
To set-up the business holidays, navigate to the Business Holiday List section,
Click on the 'Add Business Holiday List' button on the top-right part of the Business Holiday list landing page.
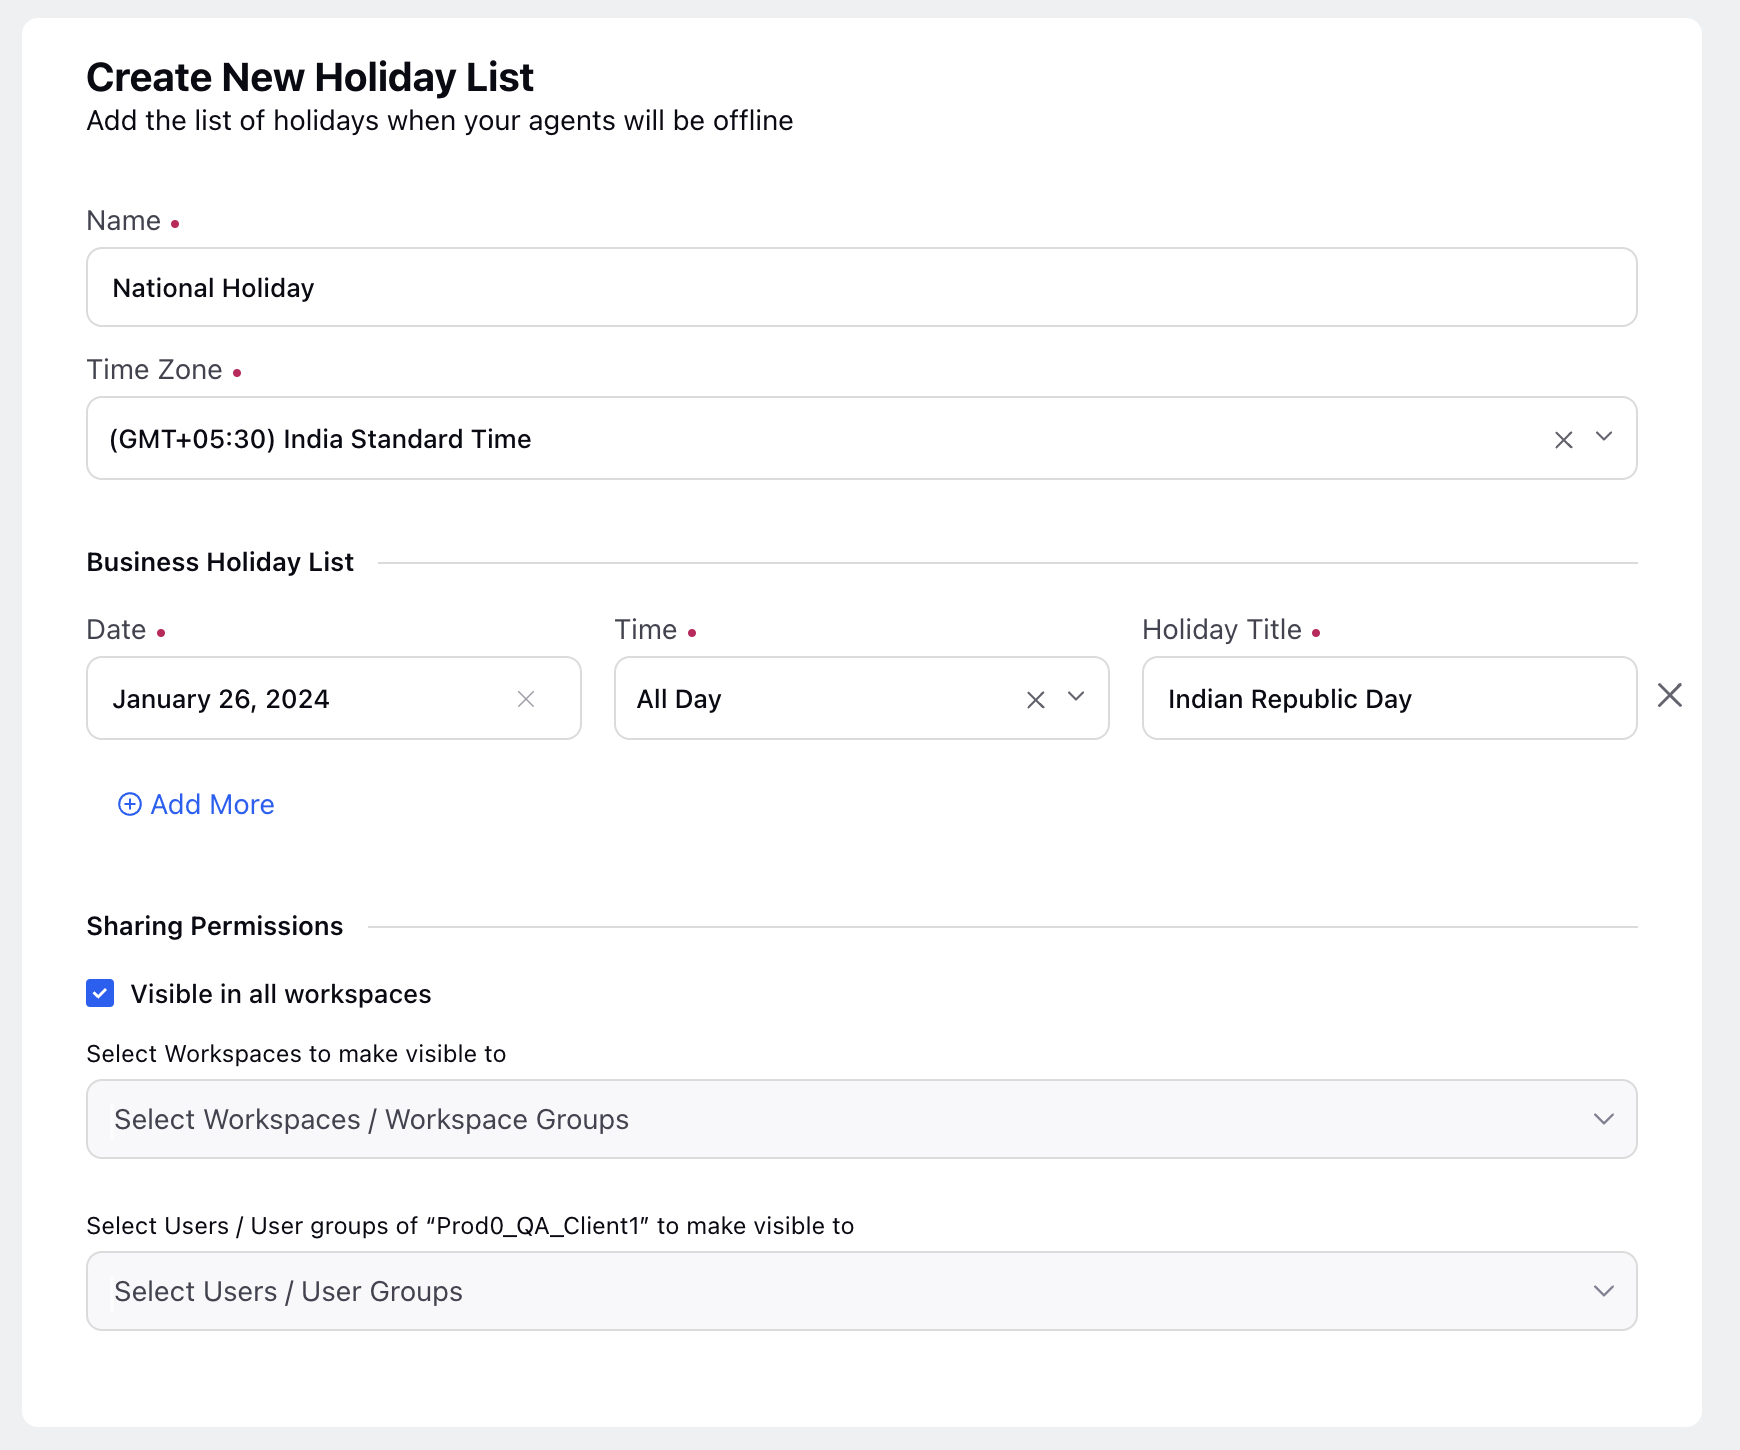
Fill in the details for the corresponding business holiday by filling in the following details:

Name: Set the name of the business holiday
Timezone: Select the timezone from the drop-down list
Date: Choose the date on which the corresponding holiday(s) will be enabled.
Time: Select the holiday as an All Day event or define the customer duration of time for which the holiday will be active.
Holiday Title: define the name of the holiday
Additionaly, you can add multiple dates and holidays under the same Holiday using the "Add more" button.
Sharing Permissions: Share this holiday to be visible across all workspaces, or custom defined workspaces, user(s) or user group(s).
3. Once the holiday details are filled, click on save to create the desired business holiday.
4. The newly created business holiday will be visible on the Business Holiday List landing page, click on the three dot button next to any business holiday to edit, delete, clone or view the audit trail of the respective holiday.
Additionally, To set-up the business holidays, navigate to the Business Holiday List section,
Click on the 'Add Business Hours' button on the top-right part of the Business Hours landing page.
Fill in the details for the corresponding business hours by filling in the following details:
Name: Set the name of the business hours sequence for example, 9AM - 5PM.
Description: Optionally, describe the business hours being setup.
Business Holiday: Select the business holidays that would be applicable for the agents part of these business hours.
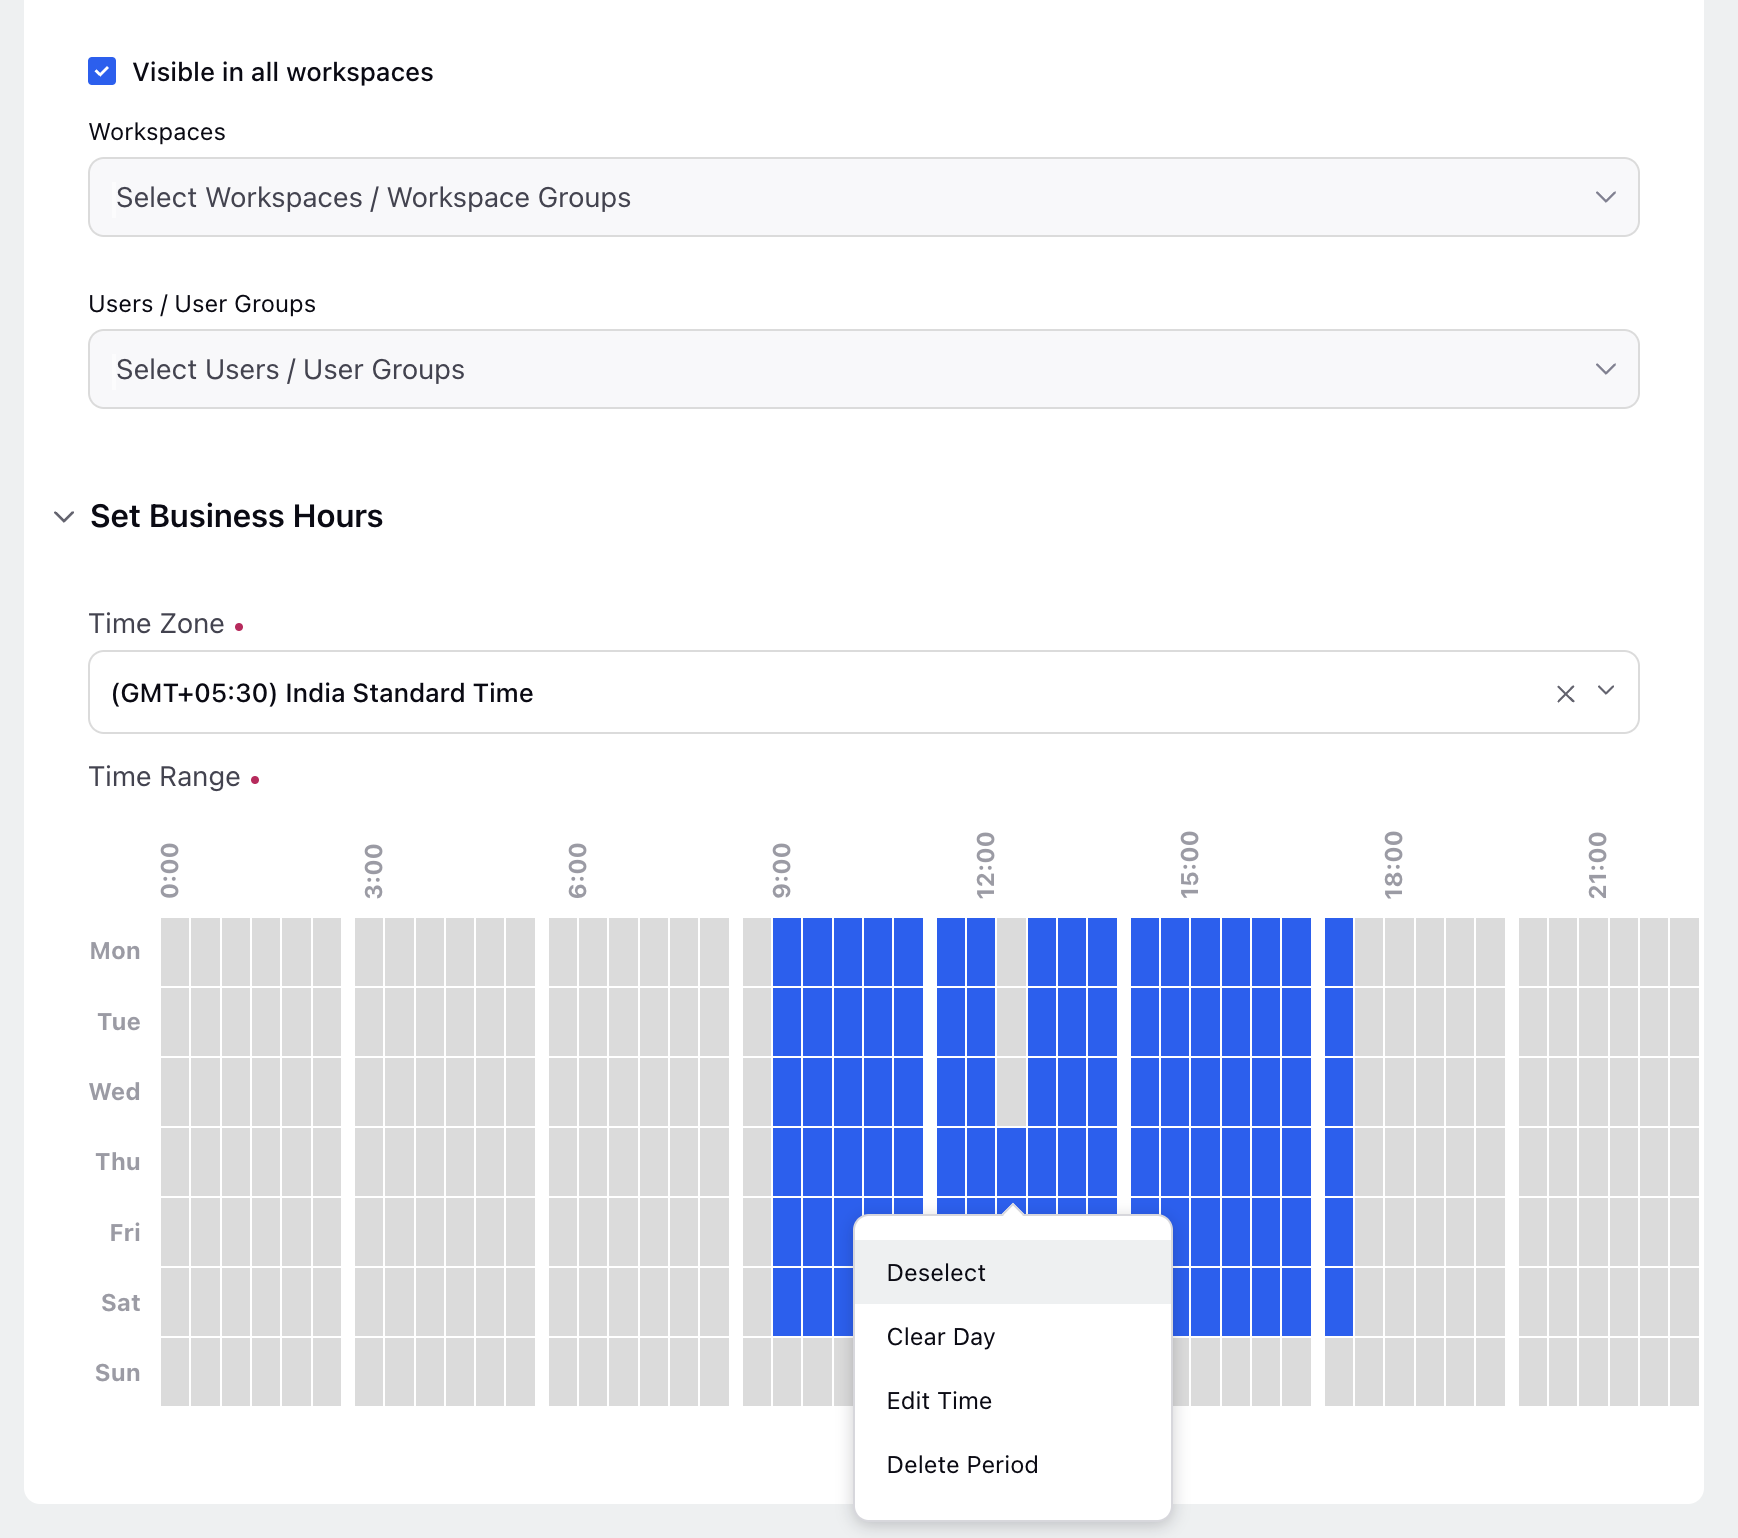
Sharing Permissions: Share this holiday to be visible across all workspaces, or custom defined workspaces, user(s) or user group(s).
Set Business Hours:
Timezone: Select the timezone from the drop-down list
Date: Choose the date on which the corresponding holiday(s) will be enabled.
Time Range: On the business range map, drag and select the business hours across the time of the day and day of the week. Click on any particular day or hour to deselect, clear day, edit time or delete the period.

3. Once the business hour details are filled, click on save to create the desired business hours sequence.
4. The newly created business hours will be visible on the Business Hours landing page, click on the three dot button next to any business hours to edit, delete, clone or view the audit trail of the respective business hours.
The newly configured business holidays and business hours are useful while setting up modules like leave management, shifts, activities on the Sprinklr Workforce Planner Persona.