Configuring Parameters in Data Connectors
Updated
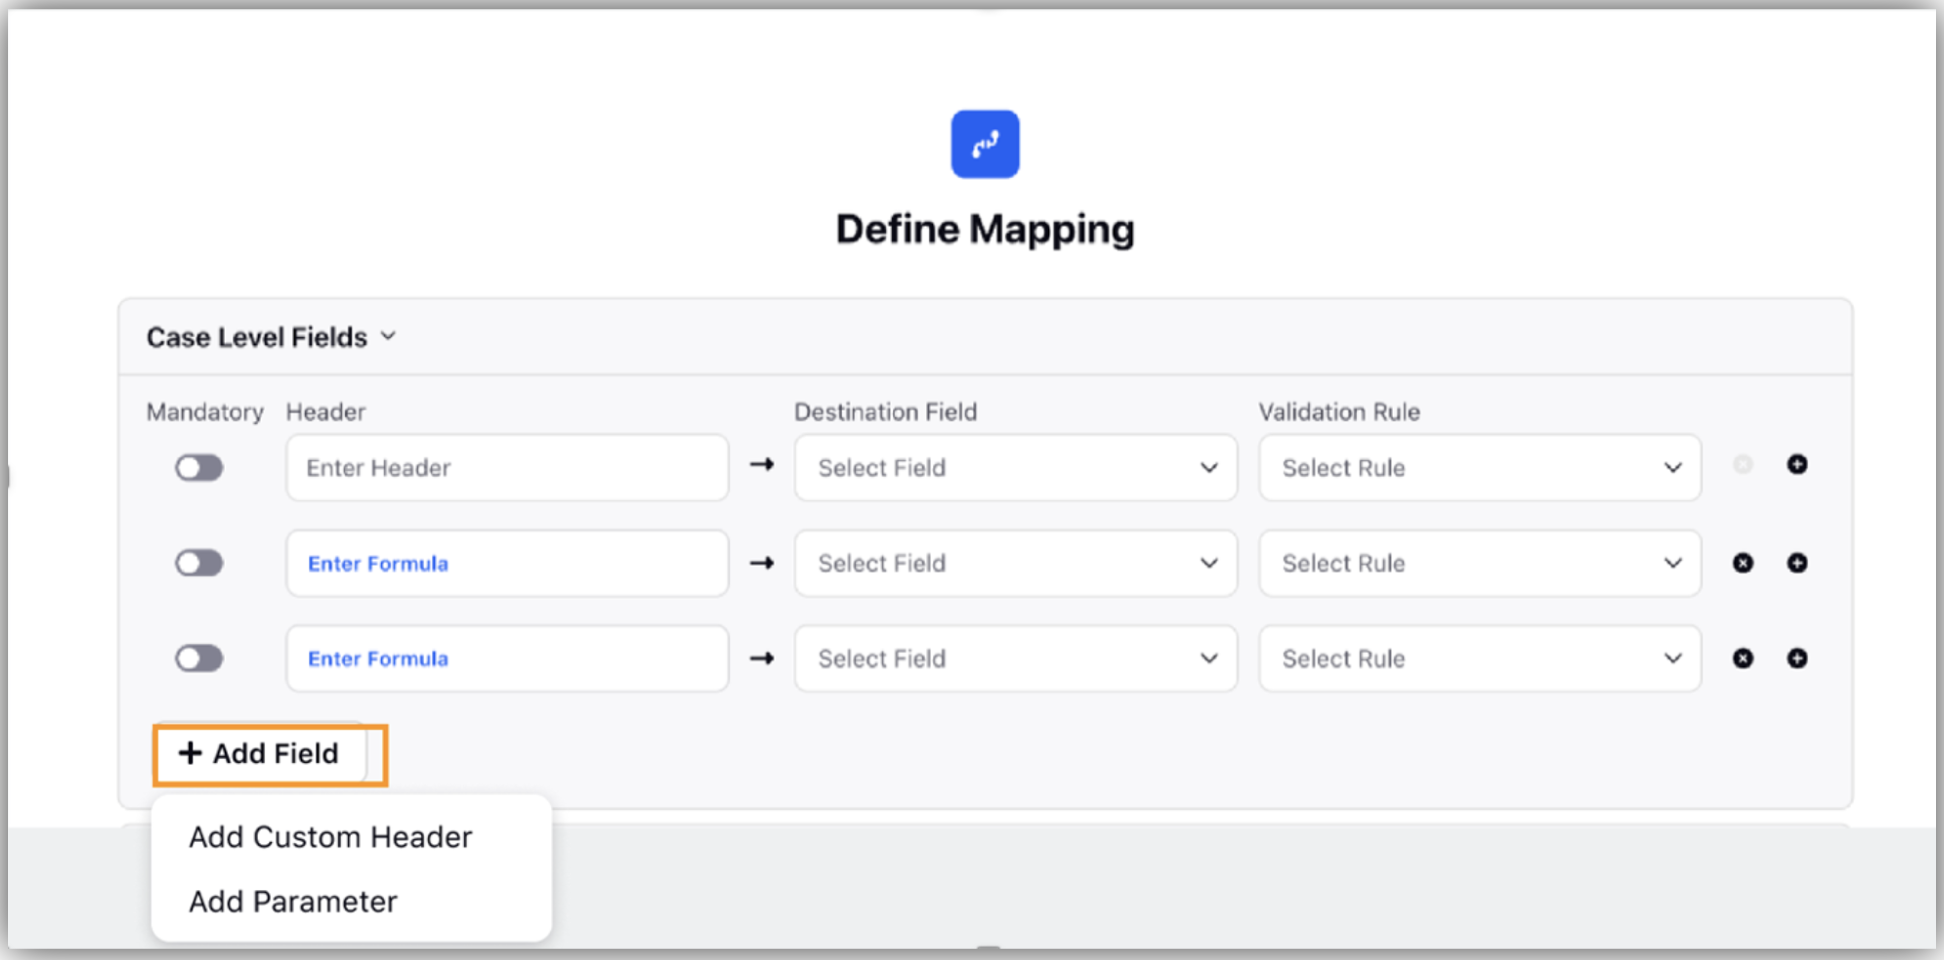
Sprinklr offers capabilities to add an additional parameter on the Define Mapping screen. On the Mapping screen, the user can add additional parameters apart from the columns that are pre-existing in the source file. The parameter can be added using the Add Field button. These parameters can be configured to get their values from the record manager of the entity from where the data connector is mapped to run. These parameters are used to provide values which are not present in the source file.
A user should be able to configure a parameter that, at runtime, enables a connector to accept values not present in the original data source, for the purpose of creating or updating the entity.
Accessing the Define Mapping Screen
Follow these steps to arrive at the Define Mapping Screen
From the launchpad, go to Sprinklr Service > Import/Export Data from External Sources > Unified Data Connector.
Click Install Connector, fill the fields in the Select Entity Screen to choose the Entity type, click Next.
In the Entity Specific Settings, fill the details specific to the entity selected in the previous screen, click Next.
In the Connector Details Screen, fill the connector details after specifying the source of the entity, click Next.
In the Source Specifications screen, depending on the selected Entity Source, fill the additional specifications that are required to be configured.
Once you have uploaded your files and configured the Source Specifications, proceed to the Define Mapping Screen to map the columns from your uploaded files to the corresponding custom or standard entity fields within Sprinklr.
For additional details refer Unified Data Connector.
Adding Header and Parameter in Define Mapping Screen
Follow these steps to add a Custom Header or a Parameter in the Define Mapping Screen:
Click on Add Field.

2. Select Add Parameter from the dropdown.
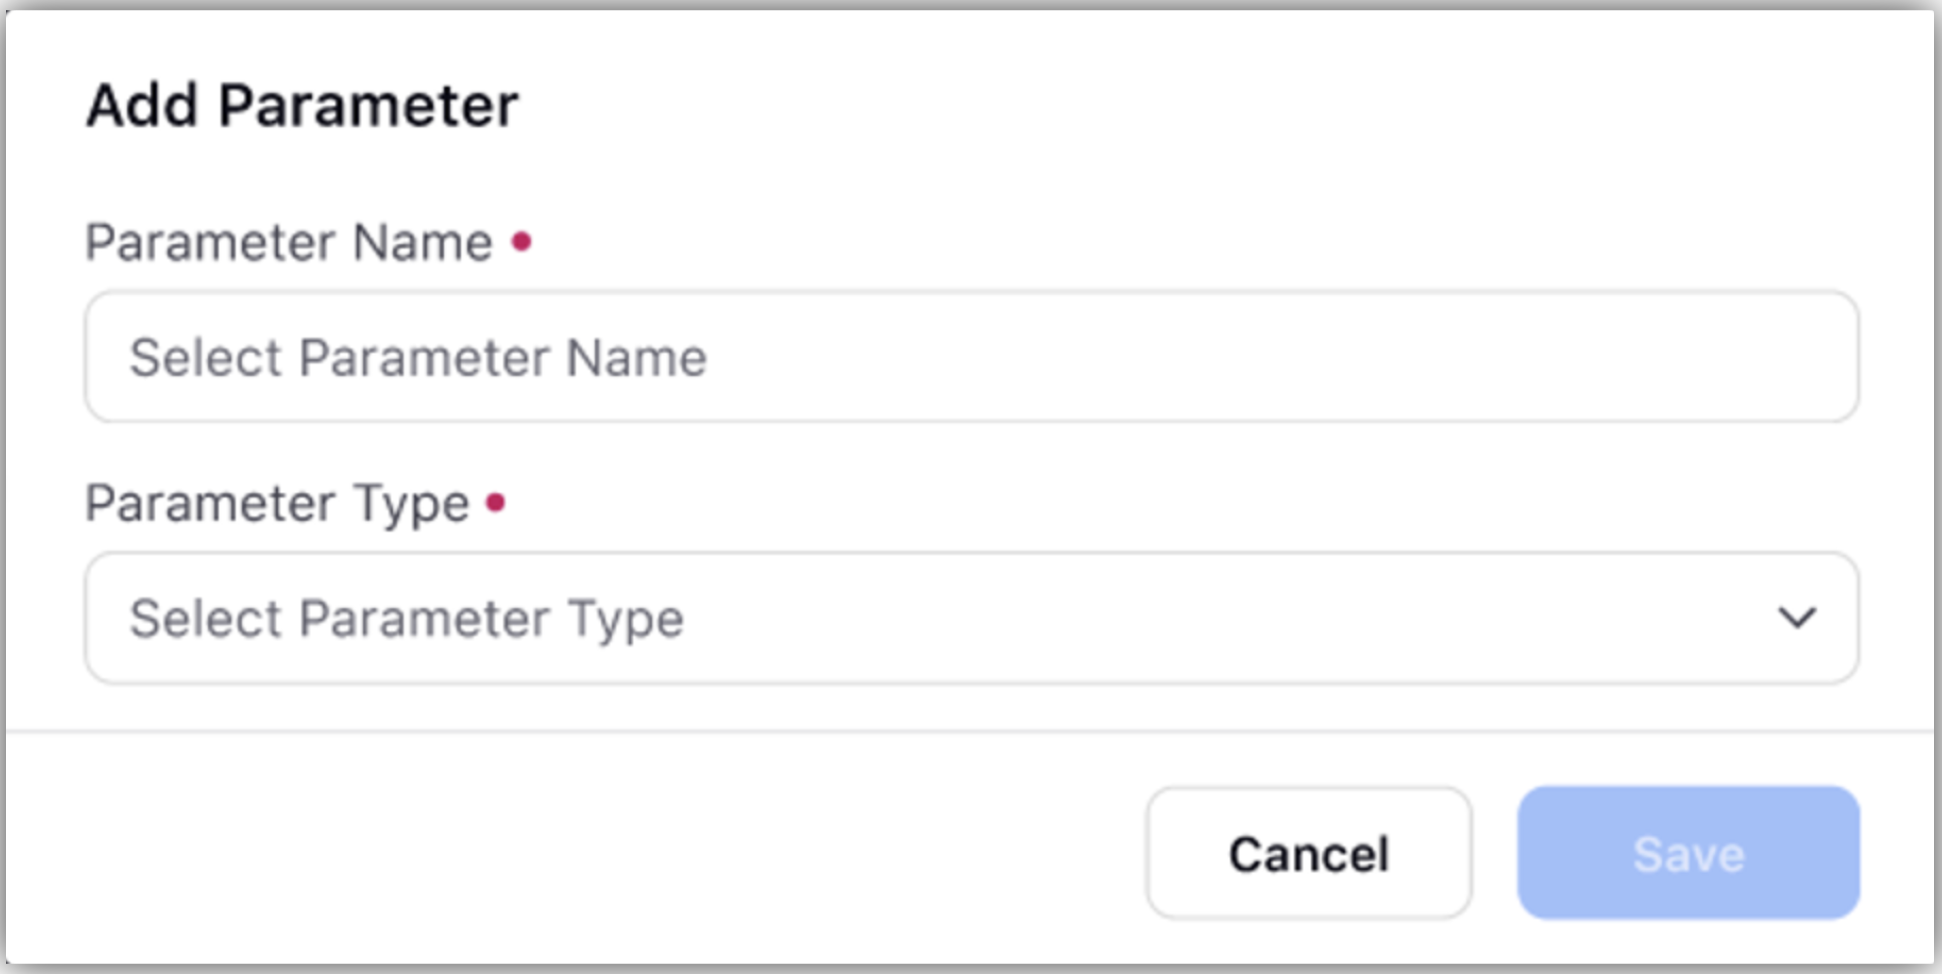
3. In the Add Parameter screen, input the following:
Parameter Name
Parameter Type
