Merging Email Cases
Updated
Merging related email cases into one will help you and your team to work smarter, faster, and better on customer requests.
You can merge two or more email cases in Agent Console and Care Console. This is helpful when different cases are created for a single customer issue. Take the following scenarios, for example.
The same person reached out on different brand email ids with the same issue.
The same person sent a new email for the same issue without asking update on the existing case.
Different people from a team raised the same issue via email.
Multiple cases about same issue make it difficult to manage conversations with customers and also add to the workload for agents. After merging related cases into one, you can keep having a conversation about the same customer issue in a single case. Note that once merged, one of the cases will become the parent case and another one will become the child case. A reply on the case will go to all the profiles involved in both cases.
You can also take different actions on the parent or child cases by creating a rule in Rule Engine. For example, you can close the child cases, add a note, or send an auto-response.
Note:
|
To Merge Email Cases
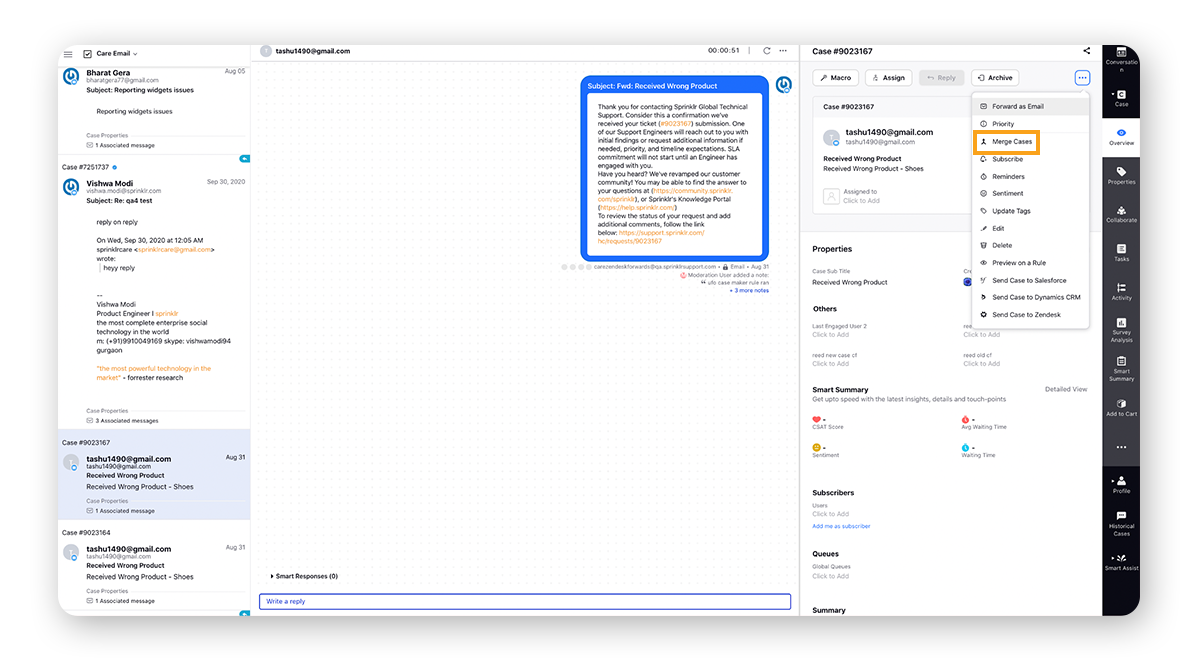
Within Agent Console or Care Console, open the email case in the third pane that you want to merge with others.
Note: In Care Console, you can get the Merge Cases option enabled in case controls by reaching out to support at tickets@sprinklr.com.
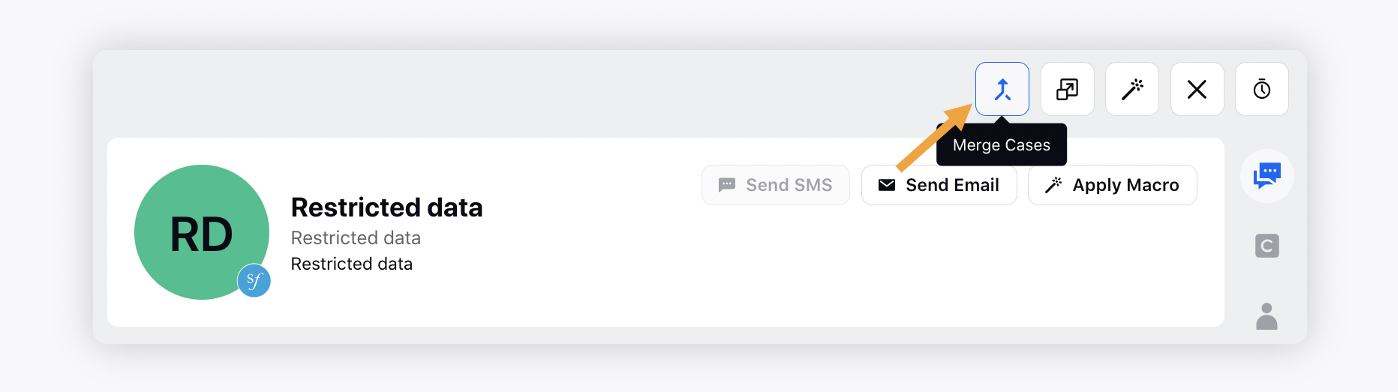
Within the Overview tab of the third pane, hover over the Options icon in the top right corner and select Merge Cases.
On the Merge Cases window, select the cases that you want to merge. You can also search for the desired cases. Once selected, you can remove the case that you do not want to merge by hovering over the case on the right pane and clicking Remove selected case.
On the right pane, hover over the case that you want to keep as master and select Mark as master.
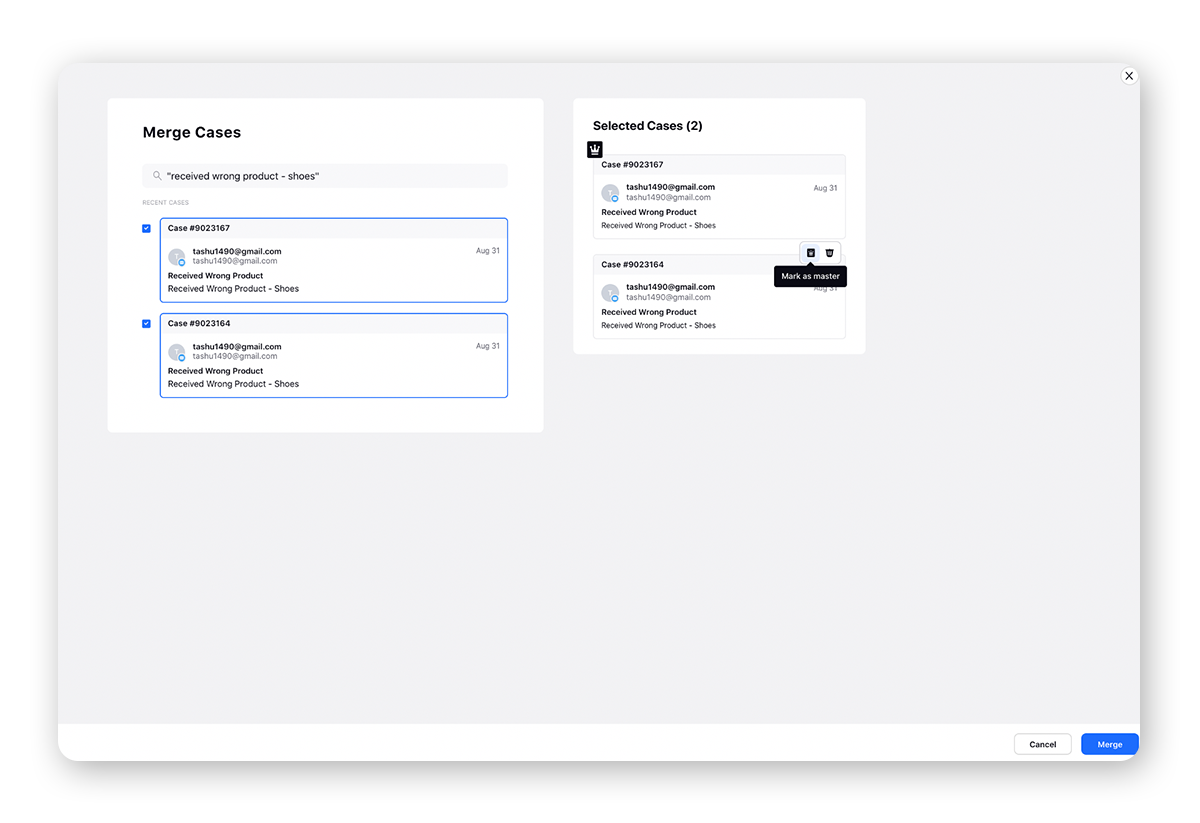
Click Merge in the bottom right corner.
Upon successful merging of the email cases, you will receive a message notification at the bottom of the Agent Console or Care Console.
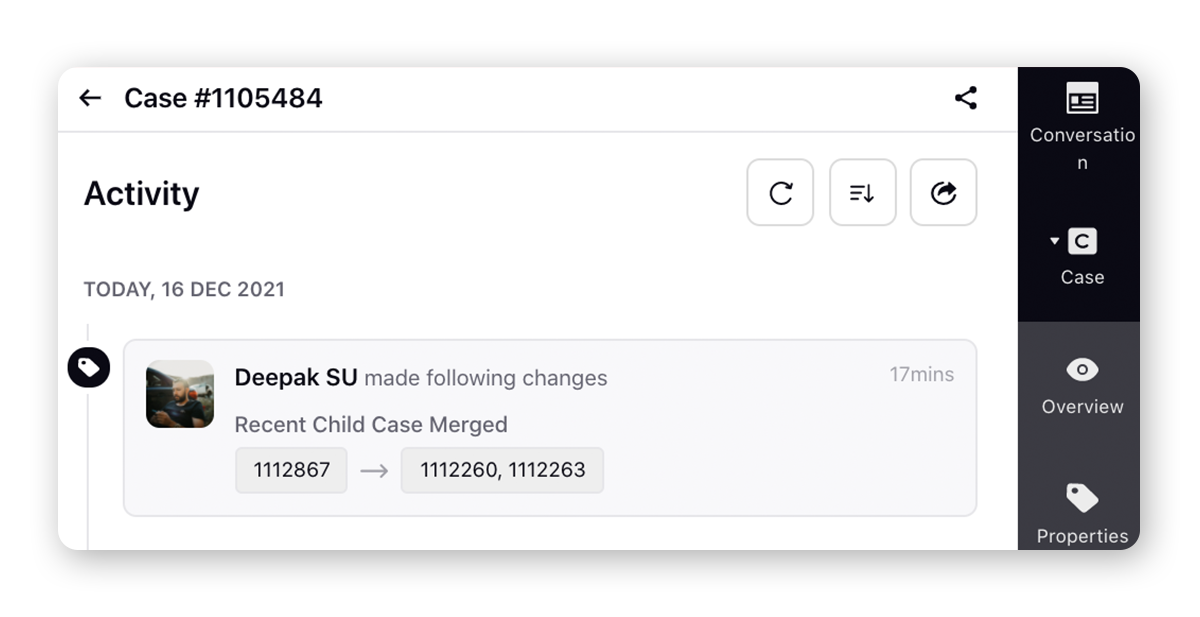
You can also view the merging activity along with the case numbers in the Activity tab of the third pane.
Once merged, all the messages in the child cases will be copied as notes within the Collaborate tab of the parent case. Also, the collaborators will be copied from child cases to the parent case.
Note: To not copy the child case messages as notes to the parent case, please work with your Success Manager.
To Take Actions on Merged Cases via Rule Engine
You can take multiple actions on merged cases via Rule Engine.
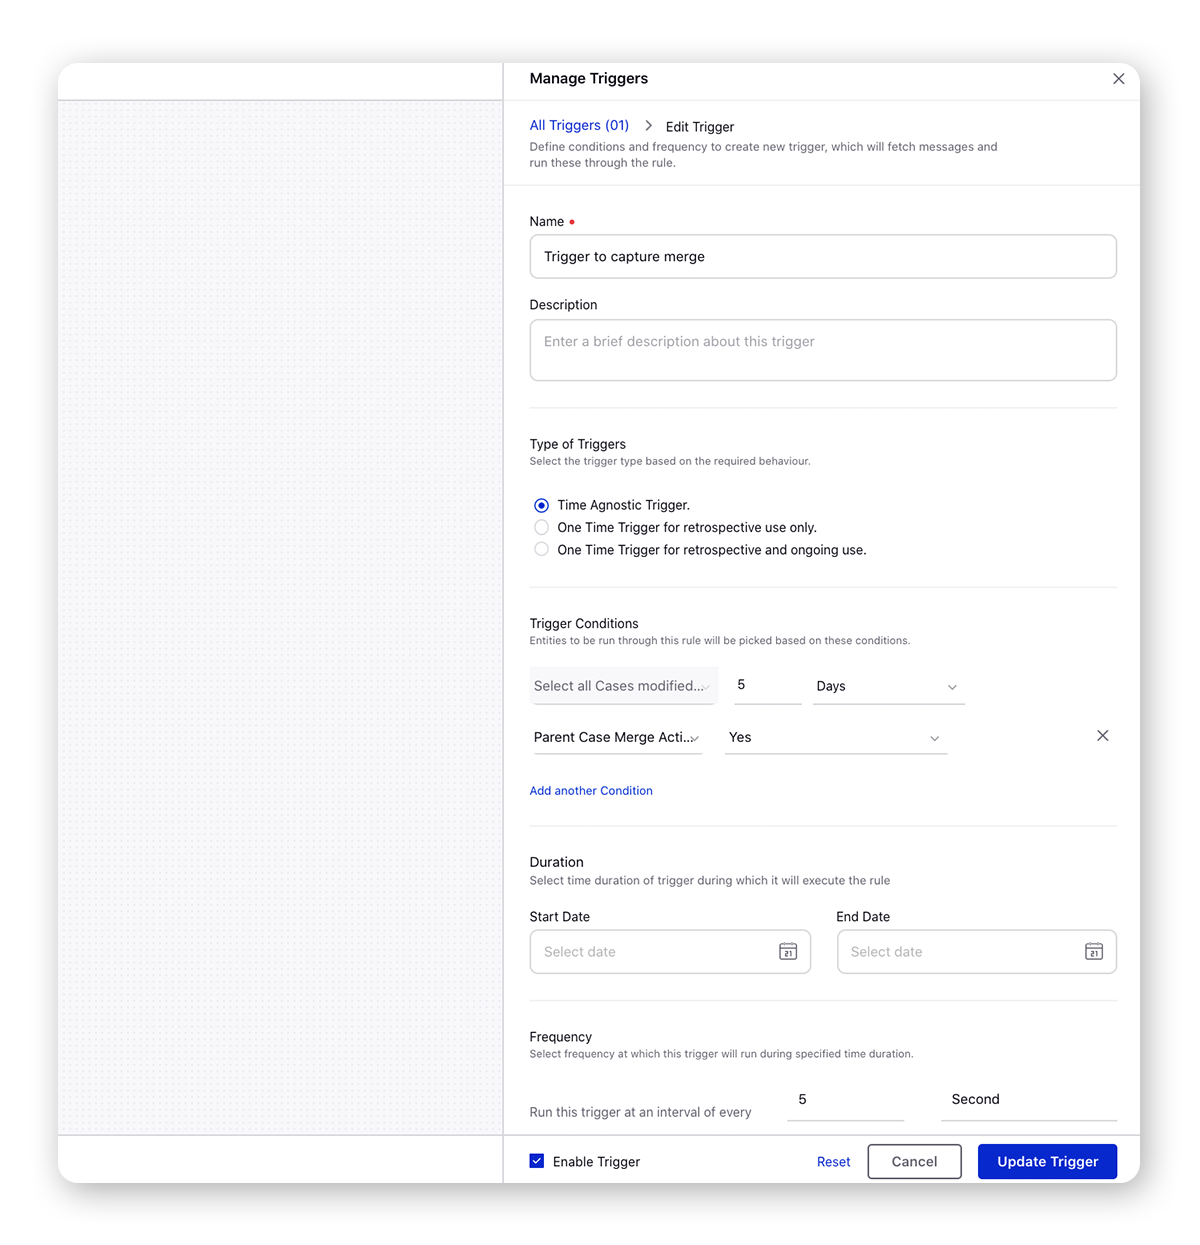
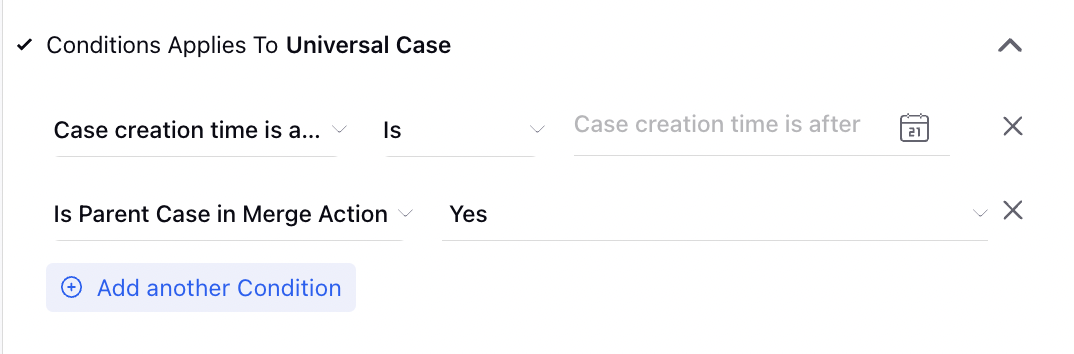
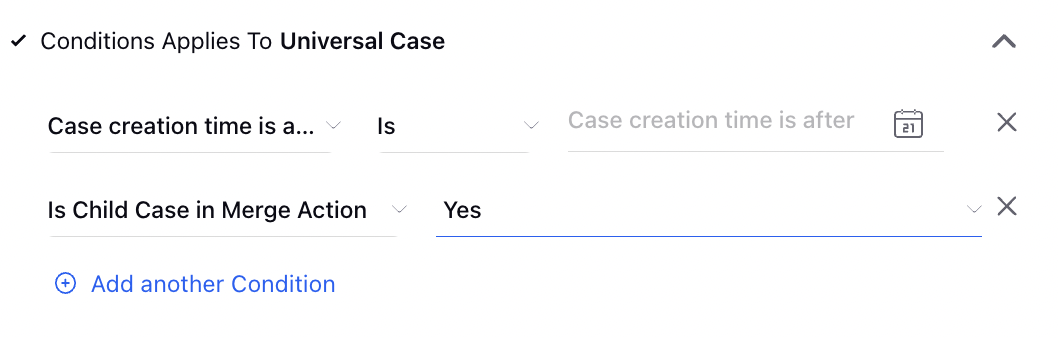
To take any action on merged cases, under Condition Applies To "Universal Case", select the Case creation time is after condition with the desired date and time. Next select Is Parent Case in Merge Action condition as Yes to take actions on the parent case and Is Child Case in Merge Action as Yes for child cases.
 To Send Auto-Response on Merged Cases
You can create a Text Template in the Digital Asset Manager to send it to users of the parent case or child cases to let them know that the particular cases have been merged being of the same issue.
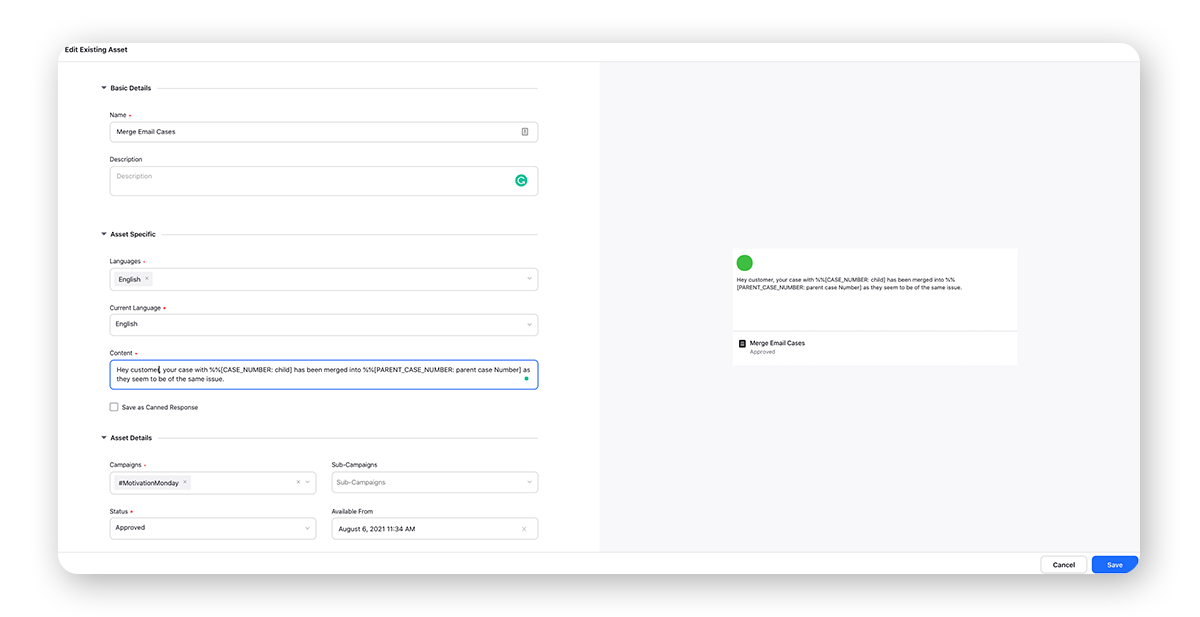
Next, create a Case Update rule in Rule Engine to send an auto-response email. Under Actions To "Auto respond to a message", select Send Auto Respond To action with the desired details.
You can also mark the merge status as completed so the rules do not re-run on such cases. Under Actions To "Universal Case", select Mark Merge Status as Completed.

To Copy Child/Parent Case Numbers on Merged Cases via Rule Engine
You can also copy the case numbers of the child cases to the parent case and vice versa.
Under Actions To "Copy properties from source to destination", select Copy Action Source and Copy Action Destination as Case.
Now, to copy the parent case number to the child case, click Add Fields and select Parent Case Number from the Action field and the desired custom field name from the corresponding dropdown where you want to copy the parent case number.
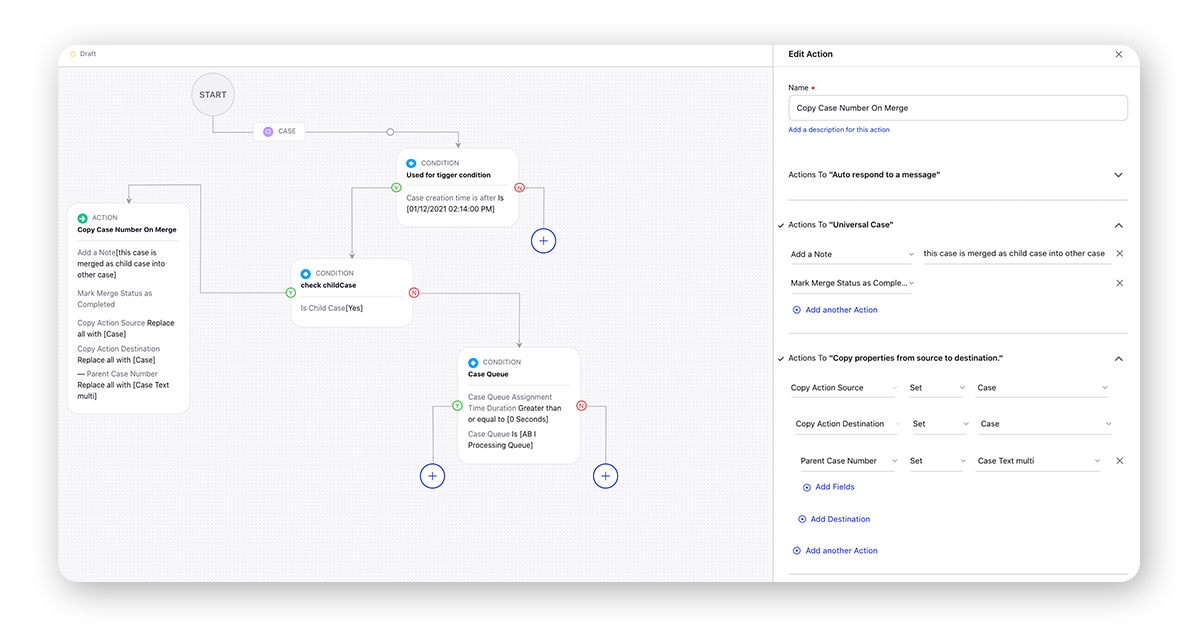
To copy the child case numbers to the parent case, click Add Fields and select Child Cases from the Action field and the desired custom field name from the corresponding dropdown where you want to copy the child case number(s).
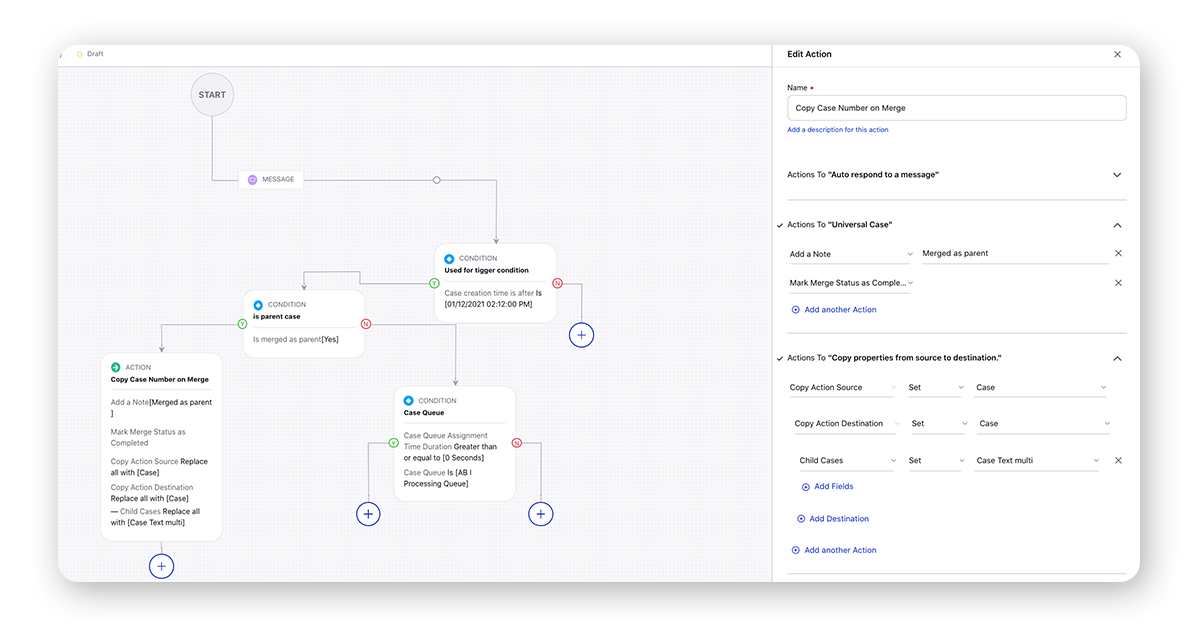
You can also add a rule trigger and add the trigger condition as Child Case Merge Action Happened or Parent Case Merge Action Happened as Yes.