Surveys on Community
Updated
Surveys are an integral part of obtaining valuable customer feedback and insights, a vital aspect for businesses looking to enhance their products and services. Community product is natively integrated with Surveys feature that allows you to send surveys to users seamlessly and efficiently when they access your online community.
The survey request appears as a non-intrusive pop-up each time a user logs in to your community platform, eliminating the need for redirection to a separate webpage. This ensures a smooth customer experience, making it more likely for users to provide feedback.
Here are some key benefits and use cases of the Survey feature:
1. Higher Response Rates: By presenting surveys immediately upon login, users are more likely to participate, providing you with valuable insights and a larger response pool.
2. Improved Customer Satisfaction: Collecting feedback and acting on it demonstrates your commitment to continuously enhancing the user experience, resulting in increased customer satisfaction and loyalty.
3. Product Development: Gather crucial feedback on new features, products, or services, allowing you to prioritize future improvements based on your user base's preferences and opinions.
4. Metrics Tracking: Easily track metrics like Net Promoter Score (NPS) and Customer Satisfaction (CSAT) through periodic surveying, enabling you to monitor the impact of changes and improvements to your product or service.
5. Showcase Transparency: Encourage open communication within your community by collecting feedback and implementing changes based on user suggestions. This helps build trust with your clients and an environment in which members feel valued.
By incorporating regular surveys into your community outreach, you create an environment of continuous improvement and an open dialogue with your user base.
Note You can also send the Survey popup to unauthenticated users (who have not signed up on Community) depending on the following criteria:
You can further get a condition added to show the survey popup only after a defined time period to the users who have already filled out the survey once. For example, if a user has filled the survey today then you can configure to not show the Survey popup for the next 10 days. For unauthenticated users, you can add additional fields in the survey form to capture from them, for example, the Email Id. So, if a user is not logged into the community then the survey form with the Email Id field will be sent to them in order to track the anonymous users. To get the above capabilities enabled, reach out to support at tickets@sprinklr.com. |
Before You Begin
Create a Survey Form in the Survey Builder. For more information, see Create a Customer Care Survey.
To Enable Community Survey
Click the New Tab icon. Under the Sprinklr Service tab, select Community Builder within Resolve.
On the Community Admin window, click Create Community in the top right corner. You can create a new Community, or edit an existing Community. To learn how to create a new community, see Create a Community.
On the Community Builder, click the Content Settings tab.
From the left pane menu of the Content Settings window, click Survey to create a survey popup.
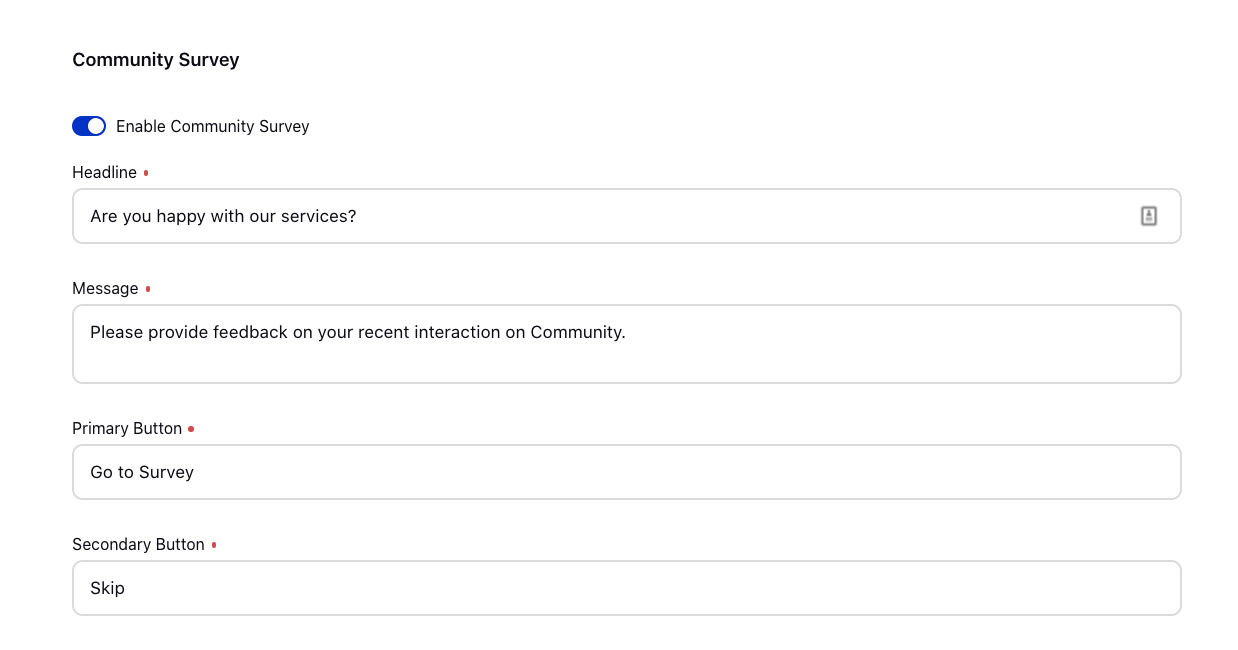
Fill in the required fields. For more information, see Community Survey — Field Descriptions.

Click Save to confirm your survey configuration.
Community Survey — Field Descriptions
Terms | Description |
Enable Community Survey | Toggle this option to enable the community survey. |
Headline | Enter the headline for your survey. |
Message | Enter the message which will be shown on your survey request popup. |
Primary Button | Enter the text for the primary button which will enable a user to fill the survey. |
Secondary Button | Enter the text for the secondary button which will cancel the survey request. |
To Add Surveys on Community
Click the New Tab icon. Under the Sprinklr Service tab, click Community Builder with Resolve.
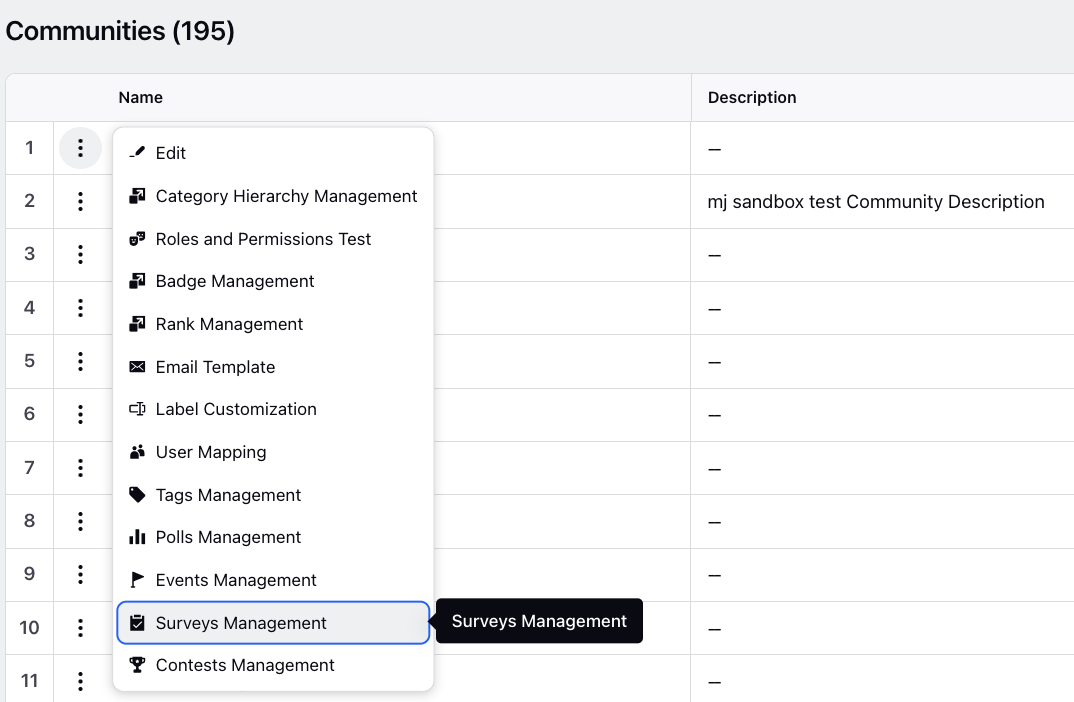
Hover over the Options icon alongside the desired community and select Surveys Management.

On the Community Surveys window, click Create Survey in the top right corner.

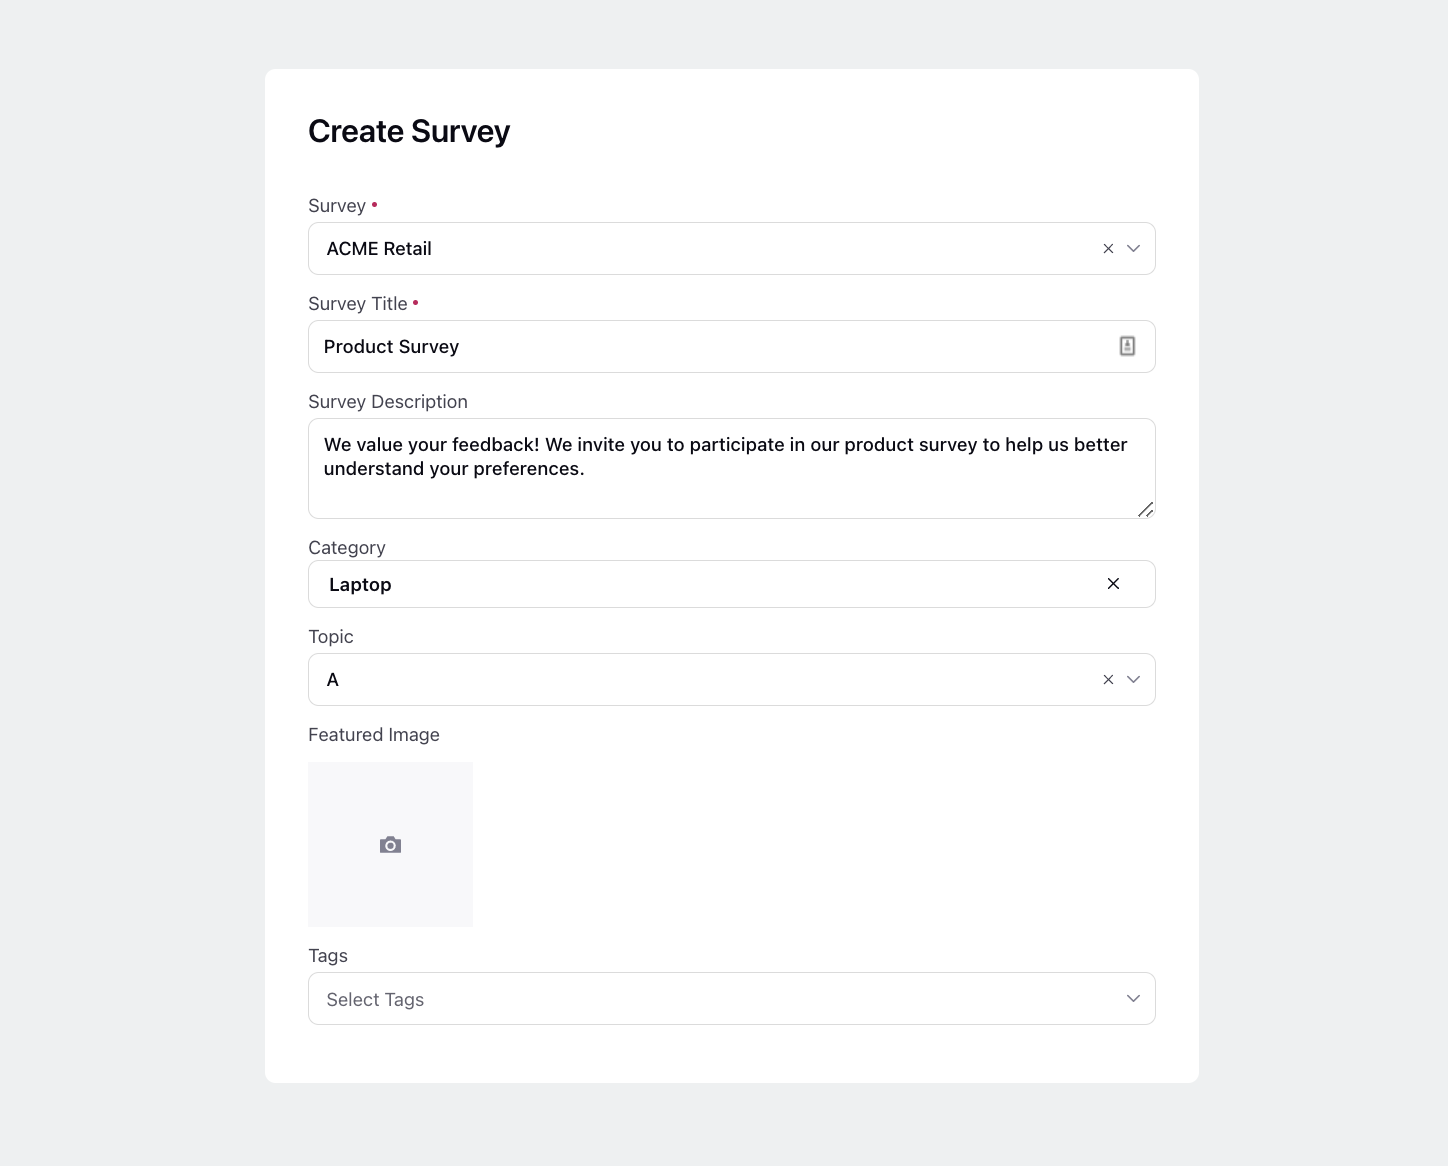
On the Create Survey window, select the Survey created in the survey builder and add the Survey Title and Survey Description. Add a Featured Image to accompany the survey if desired.

To add a survey to the community, you need to choose the appropriate Category and Topic that best represents the subject matter of the survey. This will make it easier for community members to discover and engage with the survey.
Next, choose the appropriate Tags to group your Surveys. Click Create at the bottom.
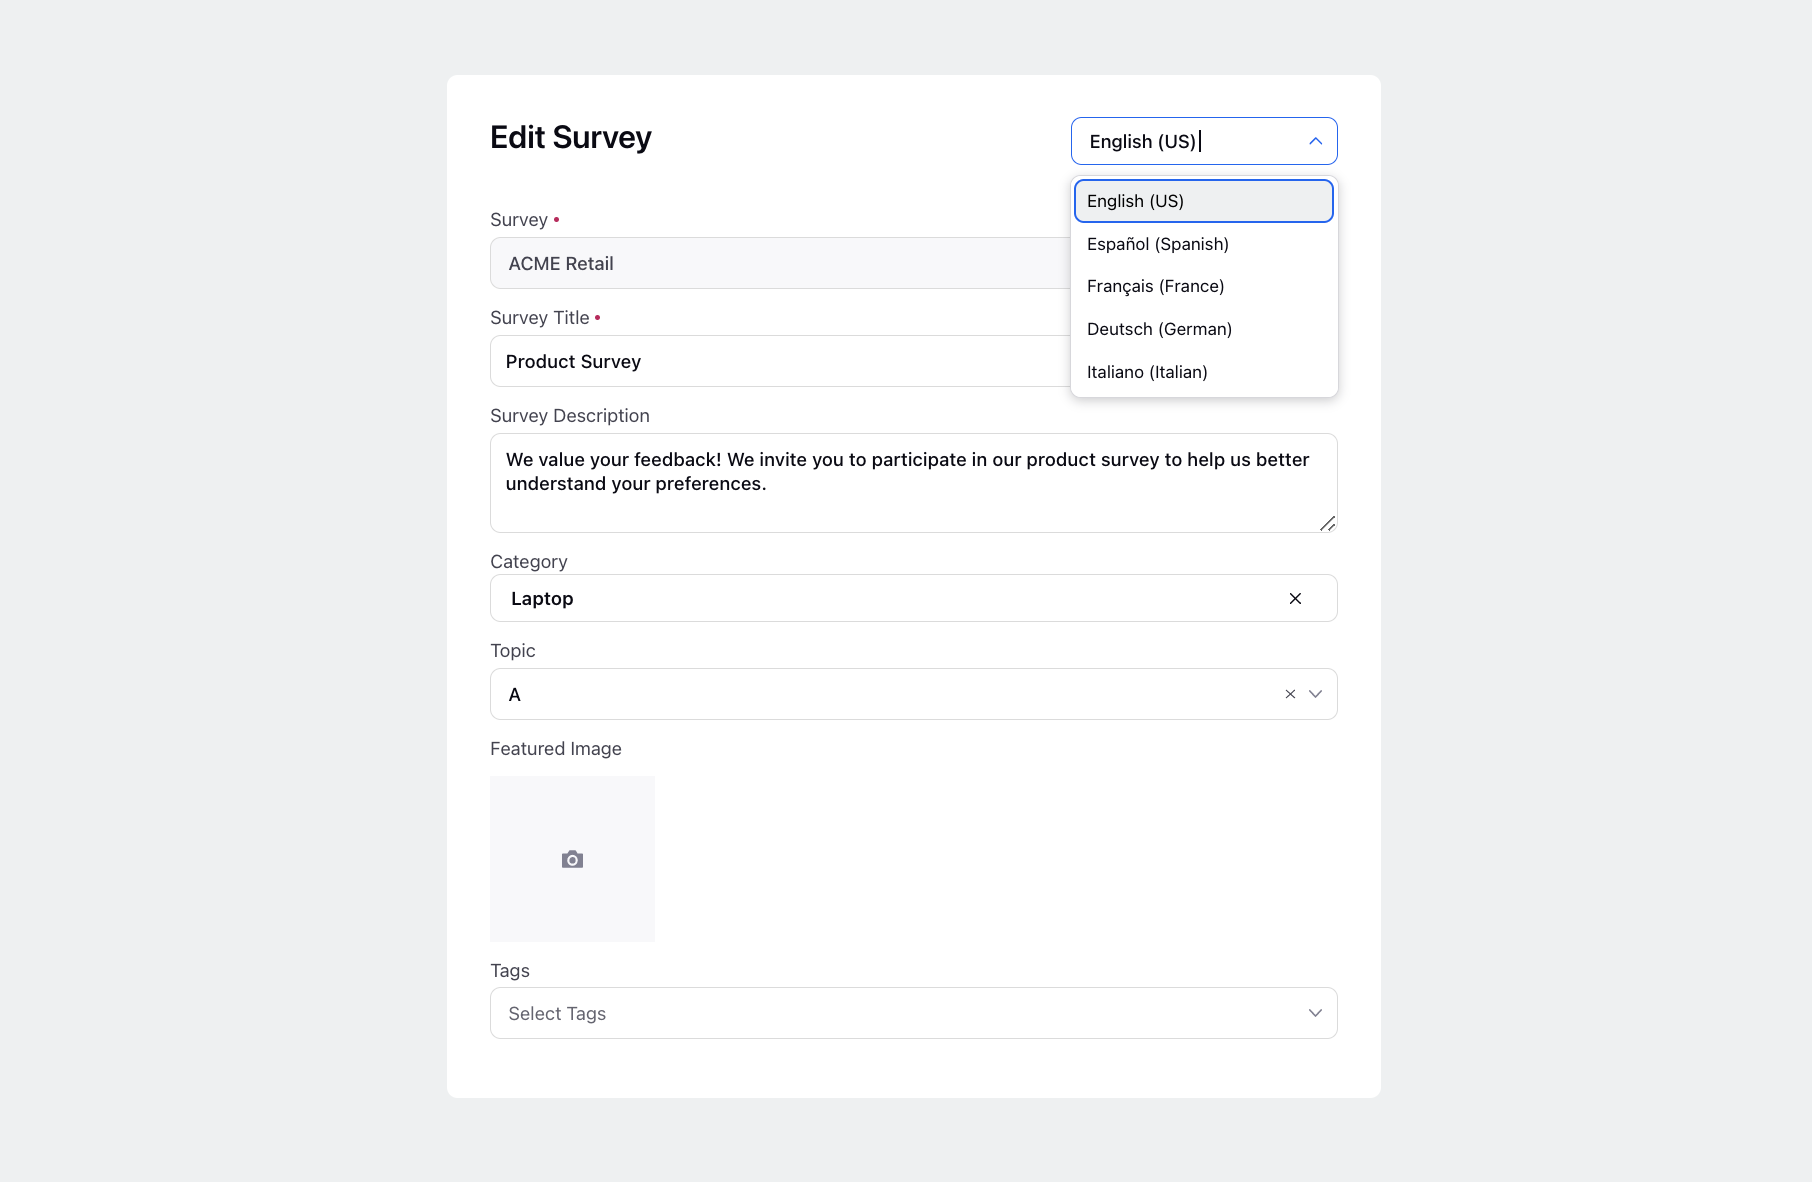
Once created, you can edit or delete a survey. On editing, you can utilize the language selection option located at the top right corner of the page and modify the language for your convenience. Simply choose the desired language and select the corresponding survey available in that language. Additionally, the survey title and description can be translated in the selected language.

Here is an example of a survey that has been published on a community platform.

To Send Community Survey via Rule Engine
Before you begin, create a Picklist type of Custom Field and select Asset Type as “Profile”. Under Set Values, select System and Source of Value as Users.
Click the New Tab icon. Under Governance Console, click Manage Rules within Platform Setup.
In the top right corner of the Rule Engine window, click Create New Rule.
On the New Rule window, fill in the required details. Select Customer under the Rule Scope and Audience Activity under the Context dropdown. For more information, see Create a Rule.
Click Next.
On the Rule Builder window, click the Addition icon to Add Condition. Enter a Name for the condition in the Edit Condition pane in the right.
Under Conditions Applies To "Audience Activity", select Activity Type from the Condition dropdown and the desired activity such as Login, Join Community, Comment, Delete Comment, Like, Reply, etc. from the corresponding dropdown. The users will get the survey pop-up after performing this activity on the Community Forum.
Under Conditions Applies To "The Object Entity of Audience Activity", select Channel as Community.
On the Rule Builder window, click the Addition icon on the Yes branch of the condition and select Add Condition to add another condition.
Next, under Condition Applies to “Survey”,select Survey last sent before duration condition and set the duration after which you want to send the survey pop-up. Also, select the Survey after which you want to send the new survey that you have created in the Survey Builder.
On the Rule Builder window, click the Addition icon on the Yes branch of the condition and select Add Action to add the action.
On the Edit Action pane in the right, enter a Name for the action select Client from the dropdown.
Under Actions to "Survey”, select “Request Survey” action and the desired survey that you want to send from the corresponding dropdown.
- Set the Survey Expiry Duration after which the survey will be expired.
- In the Survey Message field, put the placeholder %%[SURVEY_LINK]. Without this placeholder, the link will not be visible to the end customer.
- Select the value of “Survey Triggered By” as the Case Custom Field, for example, Last Engaged User, or as the name of the user to trigger the survey.
- Select the URL Shortener to shorten the Survey URL that will be sent to the users.
- Select “Survey Overridden Account Id” as the Community Account from which you want to send the survey form.Click Save in the bottom right corner to finalize the rule.
After the rule is enabled, your community users will see the pop-up on the Community forum after performing the set activity or refreshing the page.
Users can either click Skip or Go To Survey. Clicking on Go To Survey will redirect them to the Survey Form where they can give their valuable feedback.