Ads Composer Section 2: Target Audience
Updated
You can define your audiences for ad sets in this section. Defining a good target audience for ads is an important step:
- Better targeting: You may produce more targeted and relevant advertisements that are more likely to resonate with your audience by analysing the traits and habits of your target audience. Higher engagement, click-through rates, and, eventually conversions can result from this.
- Efficient use of resources: It costs money and is ineffective to advertise to everyone. You may more efficiently deploy your resources and increase your return on investment by concentrating on a certain target market.
- Improved brand perception: You're more likely to leave a good impression when your advertising is well-targeted and pertinent to your audience. This can enhance the consumer impression of your business and foster a more favourable brand image.
- Competitive advantage: You can set your brand apart from rivals and position your goods and services as the best option for your target market by focusing on a certain demographic. You may be able to take advantage of this to your advantage in the market.
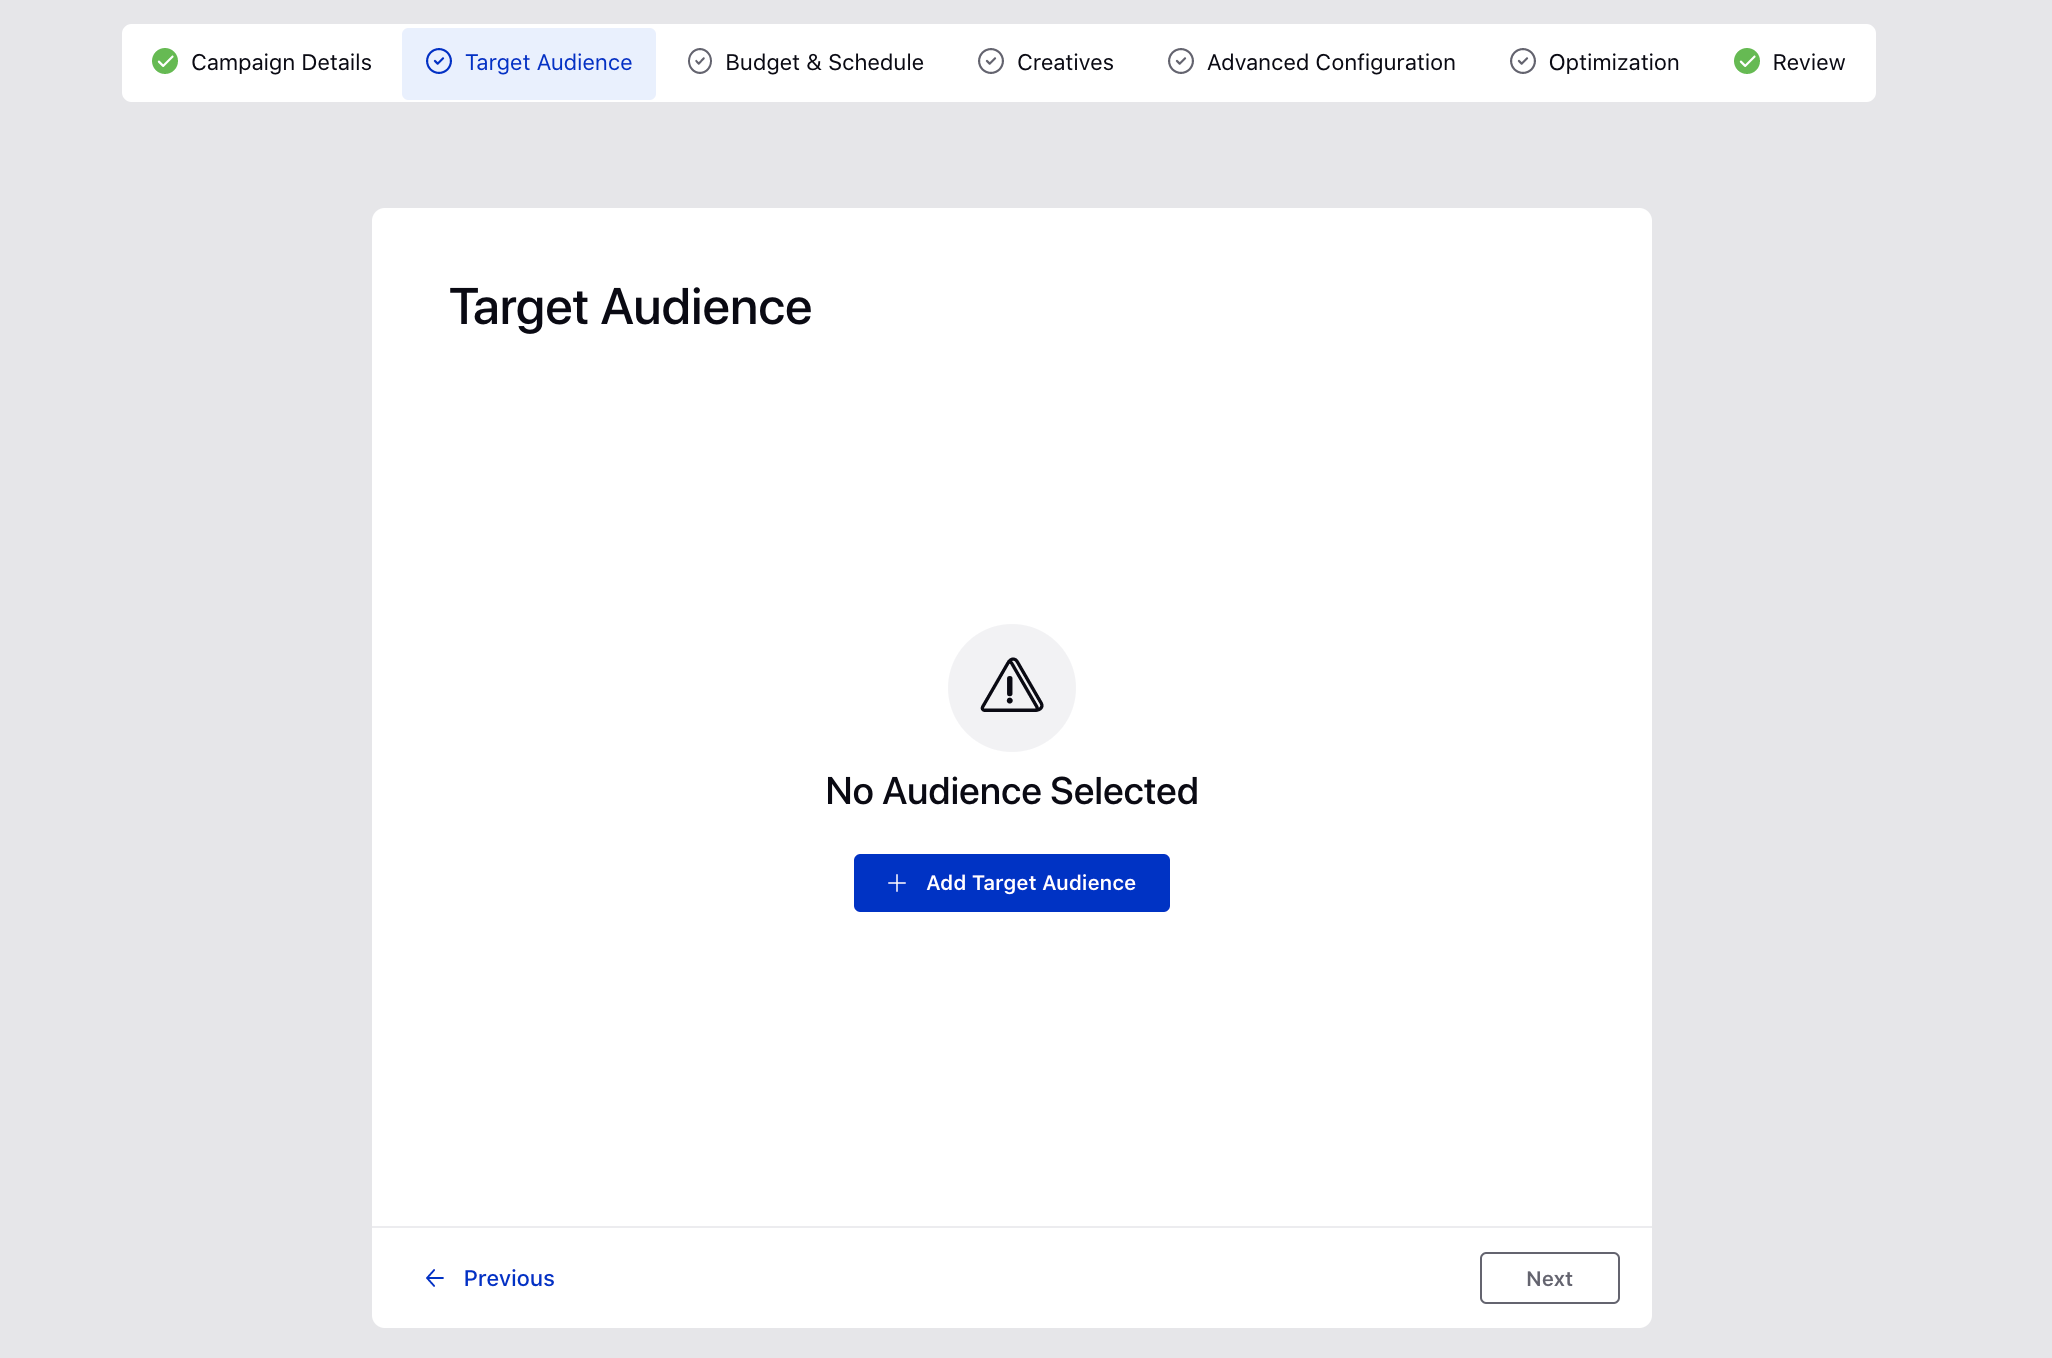
Select (or create) desired Targeting Audience
1. In the Target Audience section, click Add Target Audience.
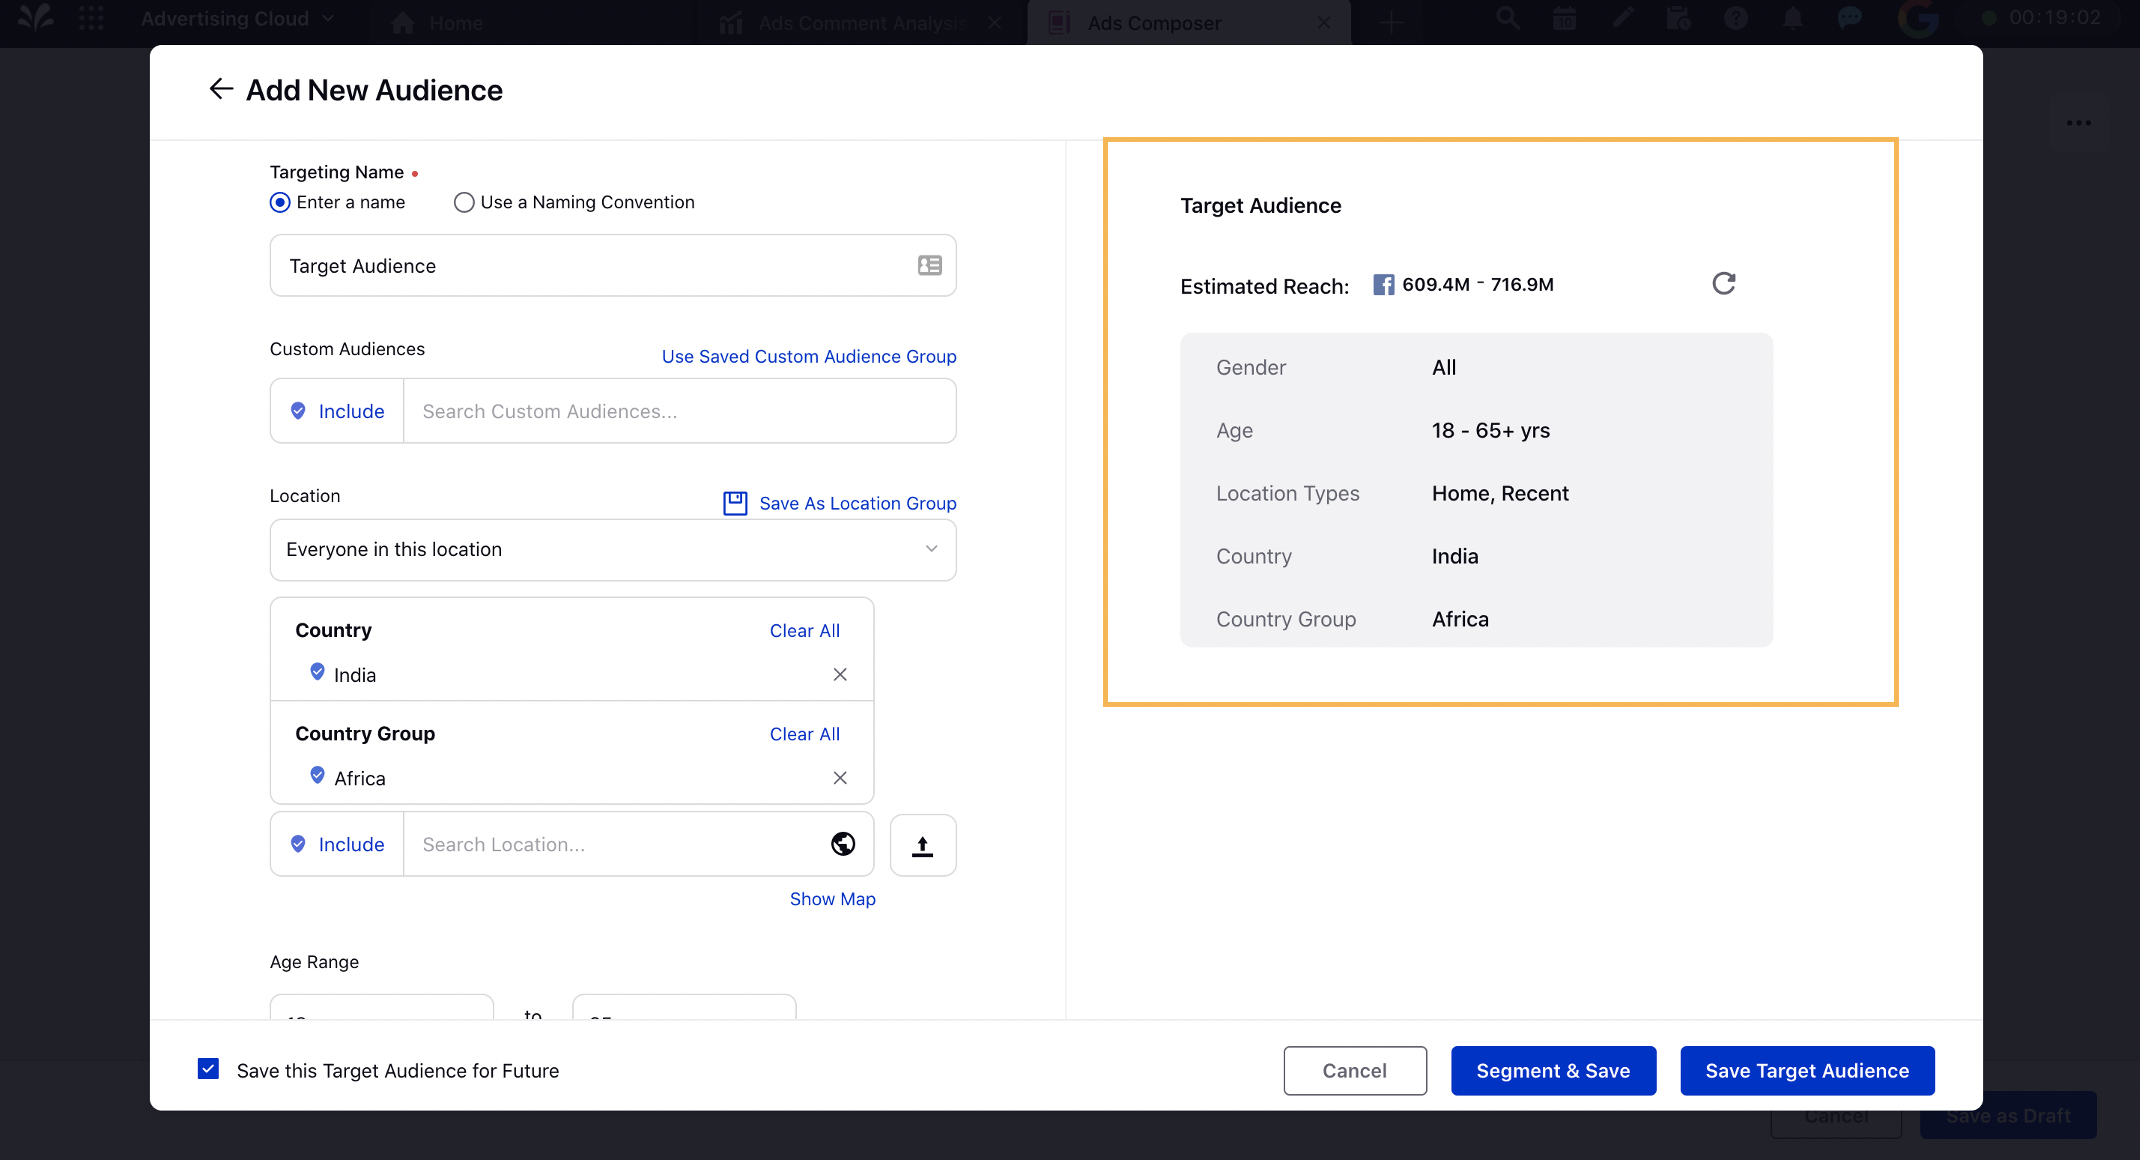
2. Select/Search the Target Audiences that you would like to use or click Add New Audience to create your custom target audience.
Tip | For an efficient selection, you can click Add Filter below the search bar to filter your saved target audiences by Audience Status or Audience Type or Source Creation Type or User (Created By). We will retain the filter configuration every time you compose a new ad campaign and define targeting. |
By default, all the valid target audiences will be populated on the Select from Saved Target Audiences window. You can also search and select invalid target audiences available in the Audience Manager from the Search bar. On searching for a particular invalid target audience, it will populate along with a warning message.
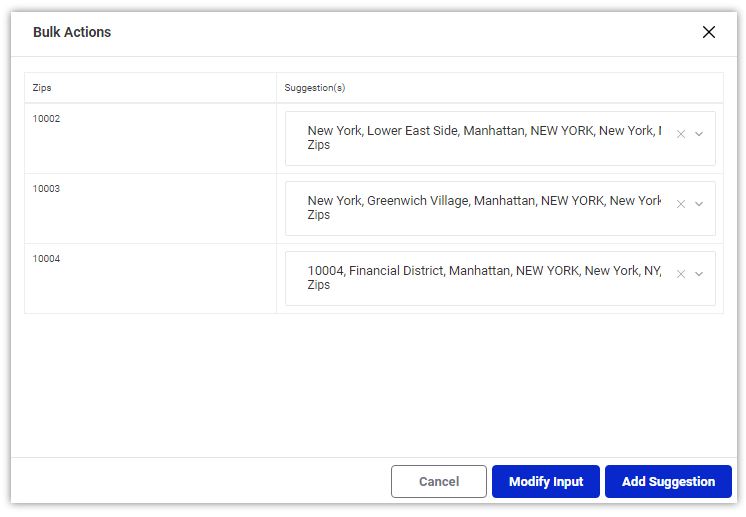
Note | While selecting your target audience from Saved Target Audiences based on a particular keyword such as a part of the saved audience's name, you can quickly multi-select all the audiences that contain the keyword by selecting the checkbox in the top-left corner of the audience details table. Please note that this functionality will not work cross-pages. |
Tip | Hover over the Options icon alongside a saved audience and select View Details to see more information on the audience. |

3. On creating a new audience, enter the target audience details. A summary of the selected target audience will populate on the right-hand side along with its estimated reach.
Note | The estimated reach field does not populate for Pinterest channel due to API limitations. |
4. Scroll down to the Define Custom Properties section and set the custom properties relevant to your target audience. This will allow you to analyze their performance in reporting. To know more about creating Custom Properties for Audiences, please refer to this article. (add link)
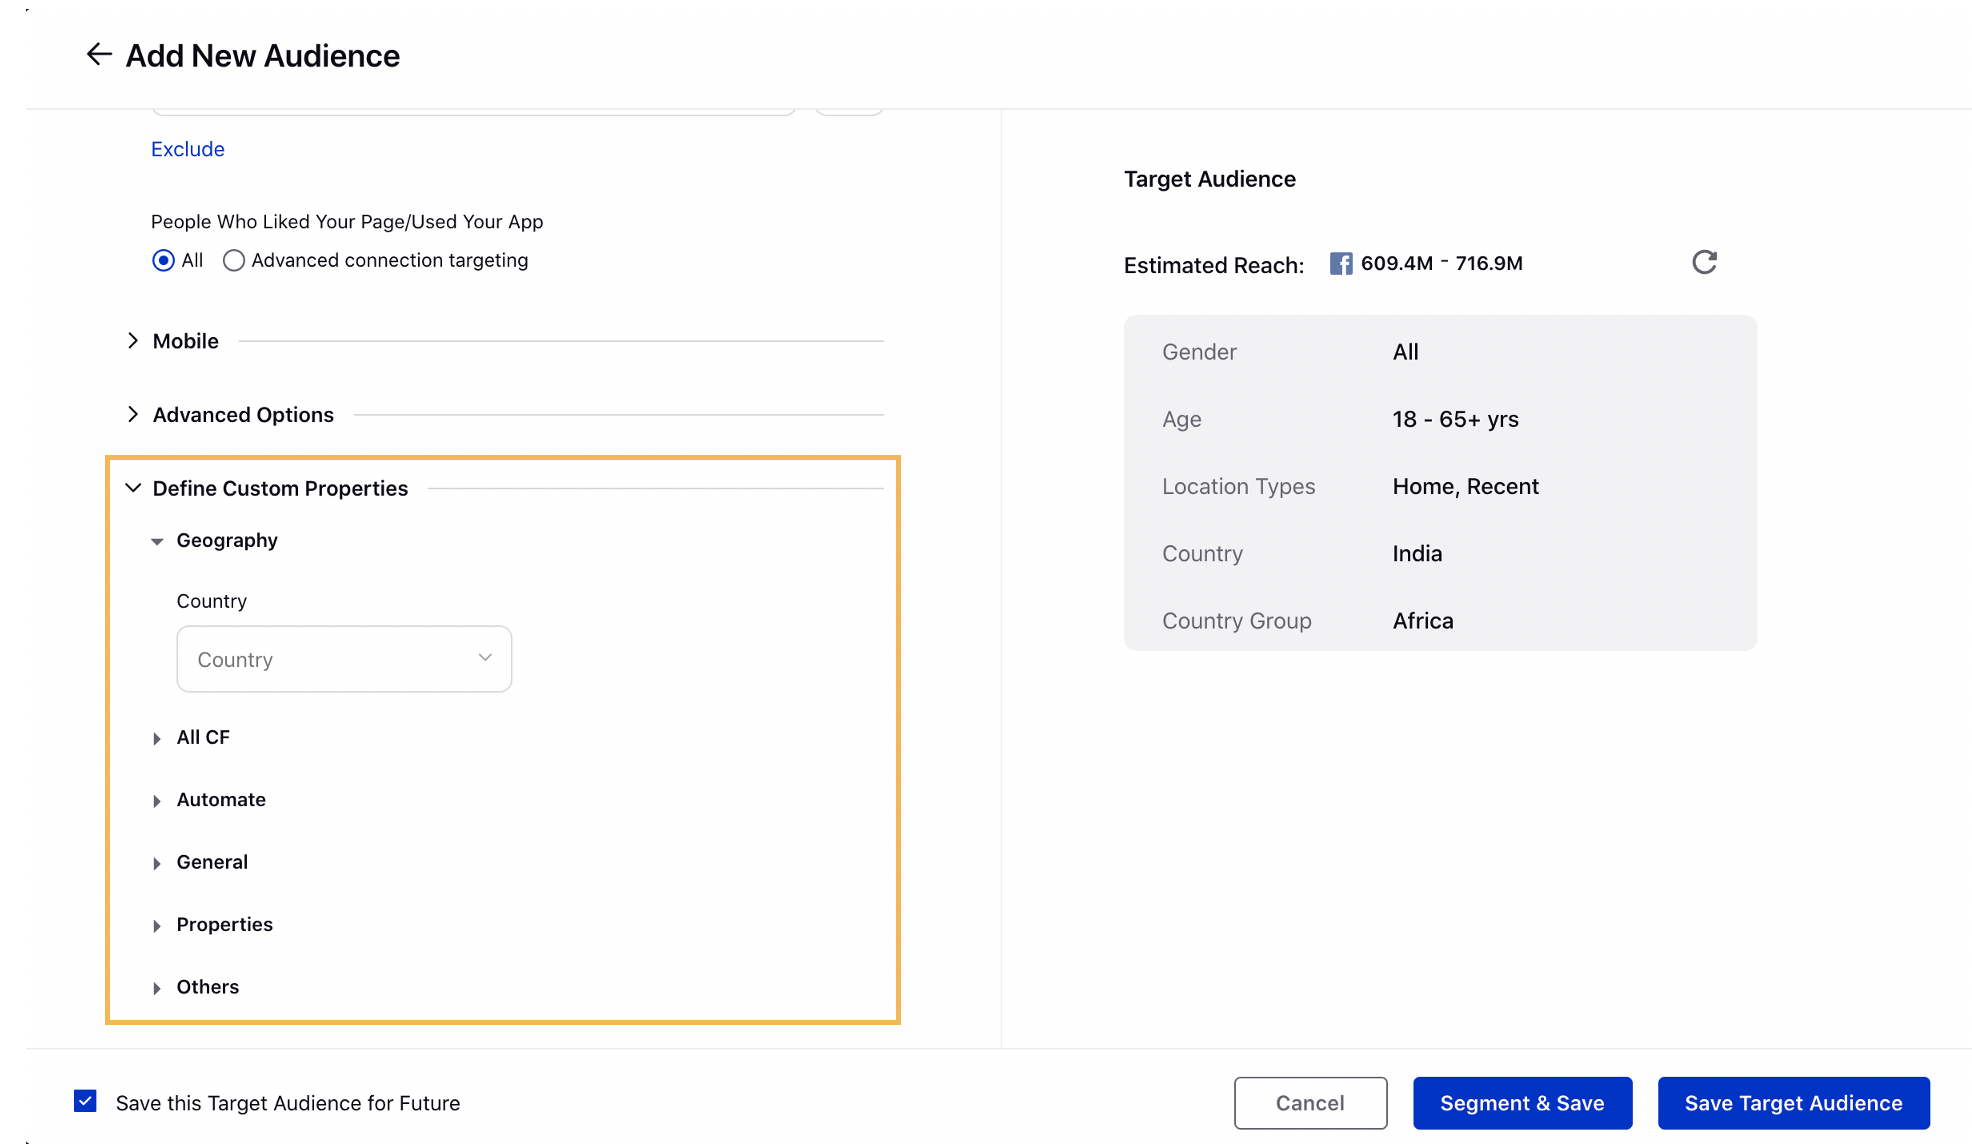
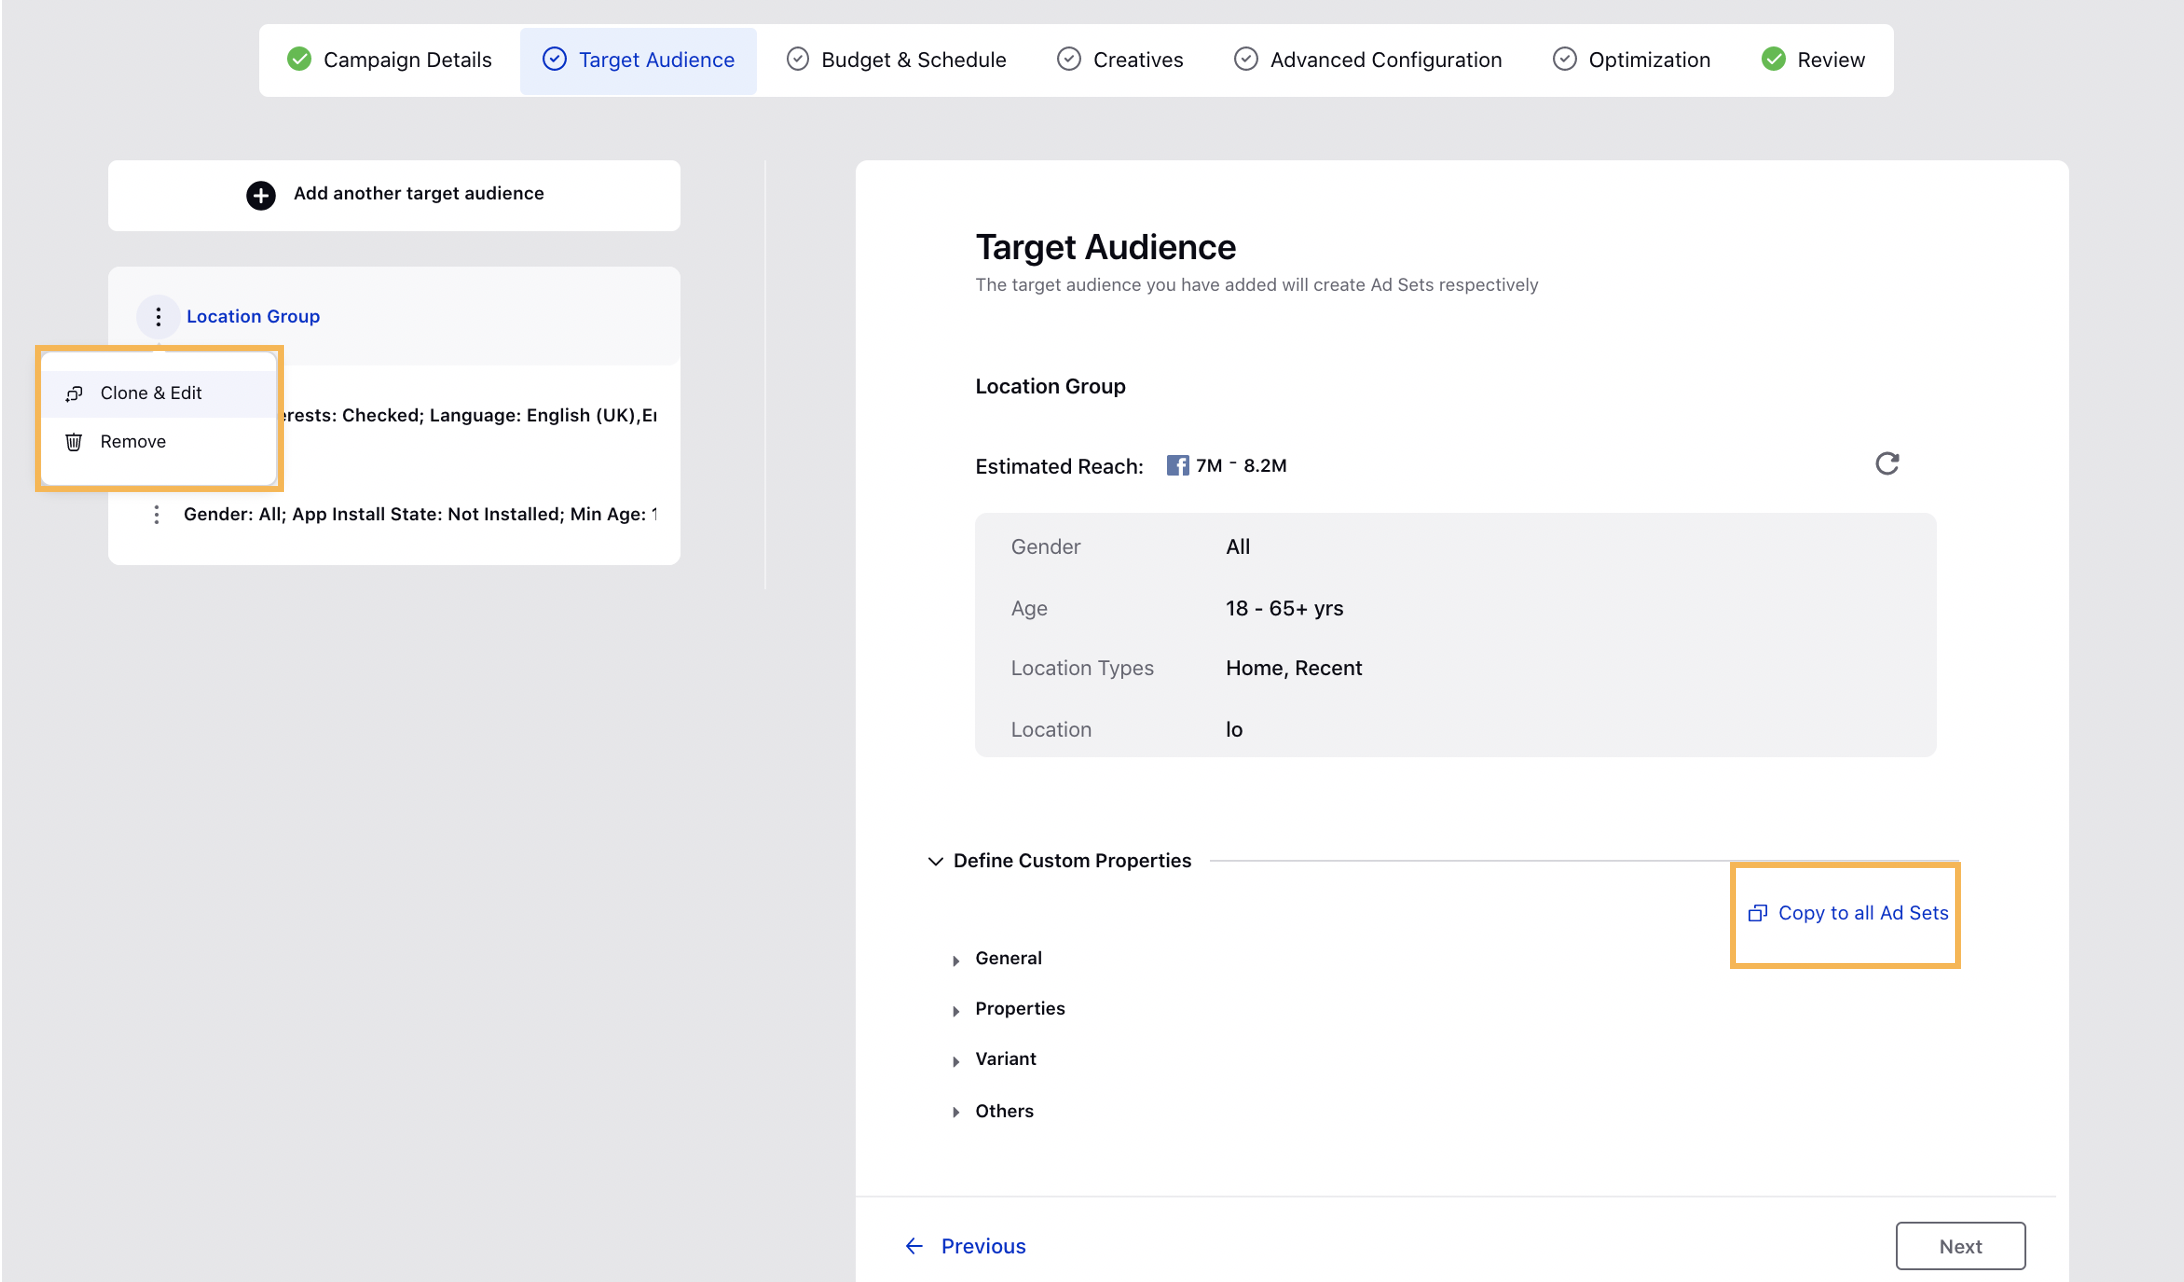
5. You may review the target audience you have selected in the right-hand pane.
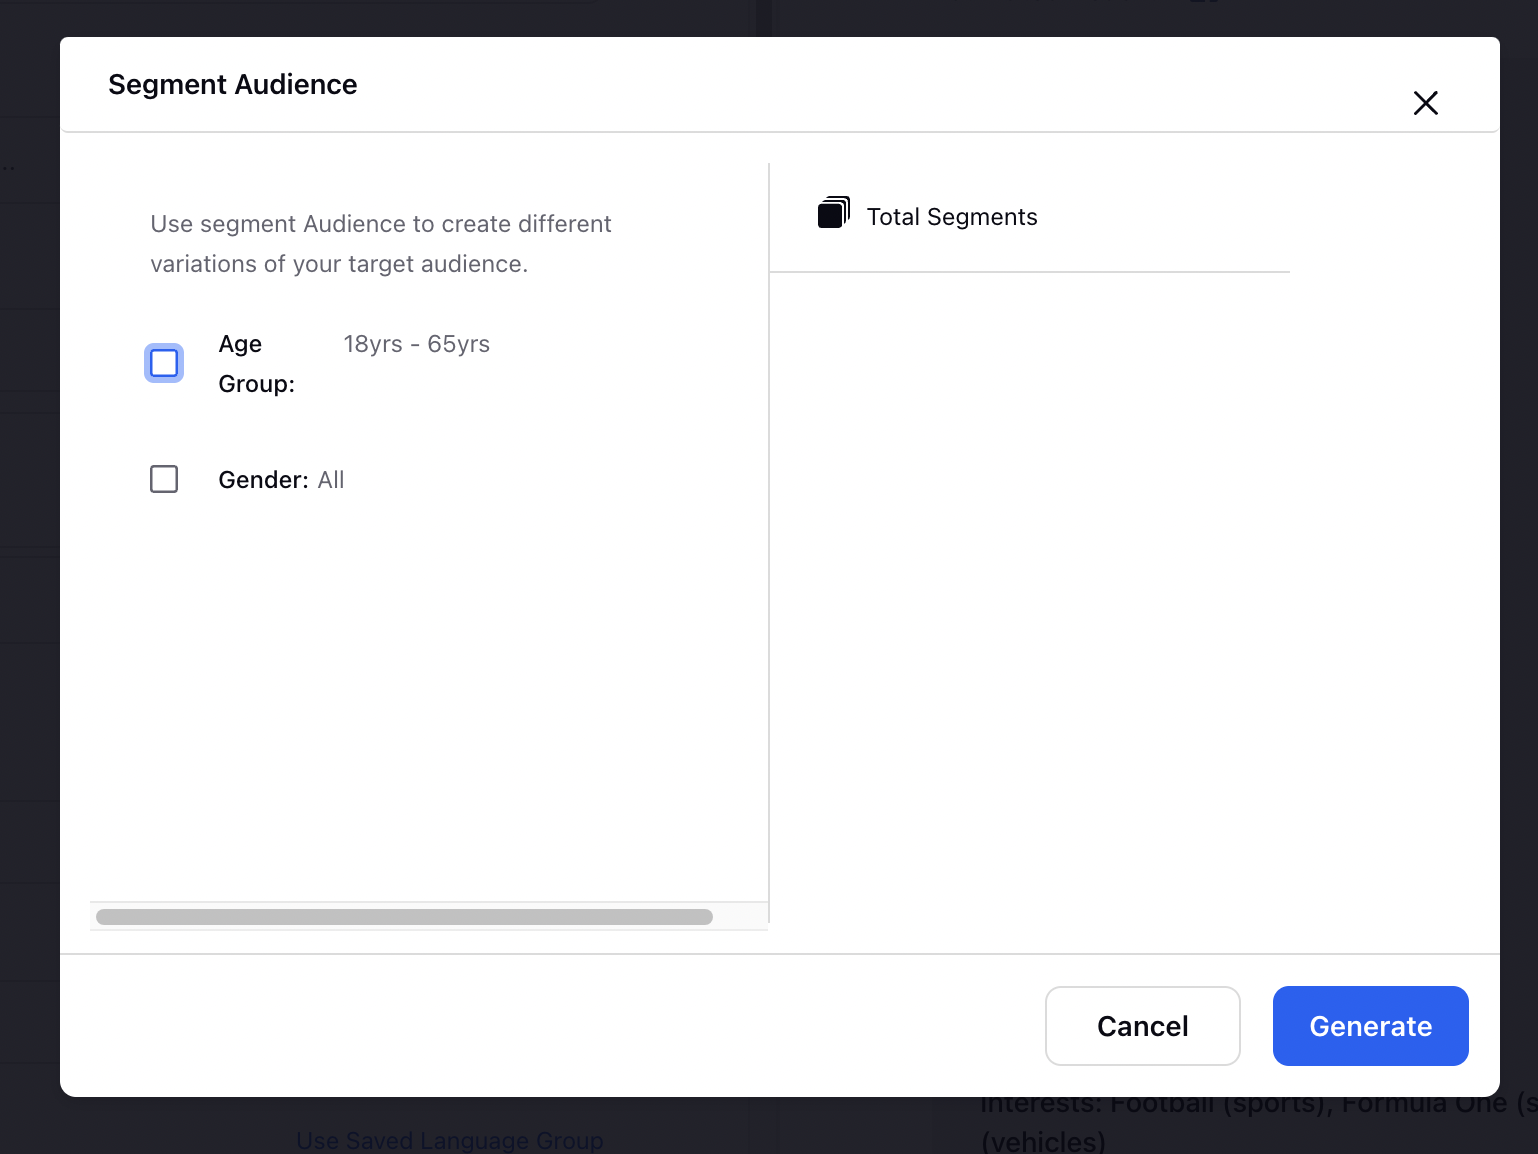
6. You also get an option to Segment & Save to split up the now created audience to create different variations of the target audiences.
7. You may clone and edit your selected target audience by clicking the Options icon alongside a target audience and selecting the Clone & Edit option. A clone of that audience will be available to edit containing the same target audience demographics. While reviewing target audiences, you may create new targeting by clicking Add another target audience.
7. Once you have completed, click Save. This will create a new Target Audience within Social DMP, and a new Target Audience within your campaign. Click Next to proceed to the next section.