Decision Box Node
Updated
Before we begin
We need to understand what are Dialogue trees.
Overview
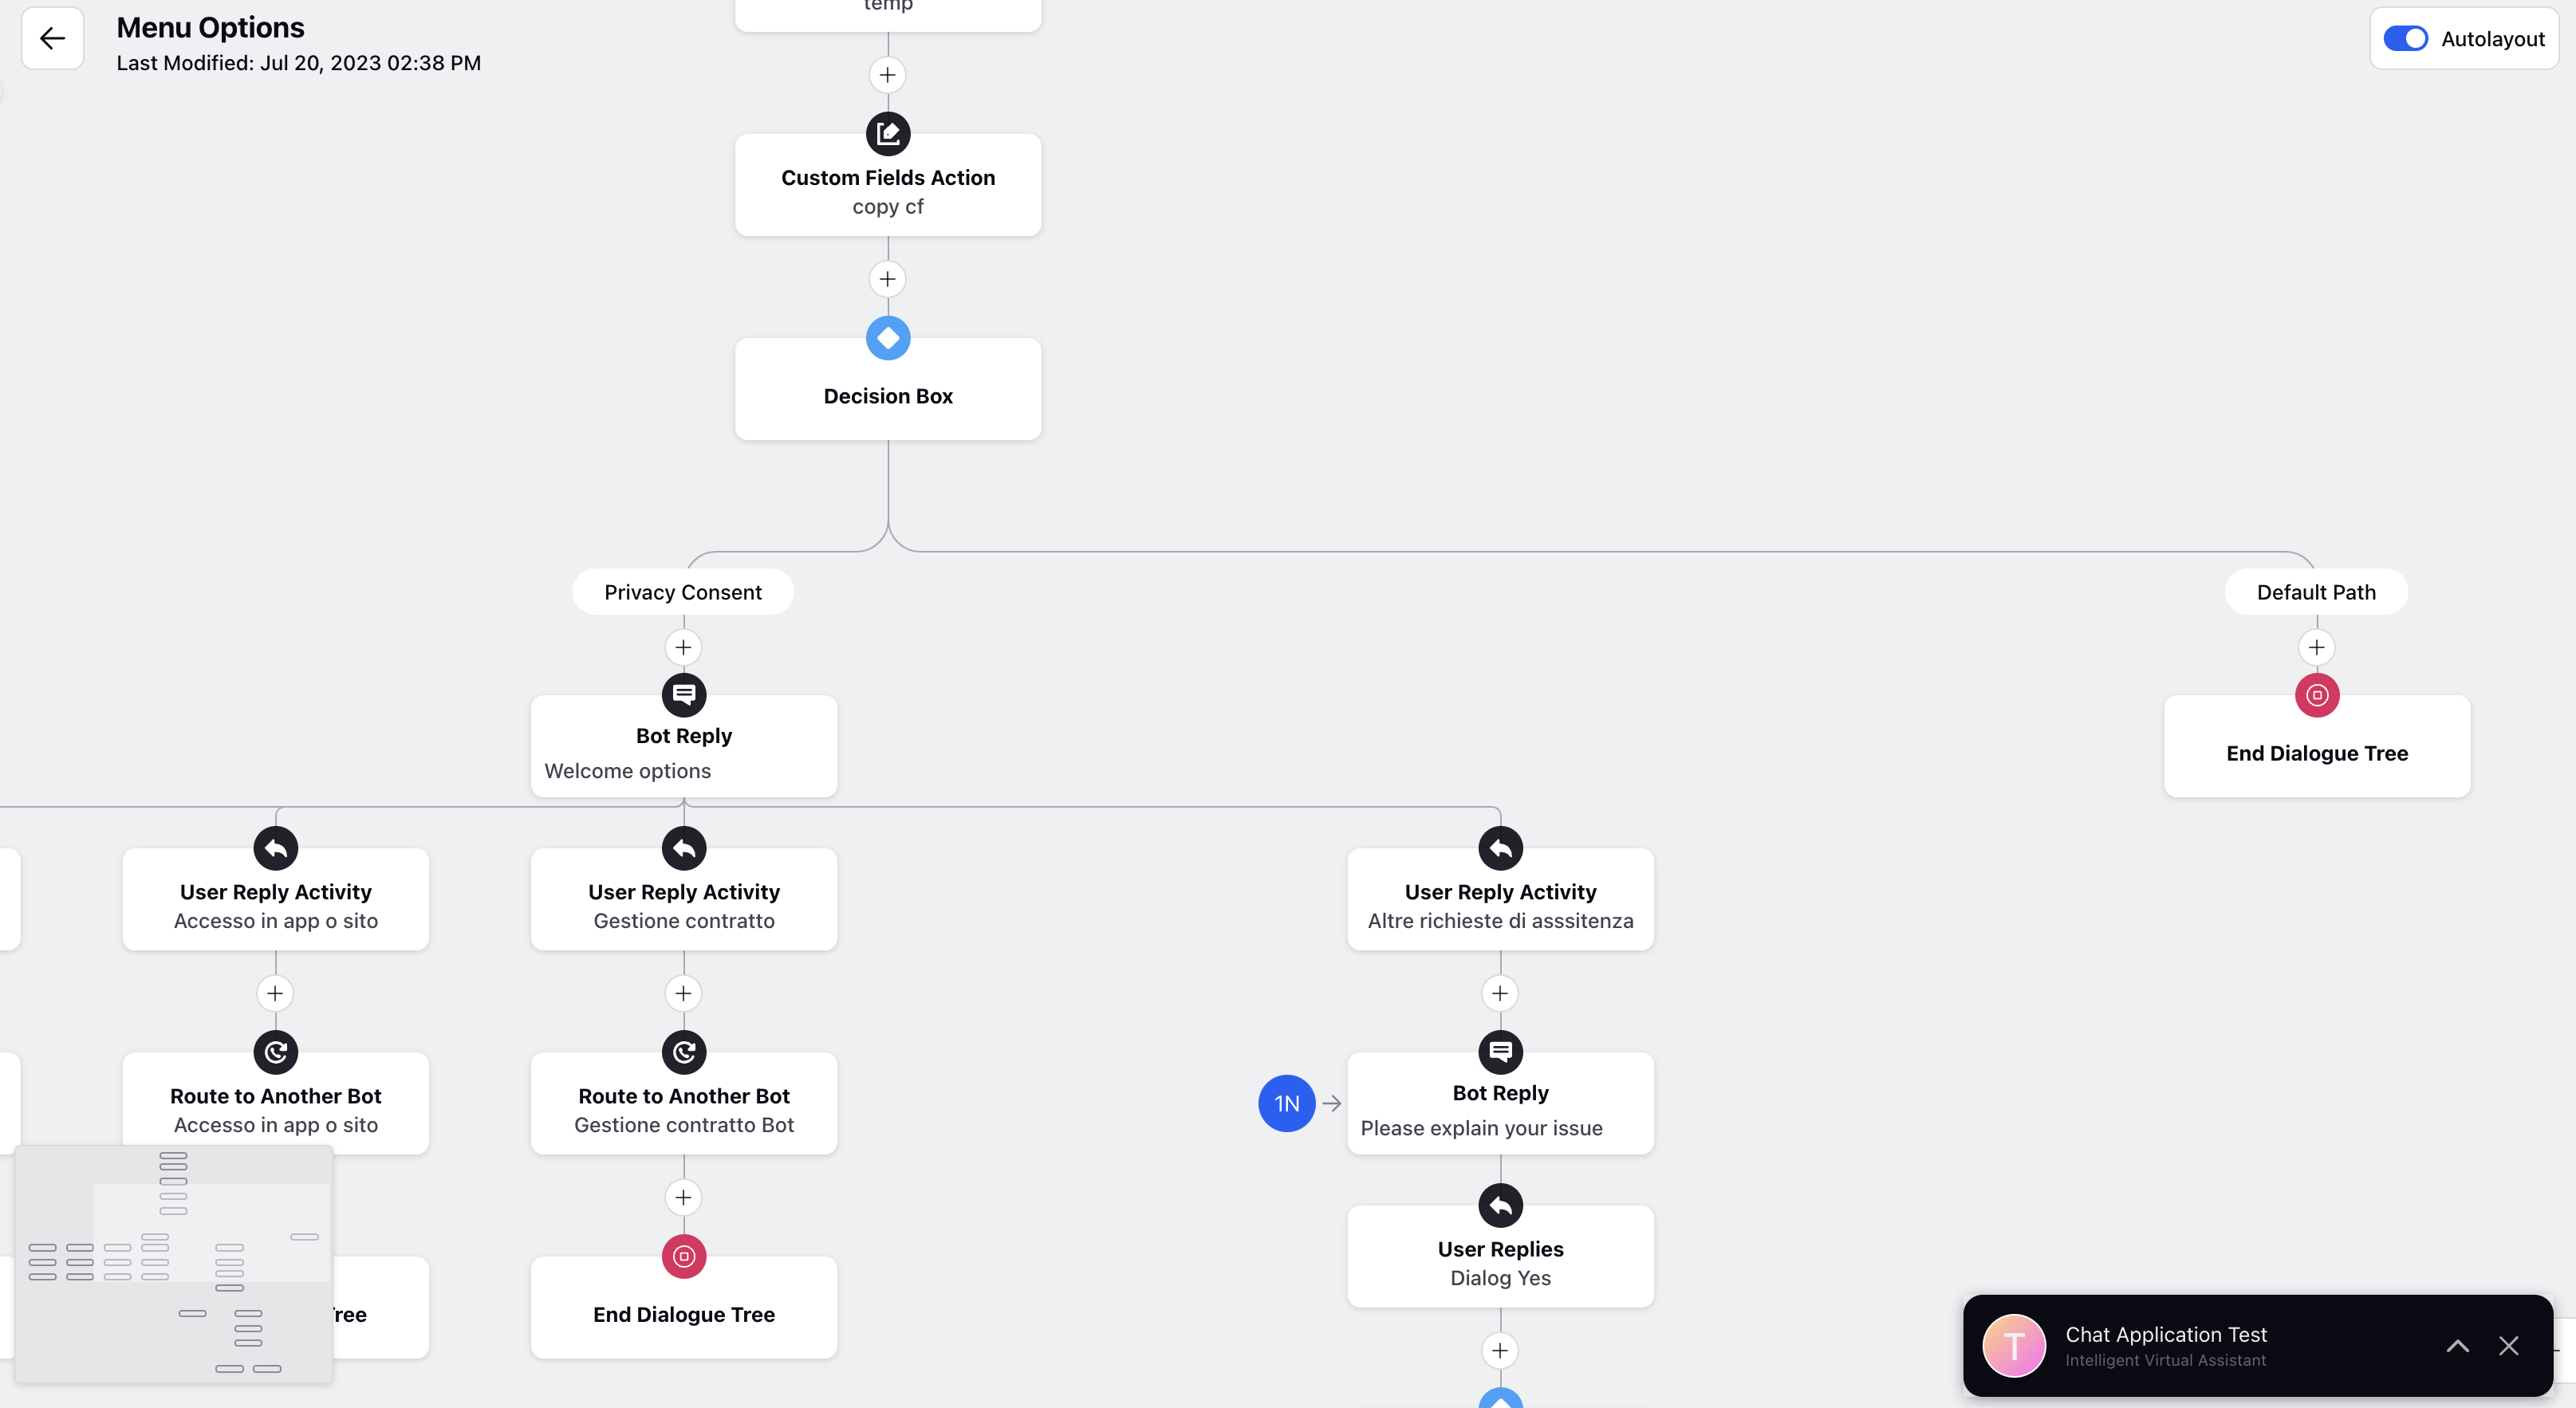
A decision box node in Sprinklr's chatbot system is like a crossroad in a conversation, where the bot makes decisions based on certain conditions. It enables the bot to understand and respond differently depending on user inputs or predetermined factors.In this guide, we will go over how to define Decision Boxes within a Dialogue Tree.
Note: In the Conversational AI, the terms "Decision Box" and "Condition Box" are used interchangeably. |
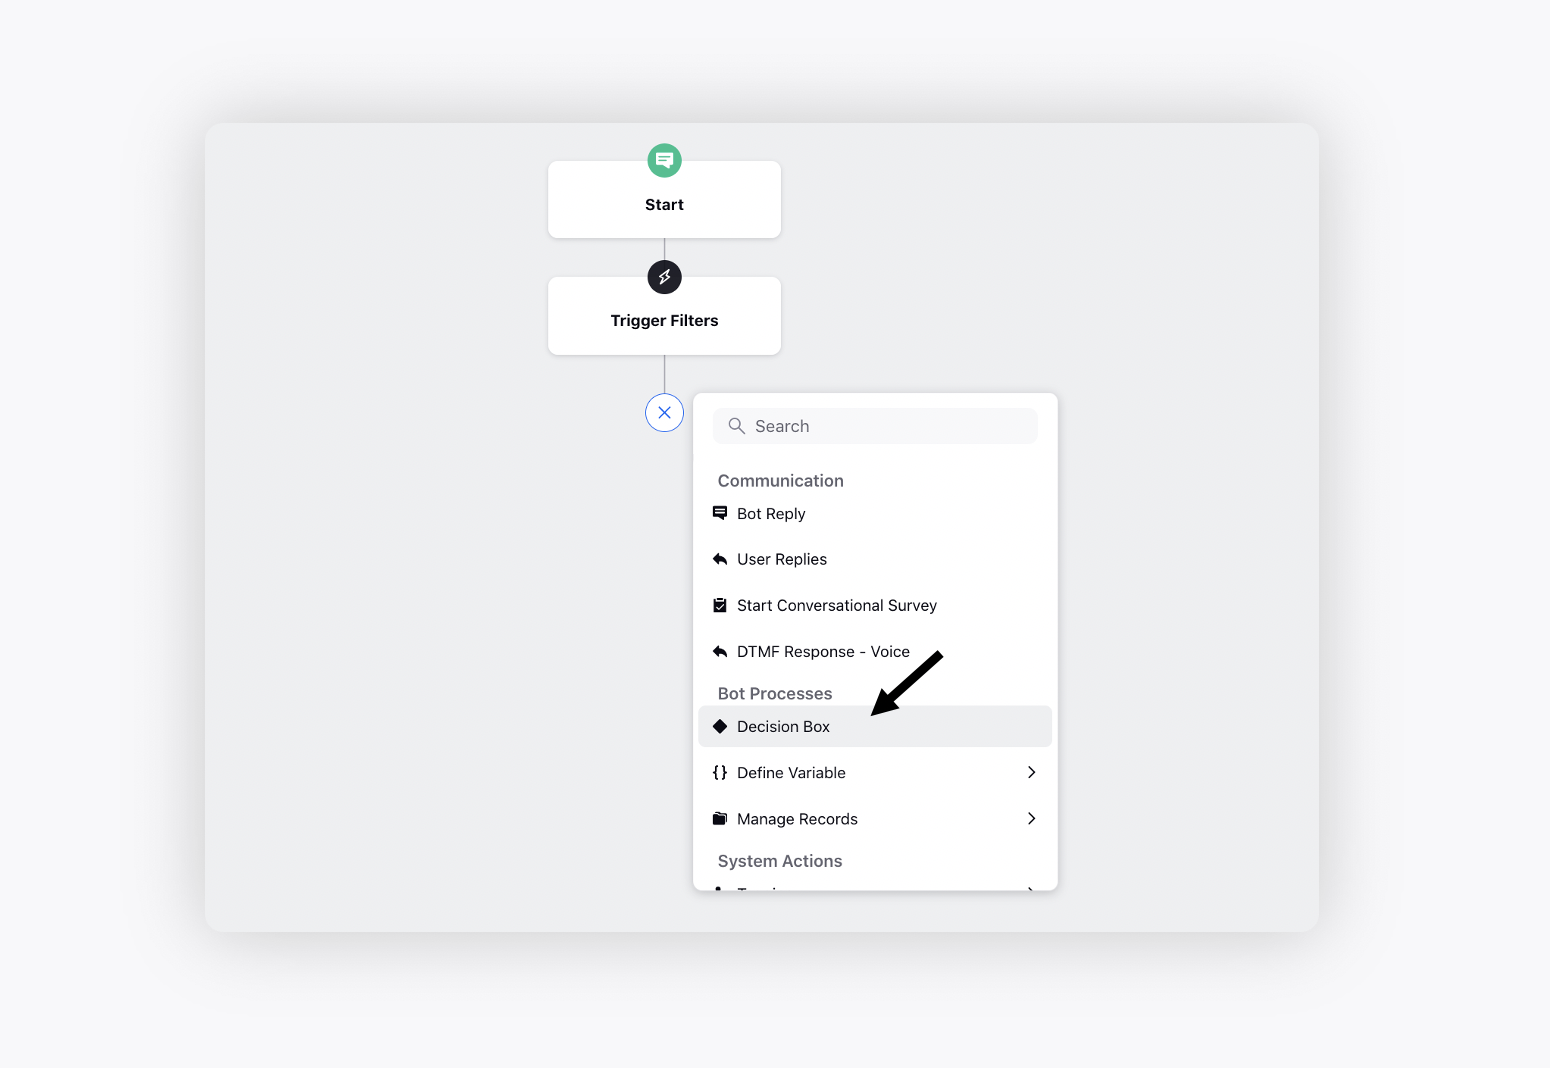
Steps to configure a Decision Box
To create a decision box, select Decision Box from the dropdown.
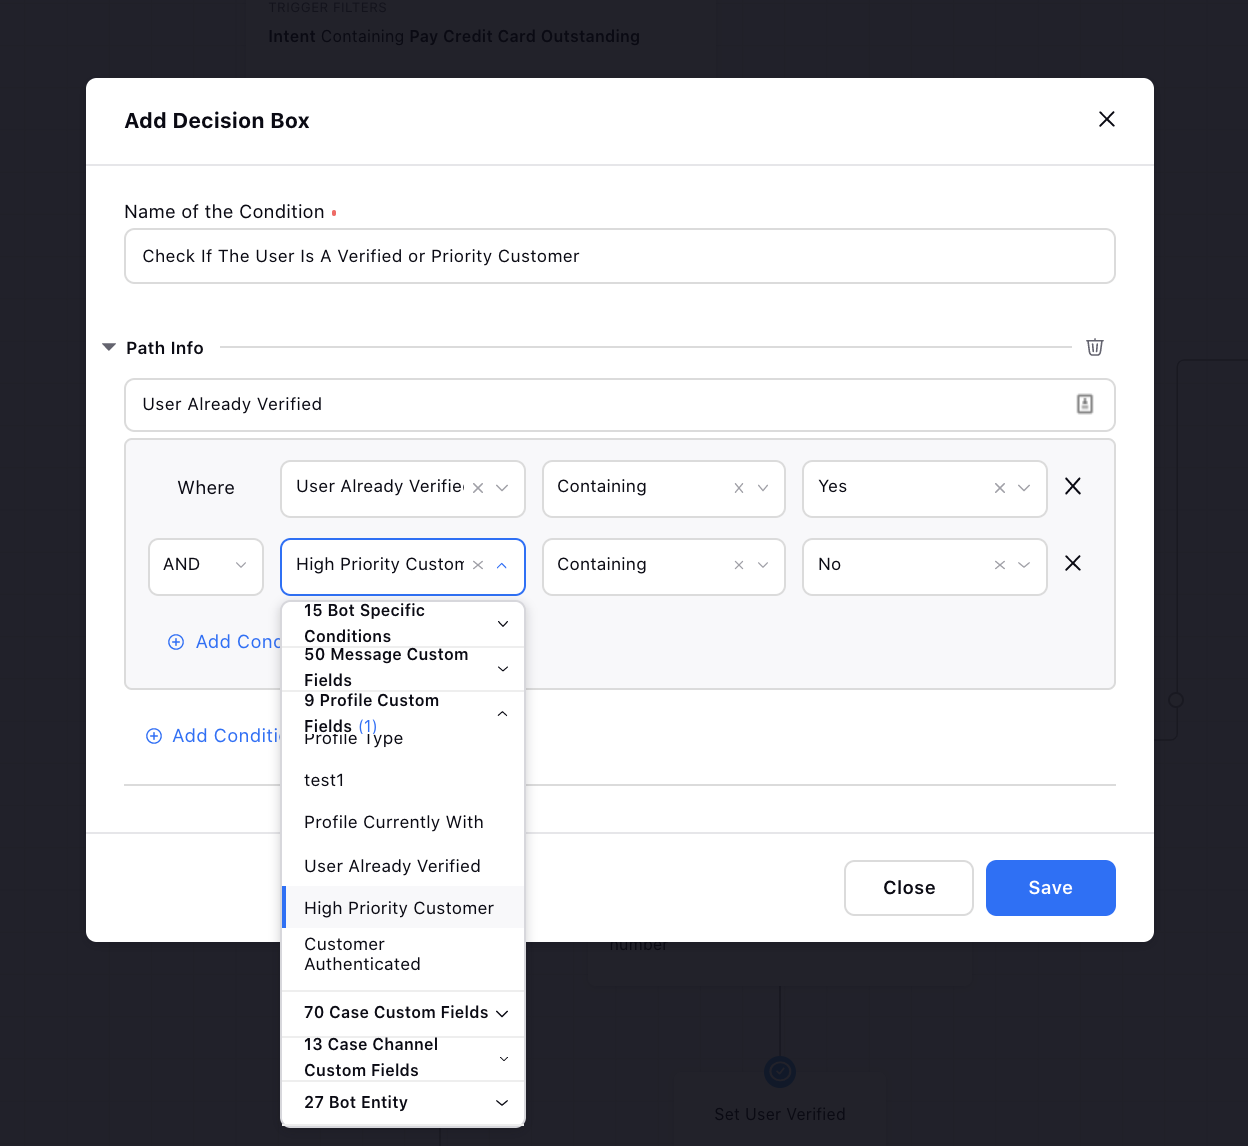
To add a path, follow these steps:
Give the path a name
Add multiple conditions to the path if needed.
Click "Save"
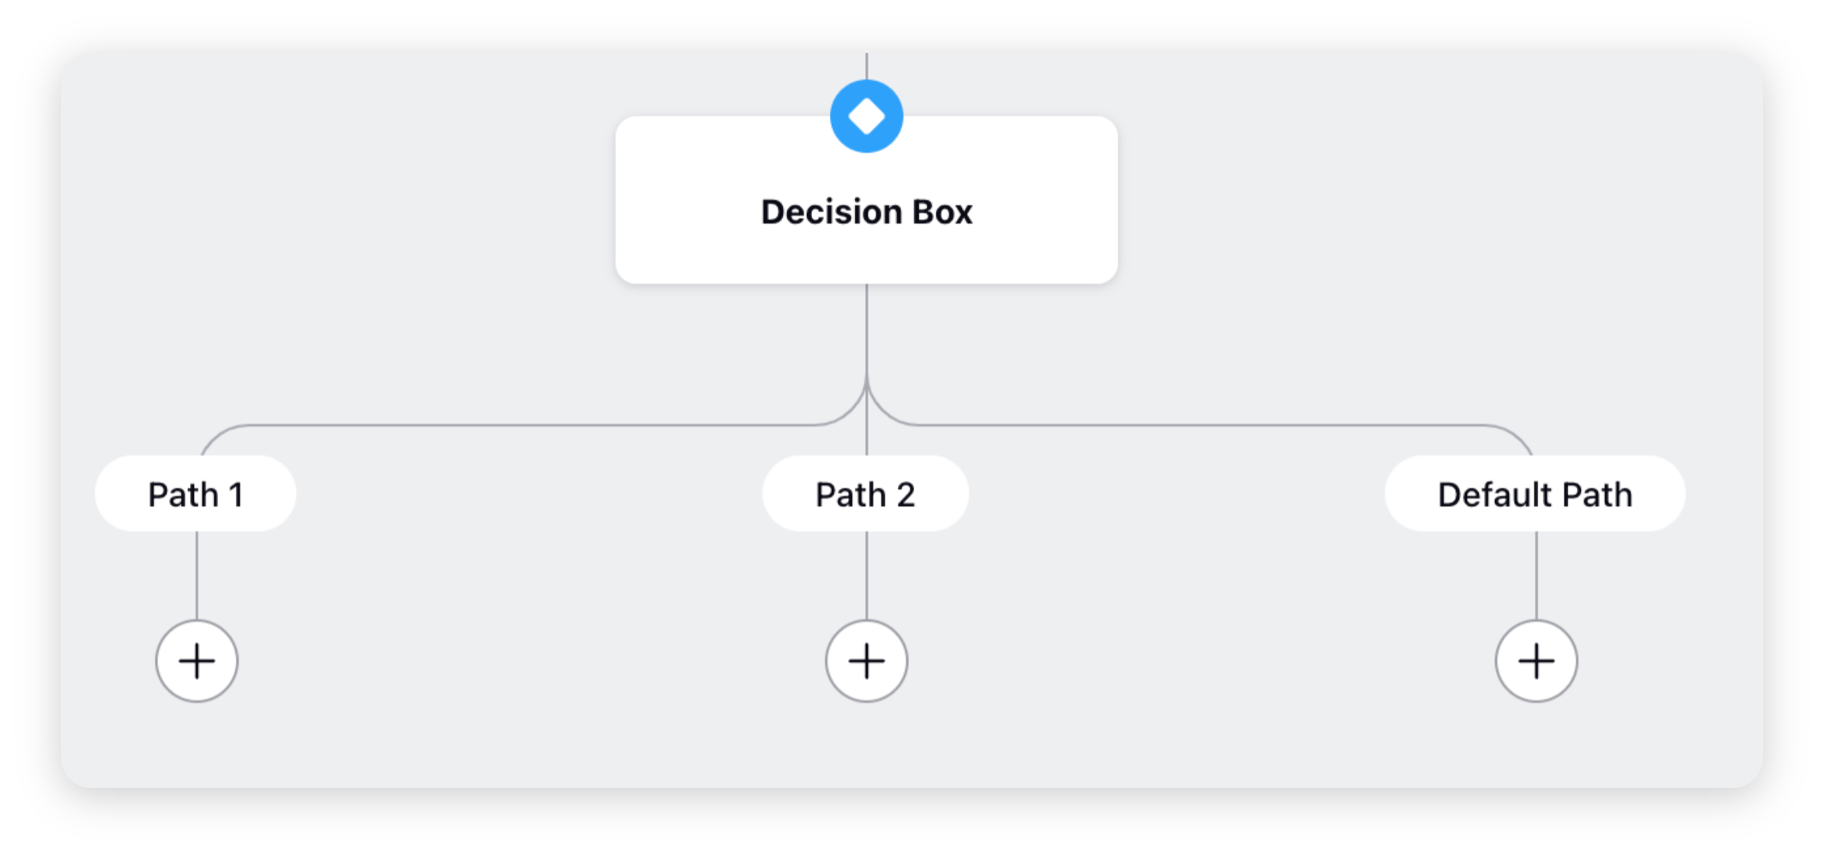
Note: Please note that a decision box always includes a default path. This means that if none of the configured conditions are met, the bot will take the default path.
|
Note: Double quotes don't work with containing operator in the decision box. |
Decision Box — Field Descriptions
Term | Description |
Label | Provide a Label to your Decision Box. |
Description | Provide a description of your Decision Path. |
Define Path | Define a path for your Decision Box by setting conditions. |
Name the Path | Provide a name for your path. |
Condition | Set a condition for your path:
|
Add Condition | Click to set more than one condition for the same path. |
Add New Path | Click if you want to set more than one path for your Decision Box |
Operator Type — Field Descriptions
Condition | Operator Type |
Outbound Message Fields | |
If the condition to be applied is Date or Number type custom field. | The operator type will be:
|
If the condition to be applied is Text or TextArea type custom field | The operator type will be:
|
If the condition to be applied is Picklist type custom field | The operator type will be:
|
If the condition to be applied is Textmulti or Picklist Multiselect type custom field | The operator type will be:
|
Retain Workflow on Deletion of Decision Box
Upon deleting the decision box within the workflow, rest assured that the sub-tasks and other action items will not be removed. To prevent the necessity of reconstructing the entire workflow, it is advisable to retain the nodes and branches originating from the decision box.
Please place your cursor over the Decision Box and then click on the Options icon.
Choose either "Move Element With Subtree" or "Copy Element With Subtree".
Select the target Destination Node where you wish to Move or Attach the copied nodes.
Finally, click on "Save as Draft" or "Save & Deploy".
Whats Next?
Now we know all about decision box node, So we are ready to explore