Dynamic Workflow Node
Updated
Introduction
Dynamic Workflow Nodes are a crucial component of Sprinklr's Conversational AI, enabling the creation of flexible and responsive workflows. This article provides a comprehensive overview of the dynamic workflow node, its functionalities, and how to use it within the Sprinklr platform effectively.
Overview of Dynamic Workflow Nodes
Dynamic Workflow Nodes allow you to capture and process data dynamically within a conversational AI workflow. You can also create and use complex functions or skills within Dynamic workflow nodes, These features greatly enhance the flexibility and capability of workflows by enabling real-time data handling and decision-making.
Key Features of Dynamic Workflow Nodes
Engaging Conversations: Customize a prompt to help users interact with the bot in a natural, human-like way, fostering personalized and conversational exchanges
Skills - The dynamic workflow node allows you to create and utilize skills that can be used to enhance the workflow's functionality.
Enhanced Data Capture: It enables the workflow to capture and utilize user inputs dynamically.
Easy API Integrations: You can invoke API calls from within the dynamic workflow node to fetch or send data.
Note: To ensure you can effectively use the dynamic workflow node, ensure :
you have access to GPT features which are a part of Sprinklr AI+ . You can get this enabled by raising a support ticket at tickets@sprinklr.com.
you have enabled Advanced Modules for your application under "Additional Settings" in the Admin Panel.
Creating a Dynamic Workflow Node
Create a Skill
Since the dynamic workflow node requires usage of skills , you will have to either create a skill within the Skill Builder or reuse an exisitng skill. To know more about working with skills refer to the Skills in dynamic workflow node article.
Configure the Dynamic Workflow Node
Once your skills are ready, follow the below steps to create and use your Dynamic Workflow node.
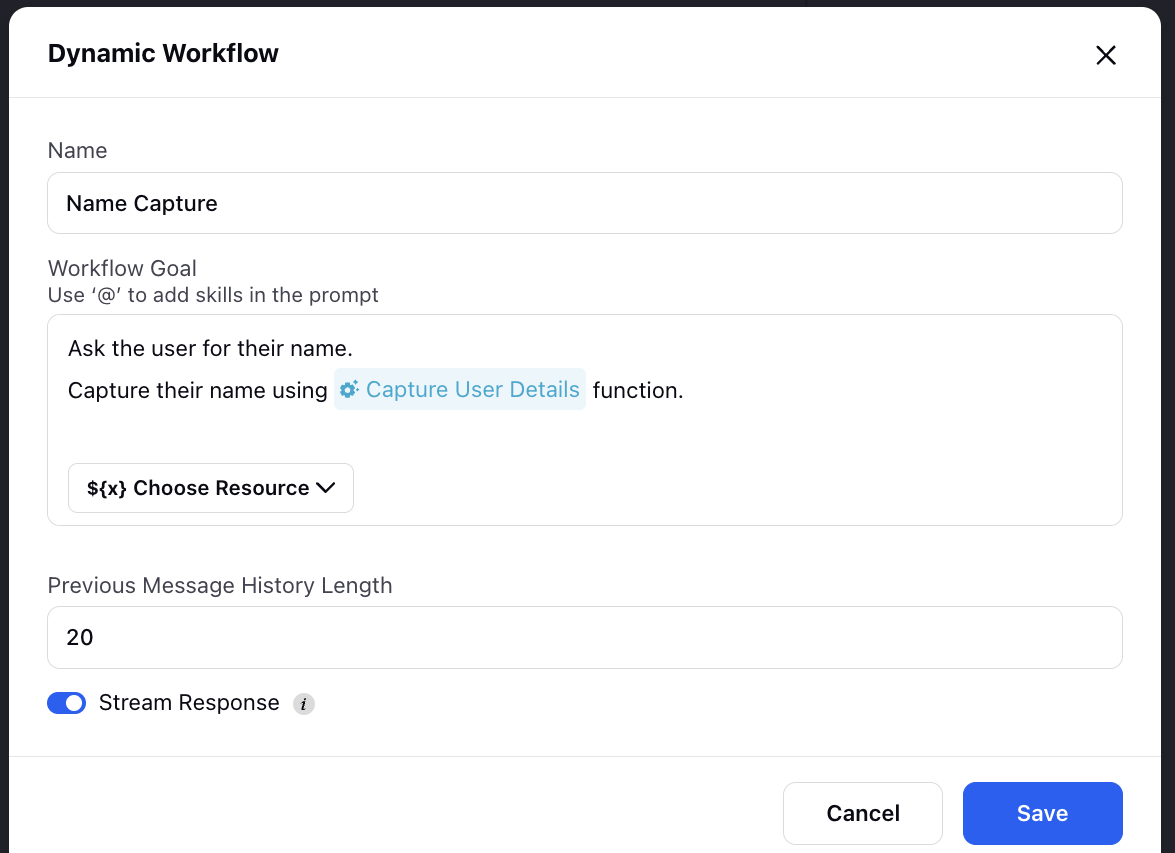
a. Create a new dialogue tree or open the dialogue tree you wish to edit and add the "Dynamic Worflow".

b. Within the dynamic node. fill in the node name and workflow goal. You can call any previously created function by using @skillname. You can stream responses by enabling the Stream Response option.Currently streaming is only supported for live chat.
Note:
When defining the workflow goal, ensure your prompt includes all the necessary information required for GPT to efficiently execute the instructions.
Sample prompt :
You're a customer service representative for an airline, assisting passengers with modifying their flight details. Follow these strict steps when handling date or destination changes:
Steps for Modifying a Flight
Ask for PNR
Ask for Last Name
Show Flight Details
Check if the user has already mentioned what they want to modify
If not specified, ask if they want to change the date or destination
Execute the correct action:
If changing the date, initiate the date modification process by calling the Function : <Modify Date>
Other Requests
If the user asks about anything else, redirect them to the general FAQ section by calling <FAQ Query>
If they ask about both FAQs and modifications, confirm which they’d like to handle first
Important Notes
Keep responses short and engaging (max ~100 characters)
Use "dollar" instead of the symbol
Always maintain a respectful and positive tone
Here to ensure a smooth journey.

Note: You can call any skill within the dynamic workflow node by using @
c. Click on Save.
Utilize Captured data
Use the captured data within the workflow by referencing it with the ${} . Contining our previous example , we can use ${Nickname} to utilize the captured data.
.png)
Note: Always use ${} to reference captured data.