Other Important Nodes
Updated
Some other important nodes that enable you to take different actions within a Dialogue Tree depending upon various use cases are:
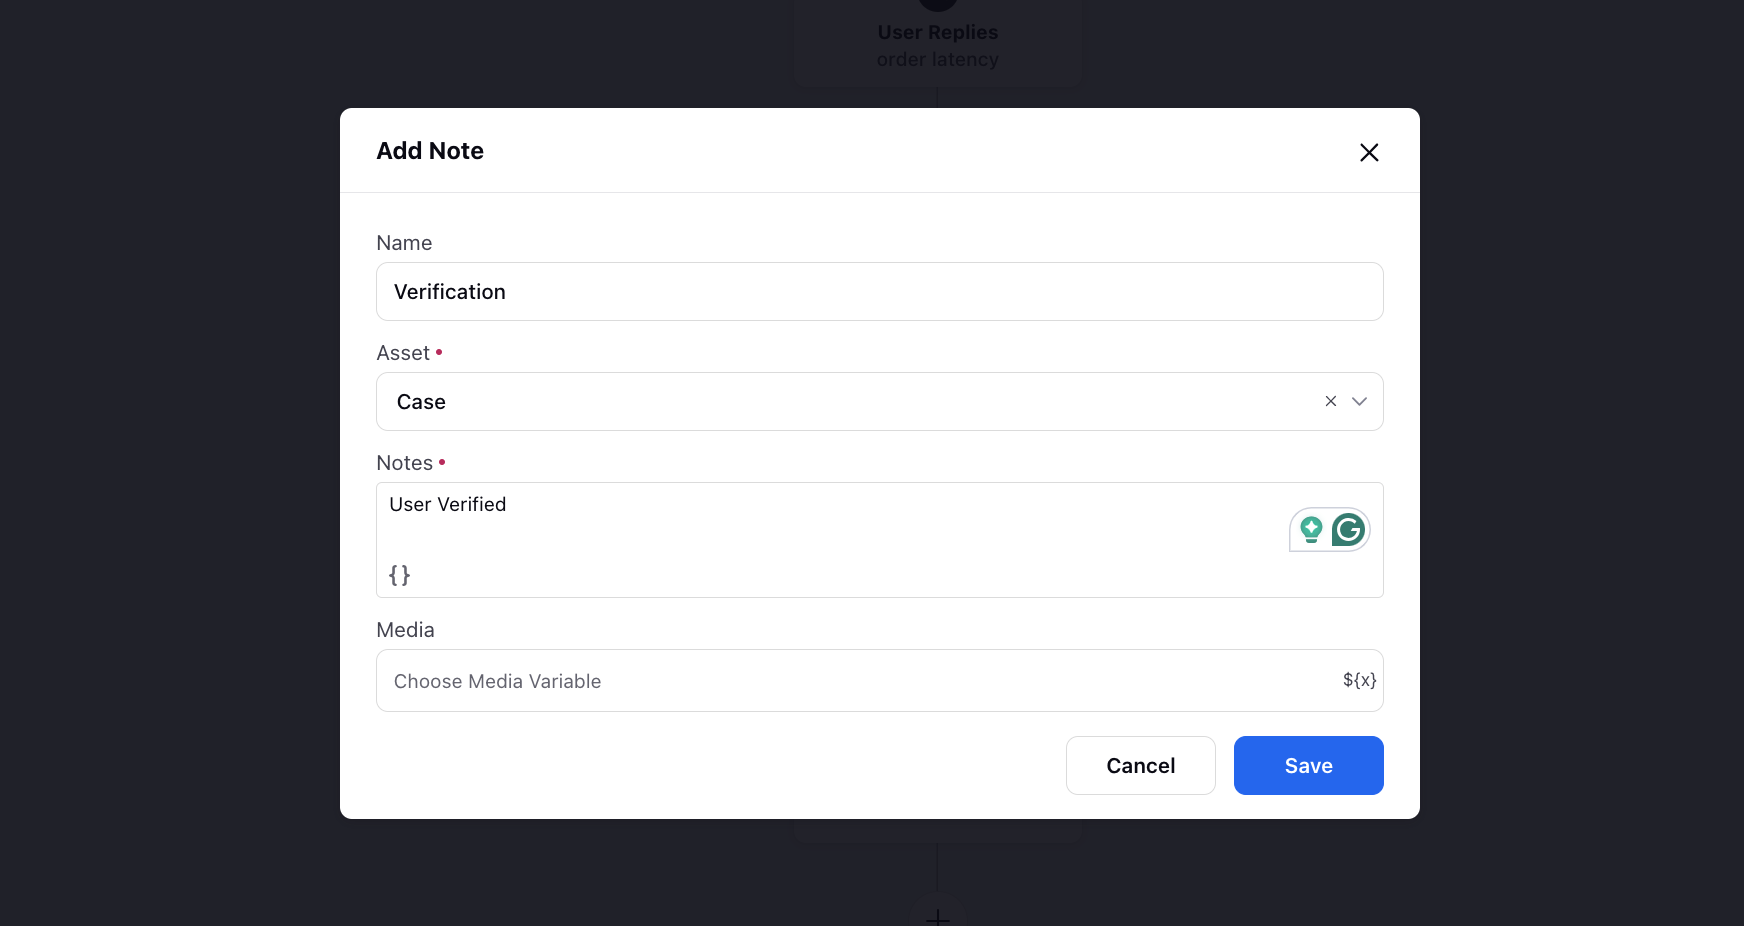
To Add Notes
The Add Note Action node allows you to add custom notes inside the dialogue tree at the message, profile & case levels. These notes can be used by the brand for internal reference purposes or can be used to give context to the agents when the case is handed over to them by the bot or can also be used for debugging your dialogue tree. Added notes are visible in the Agent Console under the collaboration section and in the activity trail.
Click the Addition icon on the dialogue tree and select Add Note Action.
On the Add Note dialogue box, enter the note and select the field (Message, Profile, Case) on which the note will be shown. Click Save. The note action will be visible in the Dialogue Tree.
To Add or Remove from Queues
You can also add and remove messages and cases from queues in the dialogue tree itself.
To do this, click the Addition icon on a dialogue tree and select Add or Remove from Queues.
On the Add or Remove from Queues dialog box, you can select the queues that you want to add or remove messages/cases from. Click Save. The queue addition/removal action will be visible in the Dialogue Tree.

To Assign to Agent
Let’s say your Conversational AI is taking payment details and you are at a point where the customer has provided his credit card details and will be selecting to either pay the total due amount or the minimum due amount. Perhaps the user’s connection isn’t stable and the user drops out at this crucial juncture in the journey. This is a time when assigning the chat to an agent to take over would be ideal. The agent might attempt to see whether the user is able to get back online or attempt to contact them by phone to assist them in completing the transaction.
Another scenario is a situation where you are using the Conversational AI to triage a user's problem or gather routine information before involving the agent. Let’s take a look at an example of this. Here we have a user who is looking to modify or cancel their reservation. We have gone through the dialogue tree following a path that included capturing the user’s details and verifying it with the brands’ existing CRM record via an API call to retrieve the correct booking details.
Now that the details have been confirmed, the user has indicated that they would like to modify their reservation. This is the point that the bot will assign to an agent who will take over.
To do this, click the Addition icon on a dialogue tree and select Assign Agent.
Now you can either select a work queue here and the case will be assigned to one of the available agents in that work queue. Or, you can leave the work queue blank. If you do this, the "bot application conversation state" system field will be set as ‘routed to agent’ in the backend & you can use this property in the Rule Engine to check various scenarios in order to feed the case into the right work queue later. The scenarios that could be checked might be; the language or location of the user, or whether their profile is an influencer or a VIP. Depending on which, the rule engine will route the case to the appropriate work queues.

To Get, Update and Create Records
For detailed information, see Custom Entity Application - Nodes in a Dialogue Tree.
To Set Priority Rank
Priority Rank on the case level is used for prioritising assignment where 100 is the highest priority rank & 1 being the lowest priority rank.

To Set Skills
You can set skills and proficiency scores to cases from the dialogue tree before assigning to a work queue.
Also, define how you want to manage the required skill(s).
Set: To set up a new skill.
Unset: To remove the earlier skill setup.
Merge: To append/update more skills and proficiency scores.

To Define Variable
You can define variables for
Business Hours - This node can be used to select the Business Hours and define a variable for Is in Business Hours for which the value will be true if the user messages within business hours. You can also set the variable and format for Start of Business Hour for the bot to reply with upcoming business hours when a user sends a message outside of business hours.

Work Queue Properties - This node can be used to define a variable for a particular work queue which can be used in decision boxes, bot replies, etc.
Sample variable mapping for Work Queue Properties: wqProperties
waitTimeForWorkQueue: ${wqProperties.waitTimeForWorkQueue} >>This is in milliseconds
waitTimeReadable: ${wqProperties.waitTimeReadable}
waitTimeForWorkQueueMin: ${wqProperties.waitTimeForWorkQueueMin}
waitTimeForWorkQueueSec: ${wqProperties.waitTimeForWorkQueueSec}
numberOfPendingCases: ${wqProperties.numberOfPendingCases}
noOfAgentsAvailable: ${wqProperties.noOfAgentsAvailable}
idleAgents: ${wqProperties.idleAgents}

To End Dialogue Tree
You can choose to end a particular path. Whenever you feel that the user journey is complete, you can end that path by clicking the Addition icon and selecting End Dialogue Tree. Here, the context of the dialogue tree gets reset and the context will pass back to the parent bot, if any. The application will also check if any issue type is pending and will trigger the issues type if trigger conditions are met.

To End Conversation
You can also choose to end the entire conversation at the application level. Click the Addition icon and select End Conversation. Here, the entire context of the application will get reset and the conversation will be finished. The application will not check for any further issue types and will also not route back to the parent bot.

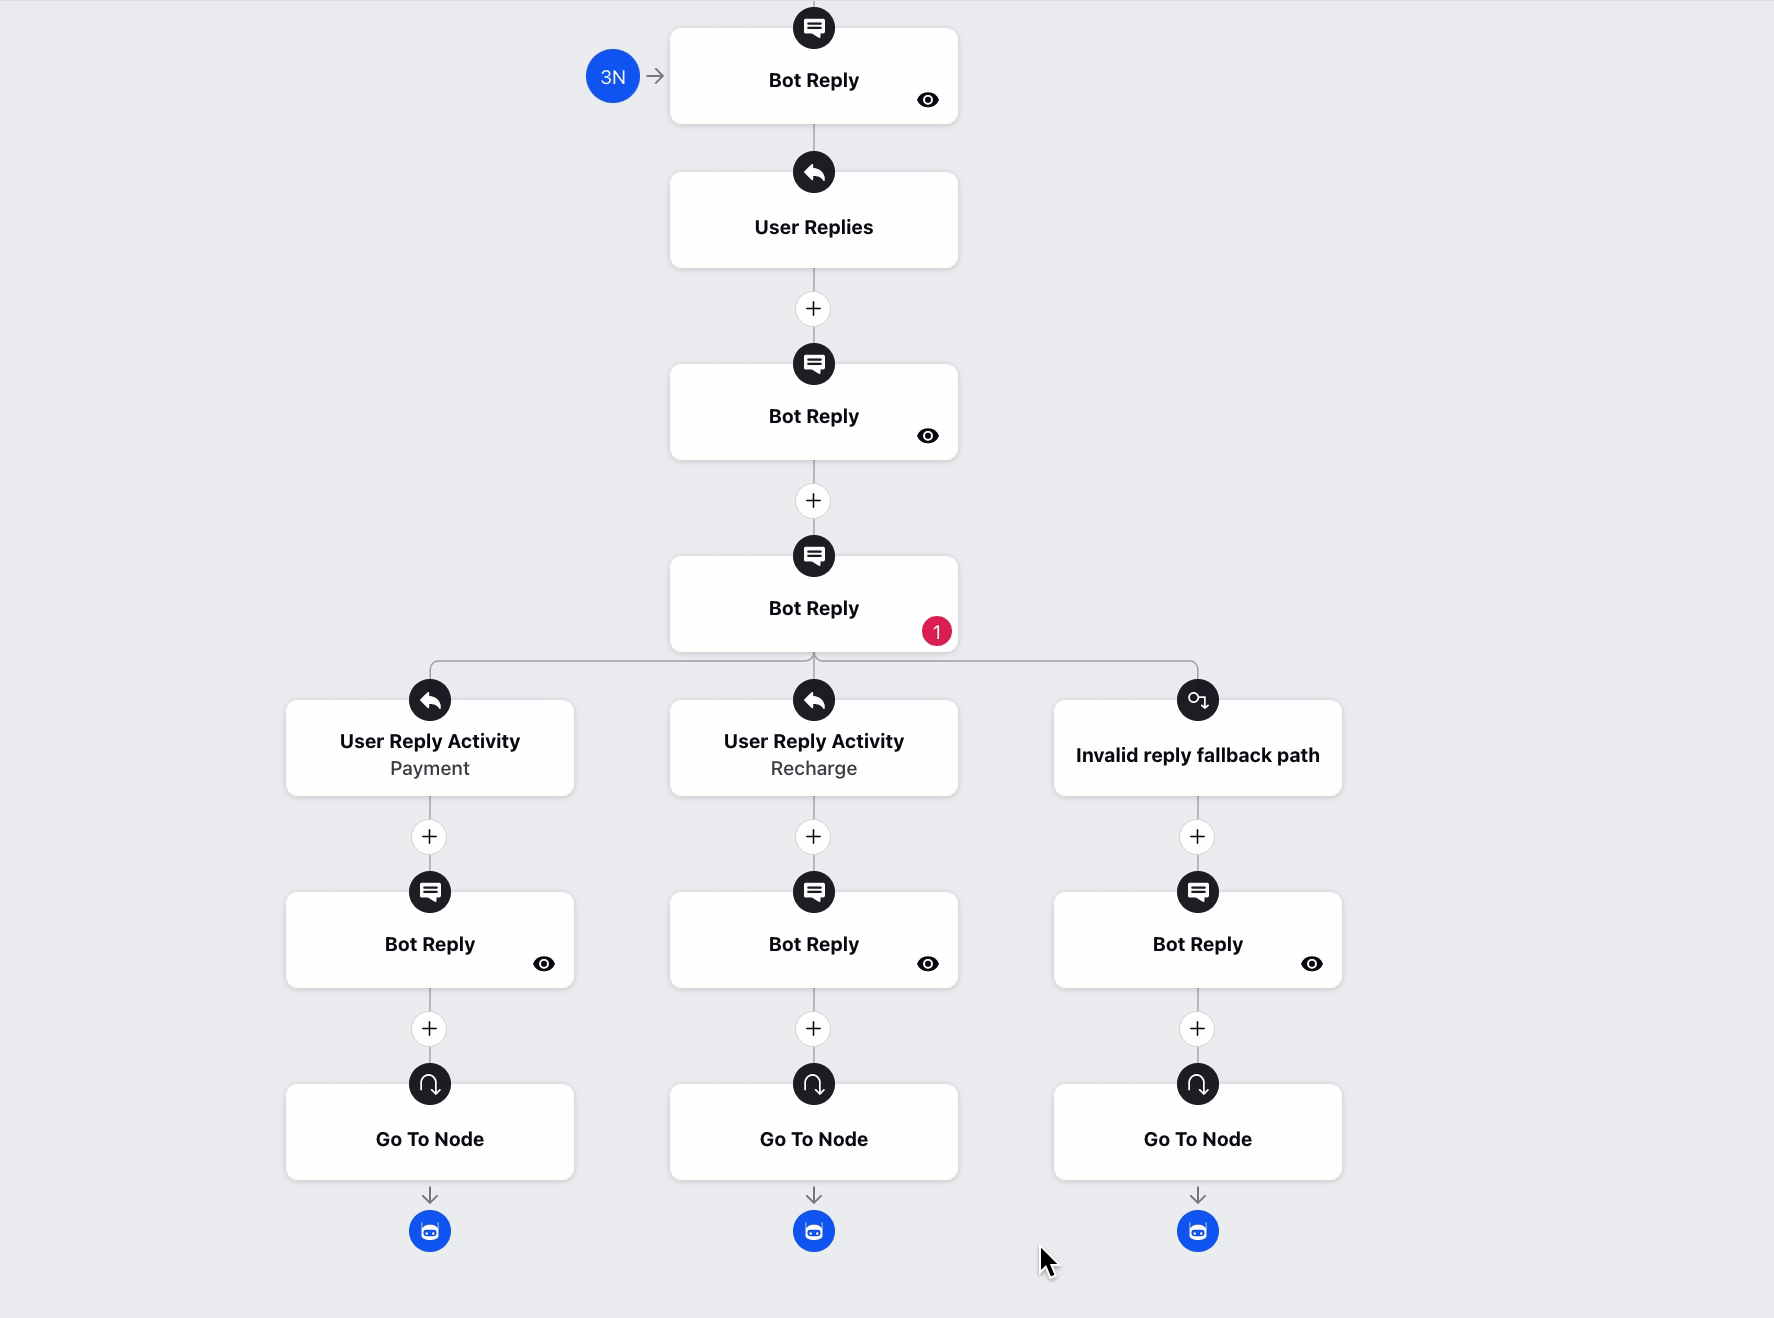
Go To Node
You can connect two nodes using this node. Select Go To Node and and then choose the node to redirect the conversation to.
Note that
- Go to Node cannot be connected to its immediate node above.
- Go to Node cannot be connected to any user reply.
- Go to Node cannot be added between two existing nodes.
- In case of multiple go to nodes, you can click on the Go To Node count alongside the Source node and then navigate between different go to nodes using the arrow keys on the snackbar at the bottom.
- You can also click Go To Source on the snackbar to navigate to the source node.
What's next?
Now when you know all about different types of commonly used nodes in a dialogue tree, you are ready to explore