How to View a Schedule
Updated
Scheduling in Workforce Management (WFM) is a pivotal process that involves the strategic allocation of resources to optimize operational efficiency. It ensures that the right people with the appropriate skills are assigned to specific tasks, facilitating a seamless workflow and meeting organizational objectives.
Prerequisites for Viewing a Schedule:
Sprinklr WFM should be enabled for your environment.
You must have access to the Workforce Manager Persona App.
View permission under the Scheduling section in the Workforce Management module.
View a Schedule
Once a schedule is created, supervisors can click on the eye icon beside the schedule name on the Records Screen to view the schedule. They can view the number of staffed agents and also view the agents' schedules.

Major Components:
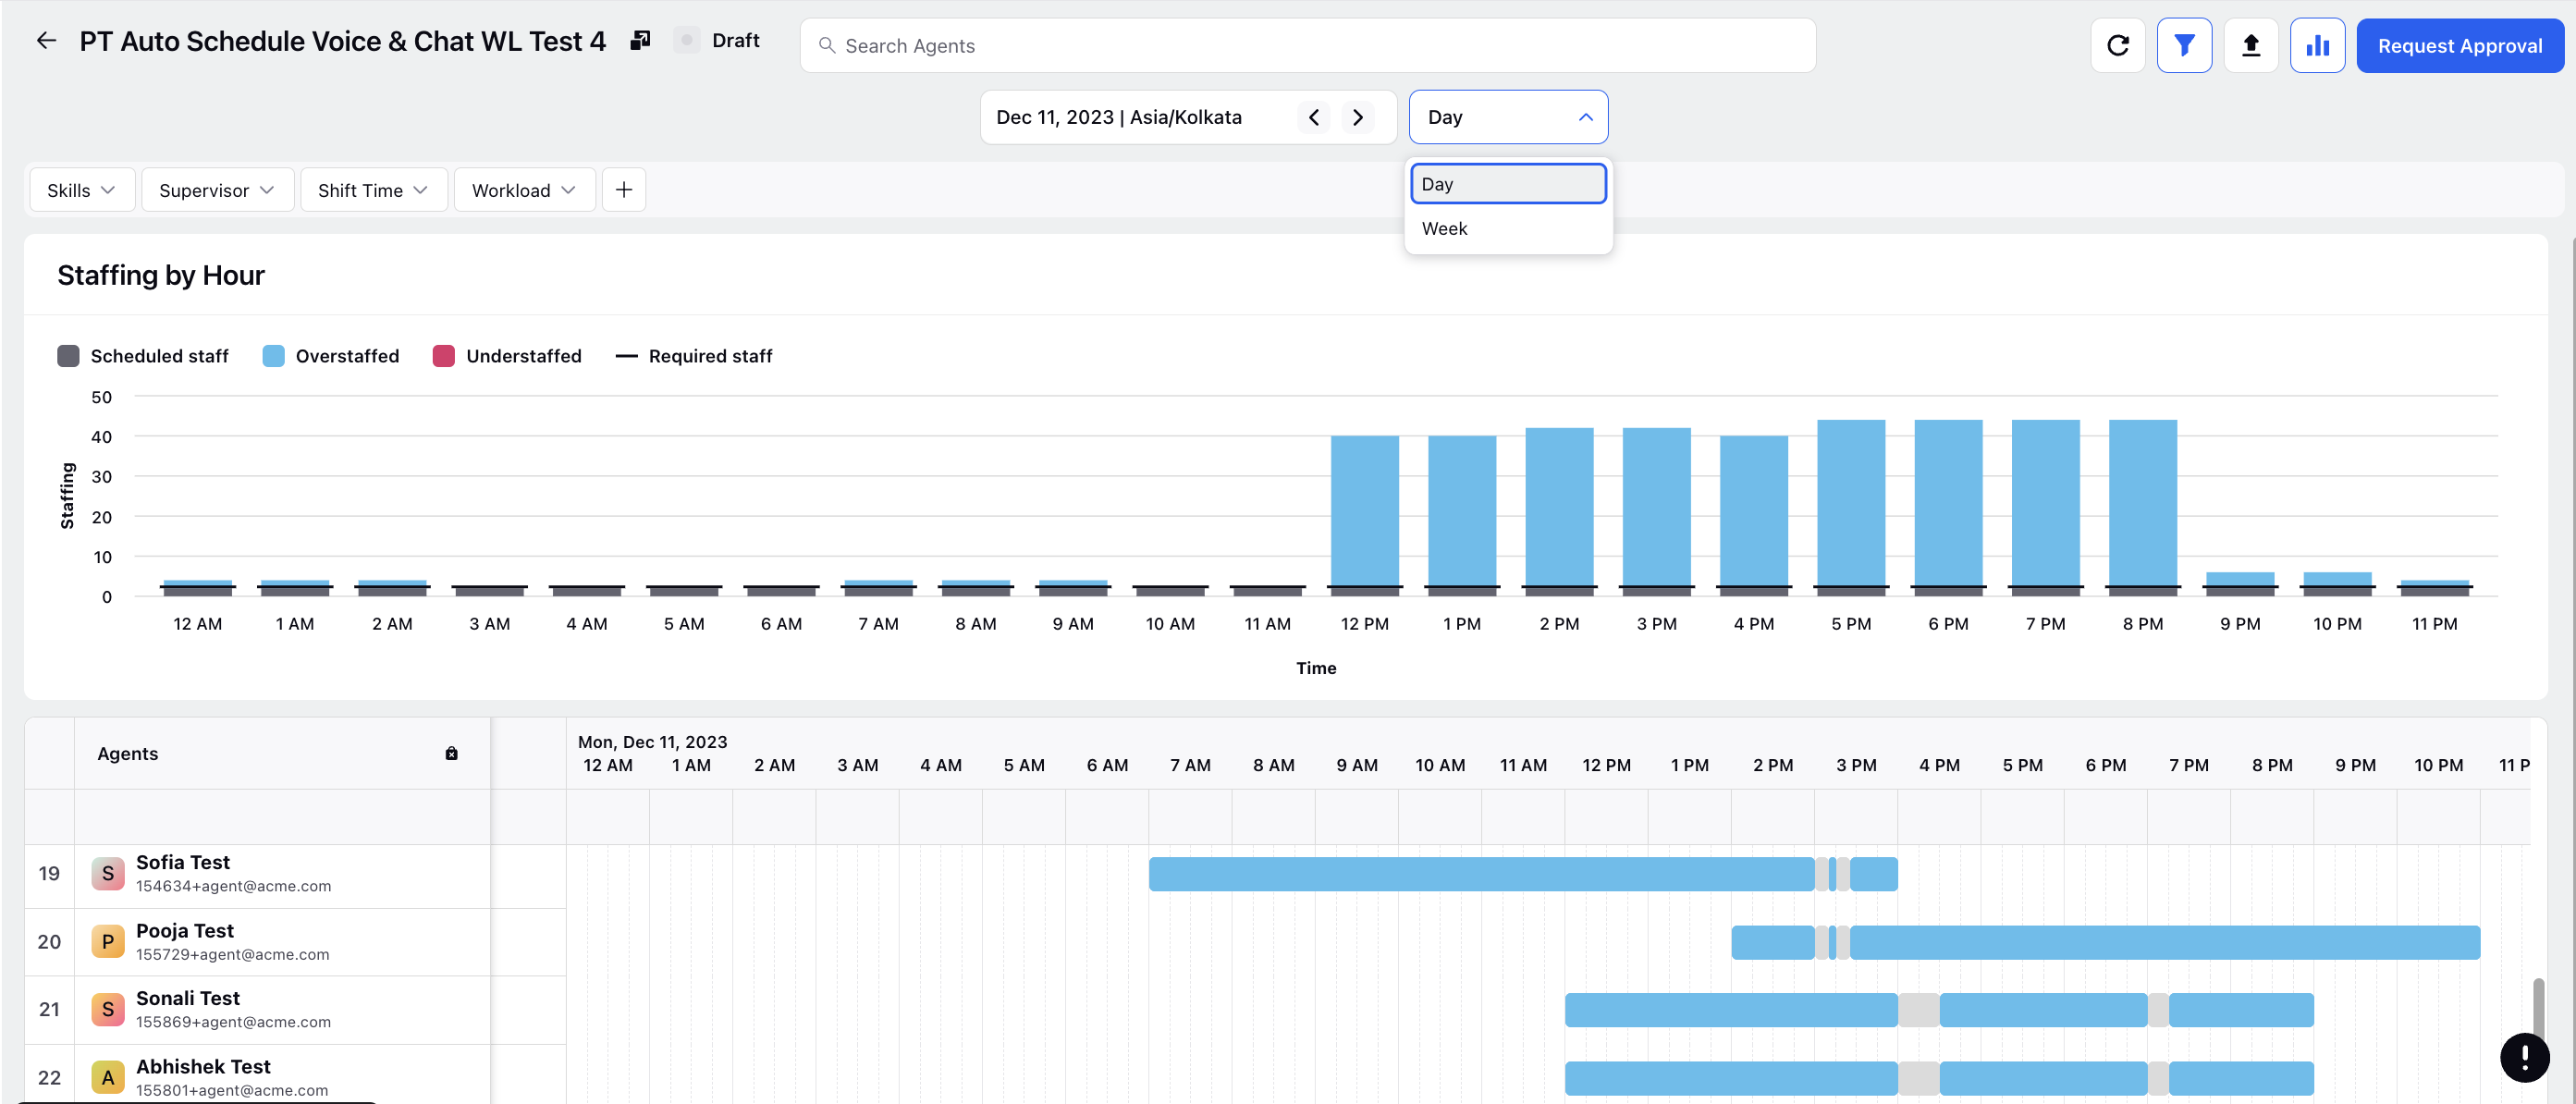
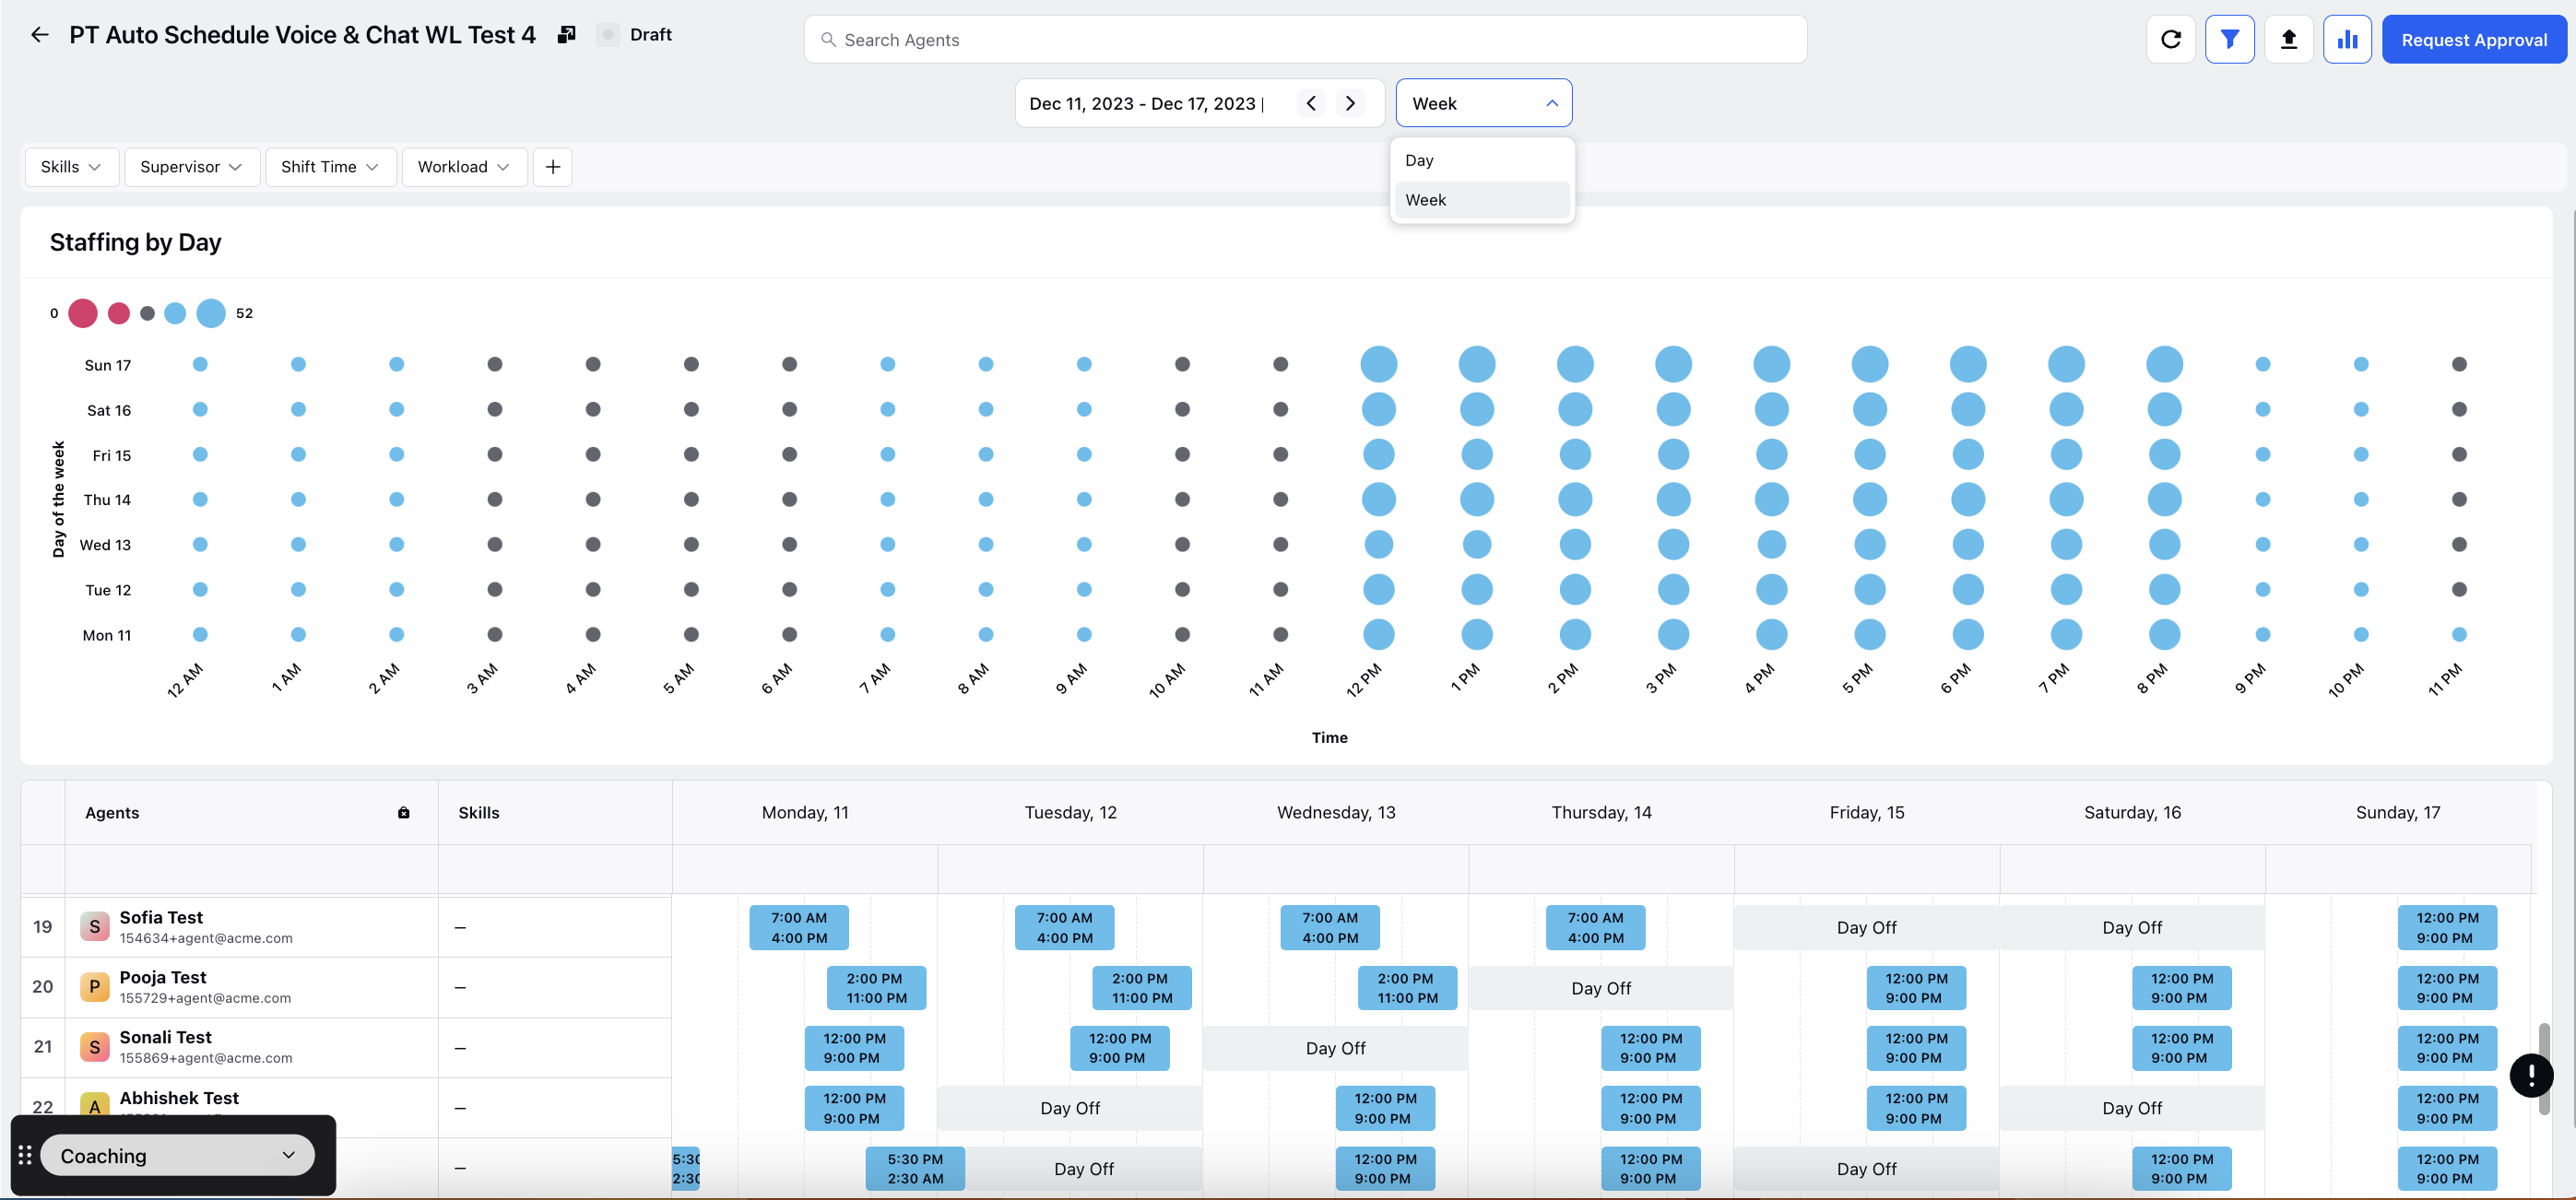
View Selector: - Supervisors can switch between Day view and Week view. If they opt for Day view, they can select a specific date from the Date Selector and view the Staffing Levels on an hourly basis in a color coded bar graph format. They can also view the agents' daily schedule for the chosen date. If they opt for Week view, they can select select a start date for the week from the Date Selector and view the Staffing Levels on a daily basis in a color coded bubble graph format. They can further view the agents' weekly schedule for the chosen week.
The Scheduling page shows the Schedule in 24-hour format by default, which can be switched between the 24-hour and 12-hour formats. Contact your Success Manager to switch the default time format.

Date Selector: - Supervisors can select a specific date from the date range for which the schedule is created. They can use the previous and next buttons to navigate to different months and also use the year's drop-down menu to select the year. Further, they can choose a timezone from the Timezone Selector to view agents' schedules in that particular timezone.

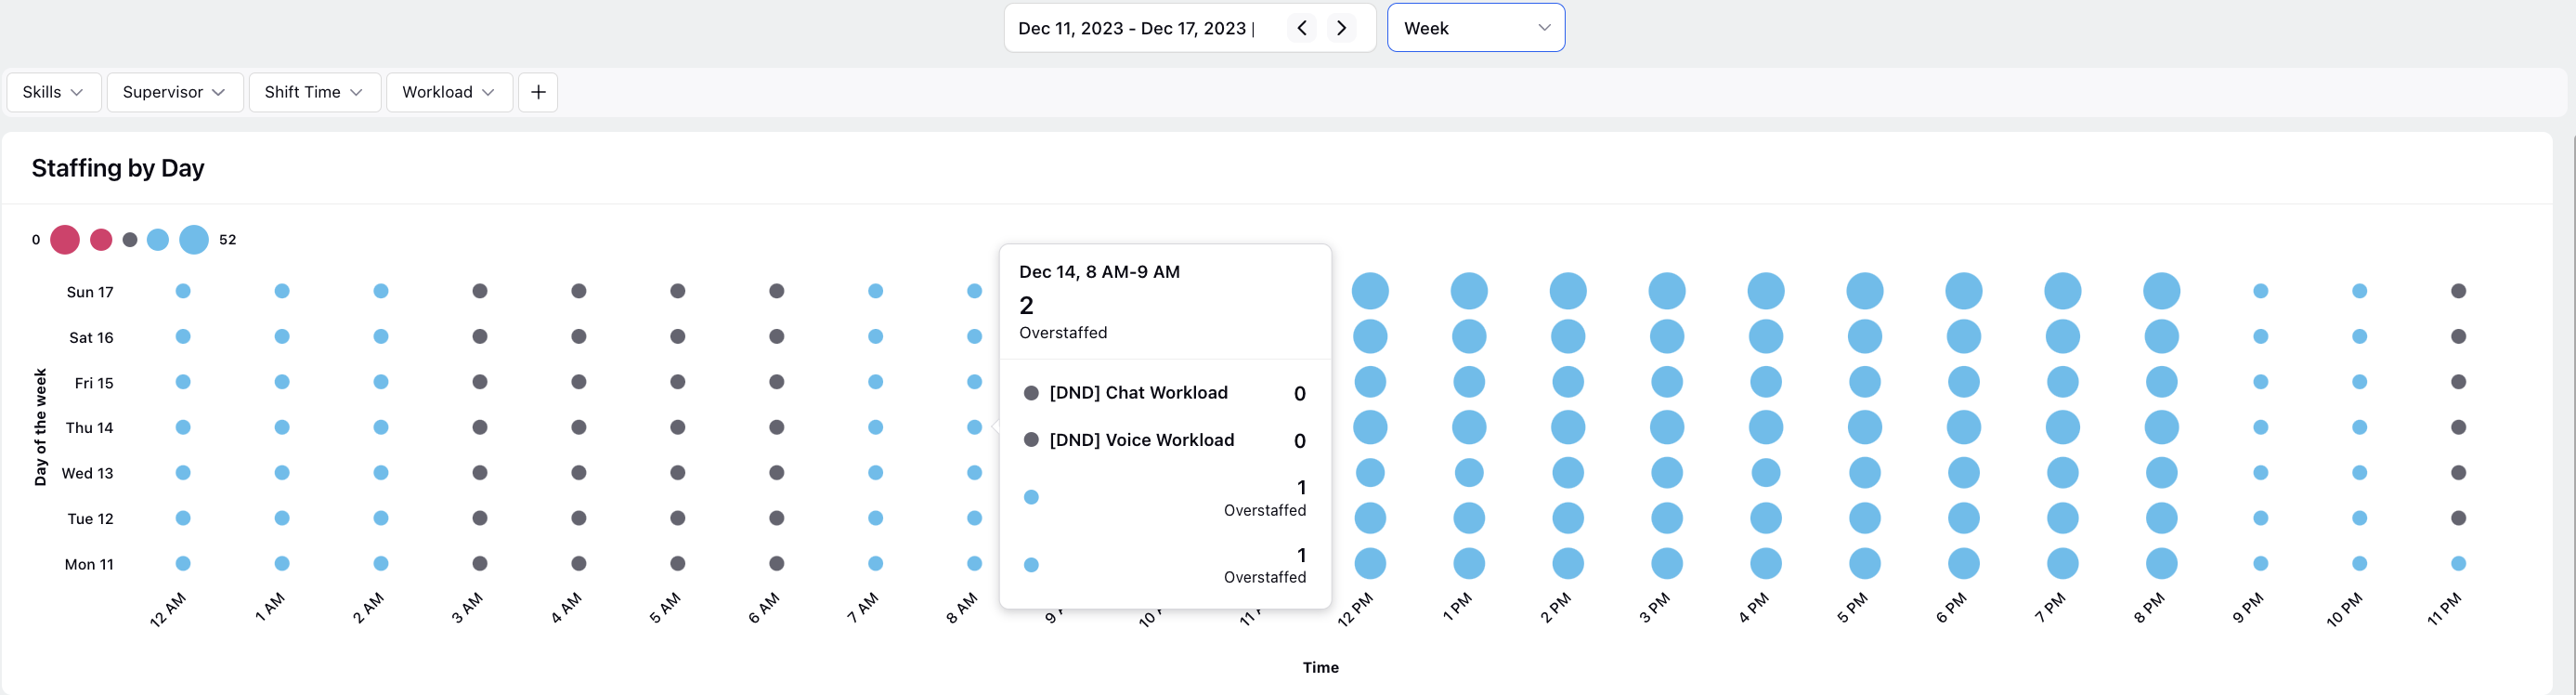
Staffing Graph: - The widget comes from the staffing report which displays the staffing levels on an hourly basis in the day view and on a daily basis in the week view. Supervisors can hover on an hour's timestamp and view the required staff, scheduled staff and the difference between these as overstaffing or understaffing color coded in blue and red respectively.

Similary, supervisors can hover on a particular day's hourly timestamp to view the overstaffing and understaffing color coded in blue and red respectively bifurcated by the workloads used to generate the schedule. The size of the bubble depicts the magnitude of difference between the required and scheduled staff.
When shifts or activities are modified, rescheduled, or moved via drag-and-drop, the Staffing Graph updates dynamically. This ensures that scheduled staffing levels and information on over/understaffing reflect real-time changes, empowering supervisors and planners to make more informed decisions.
Toggle Staffing Report: - Supervisors can hide or unhide the Staffing Graph widget using the "Toggle Staffing Report" button present at the top right beside Request Approval icon.

Agents' Schedule: - Supervisors can view agents' schedules at a daily level by selecting a particular date and timezone from the Date Selector in Day view. They could hover on an agent's daily schedule to view their shift timings and duration along with their scheduled intraday activities' timings and duration.

Filters: - Supervisors can further filter the generated schedule based on combination of Name, Skills, Supervisors, Shift Timings, Workloads or users' custom fields and properties from the top right beside the Refresh icon.

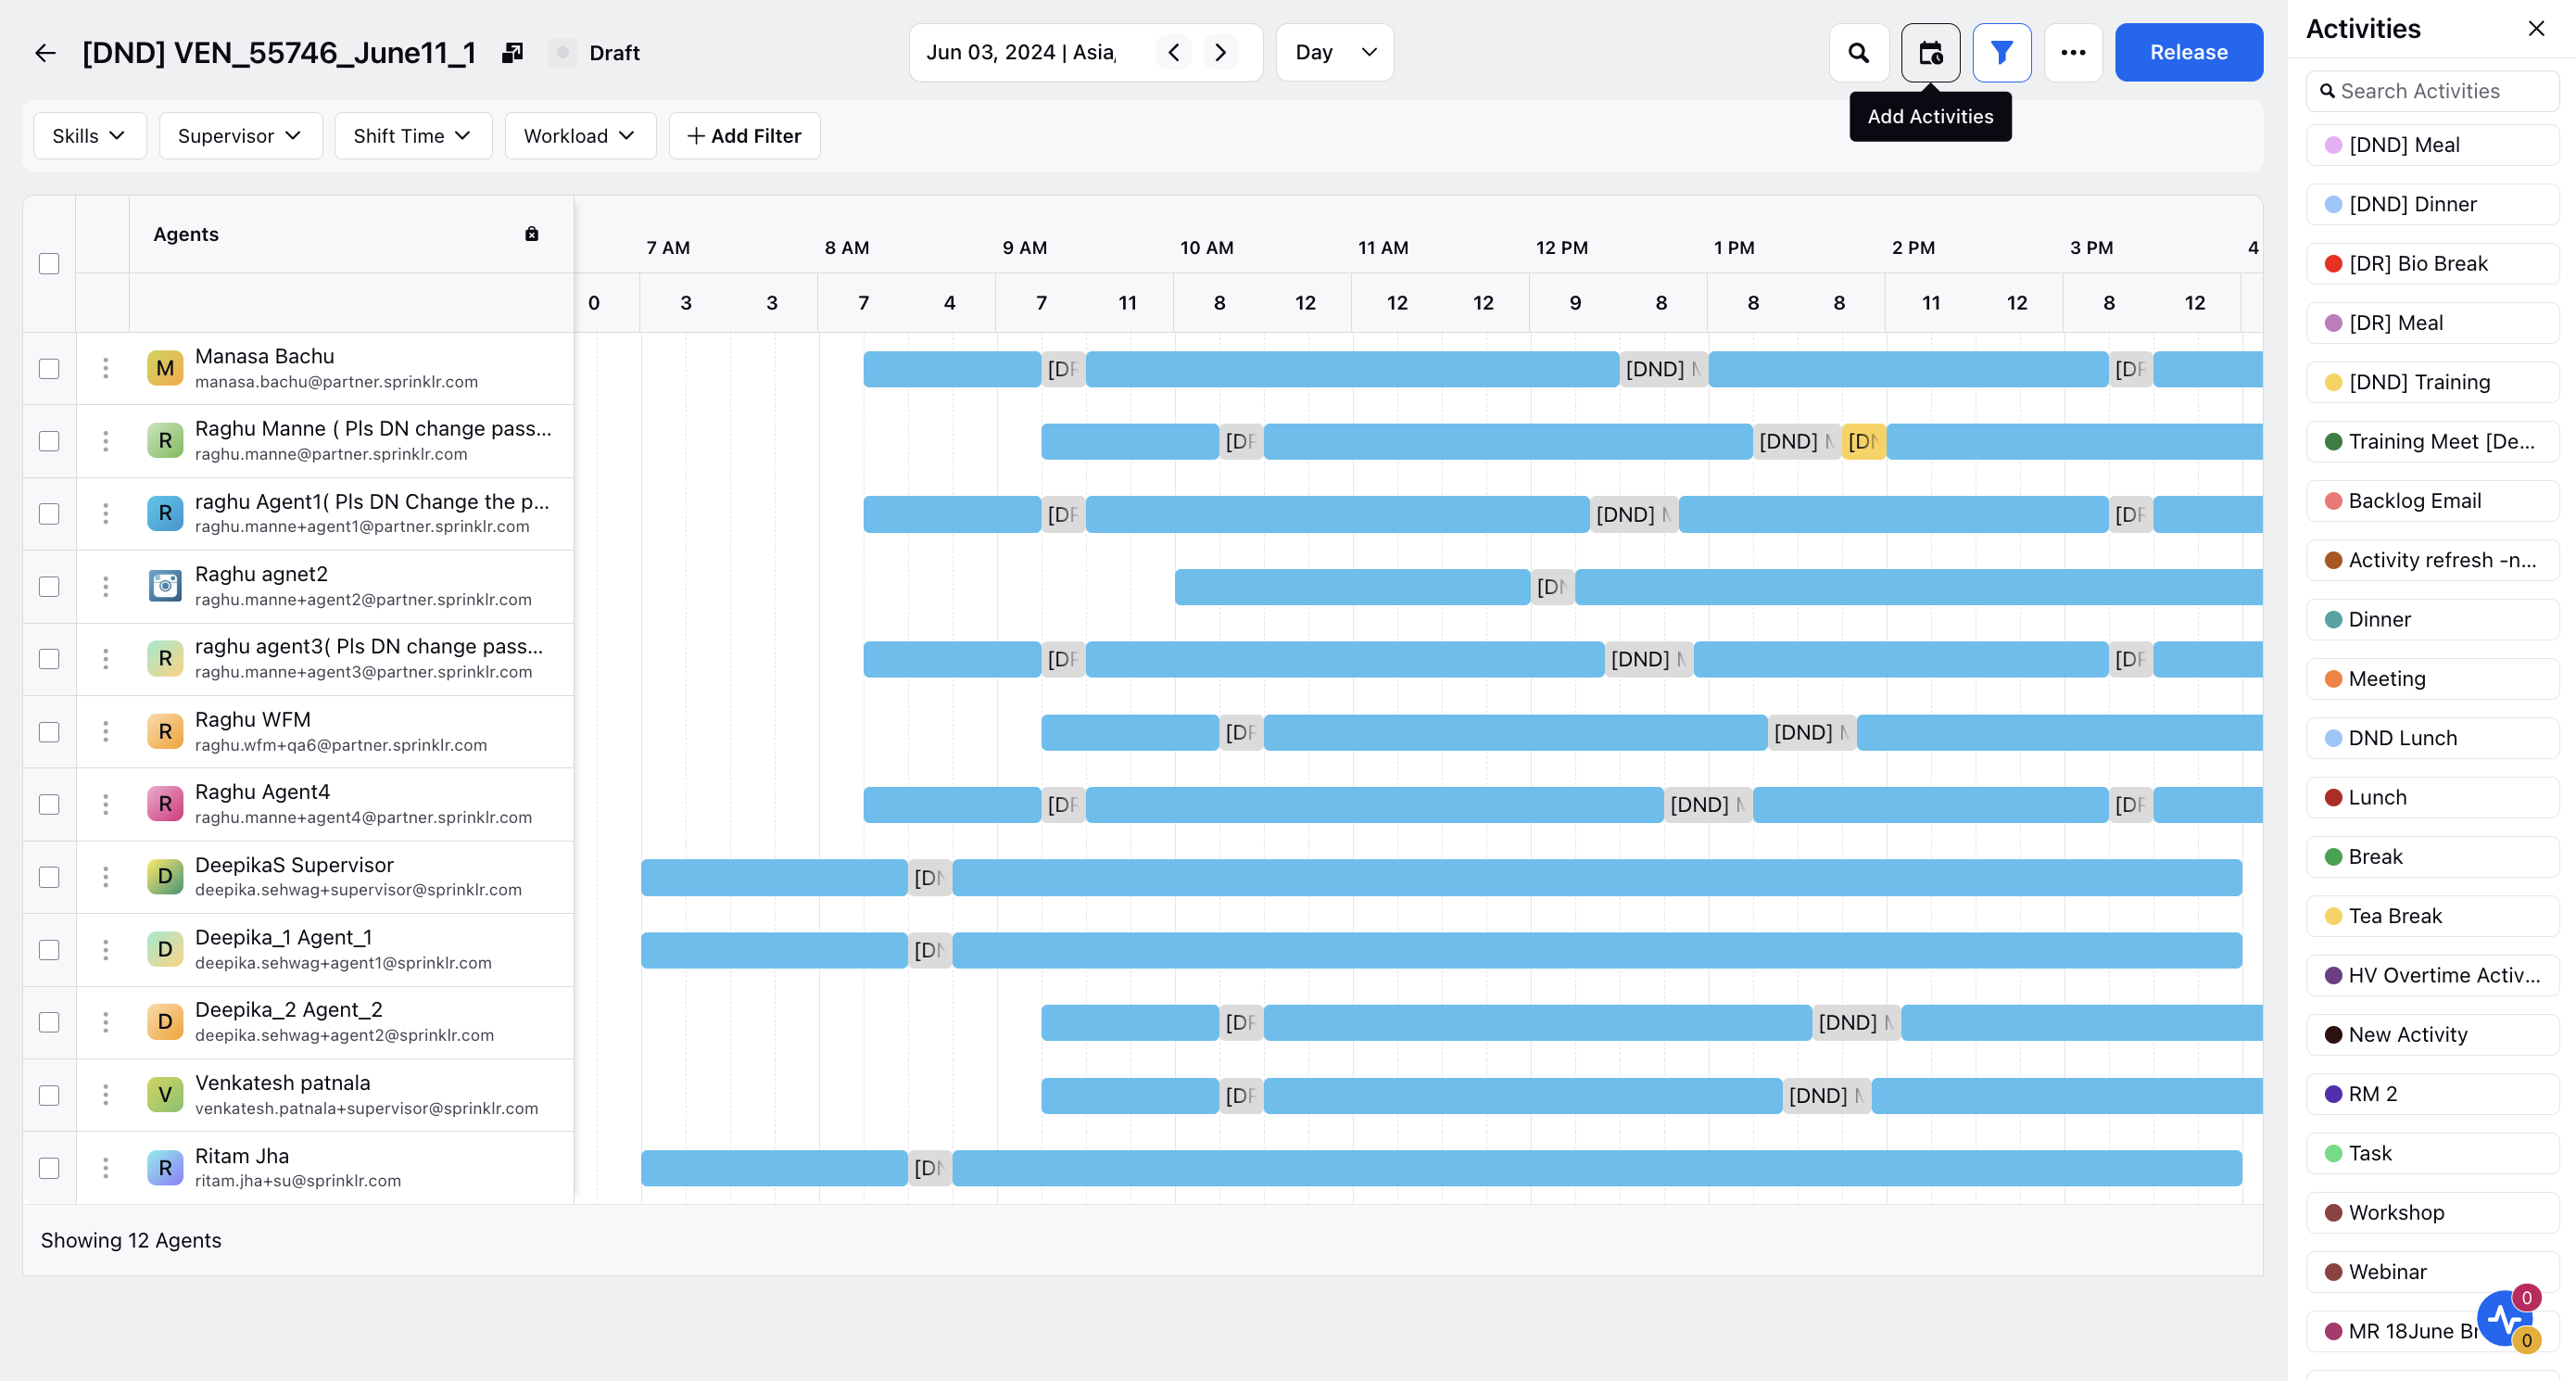
Drag-and-Drop Activities from the Catalogue to Shifts in a Day View
The Scheduling page in day view has been enhanced to improve user efficiency by introducing drag-and-drop functionality for activities from a newly integrated catalogue. Click the Add Activities icon at the top and select activities from the catalogue on the right, which are represented as distinct blocks with color coding and abbreviated names. You can then drag these activities to the desired agent's shift at the preferred time. Hovering over an activity displays its full name for clarity.
View Schedule Activity Log
Activity Logs of Schedules provide a detailed record of all scheduling tasks, including changes, approvals, and updates. This log helps ensure transparency, accountability, and efficient management of Workforce Managers, and make informed decisions based on historical data.
Follow these steps to view the activity log of a Schedule:

Go to the Workforce Manager Persona App on the Launchpad. Alternatively, search for 'Workforce Manager' on the Launchpad search bar.
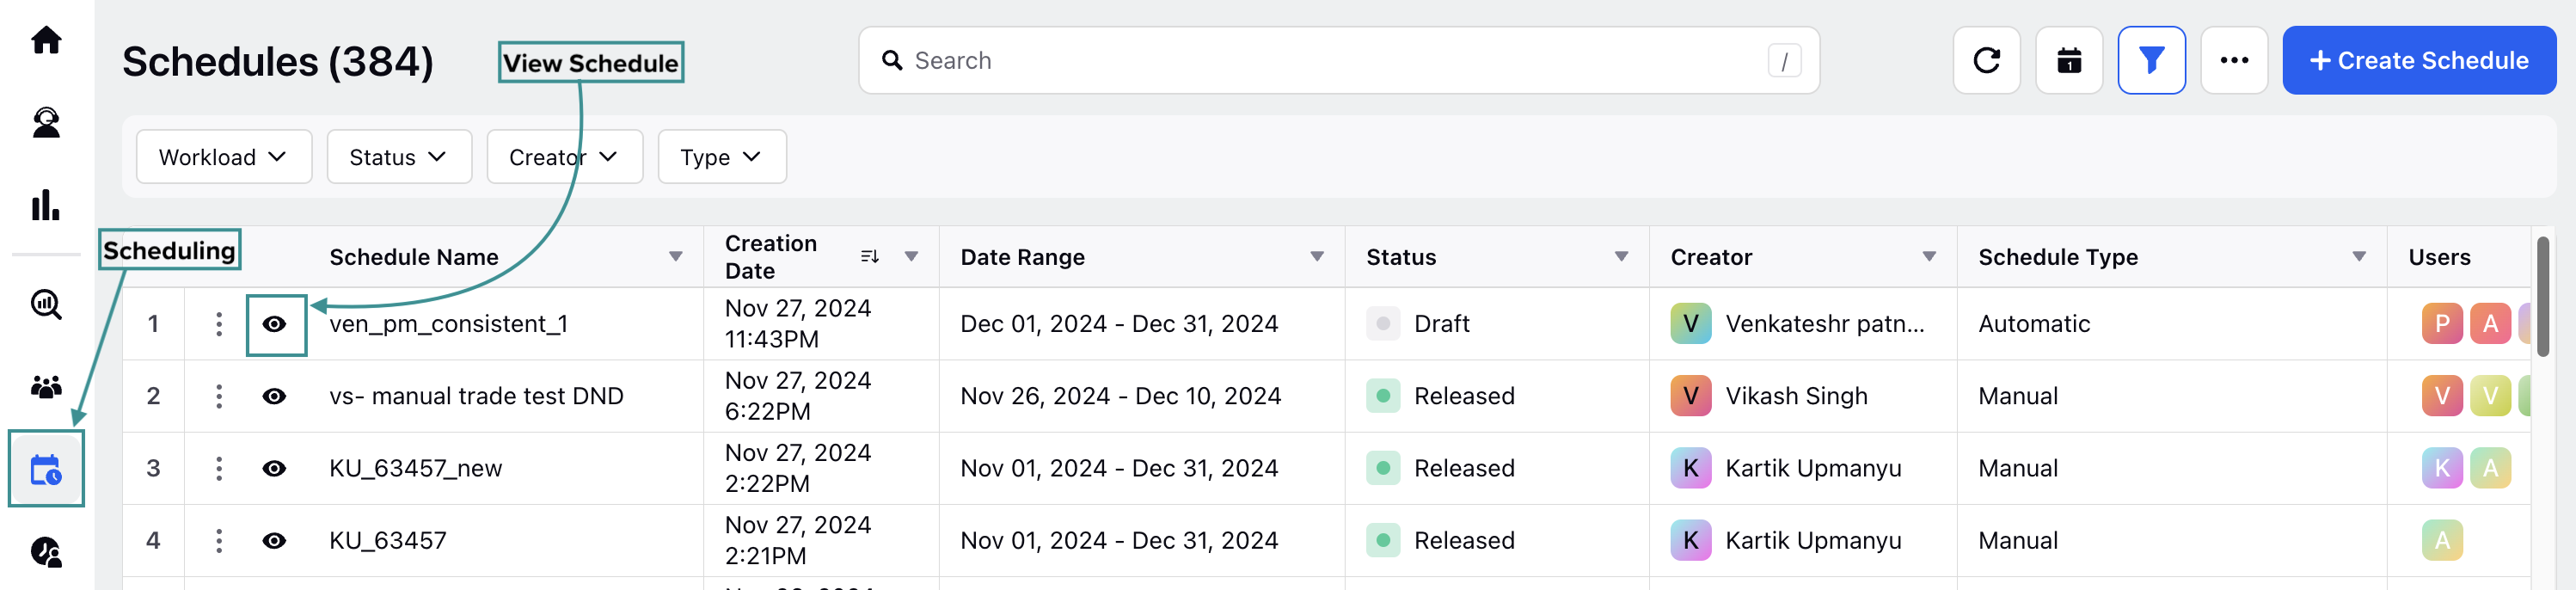
Select Scheduling from the Left Pane to open the Schedules Record Manager.
Click the View Schedule (eye icon) button corresponding to the Schedule for which you want to view the activity log. This will open a page with details of the Schedule.

Click the Open third pane button at the top of the page to show the Schedule details from the Third Pane.
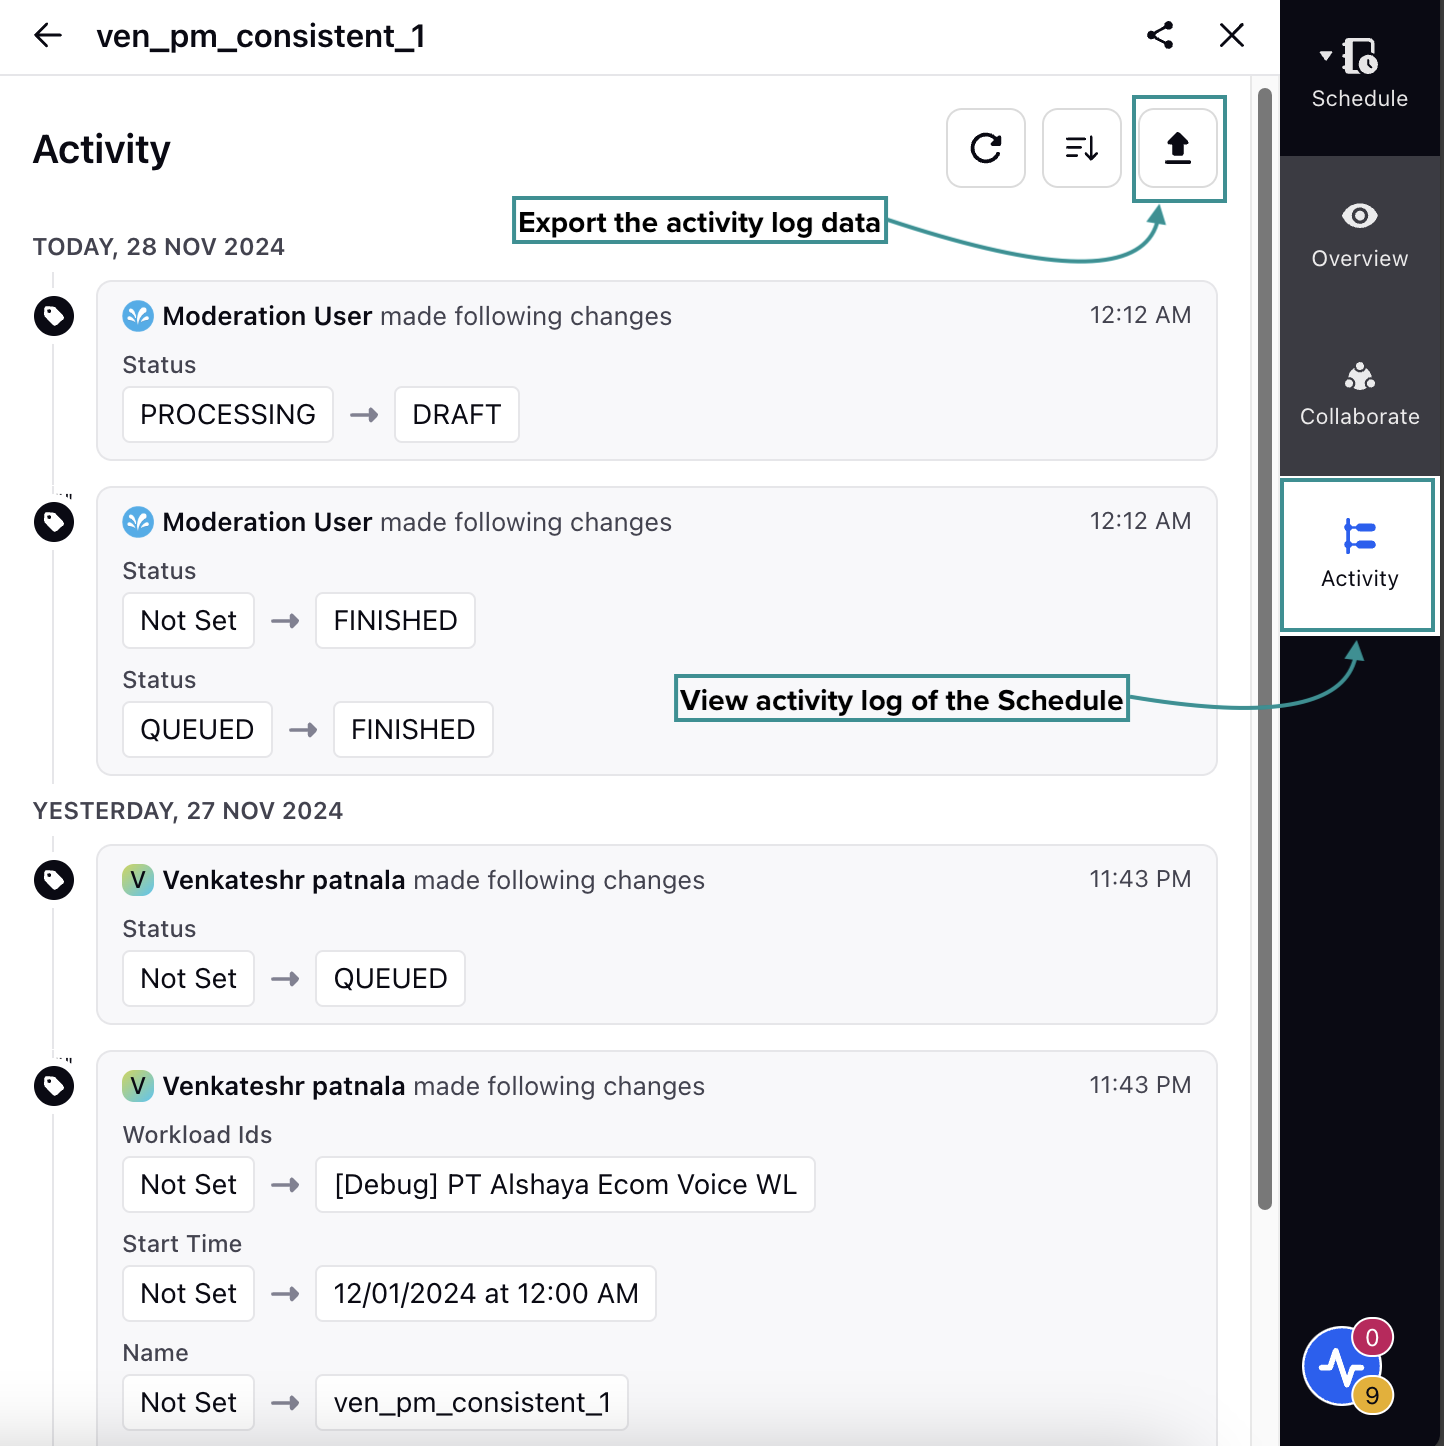
Click the Activity tab in the Third Pane. This will show the activity log of the Schedule.
You can view all previously published versions of the Schedule from the Activity tab. You can refresh the data, sort it by the date of updates in ascending or descending order, and export the activity log data.
Version History of Schedules
Versioning support for Scheduling in Sprinklr enhances user control and flexibility. It lets you view previously published versions of the Schedules, providing a clear history of changes.
Follow these steps to view the version history of a Schedule:
Go to the Workforce Manager Persona App on the Launchpad. Alternatively, search for 'Workforce Manager' on the Launchpad search bar.
Select Scheduling from the Left Pane to open the Schedules Record Manager.
Click the View Schedule (eye icon) button corresponding to the Schedule for which you want to view the version history. This will open a page with details of the Schedule.
Click the Open third pane button at the top of the page to show the Schedule details from the Third Pane.
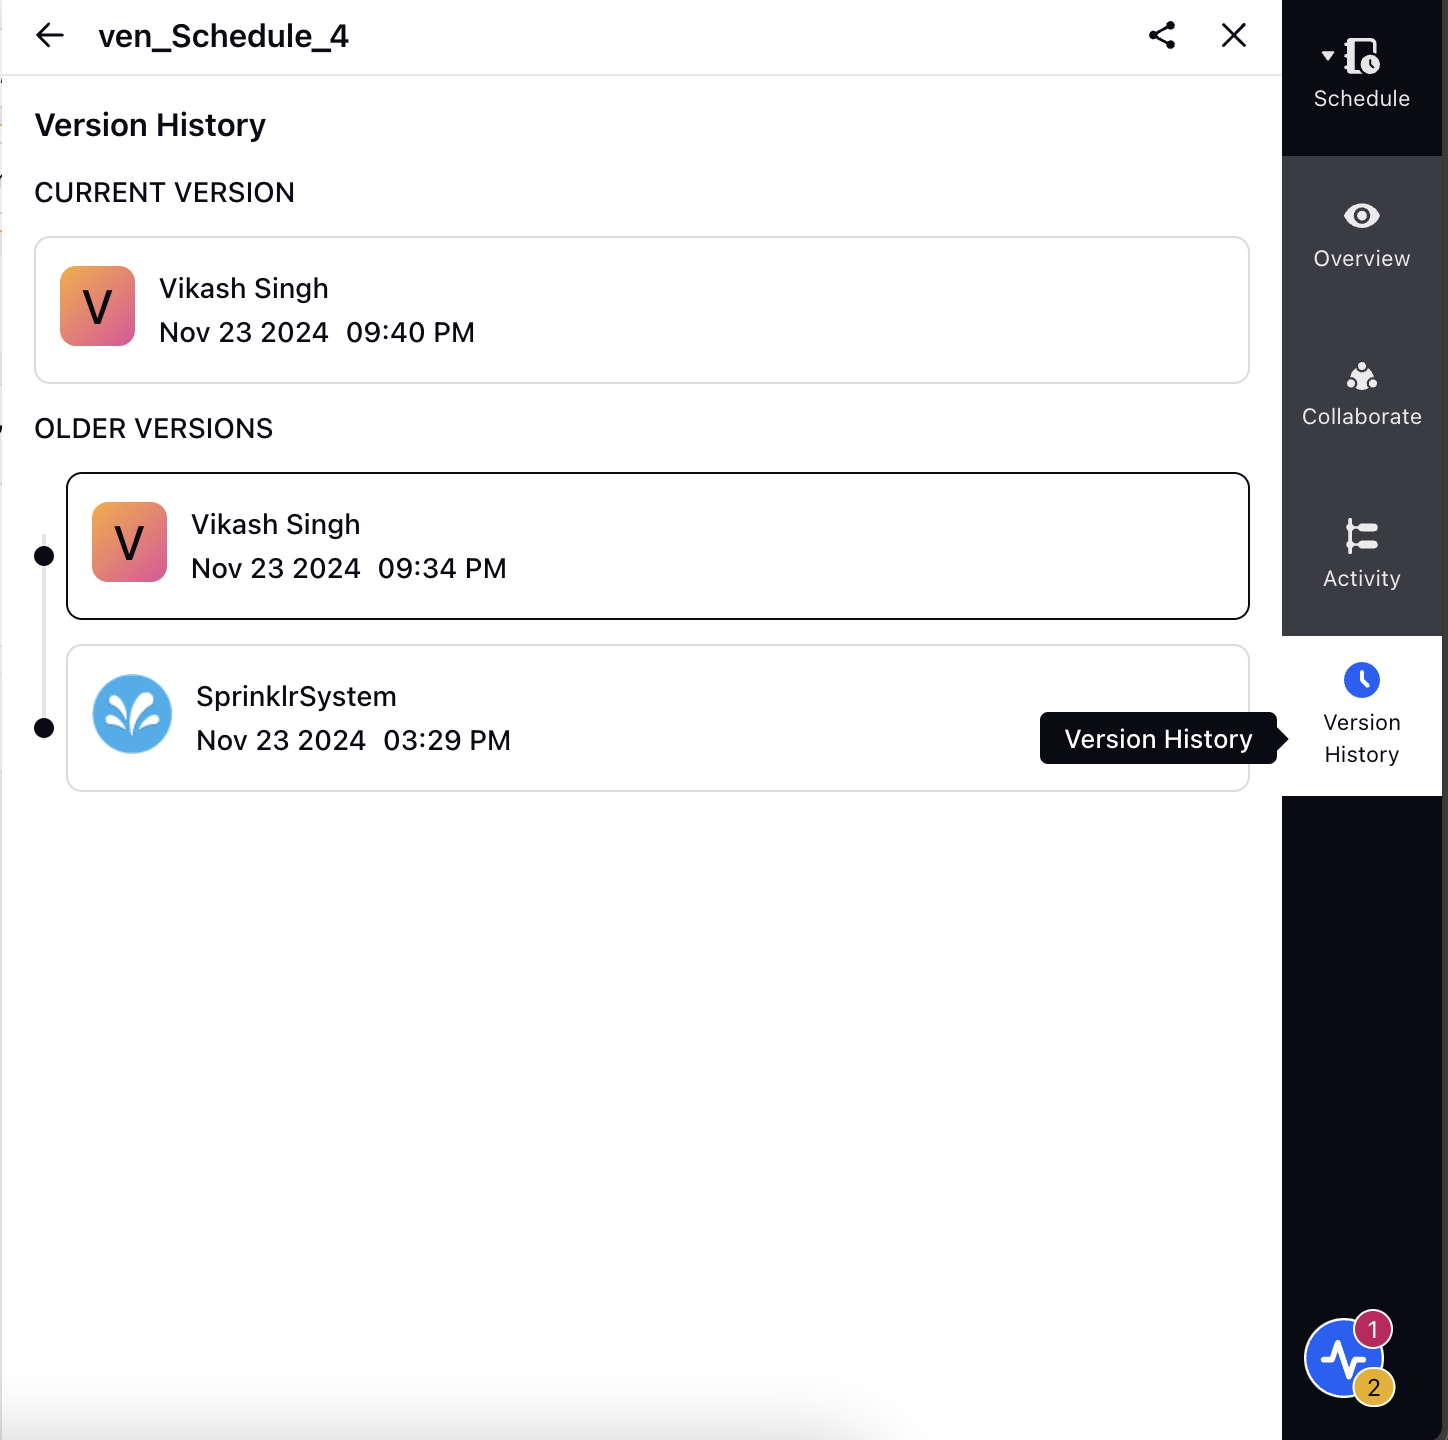
Select the Version History tab in the Third Pane. This will show all available versions of the Schedule.
All available past versions of the Schedule will be shown under the 'Older Versions' section. Select the version from this section to show the details of that version of the Schedule. This will show a notification banner indicating that data from a previous version is being displayed.
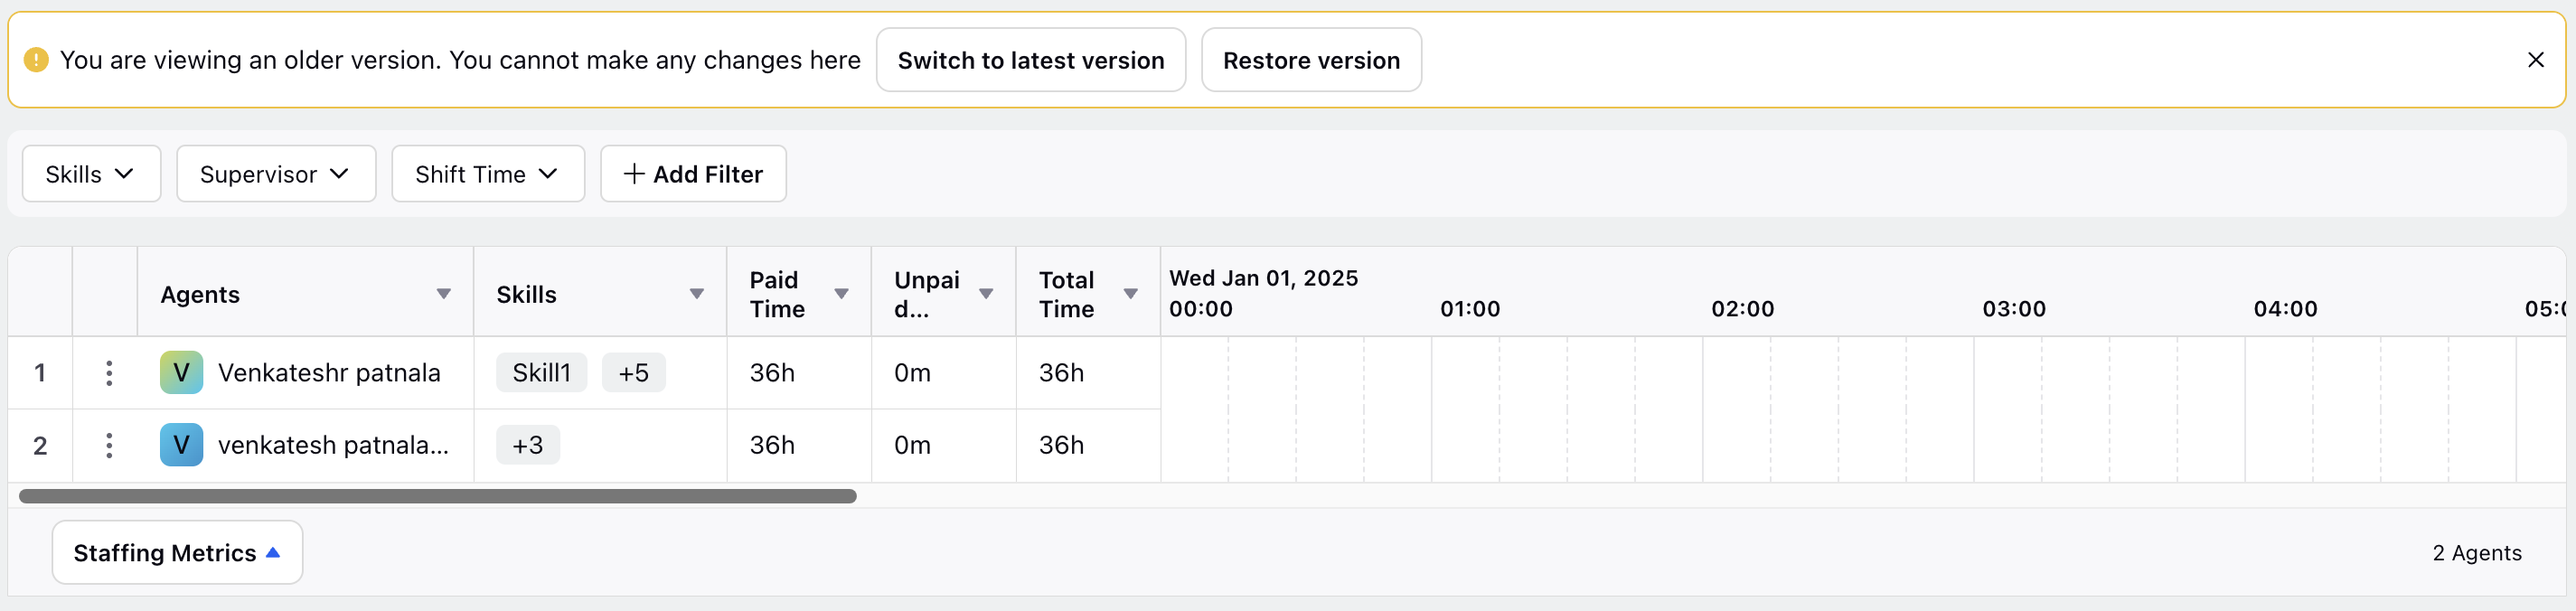
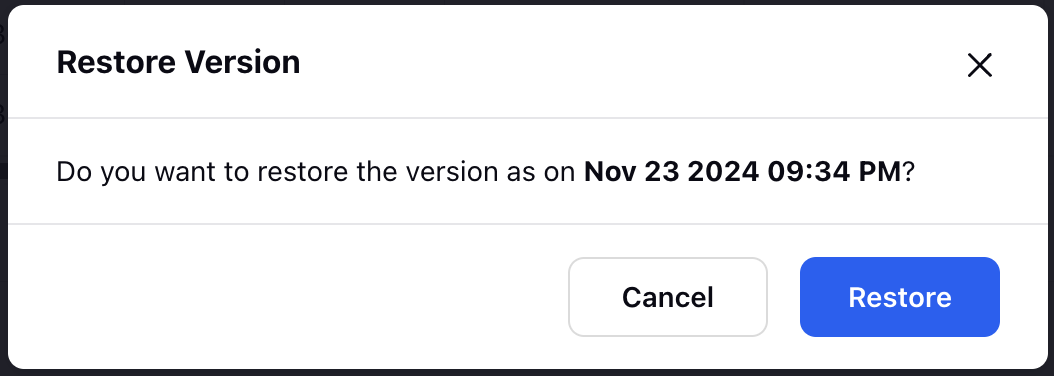
The banner has the Switch to latest version and Restore version buttons.
Switch to latest version: This button shows the details of the current version of the Schedule.
Restore version: This button restores the data of the older version. Clicking it will open a confirmation box. Select the Restore button to restore the data of the previous version.