Create and Send Omnichannel Secure Forms
Updated
How you can create secure forms and send the corresponding links on all the channels supported in Sprinklr.
You can send the secure forms to capture Personally Identifiable Information (PII) or any other sensitive information required for customer authentication. The PII information of the customers captured via secure forms will not be stored in the Sprinklr database, and it will be directly communicated to the brands.
Note:
|
To create a Secure Form
1. Click the New Tab icon. Under the Sprinklr Service tab, click Secure Form within Resolve.
2. On the Secure Forms window, click Create New Secure Form in the top right corner.
.png)
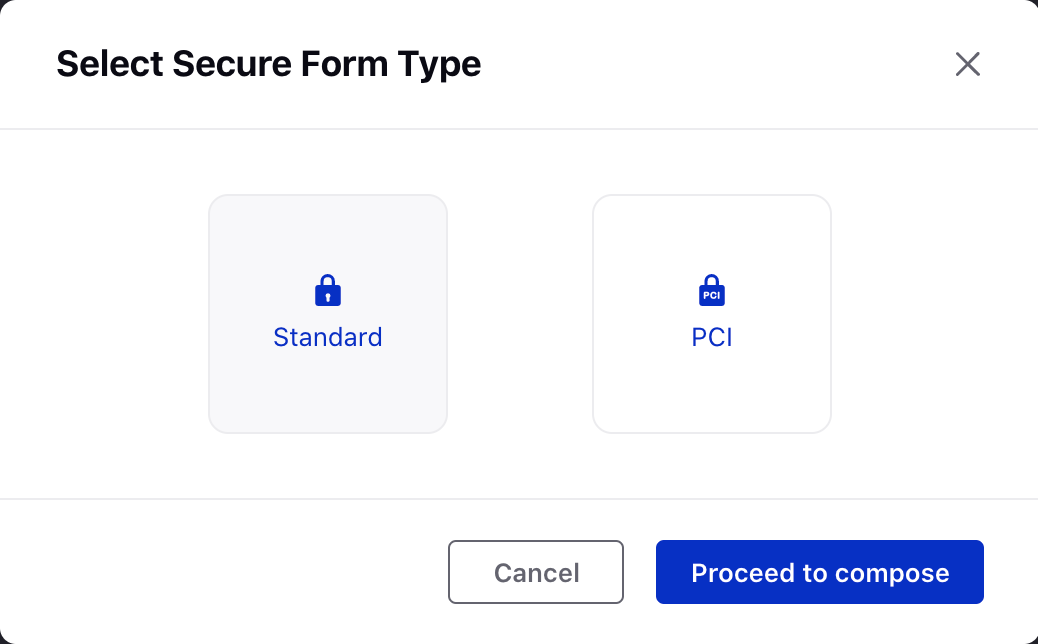
3. On the Select Secure Form Type pop-up window, select Standard for capturing non-PCI compliant customer data and PCI for capturing PCI compliant data like credit card details. Click Proceed to Compose to open the Secure Form Builder.
4. On the Edit window, create a form as explained below.

1. On the Form Styling window, set the Background Color, Header Image & Background Image for the form, as desired.
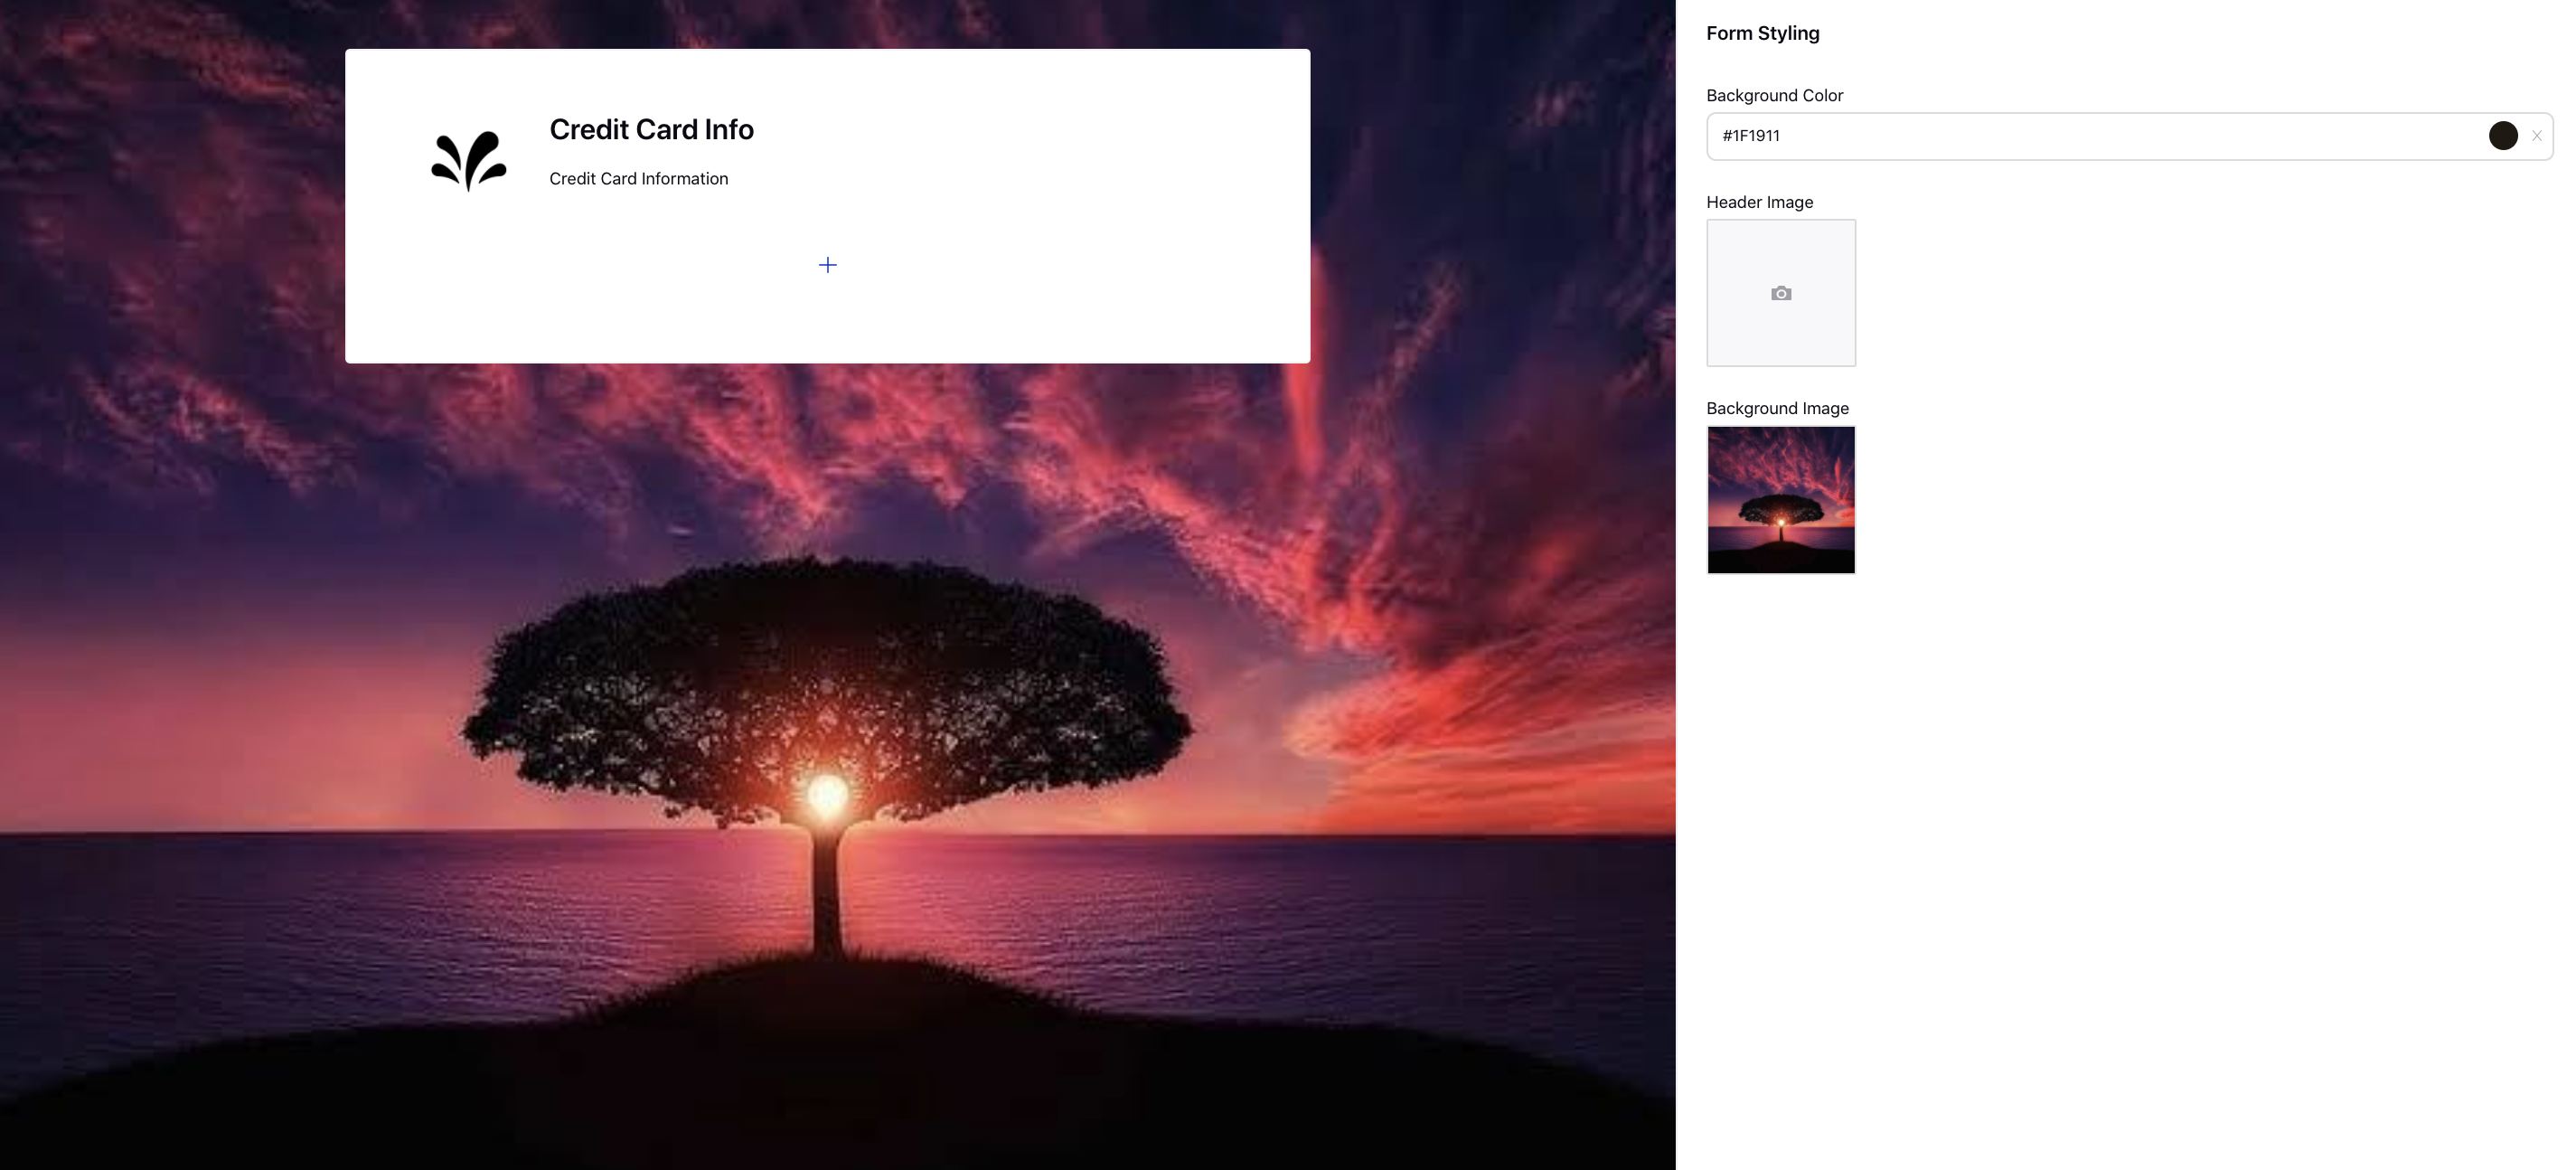
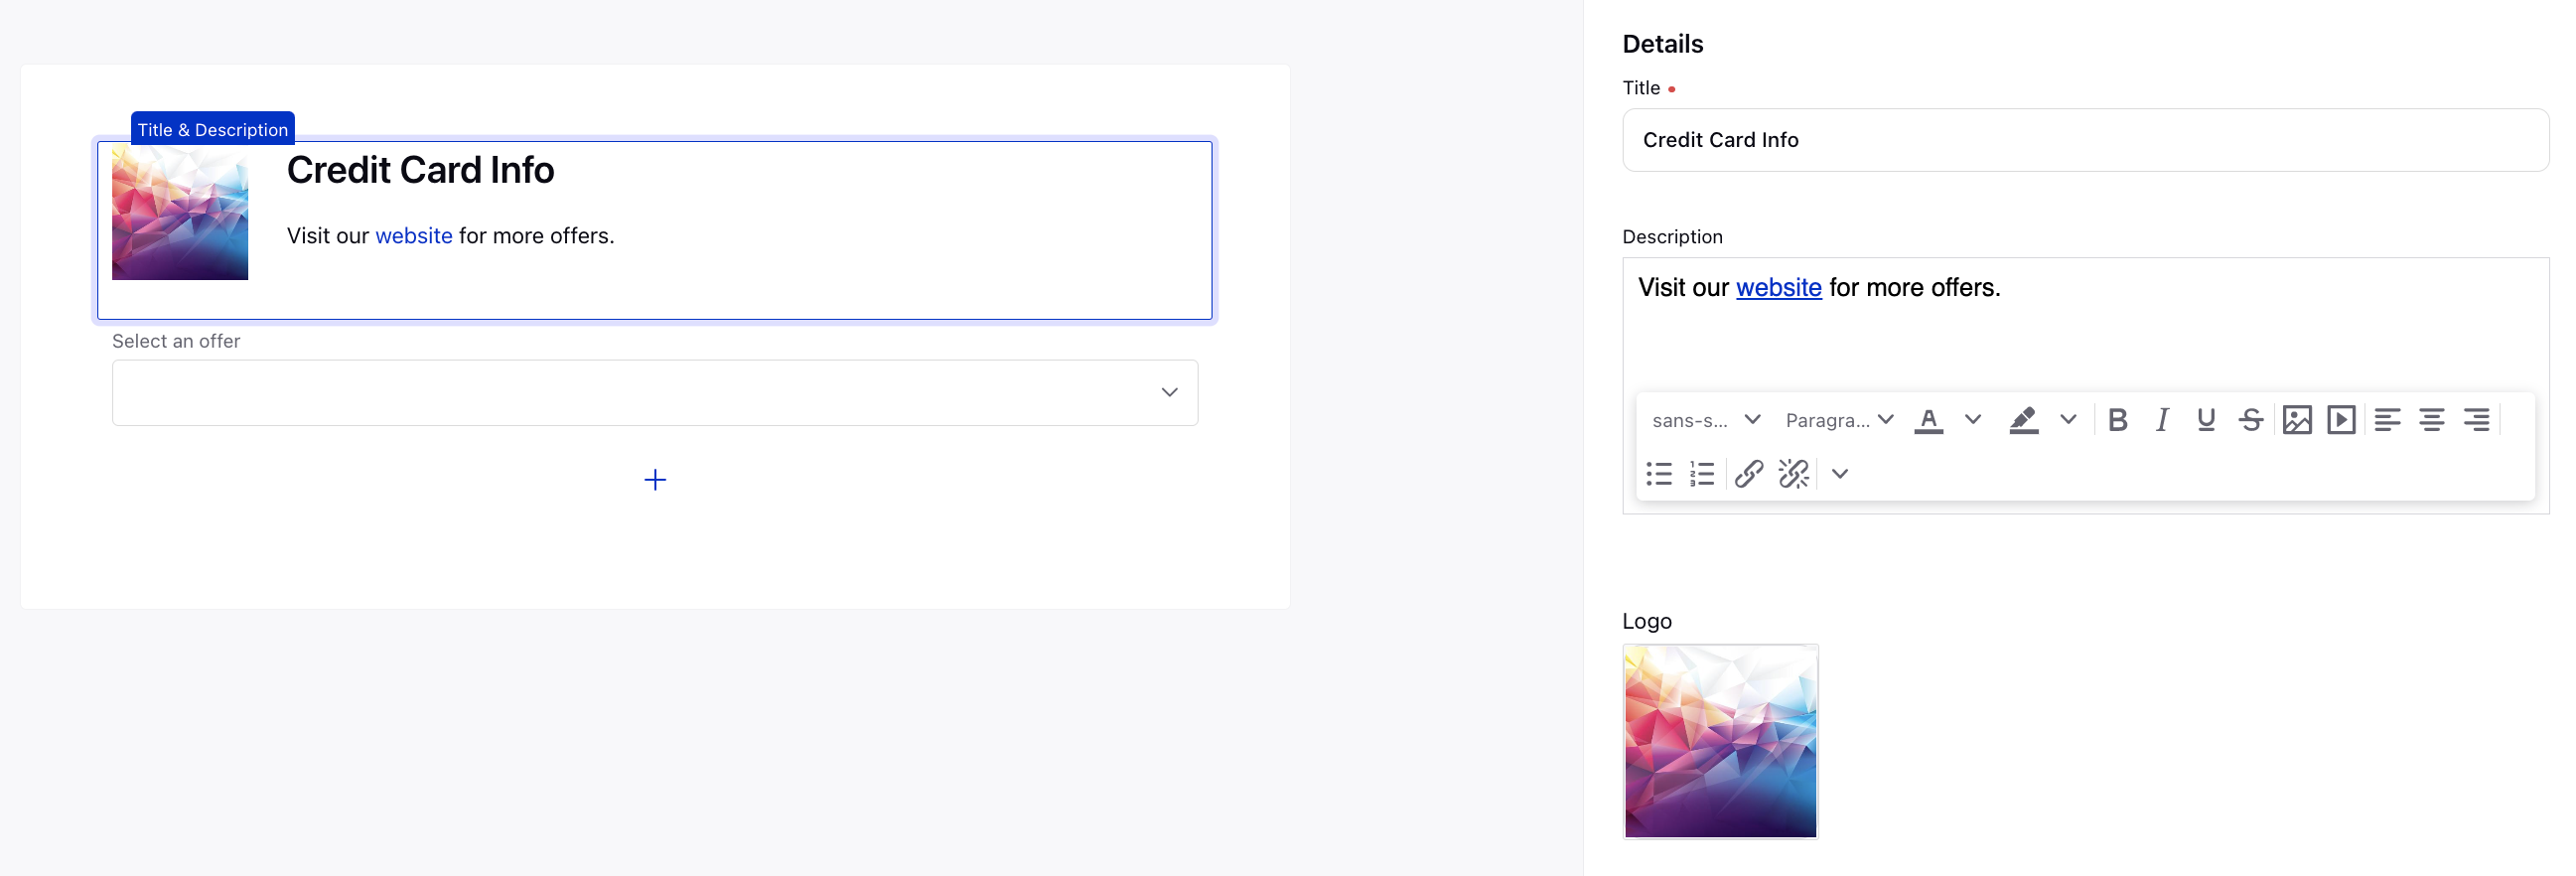
2. Click the Title & Description box on the left to open the Details window and set the Title, Description, and Logo for the form. For description, you can use the Rich Text editor to format your text with bullets, links, bold/italics/underlining, etc.
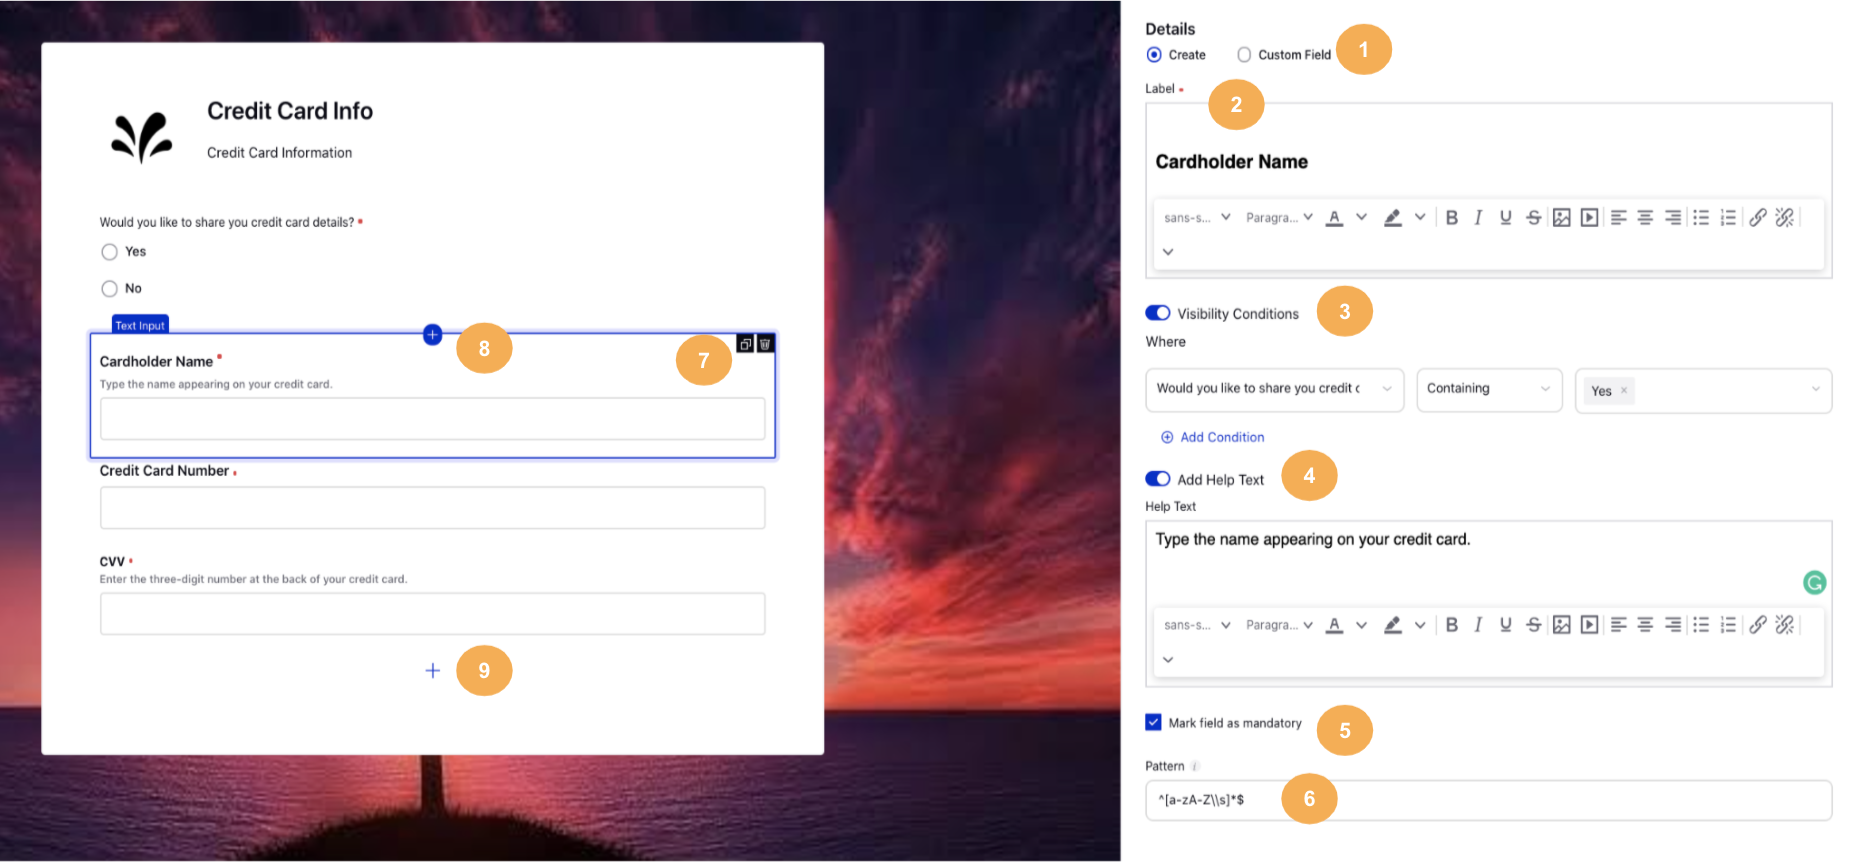
3. Click the Addition icon on the left pane to add a component to the form. Select the desired question type from the given options: Text Input, Text Area, Checkbox, Checkbox Group, Pick List, Radio Group, Multi Select, Number Input, Email Input, Phone, Date & Time Input, & Custom Field.
S. No. | Title | Description |
1 | Create/Custom Field | Under Details, select Create to create a new question from scratch. Select Custom Field to use a custom field as a question. |
2 | Label | Enter the question. You can use various formatting options appearing at the bottom. |
3 | Visibility Condition | Specify the visibility condition for the given question to appear based on other input field values added in the form. |
4 | Add Help Text | Add help text beneath the question. |
5 | Mark field as mandatory | Mark the question mandatory for the users to not be able to skip it. |
6 | Pattern | Set the Regular Expression to validate the user input. |
7 | Clone & Delete | Make a copy of the question or delete it. |
8 | Addition icon | Click this addition icon to add a new question above the given question. |
9 | Addition icon | Click this addition icon to add a new question beneath the given question. |
4. Click Preview to preview the created Secure Form.
5. Click Save to save the details.
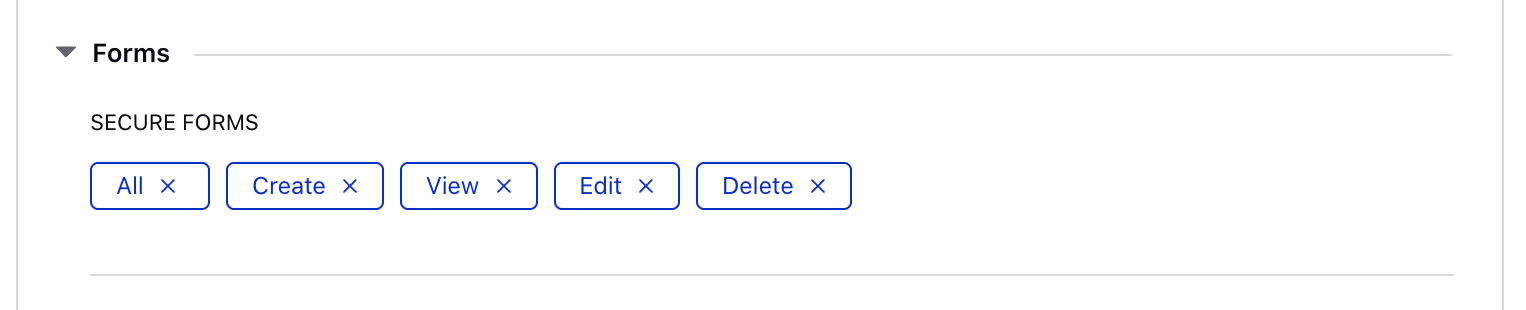
To take actions on a Secure Form
On the Secure Forms window, click the Options icon alongside the desired secure form and select:
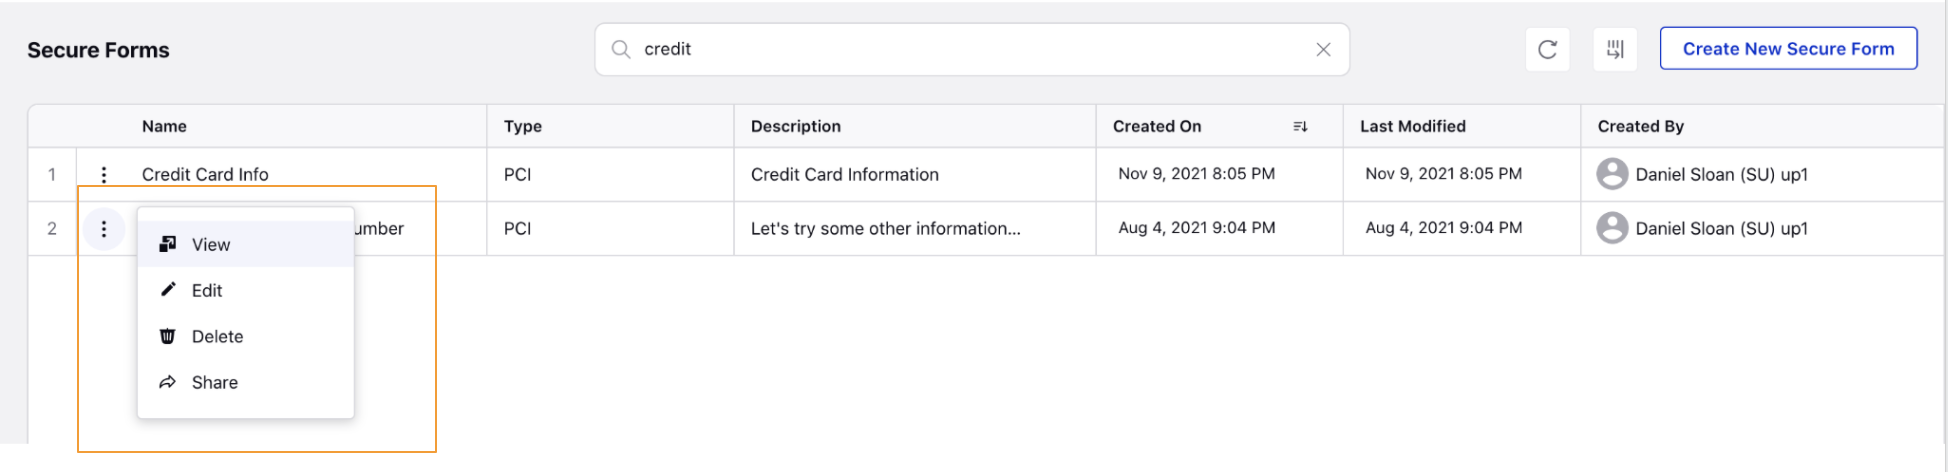
1. View - Preview the secure form.
2. Edit - Edit the secure form.
3. Delete - Delete the secure form.
4. Share - Select Workspace(s) and Users/Users Group(s) you want to share this form with. You can also check the box alongside Visible in all workspaces to share the form with all workspaces.
To send Secure Form link
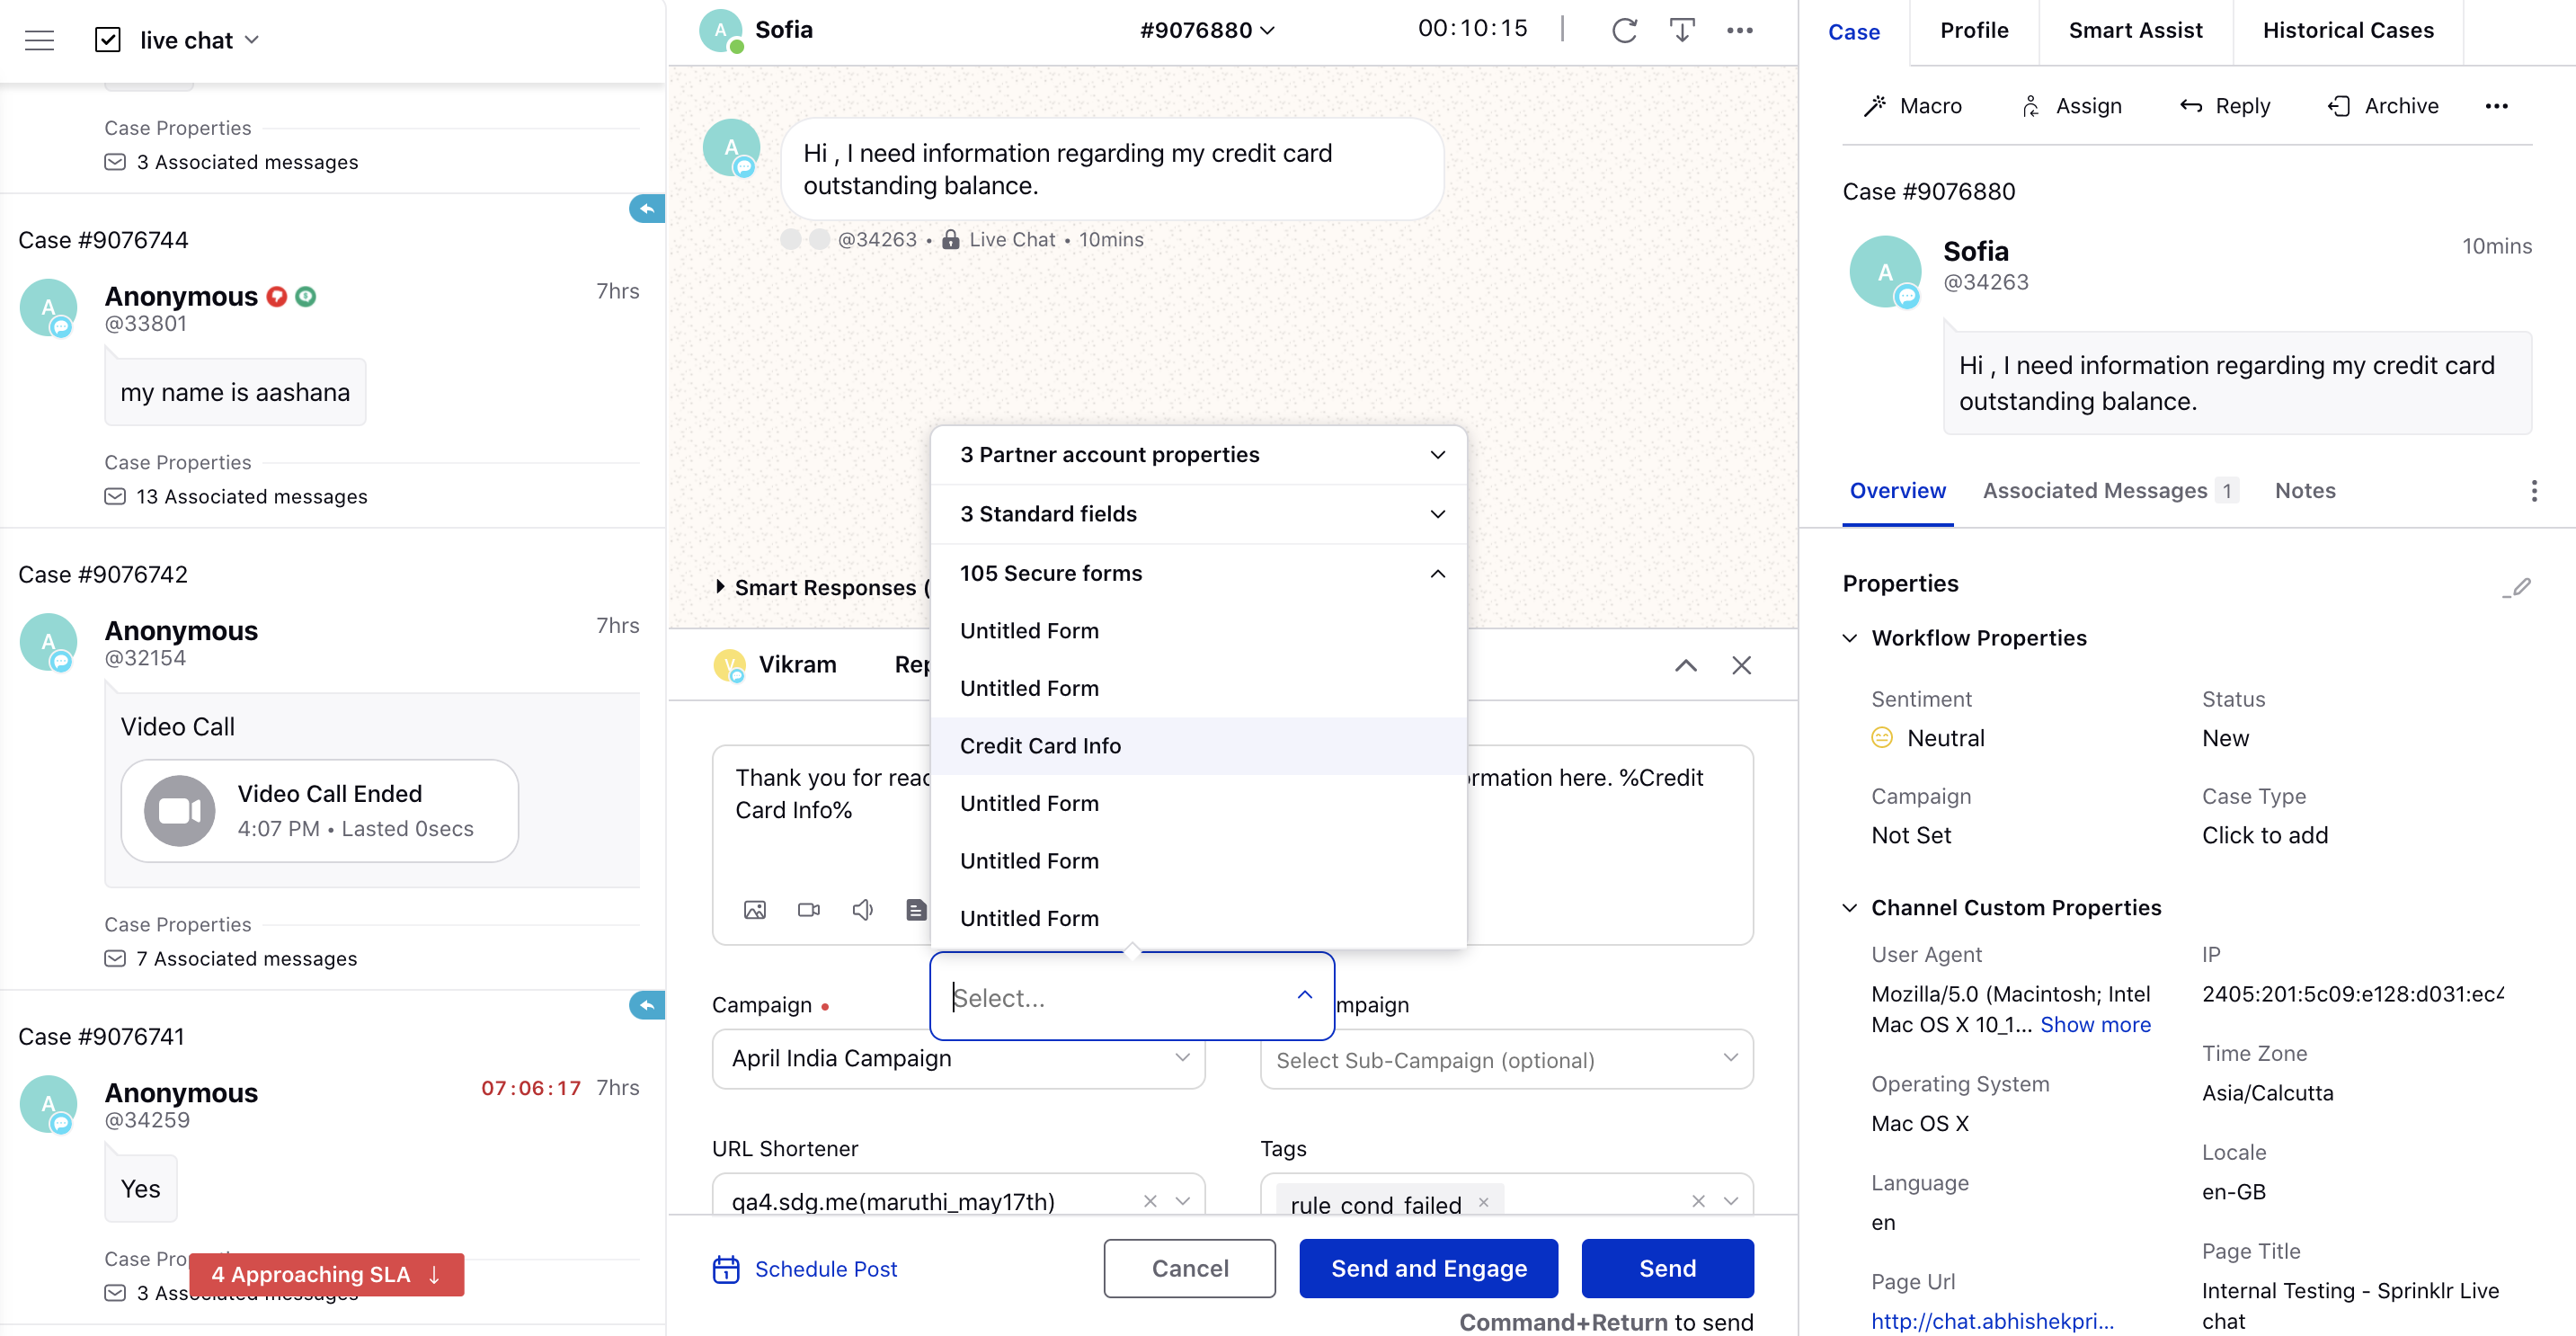
1. Open the reply box in Agent Console or Care Console. Click the Content Placeholder icon and select the desired secure form under the Secure forms section. The survey link placeholder will be added in the reply box.
Agent Console
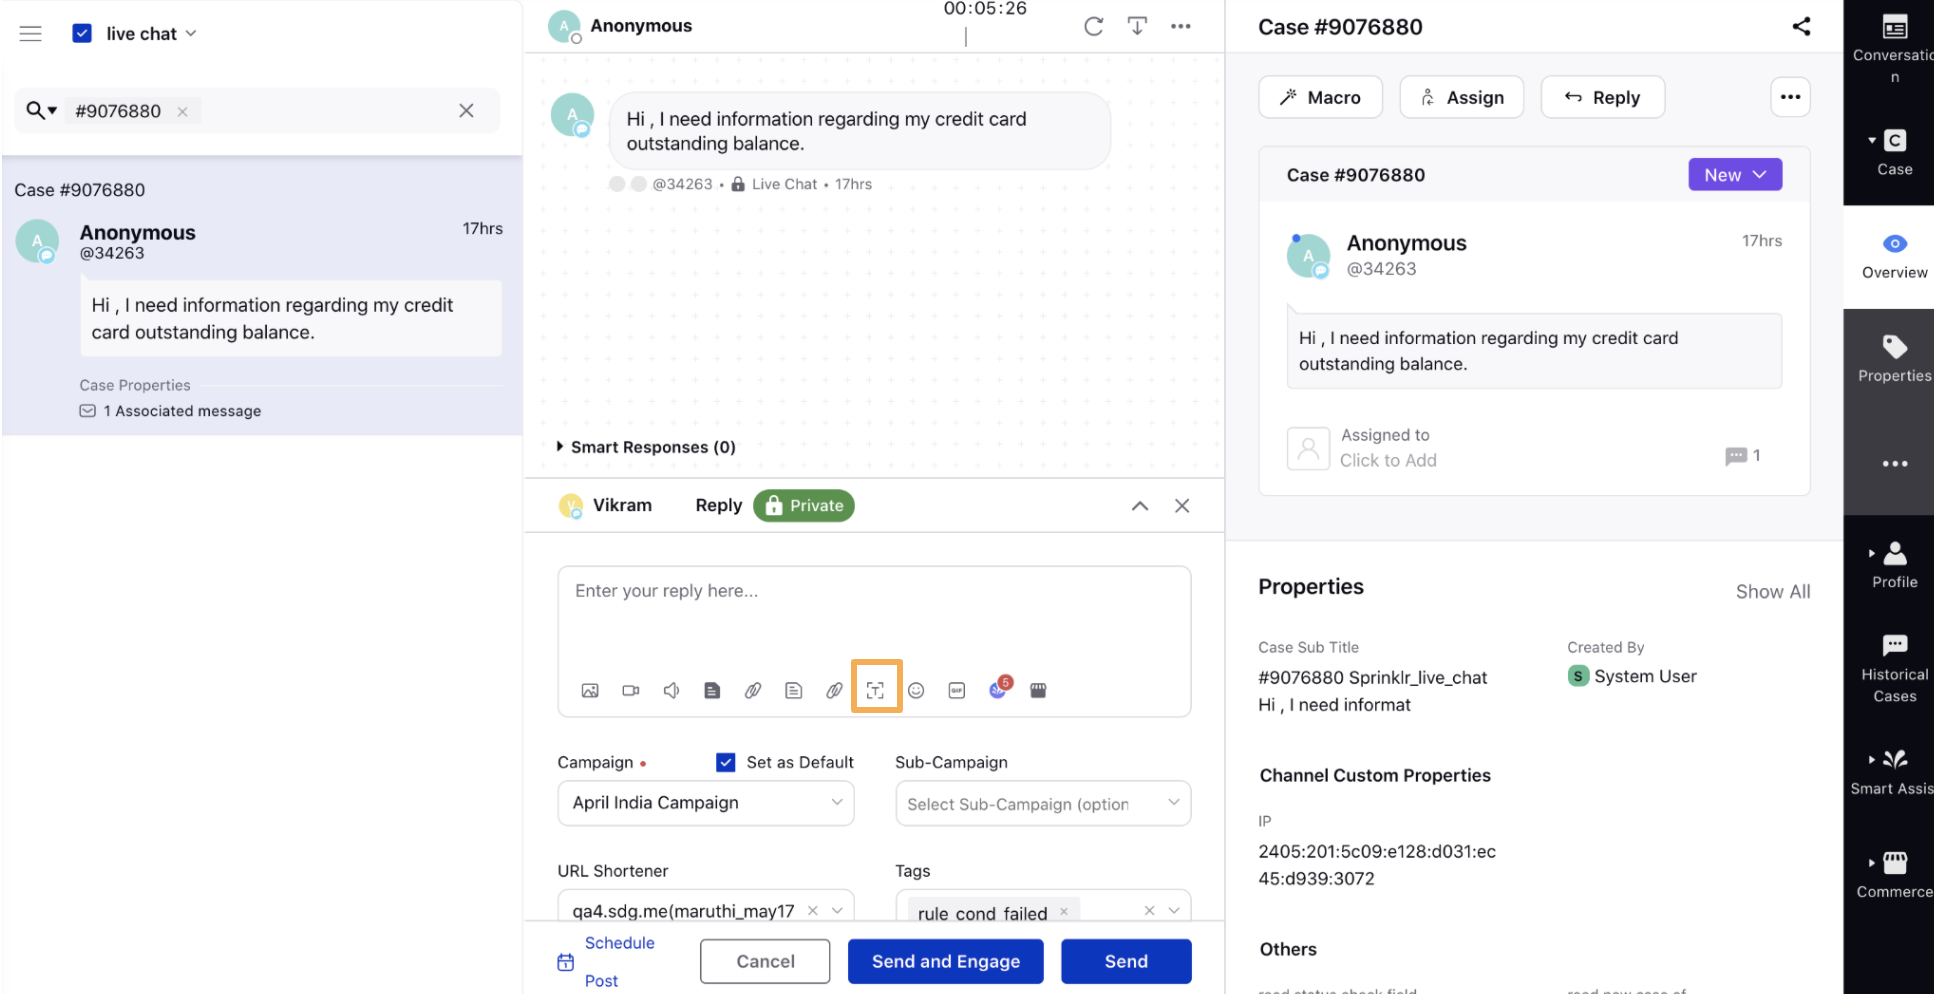
Care Console
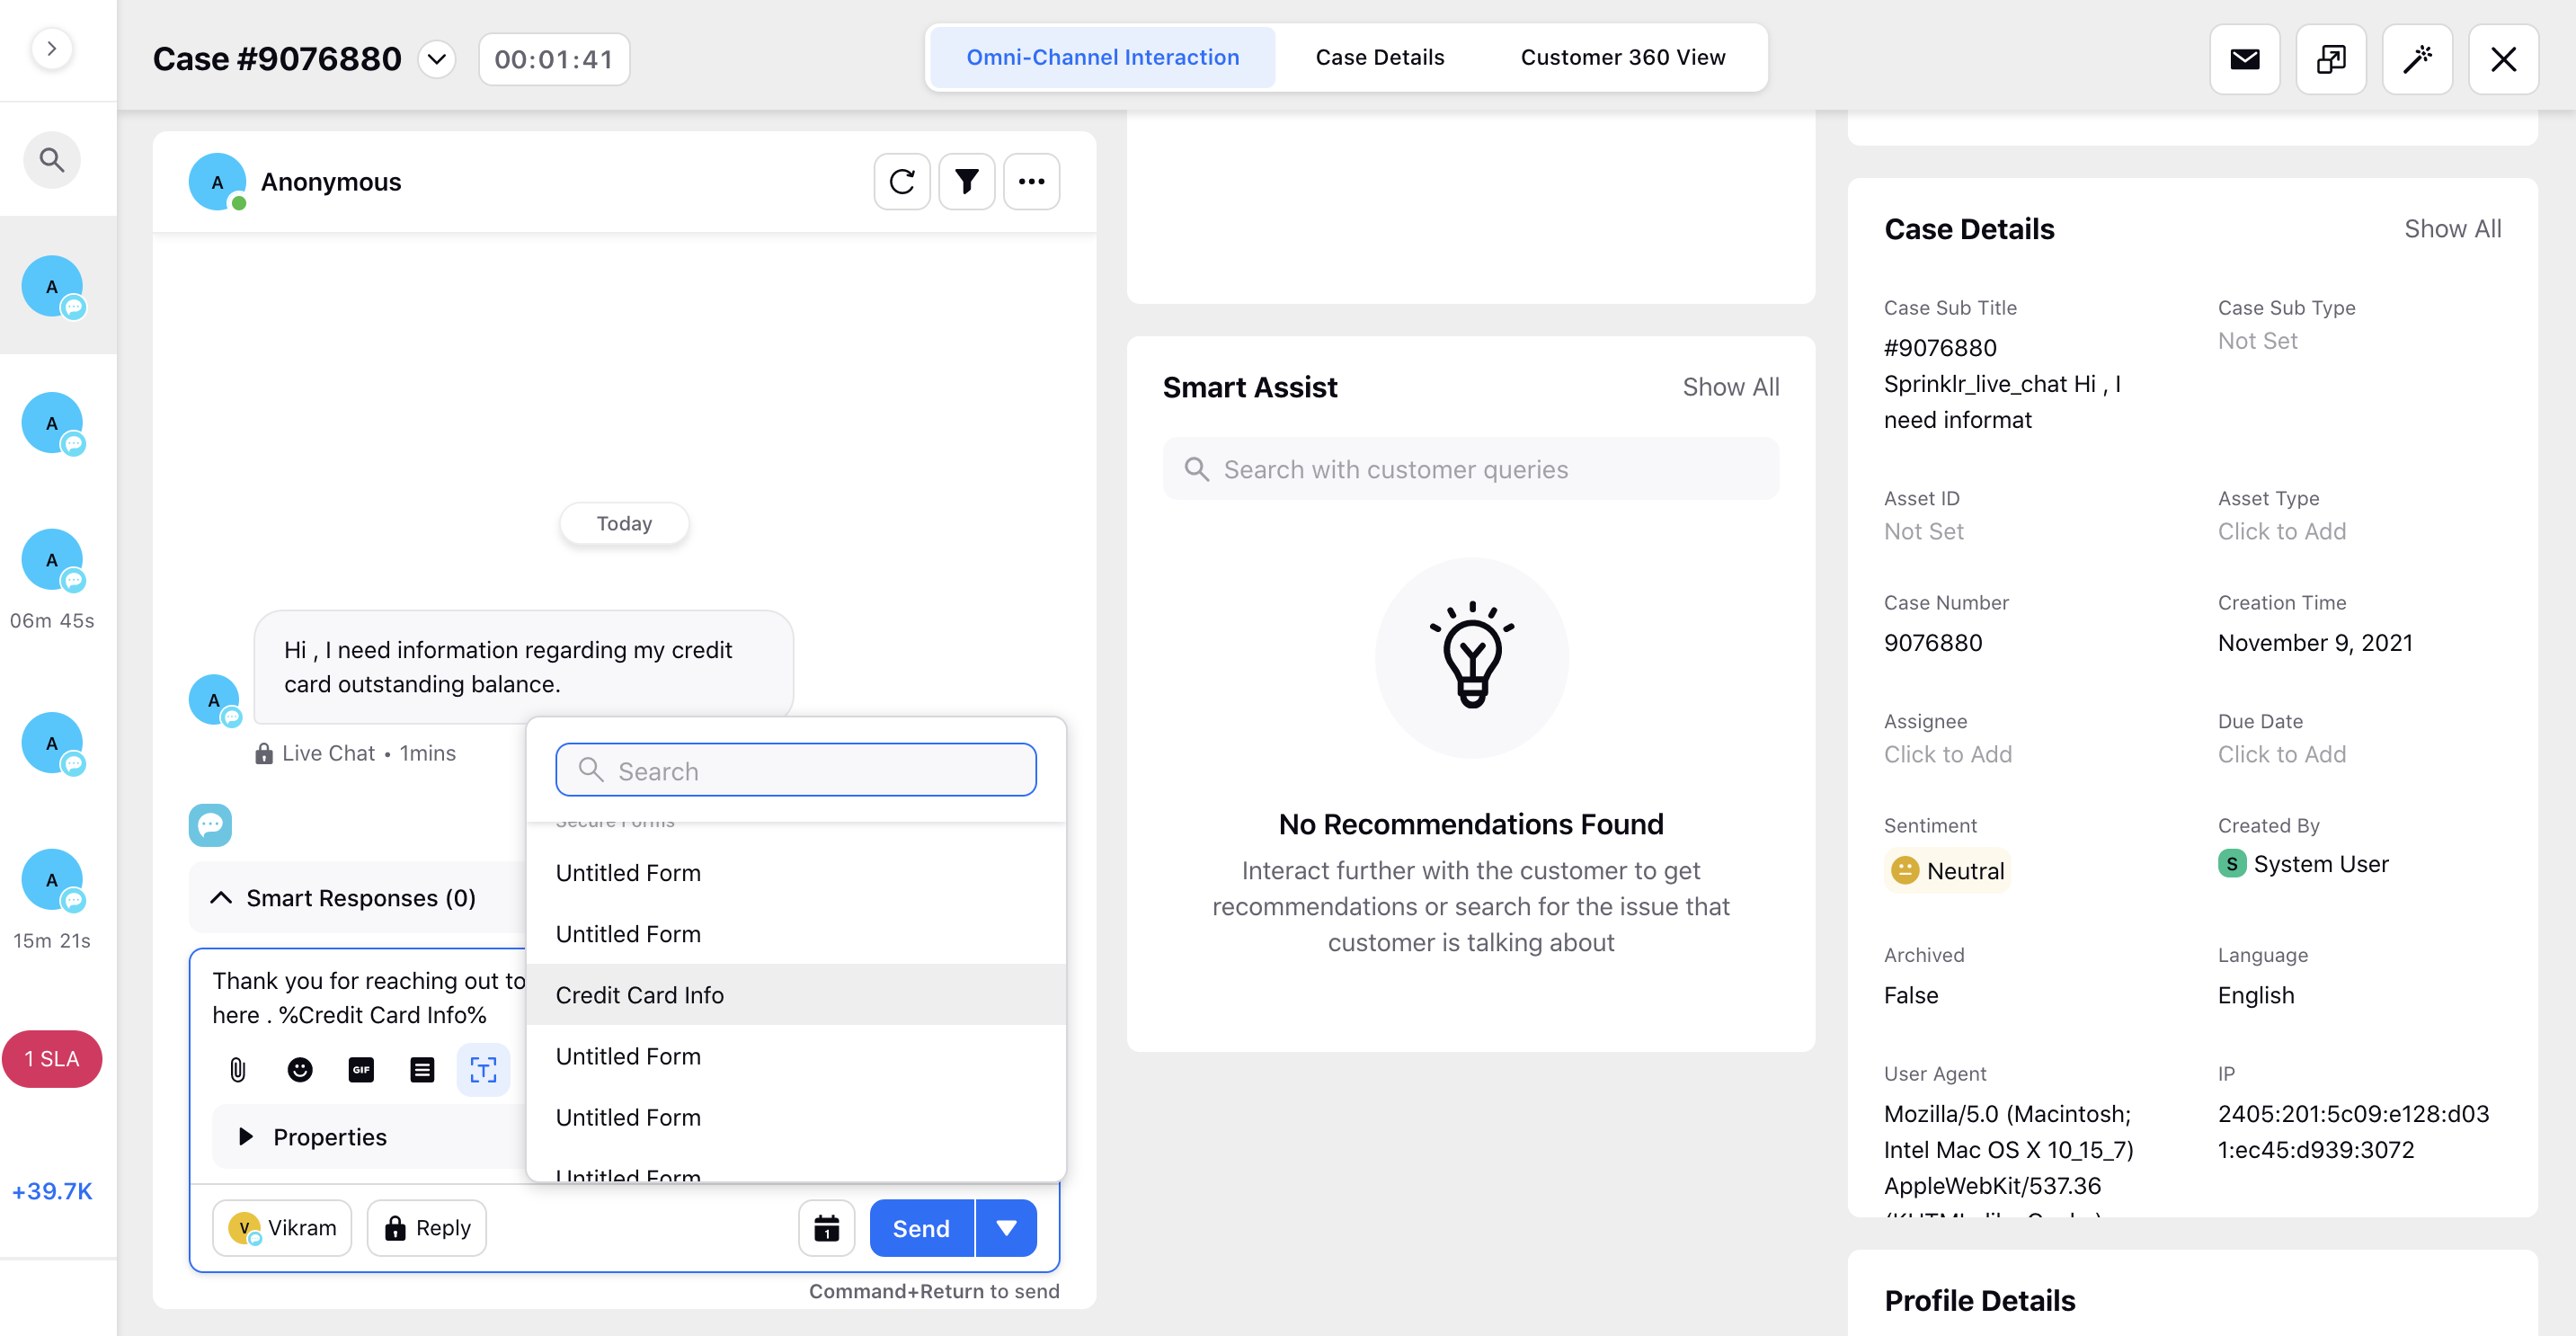
2. Click Send.
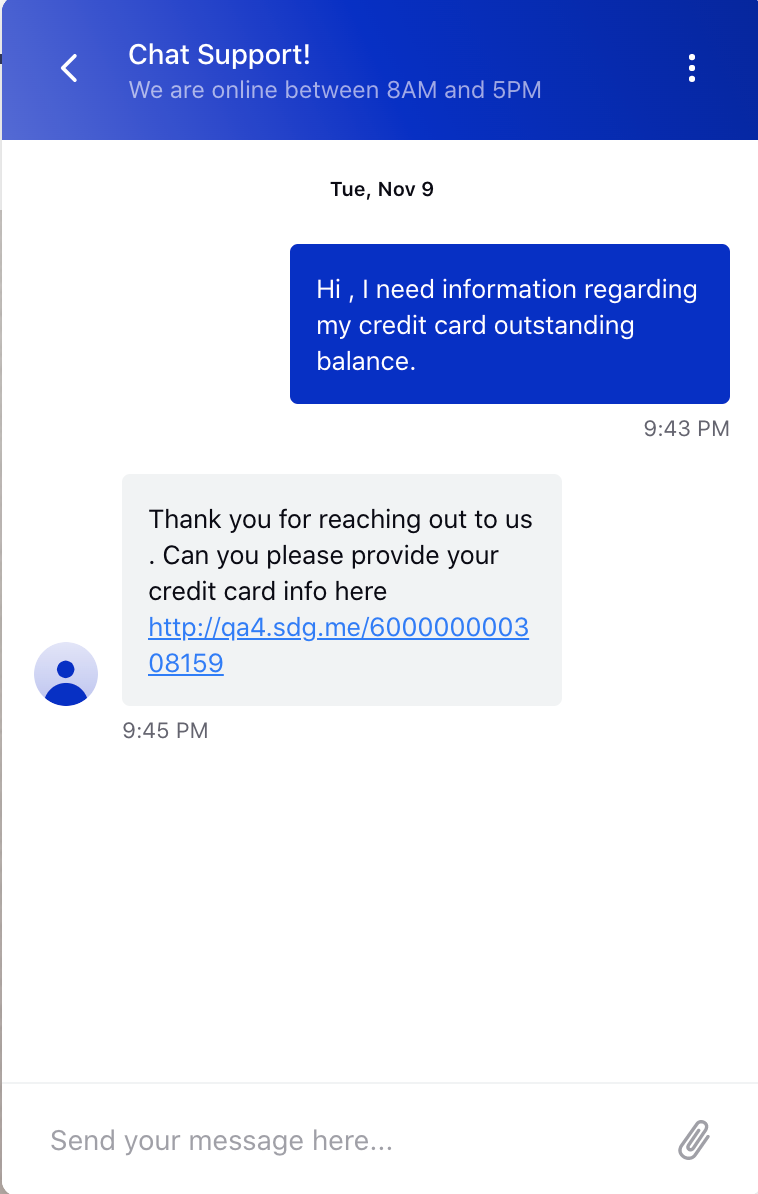
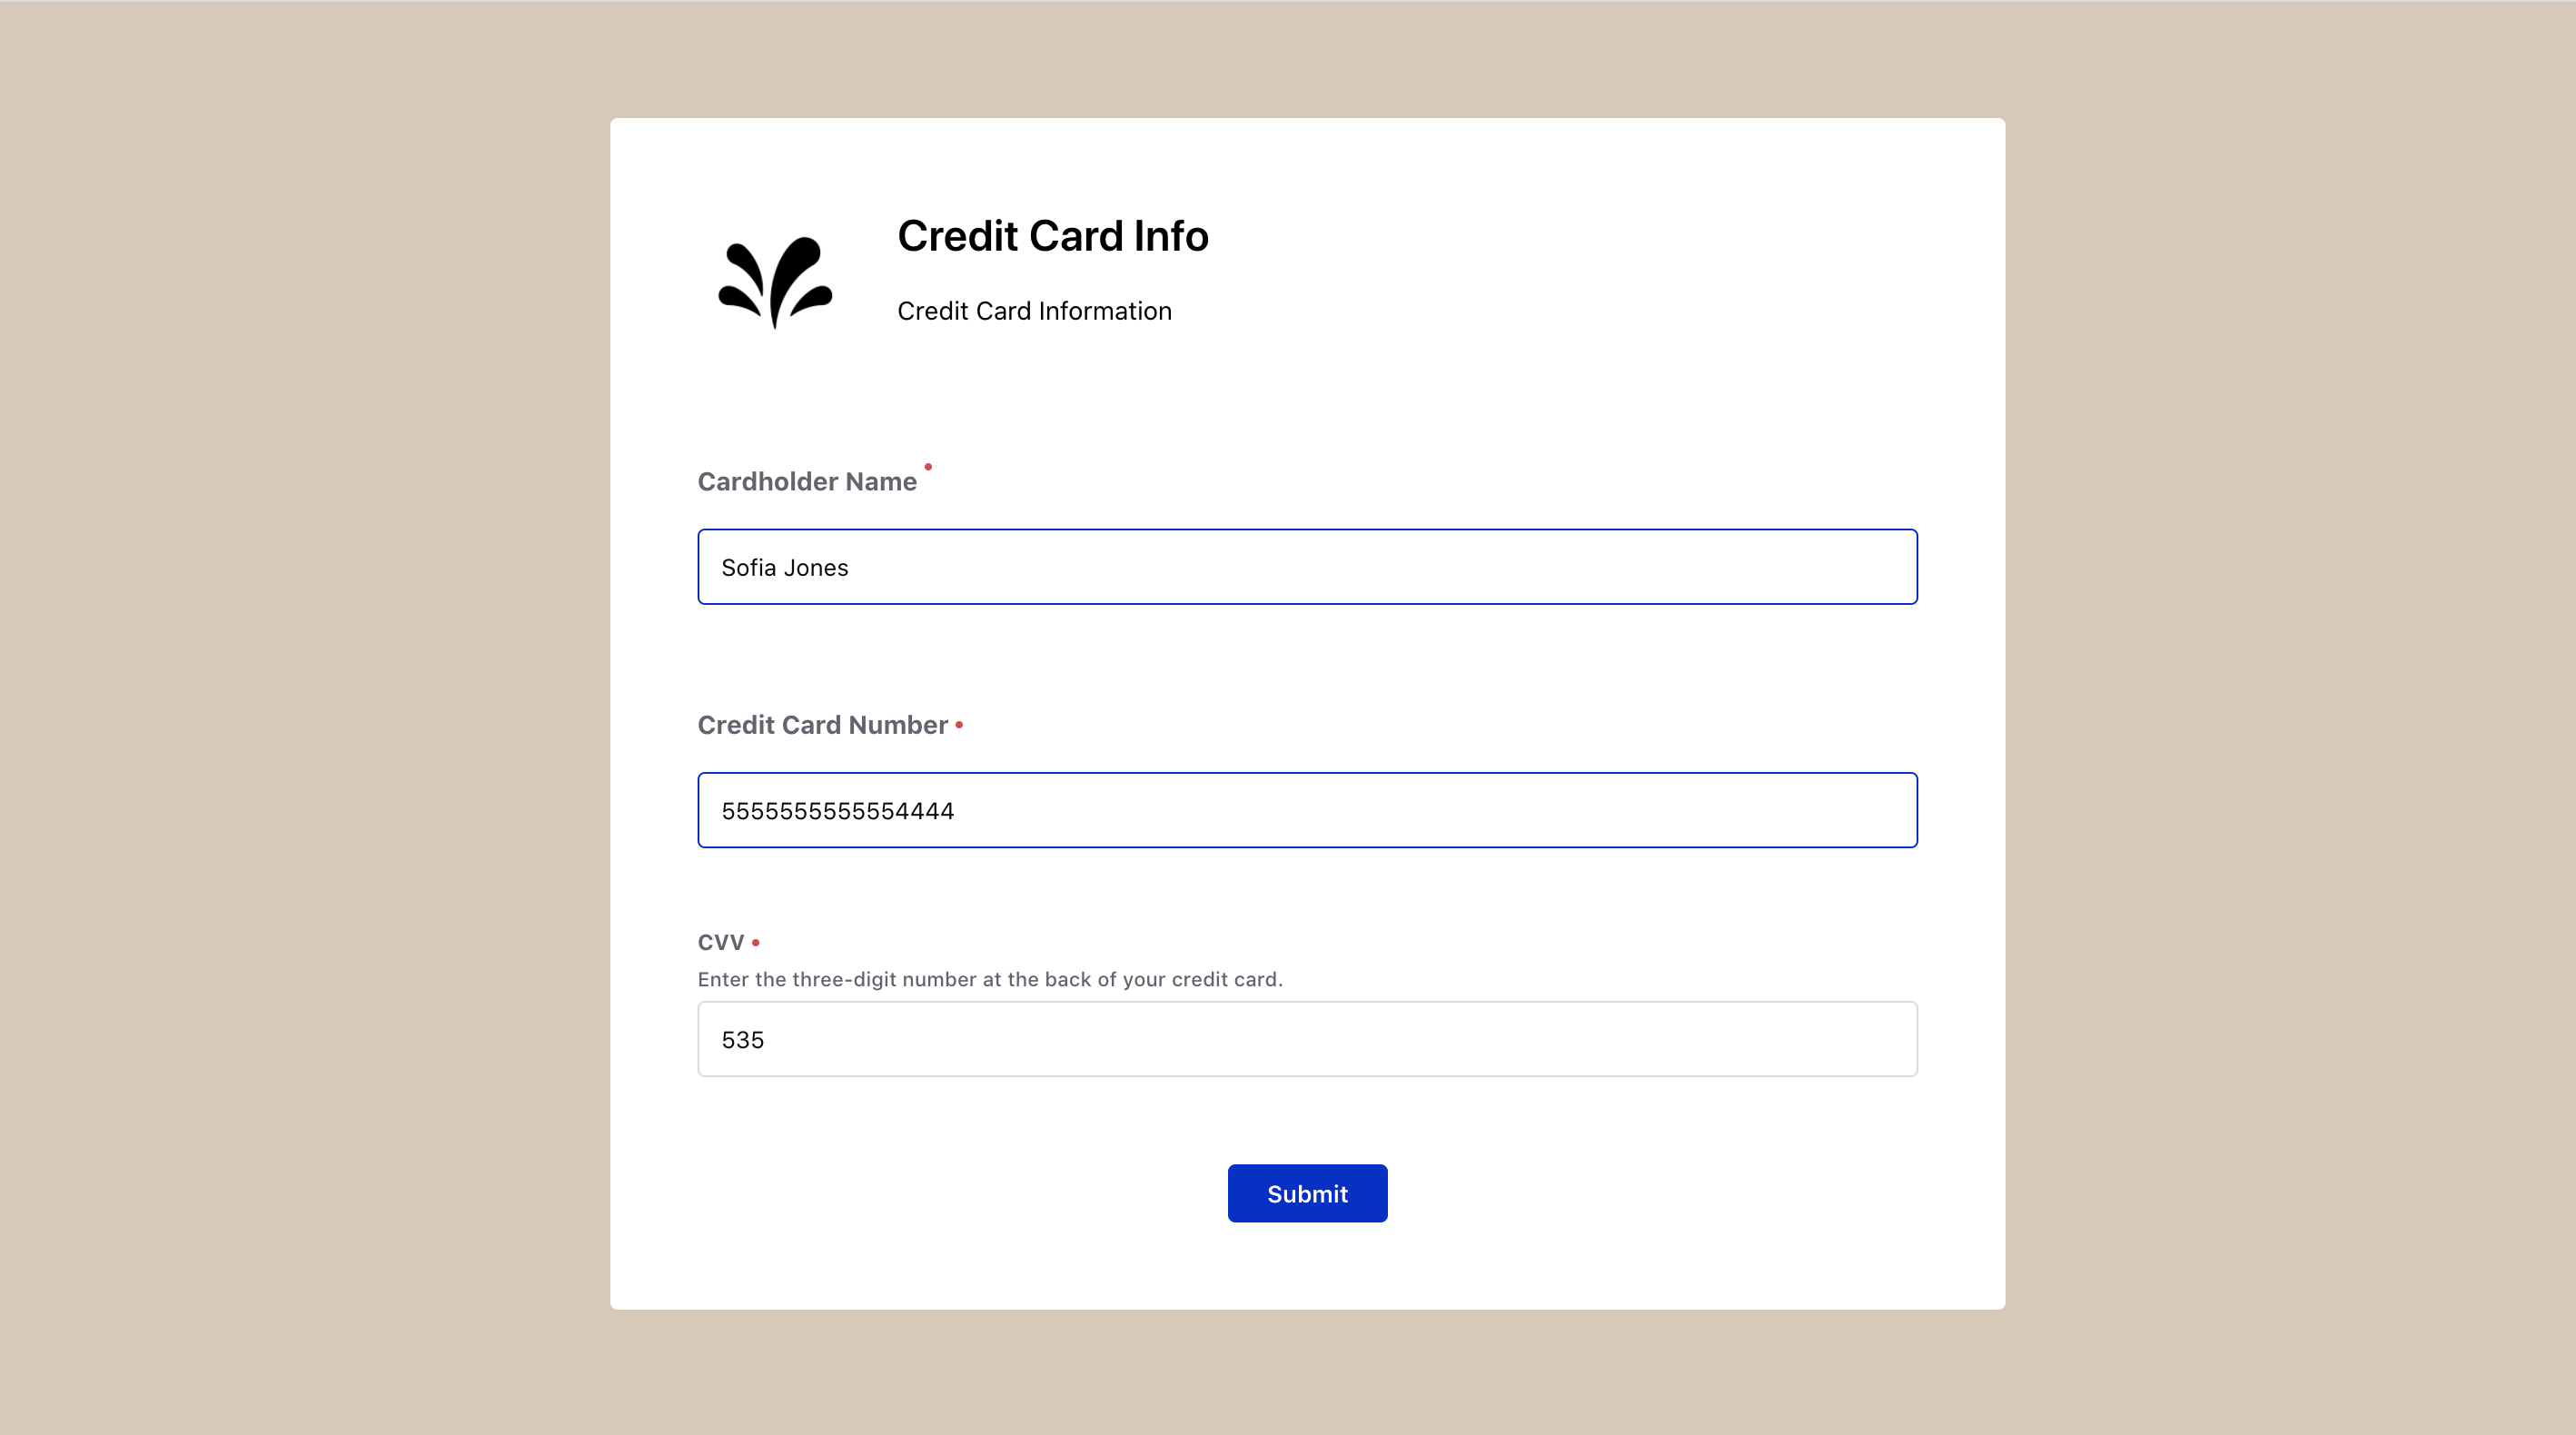
On the selected channel, the customer will receive the link to the secure form, clicking on which will open the secure form in a new window. The form will auto-expire after the specified duration.
To learn more about getting the auto-expire duration set, please work with your success manager. |
To send a Secure Form via Rule Engine
Create a Text asset in Digital Asset Manager and add the following placeholder in the Content field with the desired Secure Form ID and Name.
%%[SECURE_FORMπsecureformid:Secure Form name]
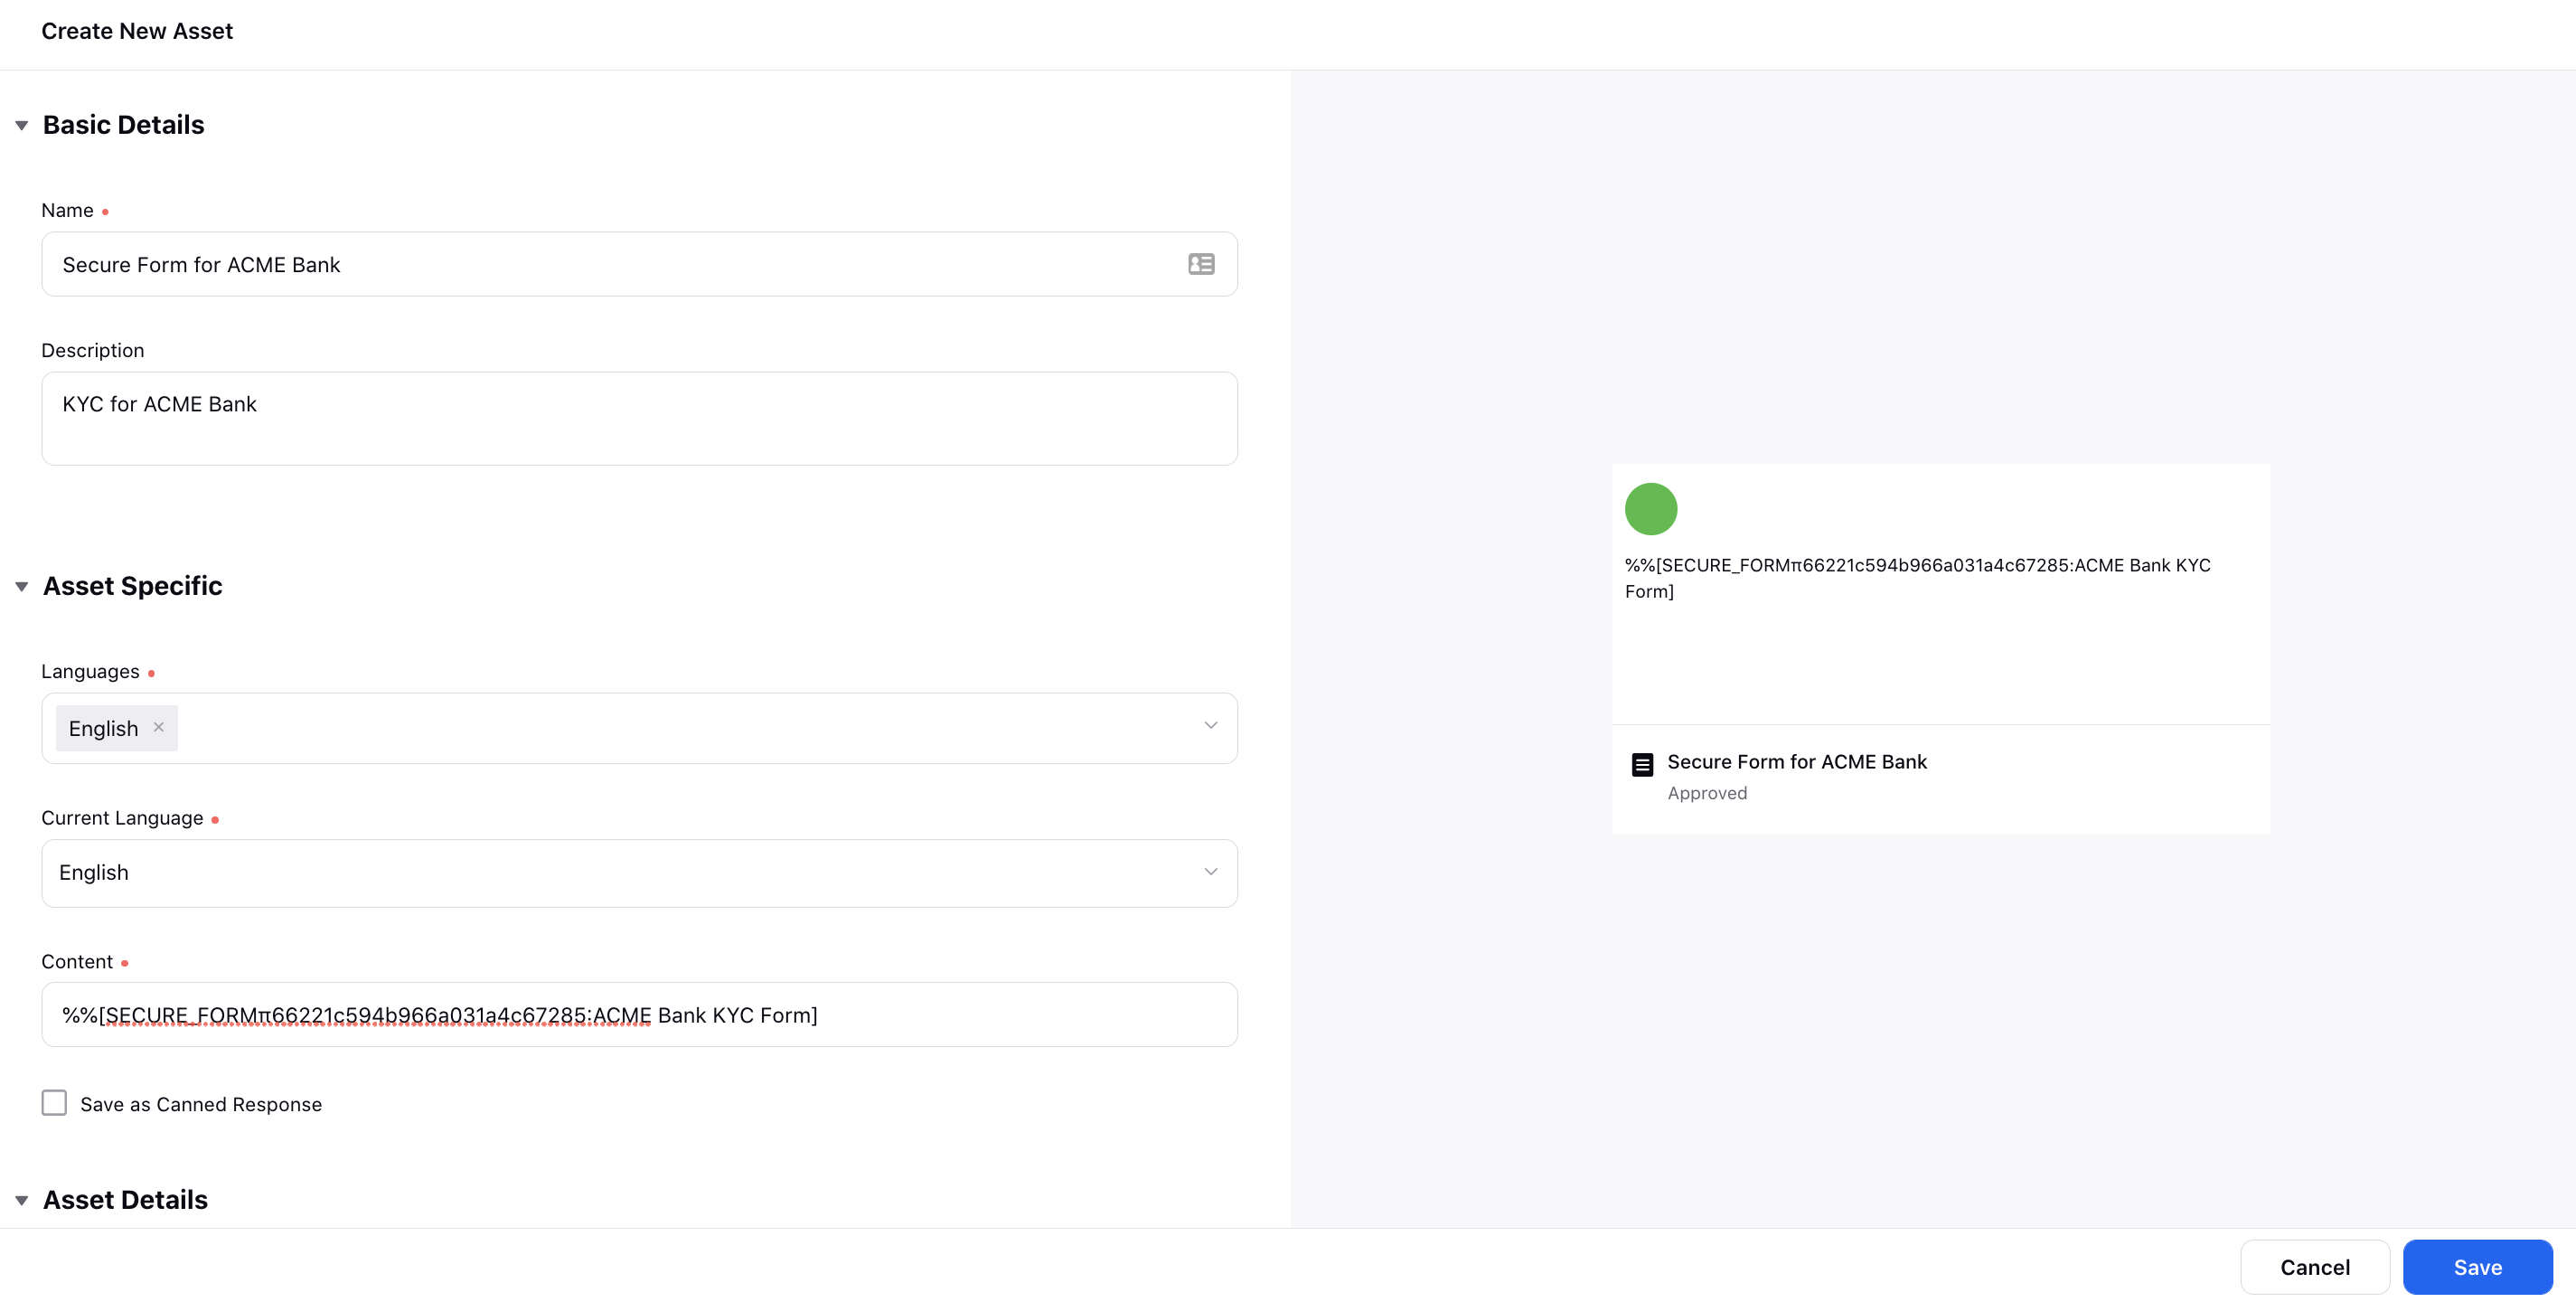
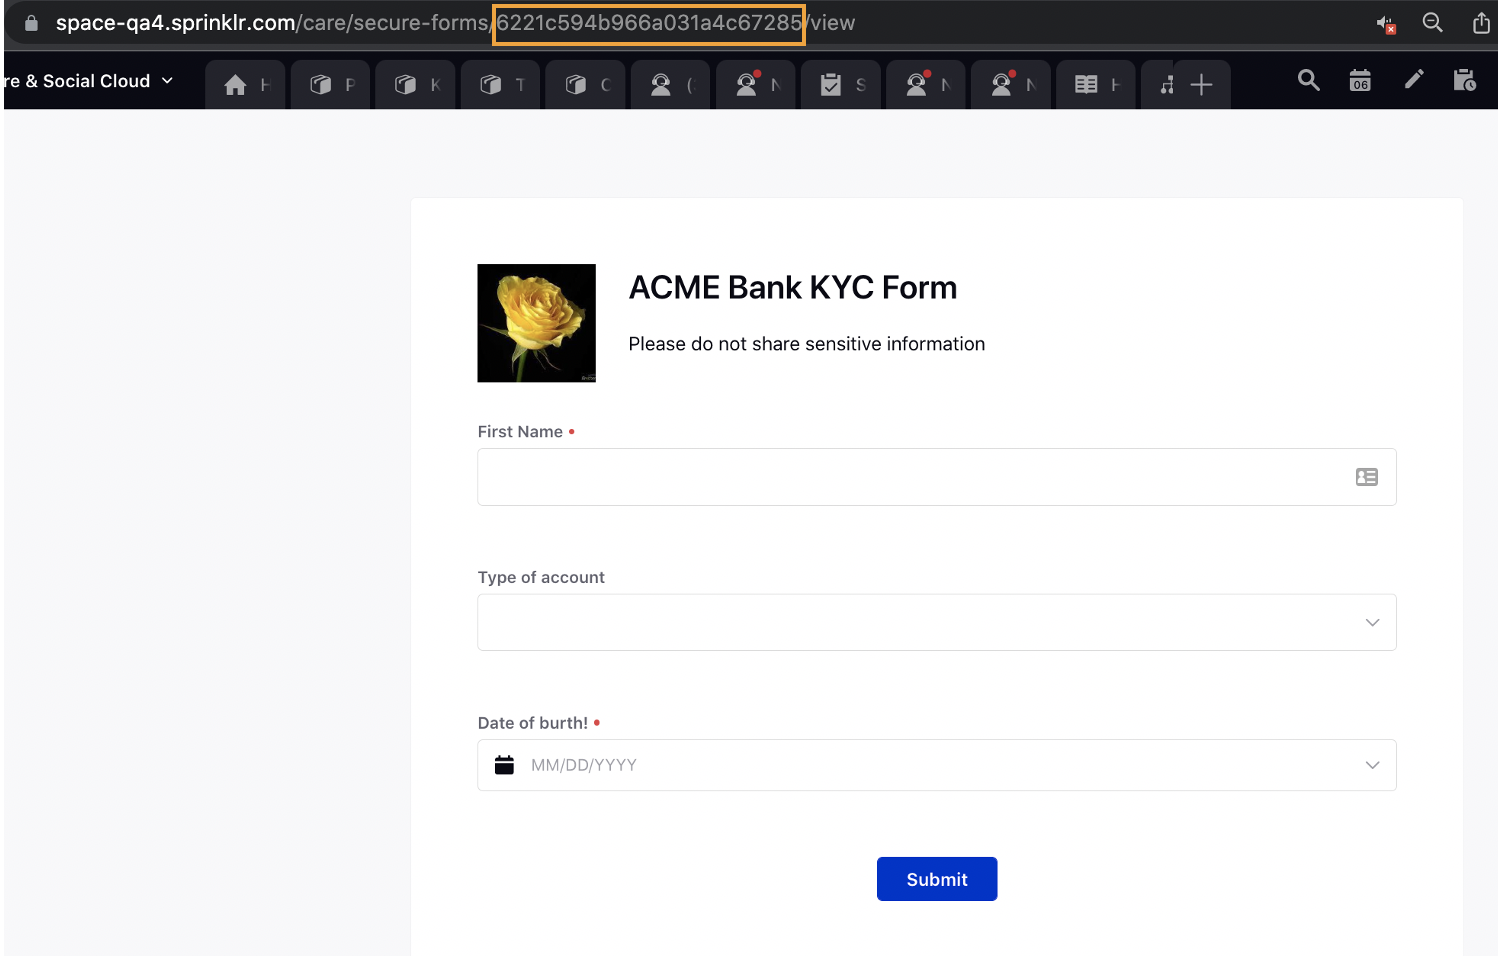
Note: Secure Form ID can be taken from the URL of the form. Open the desired Secure Form in the view or edit mode and copy the ID from the URL as shown below.
|
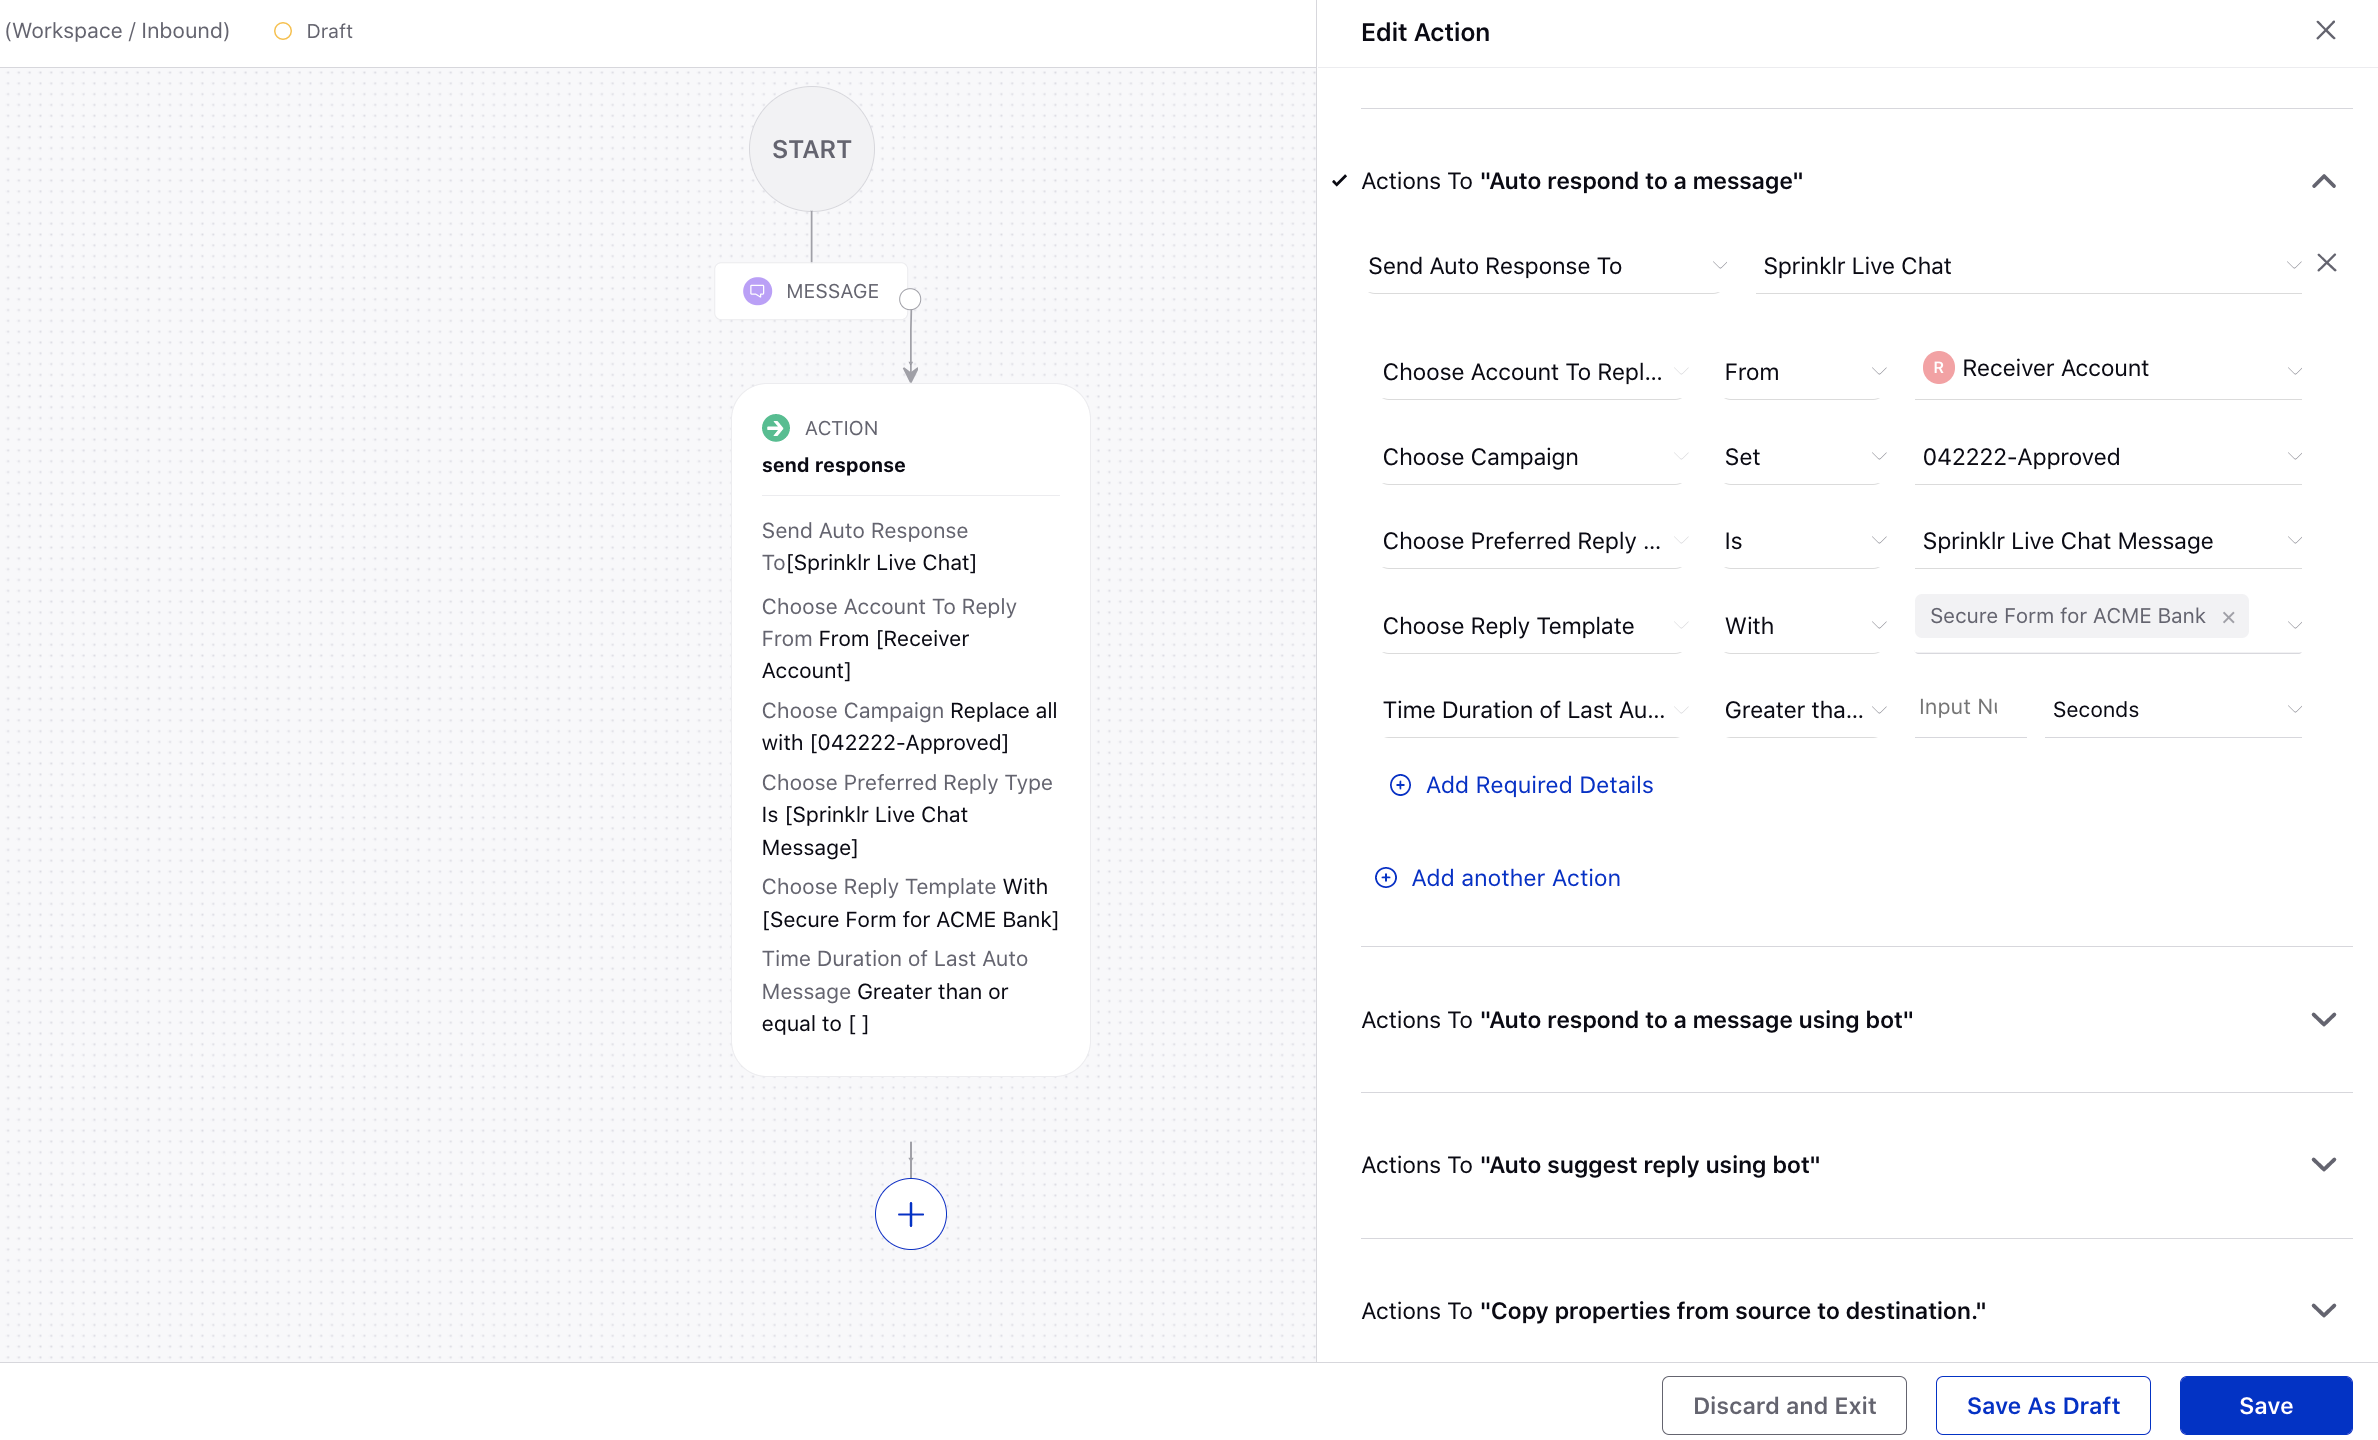
Next, create an inbound auto-response rule in Rule Engine, and select the Reply Template as the Text asset created in Digital Asset Manager.
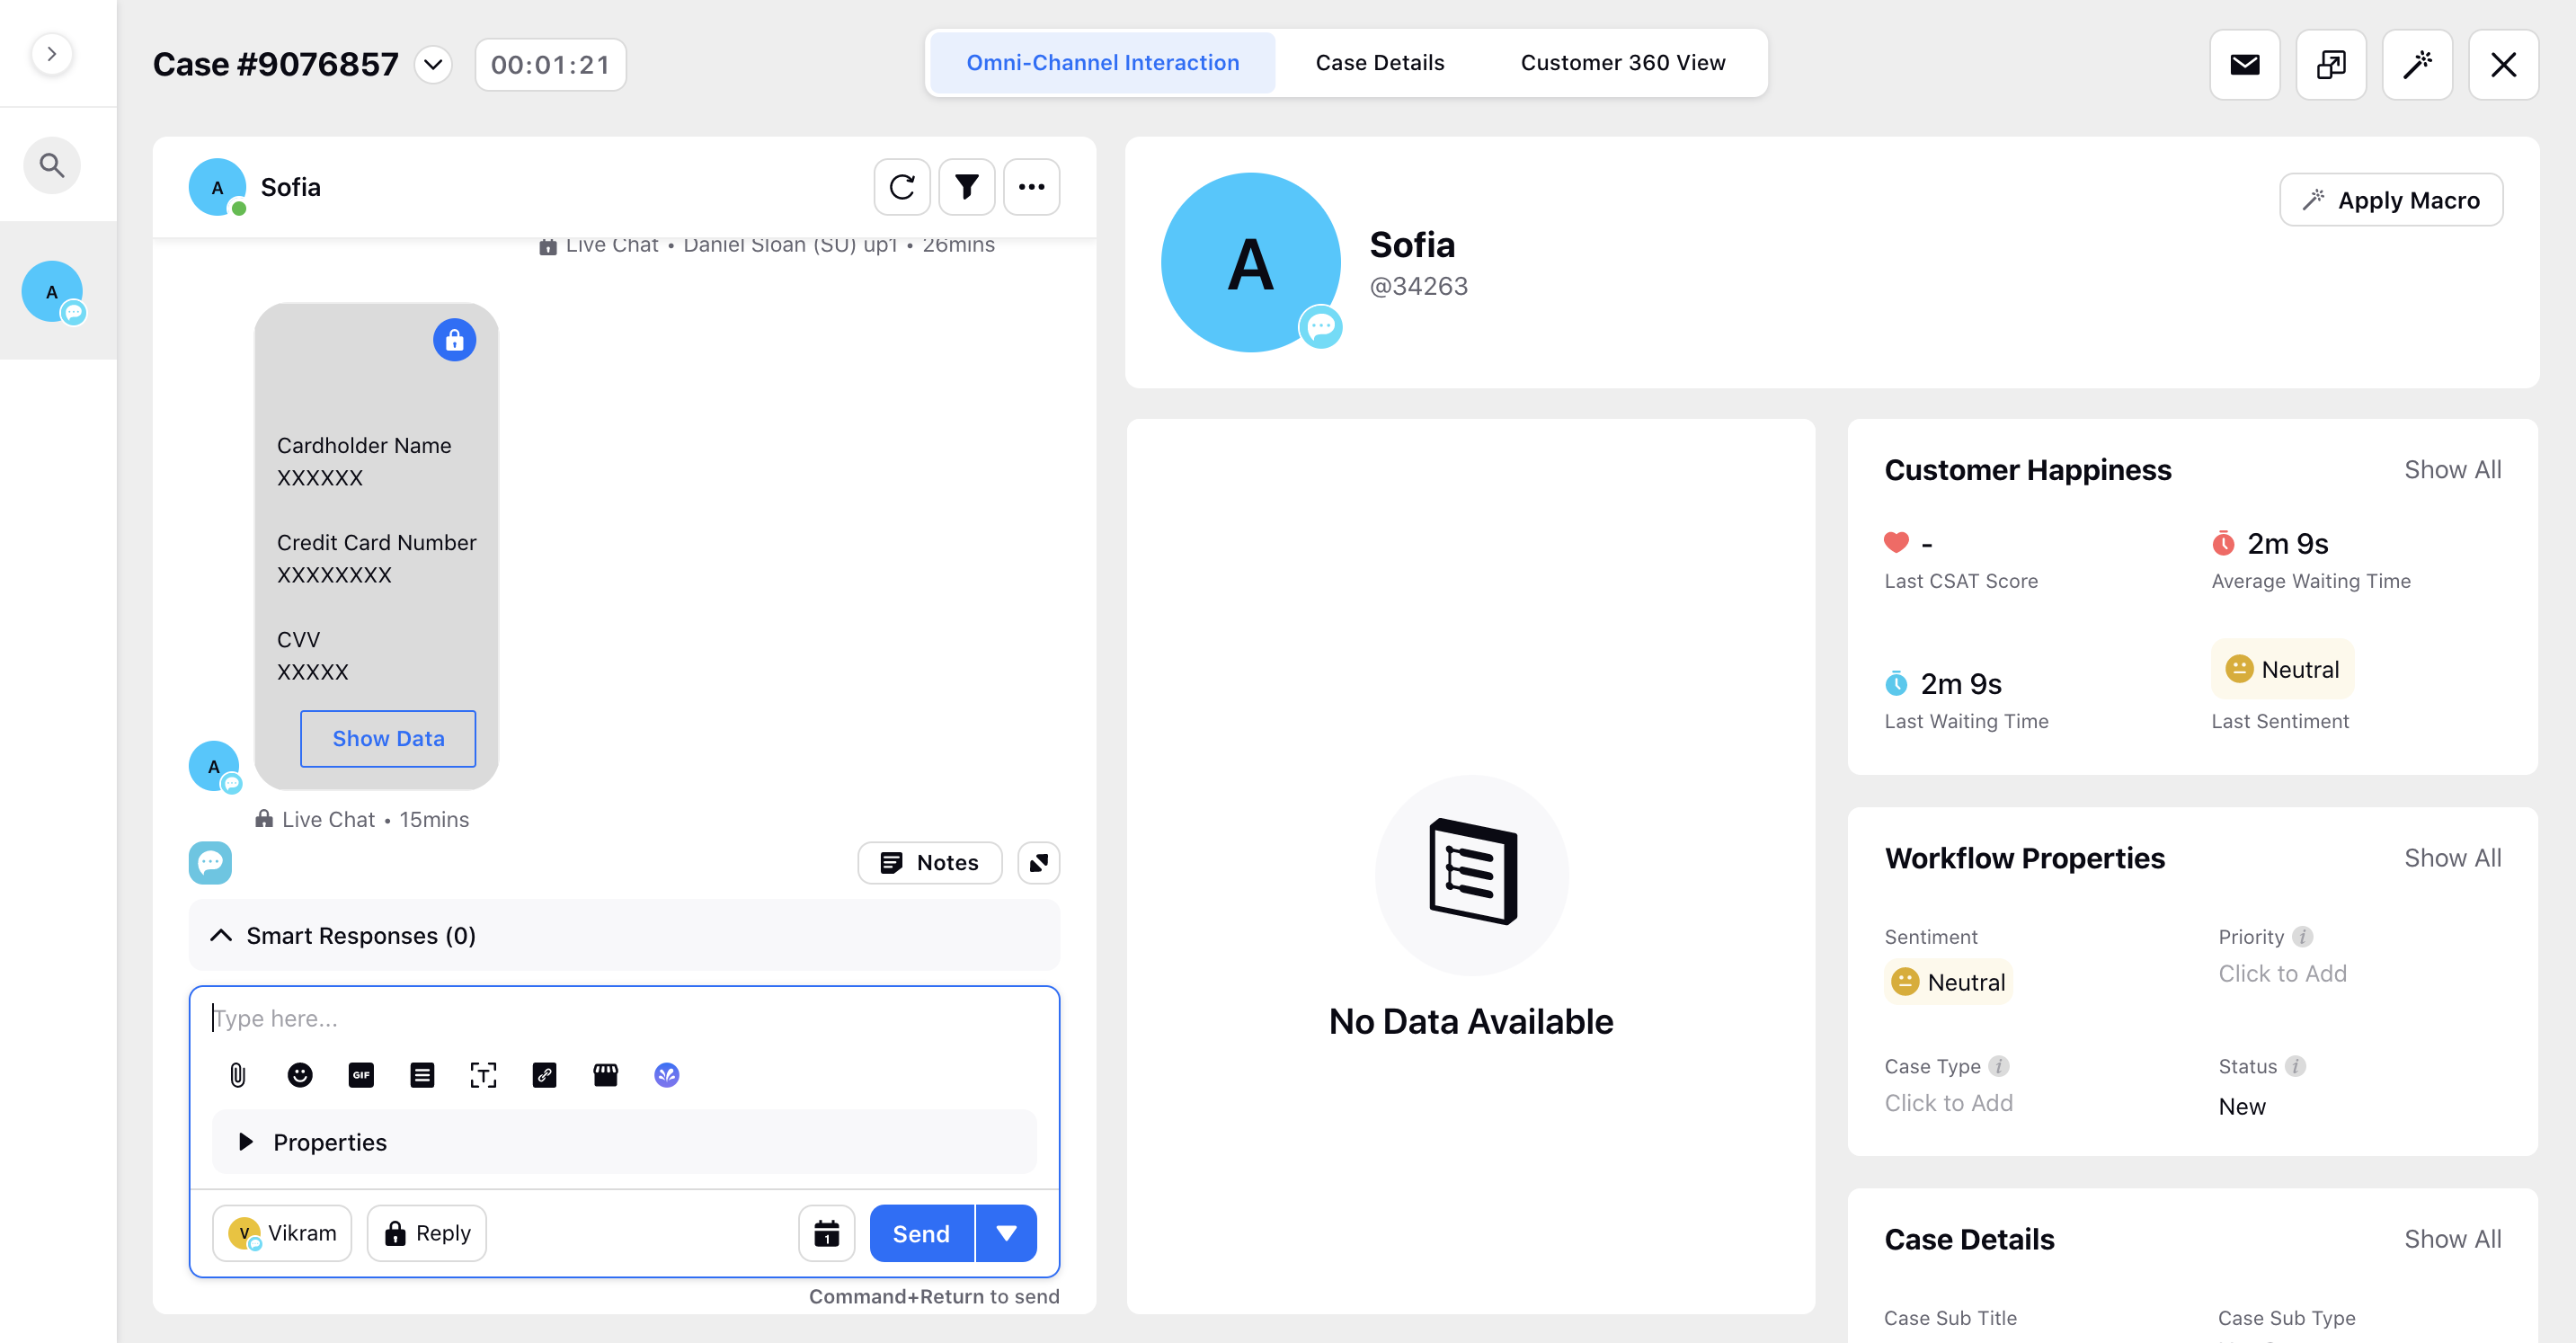
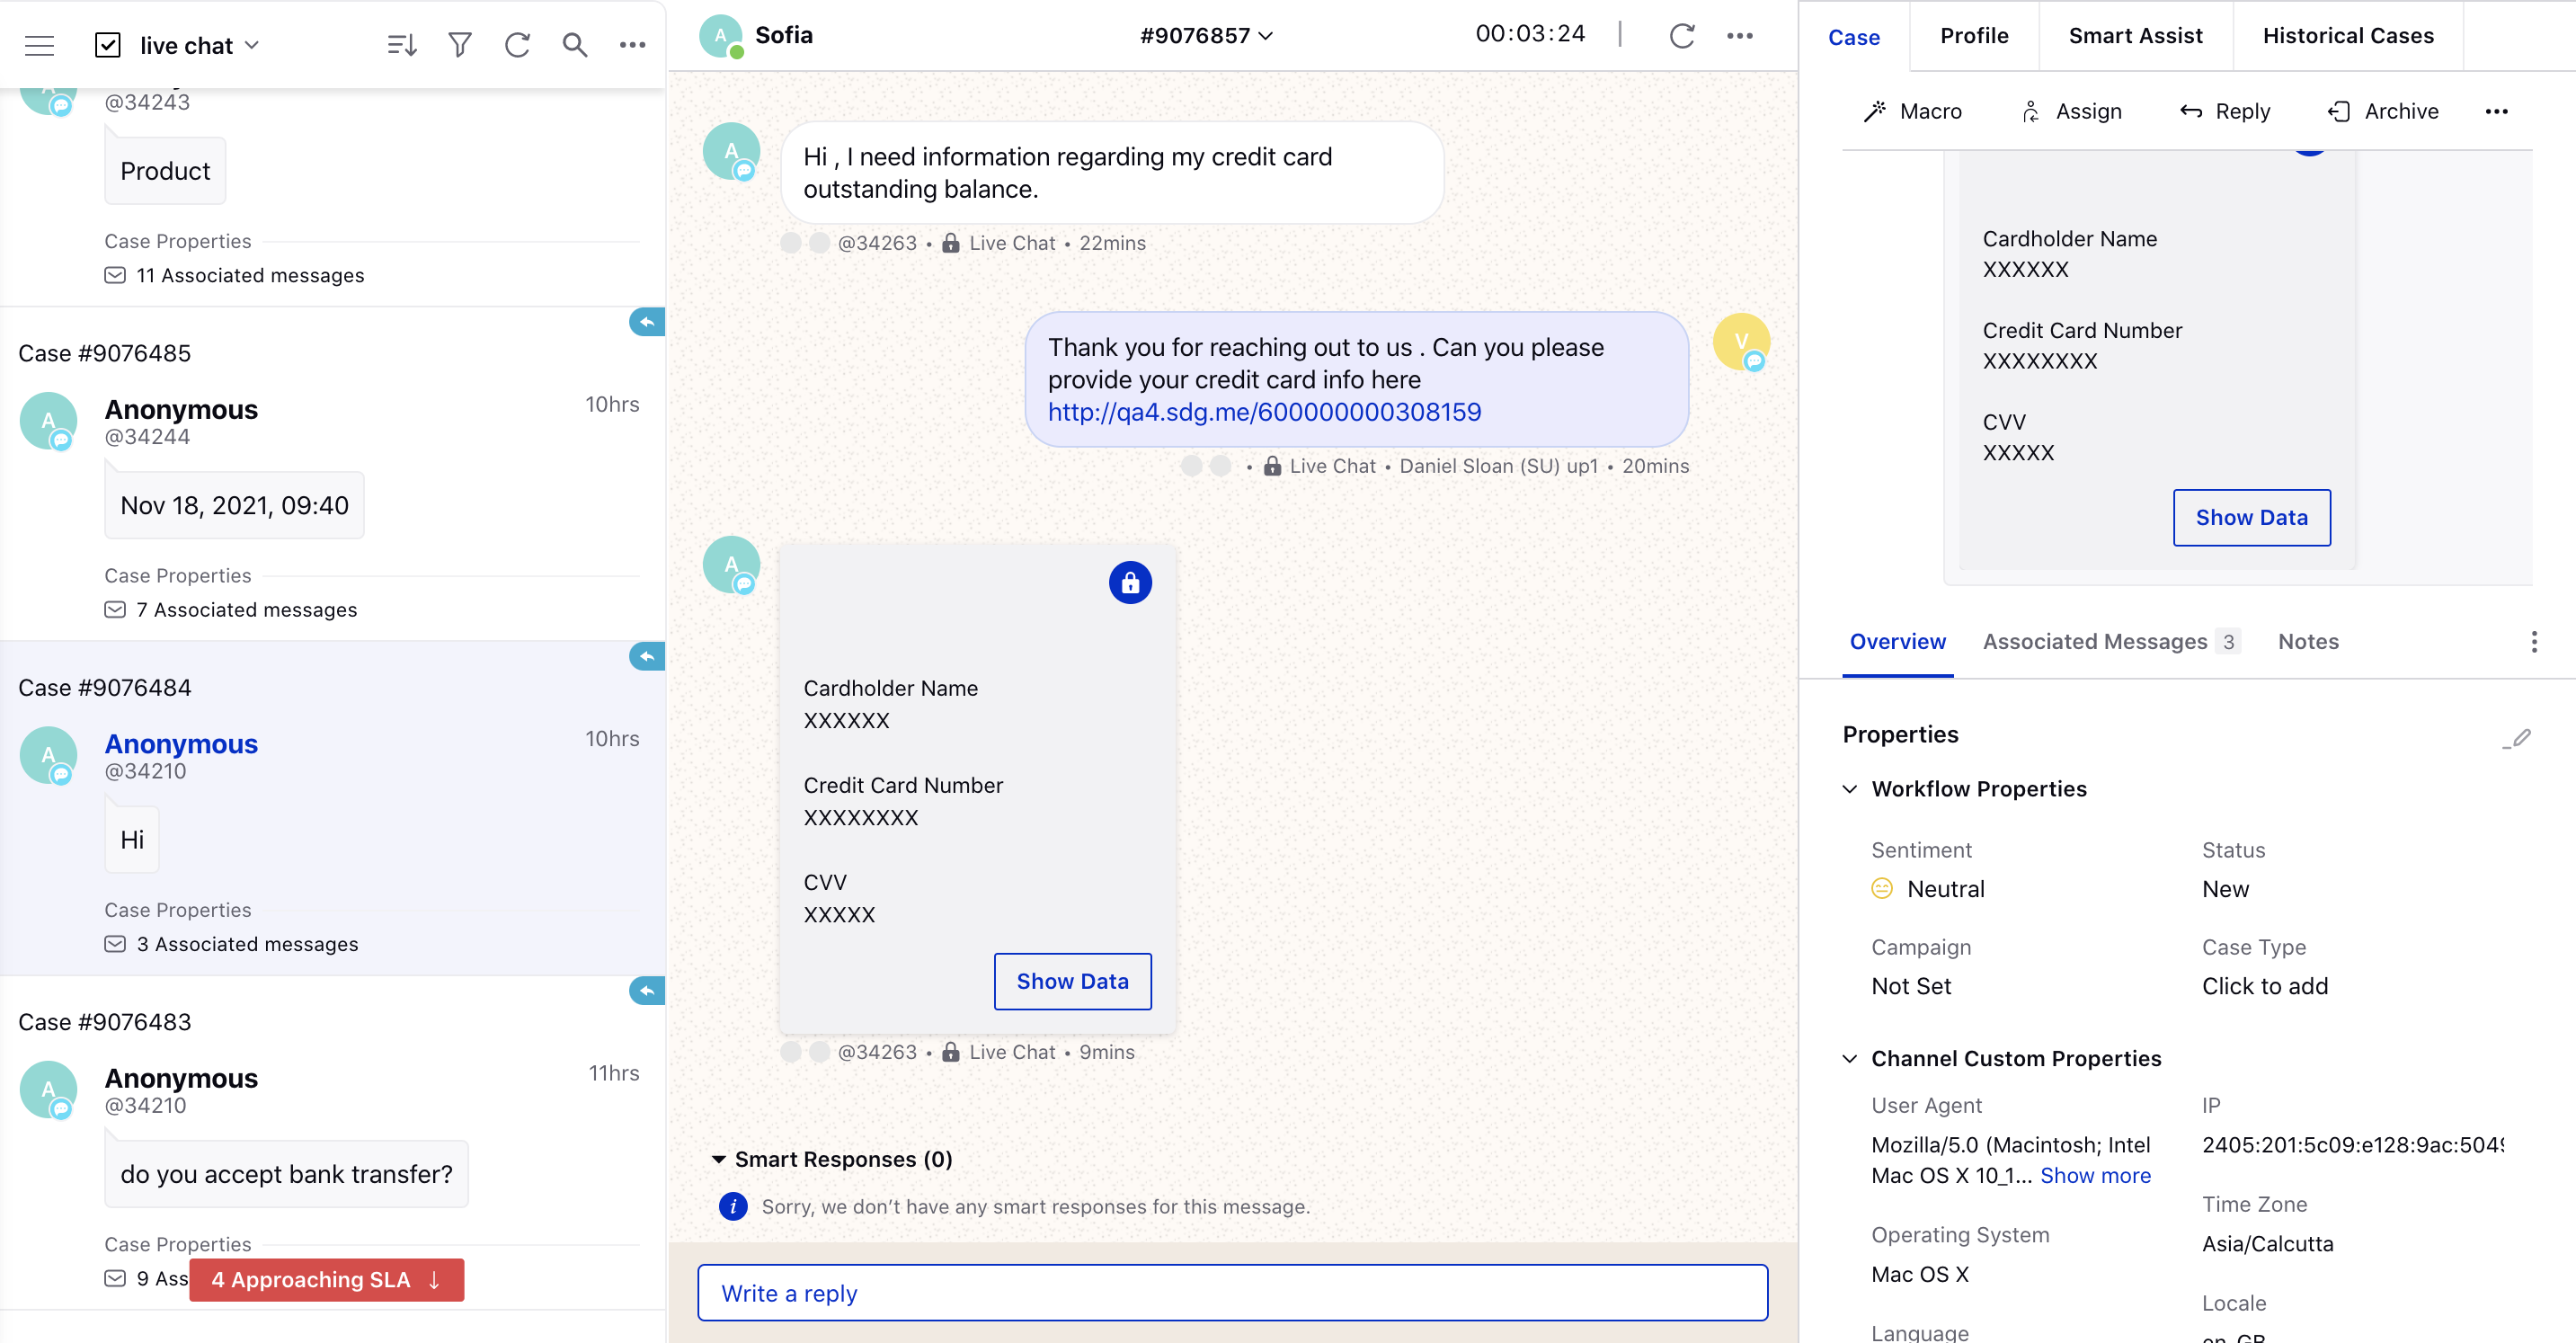
To view submitted data in Agent Console/Care Console
Once the user submits the form, the submitted data will be visible in Agent Console/Care Console. In case of PCI form, the data will be masked by default. The agents can click Show Data to view the data.
The expiry duration of the data for agent accessibility and PCI server storage can be configured as desired. You can configure the expiry duration to commence either after submitting the form or after an agent accesses the information, and the shorter of the two durations will be applicable. To learn more about getting this capability enabled, please work with your Success Manager. |
Agent Console
Care Console