Convert Facebook dark posts into published posts
Updated
Sprinklr allows Facebook Dark Posts that were published in the Sprinklr platform to be converted into published posts at a later time. This capability allows you to make posts public when desired, giving greater flexibility in your workflows. This article will provide you with the details of how to convert Facebook dark posts into published posts. Before jumping into that, we also give a brief on how to create a dark post, pls skip to the next section if needed.
Create a dark post
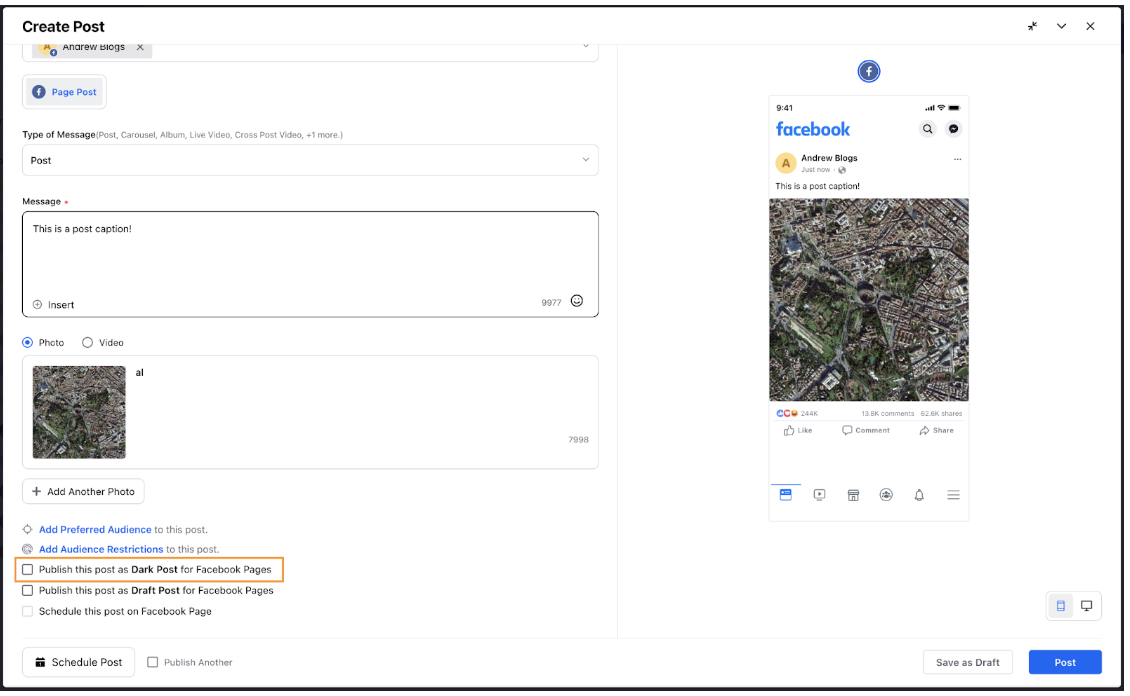
You can create Dark posts while creating an organic Facebook Posts from quick publisher, and check the box Publish as a Dark Post. To know more about post creation, you can check out this article as well: Create a post on Facebook.
You can view the dark posts in the outbound sent column, however, you do not have the option to publish from the outbound Sent column type.
The dark posts can be only published from the inbound column types such as Facebook Post column type.
To ensure that the dark post gets fetched in the inbound column type, you must perform an engagement in the post and then the dark post gets fetched in the inbound column.
Convert dark posts into published posts
Click the New Tab icon in Sprinklr. Under the Sprinklr Social tab, click Engagement Dashboards within Engage.
In the Engagement Dashboard, click Add Column in the top right corner to create a new column.
Select Facebook from the Add New Column window. You can also search for it in the search bar above.
In the Add New Facebook Column window, select Post as a column to add from the given options.
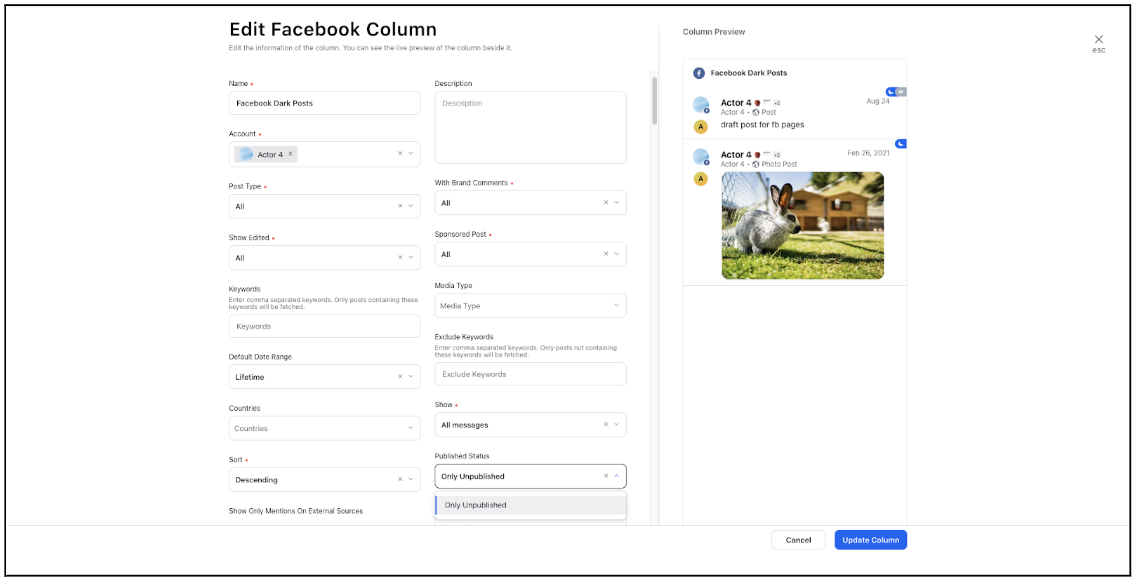
Enter the Basic Information for your column. Note that the preview of your column will render on the right-hand pane.
Under the Published Status, select Only Unpublished from the drop-down menu.
Enter Workflow Properties as desired. Workflow properties refer to the properties applied in Sprinklr, either automatically or manually, that determine the message's workflow status, user assignment, priority, Spam designation, and sentiment.
Provide the Custom Properties as desired. Configuring additional properties in an Engagement Dashboard column, you can specify messages to include or exclude based on the properties that have been applied to the message.
After you've provided all the details for your column, click Create Column in the bottom right corner to create a new column. Upon creation, your column will be available in your current dashboard for you to engage with. For more information on engagement capabilities for the different Facebook account types, see Engagement in Facebook Capabilities and Limitations.
Next, in the Engagement Dashboards, select the Message where you want to publish the Facebook Dark Post, hover the Options icon, in the bottom right corner of the message and select the Publish option. The Dark Post will become a published post.
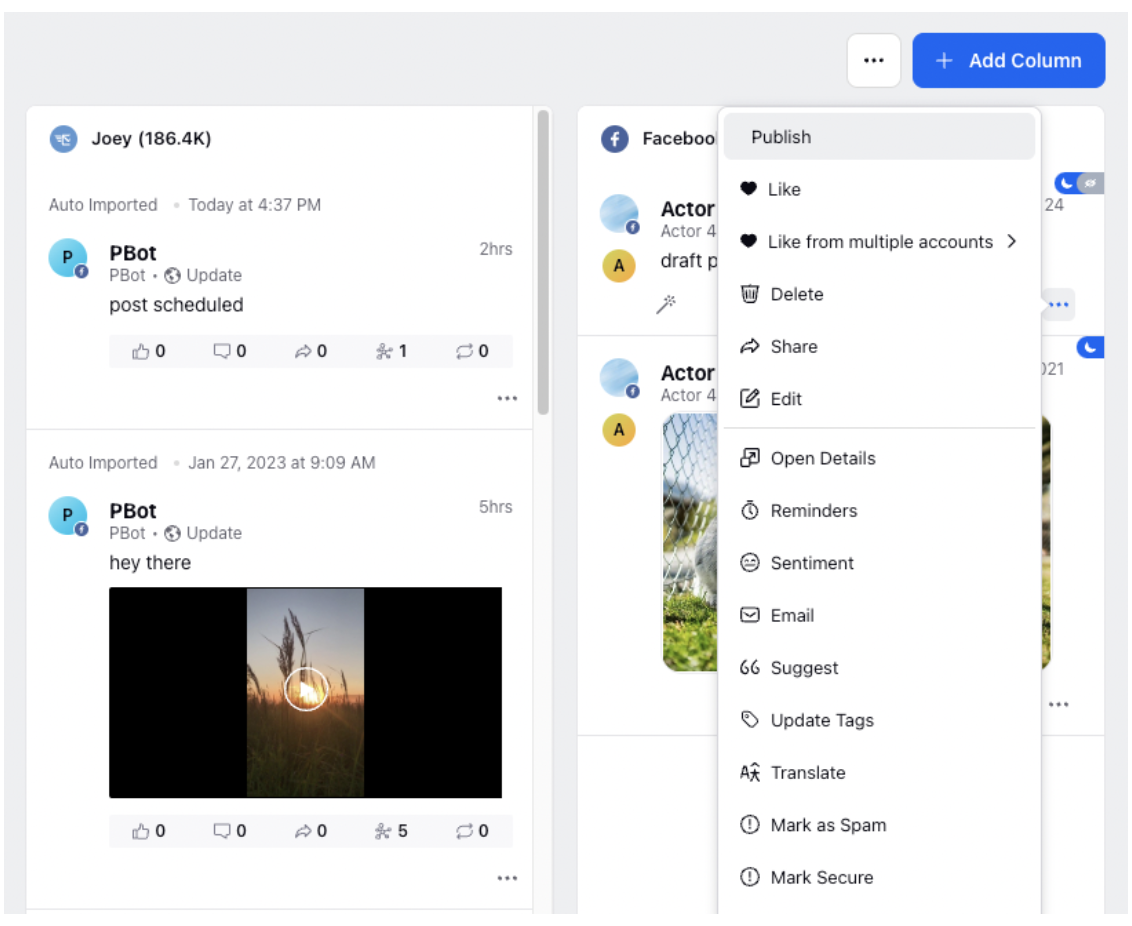
If you wish to make any changes before publishing it, hover the Options icon, in the bottom right corner of the message and select the Edit, and the post will open up in the Quick publisher window for you to edit and save.