Create and Publish Emails via Quick Publisher
Updated
Sprinklr Quick Publisher allows users to quickly create and send emails without having to navigate through the platform, you can send an email to multiple recipients defined in To, CC, and BCC fields. When the recipients reply, their reply will be sent to other recipients too and will get associated with the same case.
To Create & Publish an Email
Click the Quick Publish icon
in the top right corner of the top navigation bar and select Create Post.
On the Create Post window, click the Maximize icon in the top right corner to open the expanded Create Post window.
If you wish, you can click the Minimize icon again to scale down the Create Post window.
Note
Quick Publisher retains the last view you used to publish a post.
On the Create Post window, search and select the required Email Account(s) from the Select Accounts field. You can also use Advanced Search to narrow down your searches by a series of different filters.
Tip
|
5. Once you have selected the Account you would like to publish to, enter the content for the post.
6. Next, choose Email Type either as Standard Email or Bulk Email.
Using Standard Email, you can send an email to multiple recipients defined in To, CC, and BCC fields. The recipients will receive the email
as a normal email. When they reply, their reply will be sent to other recipients. There will be a single case created for every recipient in the
To, CC, and BCC fields and the replies from them will also get associated with the same case.
7. Using Bulk Email, you can send an email to several of your contacts at once. The recipients will receive the email as a normal email. When they reply, their reply will not be sent to other recipients. There will be a new case created for every recipient in the To field and the replies from them will also get associated with the respective cases.
8. The preview of the post will render on the right pane. Also, for the scale down version, you can click the
Preview icon in the top right corner of the Create Post window.
Tip You can see a live preview simultaneously while you type, insert assets or make any changes on your post in the right pane. By default, the Mobile preview is enabled in the right pane and you can always change it to Desktop preview at your convenience. Note that the Mobile preview is not available for Email. |
9. Enter the recipients in the To field. For Standard Email, you can also add the recipients in the Cc and Bcc fields.
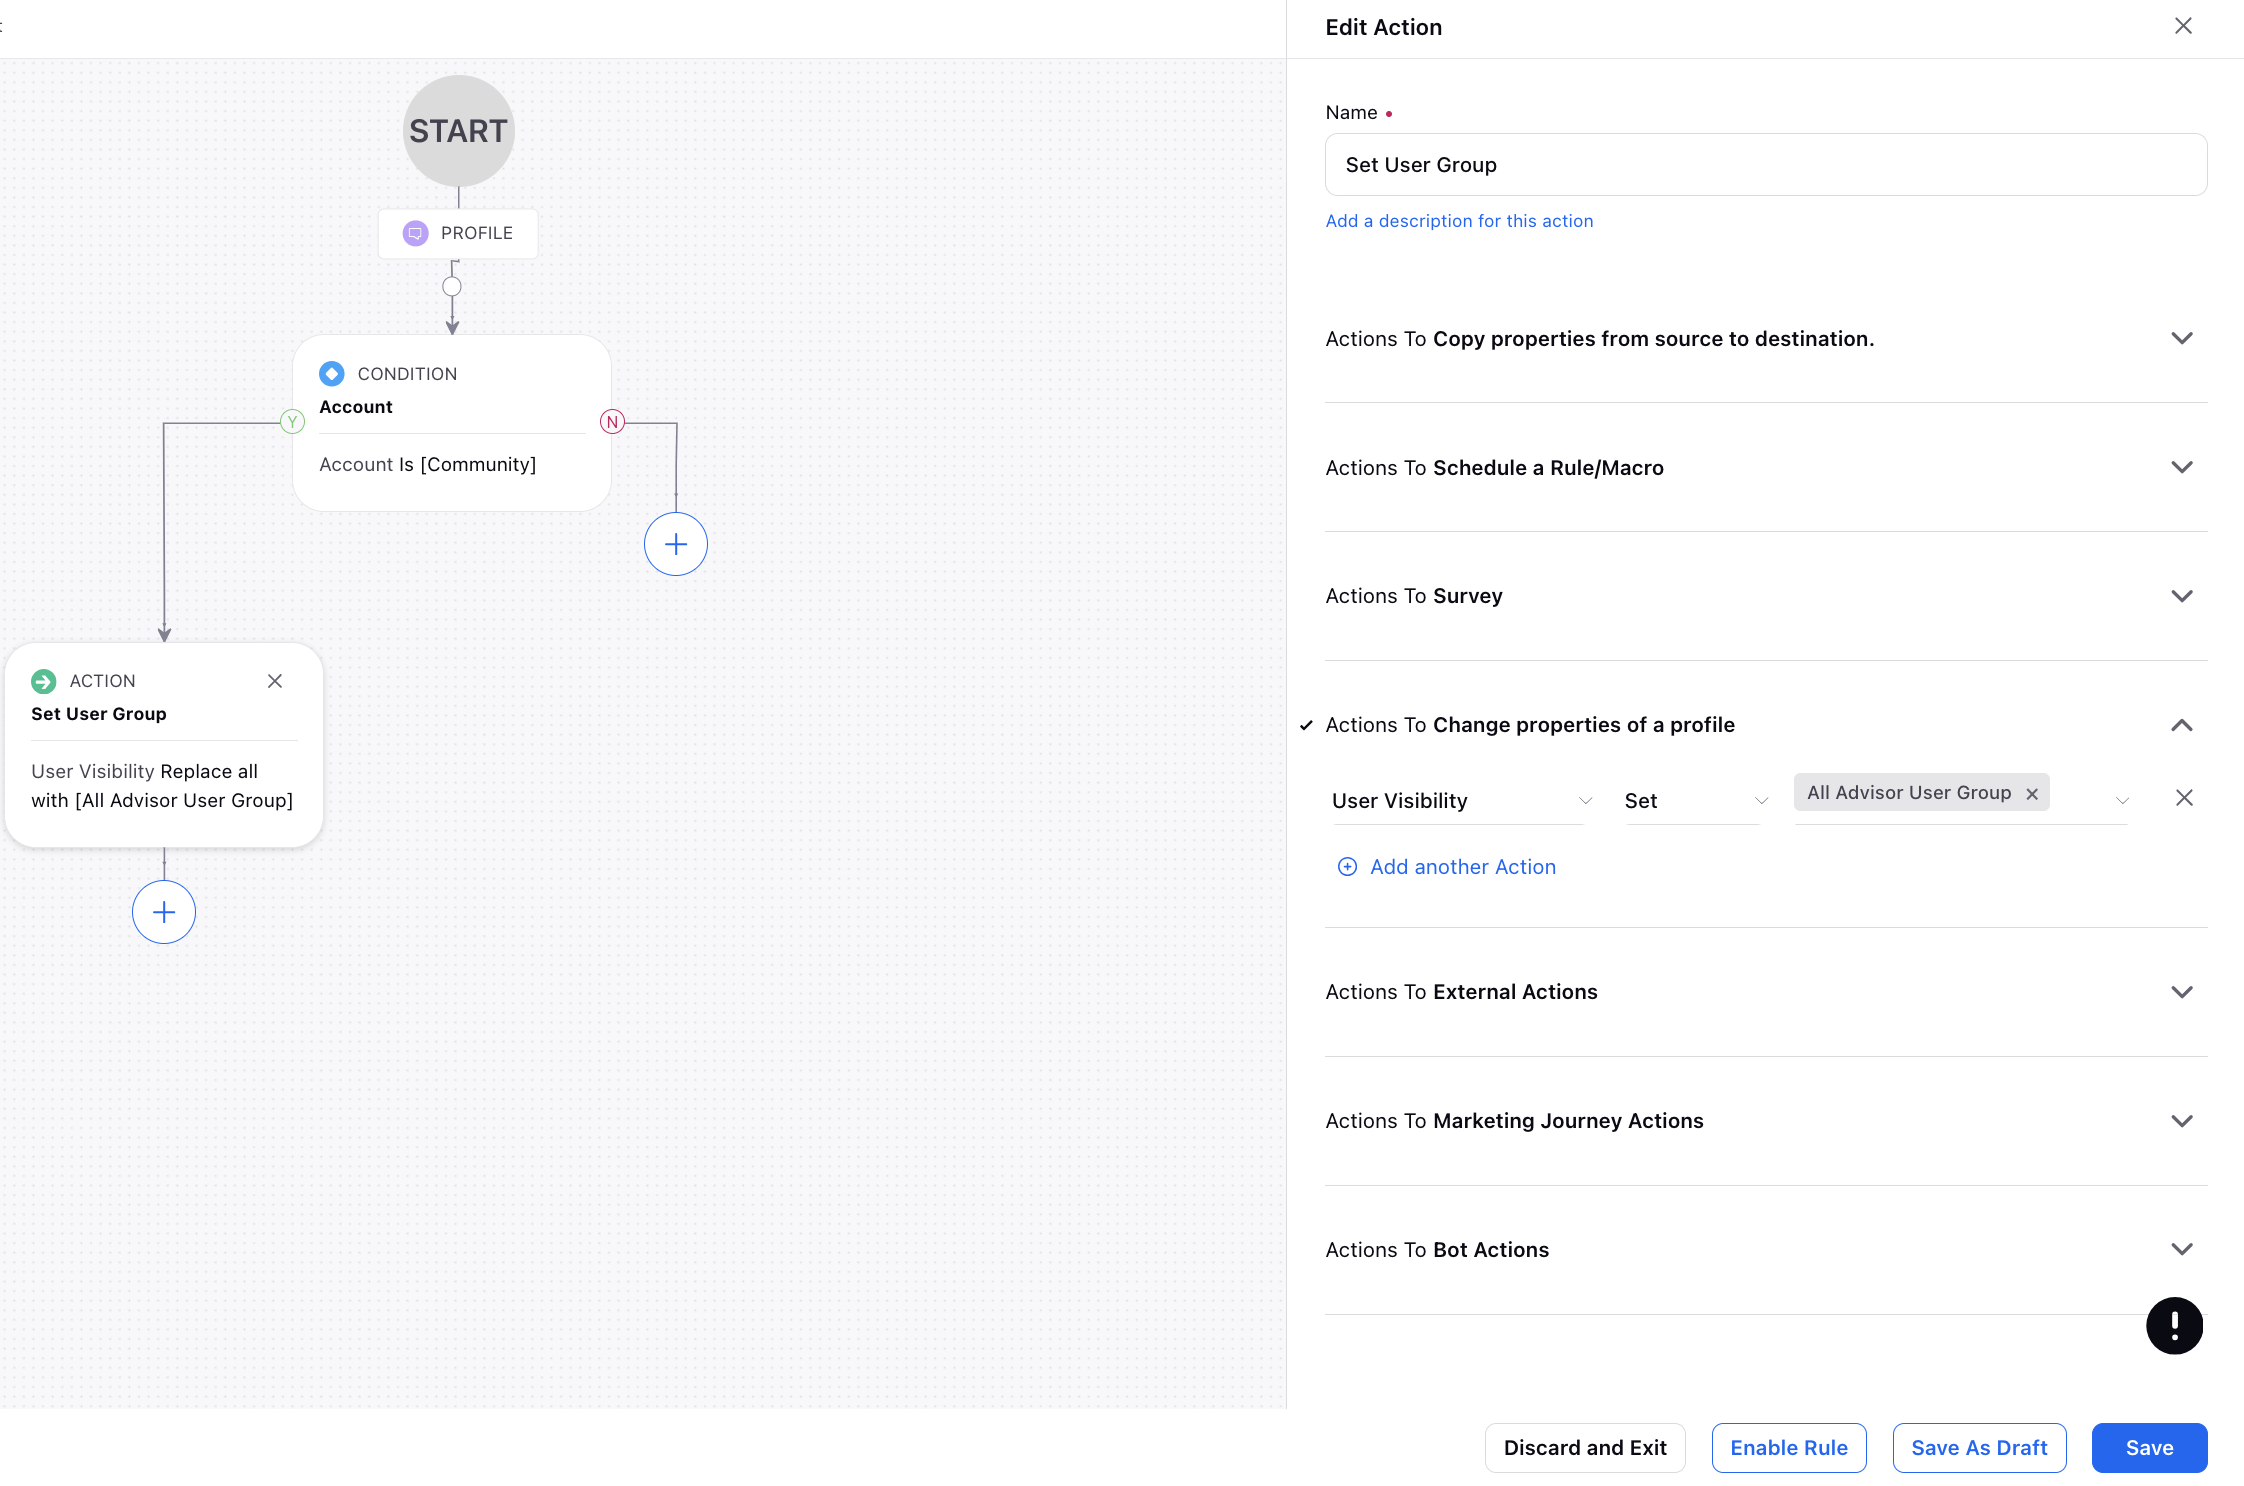
Note: You can limit the audience profile email suggestions that appear in the "To" field. To do this, create an Audience Update rule and set the conditions as desired. Under Actions To Change properties of a profile, add the User Visibility action and set it with desired users or user groups. This ensures that only the specified users will be able to view the audience profiles on which the rule is applied across the platform. To get this action enabled, please raise a support ticket by contacting tickets@sprinklr.com.
|
10. Enter a Subject of your email.
11. Next, enter the content for the email in the Message box. You can format the text using the various formatting options available at the bottom of the message box.
12. Click the Image/Video icon to add a photo/video from the "Media Uploader".
13. You can also add Custom Links, Content Placeholders, previously created Text Templates, and YouTube Videos to the post by clicking the
Insert icon.
14. Add Attachments to the email from the "Media Uploader" by clicking Select Media.
15. Click Add Targeting to select a target audience for the post. You can select from a saved audience or create a new audience for
targeting.
16. Next, select a campaign from the Campaign drop-down menu to associate your post with. You can also set this campaign as default by
clicking Set as Default.
17. Select a sub-campaign from the Sub-Campaign drop-down menu to associate your post with.
18. Select URL Shortener to shorten every link that you add to your message.
19. Select Tags and Social Bars from the drop-down menu respectively.
20. Apply Properties to the post.
21. Under "Approval", set an Approval Type for your post. You can also add an Approval Note.
22. Click Post in the bottom right corner to send the email to the selected recipients. If you are not ready to publish and want to save your post
as a draft, click Save as Draft.
23. You can also schedule your post for a future date and time by clicking "Schedule Post" in the bottom right corner. Select the month,
date, and time of publishing. Click Apply to save your changes.
24. To continue publishing more posts after this one, check the Publish Another box at the bottom.
