Sprinklr helps you analyze, optimize, and eliminate the threat around governance — and deliver a consistent experience at every touchpoint. It goes way beyond just compliance, crisis mitigation, or brand management. Its proactive measures ensure that your brand is portrayed in the right way across all touchpoints.
Governance in Sprinklr is controlled at 3 levels:
Role: Determines which tools within the platform a user will be able to use and at what level (i.e. can they see the Ads Manager, what actions they can take within the Ads Manager, etc.).
User Type: Determines if a user will be able to see other workspaces or have access to certain admin features.
Account Access: Determines which accounts the user can publish from, report on, engage with comments, etc.
In this article, you will learn about the roles available for advertising along with an outline for creating and assigning different roles.
Note
Roles should have all already been set up for you during the implementation.
It's generally not a good idea to edit Roles unless you are a trained System Admin.
Workspace Roles will override Global Roles and should normally not be used.
Roles at the same level will be additive, i.e. the user will have the union of permissions granted by multiple roles.
Some permissions are negative, i.e. they restrict what actions a user can take within a tool.
There are other permissions which affect advertising but are not specific to paid.
Engagement Dashbaords - For Approvals and Boosting
Rule Engine - Tagging, Optimization & Auto Boosting
Editorial Calendar - For boosting
Asset Manager - View access required to see the Ads Creative Library
Audience Profile - View access required to see the Audience Manager
Integrated Applications - To add third party tracking integrations such as DCM (Google Campaign Manager)
Media Uploader - For adding images and videos while creating ads
Support Options - i.e. Knowledge Portal, Sprinklr University
Admin Settings:
For adding Ad Accounts
Editing ads Custom Fields
Configuring Approval Workflows
Configuring Web Analytics Profiles
Access to the Data Managament Platform to setup Audience Segments
Creating and Assigning Roles
Note that there should already be a Custom Field called Persona (or User Role or similar) set up for this purpose. Check with your System Admin before creating new custom fields.
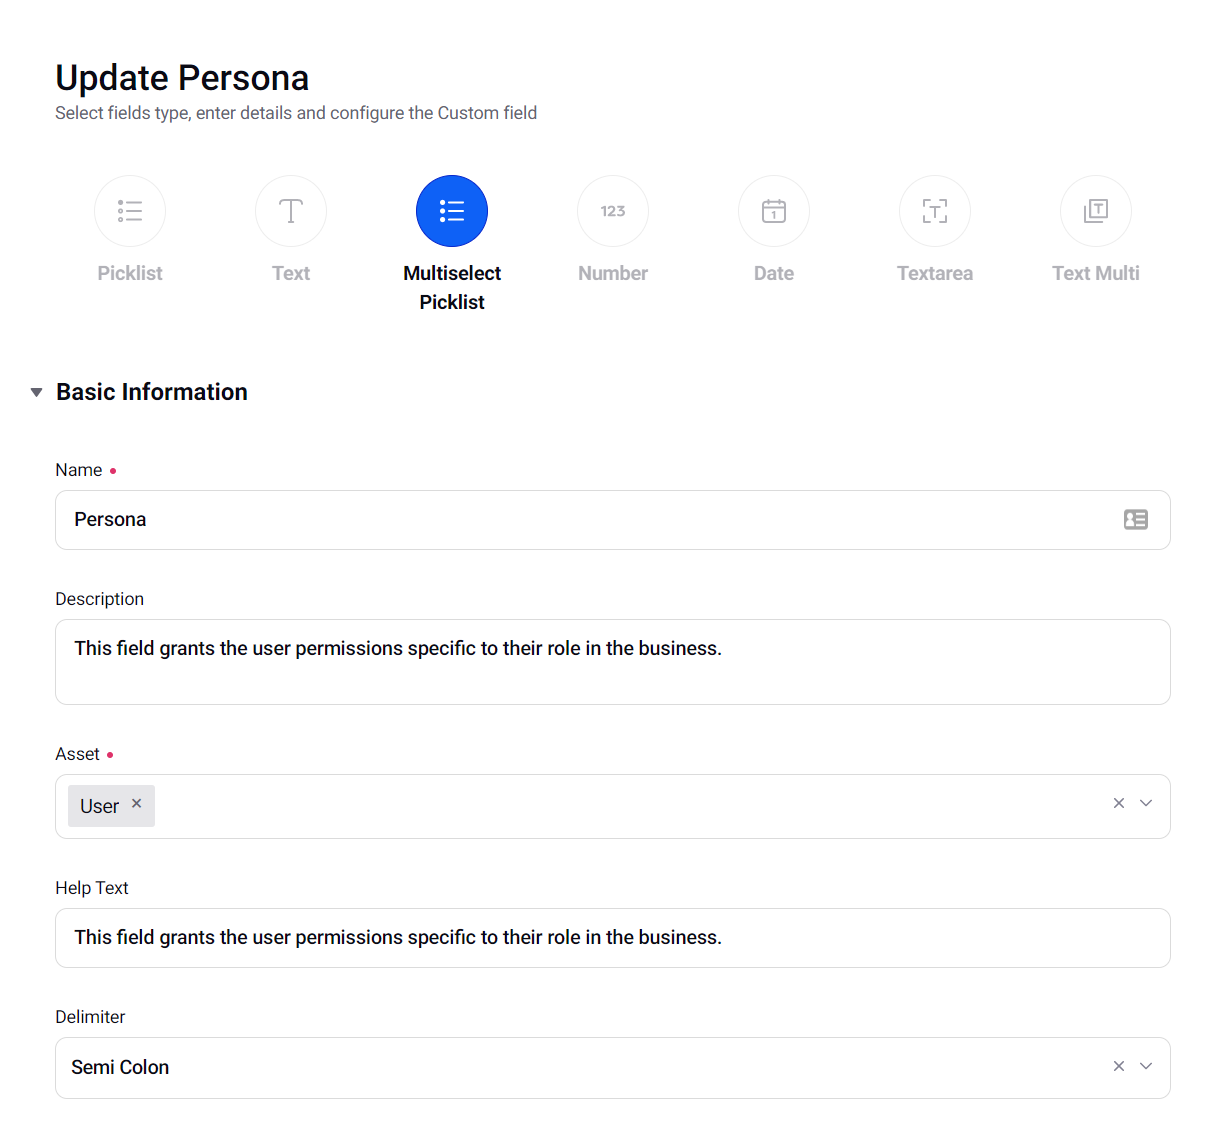
Navigate to All Settings > Manage Workspace > Custom Fields > Create Custom Field.
Ideally choose a Multi Picklist field so that users can have multiple roles.
Select User within the Asset menu.
Give the field a name and, if needed, a description and help text.
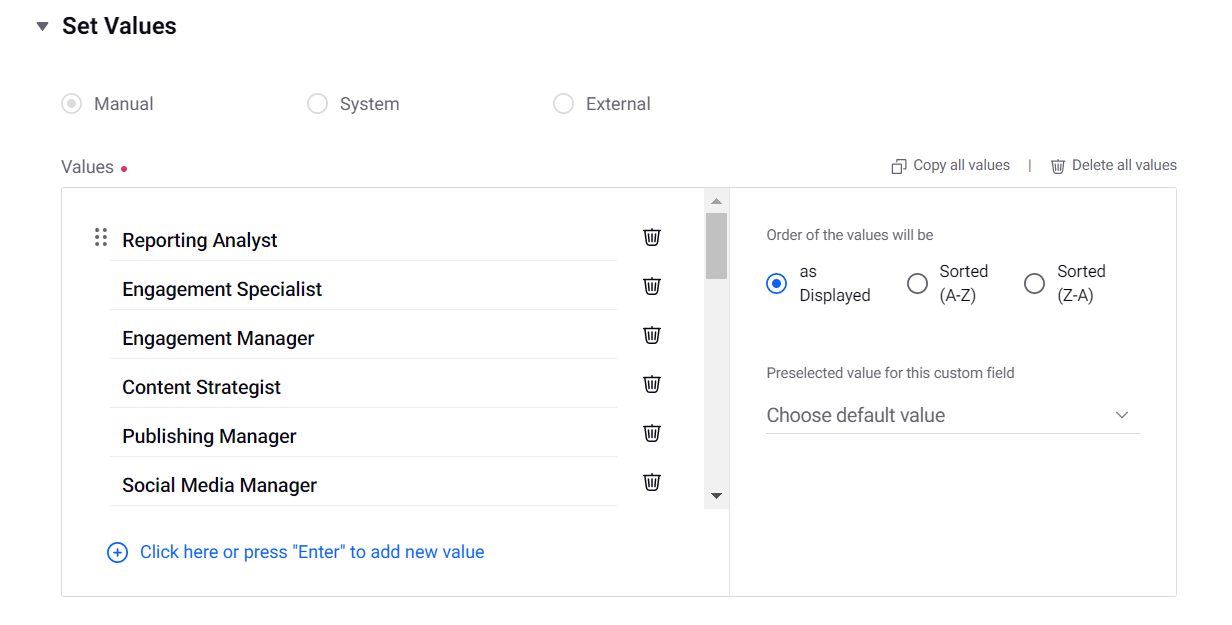
In the Values section, enter the names of the roles you want to create.
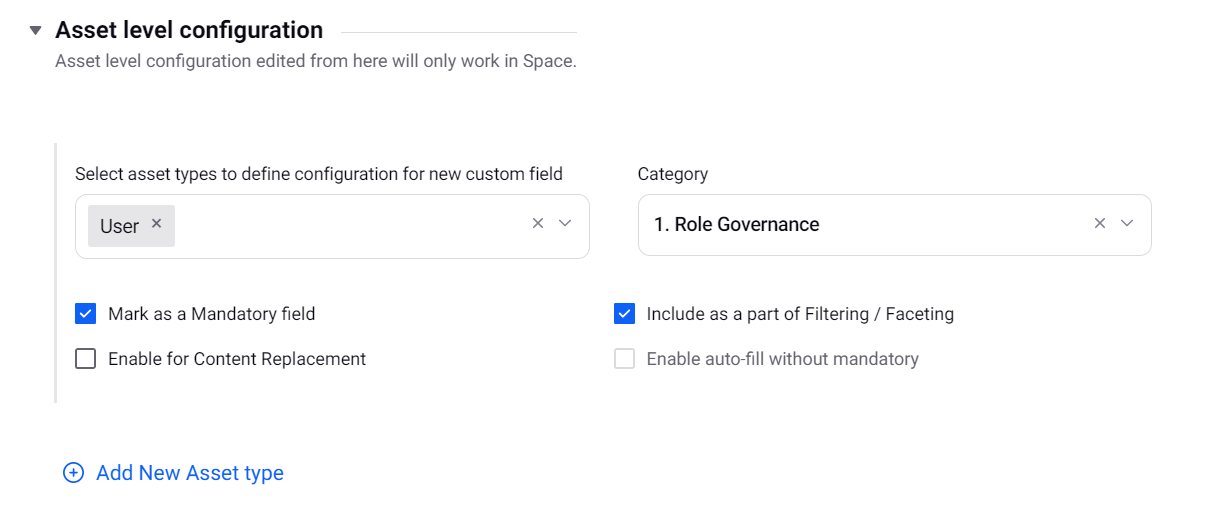
Select Include as a part of Filtering / Faceting and save the field.
The screenshots below show the setup for the standard Persona field.
It is best practise to use Dynamic Groups rather than Static Groups to assign roles to users. Dynamic User Groups allow users satisfying a criteria to be dynamically grouped together in a single user group.
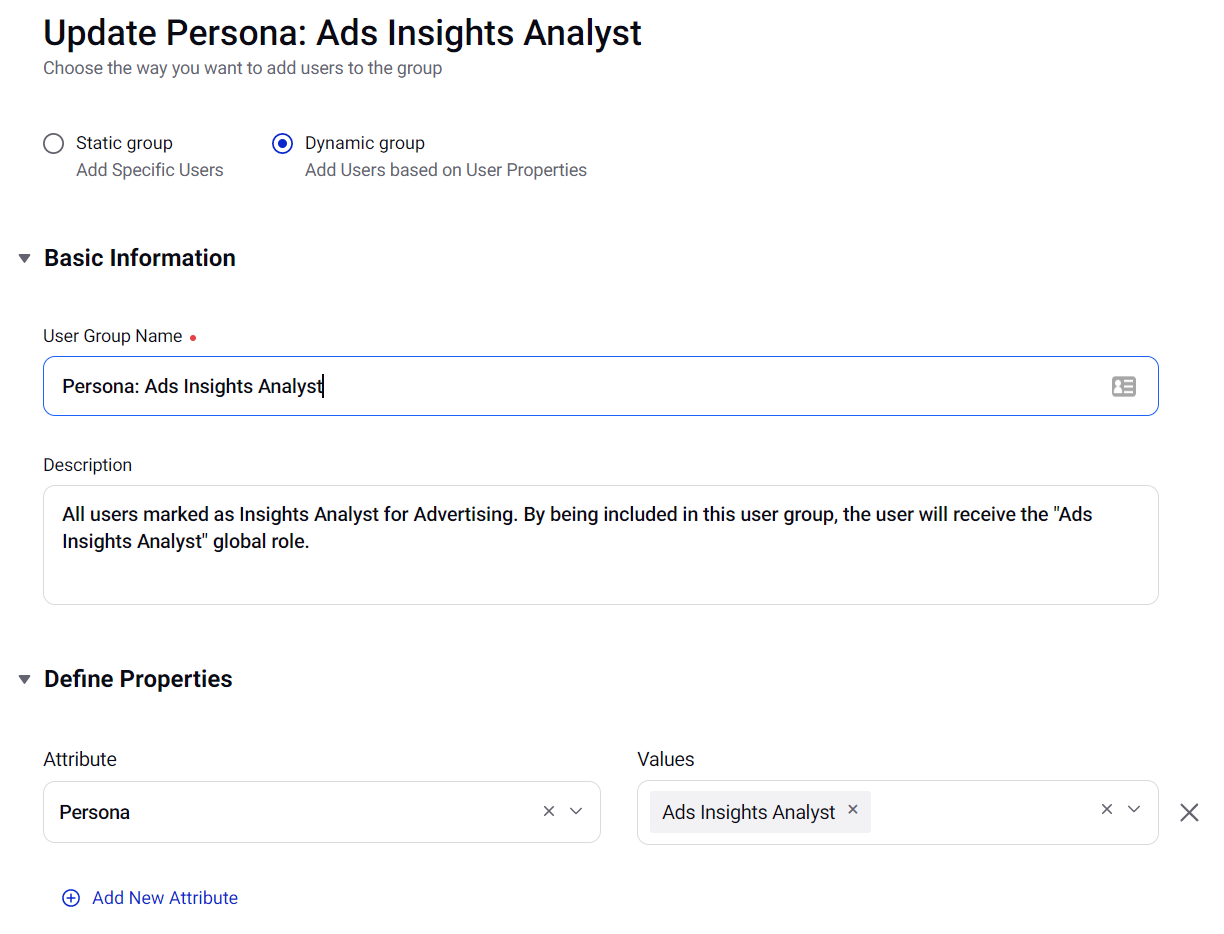
Navigate to All Settings > Manage Workspace > User Groups > Add User Group.
Give the User Group a name, ideally with the prefix Role: or Persona:, matching one of the values in the custom field created earlier, i.e. "Persona: Ads Insight Analyst". Add a description if desired.
Select Dynamic Group.
Under Attribute, select the custom field created earlier.
Under Values, select the name of the Role.
Note that Roles should have already been configured during implemntation. Check with your System Admin before creating new Roles.
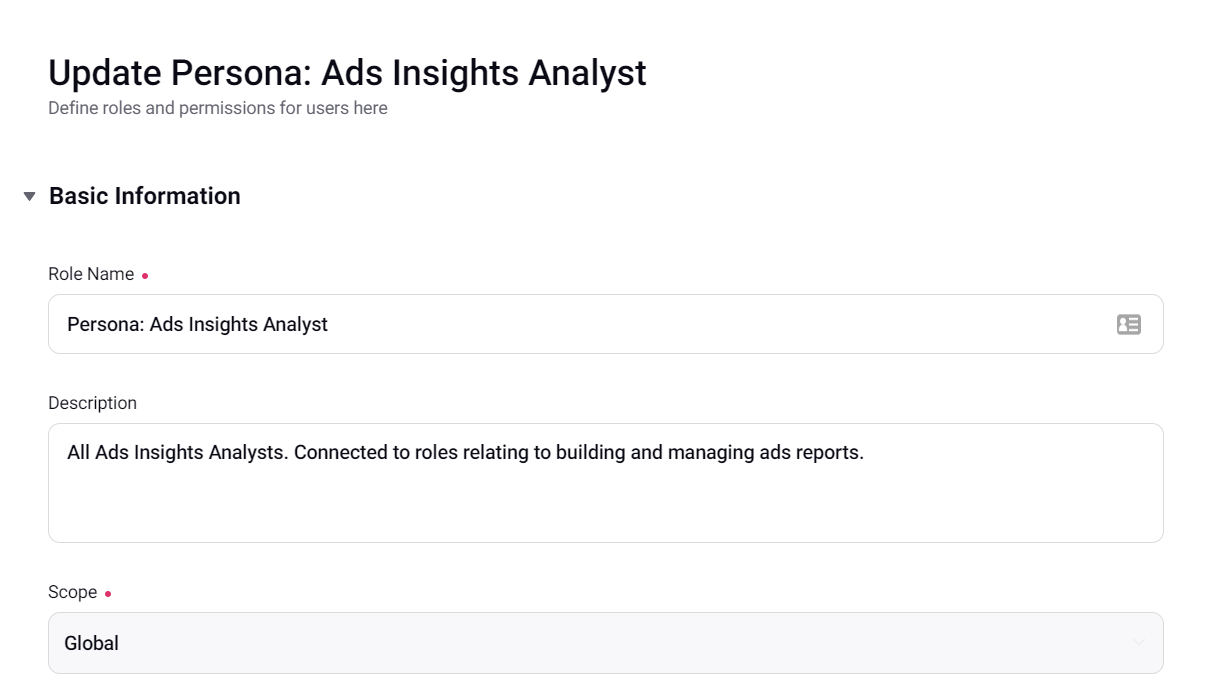
Navigate to All Settings > Manage Customer > Global Roles > Create Role.
Name the Role (ideally to match the User Group name just created) and add a description if desired
Choose Global as the Scope.
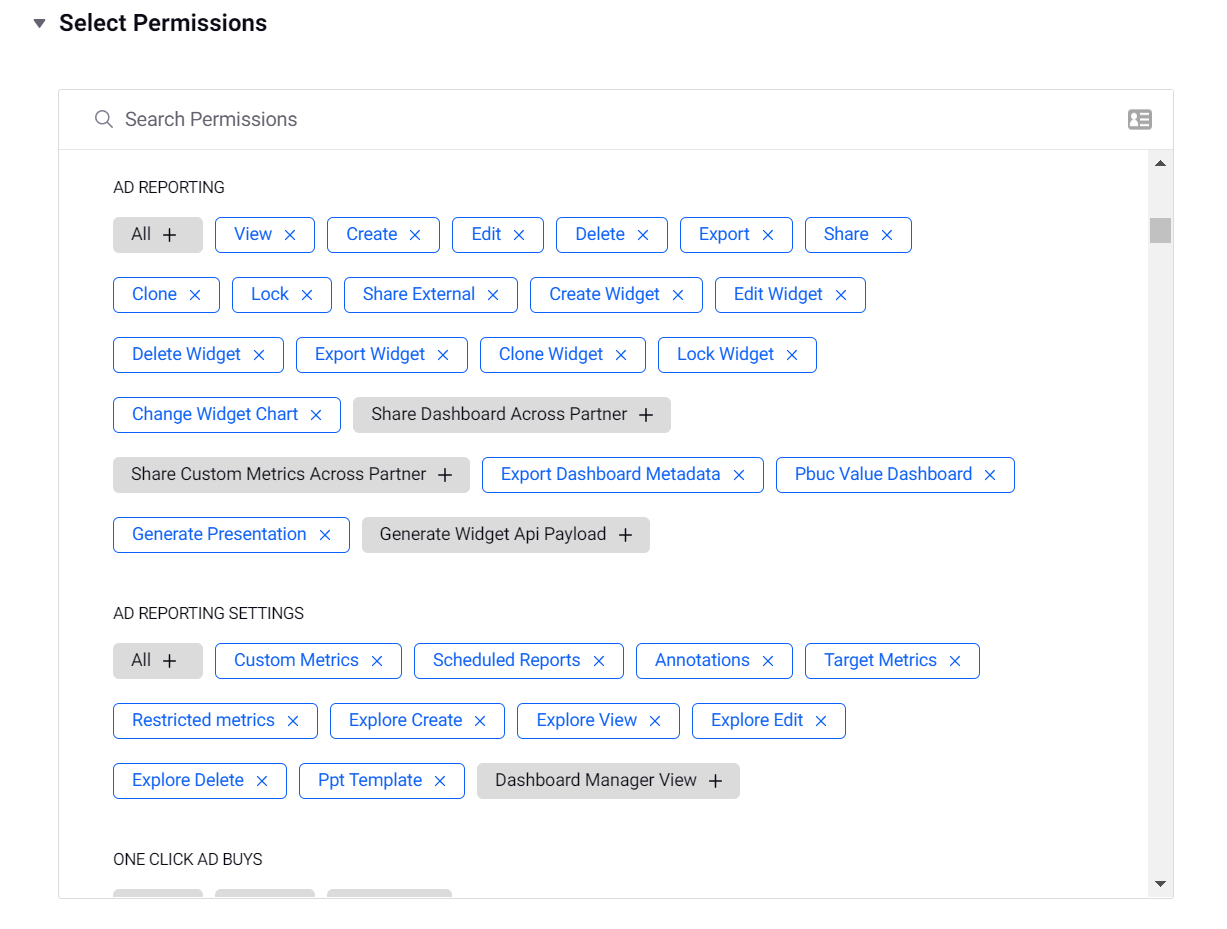
Under Select Permissions, choose the permissions you wish the role to give to the users - see here for recommendations.
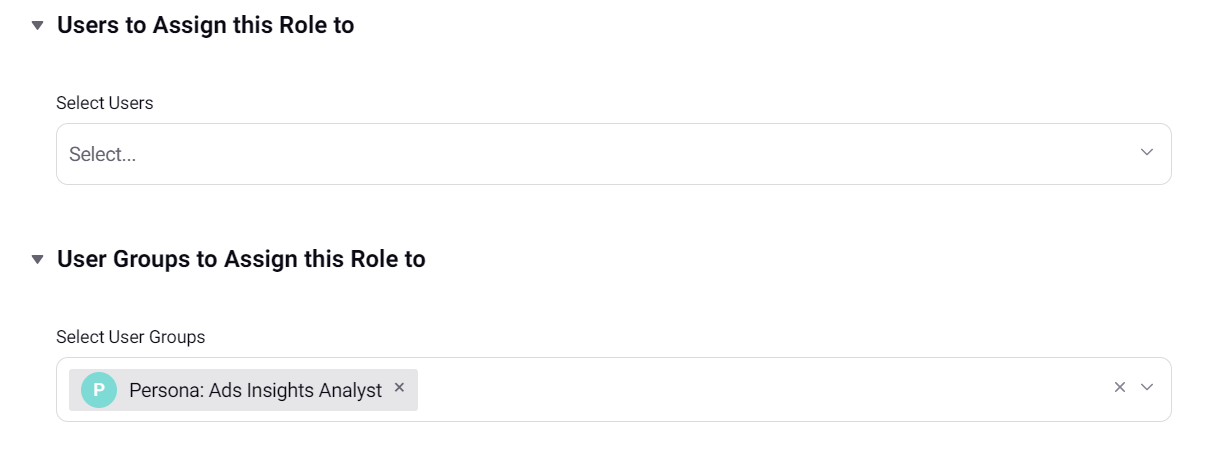
Under User Groups to Assign this Role to, select the User Group created earlier and click Save.
To assign users to the role that you just created, they will need to be added to the corresponding User Group. This can be done by tagging the Users with the Custom Field.
Navigate to All Settings > Manage Workspace > Users.
Search for the user in the search bar, navigate to the Options menu alongside the user name and select Edit.
Under Properties, find the Custom Field created earlier in step 1, apply the value required and click Save.
This will add the user to the user group and hence, to the corresponding role.