Care Console iFrame
Updated
Sprinklr's Care Console is a comprehensive, omnichannel customer support platform designed to help businesses manage customer interactions across various channels, including social media, email, chat, and more. The Care Console iFrame is an embeddable interface that allows companies to integrate Sprinklr's customer care capabilities directly into their existing business applications primarily CRMs.
We have unified customer experience across CRMs (Salesforce, Zendesk, MS Dynamics and ServiceNow) by migrating Iframe Conversation UI from legacy agent console to the modern Care Console.
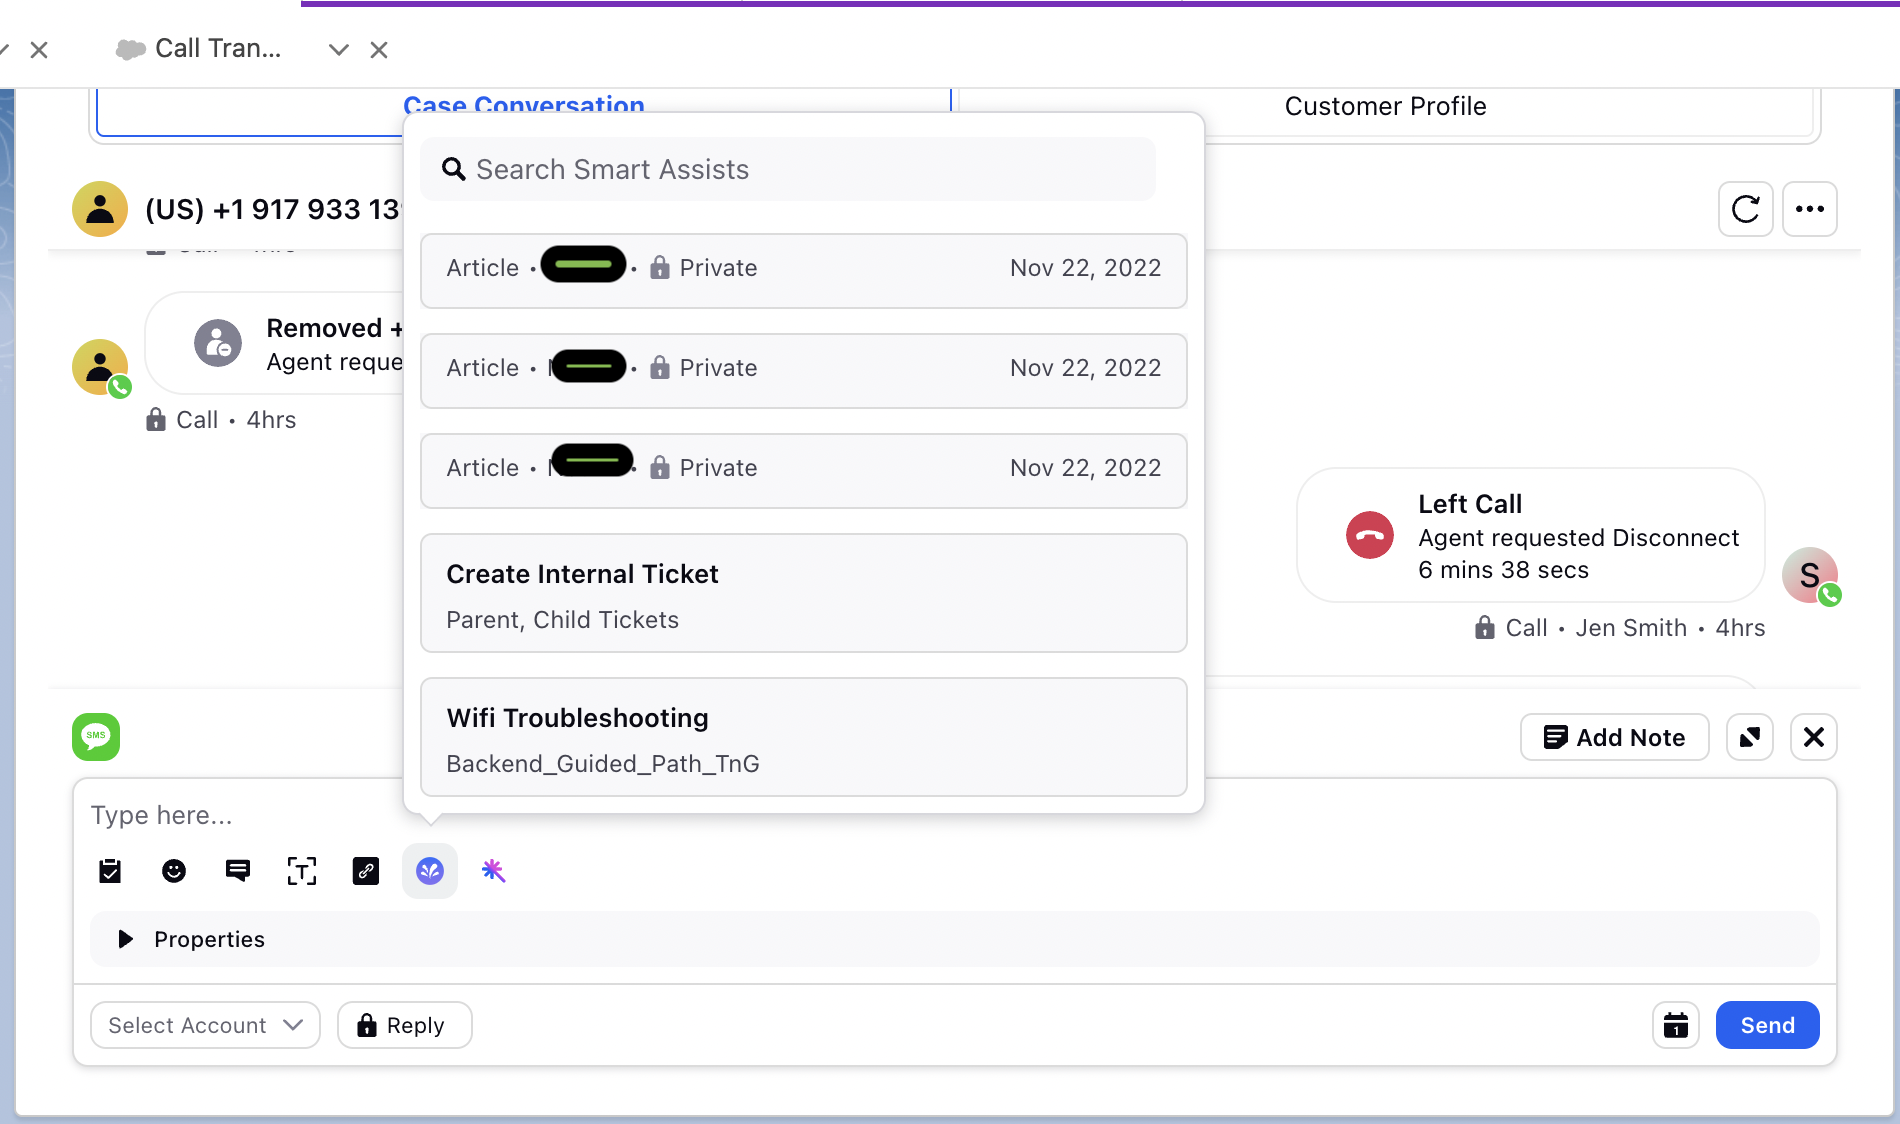
Case Conversation Pane
Using the Case Conversation Pane, agents can read the conversation and reply to the customers.

S.No
|
Title
|
Description |
1 | Refresh | Click to refresh the conversation. |
2
|
Options Icon
|
|
3 | Brand Account Name | View the brand name the customer message was sent to. |
4 | Locale Supported | Note:
|


Message Actions
S.No | Title | Description |
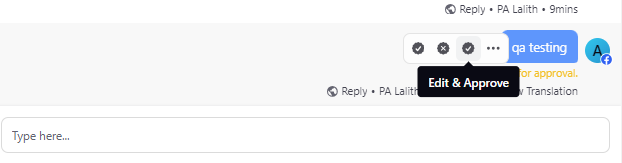
1 | Outbound Message Actions |
Note: The above functionalities are only visible to people who are present in approval flow. |
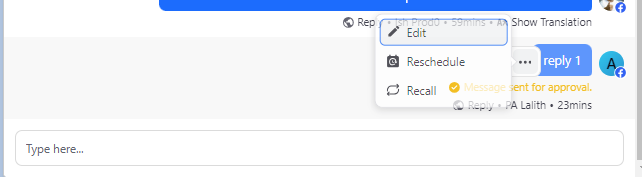
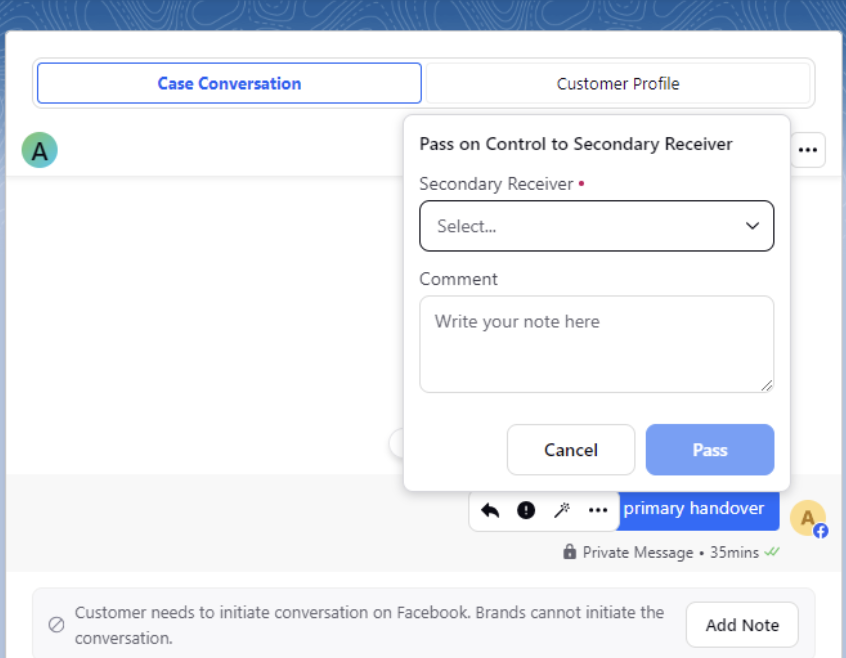
2 | Inbound Channel Actions | Facebook Channel Actions:
Twitter Channel Action:
|
Reply Box
The Reply Box is the primary component of the conversation pane, equipped with all the essential features to help users craft and enrich their responses.

S.No
|
Title
|
Description |
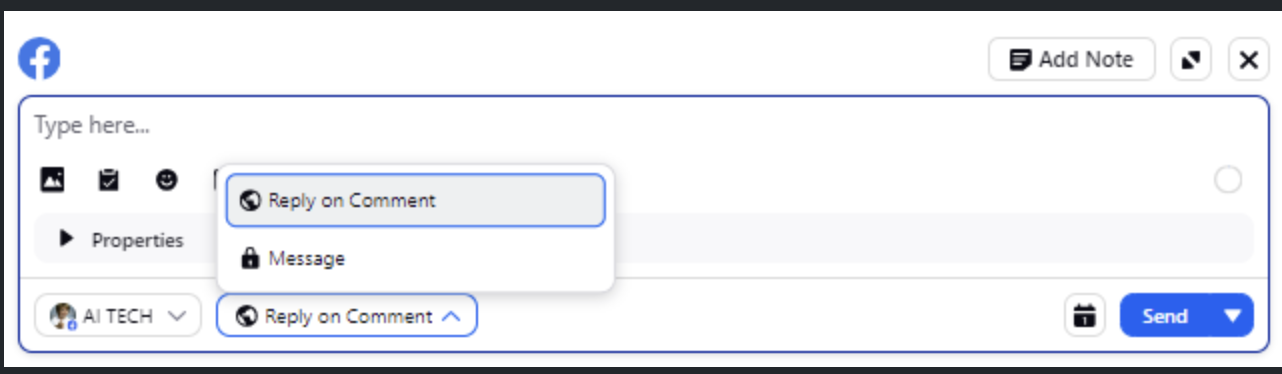
1
|
Channel
|
Select the channel to reply from.
|
2
|
Add Note
|
You can add note to the response as per your needs through reply box.
|
3
|
Expand Reply Box
|
Click to expand the reply box in case of longer replies.
|
4
|
Reply
| You can add the following to your response as needed:
|
5 |
Reply Properties |
|
6
|
Reply Account |
Choose the account to reply from. |
7
|
Reply type
|
|
8
|
Schedule Message
|
Schedule the preferred time of reply.
|
9 | Preview | Use this option to preview the response before sending the response. You can review the content and formatting of your response and make any necessary edits before clicking Send.
|
10
|
Send
|
|


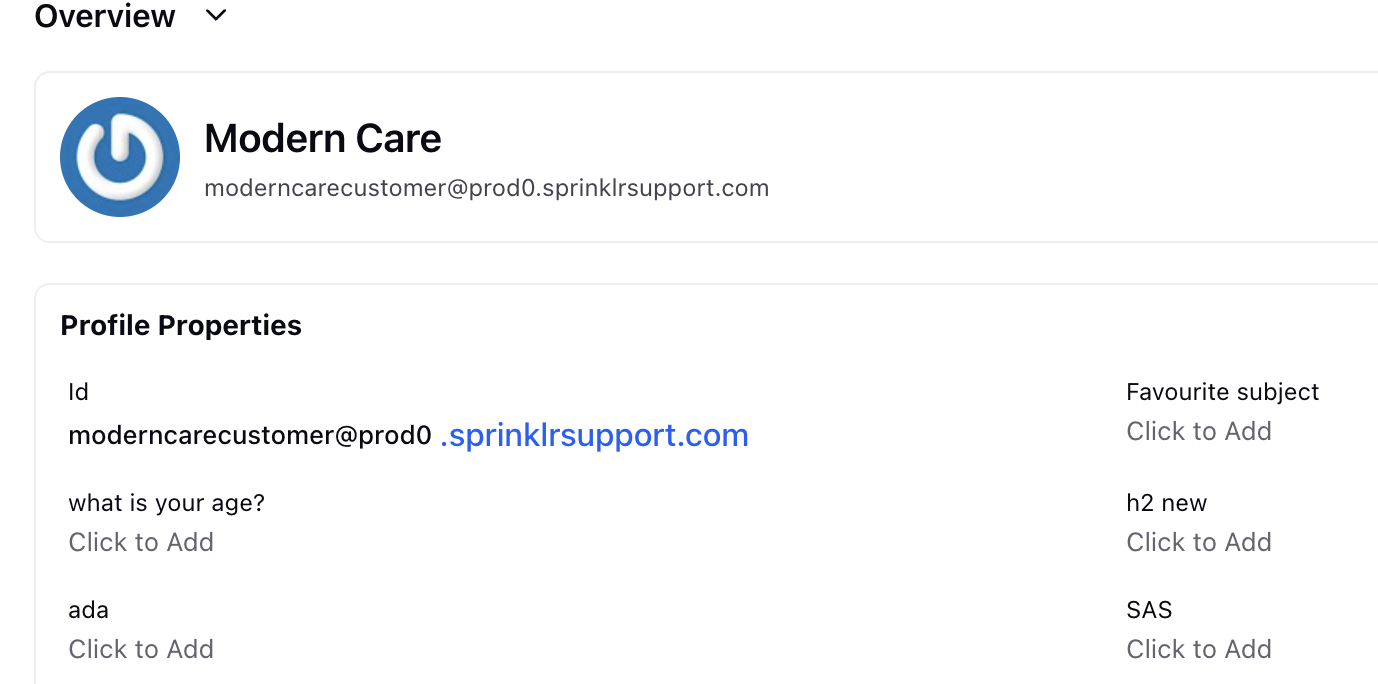
Customer Profile Pane

S. No
|
Title
|
Description
|
1
|
Profile Conversations
|
|
2
|
Profile Collaborations
|
|
3 | Profile Overview |
|


Notification Alert in Sprinklr iFrame
To enhance the responsiveness of CRM agents, Sprinklr introduces a tab highlight notification alert within the iFrame. This feature ensures agents never miss a new customer message, even when they are working outside the iFrame context.
How It Works?
When a customer sends a new message, the tab containing the Sprinklr iFrame will visually highlight, serving as an alert for agents. This notification mechanism helps agents stay informed in real-time and respond promptly, improving overall customer engagement.

![]() Enablement Note: Select the "Highlight tab for new messages" checkbox in Sprinklr Case Detail Page layout to activate the notification alert for incoming customer messages.
Enablement Note: Select the "Highlight tab for new messages" checkbox in Sprinklr Case Detail Page layout to activate the notification alert for incoming customer messages.

Key Benefits
Increased Agent Responsiveness: Agents can quickly notice and address new customer messages without constantly monitoring the iFrame.
Seamless Multitasking: Agents working on different tasks or in other CRM sections can still stay updated on customer interactions.
Improved Customer Satisfaction: Faster responses lead to better customer experiences and stronger relationships.
With this Notification Alert in Sprinklr iFrame, agents can maintain efficient workflows while ensuring no customer query goes unnoticed.
Smart Responses
Smart Responses are contextually relevant reply suggestions generated for agents based on the ongoing conversation. These suggestions are generated by leveraging Sprinklr’s in-house large language model (LLM), which uses machine learning to analyze the conversation and generate appropriate responses.
Smart Responses Feedback Actions
Agents can provide feedback to help improve the quality of future Smart Response suggestions. To submit feedback, follow these steps:
Hover over a Smart Response to display the Thumbs Up and Thumbs Down icons.
Click Thumbs Up if the suggestion was helpful.
If the suggestion was not helpful, click Thumbs Down. A feedback window will appear with a list of reasons.
Select the most relevant reasons and click Submit.
Your feedback helps enhance the accuracy and relevance of future Smart Response suggestions.
.png)